Web Chat Deployment
Connecting Web Chat Channel

Web chat channel
- Select "Channels" at the top menu bar.
- Click "+New Channel".
- Name your new channel and select Web Chat as your deployment platform.
Basic Settings
Profile Picture & Web Chat Icon Picture
![]()
Set web chat icons
| Property | Description | Placement |
|---|---|---|
| Profile Picture | The logo displayed next to the messaging bubbles | 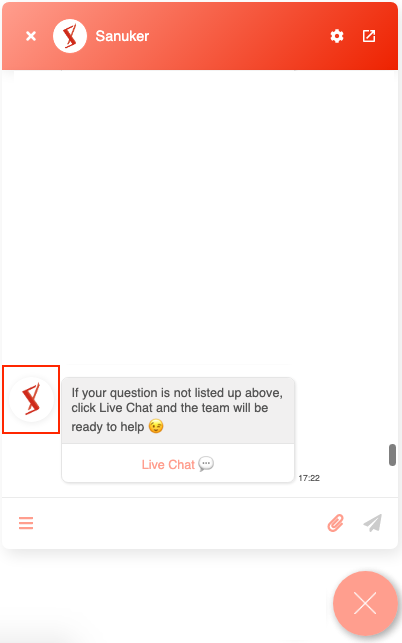 |
| Web Chat Icon Picture | The logo displayed at the upper layer and you can click it to open up the chatroom window |
- Upload a profile picture and web chat icon picture for your chatbot. You can directly paste the image URL or upload to media library.
Theme Color

Set theme color
- Select the theme color you want to display on your chatbot. You may select from the default theme colors or use the color picker to customize your own favourite color.
Language
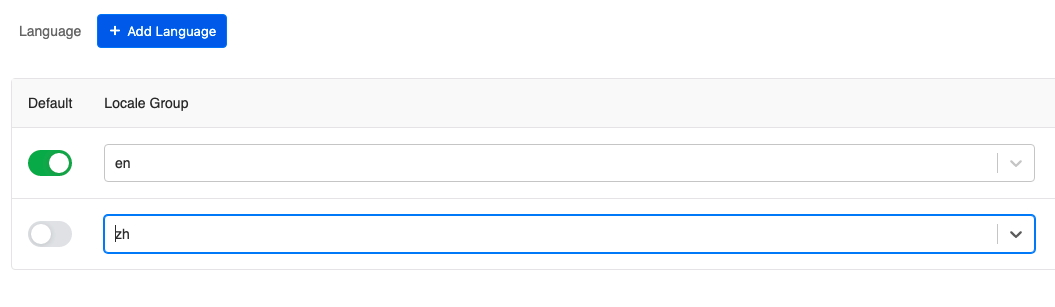
Language settings
- Set up all the languages you want to display on your web chat. Click "+Add Language" to add additional display languages.
- Toggle on the default button into green for your default language.
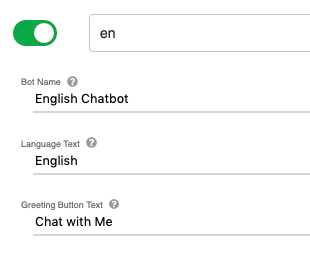
Set display text for different languages
| Property | Description |
|---|---|
| Bot Name | The name of the chat room |
| Language Text | The display text of language settings |
| Greeting Button Text | The display text of the get started button |
- Set up your Bot Name, Language Text and Greeting Button Text under different languages.
Setup Persistent Menu
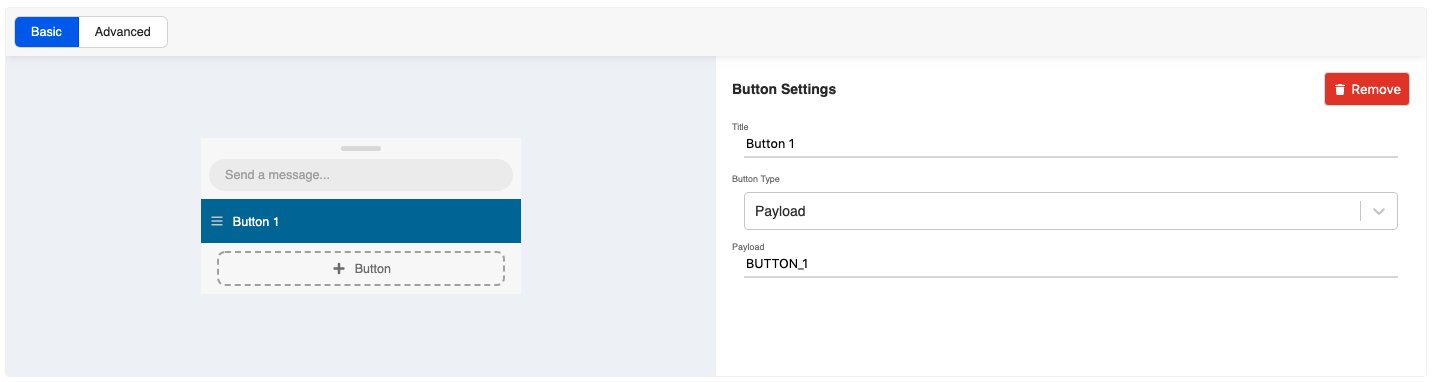
Set up persistent menu
| Property | Description |
|---|---|
| Button Type | Can set to "Payload", "Nested" or "URL"; unlimited number of buttons can be set |
| Payload | Specifies the menu item is a postback, see Web Chat Button Types |
| URL | Specifies the menu item opens a website in a new tab, see Web Chat Button Types |
| Nested | Specifies the menu item opens the next menu layer; supports unlimited menu layer |
- Set up your persistent menu with the corresponding button type.
Adding Trees & Global Nodes
- Add the specific trees and global nodes that you would like to include in the web chat channel. You can add multiple trees and global nodes into one channel.
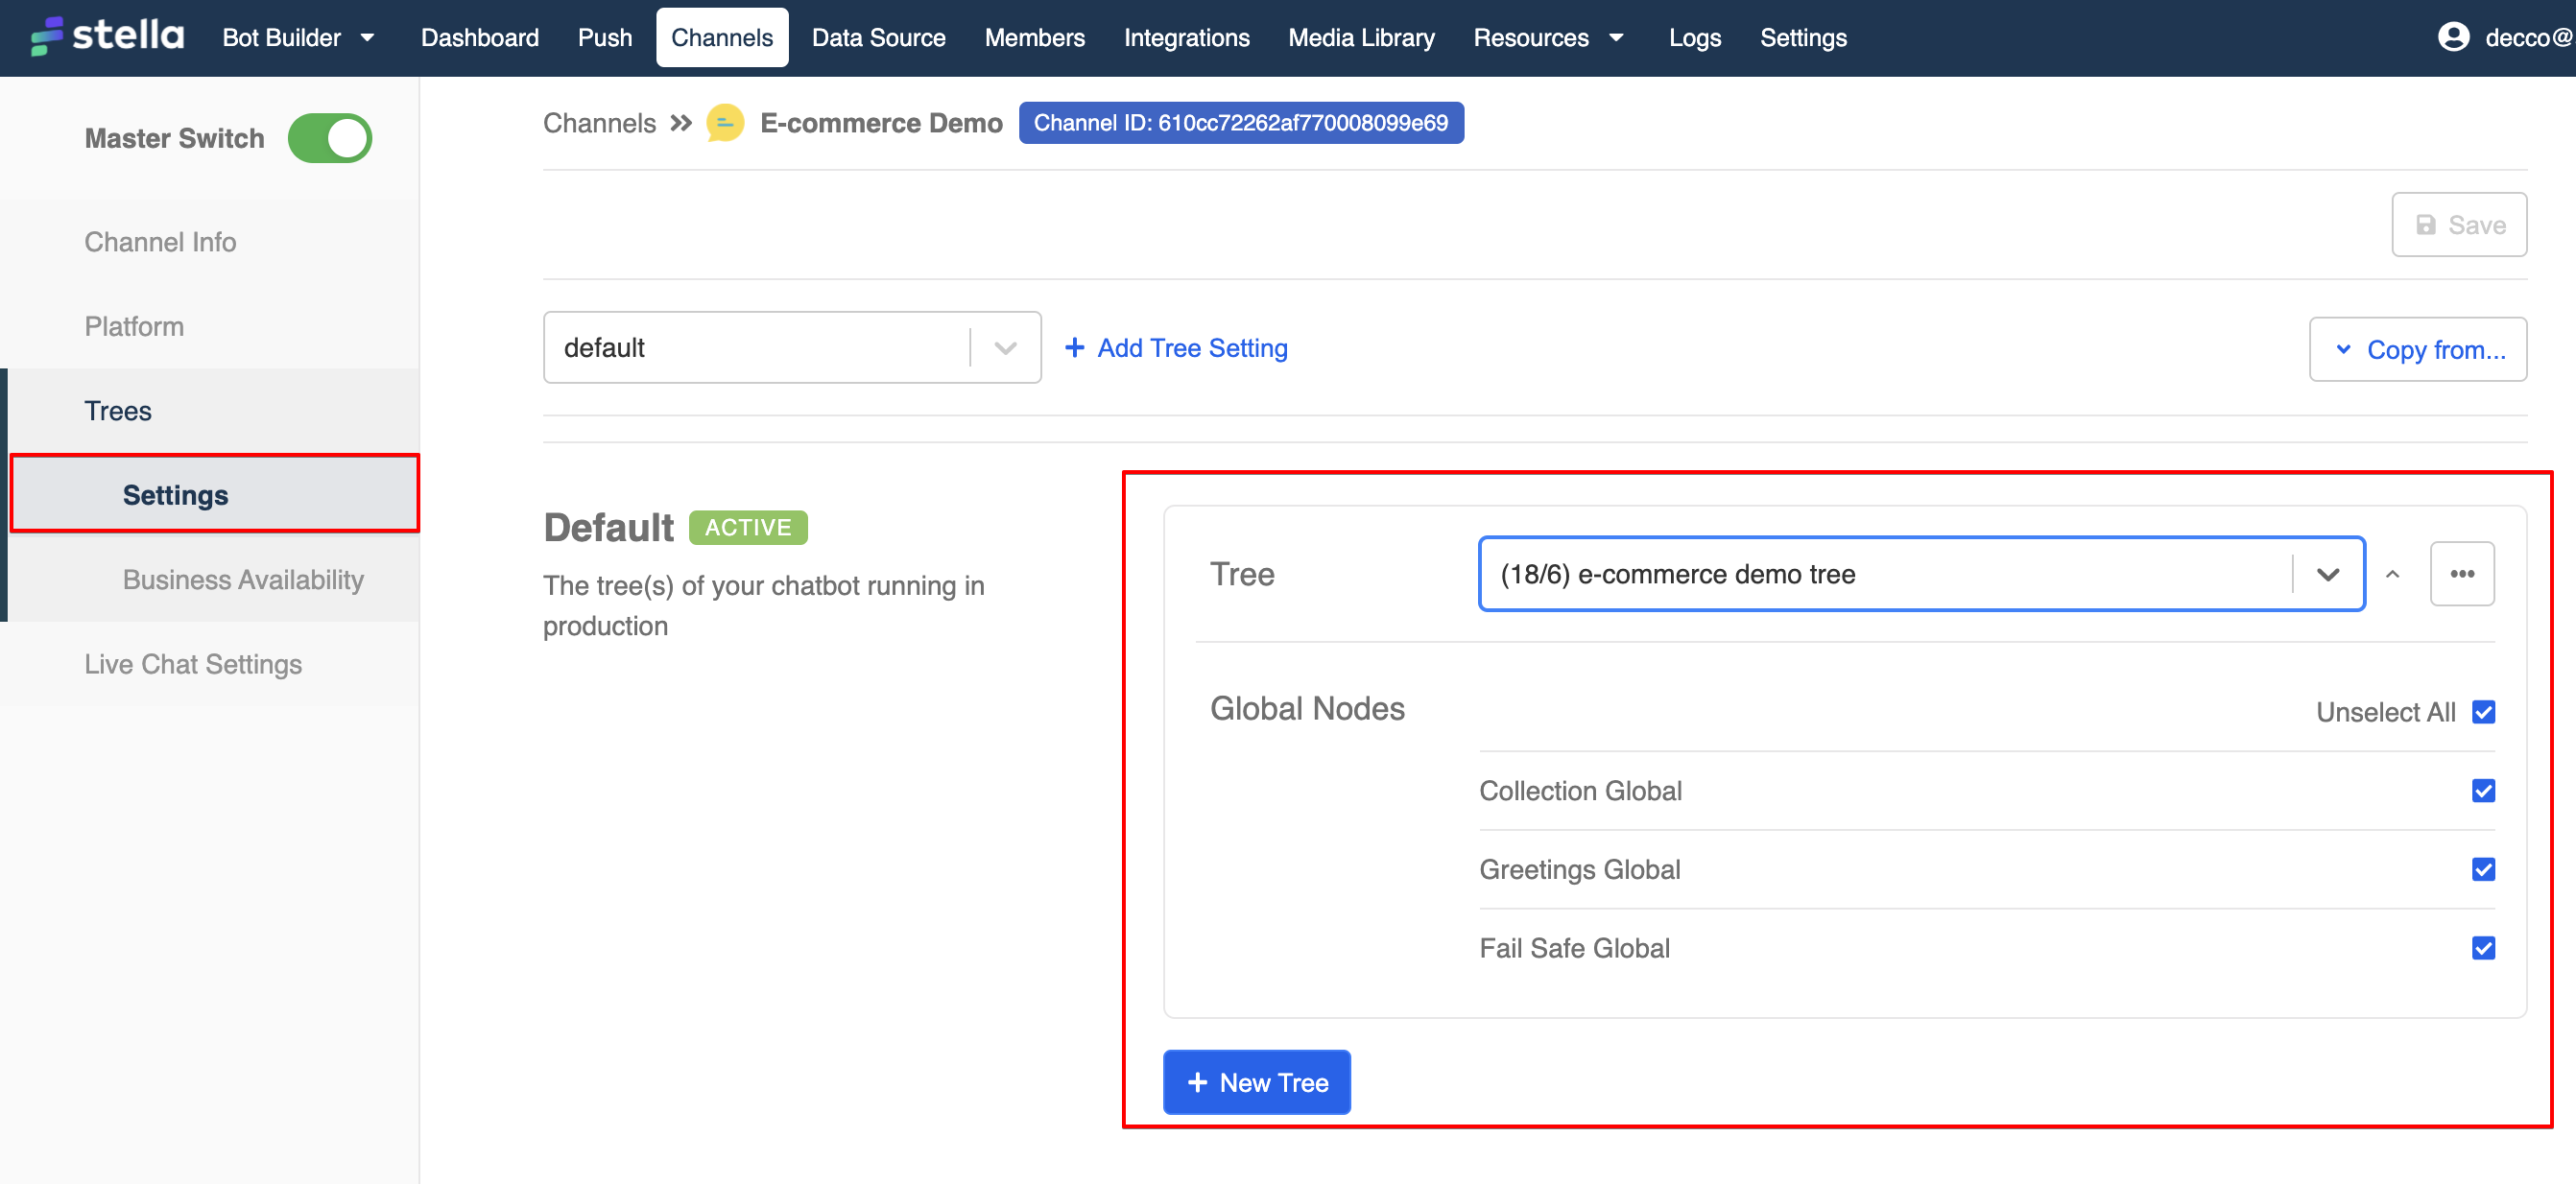
Add trees and global nodes in the channel
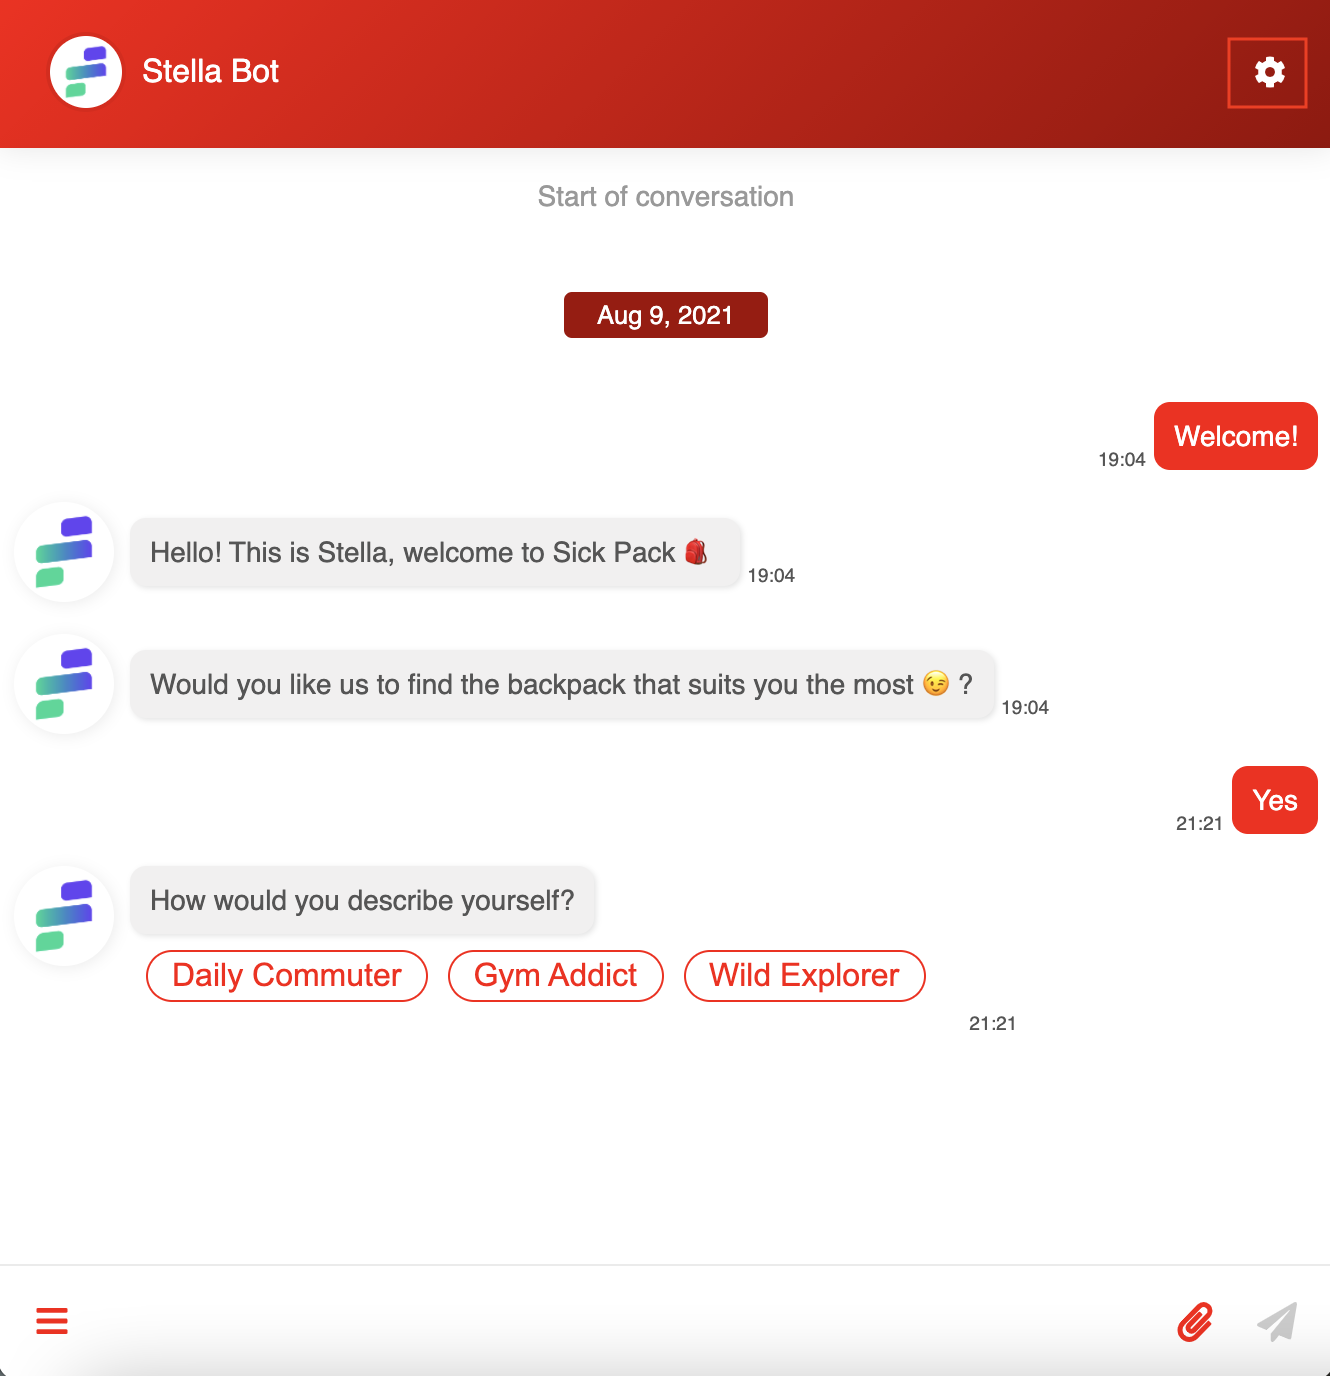
Web Chat UI
- Upon completion of setting up your web chat chatbot, you can test it with the test link in Platform.
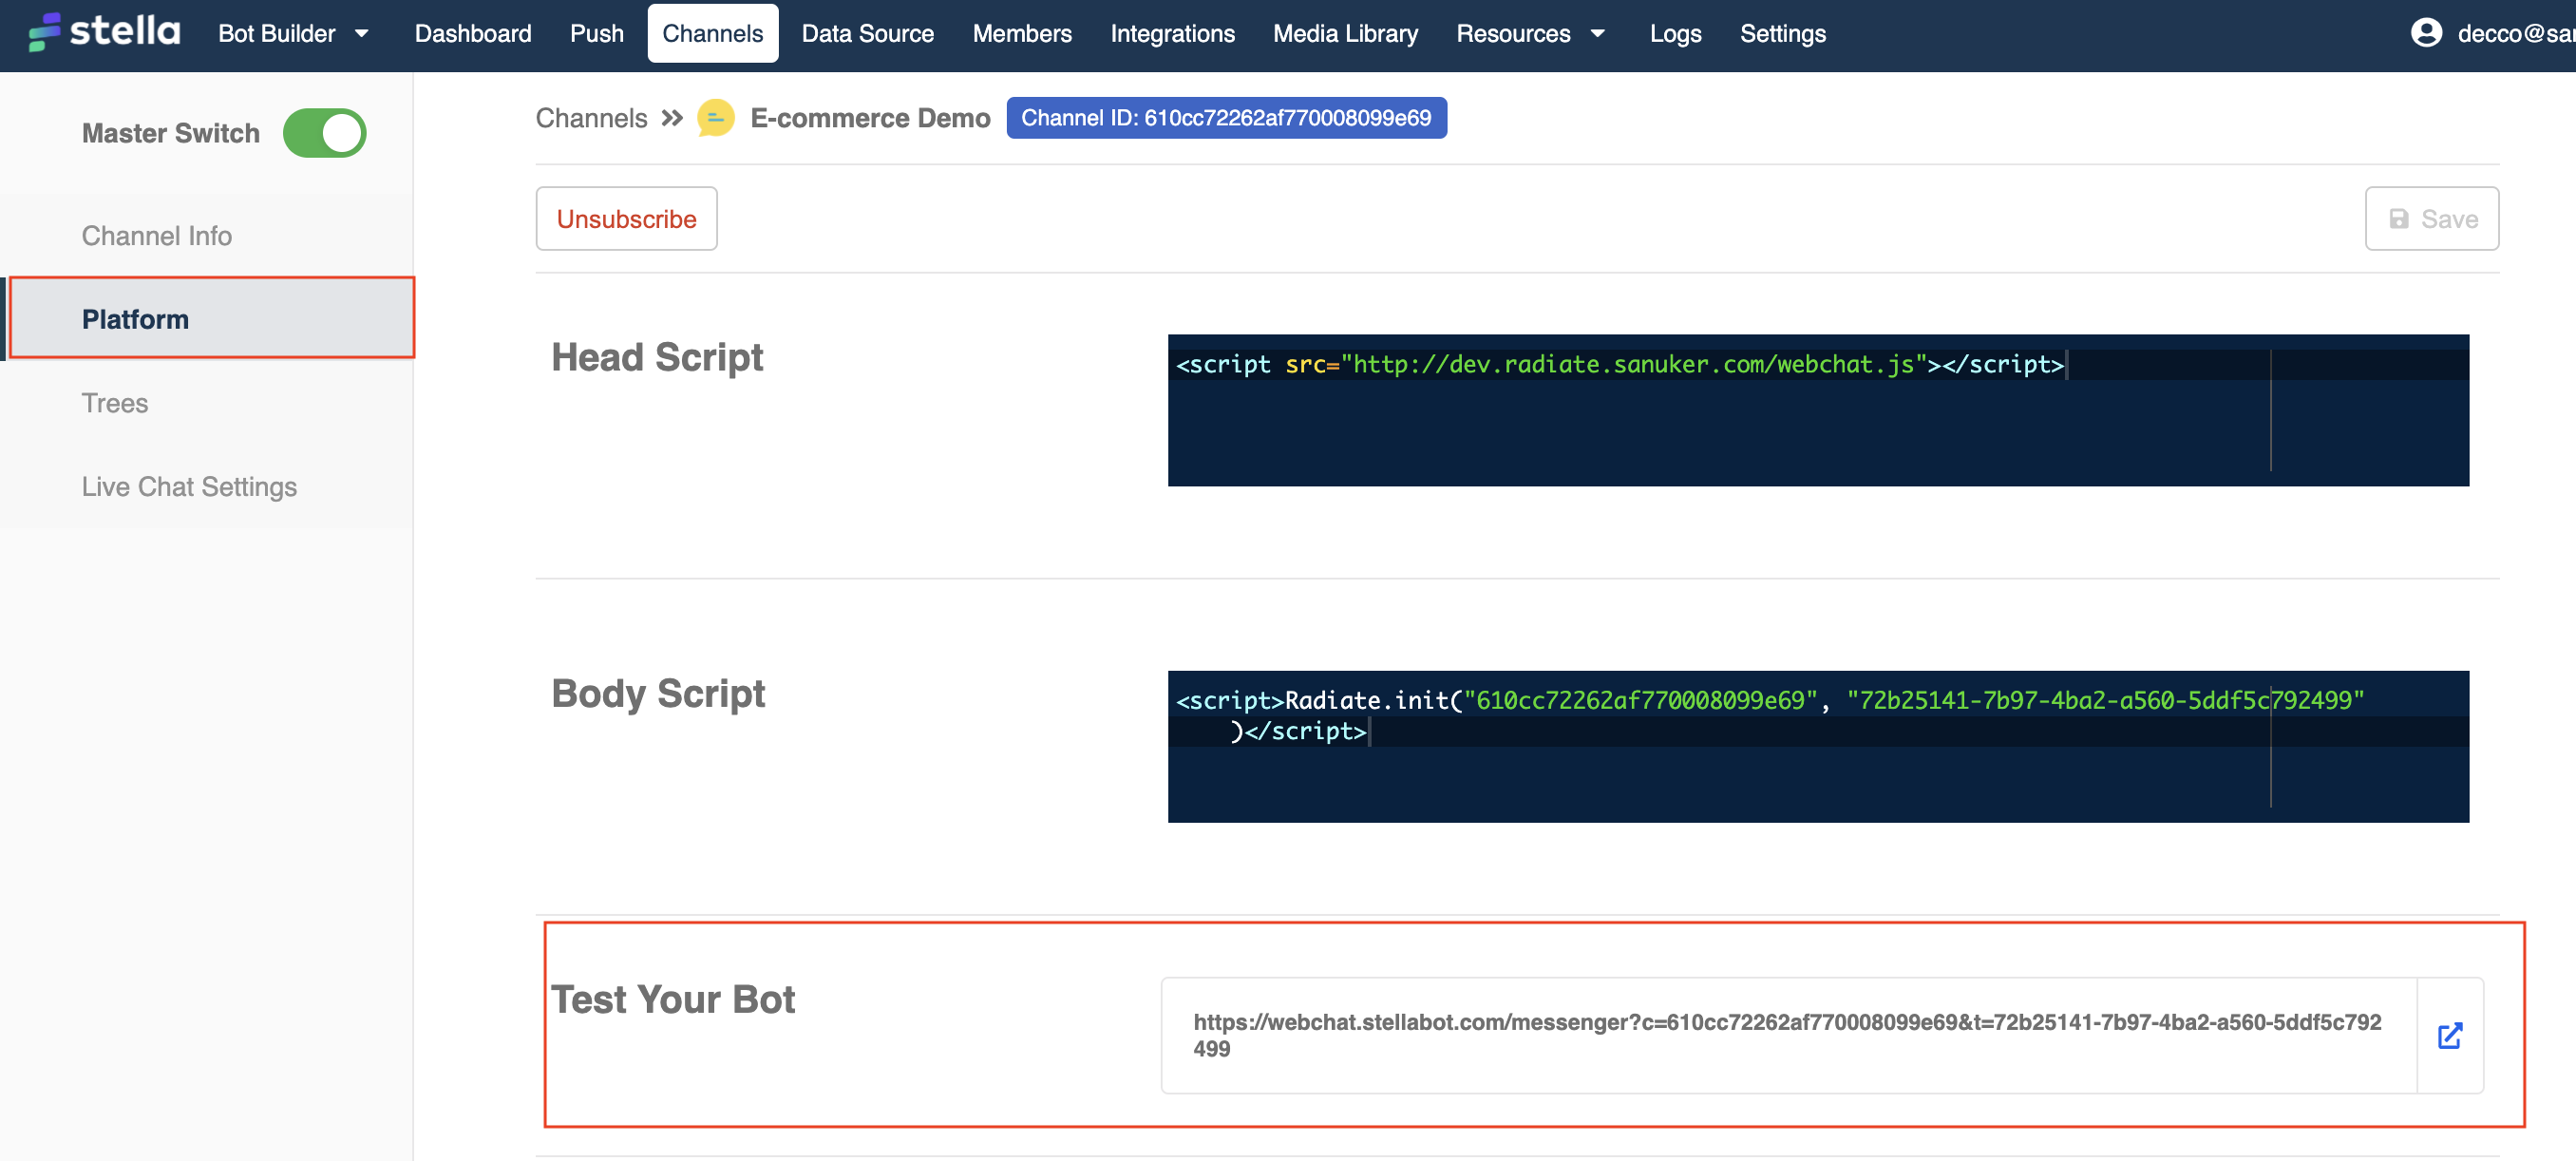
Web chat chatbot link
- In the Web Chat chatbot, by clicking "Settings" at top right, users are able to switch between different languages and font sizes.
Web Chat Settings Button
- If you have set up more than one langauges for web chat, users can switch languages in the dropdown.
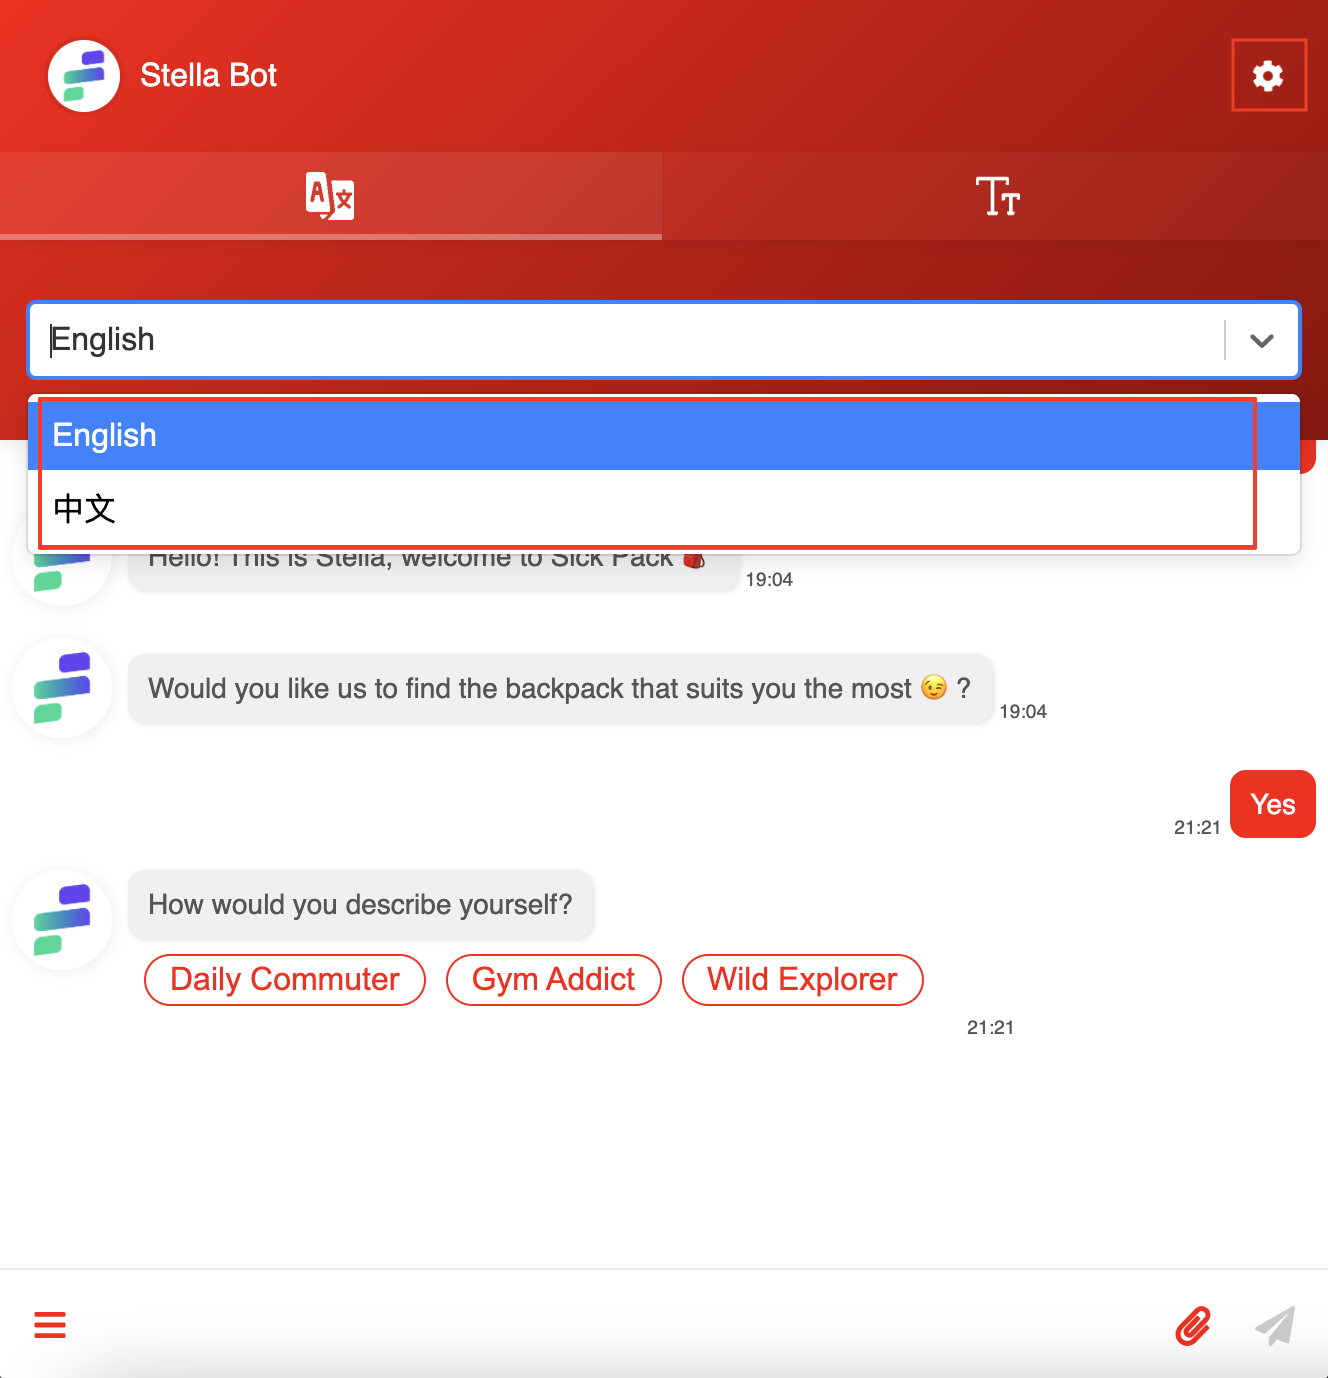
Langauge Switch
- Users can also switch to different font size.
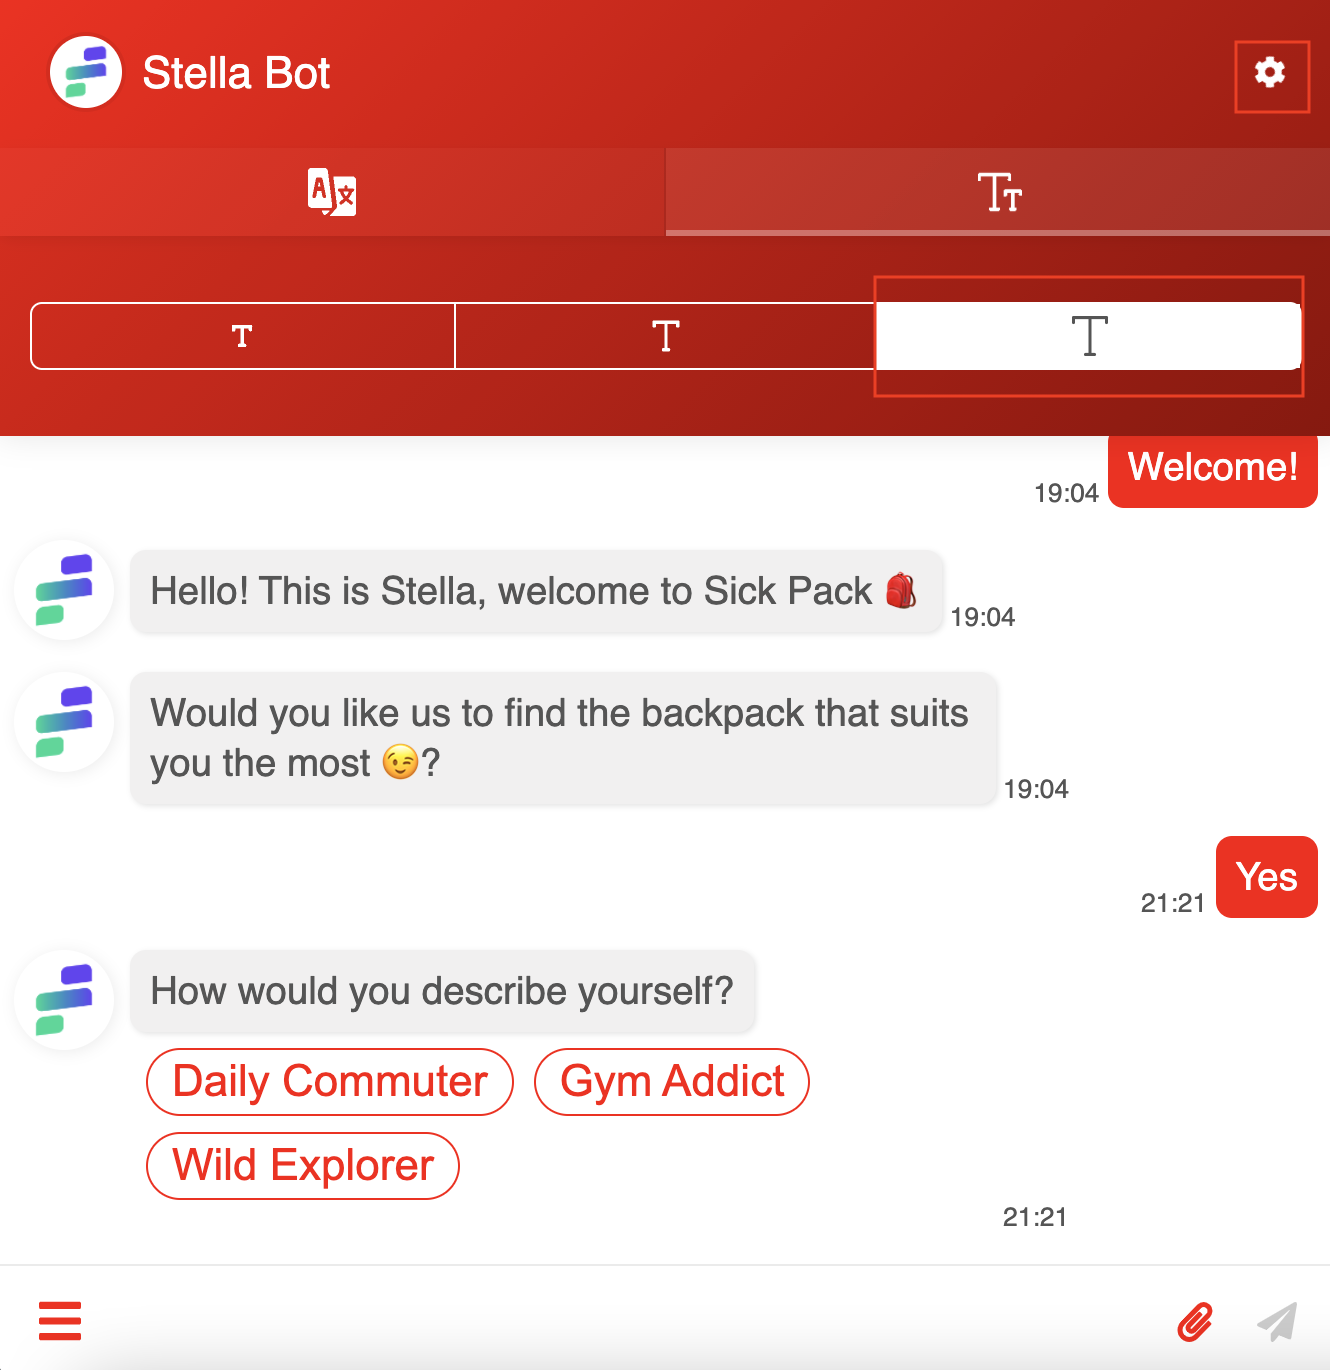
Font Size
- If you have set up the persistent menu, you are able to open it at the bottom left.
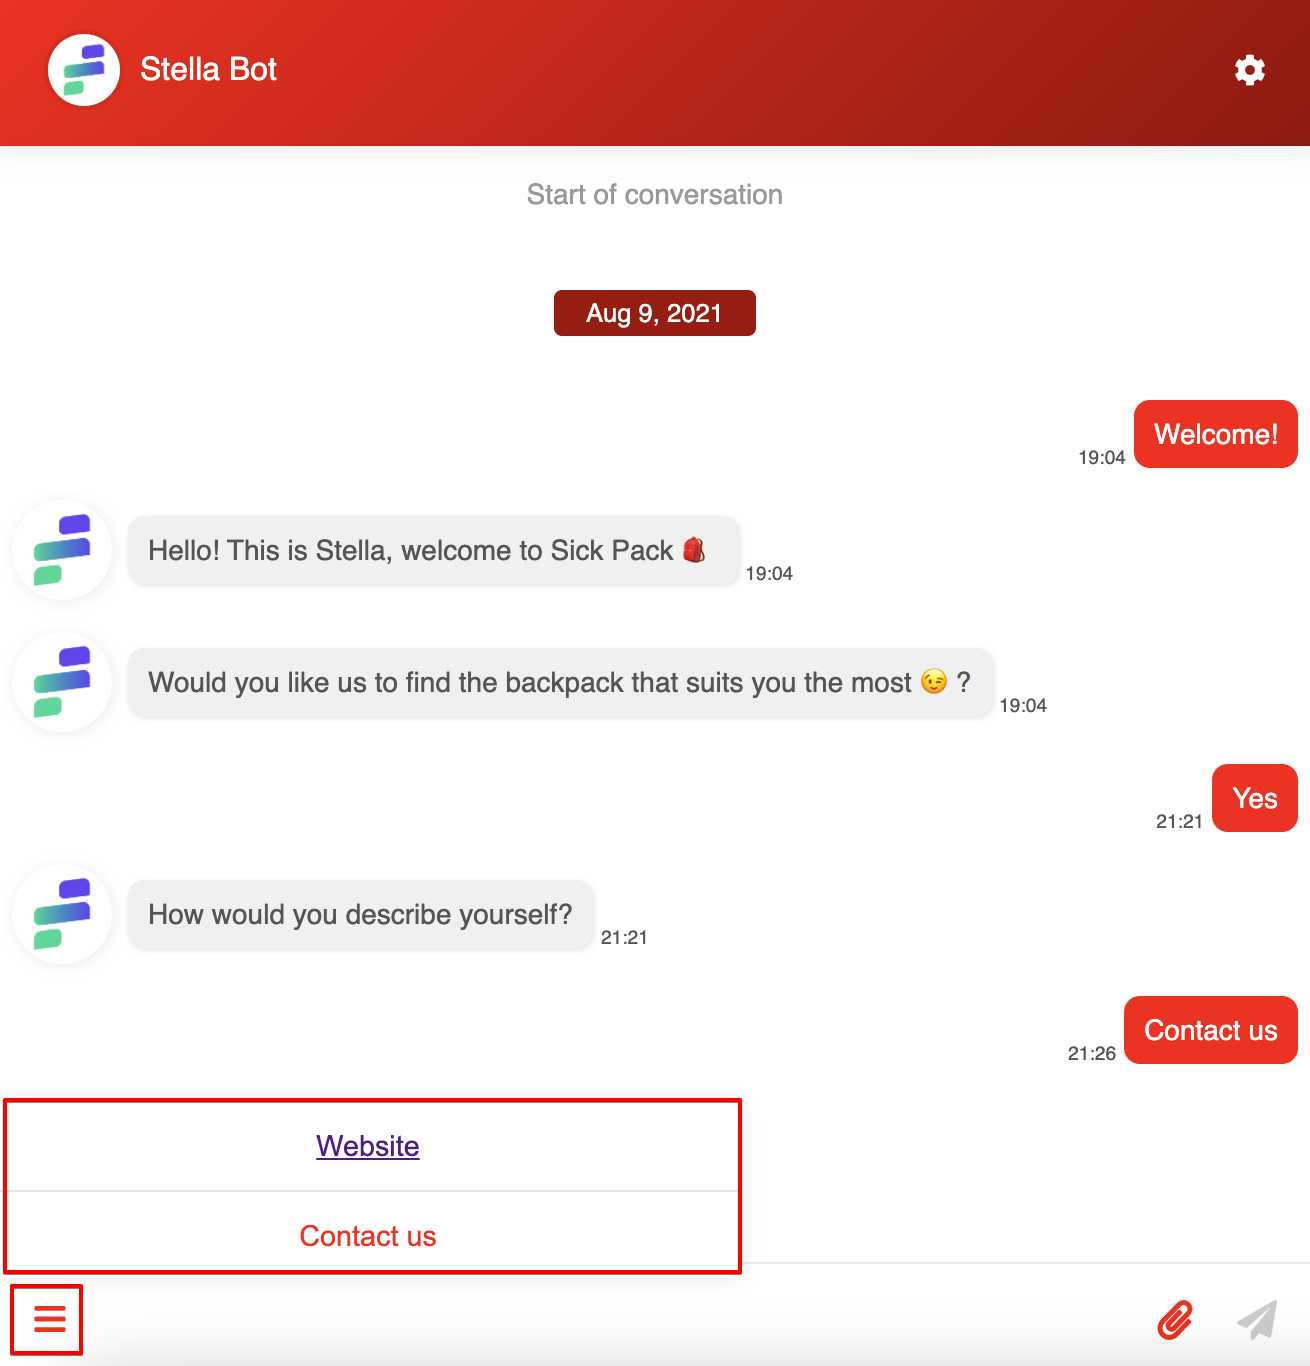
Persistent Menu
Embedding Script onto Website
In Web Chat Overview, you have learnt that you would need to embed the web chat script onto your website to properly display the plugin. You will be able to find the script in channels in the next update.