Analytics
Basic
Chatbot users come from everywhere but mainly from advertisements you placed. In order to improve the effectiveness of the advertisements, you must first understand your users’ preferences. Toggling on the Analytics on the nodes could help you to track the users’ footprint.
Analytics is a function which counts the number of times when users pass through a node. As a result, by creating analytics with“Category”, “Action” and “Label” on any nodes, you may classify and segmentise the user journey on Stella. You may visualise the analytic data on the “Dashboard” on Stella for your future marketing strategy development.
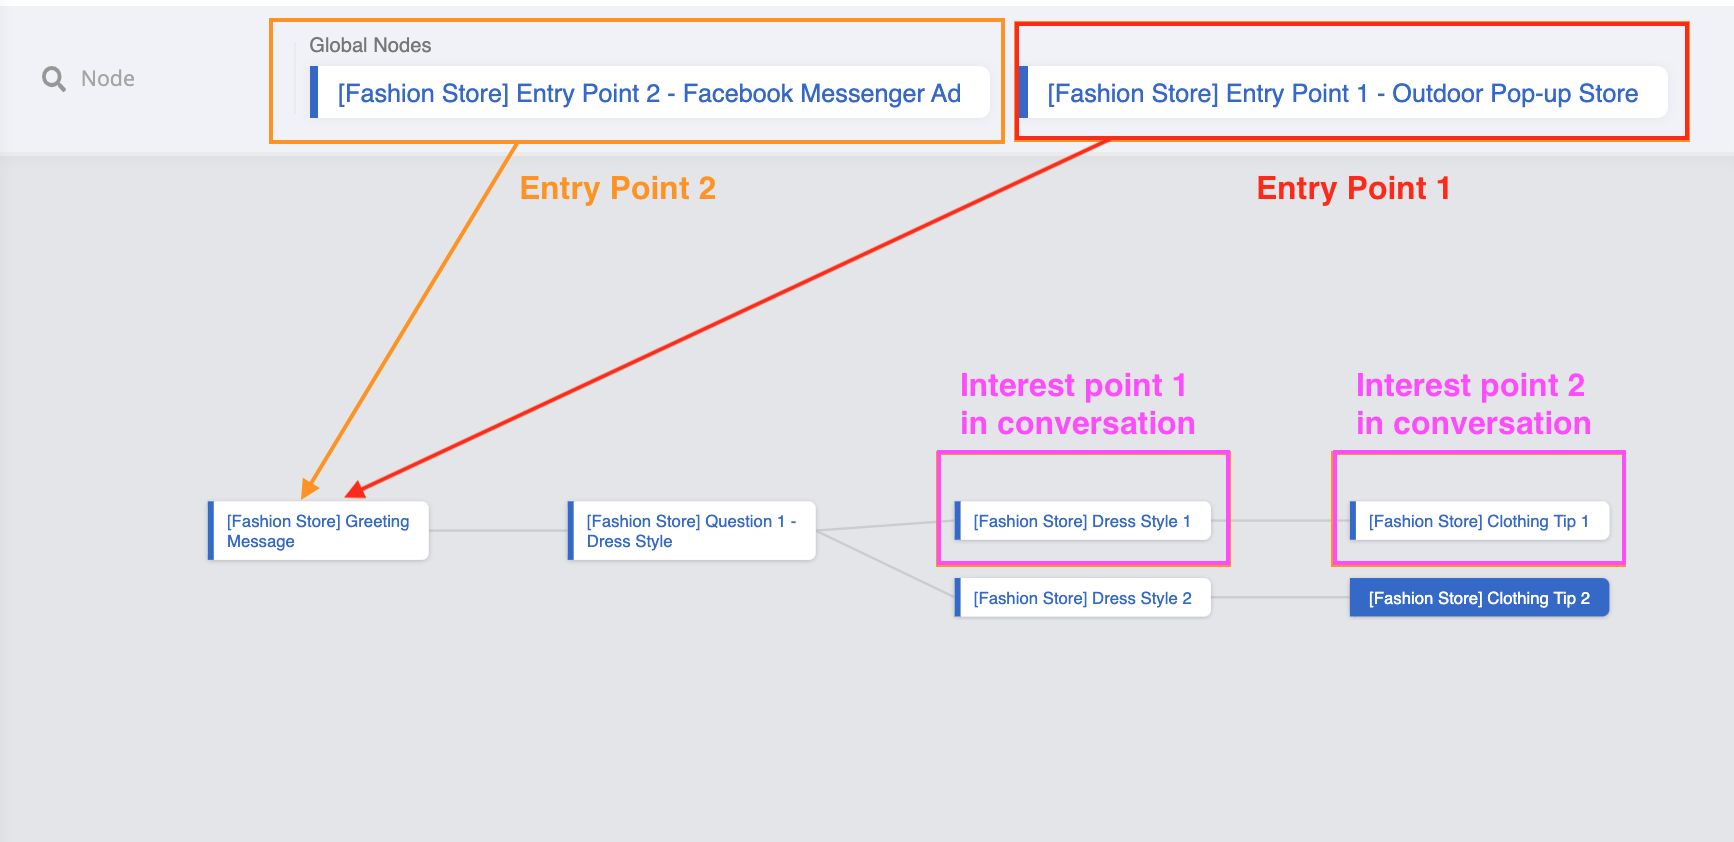
Sample Tree Structure
Imagine you are running a chatbot sales campaign for your fashion store and users would activate the chatbot from an outdoor pop-up store or from your online Facebook ad . As a result, you would like to track down the chatbot users coming from different entry points into your chatbot sales campaign.
Getting Hands-on
Select the nodes where you set the entry points for your outdoor pop-up store or your online Facebook ad.
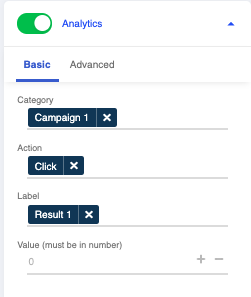
Toggle the “Analytics” button and add the “Category”, “Action”, “Label” accordingly. (E.g. if you are in the node for the outdoor pop up store entry point, you may add the tag as “Campaign 1” in the “Category”, add “Click” to the “Action” if you have set the button for the node, add “Result 1” to the “Label” to this user journey)
Apart from the entry points, you may also apply specific analytics to any nodes you think it is useful for you to analyse the user journey and preferences.
Now, whenever a user is activating the chatbot from a specific entry point, Stella will track the user journey of the user accordingly.
On the top horizontal panel, click “Dashboard”, and you will see a histogram and a table with bar charts in the “Analytics Overview”. You will be able to know which node and conversation flow the participants had passed through. Using the fashion store as an example, you can track and display the statistics of each conversation flow. It helps with your future marketing campaign development.
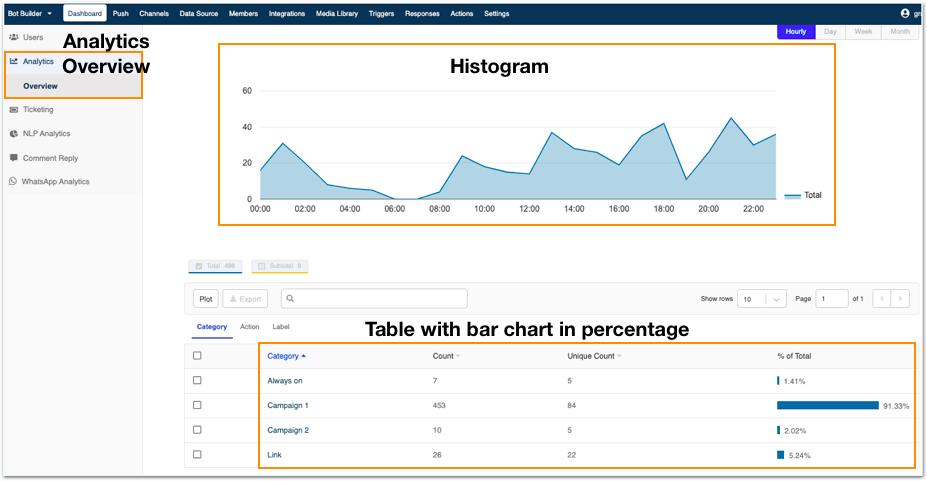
- Moreover, you could use the analytics data to discover the user’s preferred experience of the chatbot. For example, you may discover the users are more engaged in “Campaign 1” which is the outdoor pop-up store. You can now have better planning for the next marketing strategy according to the preferences of the users.
Tips:
- Remember to press Enter after naming the category, action and label
Advanced
Analytics in the basic version is very useful because you can easily track the total count of interaction in a tree node. However, you can only track the data on a node level. If you want to track the performance based on how the user interacts within the node, then you will need to set the analytics label programmatically.
When a node with analytics toggled on is executed for a member, either from trigger or redirect, an analytics event will be recorded. Advanced analytics is a Promise function. An analytics event is an object consisting of category, action, label and value. value is a number field, and the other 3 are string fields. You can use the resolve callback of the promise function to resolve the analytics event.
The recorded analytics can be found in the Dashboard page. Analytics can be grouped and filtered by category, action and label.
For more details on the advanced chatbot concept & usage, you may visit here.
Sample Tree Structure
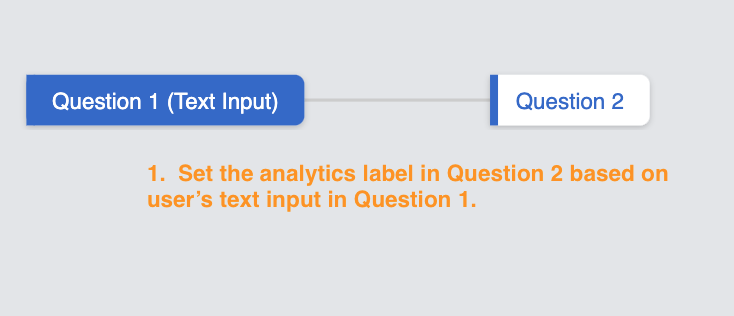
Following the below example, as you are tracking the interaction after the users have answered a question, the analytics setup should be done in the next node. (e.g. if your response in Question 1 (Text Input) is a question asking “Are you interested? ”, then the analytics of whether the user is interested or not interested should be tracked on the next node which is Question 2). The system will match the next layer of node after the user answered your question, (i.e. Question 2).
Getting Hands-on
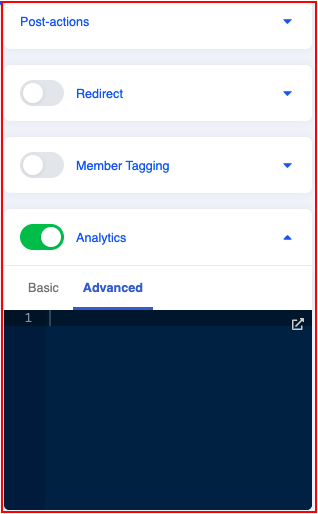
- Click “Advanced” after toggling the “Analytics”, and input the following script as example:
return new Promise((resolve) => {
  resolve({
    category: "Question 1",
    action: "User Input",
    label: `${this.messageEvent.data.text}`
  })
})
- In the above example, the label will be generated based on the text that the user has typed. For example, if the user typed “Interested”, then the label will be ”Interested”. You may also customize the category and action based on the message event if needed.
Tips:
- You can always change how you want to save the analytics category/action/label in terms of message event. For more information on message event references, see the reference documentation.