One-Time Notification
One-Time Notification (OTN) provides developer the flexibility to push any contents to the users as long as it is complied with the community standards and the users have opted-in to receive the push message.
What is your result?
- User triggers the OTN flow [First Outcome].
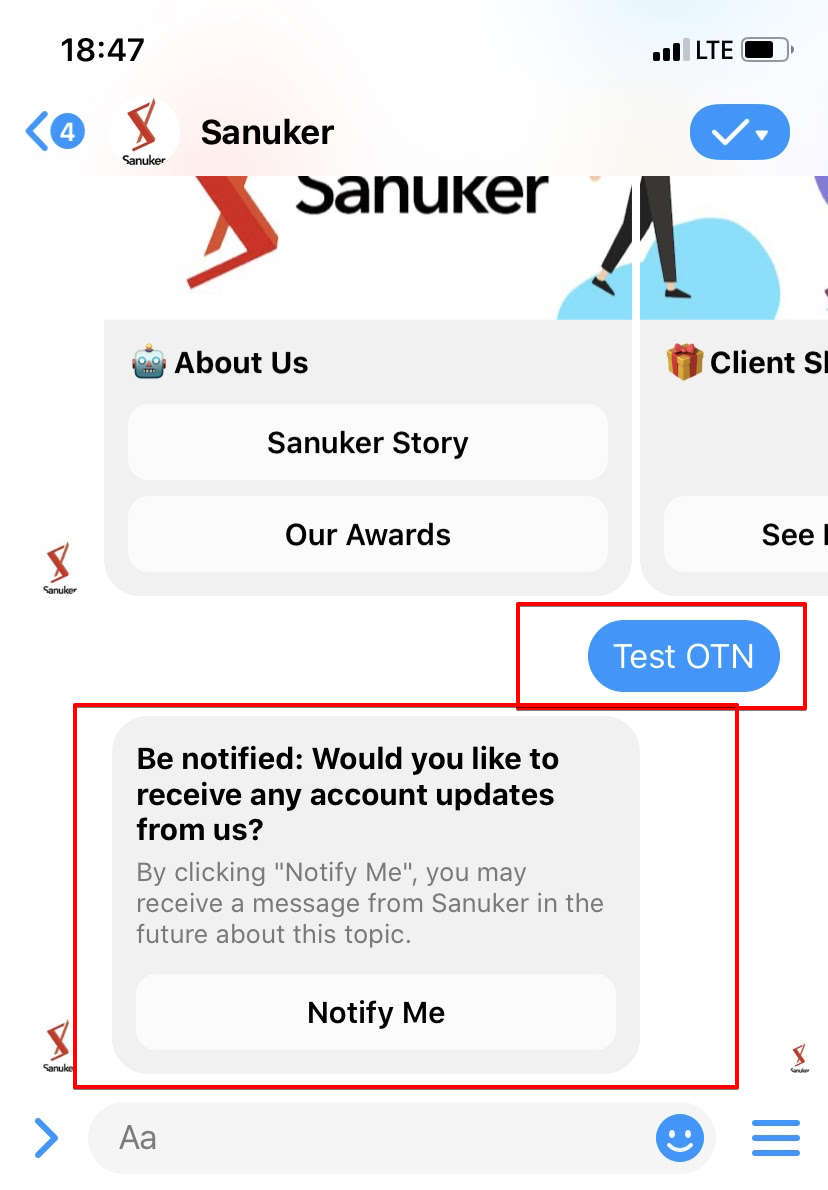
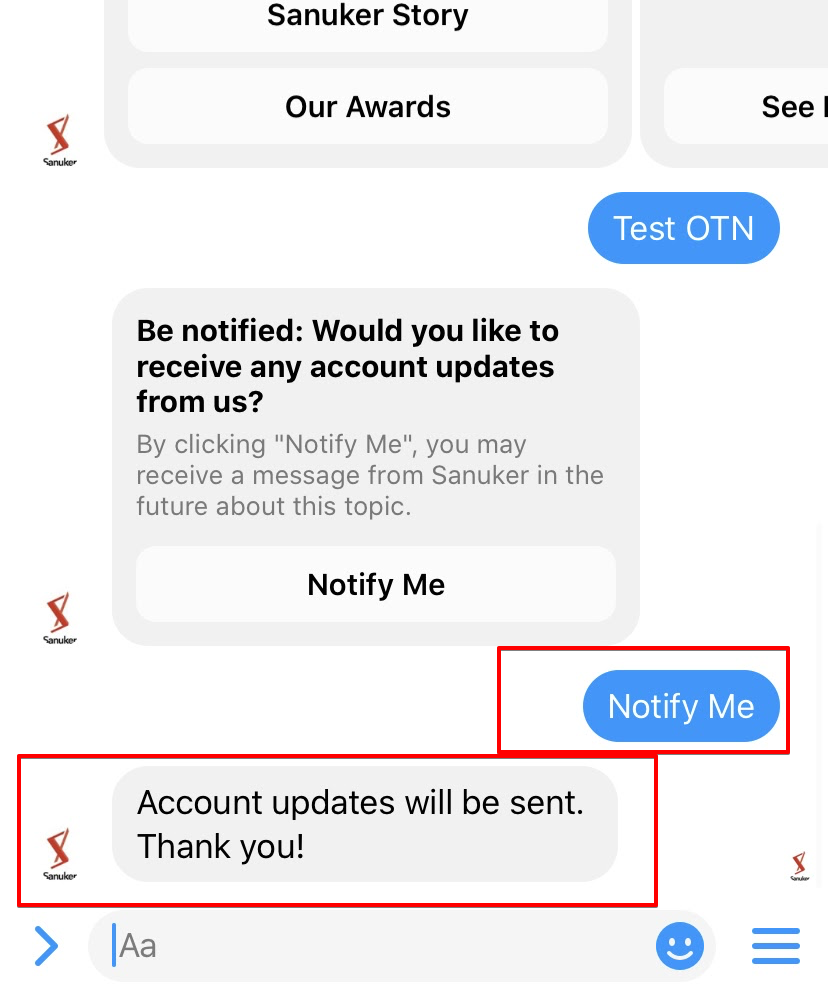
- User agrees to receive account updates via one-time notification [Second Outcome].
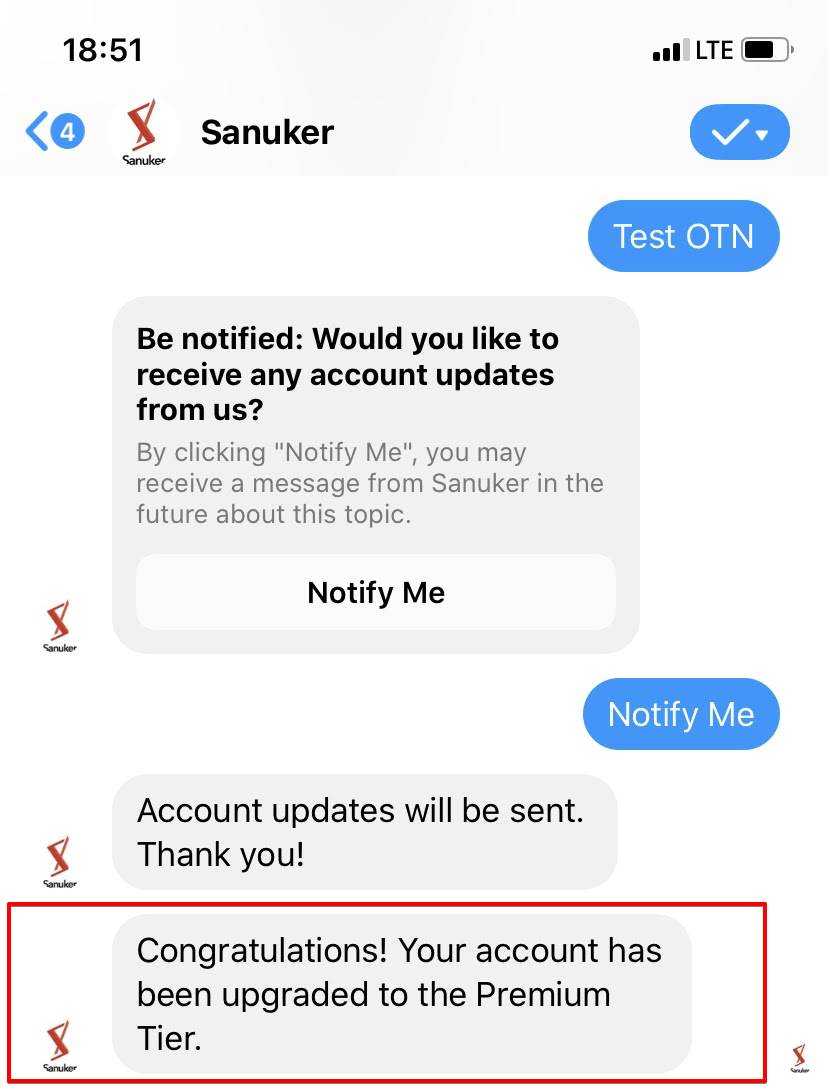
- A few days later, an account update is sent to the user [Third Outcome].
Sample Tree Structure

Getting Hands-on
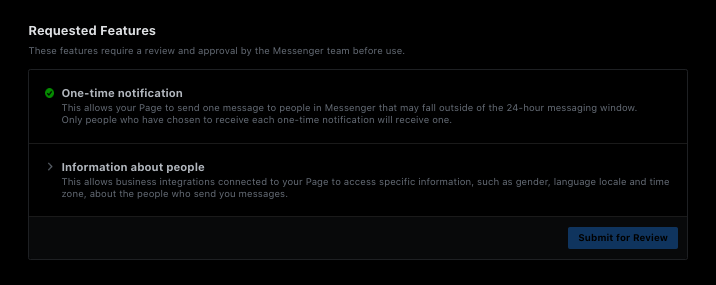
Apply for One-Time Notification on a Facebook Page
- Open your Facebook Page Settings and head to "Advanced messaging".
- Scroll down to locate "Requested Features".
- "Request" for "One-time notification".

- Select "Confirm" for the request.
- You should see a green tick next to "One-time notification".
Create a Tree Node - OTN Button
Create a Tree Node and name it as "OTN Button".
Create a new response for setting up the OTN Button. Head to “Advanced”. Then, create a new response under “Transform” with the following code :
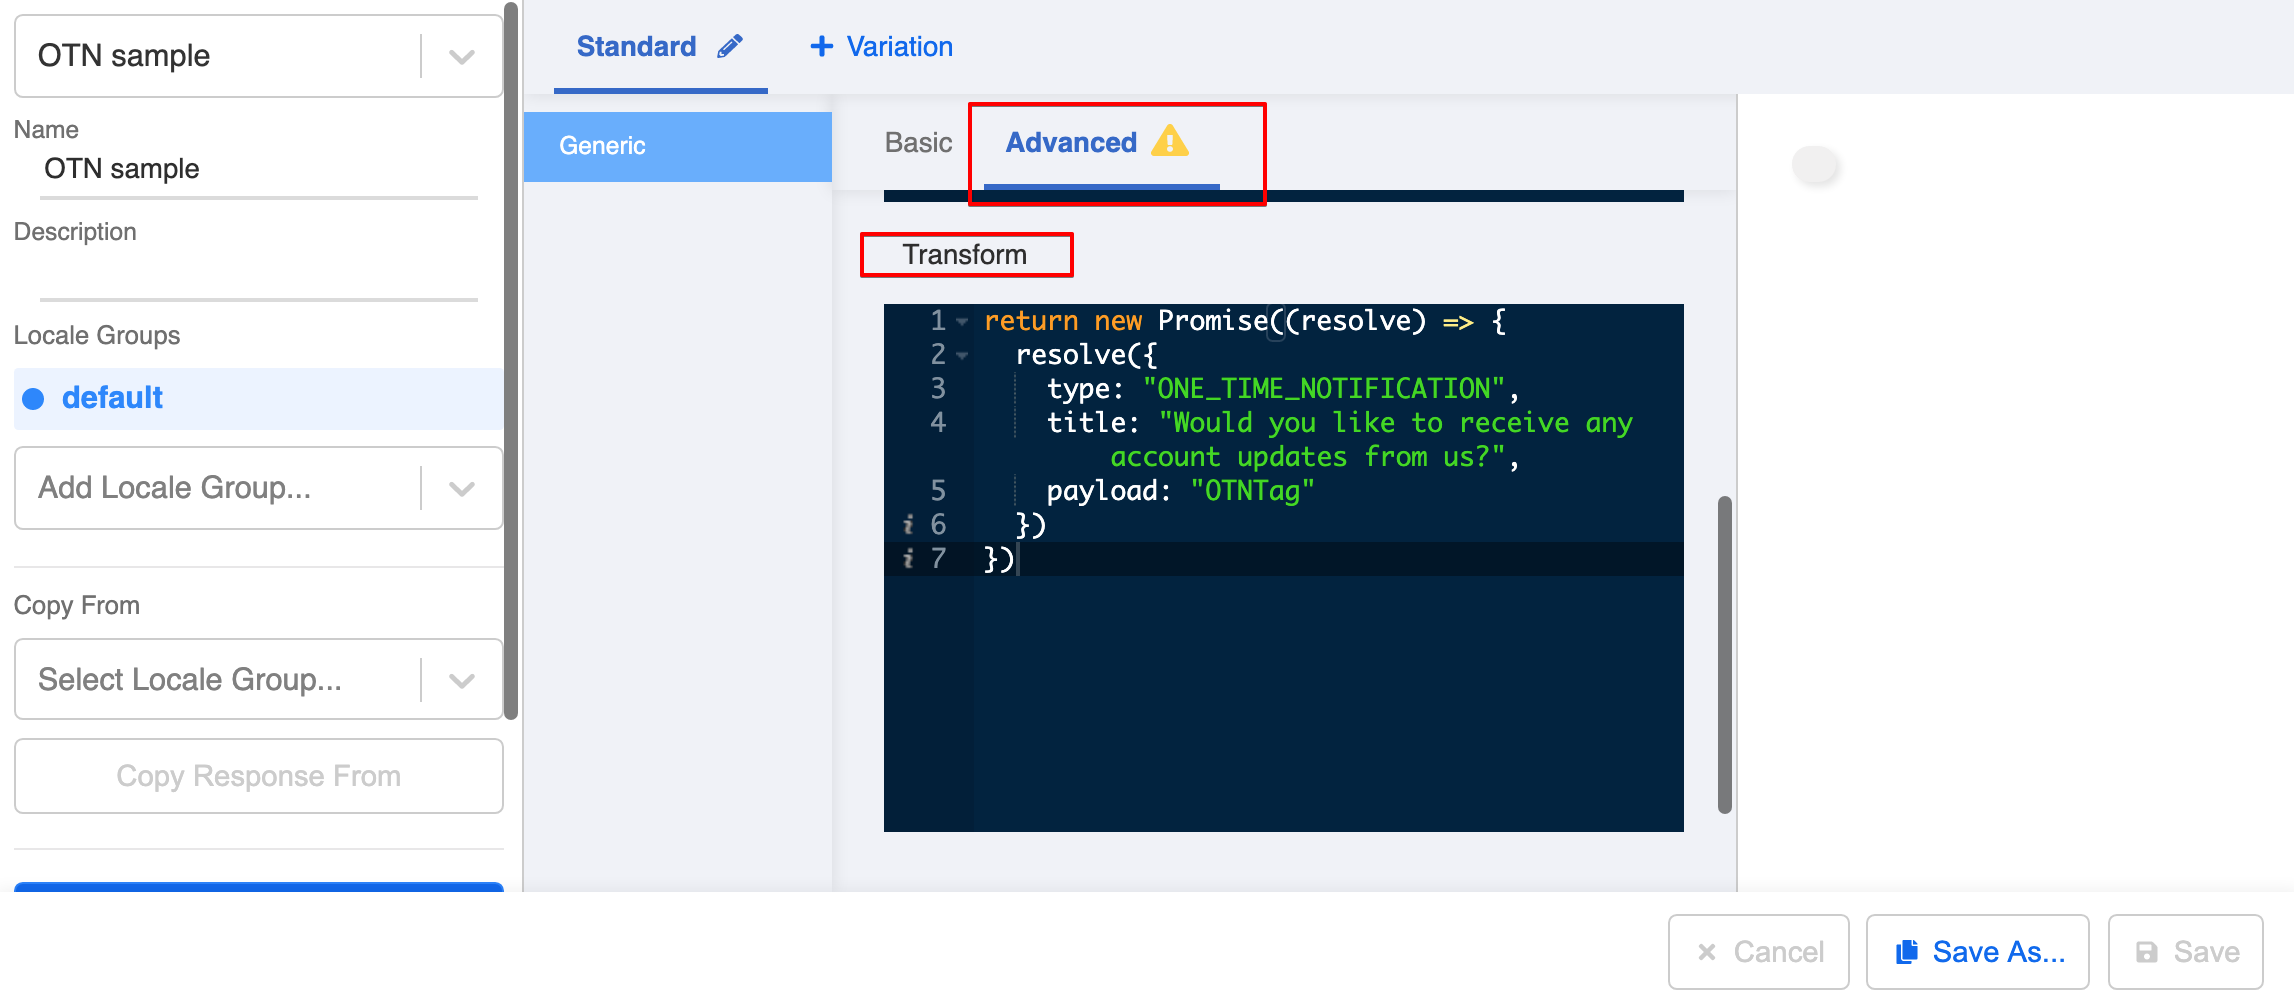
return new Promise((resolve) => {
  resolve({
    type: "ONE_TIME_NOTIFICATION",
    title: "Would you like to receive any account updates from us?",
    payload: "ACCOUNT_UPDATE"
  })
})
Please note that title field has a character limit of 65 characters.
Save the response and the Tree Node.
Please make sure you have devised a method to trigger this conversation flow. In the above example, a Global Node with the text trigger
Text OTNis added to a Facebook Channel, so that the chatbot can be triggered to send out the one-time-notification button.
Create a Tree Node - Agree to Receive OTN
Select the "OTN Button" Tree Node. Then, create another Tree Node and name it as "Agree to Receive OTN".
Create a new trigger under the “Advanced” tab with the following conditions and with an “&” relationship (Name the new trigger as “OTN Payload”):
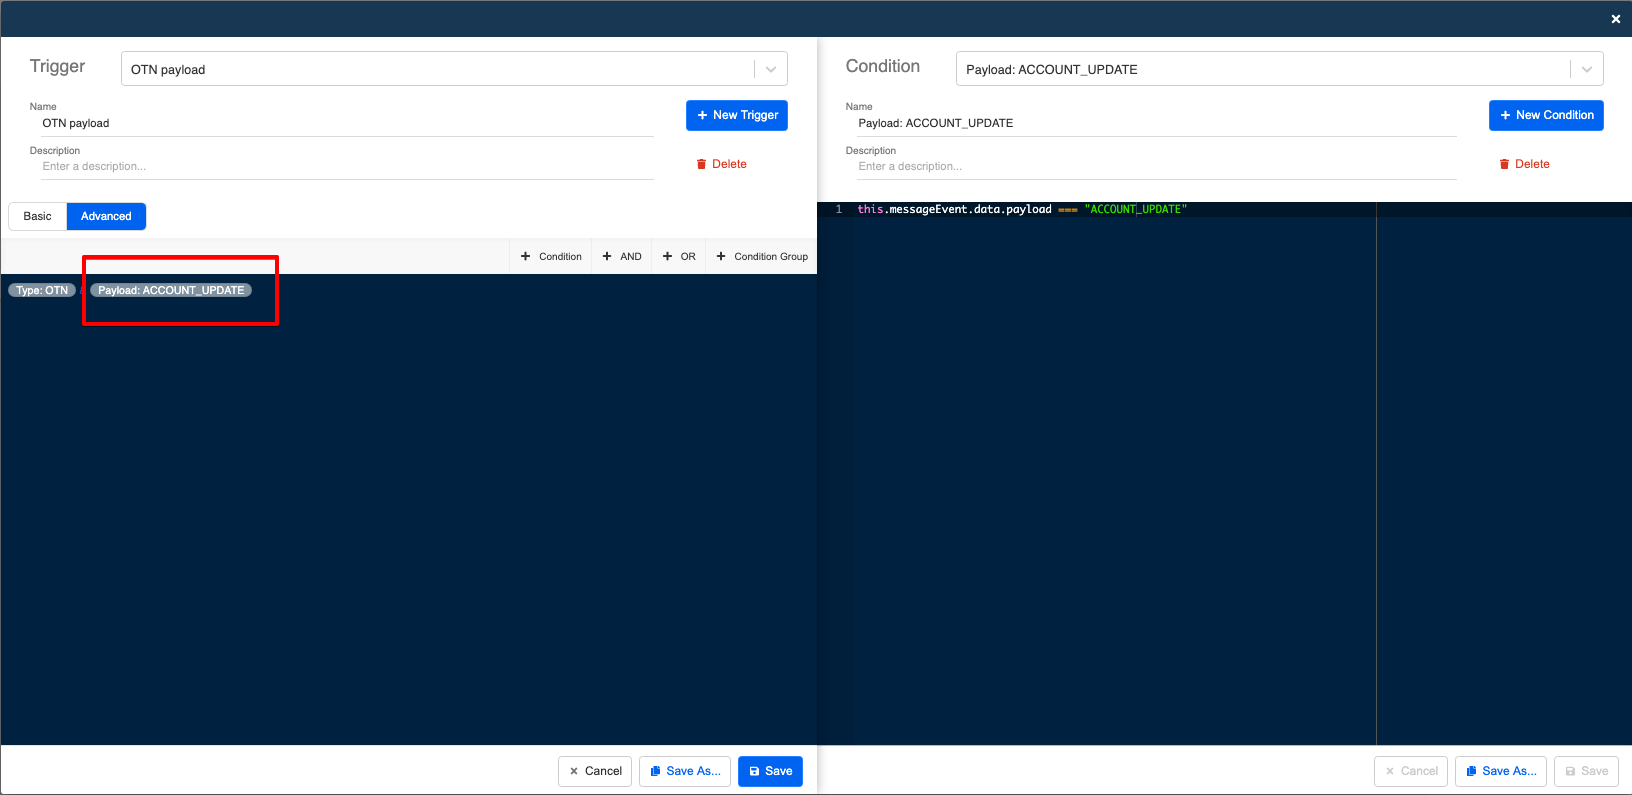
Condition 1 - Type OTN
this.messageEvent.data.type === "one_time_notif_req"
Condition 2 - Payload: ACCOUNT_UPDATE
this.messageEvent.data.payload === "ACCOUNT_UPDATE"
The payload for Condition 2 identifies the user under a certain OTN group. For example, account update OTN is under “ACCOUNT_UPDATE”. You may define it as any value you see fit. For example, change to “PROMOTIONAL_UPDATE“ if the user is opting for a promotional update.
Create a new response and name it as “Agree to receive Account Update” (You may refer to Second Outcome of the expected outcome). You may input any message types you want. (e.g. a text message "Account updates will be sent in a few days. Thank you!")
Save the response and the Tree Node.
Setting Up the Push: Create an OTN Audience
Now it's time to create a way to activate the OTN Button Tree Node to test the First & Second Outcome.
Create a "New Audience" and name the audience group.
Select the relevant Facebook Channel.
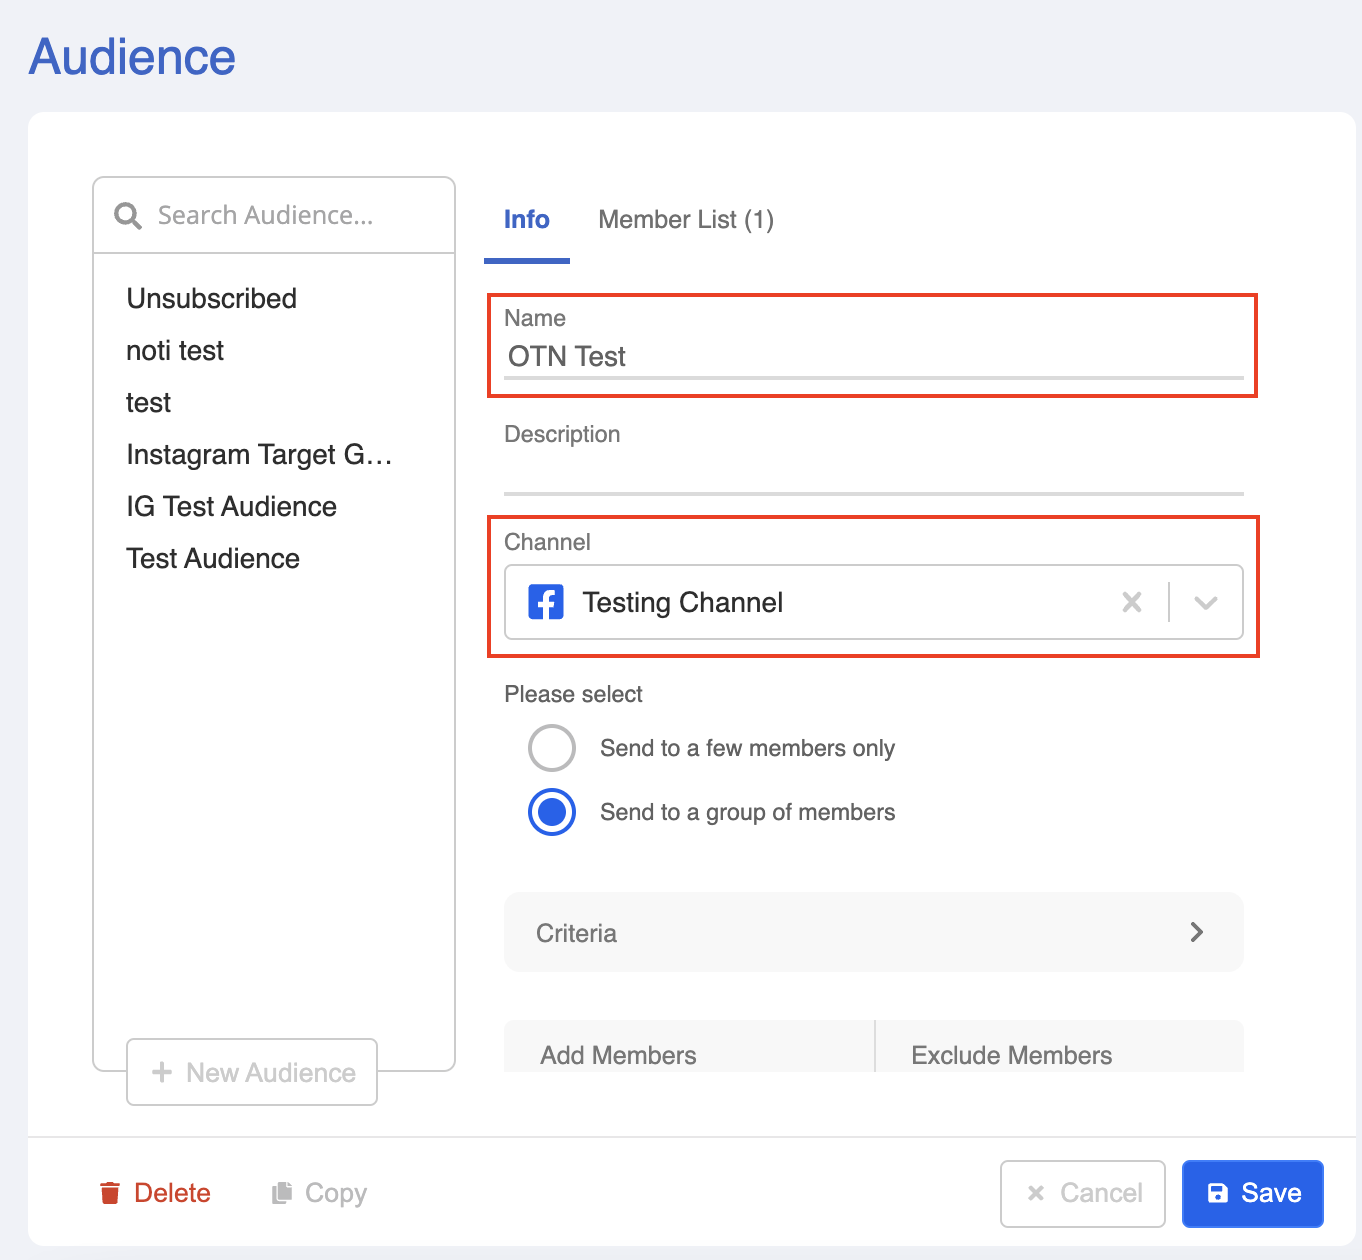
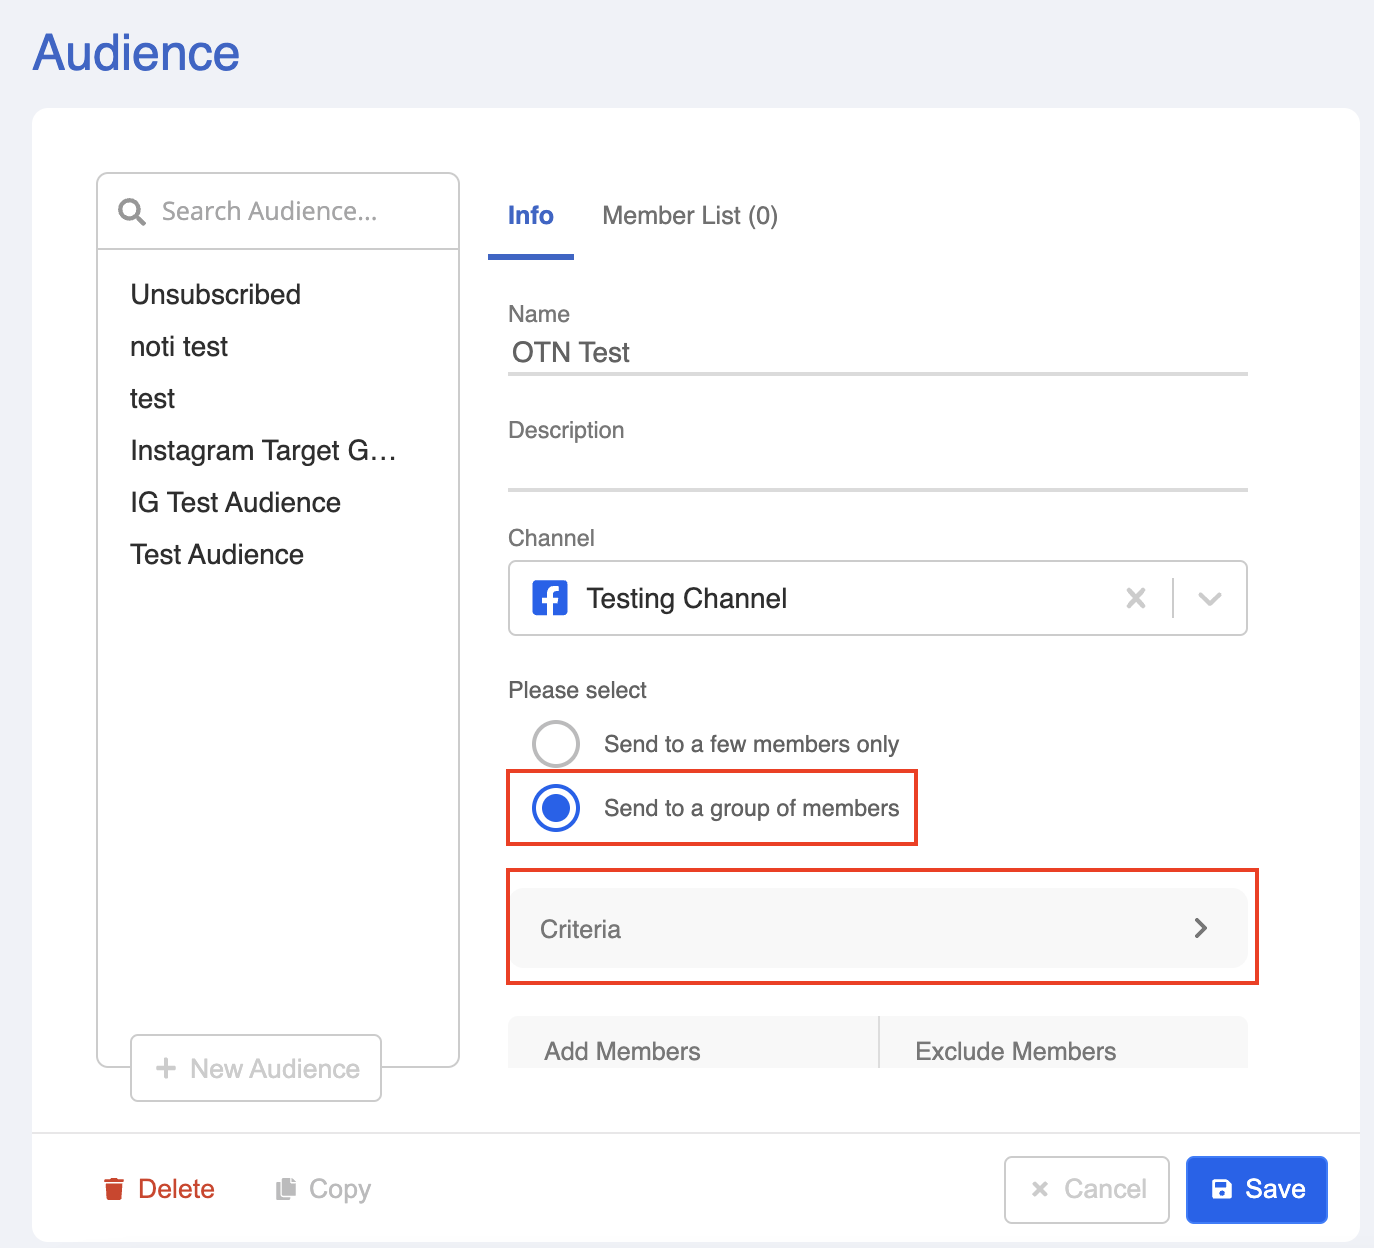
- Select "Send to a group of members". Then, click "Criteria".
- In the "Criteria", type the desired OTN Tag which you assigned previously and click the "Enter" key to confirm the tag.
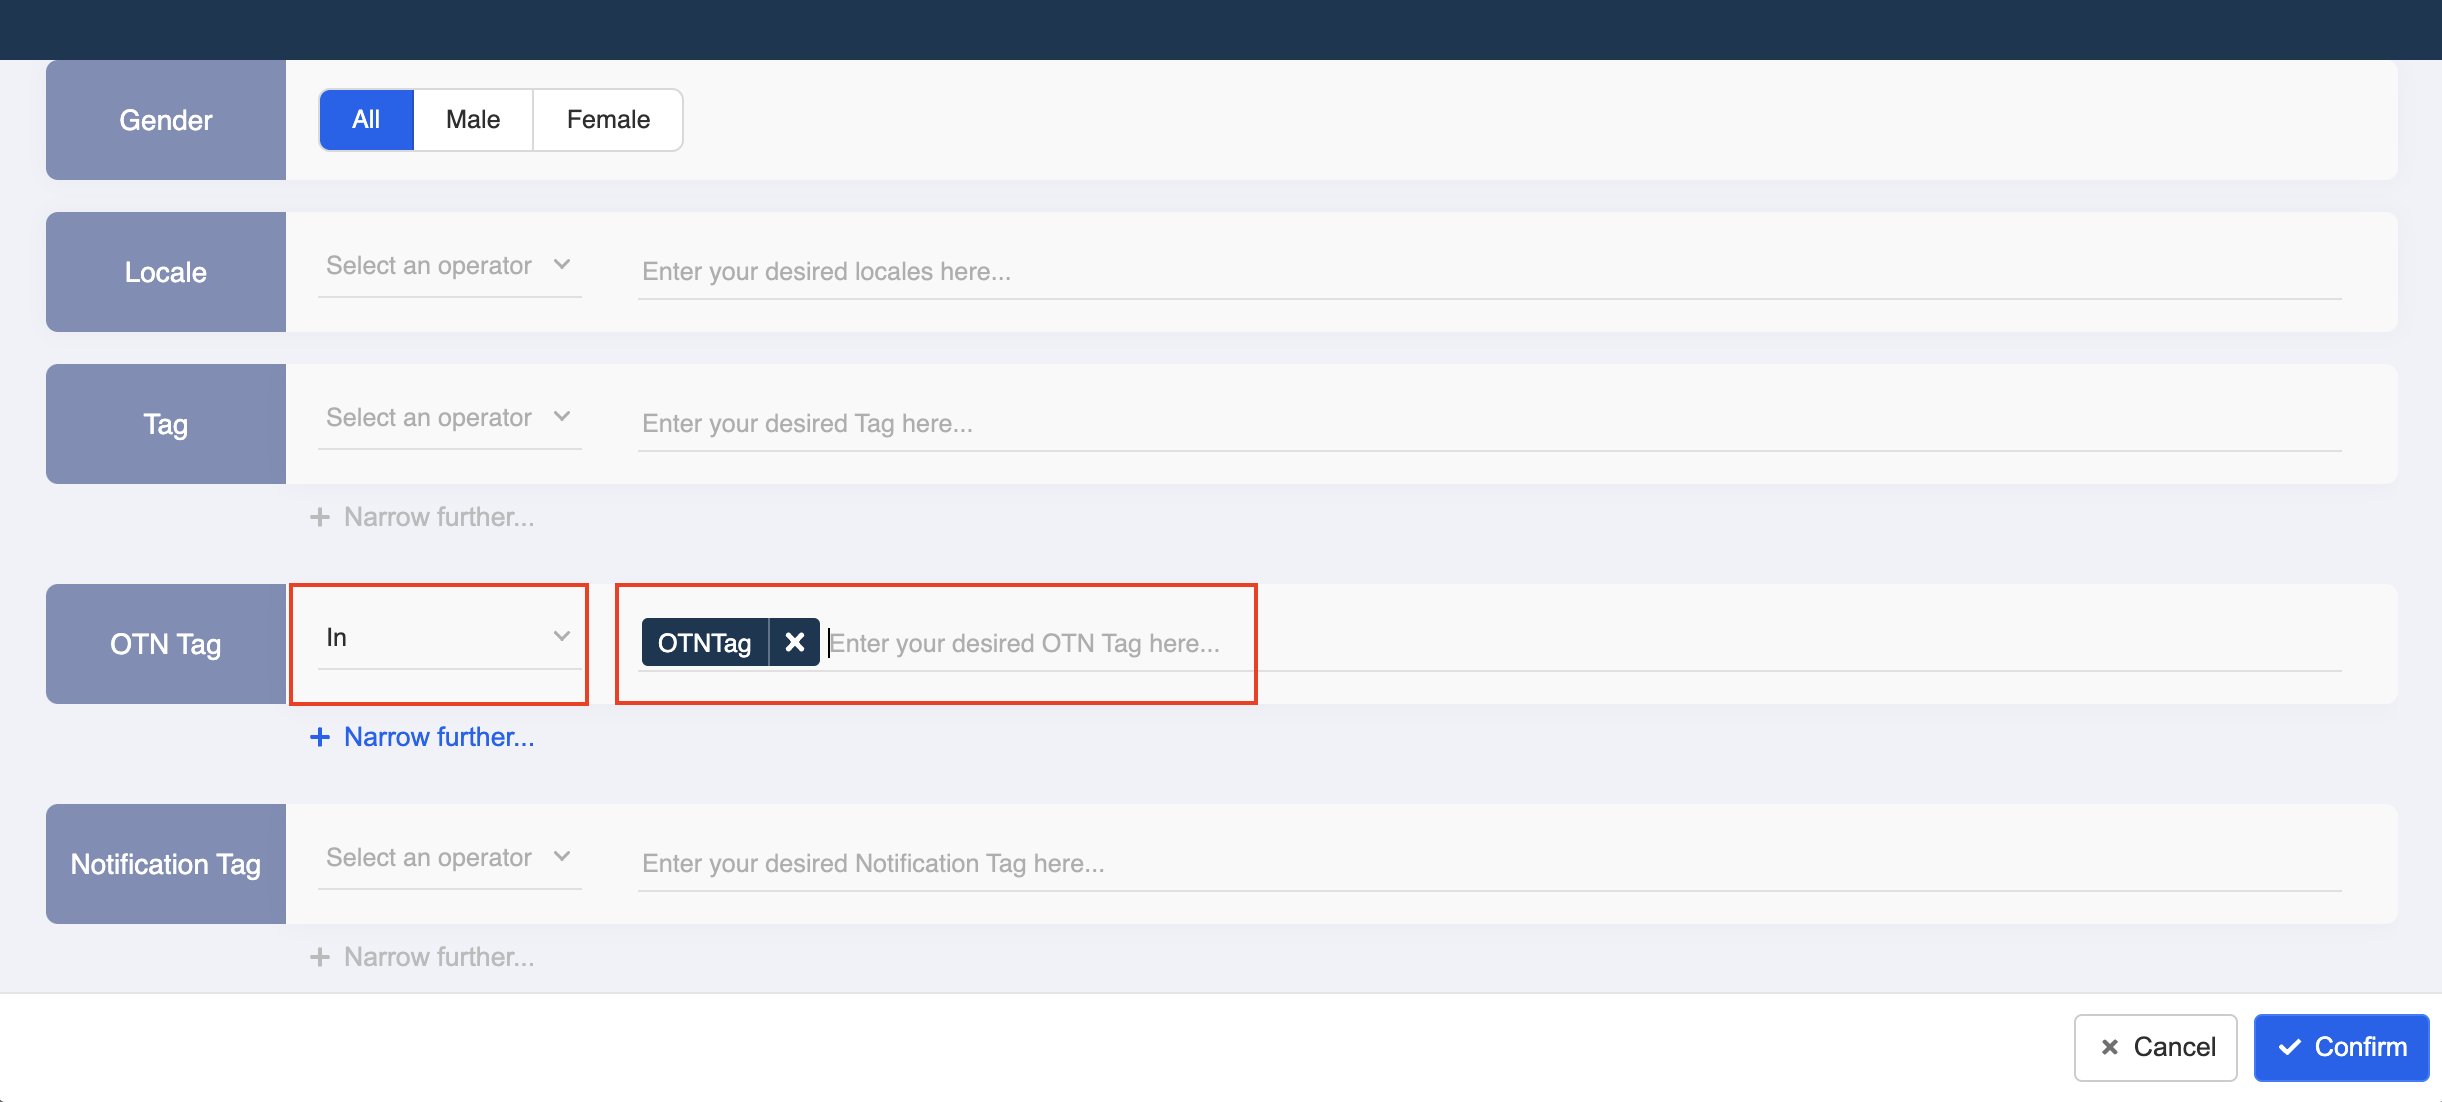
Select "Confirm" to finish setting up the criteria.
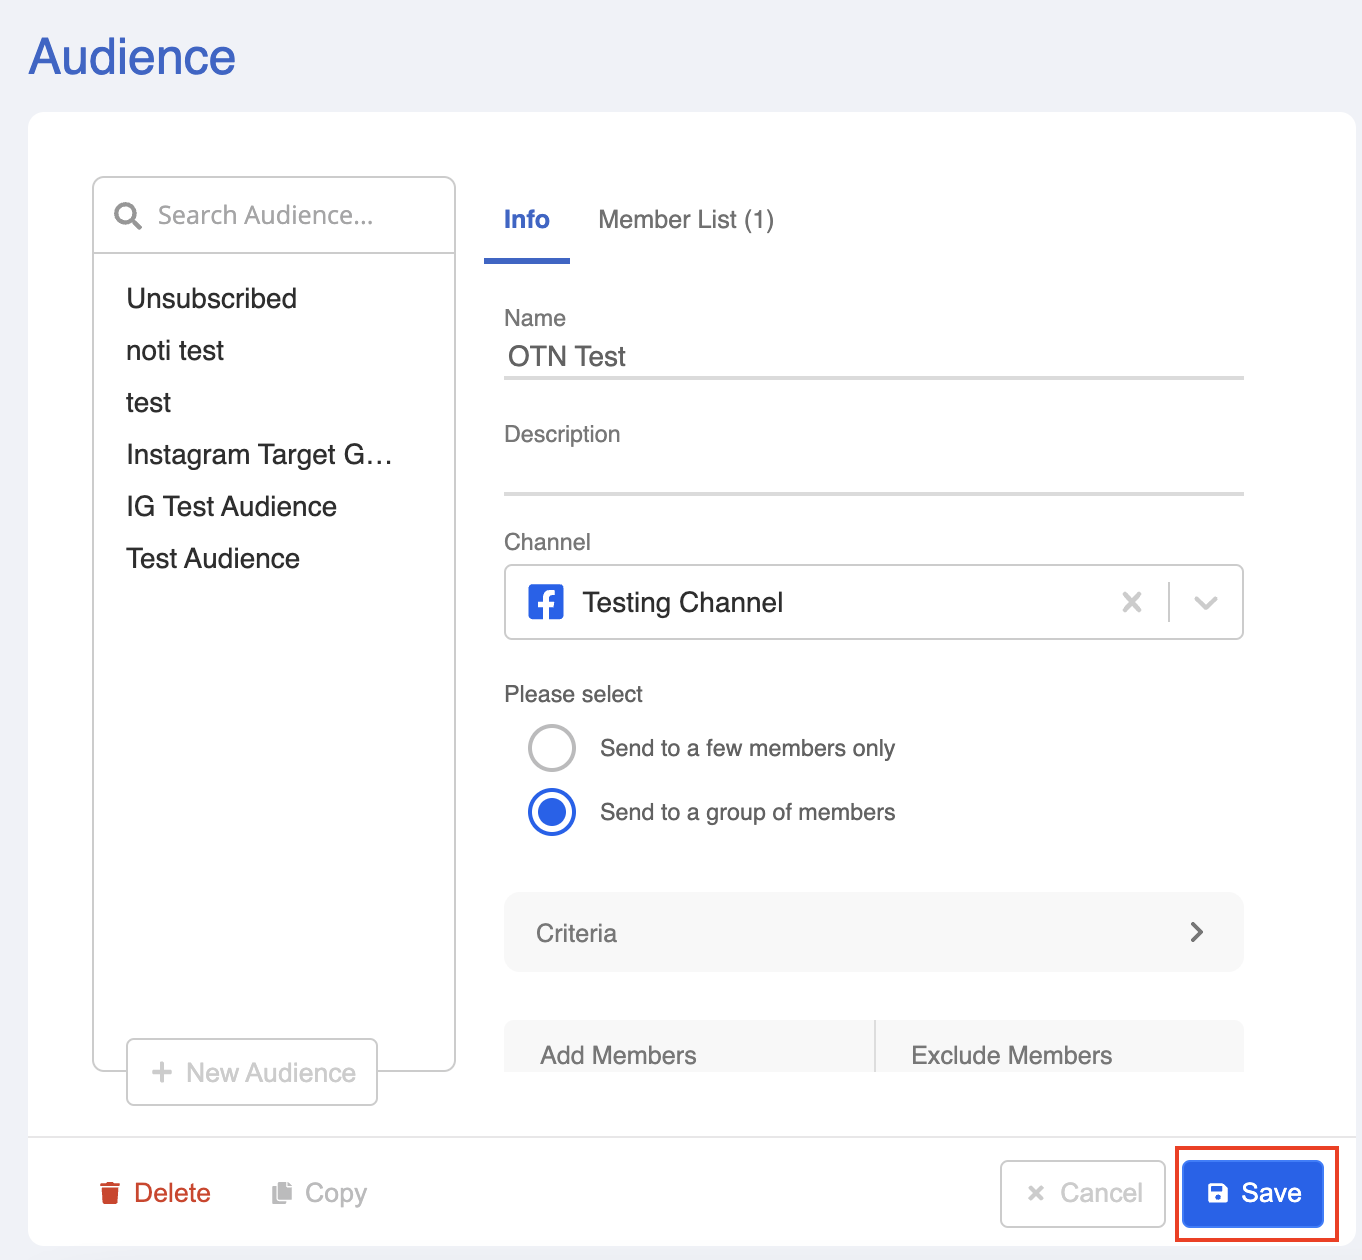
Select "Save" and the audience group is created.
Setting Up the Push: Sending the Push
- Create the push with the audience group created for OTN.
- Follow the step here to schedule the push.
- Send a testing push to see if you can produce the Third Outcome.