Slack Deployment via Public App
This part of the documentation will walk you through all the procedures to connect a Slack Channel. Once you have completed this deployment, you can set up your Slack for live chat purpose.
Here is a checklist for your reference, so that you won't miss essential items to complete the deployment:
| No. | Checklist Item |
|---|---|
| 1 | Connecting Slack Channel via Public App |
| 2 | Add Stella App to Slack |
| 3 | Set Up the Broadcast Group in Slack Channel |
| 4 | Add Pairing Channels in Settings |
Please refer to another session for setting up Slack Channel via Custom App.
Connecting Slack Channel via Public App
This section will help you subscribe and connect a Public App on Stella for Slack. This app is necessary for setting up chatbot on Slack, including live chat settings.
Before proceeding to basic settings, please make sure you have a Slack workspace ready.
Basic Settings
- Go to Stella, select "Channels" at the top menu bar
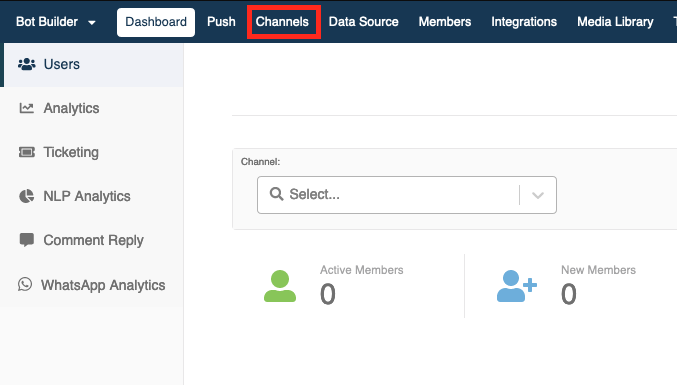
- Click "+New Channel" and name your new channel.


- Head to Platform. Select “Slack” icon and click Connect.
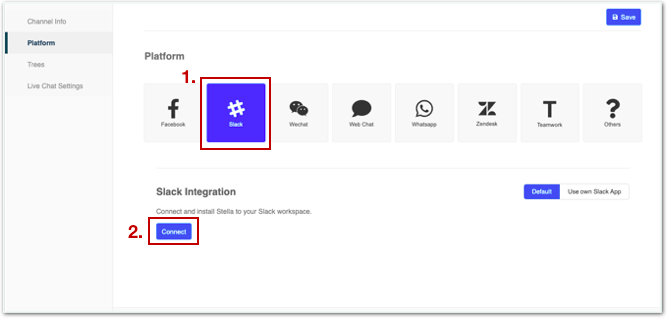
- A pop-up window will ask for permission of Stella to access your workspace, i.e. Shiny Jewelry. If you have multiple workspaces, you should be able to select one of them on the top right dropdown menu. Click Allow.

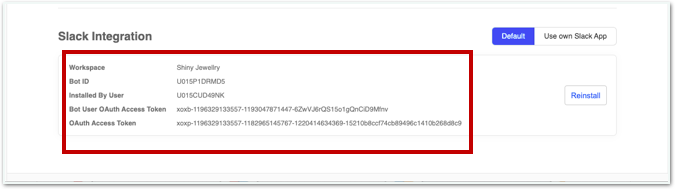
- After that, you will be able to see the below result and click Back to Stella.

- Now, once you have the bot ID and other information displayed on your Stella Channel for Slack, it means that the Stella Public App is installed into your Slack workspace.
- After creating a workspace on Slack and connecting it to Stella Public App, you can start Slack and set up the channel.
Please proceed to complete the rest of the setup:
Connecting Stella App to the Slack Workspace
Getting Hands-on
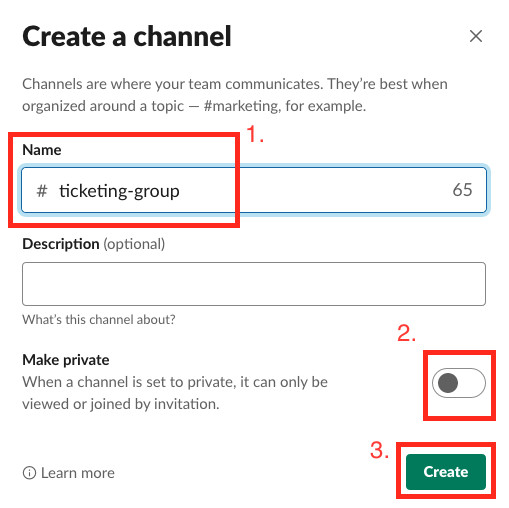
- In your Slack workspace, create a new Slack channel by clicking the “+” sign near “Channels”. Then, click “Create a channel”. The channel is for you to receive live chat tickets or to structure your workspace into different channels by different departments/teams.

- Fill in the information for the new channel, toggle on “Make private” if you want to create a private ticketing group. Then click “Create”. For your reference, you can find your "Slack Channel ID" from the URL on the web browser. The URL should look like this.
https://app.slack.com/client/<Team ID>/<Slack Channel ID>
- Add your corresponding teammates who will be handling live chat enquiries to your newly created channel.

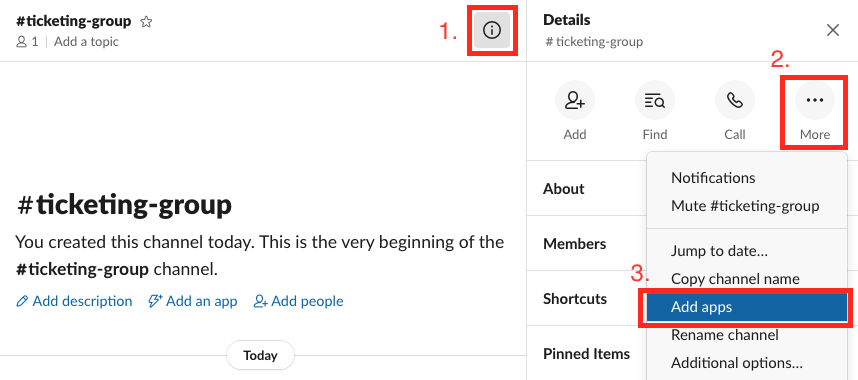
- In order to add the Stella Public App to Channel, select “i” and then “More". Then, select “Add apps”.
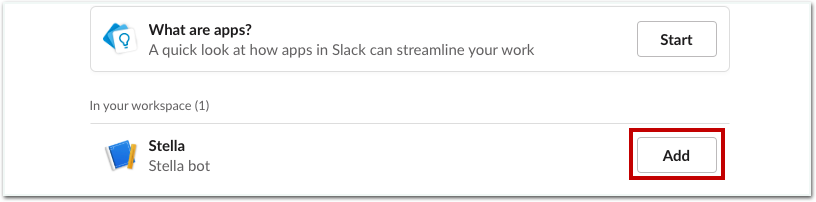
- Find the Stella Public App you have previously installed to your workspace, i.e. you should be able to find Stella or your custom app name and select "Add" to add into the ticketing channel.
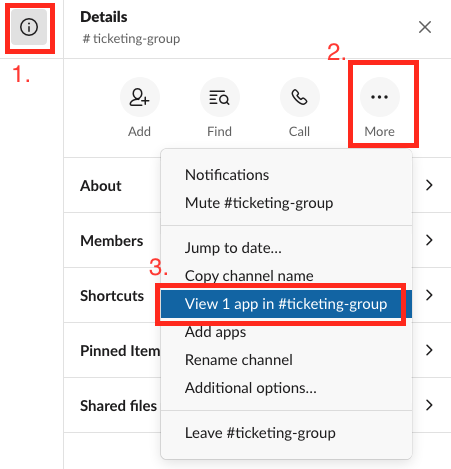
- Select the menu of the channel again, you can see “View 1 app in #
”, click to review if the Stella Public App is added to the Slack channel.
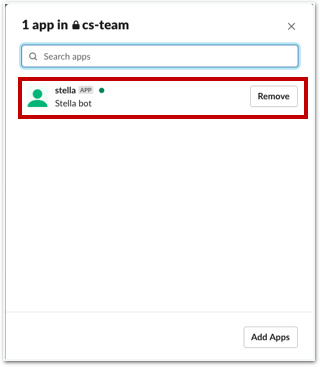
- You should be able to see the Stella Public App you have added to Slack channel now. This channel is ready for live chat ticketing!
Pairing Channels
Please remember to pair up your inlet and outlet channel. For details, please click here.
Broadcast Group
Broadcast Group is where you can mark and label which channel to send out the live chat tickets out.
Please make sure you have completed Level one of the standard procedure of Slack Live Chat Tree setup before proceeding to this step.
Getting Hands-on
Head to your Stella Channel for Slack and select "Broadcast Group".
Find the Slack channel which you would like the live chat tickets to be sent out to and select it. It should be the channel you have created back in step 2.
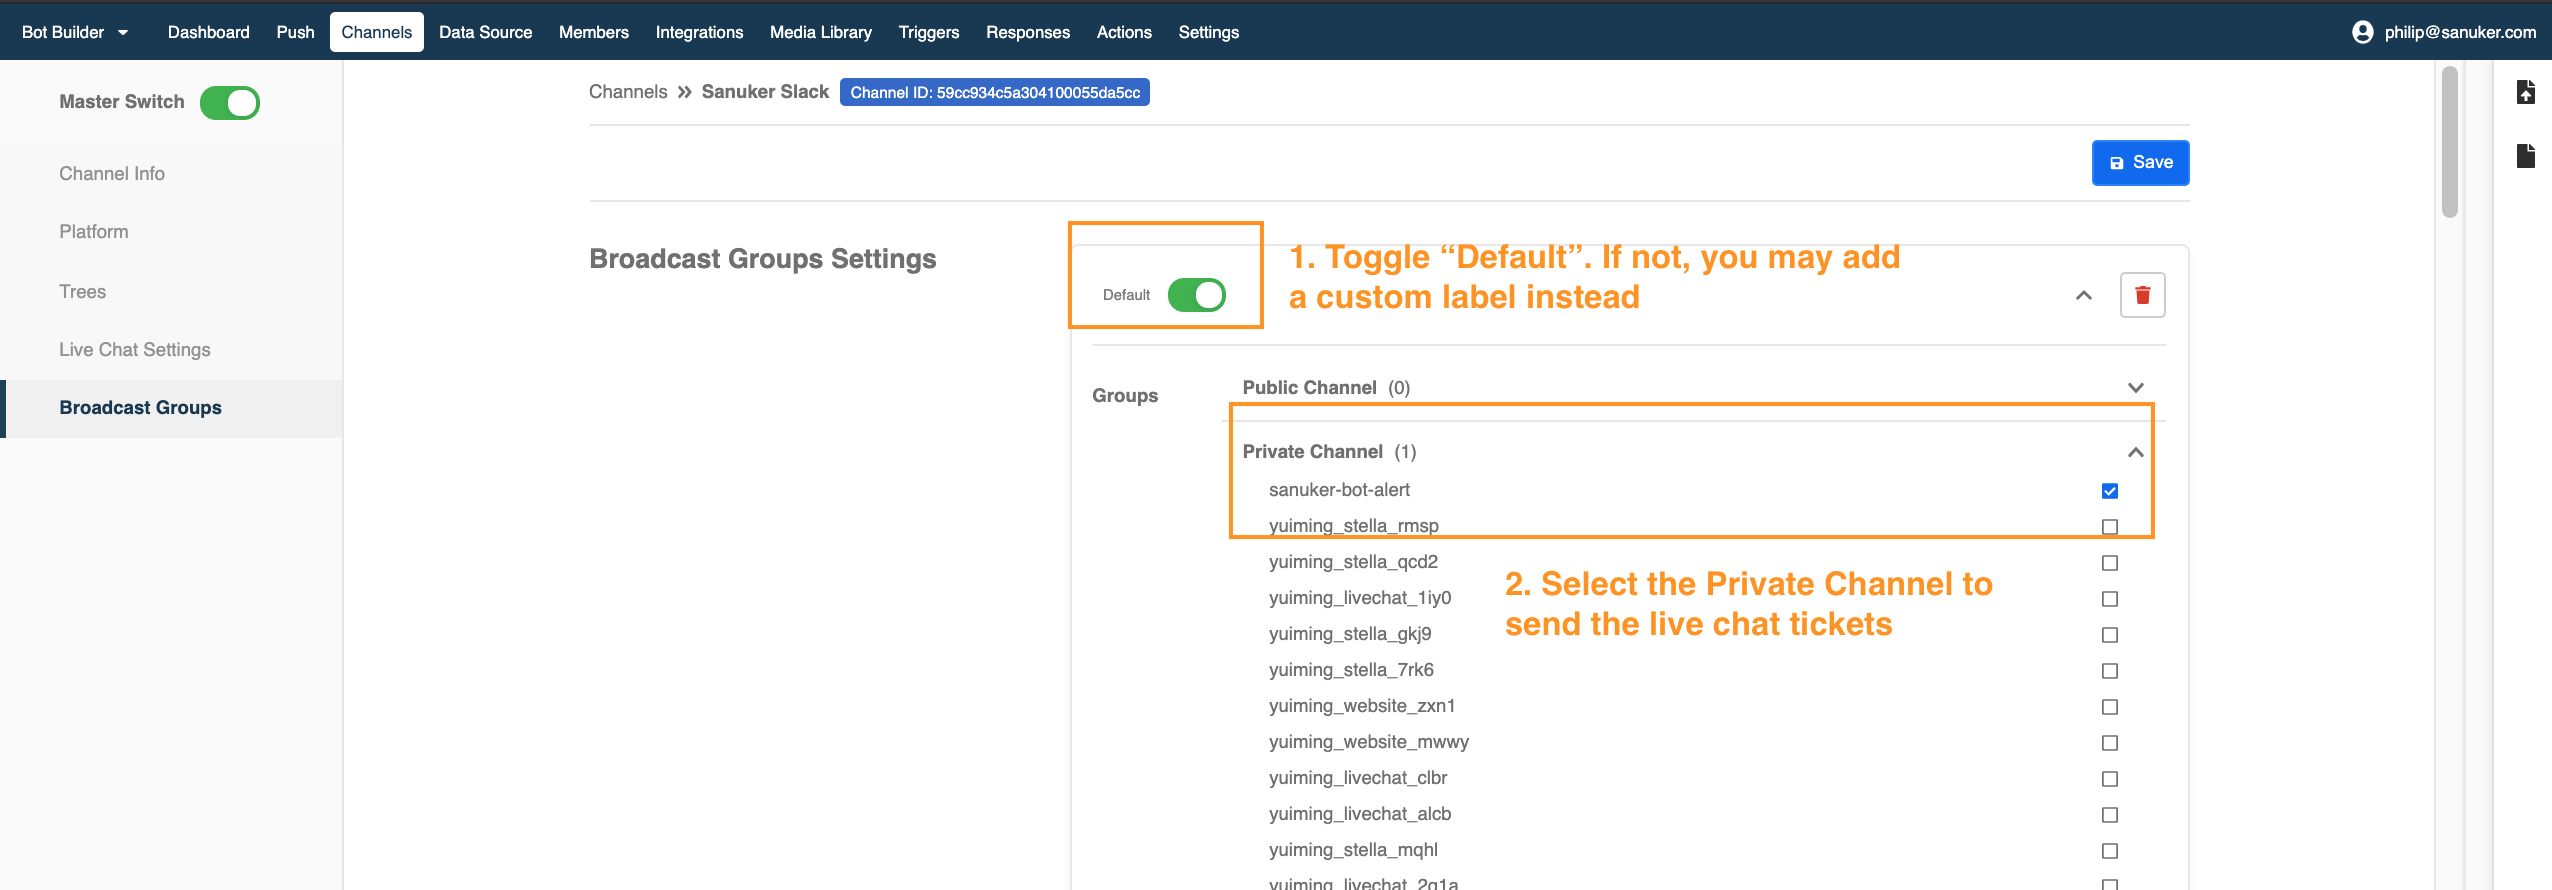
You may toggle default or customize a label (the label can be setup in the sample codes for level one standard procedure.
Click "Save" when you are done.
Live Chat Settings
Live Chat Settings is where you can set up your idle timer in live chat. For some messaging platforms like WhatsApp, there is a limitation of 24-hours conversation window. You may need this idle timer to send an automated message out to end the live chat when the time is up.
Please make sure you have completed Level two of the standard procedure of Slack Live Chat Tree setup before proceeding to this step.
Getting Hands-on
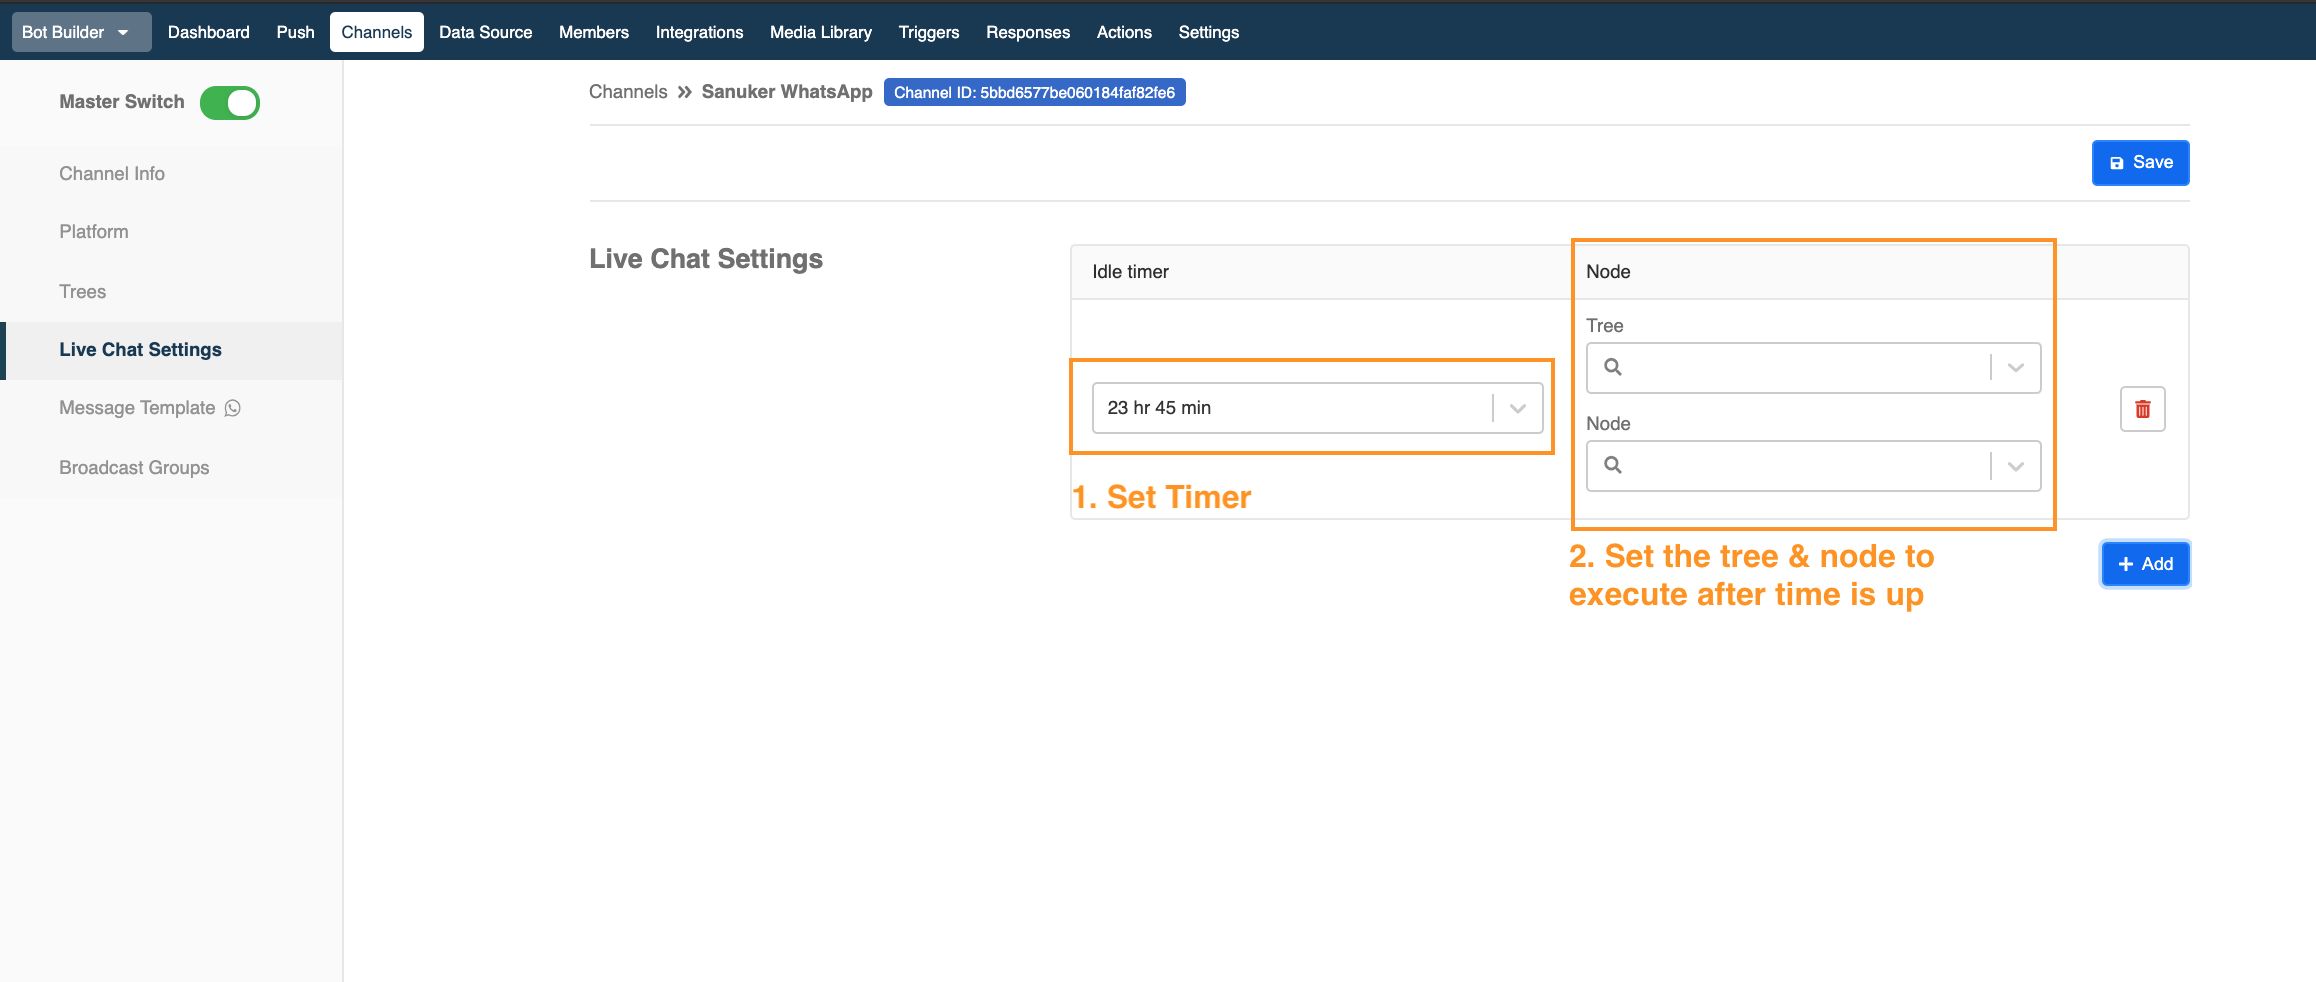
Head to your Stella Channel for Slack and select "Live Chat Settings".
Set your idle timer. The minimum interval you can select is 15 minutes.
Select the tree and node to execute when the time is up.
Click "Save".
You may also set up your Live Chat Settings following this guide: Automatic End Live Chat Function
Adding Trees & Global Nodes
This section will cover the steps on how to add the ticketing commands (i.e. done or transfer live chat) to the Stella channnel for Slack.
Please make sure you have completed Level two of the standard procedure of Slack Live Chat Tree setup before proceeding to this step.
Sample Tree Structure
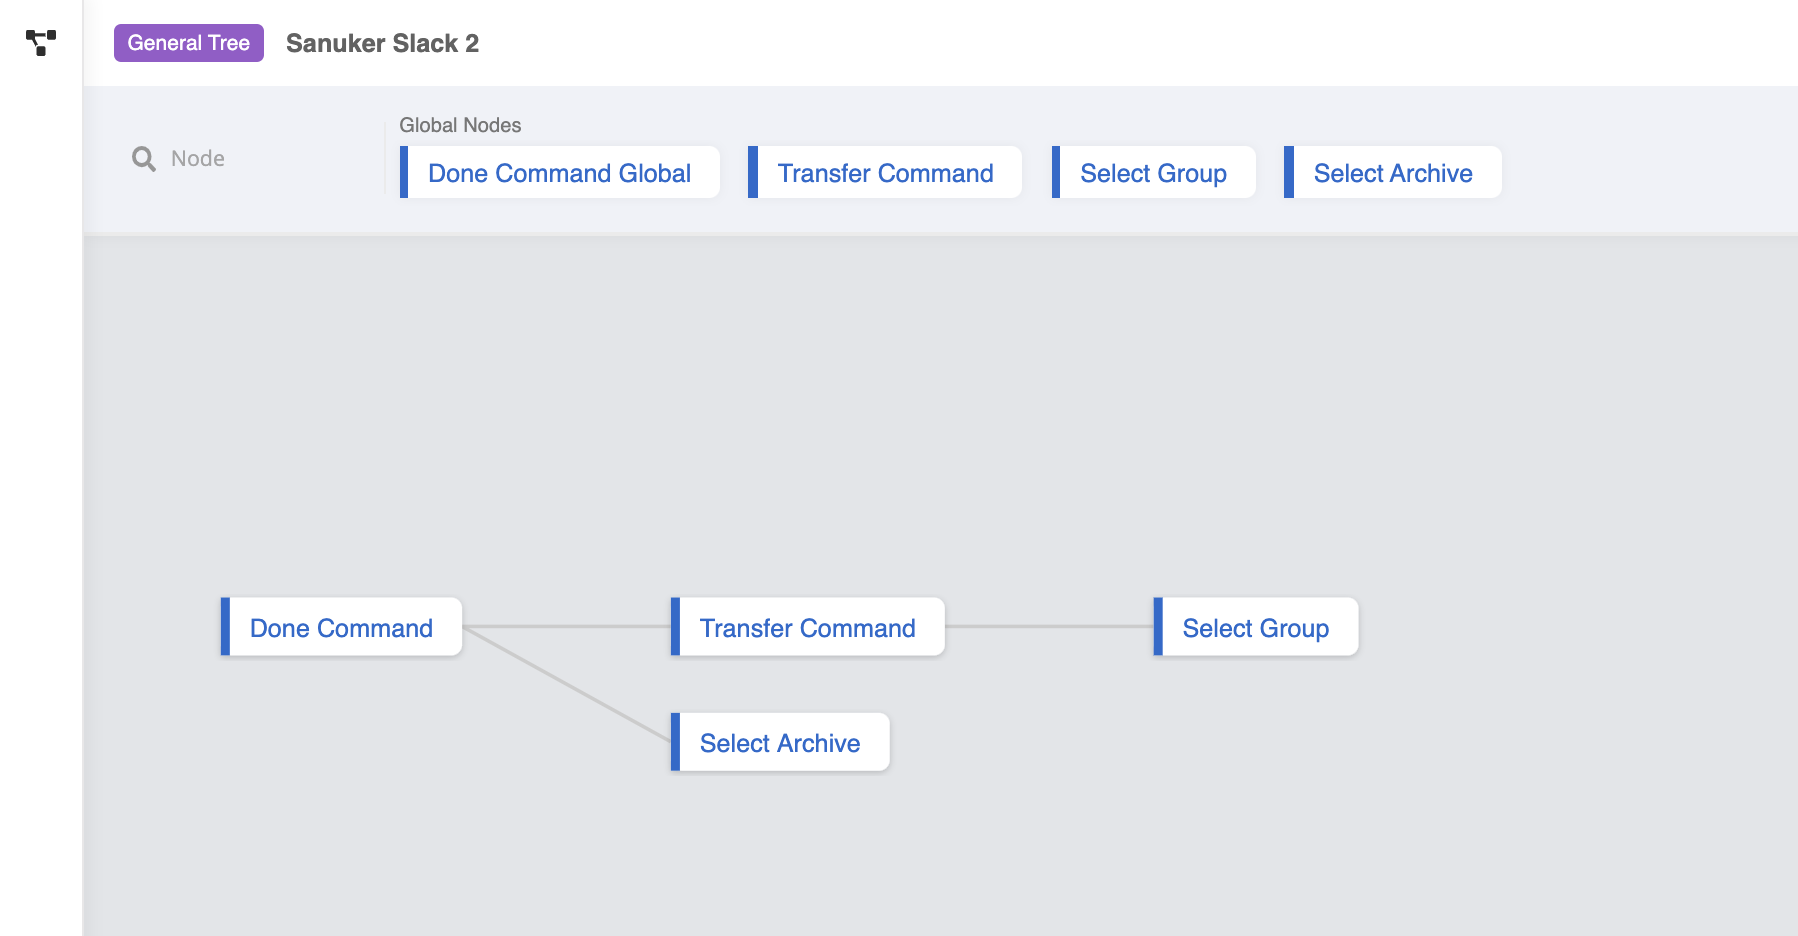
Getting Hands-on
Select the "Tree" section in your Stella Channel for Slack.
Add all the global nodes of each command under "Default".
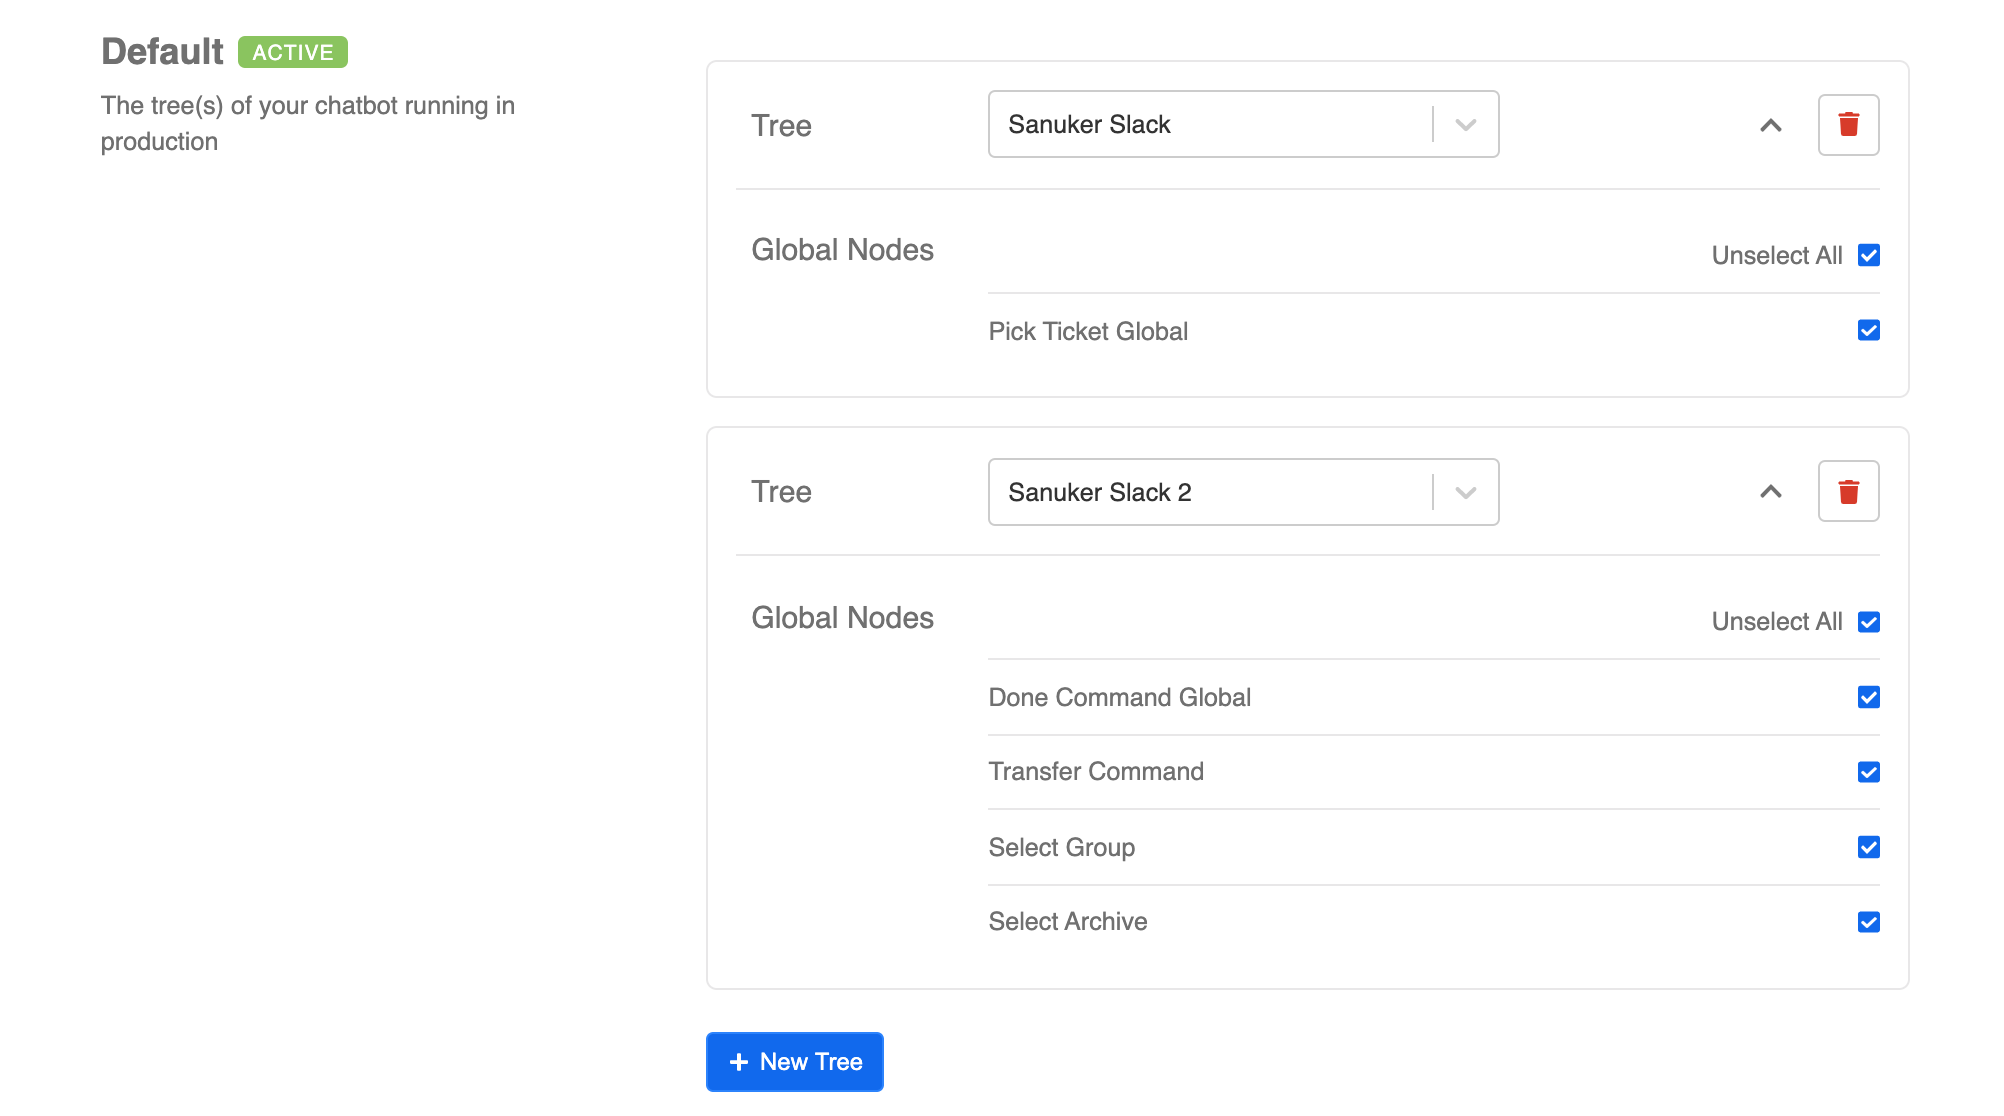
If your commands are scattered in different trees, you may add multiple trees.
Click "Save" when you are done.