Channels Overview
Channels is the section where you could select the messaging platform you would like to deploy your chatbot onto.
Most of the platforms require technical setup by Sanuker, such as account registration, account verification and platform deployment. Nevertheless, users would be able to create chatbots and subscribe the a specific Facebook page by themselves with no technical setup required.
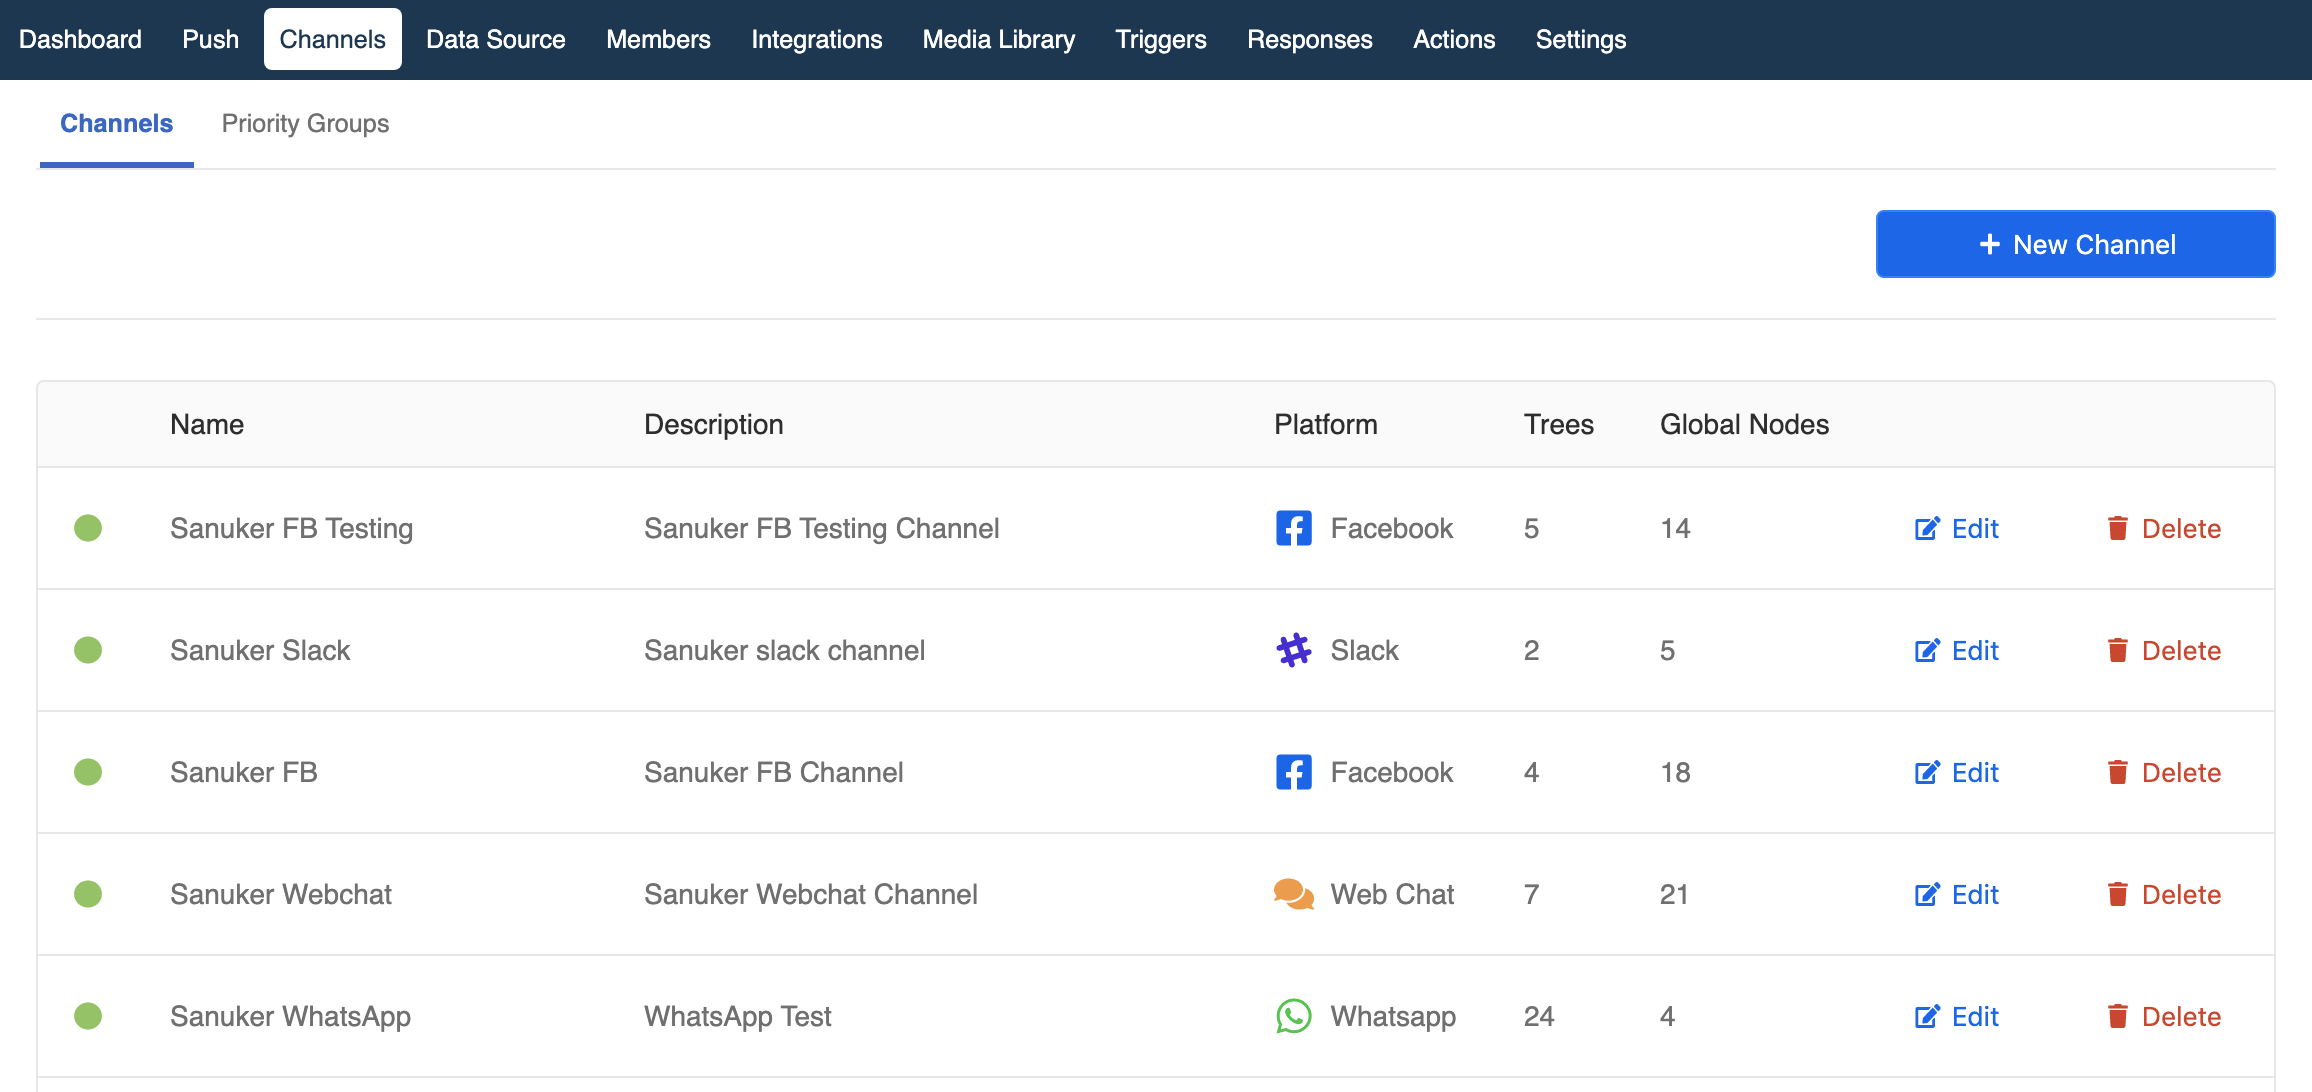
Click here to view and manage your channels.
List of Supporting Platforms
| Platform | Logo | Platform Documentation | Need Technical Setup by Sanuker? |
|---|---|---|---|
| Facebook for Developers | N | ||
| WhatsApp Business API | Y | ||
| Instagram Messaging | N | ||
| LINE | LINE Developers | Y | |
| Telegram | Telegram APIs | Y | |
| Weixin Public Doc | Y | ||
| Slack | Slack API | N | |
| Facebook Workplace | Workplace from Facebook | Y | |
| Skype | Skype Developer Platform | Y | |
| Microsoft Teams | Microsoft Teams API | Y | |
| Teamwork | Teamwork Developers | Y | |
| App | n/a | Y | |
| Web | n/a | Y | |
| Zendesk | Zendesk Documentation | N |
Each channel can be connected to one platform only and each of them has different way of connection and setup. For details, please click the name of platforms listed above.
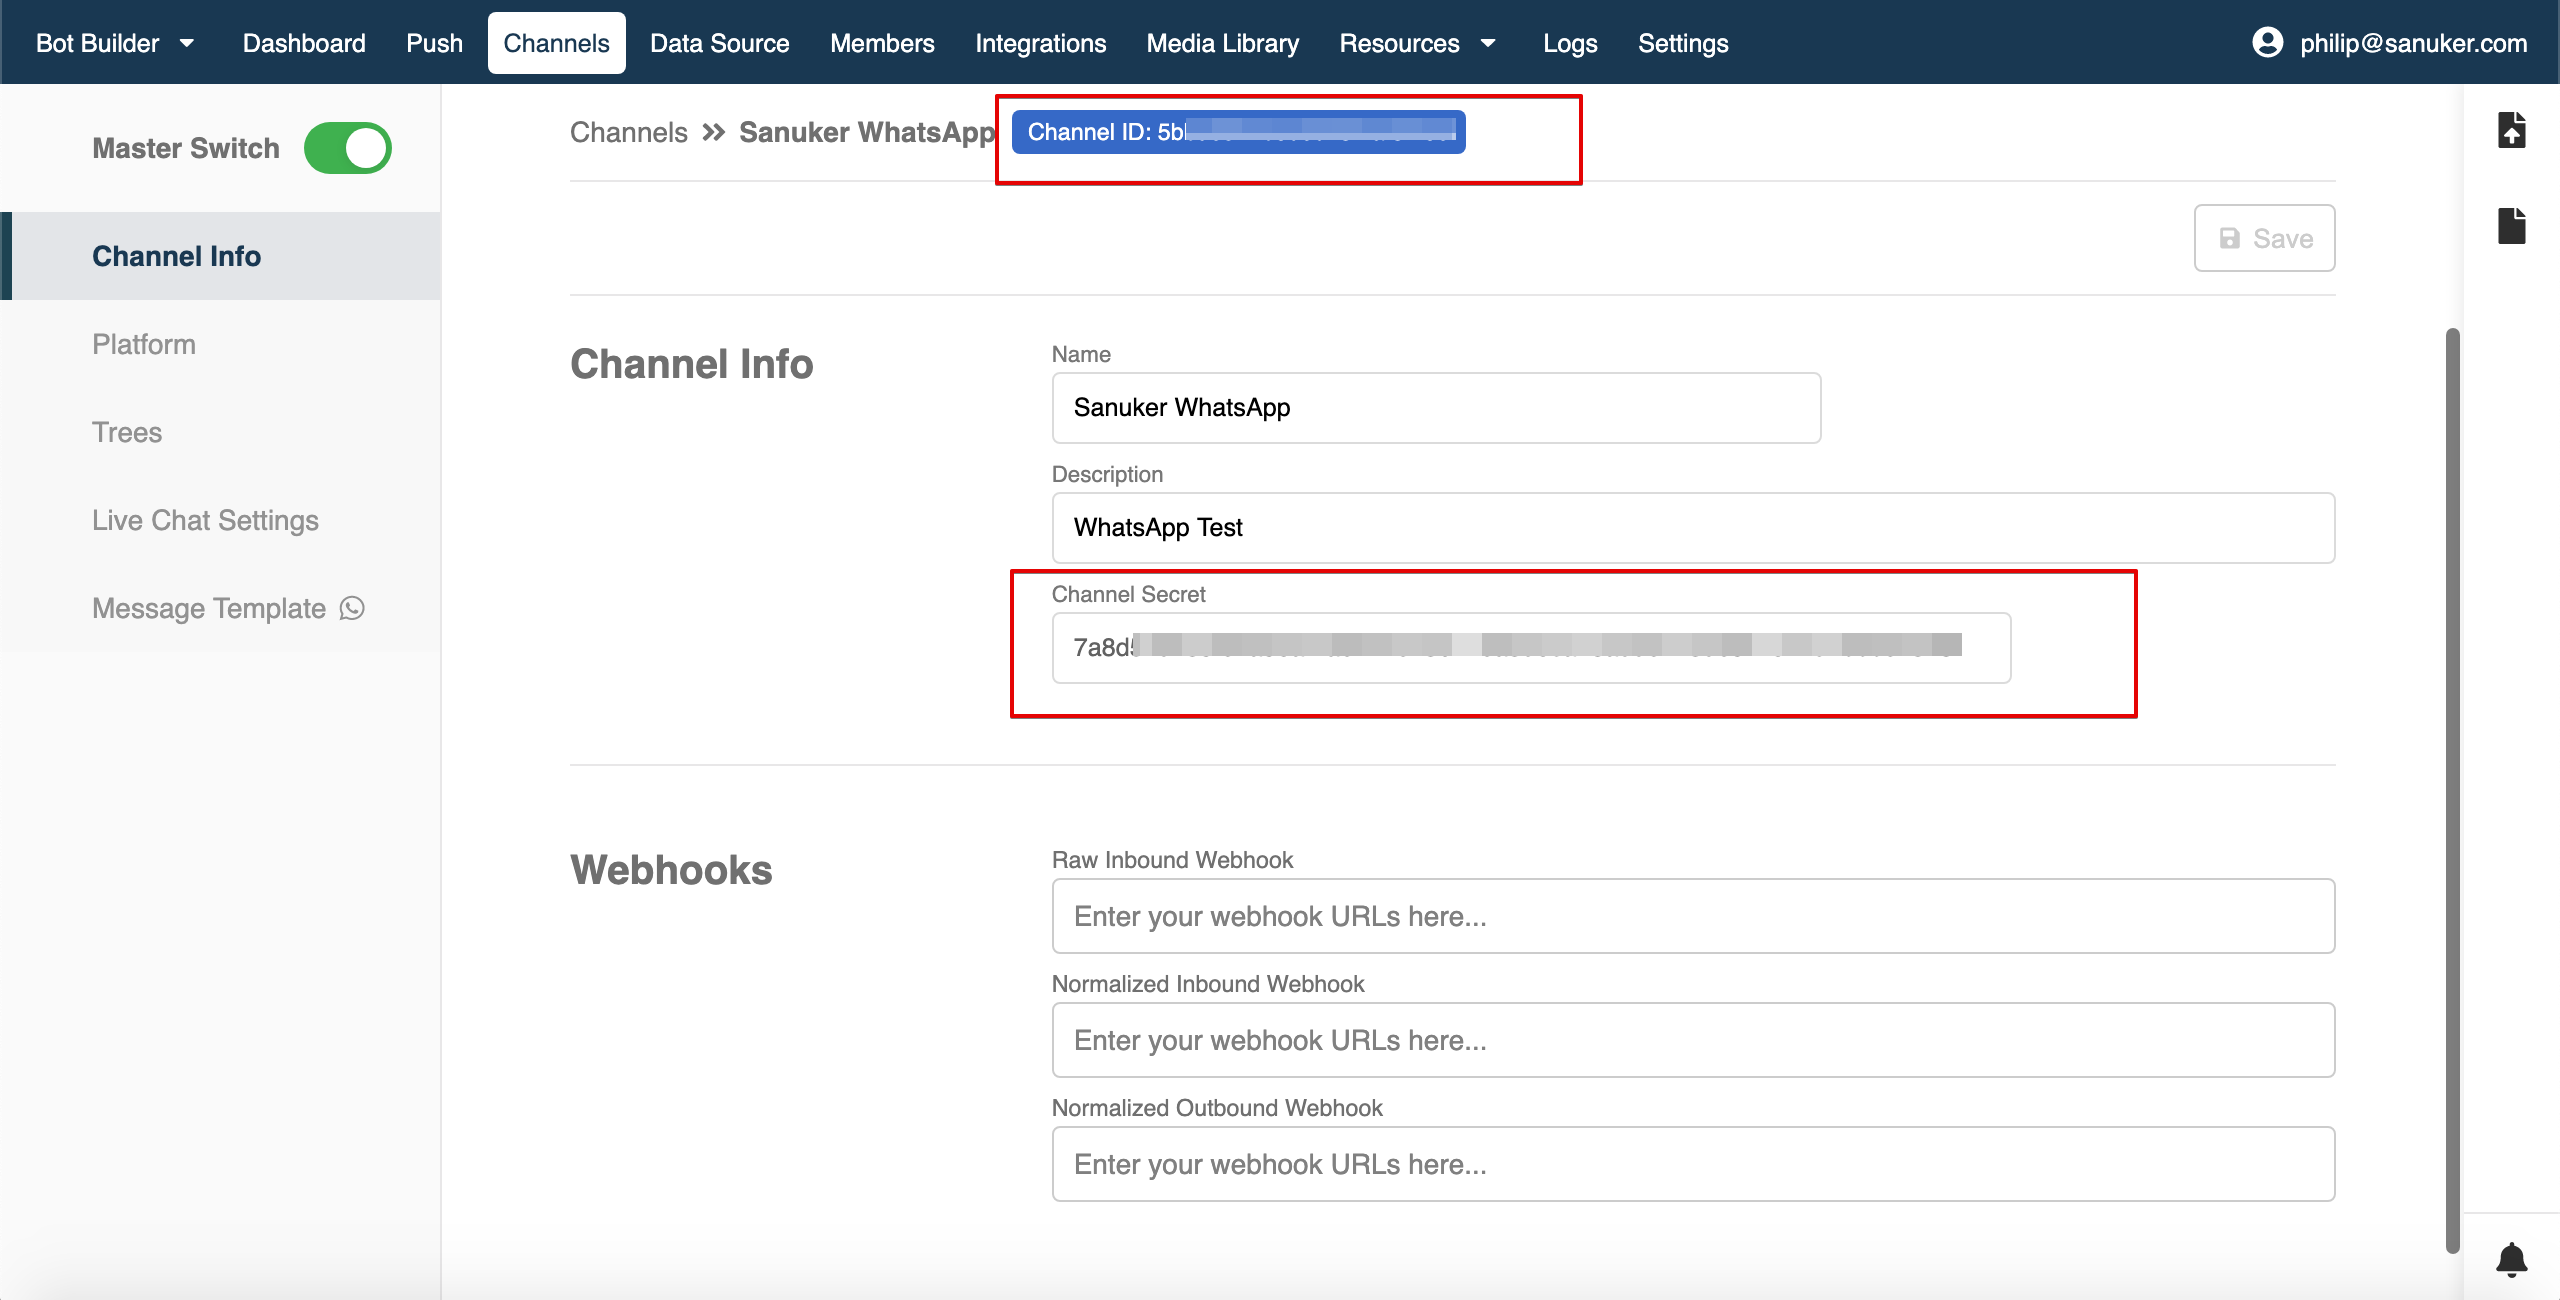
Channel Info
When a channel is being created, the following information can be accessed:
| Info | Description |
|---|---|
| Channel ID | Channal ID is the unique ID for the channel. It can be used in Stella API or web chat. |
| Channel Secret | The channel secret can be used as a secret key for webhook event validation. |
| Channel Name | The name of the channel; Self-defined. |
| Channel Description | The description of the channel; Self-defined. |
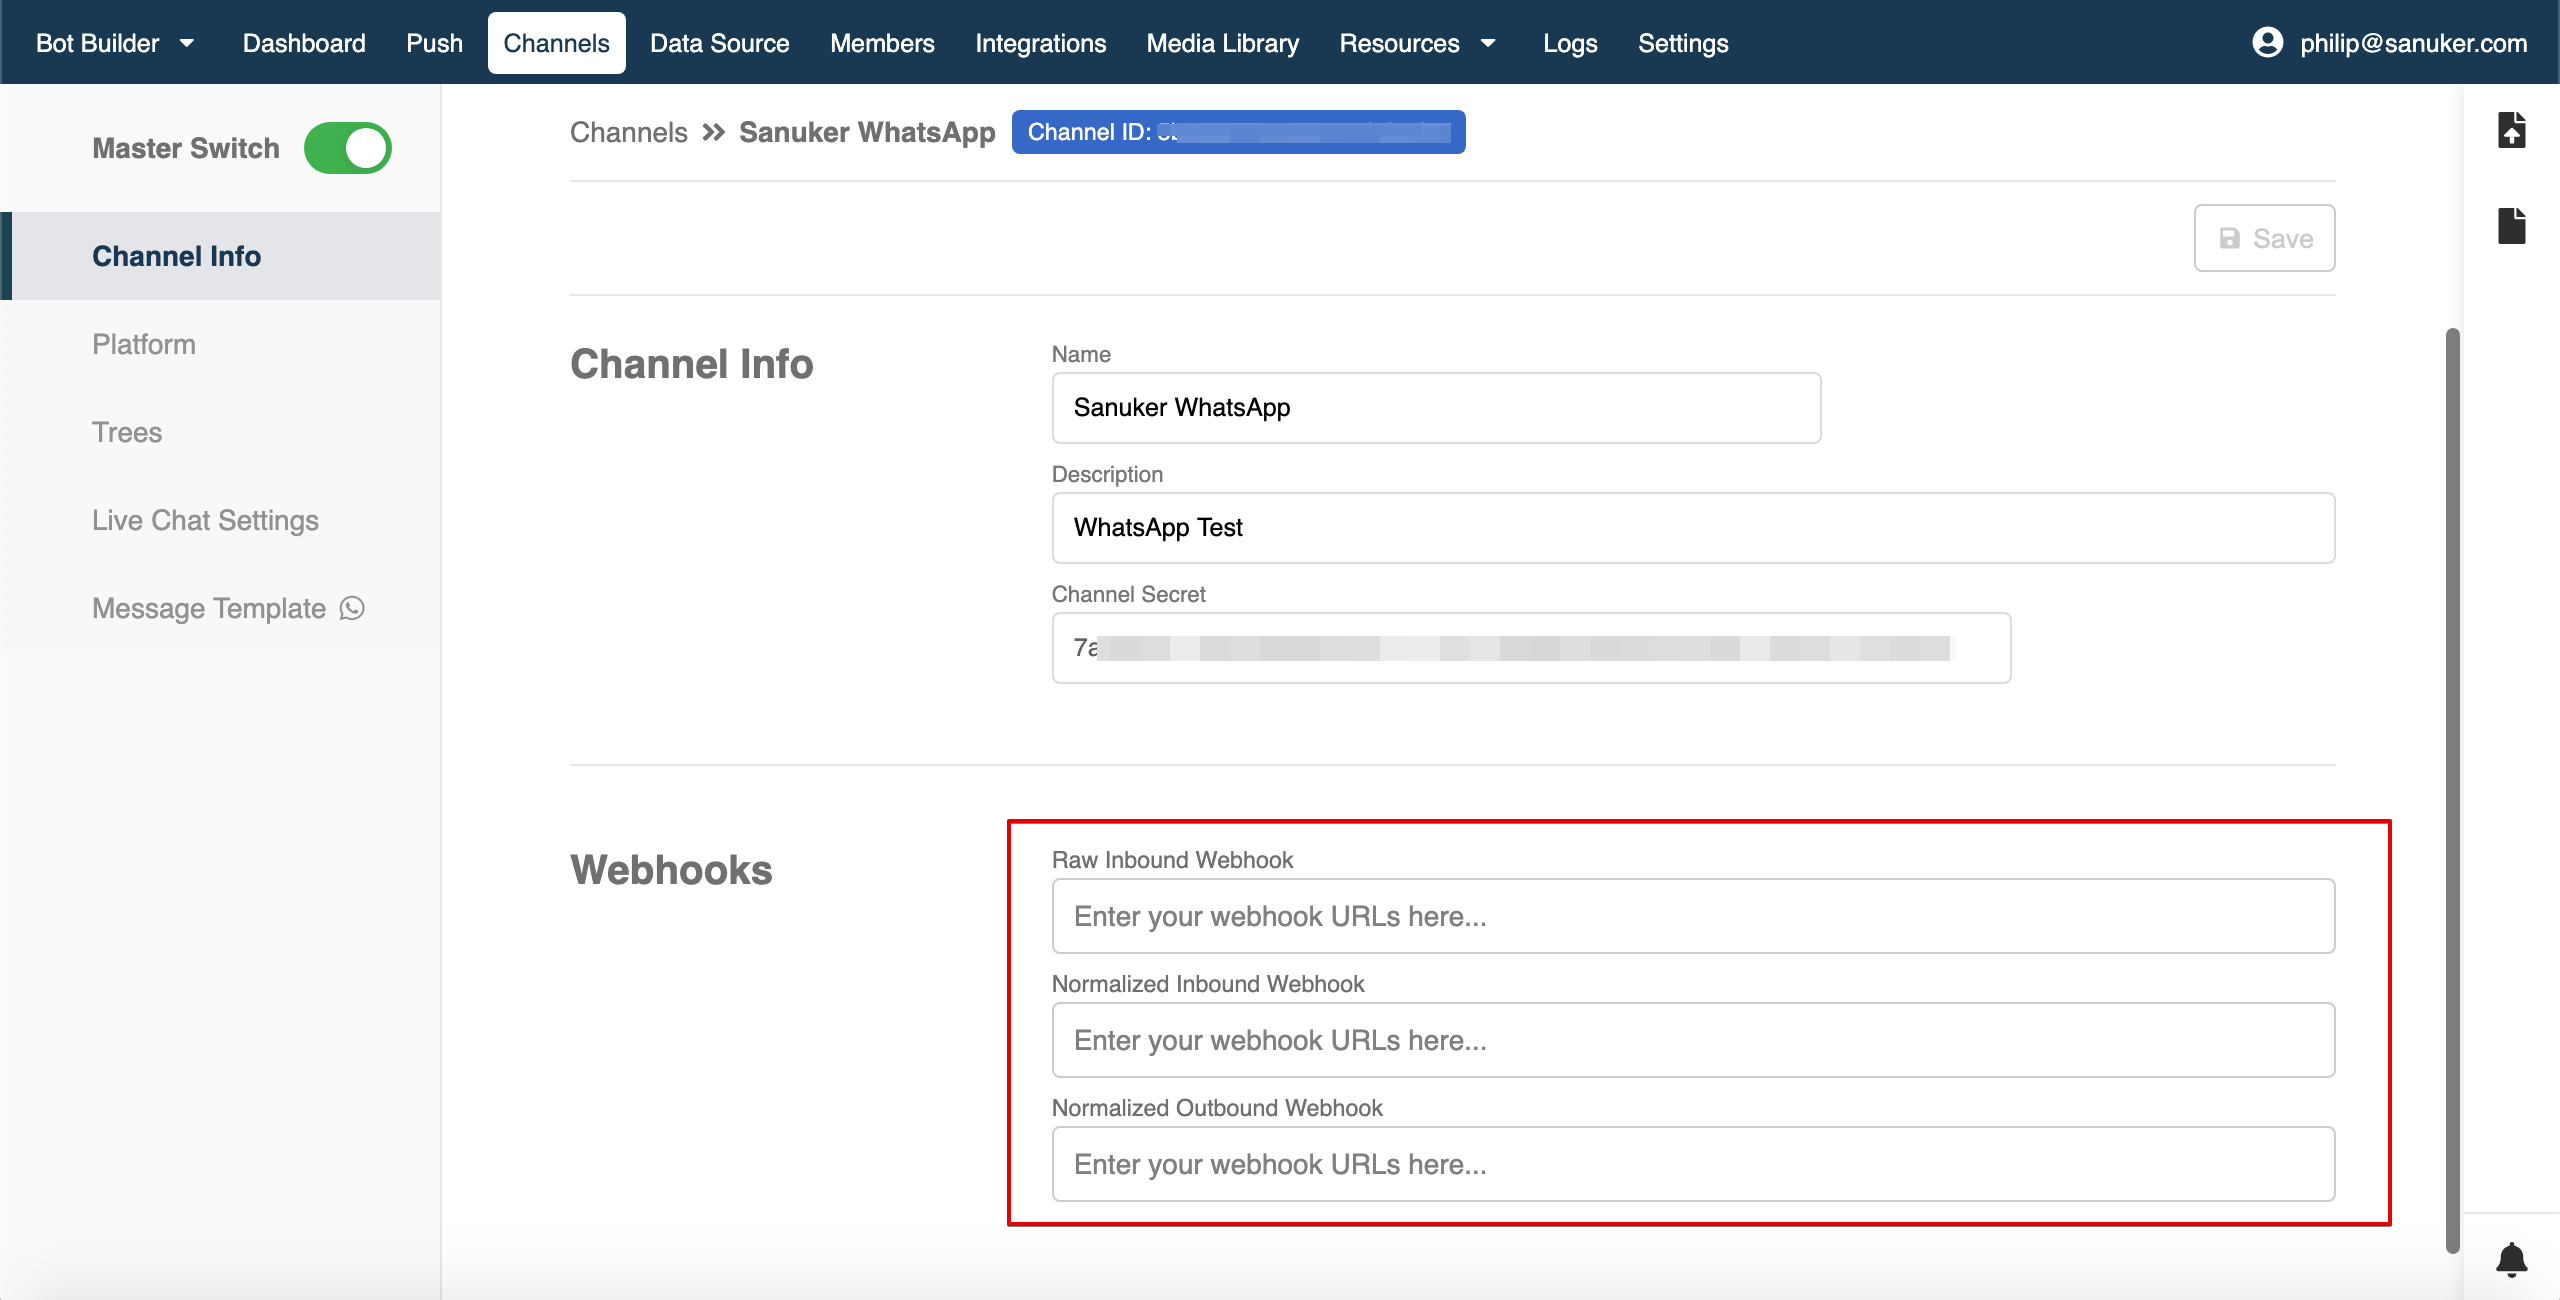
You may also apply your webhooks to relay chatbot messages to your system. For details, please refer here.
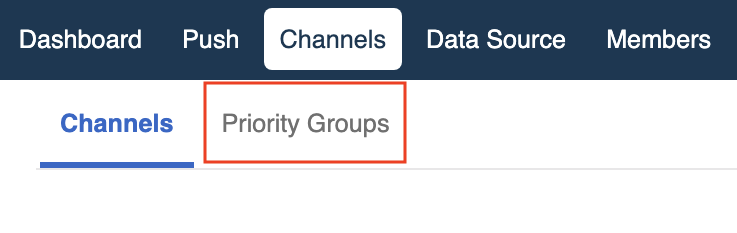
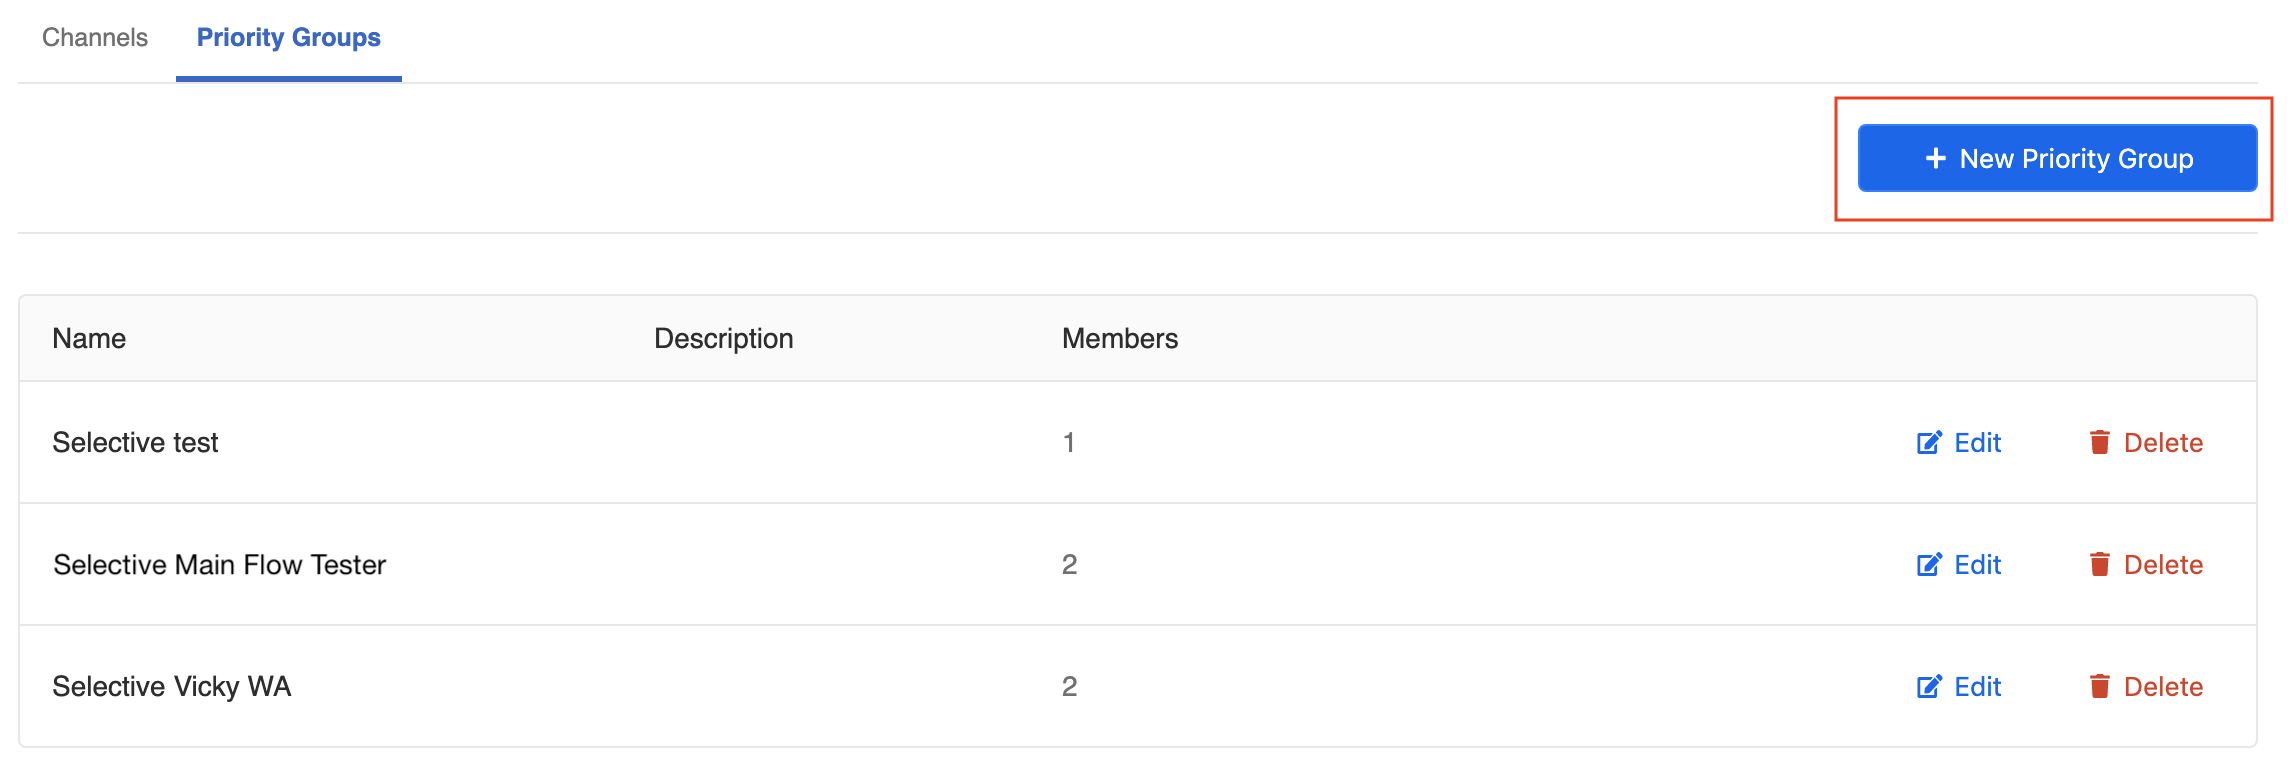
Priority Group
You may also set up groups of selected testers to allow certain users to play with specific trees in the production environment. We call these groups of users the Priority Groups.
- Click "Priority Groups" in the Channels section.
- Click "+ New Priority Group" to create a new priority group.
- You will be redirected to a new priority group creation page. You must at least fill in the name.
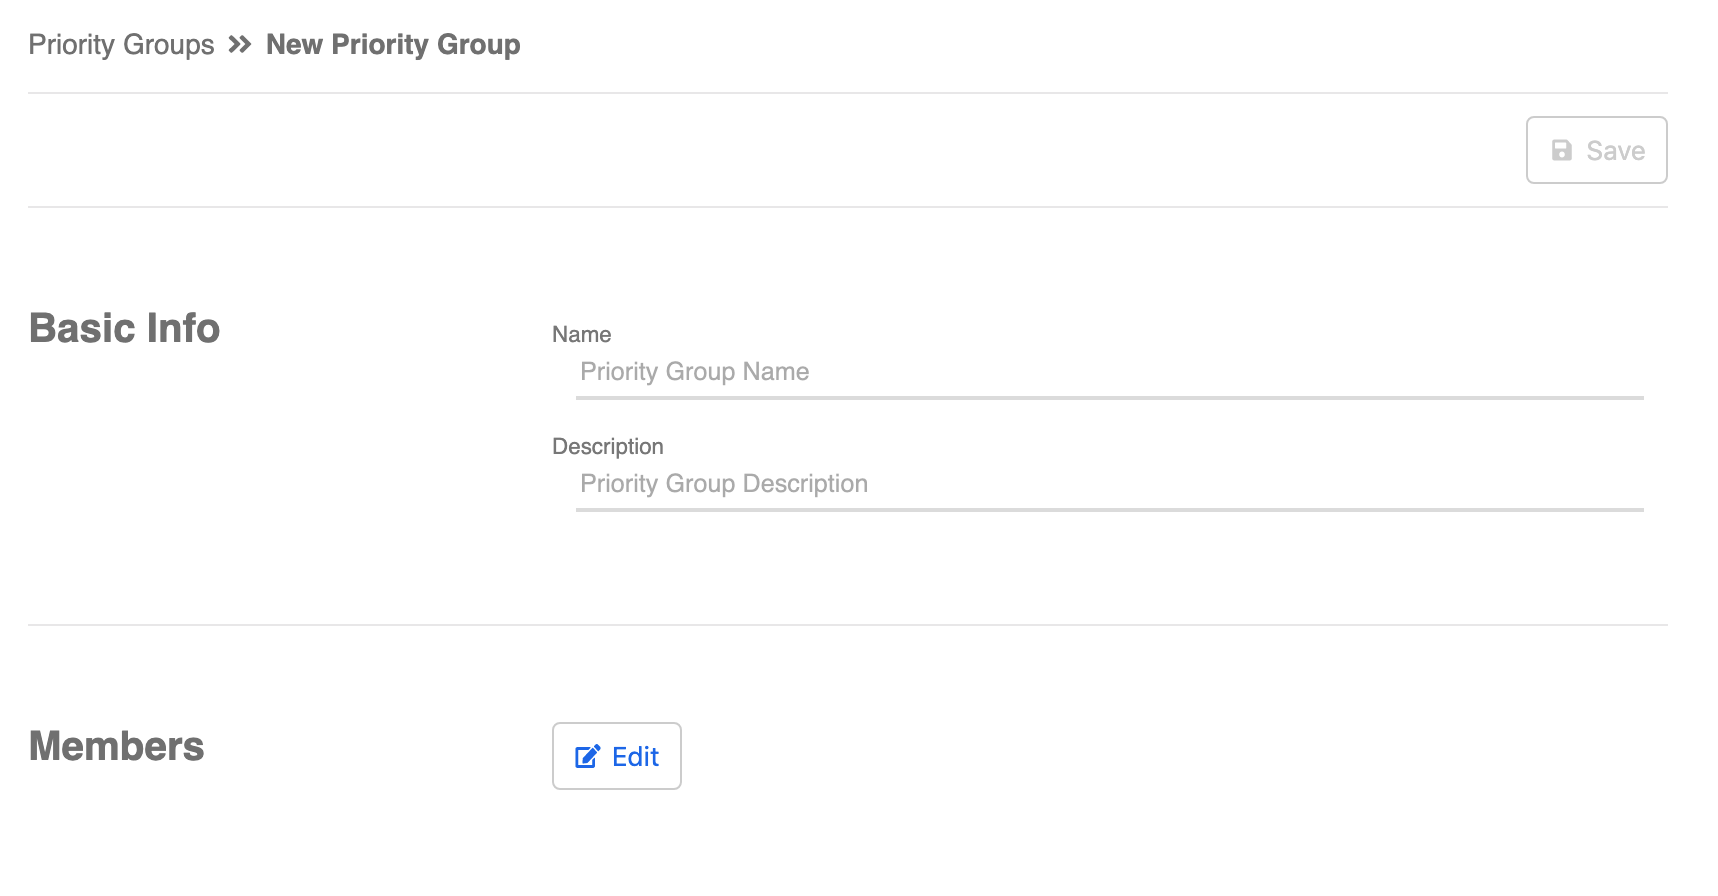
Click "Edit" to add the corresponding testers into the group. A new window will pop up.
A member list is shown with all the members who have subscribed to your channels. Tick those you want to add into the group.
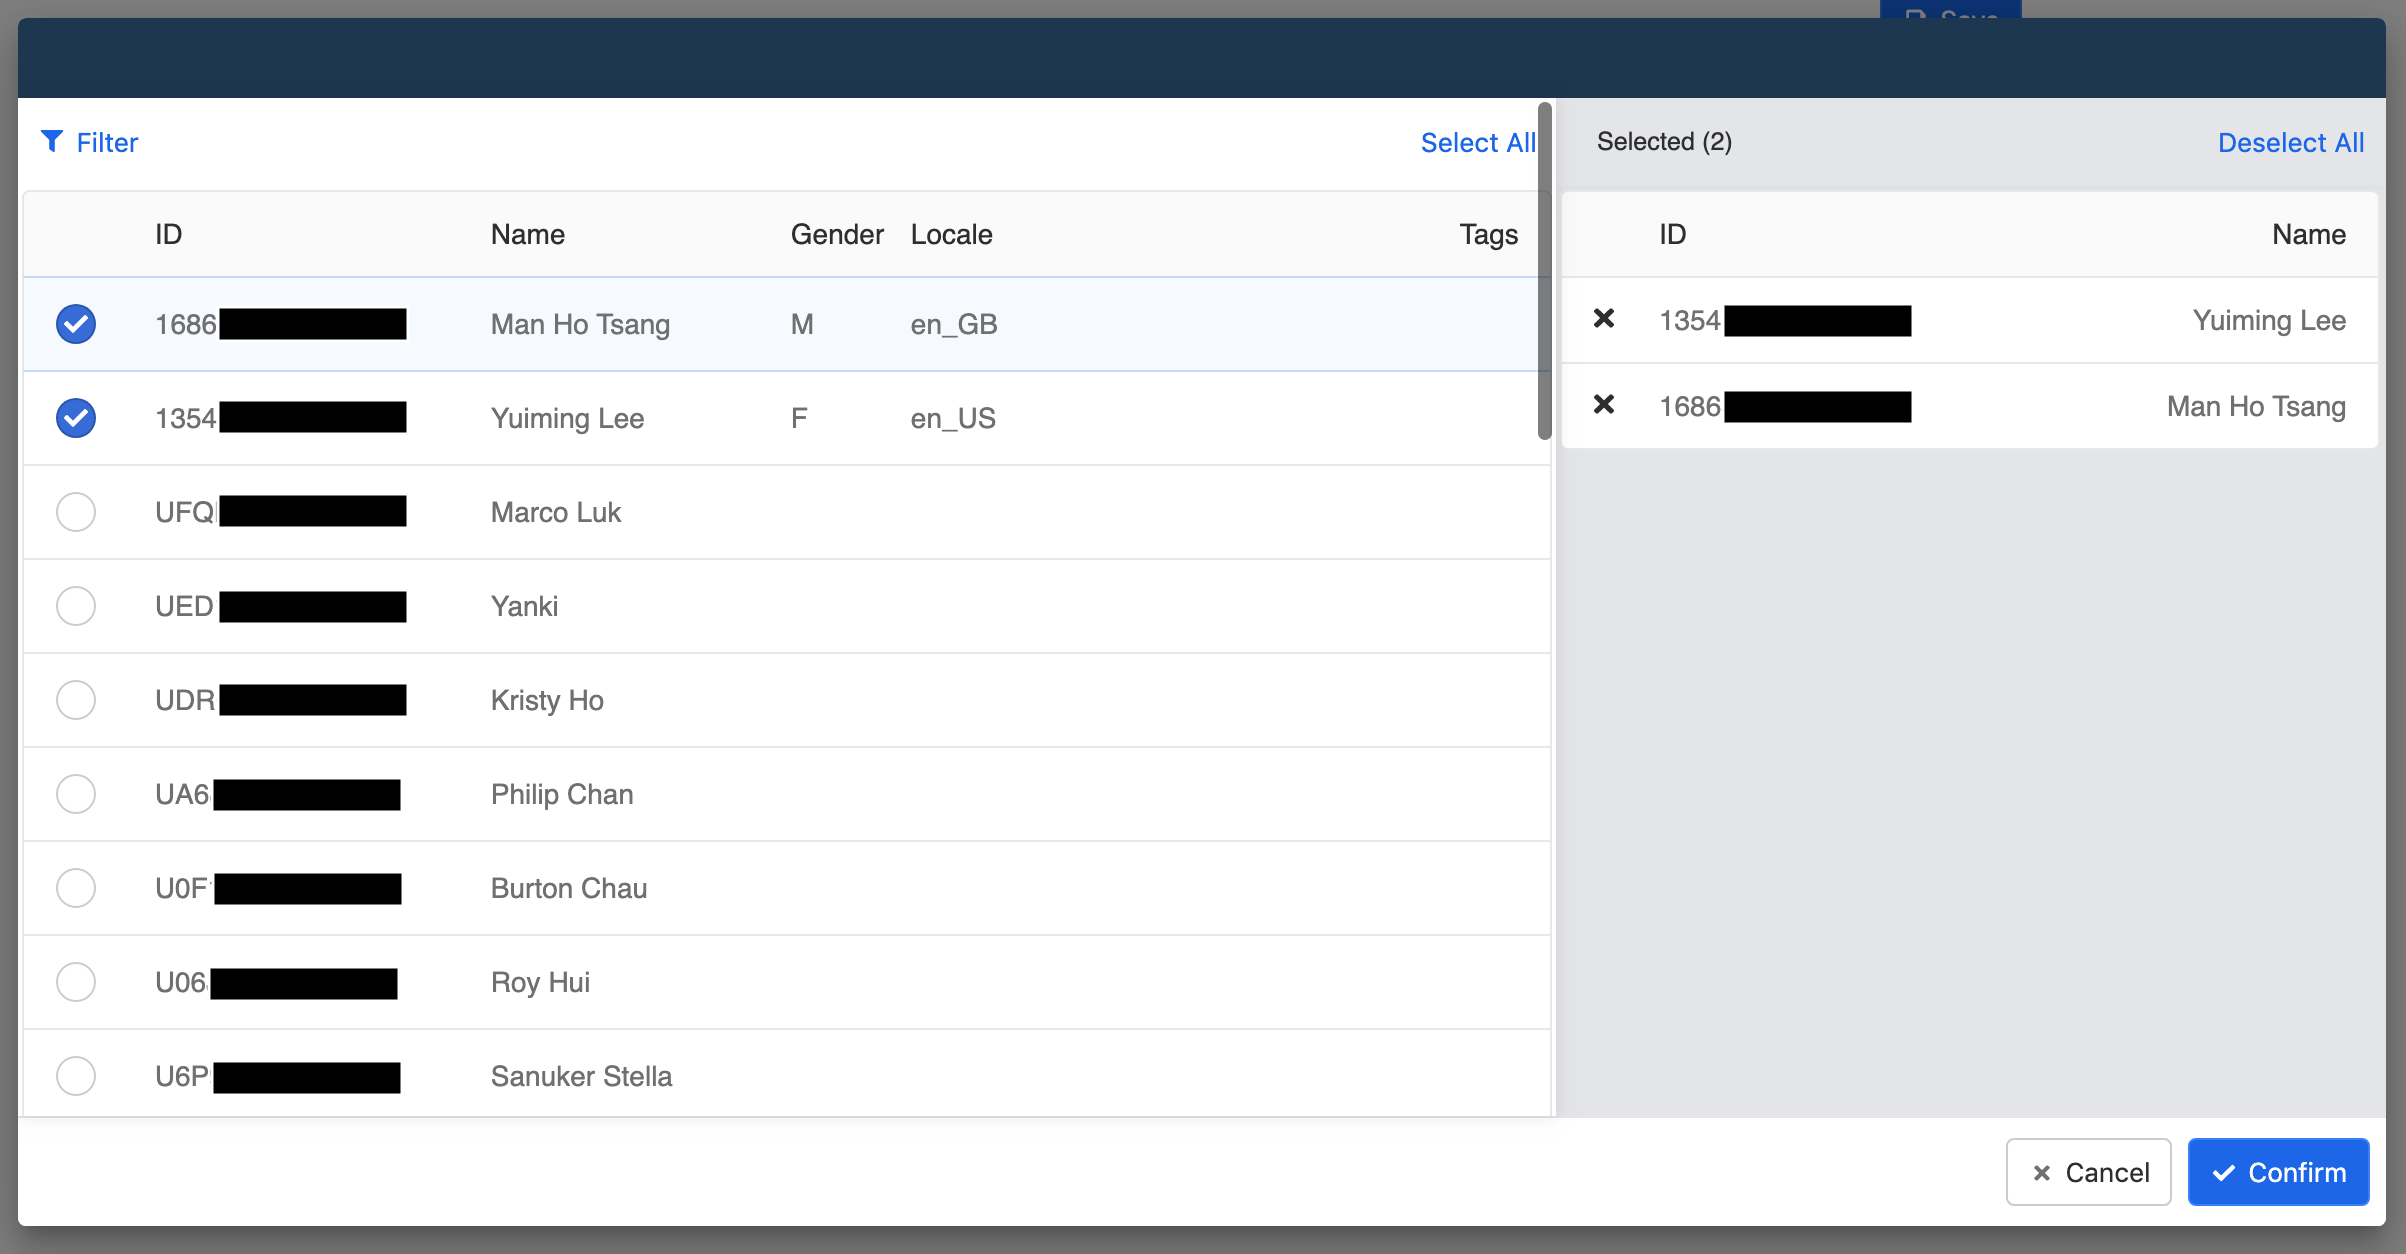
Click "Confirm" to save.
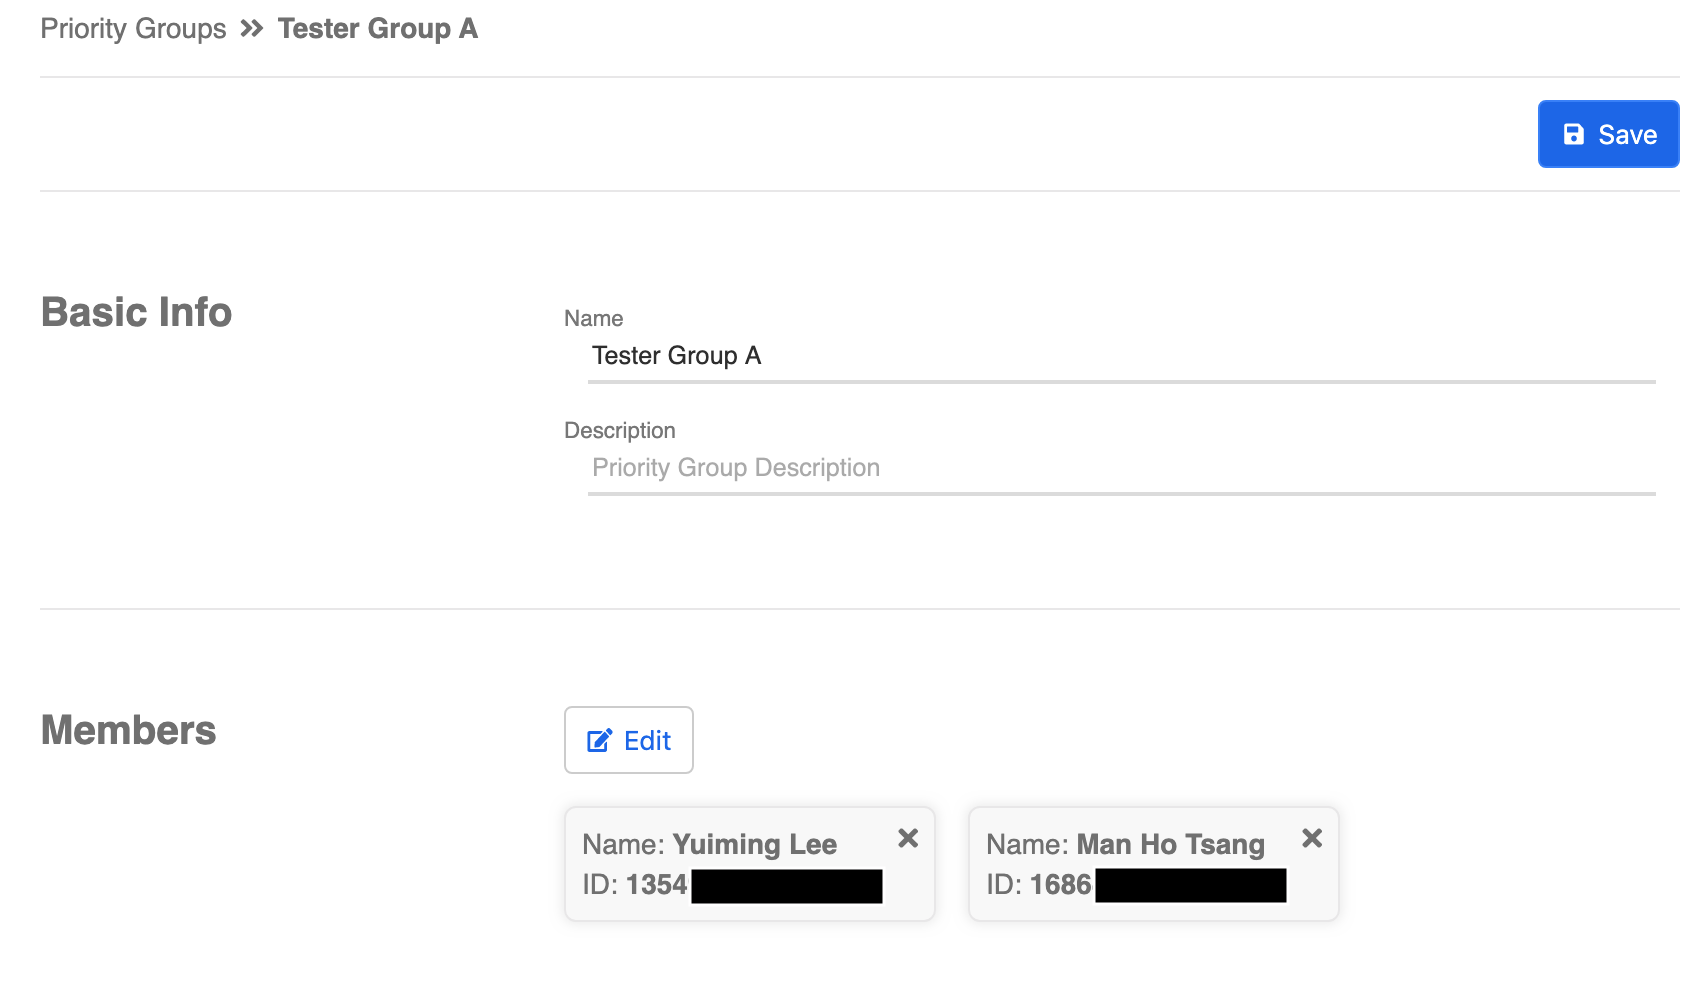
Selected testers will be shown in the Members section. You could click the top right "x" to remove the selected users. Click "Save" after adding all the users.
- For existing priority groups, you can also search by the Name of a Priority Group or Name of a Priority Group Member.

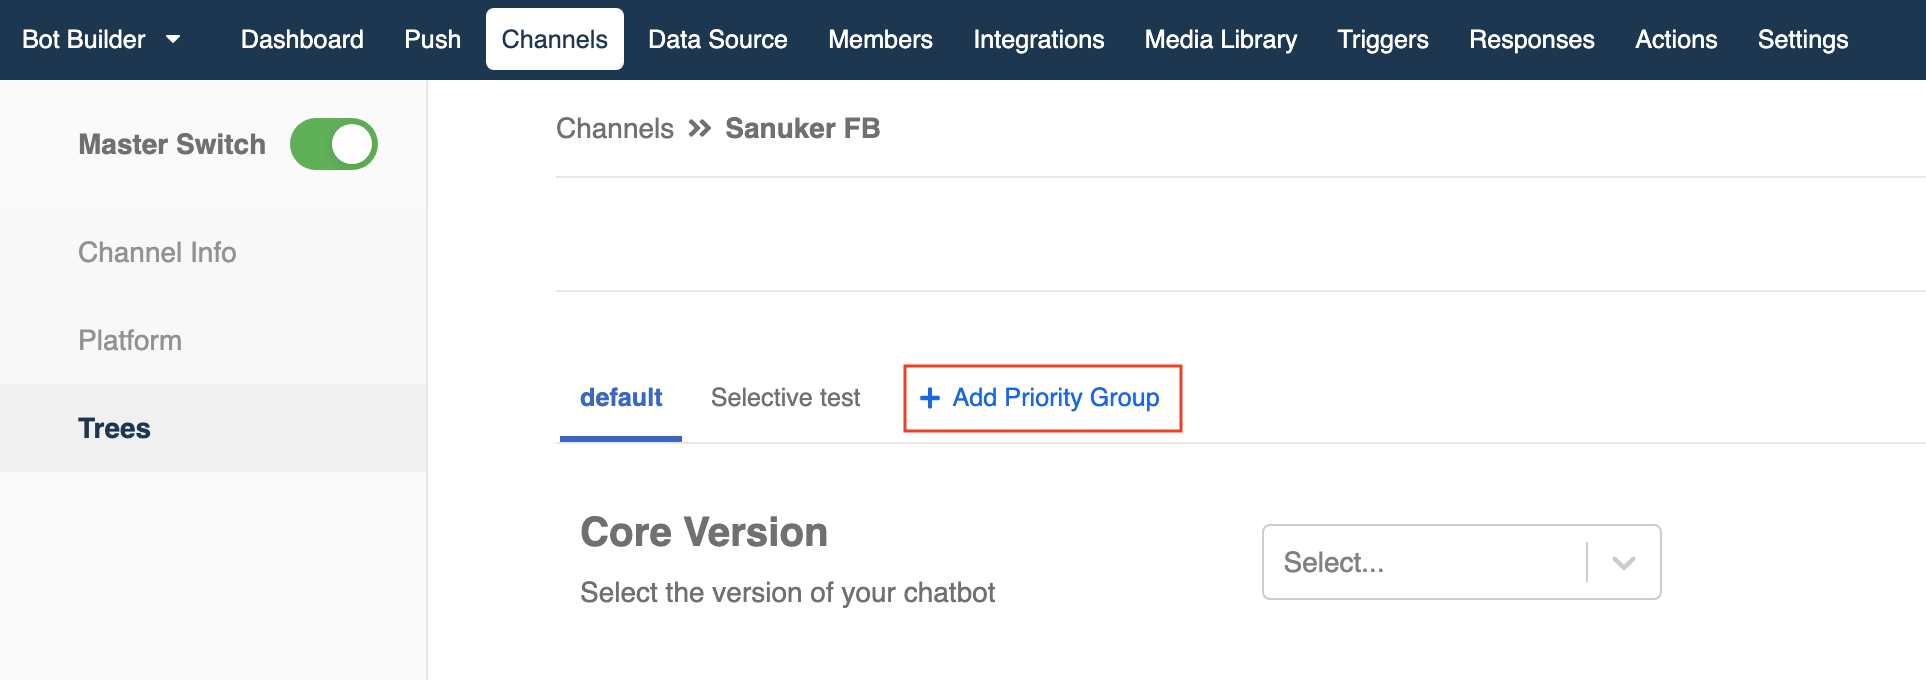
Now go back to the Channels page. Click "Edit" to enter into the channel that you want to add the priority group into.
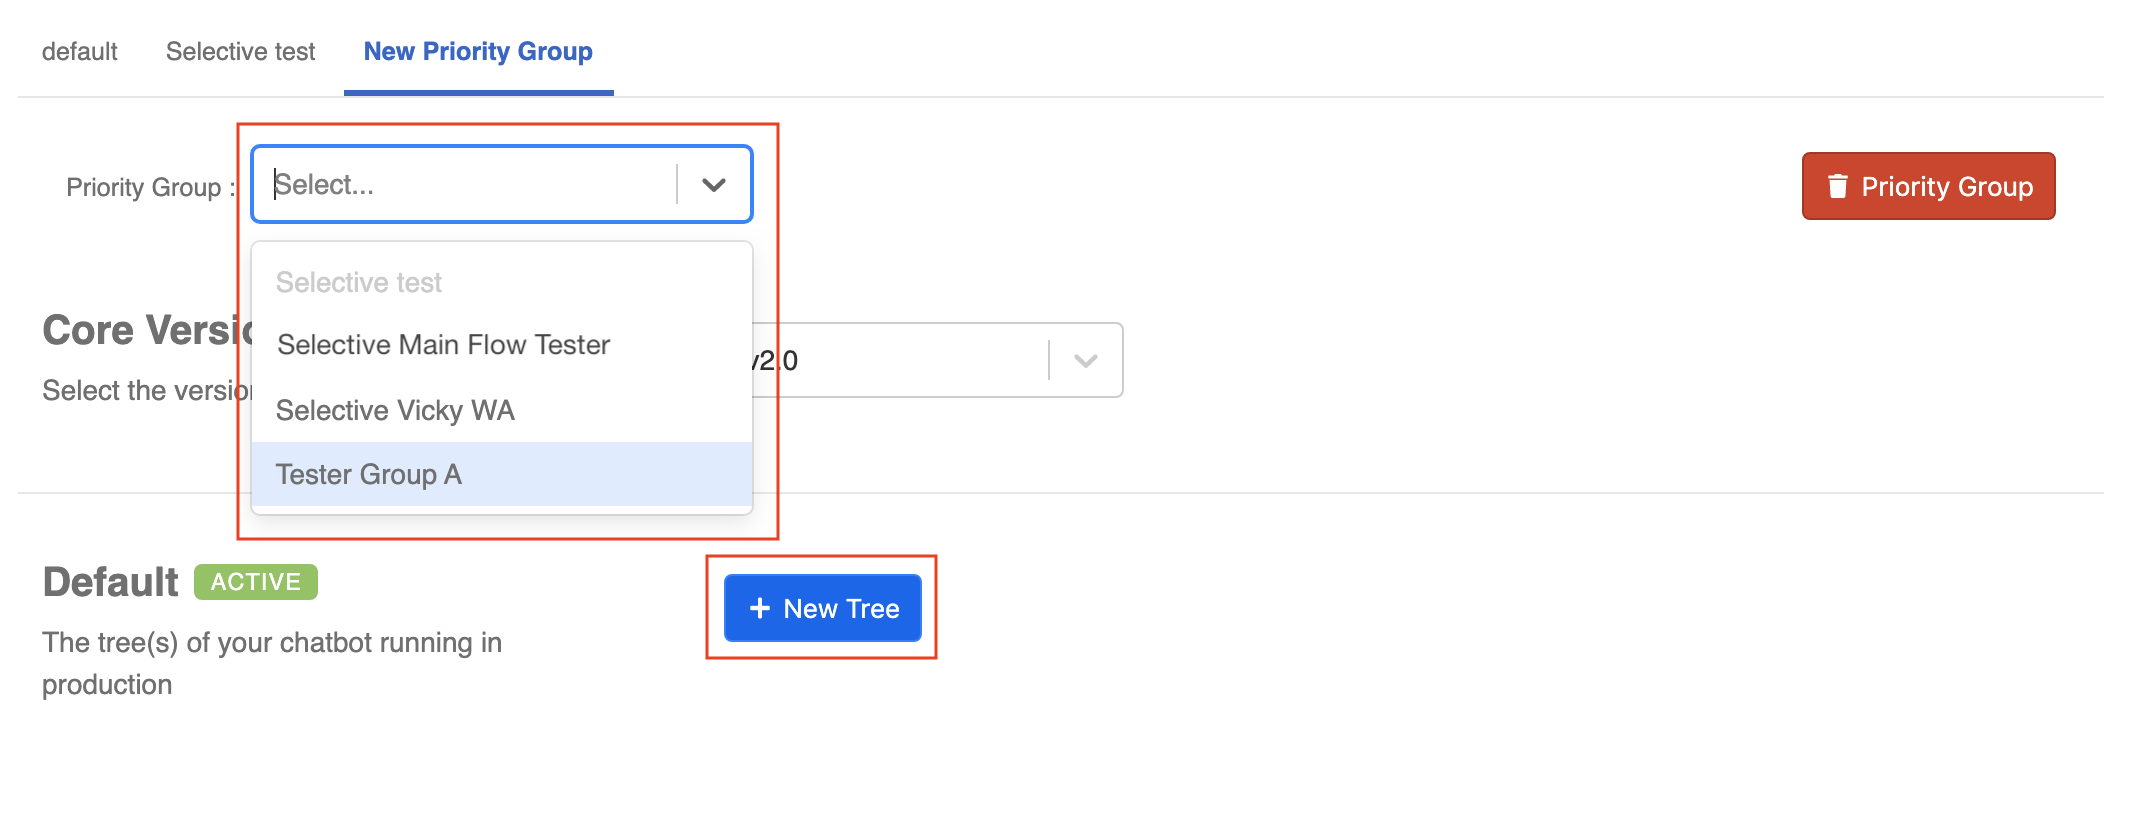
Click the tab of "Trees". Click "+ Add Priority Group" to add the priority group you have just created.
Select the correct priority group from the dropdown menu.
Click "+ New Tree" to add the specific flow(s) that is only accessible to this priority group.
Click "Save" to save the settings.
Now only the selected testers in the priority group will be able to enter into the selected trees. Example as below:


You may set up multiple priority groups in one channel and each of the groups can still be assigned to different trees. Priority group is usually used for testing purpose - users could test out the implementation of additional trees and adjustments before directly releasing the changes to production.