Stripe
Integration interface: select Stripe
Pay attention to this if you are making an e-commerce chatbot for your business: you can enable Stripe integrations on Stella to handle online payment on chatbot. By enabling such function, your chatbot will be able to ask your users to input their payment info and save it down for repeated purchase.
Stripe Setup
Input Stripe details on Stella
- Input the Name of the Stripe integration, Public Key and Secret Key of your Stripe account. You can just randomly give a name to your integration.
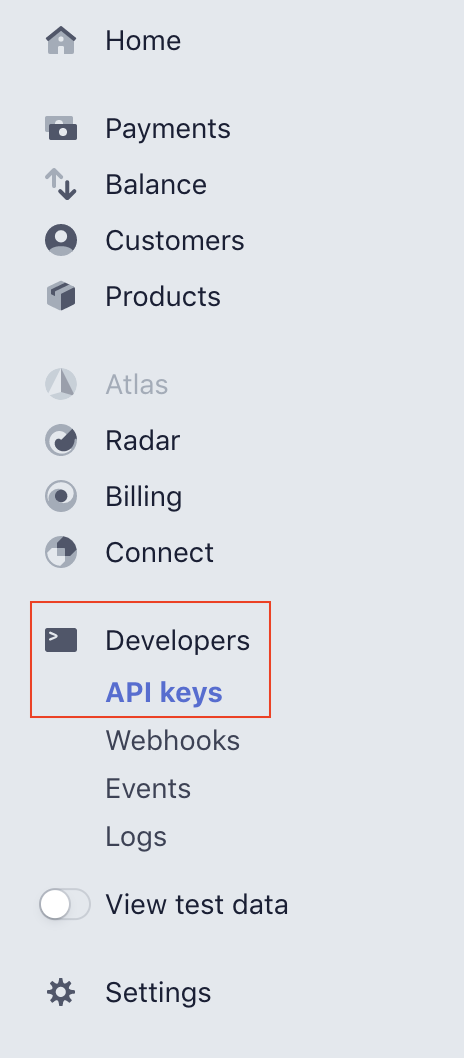
Select API keys under Developer on menu
- Go to your Stripe account and on the left side menu, click API keys under Developers.
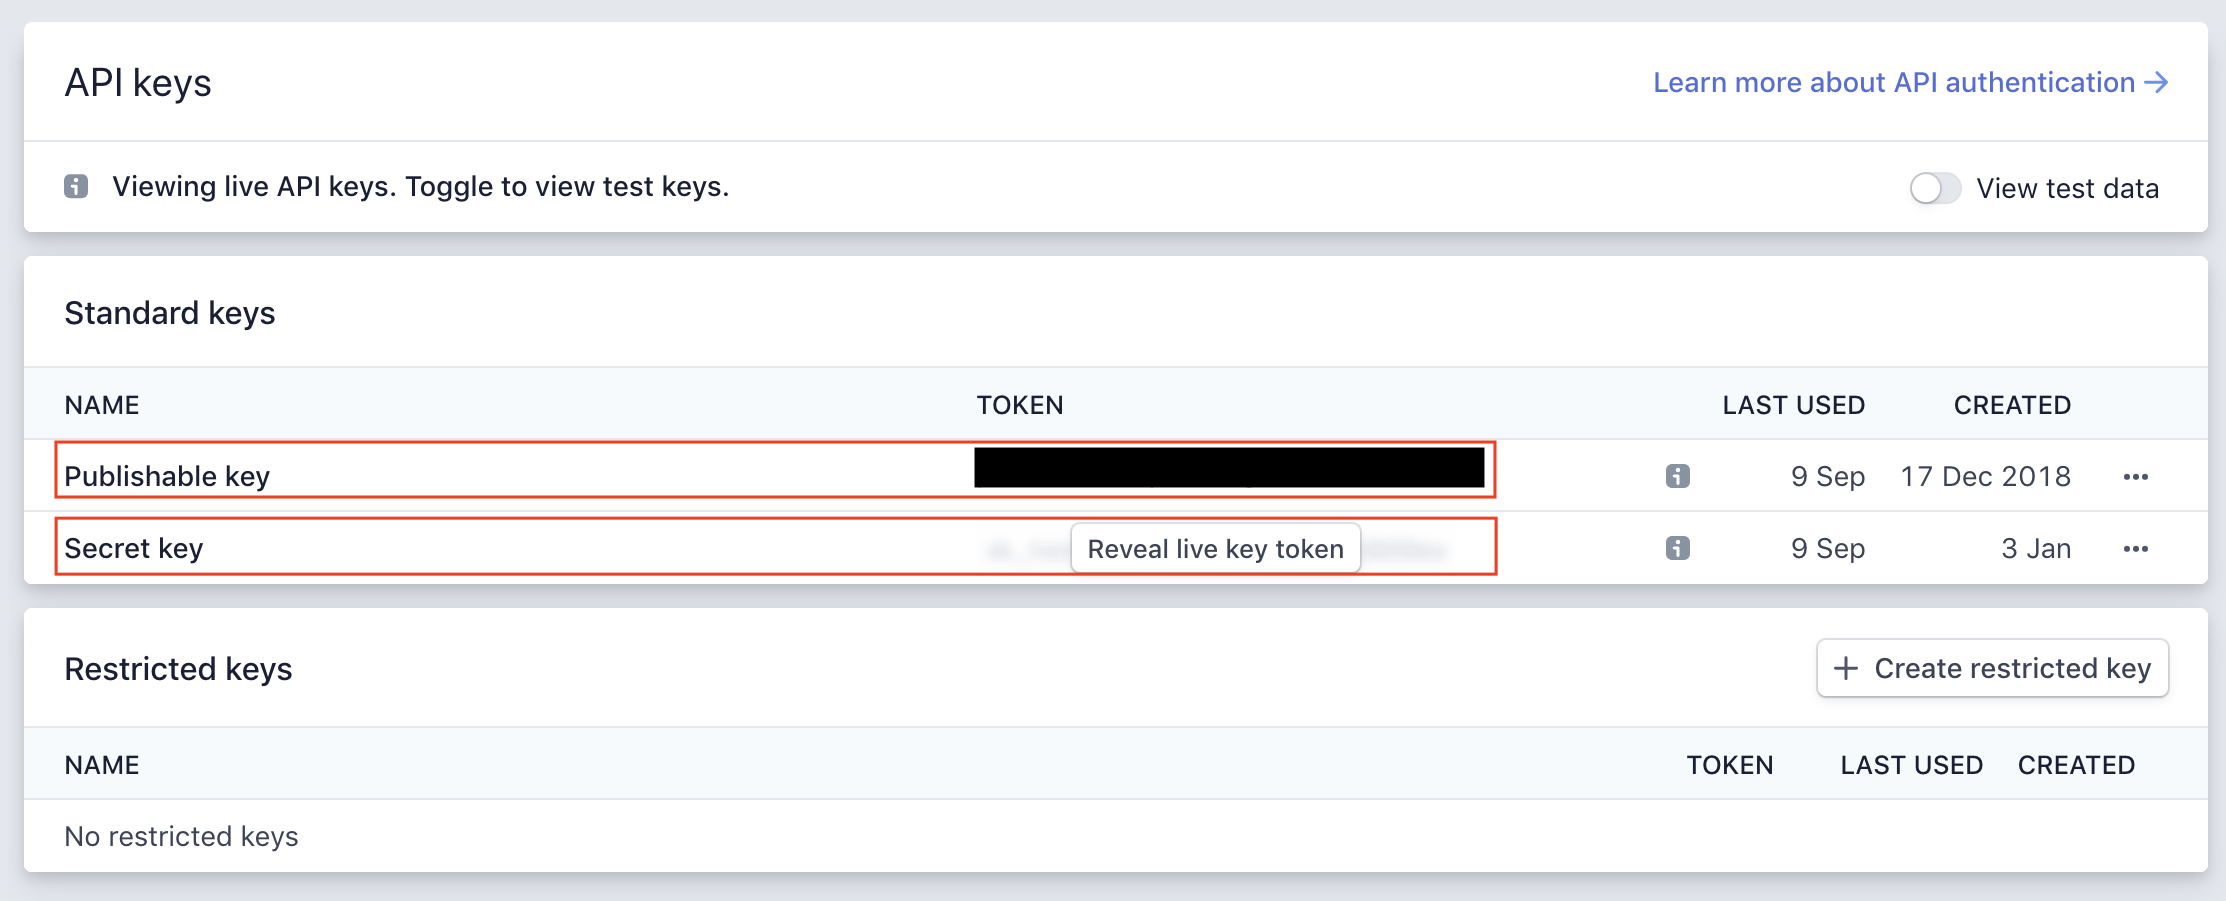
Locate keys on Stripe
- On the right workspace, you will be able to find Publishable key and Secret key which you could paste them back on Stella.
| Property | Description |
|---|---|
| Name | A name you randomly give to your integration |
| Public Key | Publishable key |
| Secret Key | Secret key |
Successful integration on Stella
- Click the "Create" button to save the credentials and you will have a successful Stripe integration listed on Stella.
Getting Hands On
Go back to node inspector and edit the node that triggers the payment action.
Put the following example code in the pre-action to access the specific Stripe account:
Example to connect to Stripe payment:
return new Promise(async (resolve, reject) => {
  try {
    const stripe = await this.stripe({ channel: this.channel, stripeName: "YOUR STRIPE INTEGRATION NAME ON STELLA" })
    try {
      const charge = await stripe.charges.create({
        amount: 38 * 100,
        currency: 'hkd',
        customer: this.member.meta.stripeCustomerId,
        description: "YOUR PRODUCT NAME",
        receipt_email: this.member.meta.email,
      })
      resolve({
        "type": "TEXT",
        "text": "Thank you fo your payment."
      })
    } catch (err) {
      resolve({
        "type": "TEXT",
        "text": `Sorry. ${err.message}`
      })
    }
  } catch (e) {
    reject(e)
  }
})
| Property | Description | Required? |
|---|---|---|
| stripeName | The name of your Stripe integration on Stella | Y |
| amount | Must be an integer; the unit of measurement is "cent" | Y |
| currency | The currency of the product | Y |
| customer | The customer ID on Stripe | Y |
| description | The name of your product | Y |
| receipt_email | The email to receive the payment receipt | N |
Remarks:
- You may refer to the documentation of Create A Charge on Stripe for more details.
Please note that the amount must be an integer and the unit is "cent". For example, if your list price is $200, you should input "200 * 100". If your list price is $0.99, you should just input "99".


