Stella Platform Documentation

Stella Platform Documentation

  • Docs
  • Procedures
  • Reference
  • FAQ
  • Bot API
  • API
  • Languages iconEnglish
    • 中文

›Analytics

Overview

  • Documentation Guide

Get Started

  • Introduction
  • Recent Updates
  • Best Practices
  • Chatbot Template

Bot Builder

  • Workspace
  • Node
  • Attachment ID

Node Inspector

  • Tree ID & Composite ID
  • Basic Information
  • Triggers
  • Responses
  • Actions
  • Redirect
  • Member Tagging
  • Analytics
  • NLP
  • Advance

Facebook

  • Message Types
  • Button Types
  • Persistent Menu
  • Access Token
  • One-Time Notification
  • N-Time Notification (Beta)

Instagram

  • Message Types

WhatsApp

  • Overview
  • Setup Procedure
  • Message Types

Web Chat

  • Overview
  • Message Types
  • Button Types

WeChat

  • Message Types

Slack

  • Message Types

Telegram

  • Message Types

Integrations

  • Dialogflow
  • Stripe
  • LUIS
  • Custom Inbox Integration

Data Source

  • Data Source

Media Library

  • Media Library

Channels

  • Overview
  • Webhooks
  • Channel-wide Metadata
  • Business Availability
  • Facebook
  • Instagram
  • Web Chat
  • WhatsApp
  • WeChat
  • Slack (Public App)
  • Slack (Custom App)
  • Teamwork
  • Zendesk
  • Custom Platform

Analytics

  • Members
  • Dashboard
  • PSID

Settings

  • Overview
  • Locale
  • Pairing Channels
  • Role-based Access Control
  • Access Token
  • Audit Trail

Push Panel

  • Push Content
  • Audience
  • Analytics

Log

  • Log

Create Audience with PSID

The very first step of retargeting is to set your target audience with your customer list. When a person interacts with a business via Messenger, an ID is created for the specific Page associated with the bot in Messenger, which is called Page-scoped ID. This means, for the same person, the IDs across different communication channels are different.

Getting Hands-on

The following section would teach you how to create a custom audience or a lookalike audience with Page-Scoped ID (PSID).

Create Custom Audience

  1. Head to "Audience" in Facebook Ad Manager
  2. Click "Create Audience" and select "Custom Audience"
  3. Select "Customer List"

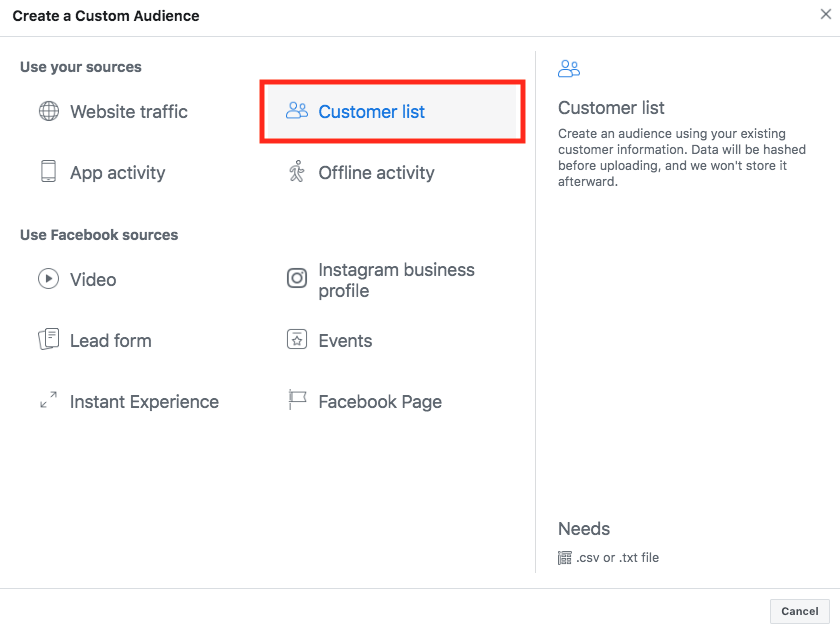
Select "Custom Audience"
  1. Select a suitable file type. In this case, use a file that doesn't include LTV and in .csv format
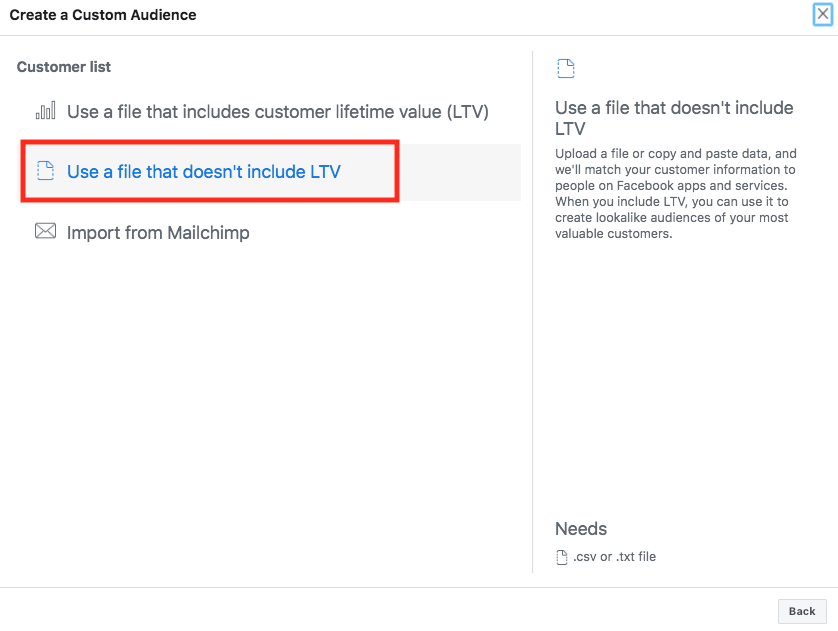
Select file type
  1. Drag your .csv file with PSID and upload. Remember to select "From partners" for the Original Data Source and name your audience

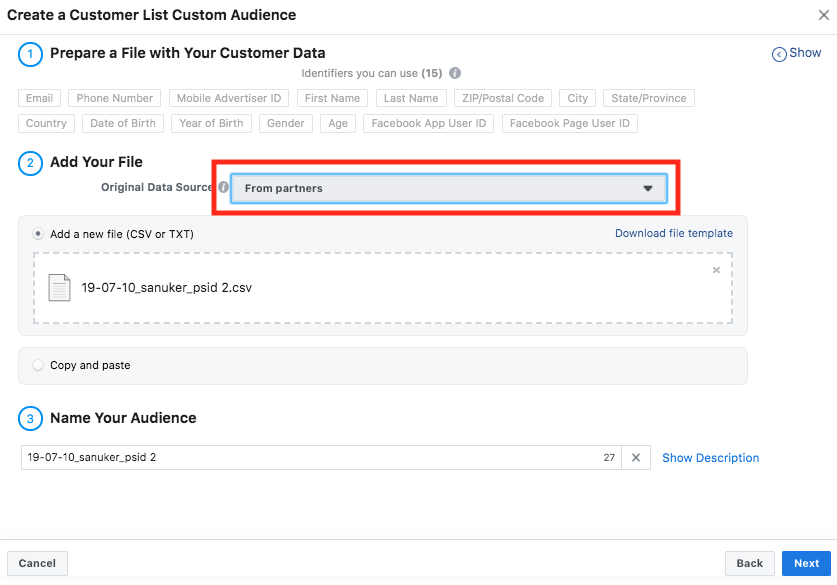
Upload .csv file with PSID
  1. Next, you need to map your data to fit a type of suitable dataset. In this case, select "Facebook Page User ID"

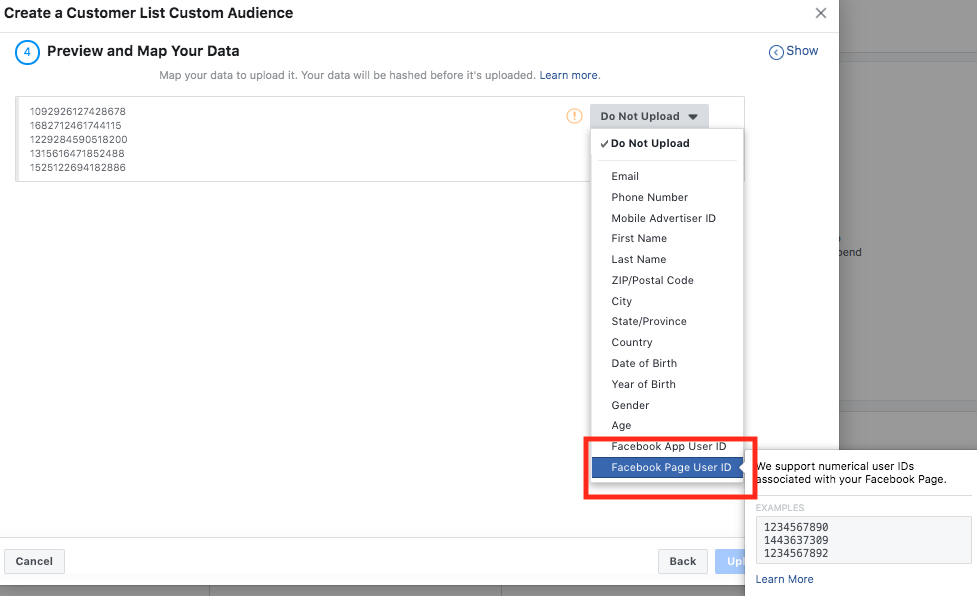
Map your Data to Facebook Page User ID
  1. Tell Facebook which page your PSID data retrieved from by typing the "Facebook Page ID"

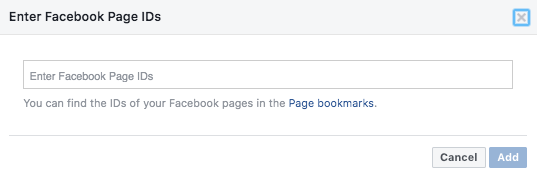
Type the Facebook Page User ID
  1. If your data file is properly uploaded and mapped, you will see a green tick. This means the Custom Audience is ready to be created
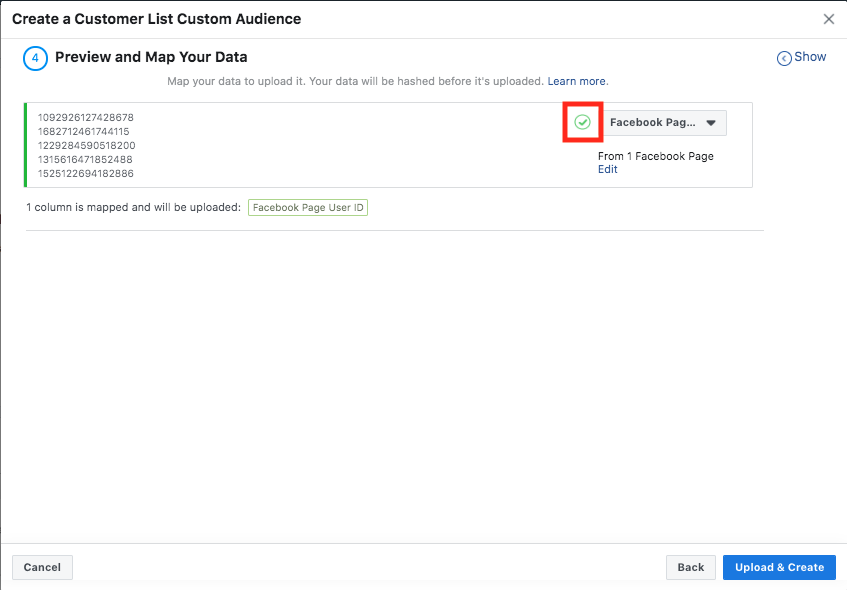
Ready to upload
  1. Custom Audience is successfully created

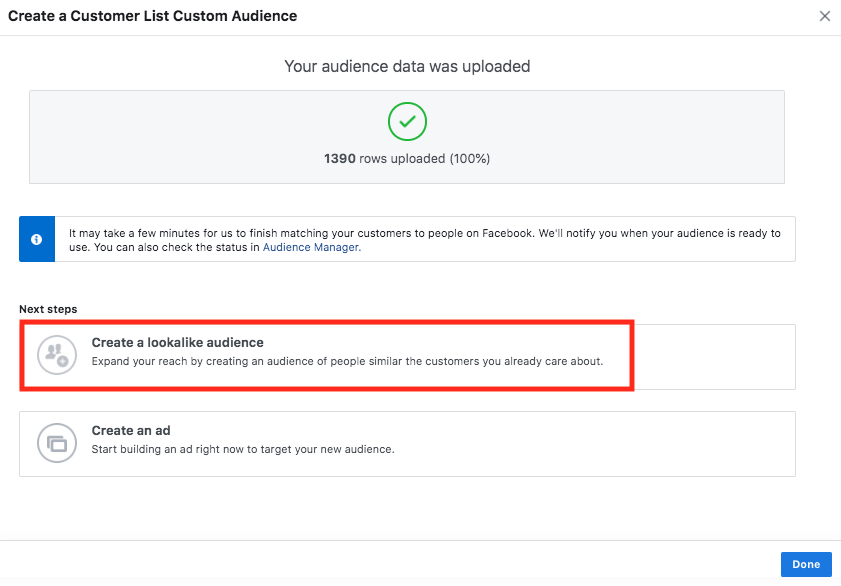
Custom Audience is created
  1. You may also select "Create a lookalike audience" with the Custom Audience you just created

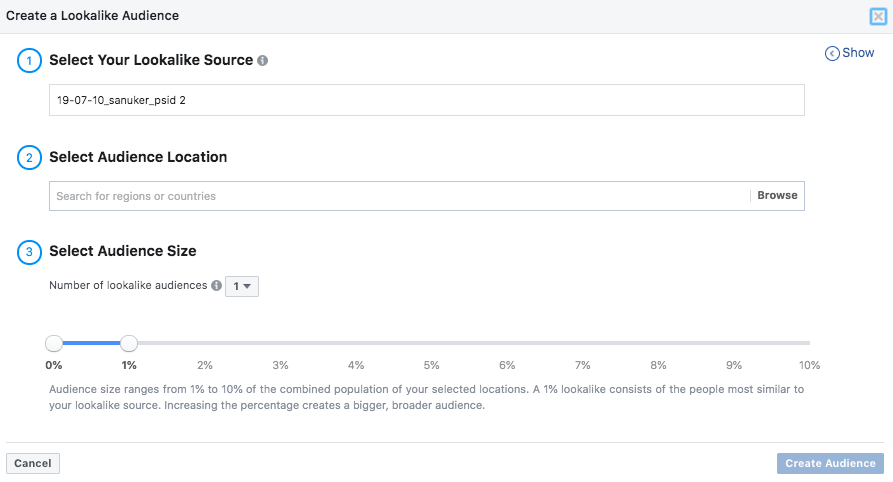
Creating lookalike audience
← DashboardOverview →
  • Getting Hands-on
    • Create Custom Audience
Stella Platform Documentation
Docs
Get StartedBot API ReferenceAPI ReferenceStandard Procedures
Community
FAQUser ShowcaseChat with Us
Copyright © 2023 Sanuker Inc. Limited