Stella Platform Documentation

Stella Platform Documentation

  • Docs
  • Procedures
  • Reference
  • FAQ
  • Bot API
  • API
  • Languages iconEnglish
    • 中文

›Basic WhatsApp Chatbot Setup

Get Started

  • Build your First Chatbot

Basic Facebook Chatbot Setup

  • Overview
  • 1.1: Connect to Channels
  • 1.2: Create New Tree
  • 1.3: Build the First Node
  • 1.4: Create a Global Node
  • 1.5: Build Child Nodes
  • 2.1: Production Channel
  • 3.1: Draft a Post
  • 3.2: Create Comment Reply

Basic Web Chat Chatbot Setup

  • Overview
  • 1.1: Connect to Channels
  • 1.2: Create New Tree
  • 1.3: Build the First Node
  • 1.4: Create a Global Node
  • 1.5: Build Child Nodes

Basic WhatsApp Chatbot Setup

  • Overview
  • 1.1: WABA Subscription
  • 1.2: Connect WABA (Old Automation)
  • 1.3: Connect WABA
  • 1.4: Check Approval Status of WABA
  • 1.5: Migrate Existing Number to WABA
  • 2.1: Create New Tree
  • 2.2: Build the First Node
  • 2.3: Create a Global Node
  • 2.4: Build Child Nodes
  • 2.5: Connect to Datasource
  • 3.1: Create Priority Group

Common Use Case Application

  • Overview
  • 1.1: Apply Fail-Safe to Chatbot

Advanced Chatbot Application

  • Overview
  • Apply Datasource to Chatbot
  • Apply Payload Value to Chatbot
  • Apply API to Chatbot
  • Apply Custom Locale to Chatbot
  • Apply Opt-in Flow to Chatbot
  • Apply Agenda to Chatbot
  • Apply Stella API to Chatbot
  • Apply Web Event to Webchat Chatbot

Stella Partner Portal Setup

  • Overview
  • 1.1: Partner Portal Setup
  • 1.2: New Customer Onboarding
  • 1.3: WABA Setup (Old Automation)
  • 1.4: WABA Setup
  • 1.5: Check Approval Status of WABA
  • 1.6: Migrate Existing Number to WABA

Template Tree

  • Overview
  • Create Template Tree
  • Manage Proxy Tree

Chatbot Testing & Deployment

  • Overview
  • Stage One - Tree Building
  • Stage Two - Testing Stage
  • Stage Three - Production Deployment

Slack Live Chat Tree Setup

  • Overview
  • 1.1: Create Tree for Live Chat Assignment
  • 2.1: Set Up Pick Ticket Status
  • 2.2: Create Done Command
  • 2.3: Create Transfer Command
  • 2.4: Create Archive Function
  • 2.5: Create Member Tagging/Remarks Command
  • 3.1: Automatic End Live Chat Function

Zendesk Live Chat Tree Setup

  • Overview
  • 1.1: Create Tree for Assignment
  • 2.1: Create Done Command
  • 2.2: Auto End Live Chat Function

FAQ Chatbot Setup

  • Overview
  • 1.1: Exact Keyword Match
  • 2.1: Exact Keyword Match & Diversion
  • 3.1: Keyword Groups Match & Diversion
  • 4.1: Redirect to Existing Chatbot Tree
  • 4.2: Data Analytics for FAQ Chatbot
  • 4.3: NLP for FAQ Chatbot
  • 5.1: Filtering Questions for FAQ Chatbot

NLP Chatbot Setup

  • Overview
  • 1.1: Apply NLP to your Chatbot
  • 2.1: Set Up an NLP Fallback Tree
  • 3.1: NLP Fallback to Other Languages

Connect Shopify Store to Stella

  • Overview
  • 1.1: Integrate Stella to Shopify
  • 2.1: Apply Facebook SDK to Shopify
  • 2.2: Setup Facebook Messenger Chatbot for Shopify
  • 2.3: Setup WhatsApp Chatbot for Shopify
  • 2.4: WhatsApp Customer Care Notification for Shopify

Slack Inbox Setup

  • Overview
  • 1.1: Access to Admin Panels & Message Shortcuts
  • 1.2: Set up Customizable Message
  • 2.1: Turn on Live Chat Directly
  • 2.2: End Live Chat Mode
  • 2.3: Ticketing
  • 2.4: Manage Ticket Helper
  • 2.5: Add Member Tag
  • 3.1: Send Chatbot Message
  • 3.2: Send WhatsApp Template

Migrate Existing Number to WABA

Embedded sign up flow requires businesses to use a clean phone number for registration. However, in some cases, businesses might want to upgrade to WABA while keeping their usual contact number.

This guide will show you how to migrate a phone number to WABA in embedded sign up, by getting display name approval before deployment.

For the usual embedded sign up flow, please refer to here.


What is your Result?

You can migrate an in-use phone number to WABA in embedded sign up, with minimum downtime.

Connected to WhatsApp (Sanuker demo screenshot)

Getting Hands-on

Embedded Sign up Flow

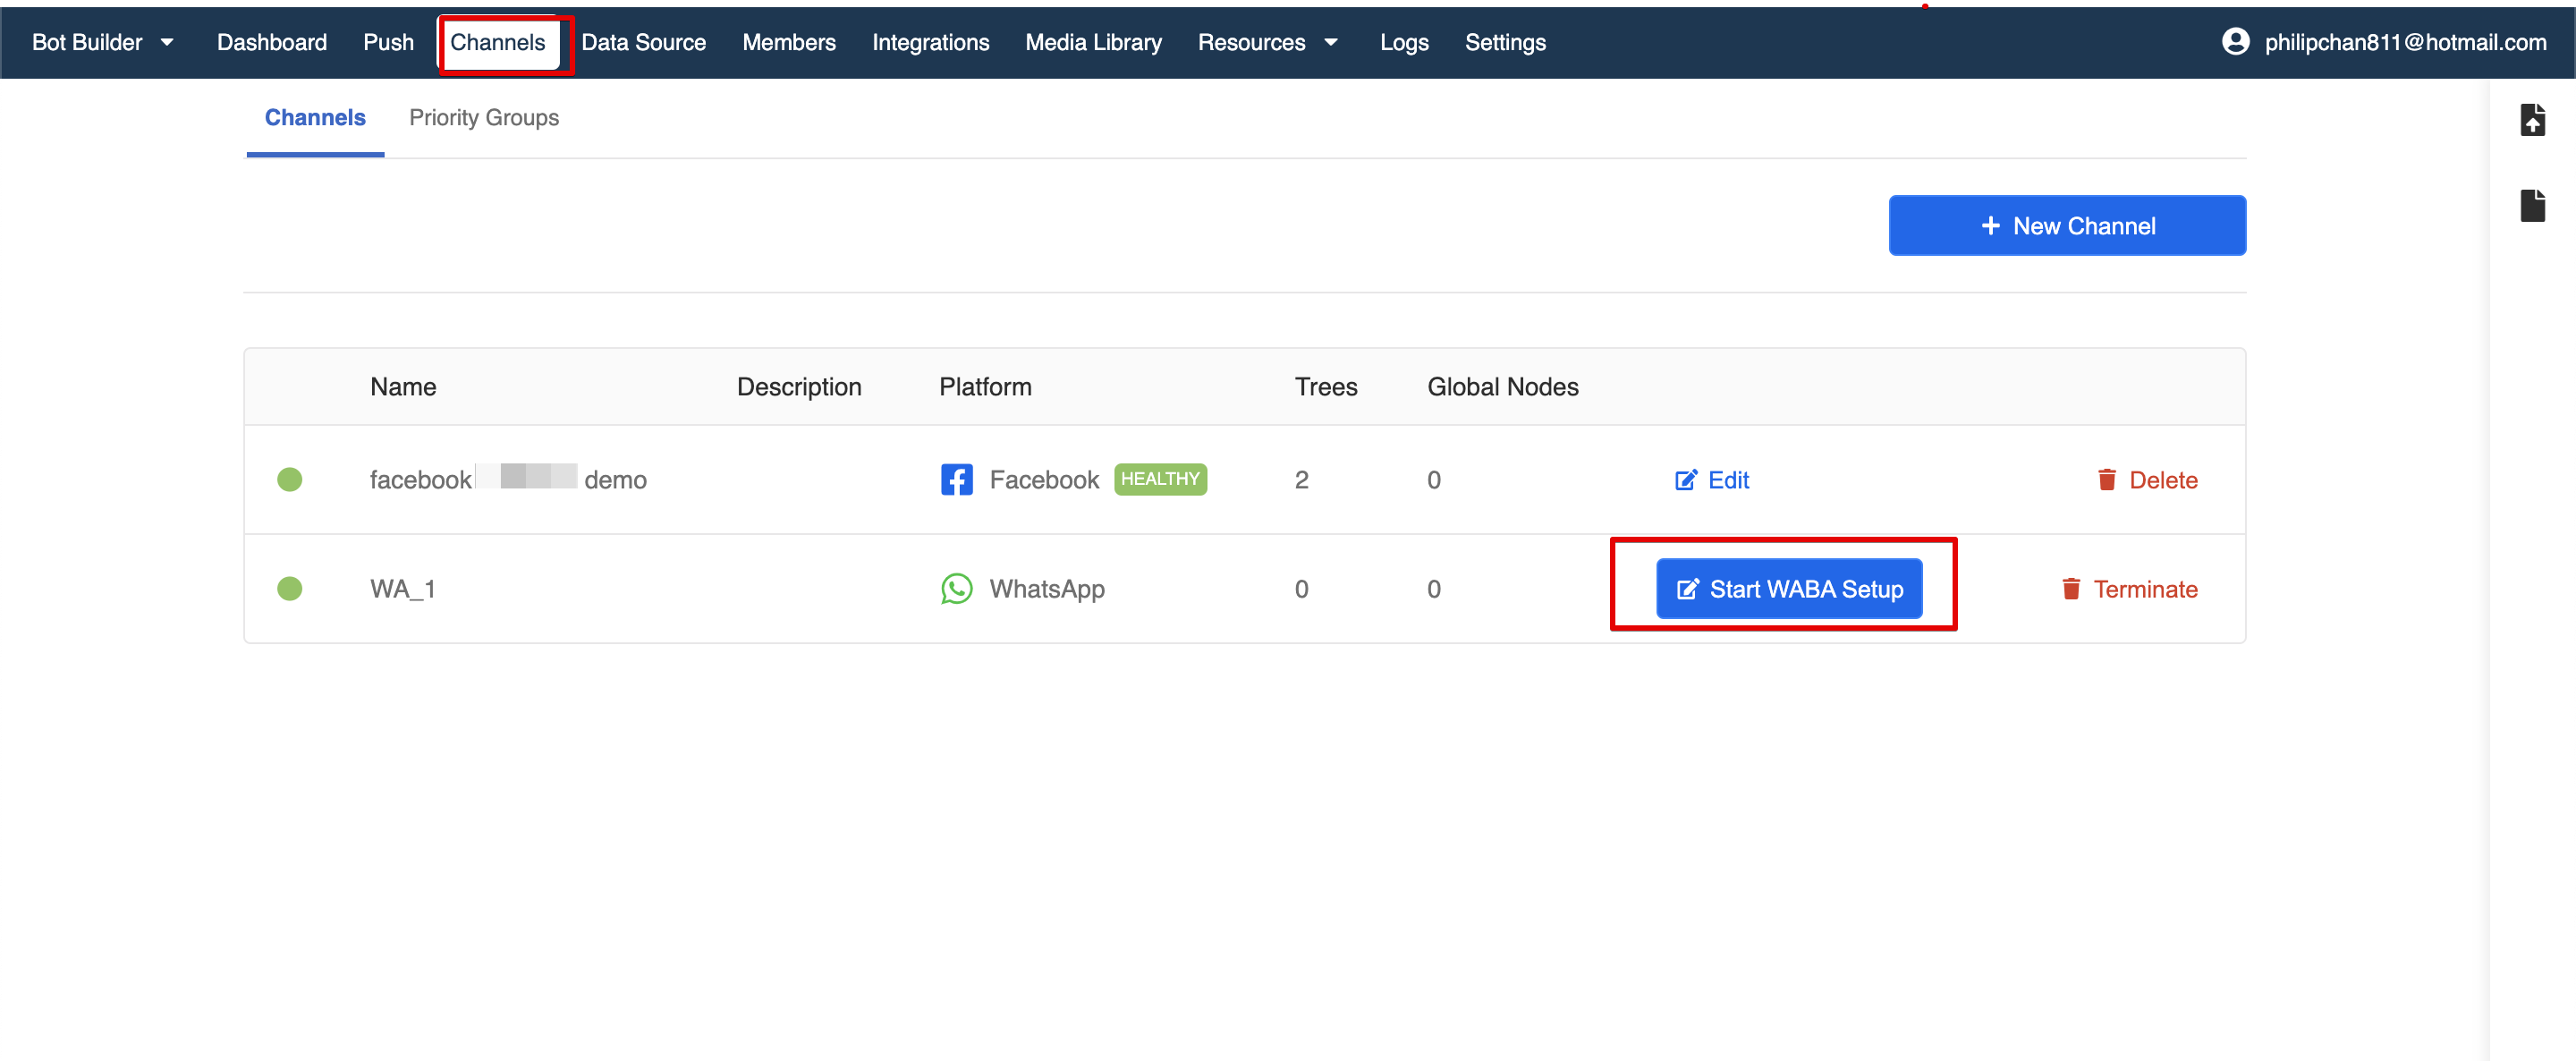
  1. After you have subscribed a WhatsApp channel on Stella, a WhatsApp channel will be automatically created in your Stella app. Please head to "Channels" and proceed by clicking "Start WABA Setup".
WhatsApp Business API Channel
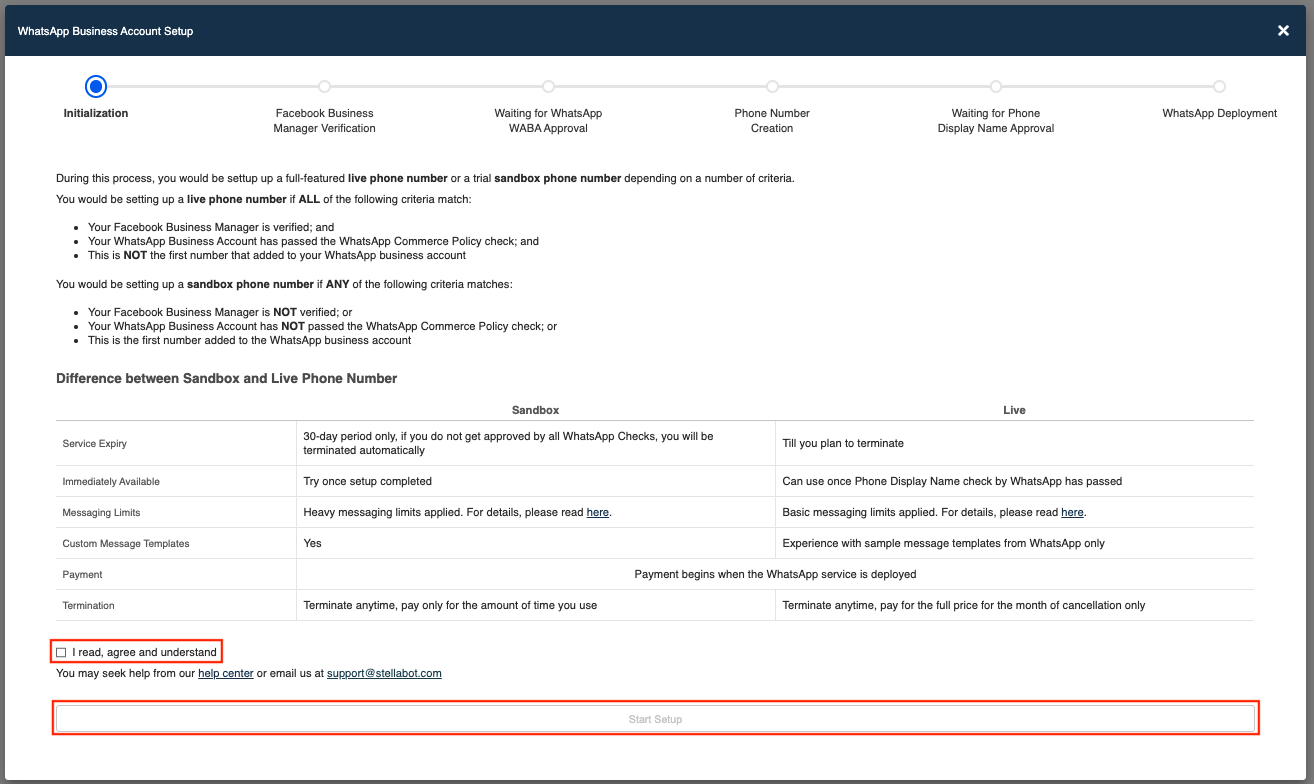
  1. Tick to checkbox. Select "Start Setup".
Start Setup
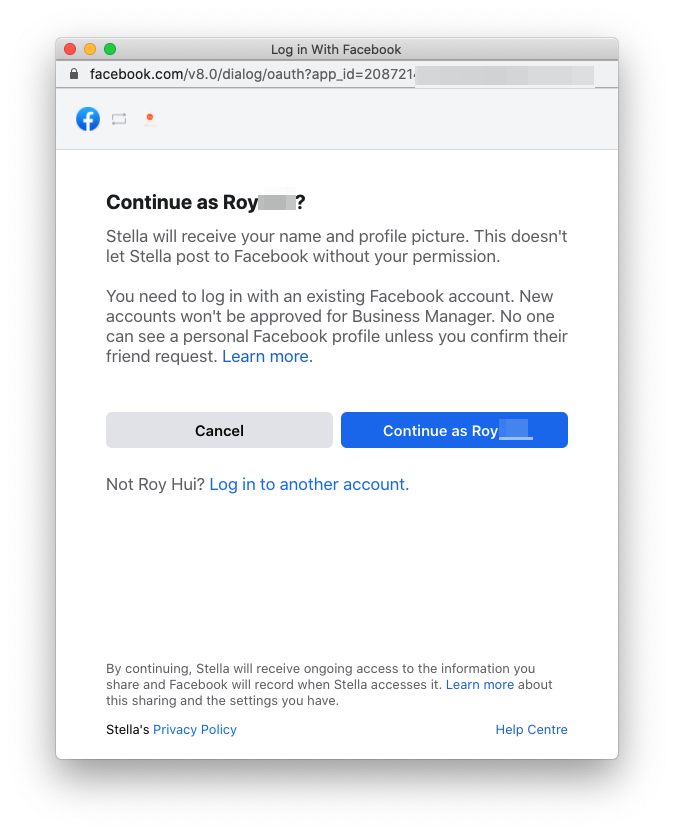
  1. You will be asked to log in your existing personal Facebook account. New Facebook Account will NOT be approved for Facebook Business Manager.
Log in Facebook Account
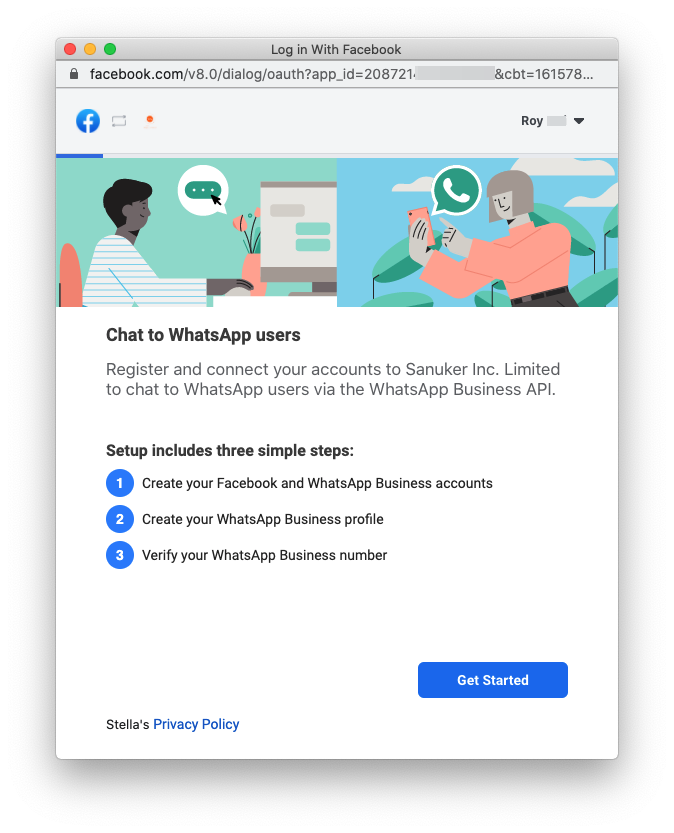
  1. Once you have logged in your Facebook account, select "Get Started" to connect your Facebook account to Sanuker. Then select "Continue" to share account and billing permissions with Sanuker.
Connect Account to Sanuker
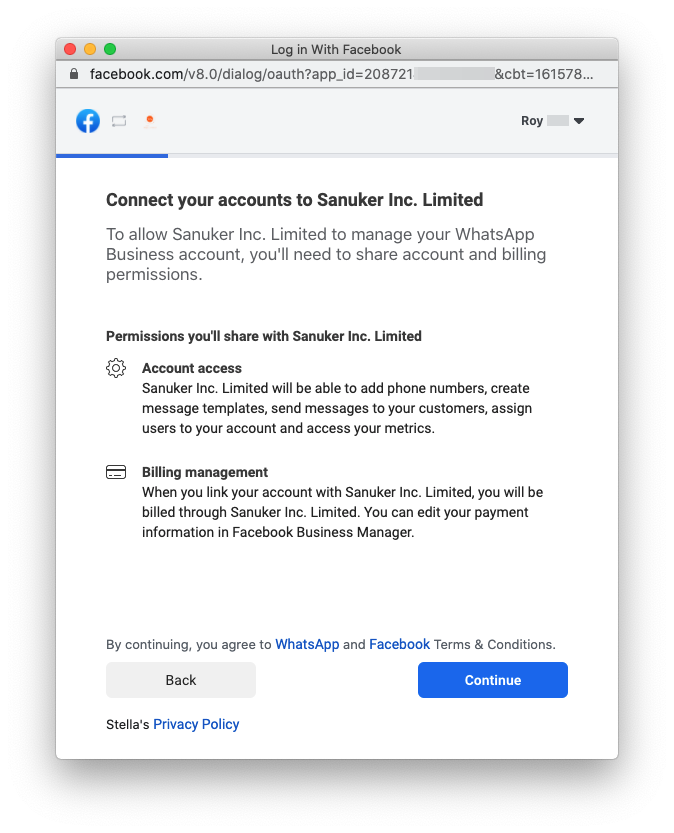
Share Account and Billing Permissions

Create Facebook and WhatsApp Business Accounts

  1. In Step 1 of 3, create a new Facebook Business Account or select an existing Facebook Business Account.
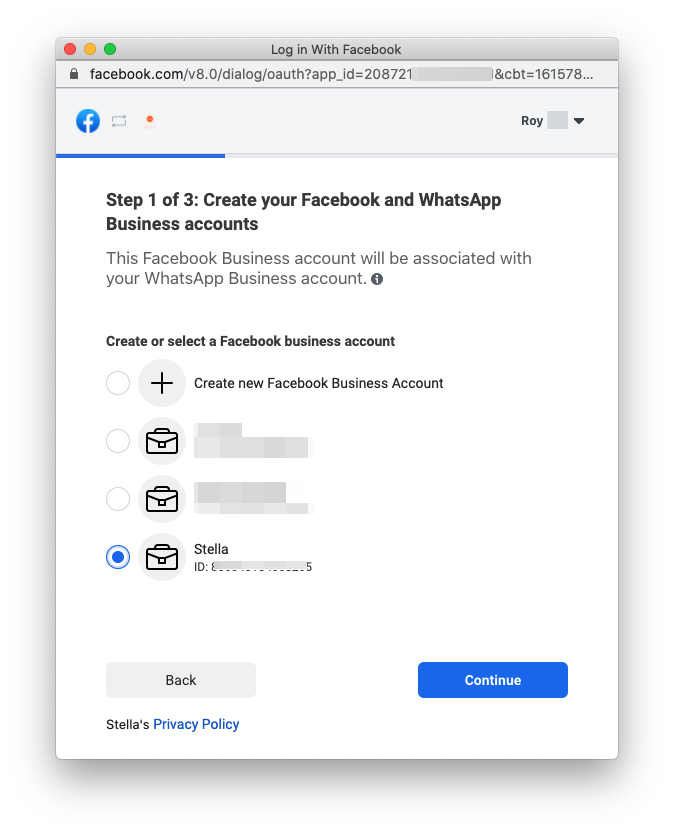
Create or Select a Facebook Business Account
  1. Then, create a new WhatsApp Business Account or select an existing account.
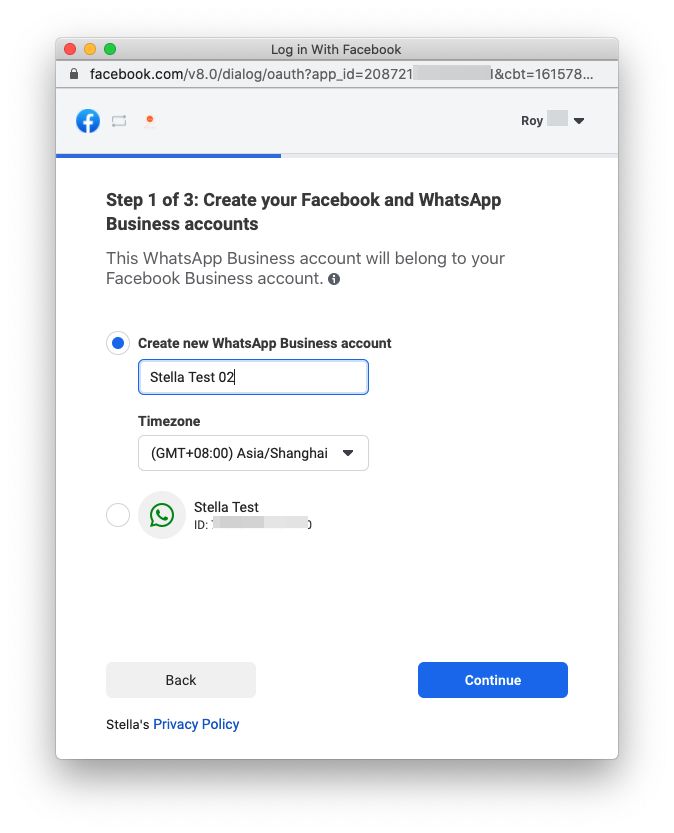
Create or Select a WhatsApp Business Accont
  1. Once the WABA account has been set up, please DO NOT proceed to step 2. Upon completion of part of the embedded signup flow, you have successfully created a Facebook Business Manager and a WhatsApp Account.
Setting up Account
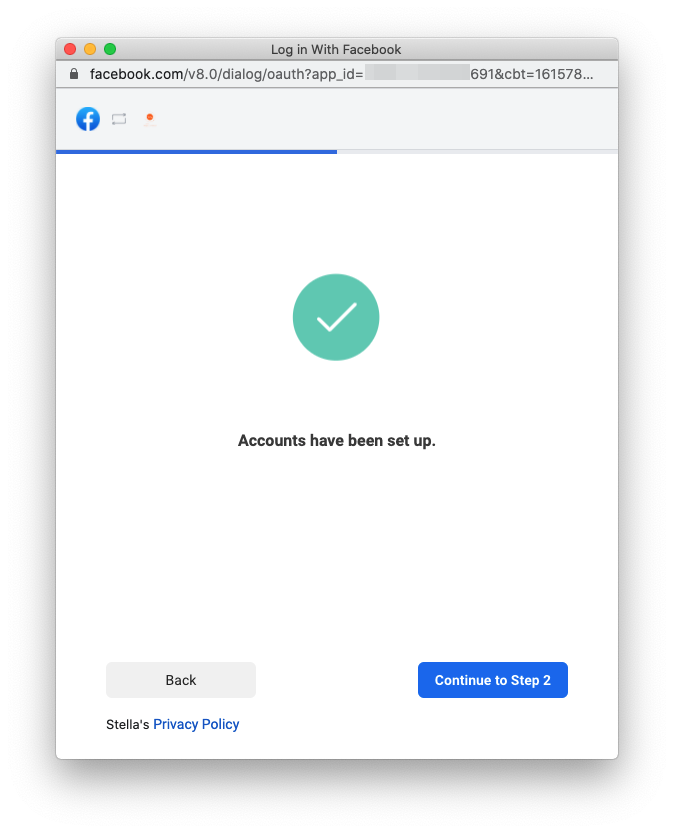
Account Setup is Successful

Add Phone Number to WABA Manager

  1. Now, go to https://business.facebook.com/ and login your Facebook Business Manager. You can refer to this documentation for verifying your business.

Login Facebook Business Manager
  1. In Facebook Business Manager, select "Business Settings". Since you have created a WABA account in embedded signup, you will be able to find "WhatsApp Accounts" under "Accounts".
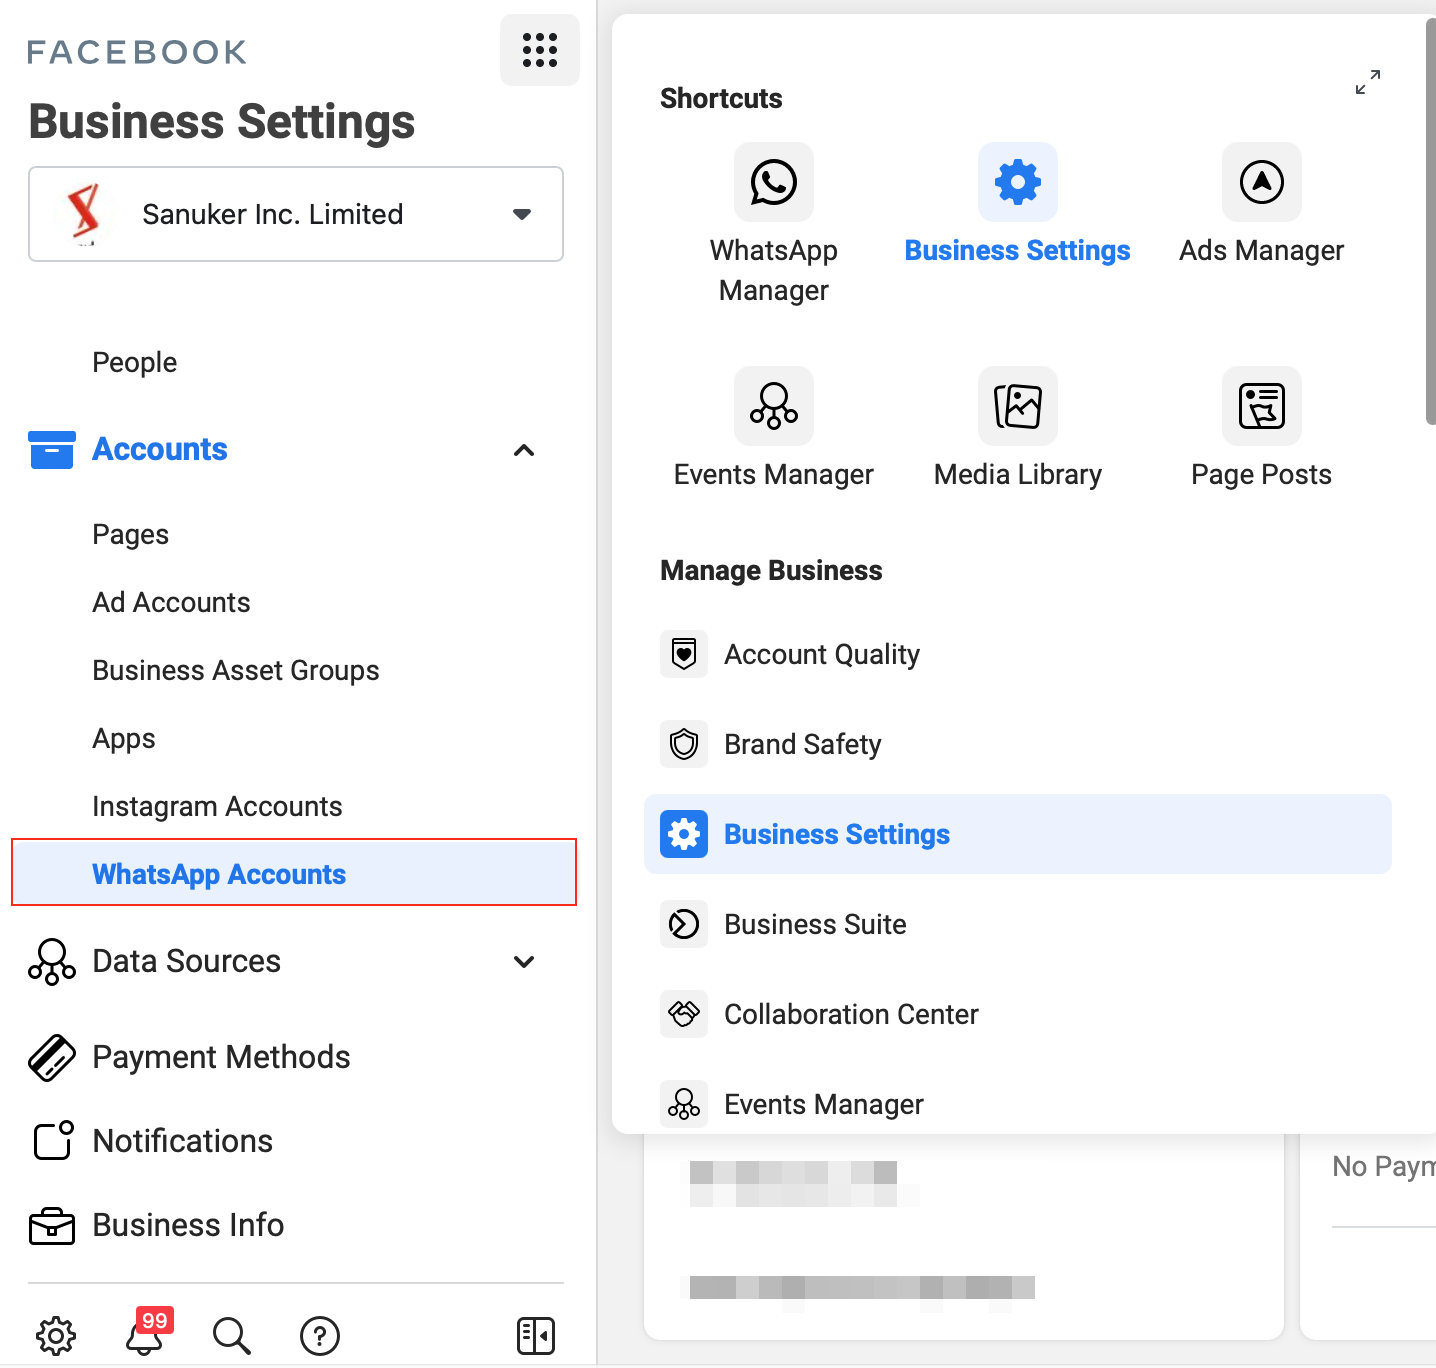
Business Settings
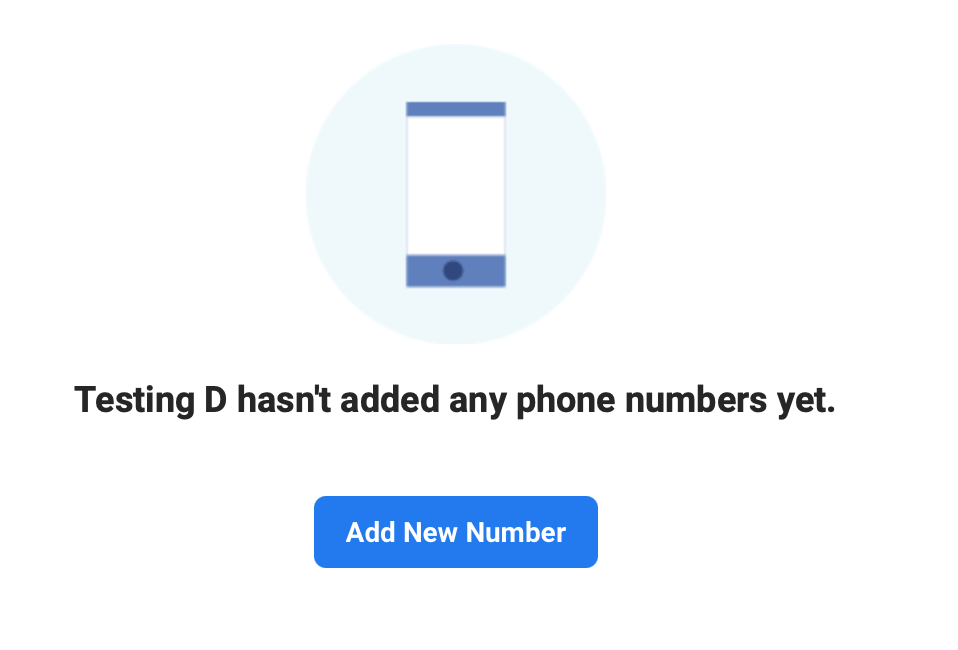
  1. Head to "WhatsApp Manager" under "Settings", click on "Add Phone Number".
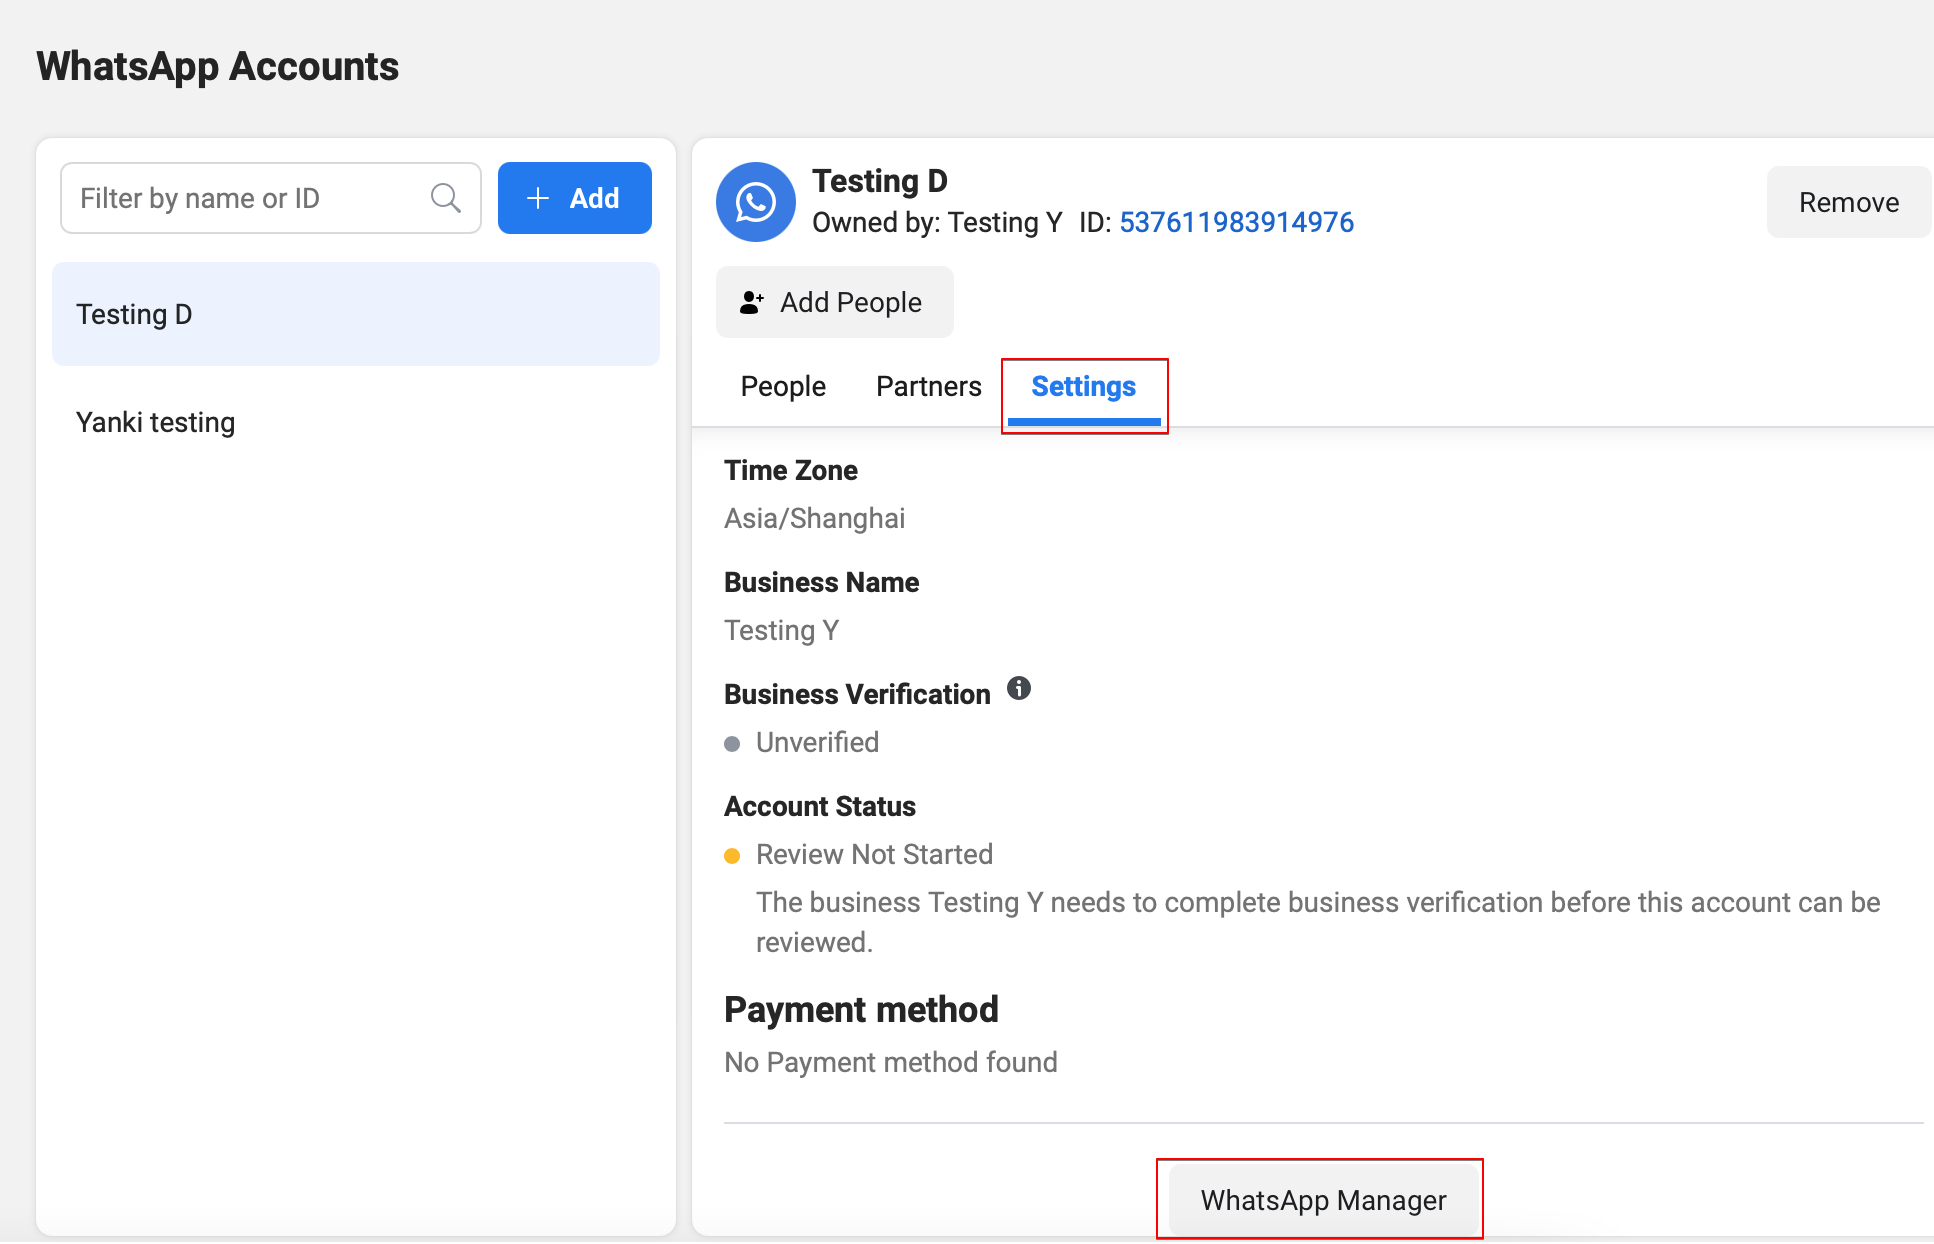
WhatsApp Manager

Add Phone Number - 1
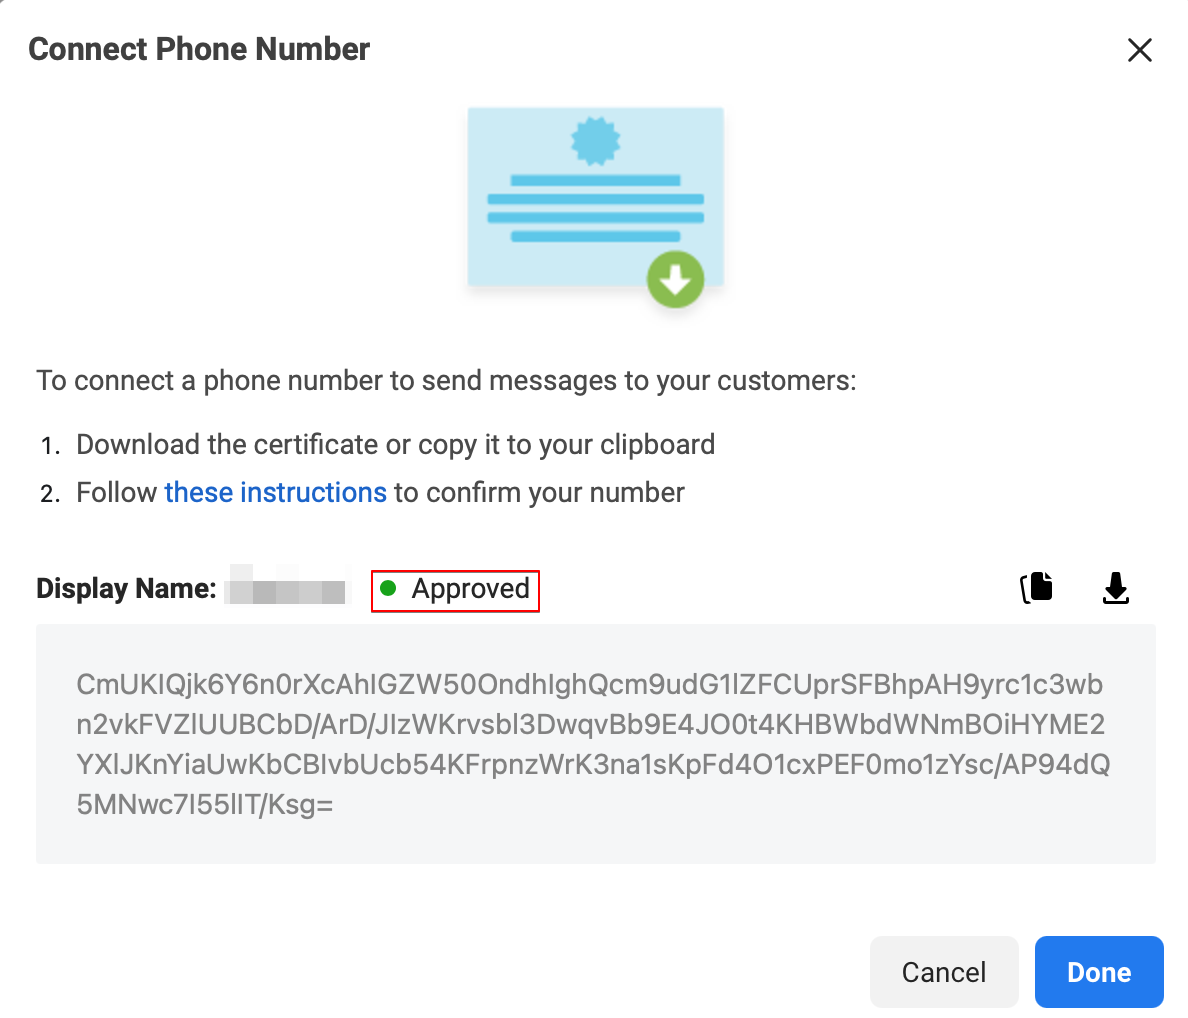
  1. Enter the phone number and the display name. Now the display name is pending for approval in WABA Manager.

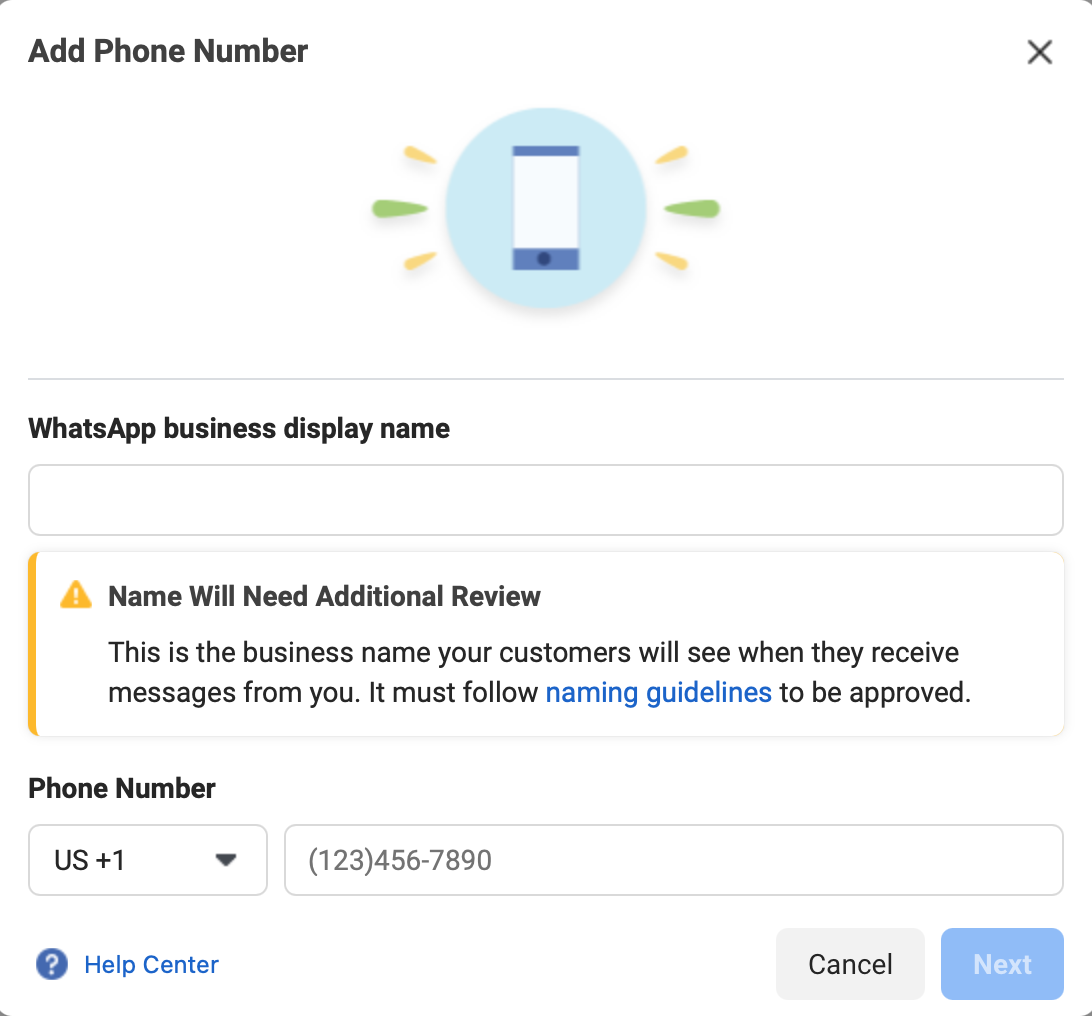
Add Phone Number - 2
  1. When the business verification is completed and the display name is approved in WABA Manager, you can head back to channels and restart the embedded sign up flow.

Add Phone Number - 3

Deploy the Phone Number

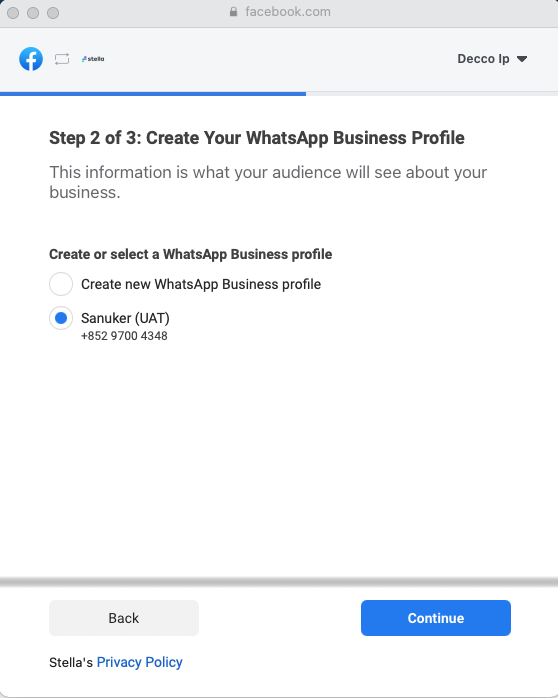
  1. This time, while registering WABA with embedded sign up, you can choose the Facebook Business Manager you have just set up, and thus the newly created WABA account.
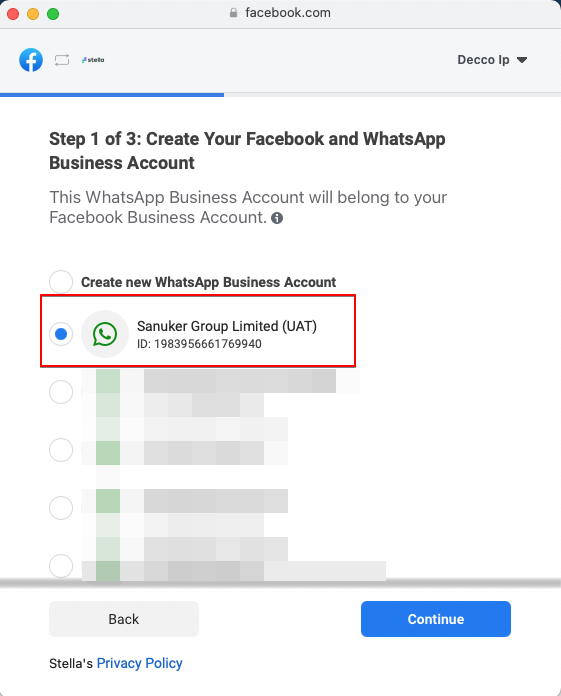
Restart Embedded Signup
  1. The phone number you added to WABA Manager will be available in the embedded sign up flow. Choose this number and proceed with the registration.
Choose Added Number
  1. Before verifying the number, you have to first make sure your phone number is disconnected from the existing WhatsApp account, otherwise, error will occur during phone number registration.
Register a Phone Number on WhatsApp
  1. Finally, you can deploy the phone number.
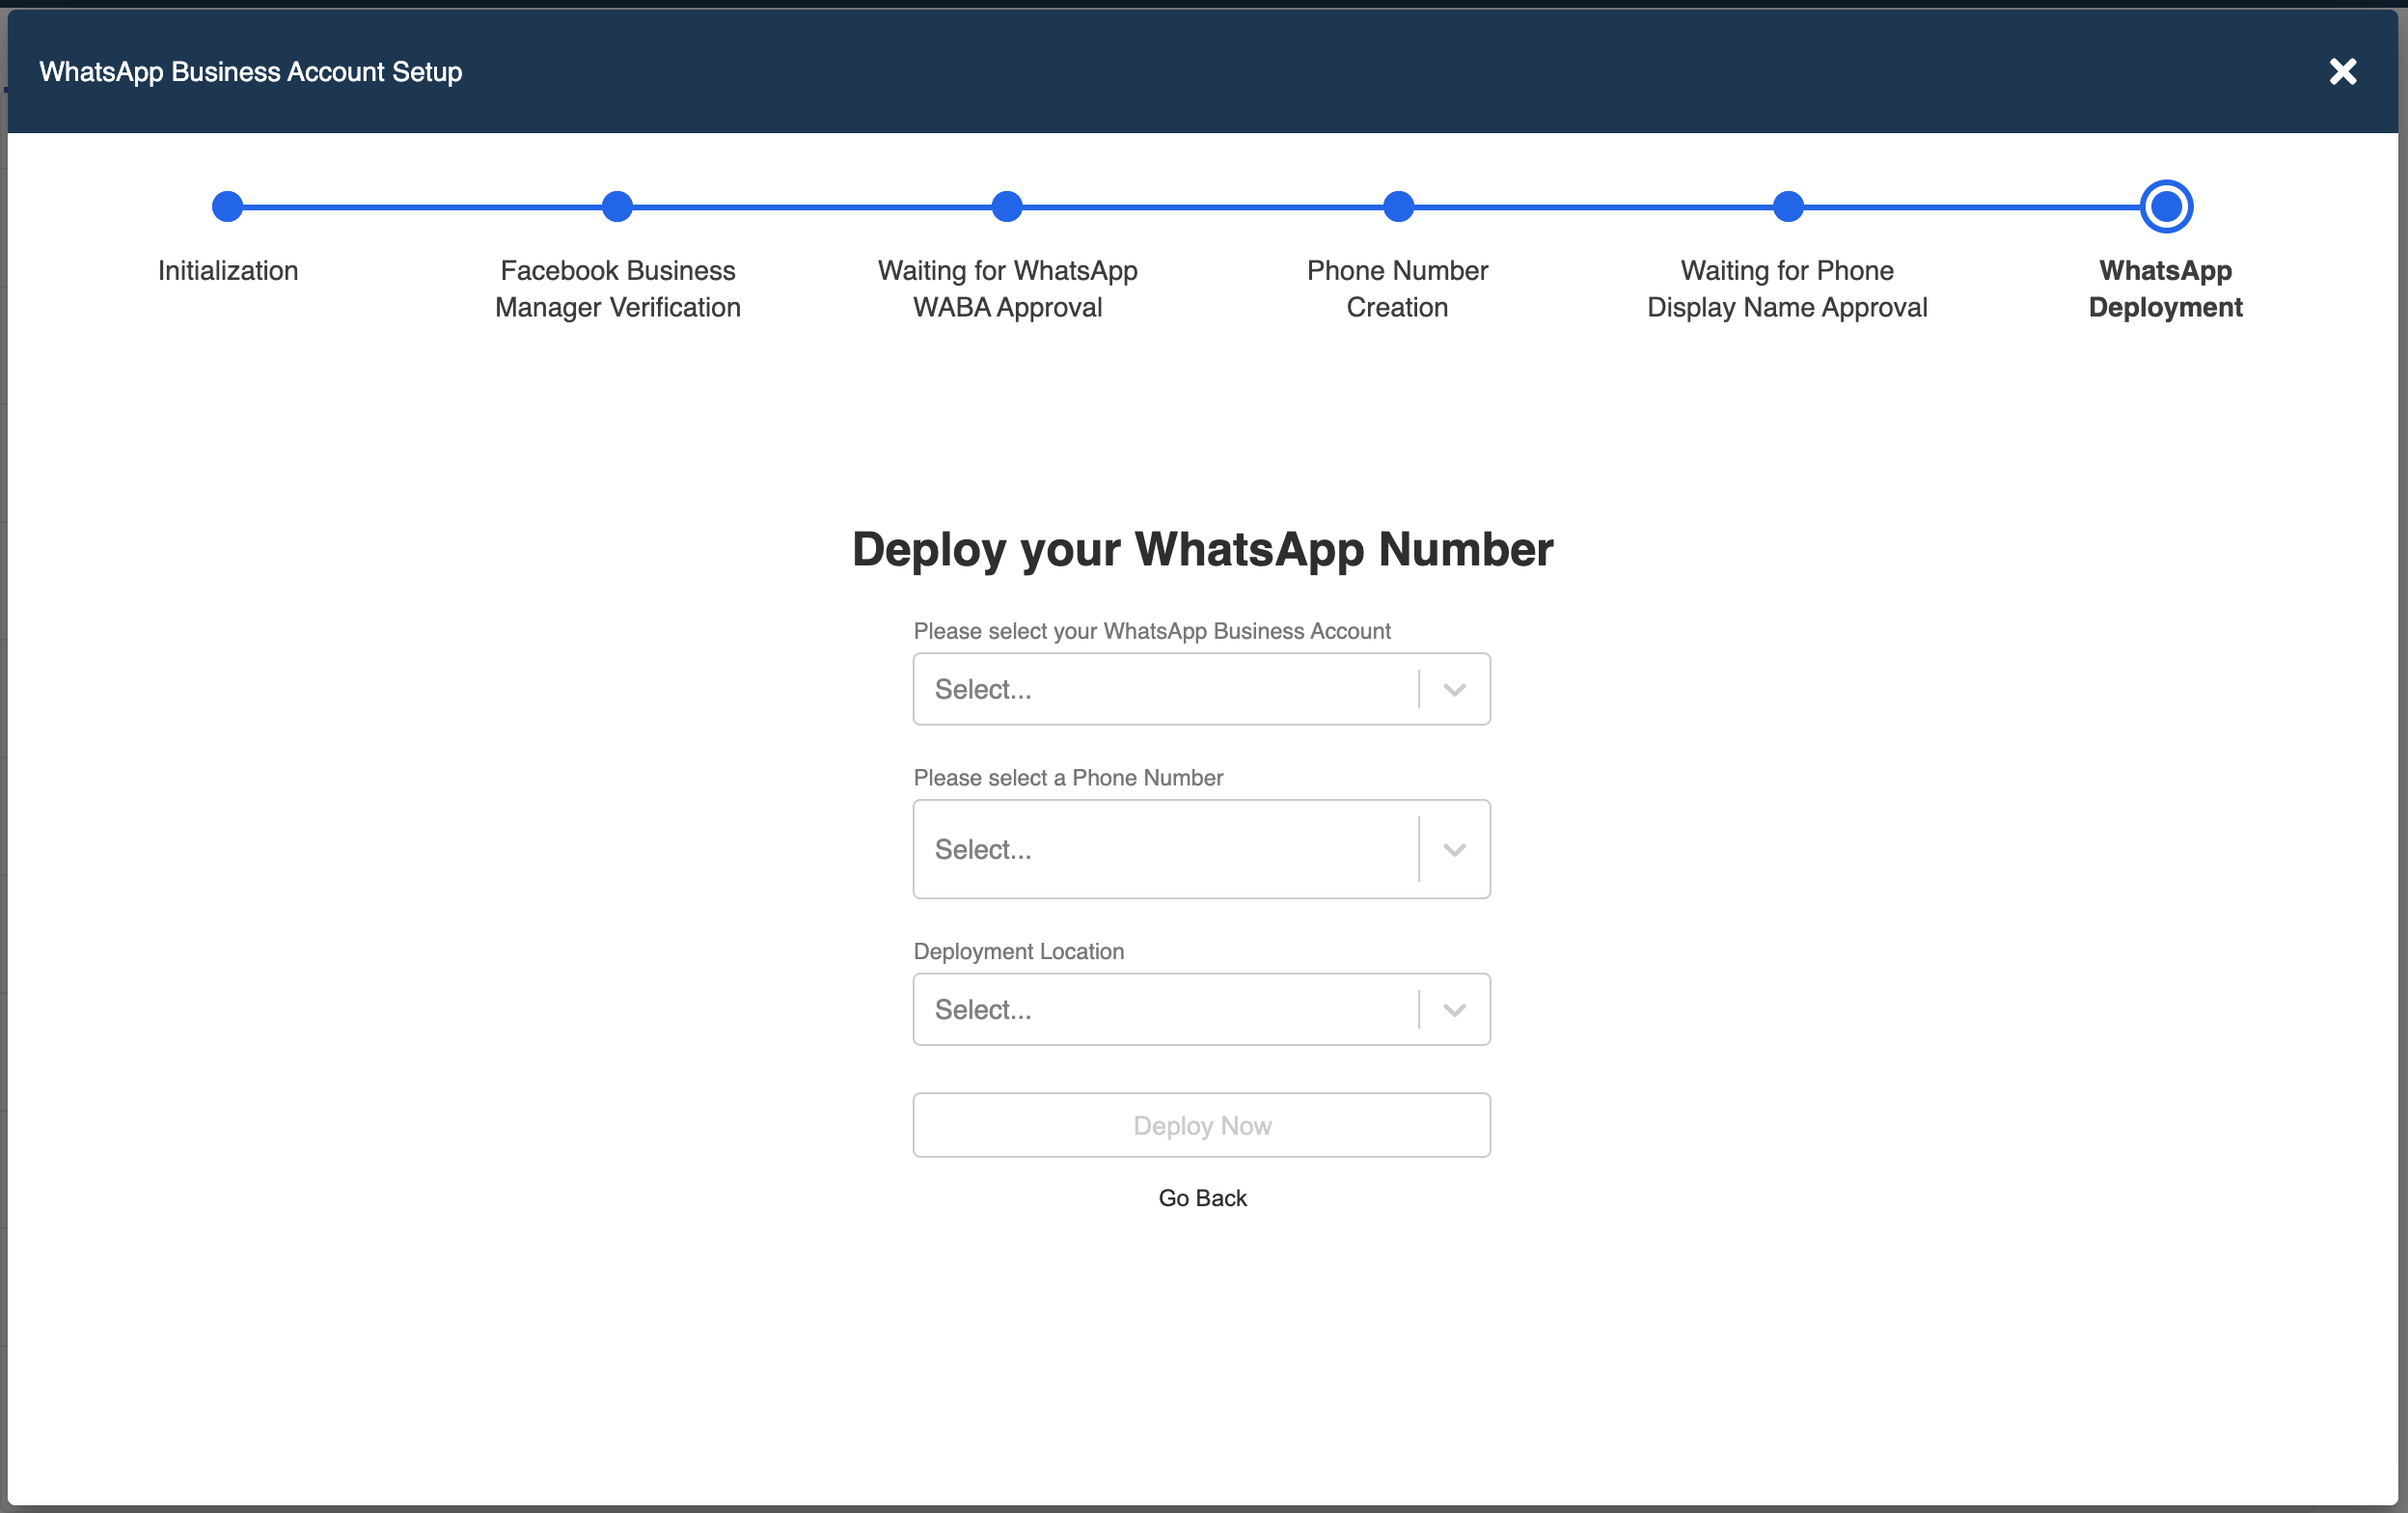
Deployment
← 1.4: Check Approval Status of WABA2.1: Create New Tree →
  • What is your Result?
  • Getting Hands-on
    • Embedded Sign up Flow
    • Create Facebook and WhatsApp Business Accounts
    • Add Phone Number to WABA Manager
    • Deploy the Phone Number
Stella Platform Documentation
Docs
Get StartedBot API ReferenceAPI ReferenceStandard Procedures
Community
FAQUser ShowcaseChat with Us
Copyright © 2021 Sanuker Inc. Limited