Create a Global Node
Now you can see your first node in the workspace, how about on your testing chatbot? In this section, we will teach you to create another type of node: Global Node. Global node allows you to trigger the same node at any point of your conversation flow.
Once added to Channel, Global Node is often used as a "door" to kickstart a conversation.
Without a Global Node, no one can ever kick-start your conversation tree.
What is your Result?
| Property | Description |
|---|---|
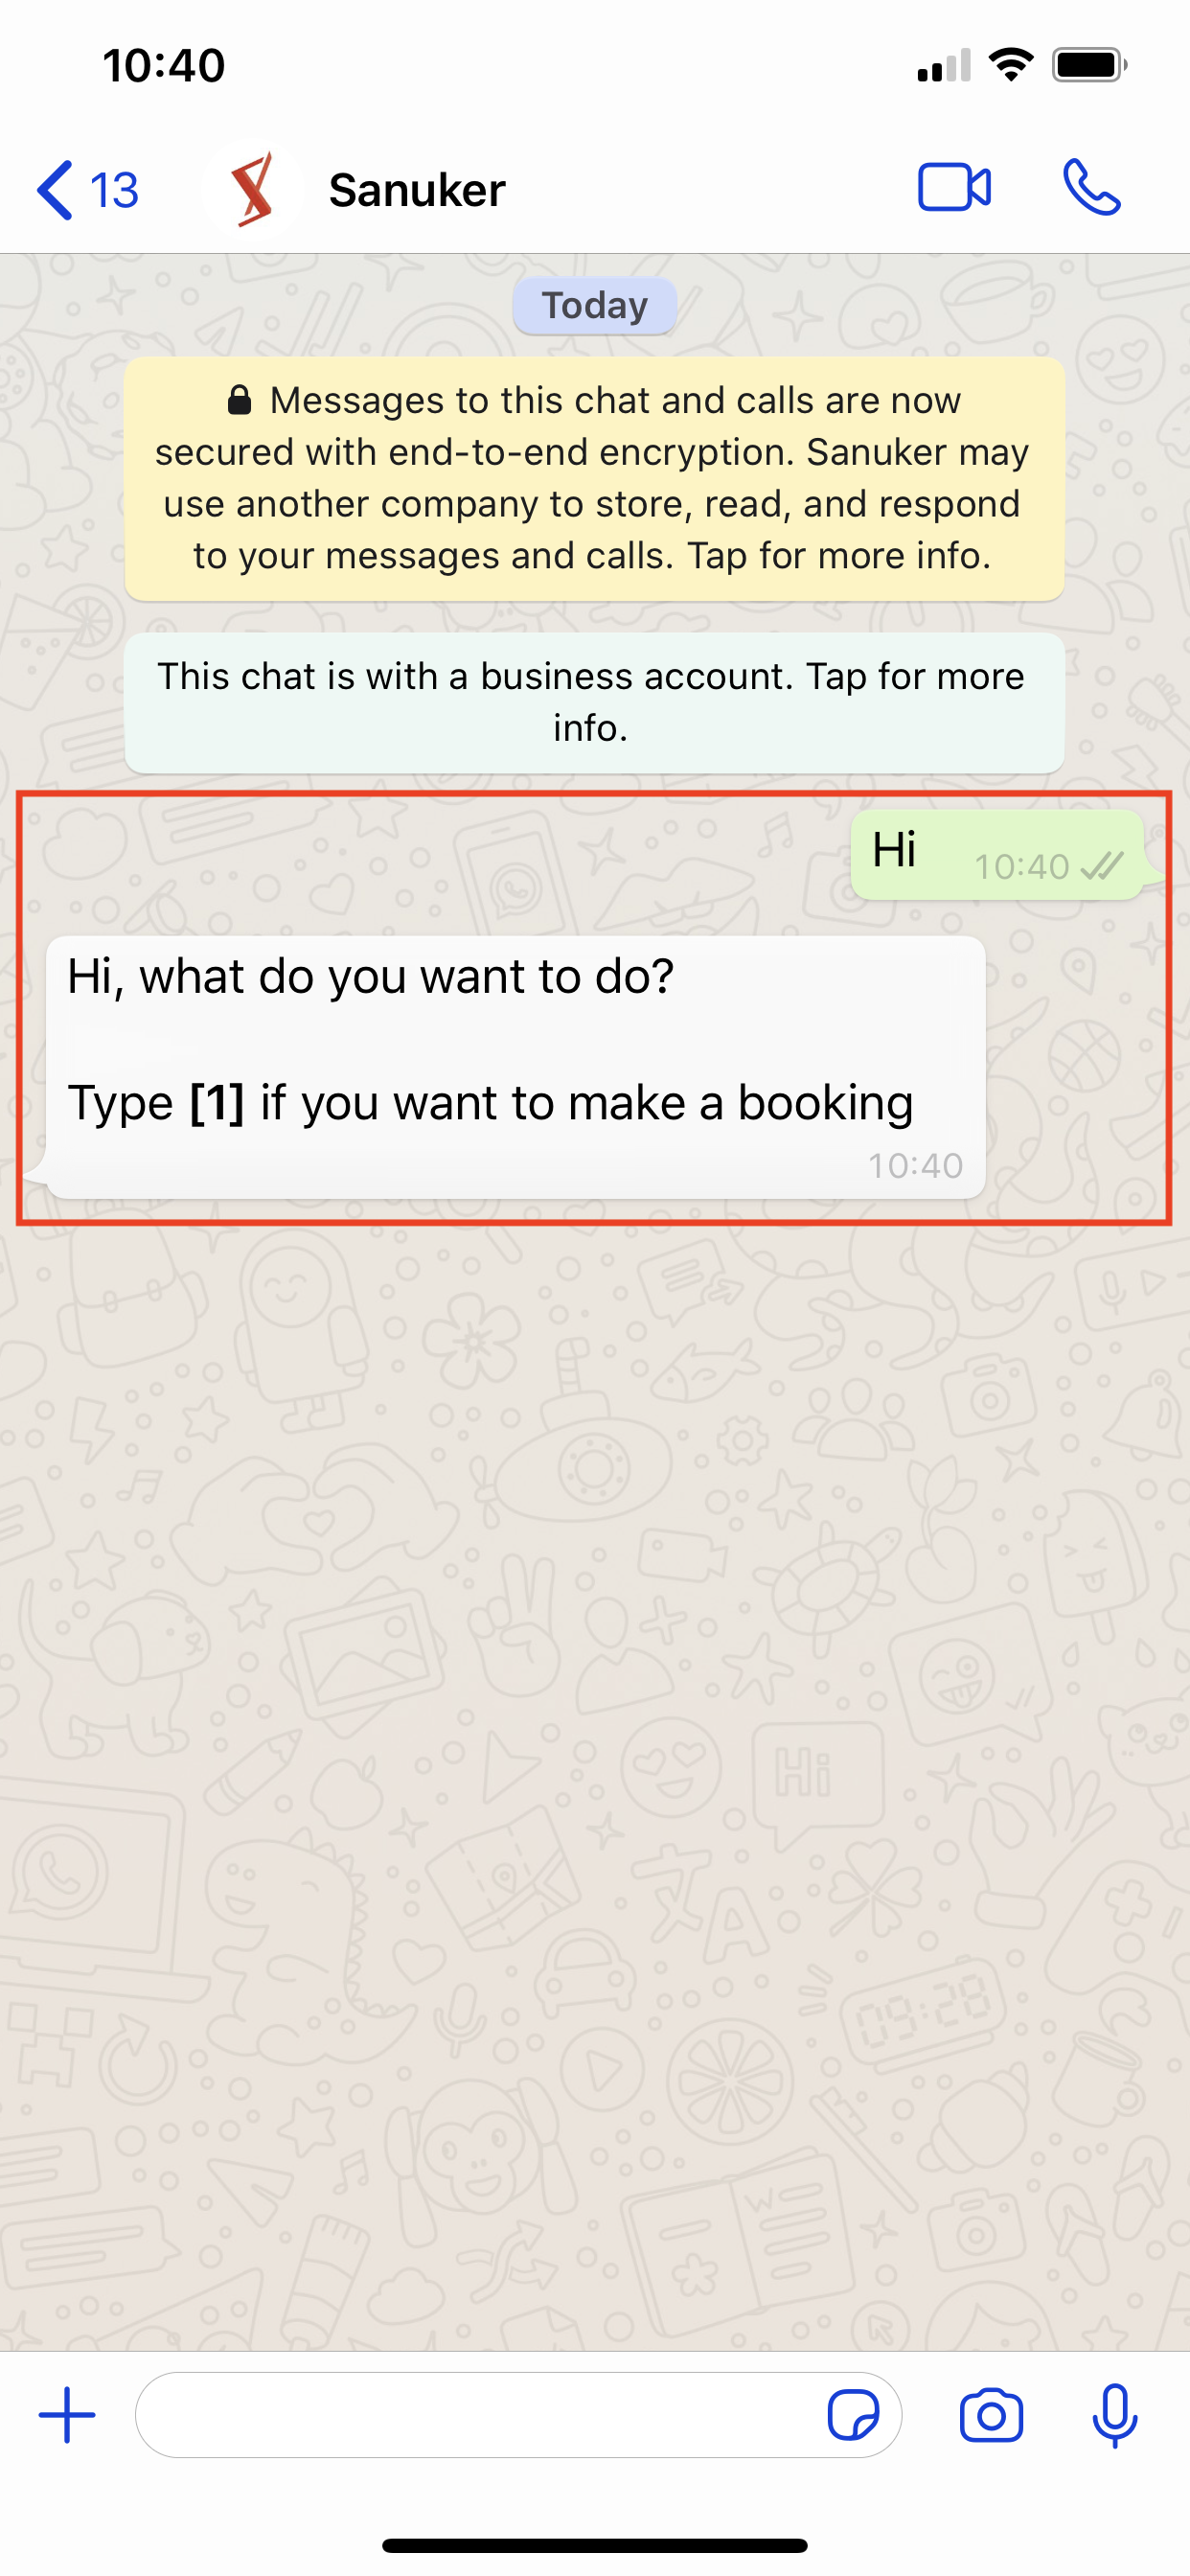
Successful Result | You should also be able to trigger the first node on your testing chatbot in one way: say Hi to the chatbot. |
Getting Hands-on
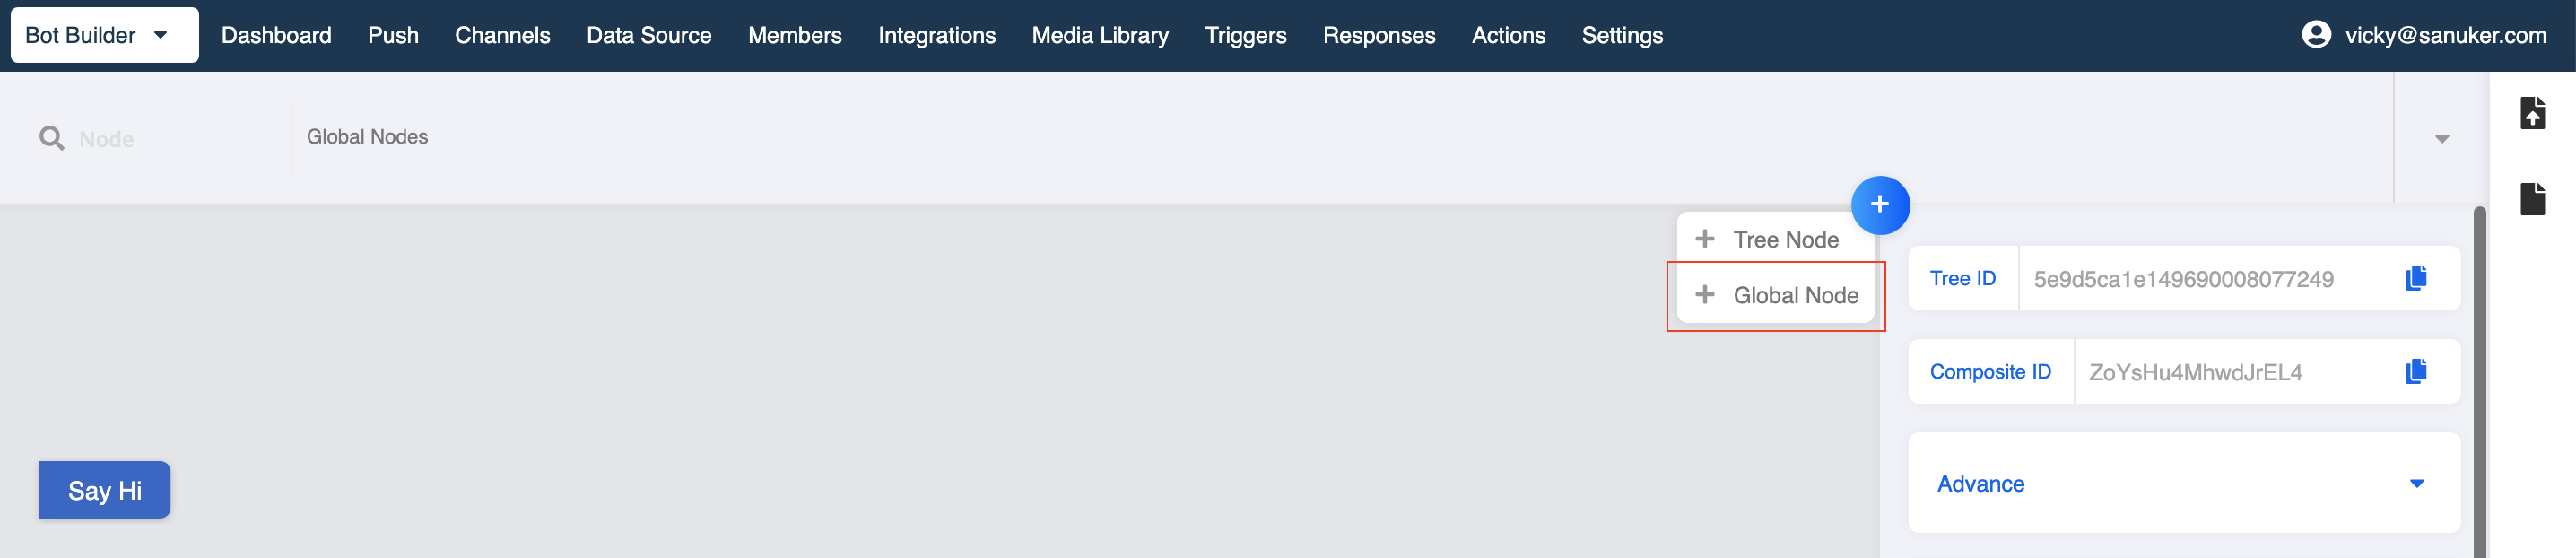
Enter the Bot Builder here to start building your node.
Create a Global Node: Say Hi
- Select "+" on right top corner of workspace.
- Select "+ Global Node".
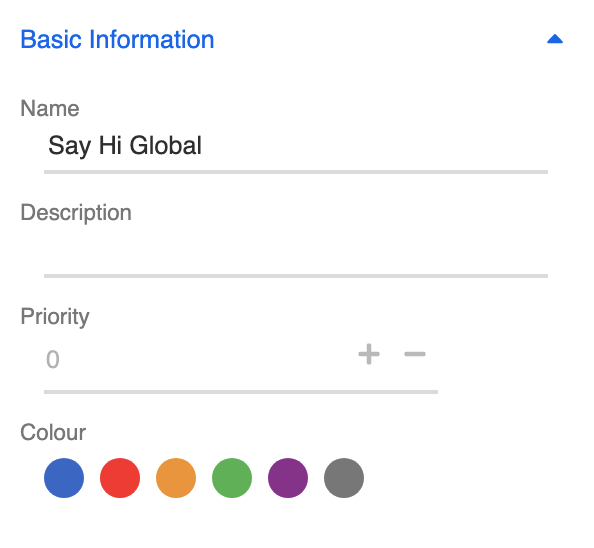
Head to the "Node Inspector" and name your global node.
Usually we would put Global at the end of the global node to identify it from the tree node with the same name. Name the global node "Say Hi Global".
Create a Trigger
- Scroll down to "Trigger" and click "+ New Trigger".
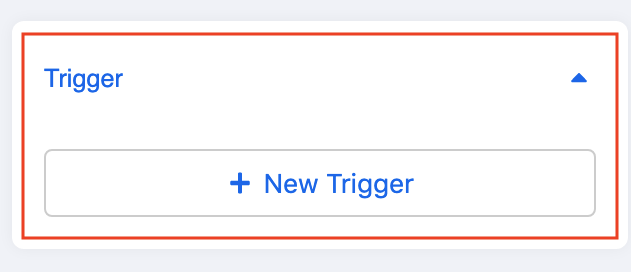
- A new window of Trigger Builder will be opened. Click "+ New Trigger" to create your global trigger.
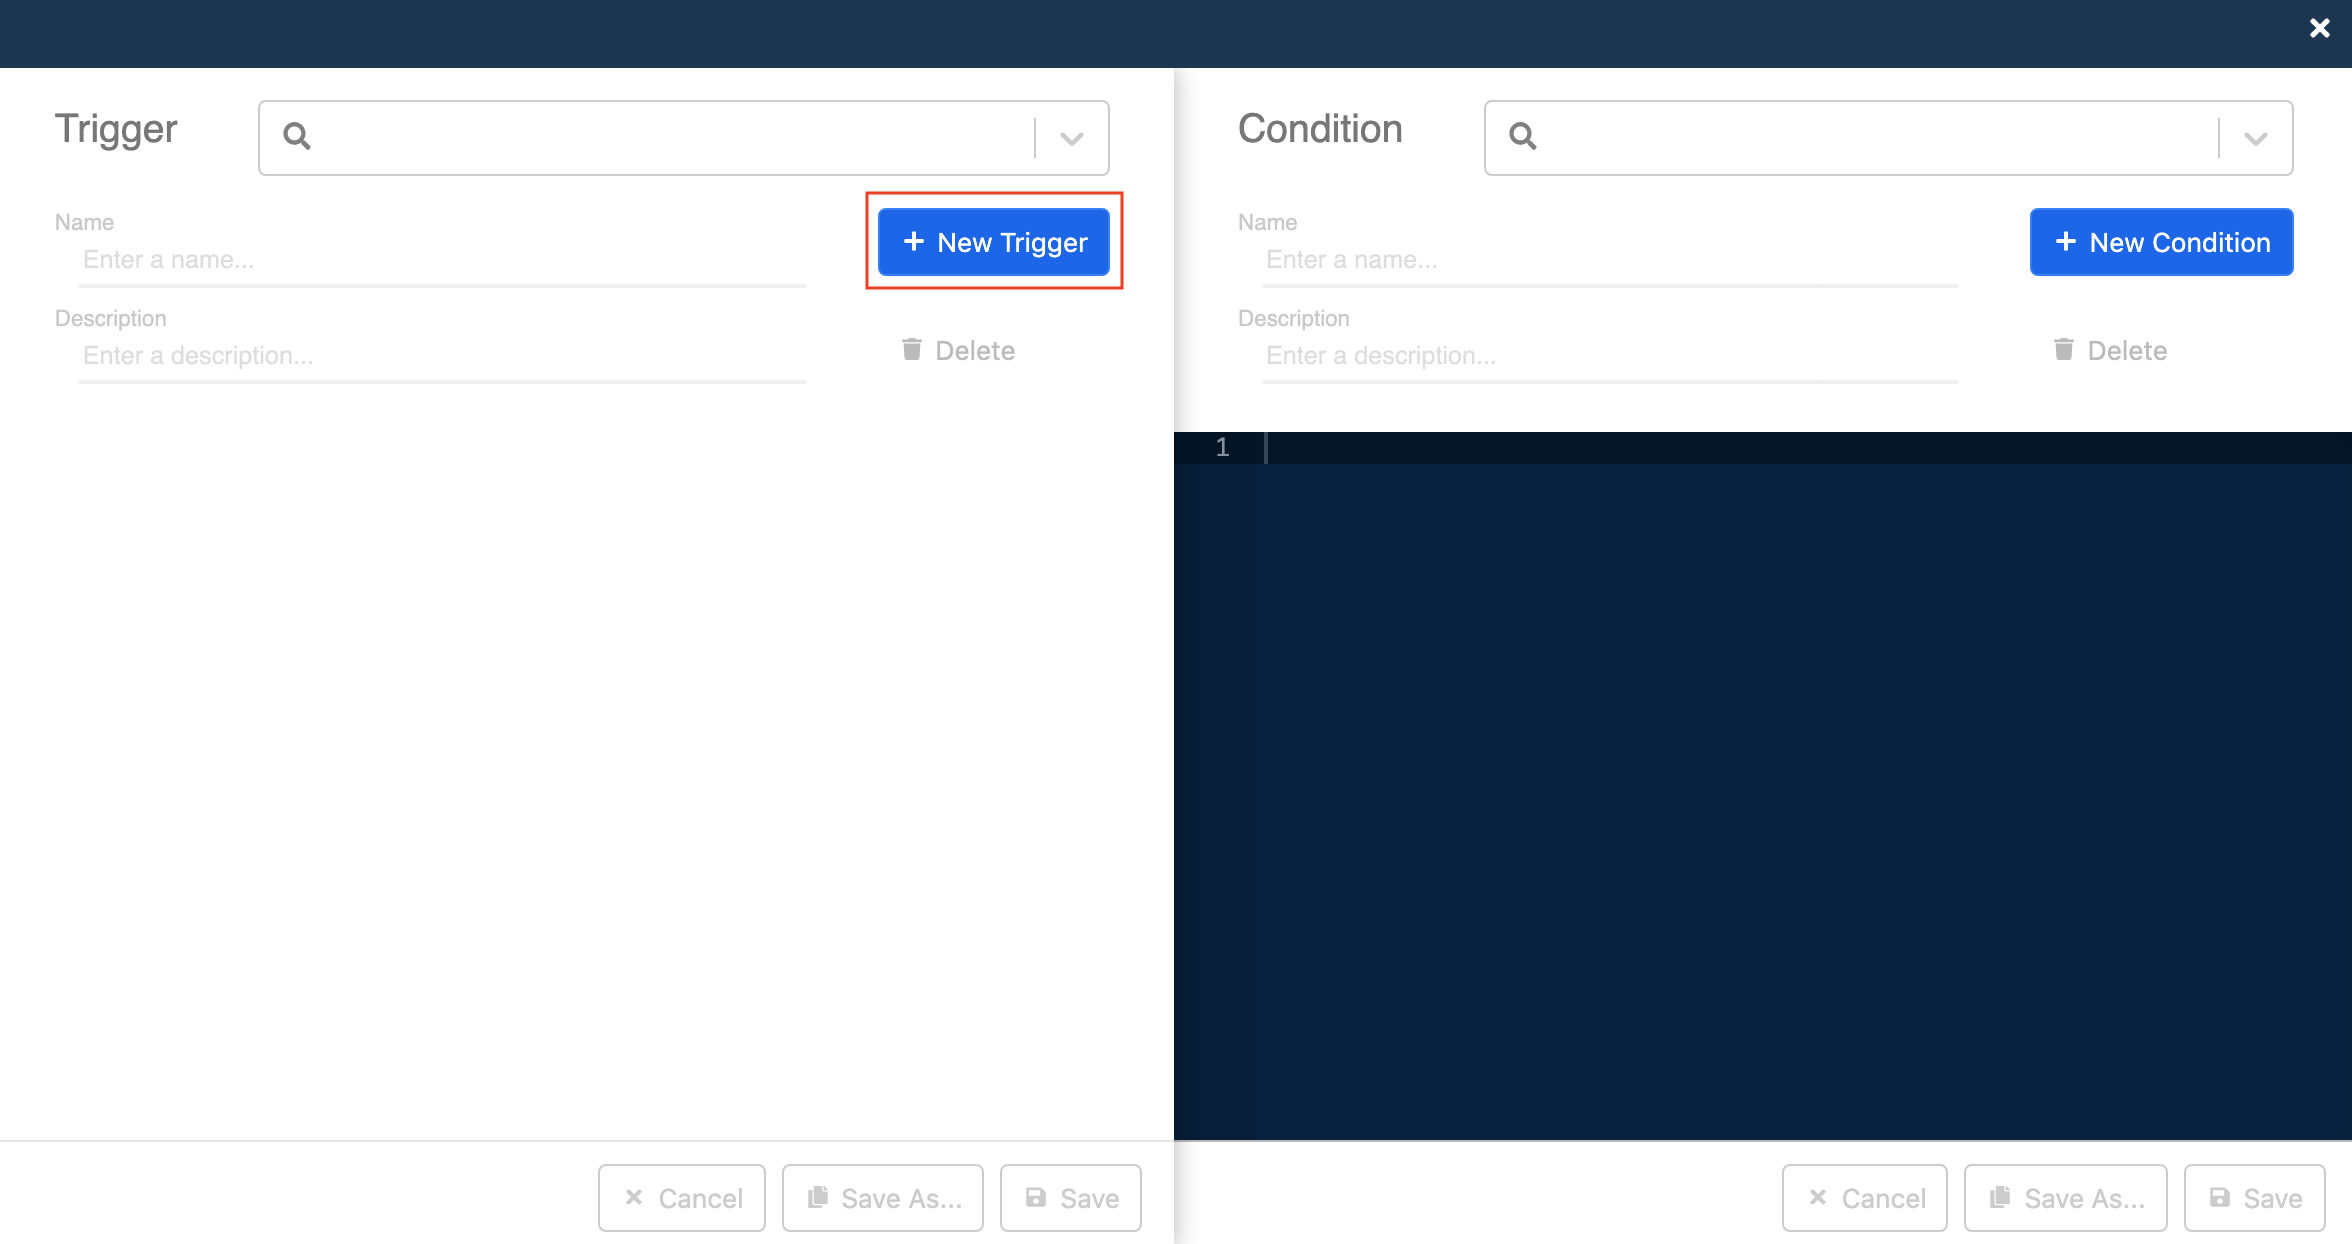
You should now see the Basic mode. Under "Keywords / Payload", you should create a keyword trigger since you want to create a text trigger.
Under Keyword, type all keywords related to greetings, including "Hi; Hey; Hello".
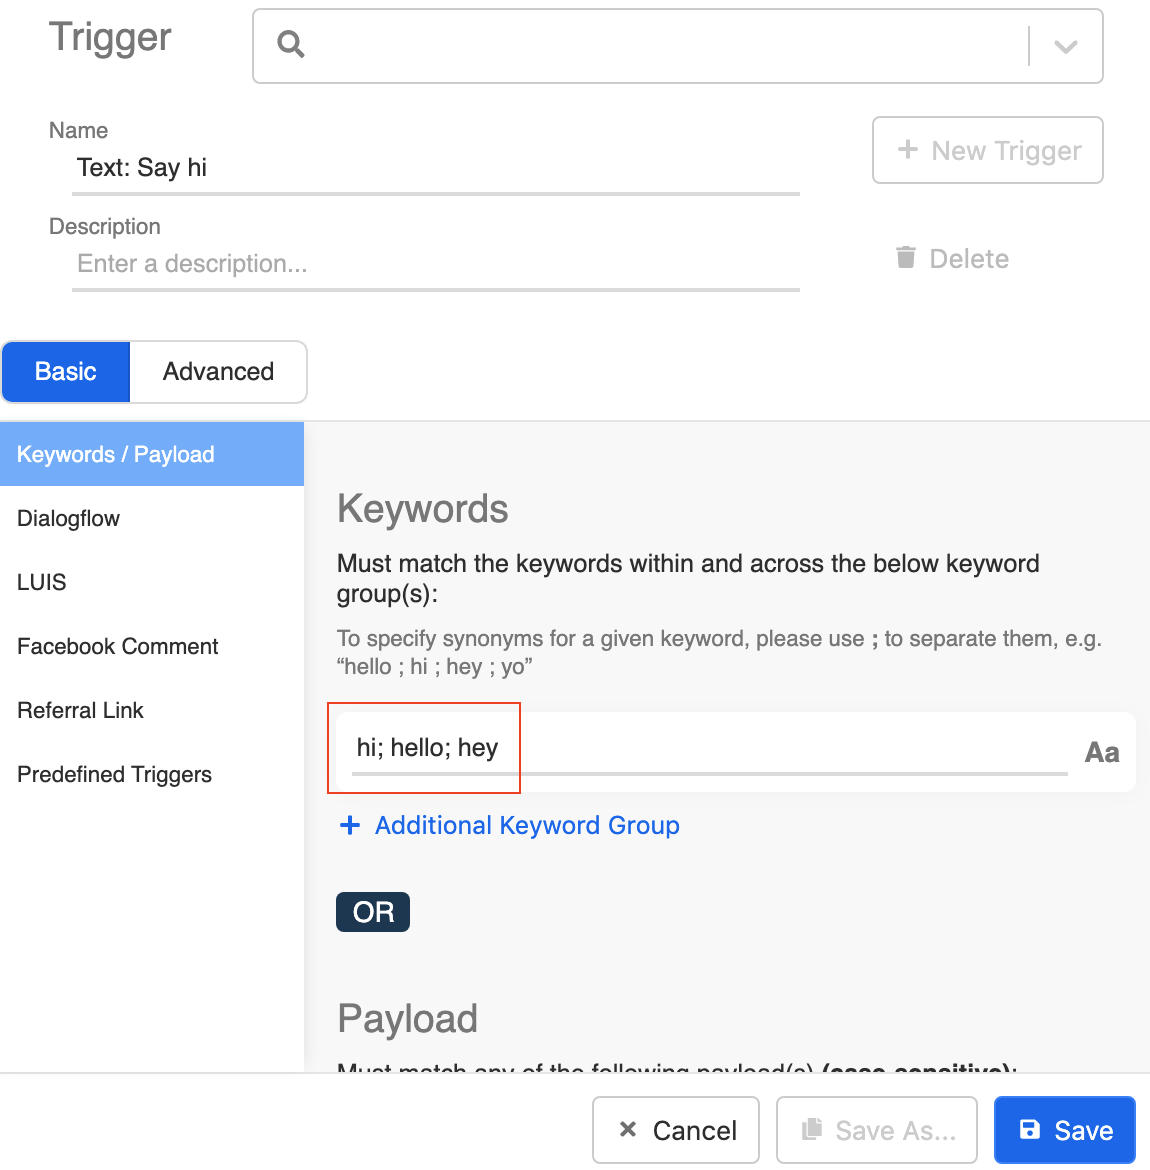
Click "Save".
Close the pop-up. Your trigger should be set up now under Trigger.
Toggle on Redirect
Scroll down to "Redirect" and toggle it on (it will turn green).
Select the tree and node you want to redirect your users to whenever they click on this global node and usually it's the tree and you are editing right now. So for tree, select "Booking Tree (WhatsApp)"; for node, select your first node "Say Hi".
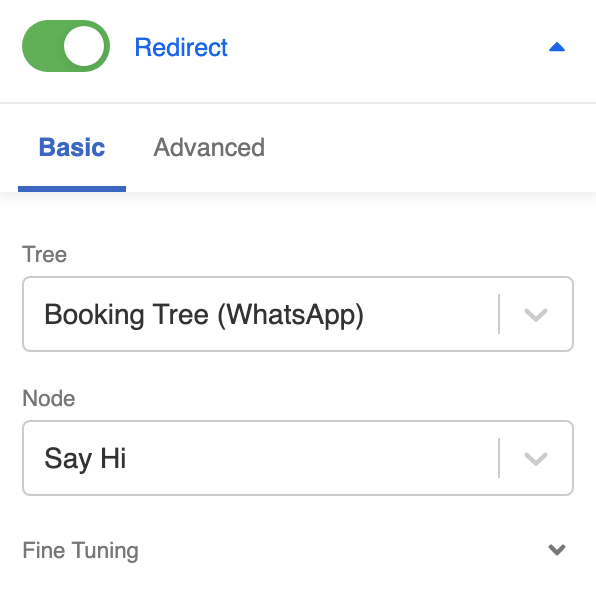
Sometimes we could also redirect users from one tree to another tree. It is applicable when you have multiple trees in your channel.
- Click "Save" at the bottom to save the node.
Add Global Node in Channel
Click "Edit" to enter into the testing channel.

On the left tab, click "Trees".
Under Default, click "+ New Tree" to add your created trees in this channel.
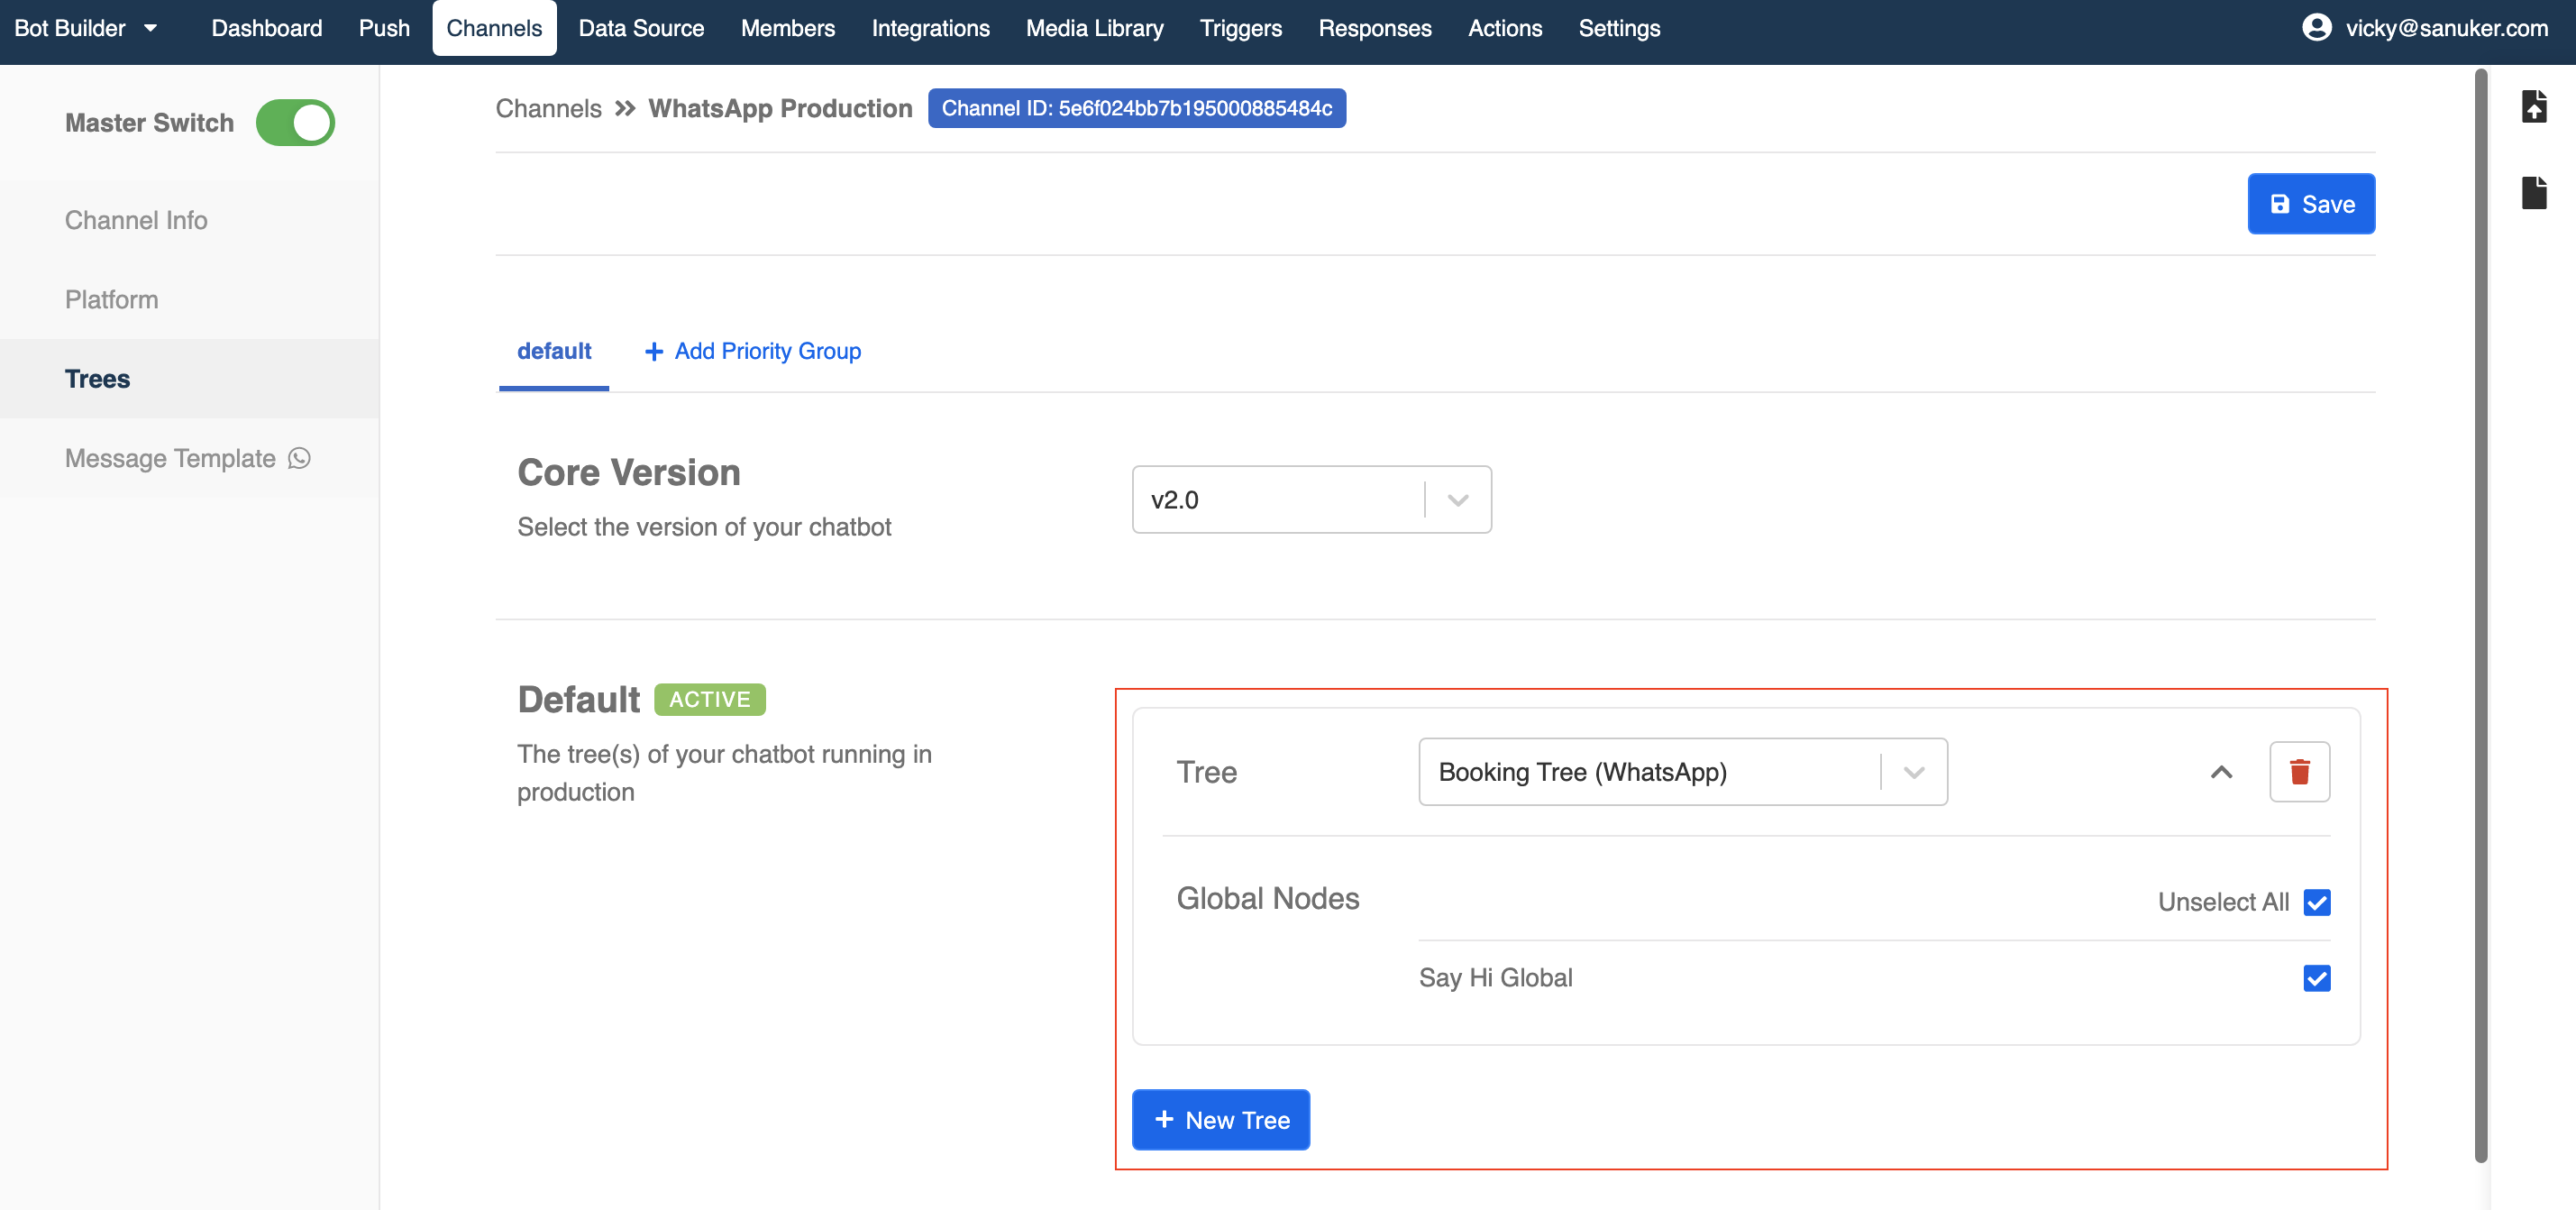
A new dropdown of tree selector will appear. It's time to add back your first tree and global node here. Select Booking Tree (WhatsApp)".
After you have selected the tree, a list of global nodes under this tree will appear. You should tick all global nodes that you want to allow user to activate (especially across trees). So you can just click "Select All".
Click "Save" to save your settings.
You can now check the messages on your testing chatbot. Check if you can get a successful result 🎉