Stella Platform Documentation

Stella Platform Documentation

  • Docs
  • Procedures
  • Reference
  • FAQ
  • Bot API
  • API
  • Languages iconEnglish
    • 中文

›NLP Chatbot Setup

Get Started

  • Build your First Chatbot

Basic Facebook Chatbot Setup

  • Overview
  • 1.1: Connect to Channels
  • 1.2: Create New Tree
  • 1.3: Build the First Node
  • 1.4: Create a Global Node
  • 1.5: Build Child Nodes
  • 2.1: Production Channel
  • 3.1: Draft a Post
  • 3.2: Create Comment Reply

Basic Instagram Chatbot Setup

  • Overview
  • 1.1: Connect to Channels
  • 1.2: Create New Tree
  • 1.3: Build the First Node
  • 1.4: Create Global Node
  • 1.5: Build Child Nodes
  • 2.1: Create Story Mention
  • 2.2: Create Comment Reply
  • 2.3: Send Push Message

Basic Web Chat Chatbot Setup

  • Overview
  • 1.1: Connect to Channels
  • 1.2: Create New Tree
  • 1.3: Build the First Node
  • 1.4: Create a Global Node
  • 1.5: Build Child Nodes

Basic WhatsApp Chatbot Setup

  • Overview
  • 1.1: WABA Subscription
  • 1.2: Connect WABA
  • 1.3: Check Approval Status of WABA
  • 1.4: Setup WABA with Used WhatsApp Number
  • 1.5: Reset / Terminate WABA
  • 2.1: Create New Tree
  • 2.2: Build the First Node
  • 2.3: Create a Global Node
  • 2.4: Build Child Nodes
  • 2.5: Connect to Datasource
  • 3.1: Create Priority Group
  • 4.1: Create Product Message

Common Use Case Application

  • Overview
  • 1.1: Apply Fail-Safe to Chatbot
  • 1.2: Apply Member Unsubscription Flow to Chatbot

Advanced Chatbot Application

  • Overview
  • Apply Datasource to Chatbot
  • Apply Payload Value to Chatbot
  • Apply API to Chatbot
  • Apply Custom Locale to Chatbot
  • Apply Opt-in Flow to Chatbot
  • Apply Agenda to Chatbot
  • Apply Stella API to Chatbot
  • Apply Web Event to Webchat Chatbot

Error Handling

  • Handle Errors for Chatbot

Stella Partner Portal Setup

  • Overview
  • 1.1: Partner Portal Setup
  • 1.2: New Customer Onboarding
  • 1.3: WABA Setup
  • 1.4: Check Approval Status of WABA
  • 1.5: Setup WABA with Used WhatsApp Number
  • 1.6: Reset / Terminate WABA

Template Tree

  • Overview
  • Create Template Tree
  • Manage Proxy Tree

Chatbot Testing & Deployment

  • Overview
  • Stage One - Tree Building
  • Stage Two - Testing Stage
  • Stage Three - Production Deployment

Slack Live Chat Tree Setup

  • Overview
  • 1.1: Create Tree for Live Chat Assignment
  • 2.1: Set Up Pick Ticket Status
  • 2.2: Create Done Command
  • 2.3: Create Transfer Command
  • 2.4: Create Archive Function
  • 2.5: Create Member Tagging/Remarks Command
  • 3.1: Automatic End Live Chat Function

Zendesk Live Chat Tree Setup

  • Overview
  • 1.1: Create Tree for Assignment
  • 2.1: Create Done Command
  • 2.2: Auto End Live Chat Function

FAQ Chatbot Setup

  • Overview
  • 1.1: Exact Keyword Match
  • 1.2: Keyword Groups Match & Diversion
  • 2.1: Redirect to Existing Chatbot Tree
  • 2.2: Data Analytics for FAQ Chatbot
  • 2.3: NLP for FAQ Chatbot
  • 3.1: Filtering Questions for FAQ Chatbot

NLP Chatbot Setup

  • Overview
  • 1.1: Apply NLP to your Chatbot
  • 2.1: Set Up an NLP Fallback Tree
  • 3.1: NLP Fallback to Other Languages

Connect Shopify Store to Stella

  • Overview
  • 1.1: Integrate Stella to Shopify
  • 2.1: Setup Facebook Messenger Chatbot for Shopify
  • 2.2: Setup WhatsApp Chatbot for Shopify
  • 2.3: WhatsApp Customer Care Notification for Shopify

Stella Inbox Setup

  • Overview
  • 1.1: Connect Channel to Slack
  • 1.2: Access Control & Admin Panel
  • 1.3: Set up Customizable Message
  • 1.4: Inbox Channel
  • 2.1: Turn on Live Chat Directly
  • 2.2: End Live Chat Mode
  • 2.3: Ticketing
  • 2.4: Manage Ticket Helper
  • 2.5: Add Member Tag
  • 3.1: Send Chatbot Message

Apply NLP to your Chatbot

In this section, you will be able to apply the NLP (Natural Language Processing) capability to your chatbot flow (Please make sure you have already mastered the procedure for building a basic chatbot of Facebook or WhatsApp).

Before you start the implementation, please check if your NLP engine has been integrated to Stella. Stella currently supports the integration of Google Dialogflow & Microsoft LUIS.

You should also study the NLP training documentation of the corresponding platform before you integrate with the Stella Bot Builder.

What is your result?

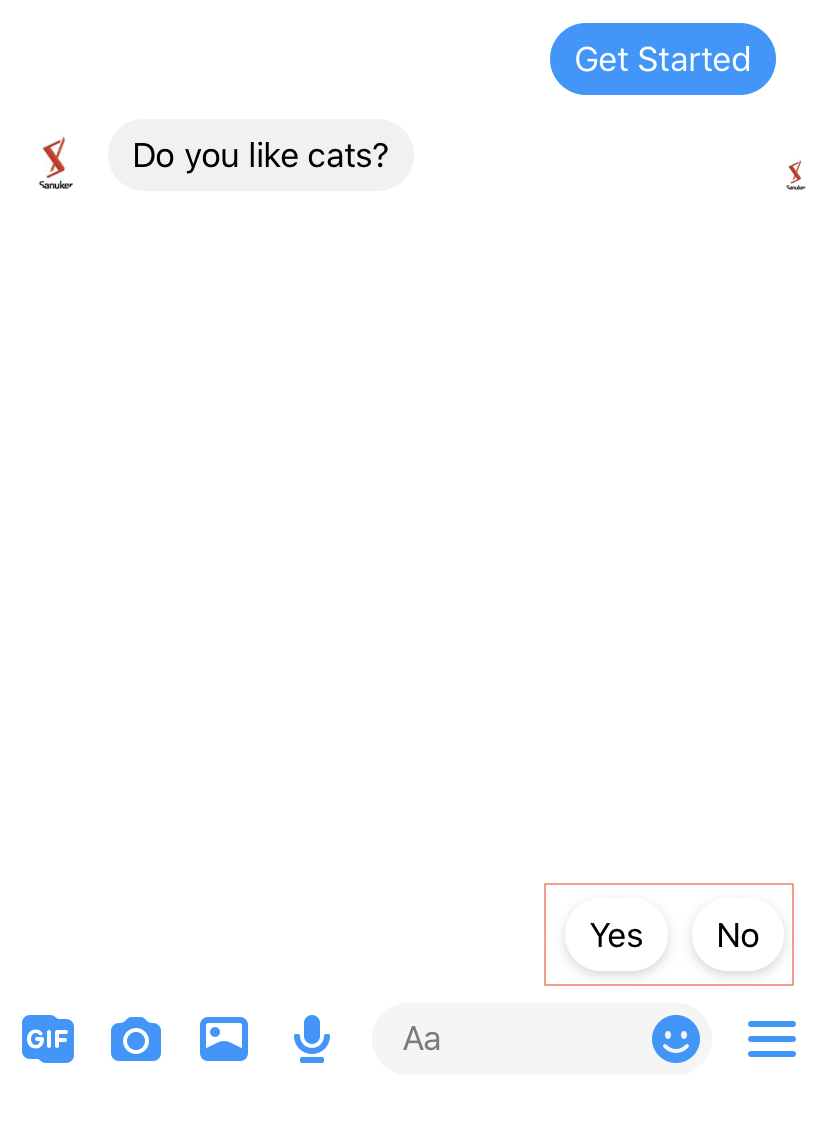
When being presented with a Yes/No question by a chatbot, the most straightforward option is to answer Yes/No (trigger a button payload or a text payload with the keyword "Yes" or "No").

Yes/No Question

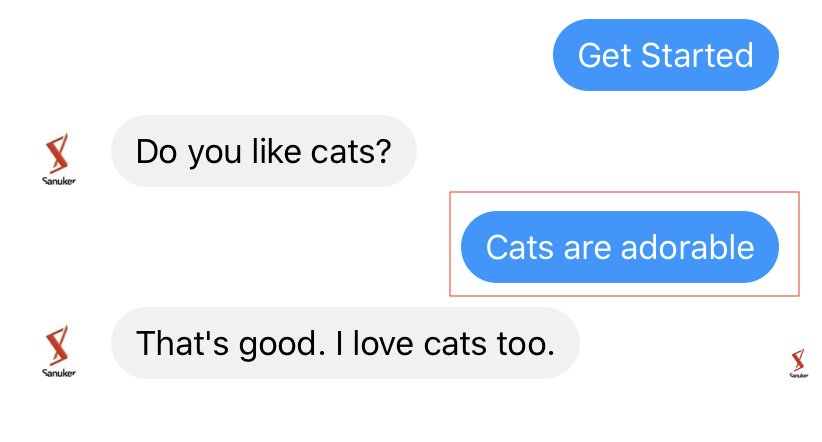
In the case that you have matched your NLP intent with a proper response, user can input anything beyond Yes/No. The trigger with the matching NLP intent will trigger the chatbot to repond appropriately.

NLP Example

Sample Tree Structure

NLP Sample Tree Structure

Getting Hands-on

Create an NLP Integration Node

  1. Head to the part of a tree where you want to add the NLP capability.

  2. Create a tree node and name it as "NLP Integration". This node is for Stella to pass the user input to the NLP engine.

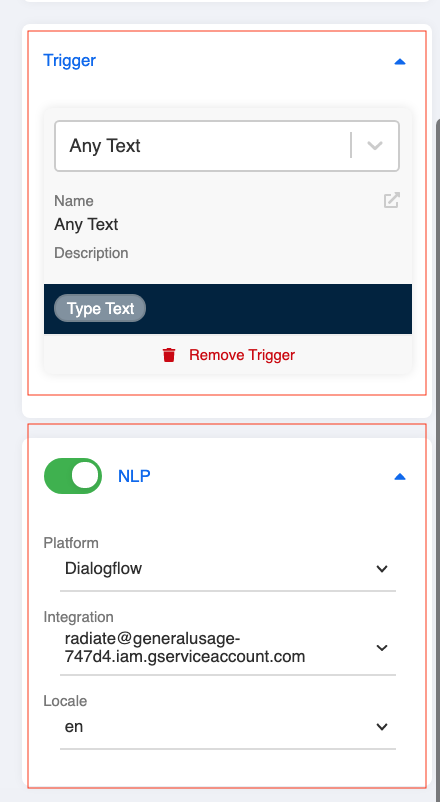
  3. Create a pre-defined Any Text trigger, so that all textual input from the user will be captured.

  1. Toggle on "NLP". Follow the steps below to set up this part:
  • Select Google Dialogflow or LUIS for "Platform".
  • Select the connected Dialogflow agent or LUIS App Name from Integration dropdown.
  • Select a Locale with your trained intent (E.g. en, zh-hk, etc).

You should have these information in the integrations you created for Google Dialogflow or LUIS.

Trigger & NLP Settings
  1. For LUIS v3.0, the options "Get all intents" and "Log and export for training" are available in the NLP settings. Users can either ignore or select one of the two options.
LUIS v3.0 NLP Settings

Create a Tree Node with Intent Trigger

  1. Create a tree node and name it as with the intent name. This node is for Stella to match the intent received from the NLP engine and then give out an appropriate response.

  2. You may create your NLP Trigger according to which engine you are using in the "NLP Integration" tree node.

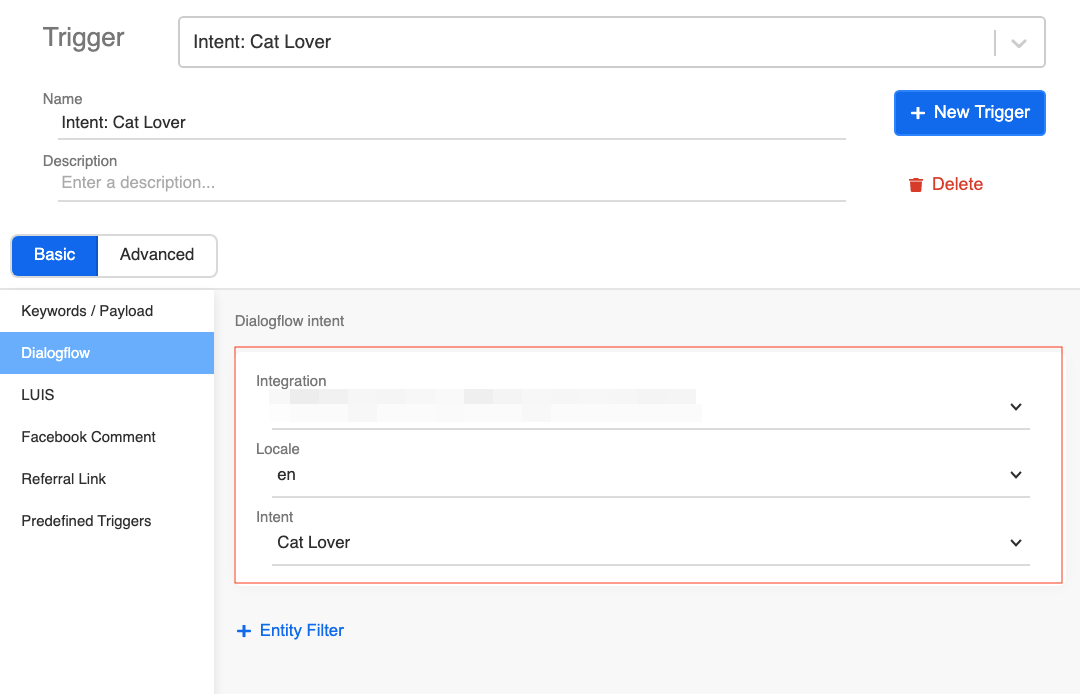
For Google Dialogflow, please create the trigger under Dialogflow in the Basic tab. You can set it up with the following steps:

  • Select the connected Dialogflow agent from Integration dropdown.
  • Select a Locale with your trained intent (E.g. en, zh-hk, etc).
  • Select the specific Intent as trigger (the intent is “Cat Lover” in the below example).
Google Dialogflow Trigger

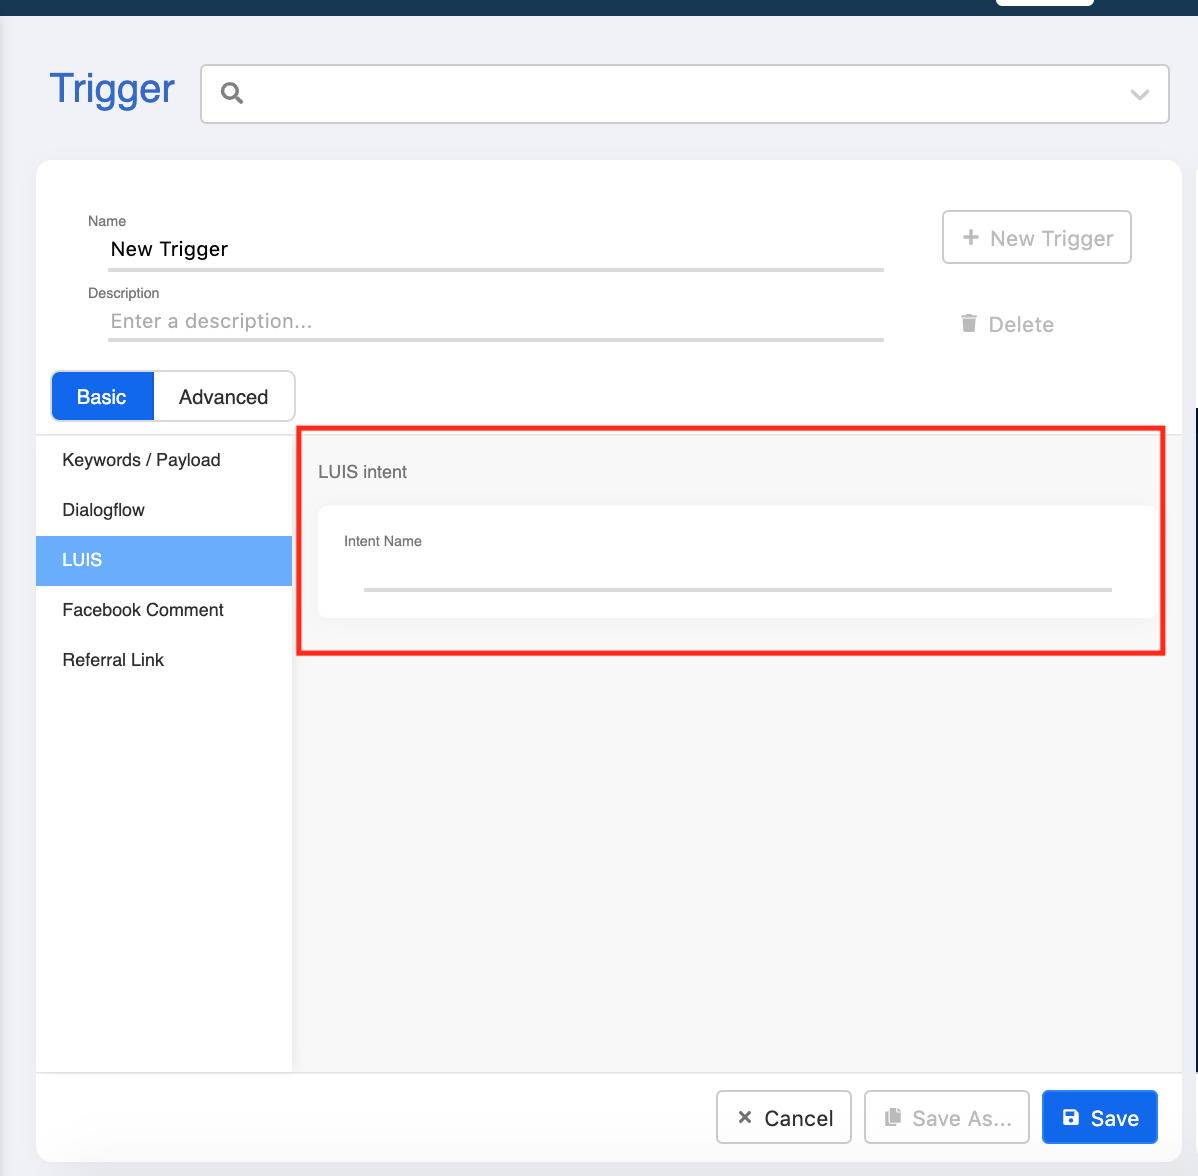
For Luis, please create the trigger under LUIS in the Basic tab. You can set it up with the following steps:

  • Copy and paste the intent name from LUIS console onto the trigger.

Add Trigger & Paste Intent
  1. After the NLP trigger has been setup, you can create an appropriate response or redirect to an appropriate tree node containing the response (i.e. Text Response: Great! I love cats too.).

  2. Check and see if you can produce the expected outcome.

← Overview2.1: Set Up an NLP Fallback Tree →
  • What is your result?
  • Sample Tree Structure
  • Getting Hands-on
    • Create an NLP Integration Node
    • Create a Tree Node with Intent Trigger
Stella Platform Documentation
Docs
Get StartedBot API ReferenceAPI ReferenceStandard Procedures
Community
FAQUser ShowcaseChat with Us
Copyright © 2023 Sanuker Inc. Limited