Apply Custom Locale to Chatbot
You can set up a conversation flow to control the language of your chatbot response. This feature is called custom locale. The following object will be used in the application of custom locale:
Expected Outcome
When user types a keyword to indicate a switch to a specific language (i.e. "English"), the subsequent chatbot response will be changed to that specific locale group (i.e. "en").

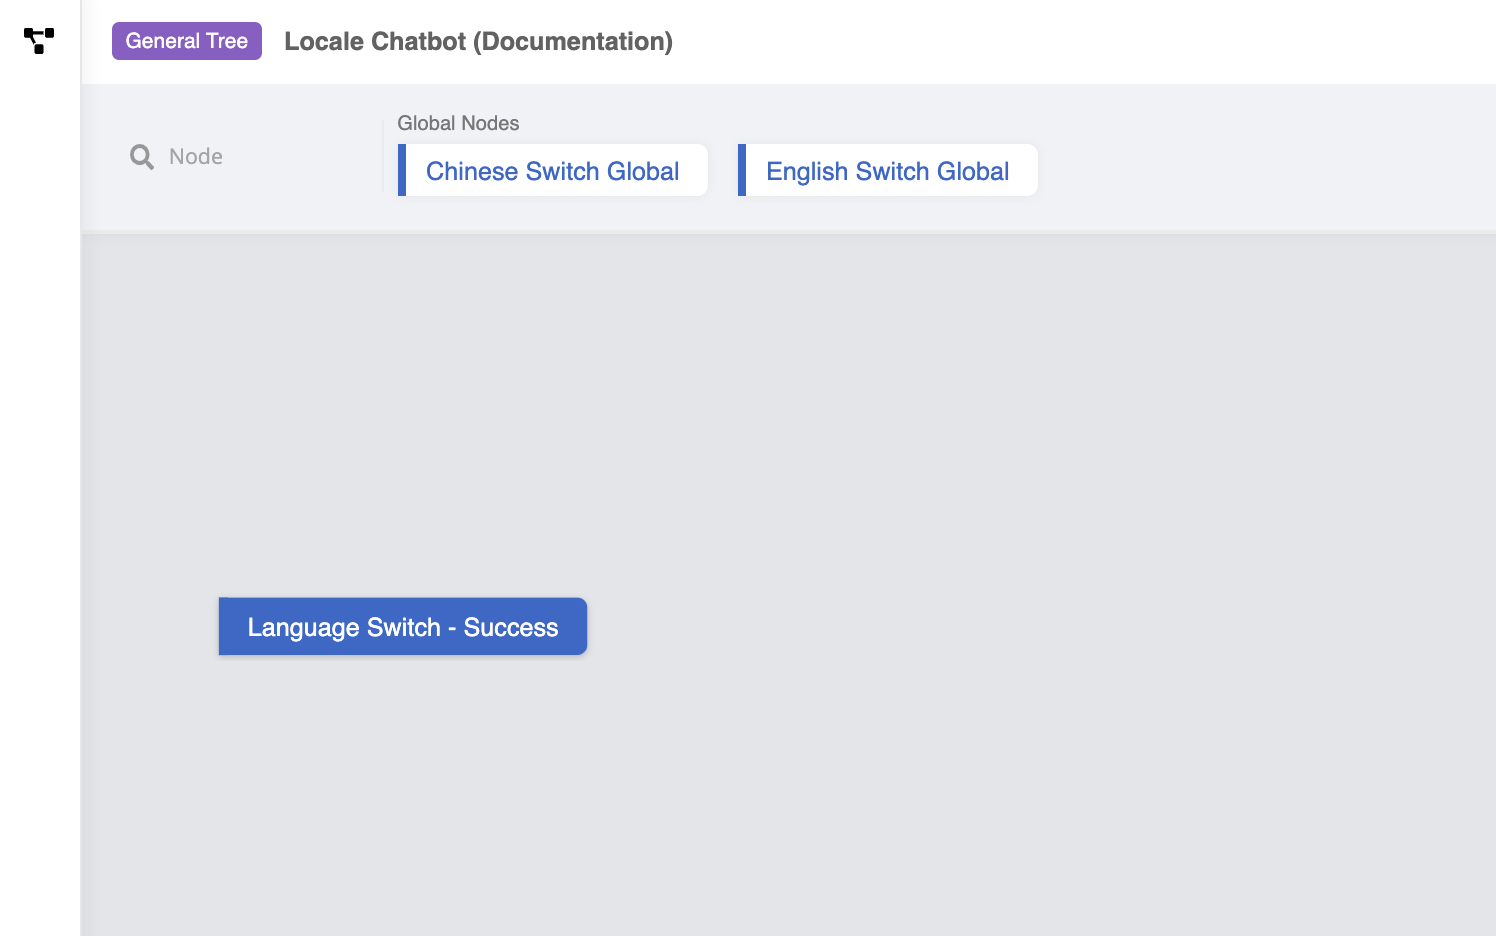
Sample Tree Structure
Getting Hands-on
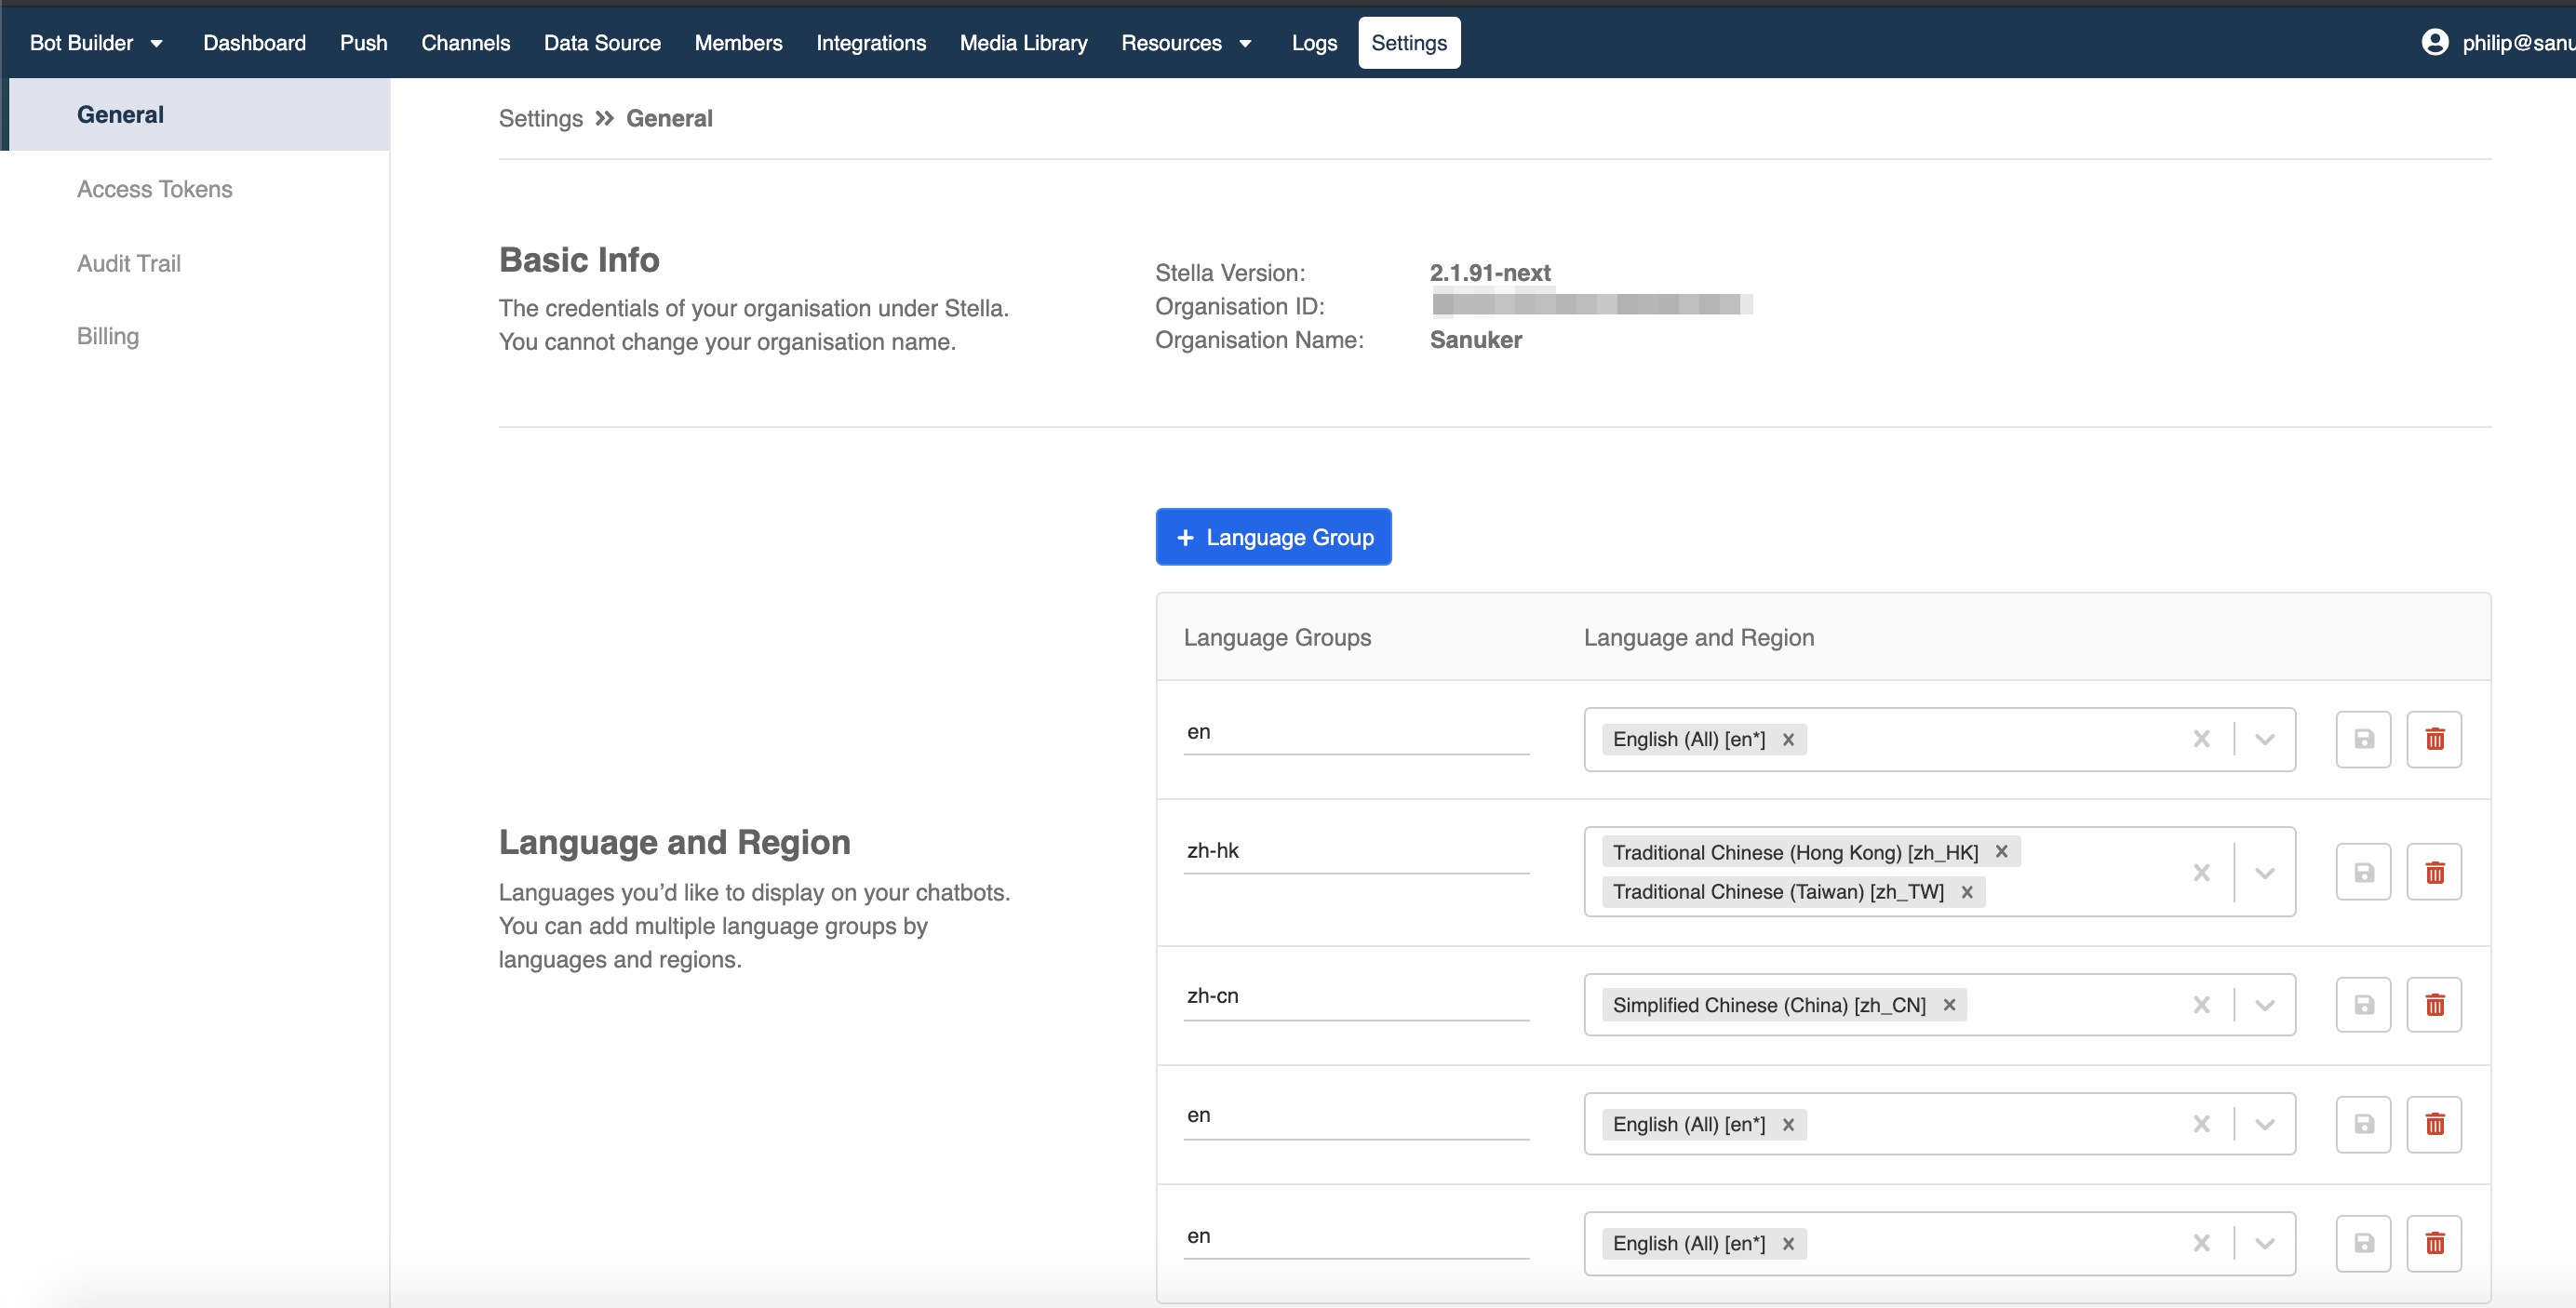
Click here to get access to Settings.
Create a Tree Node - "Language Switch - Success"
- Before creating this Tree Node, you should set up any specific language you want to use in Stella. To do so, please follow this guide. In this standard procedure, you should set up "en" and "zh-HK" locale groups.
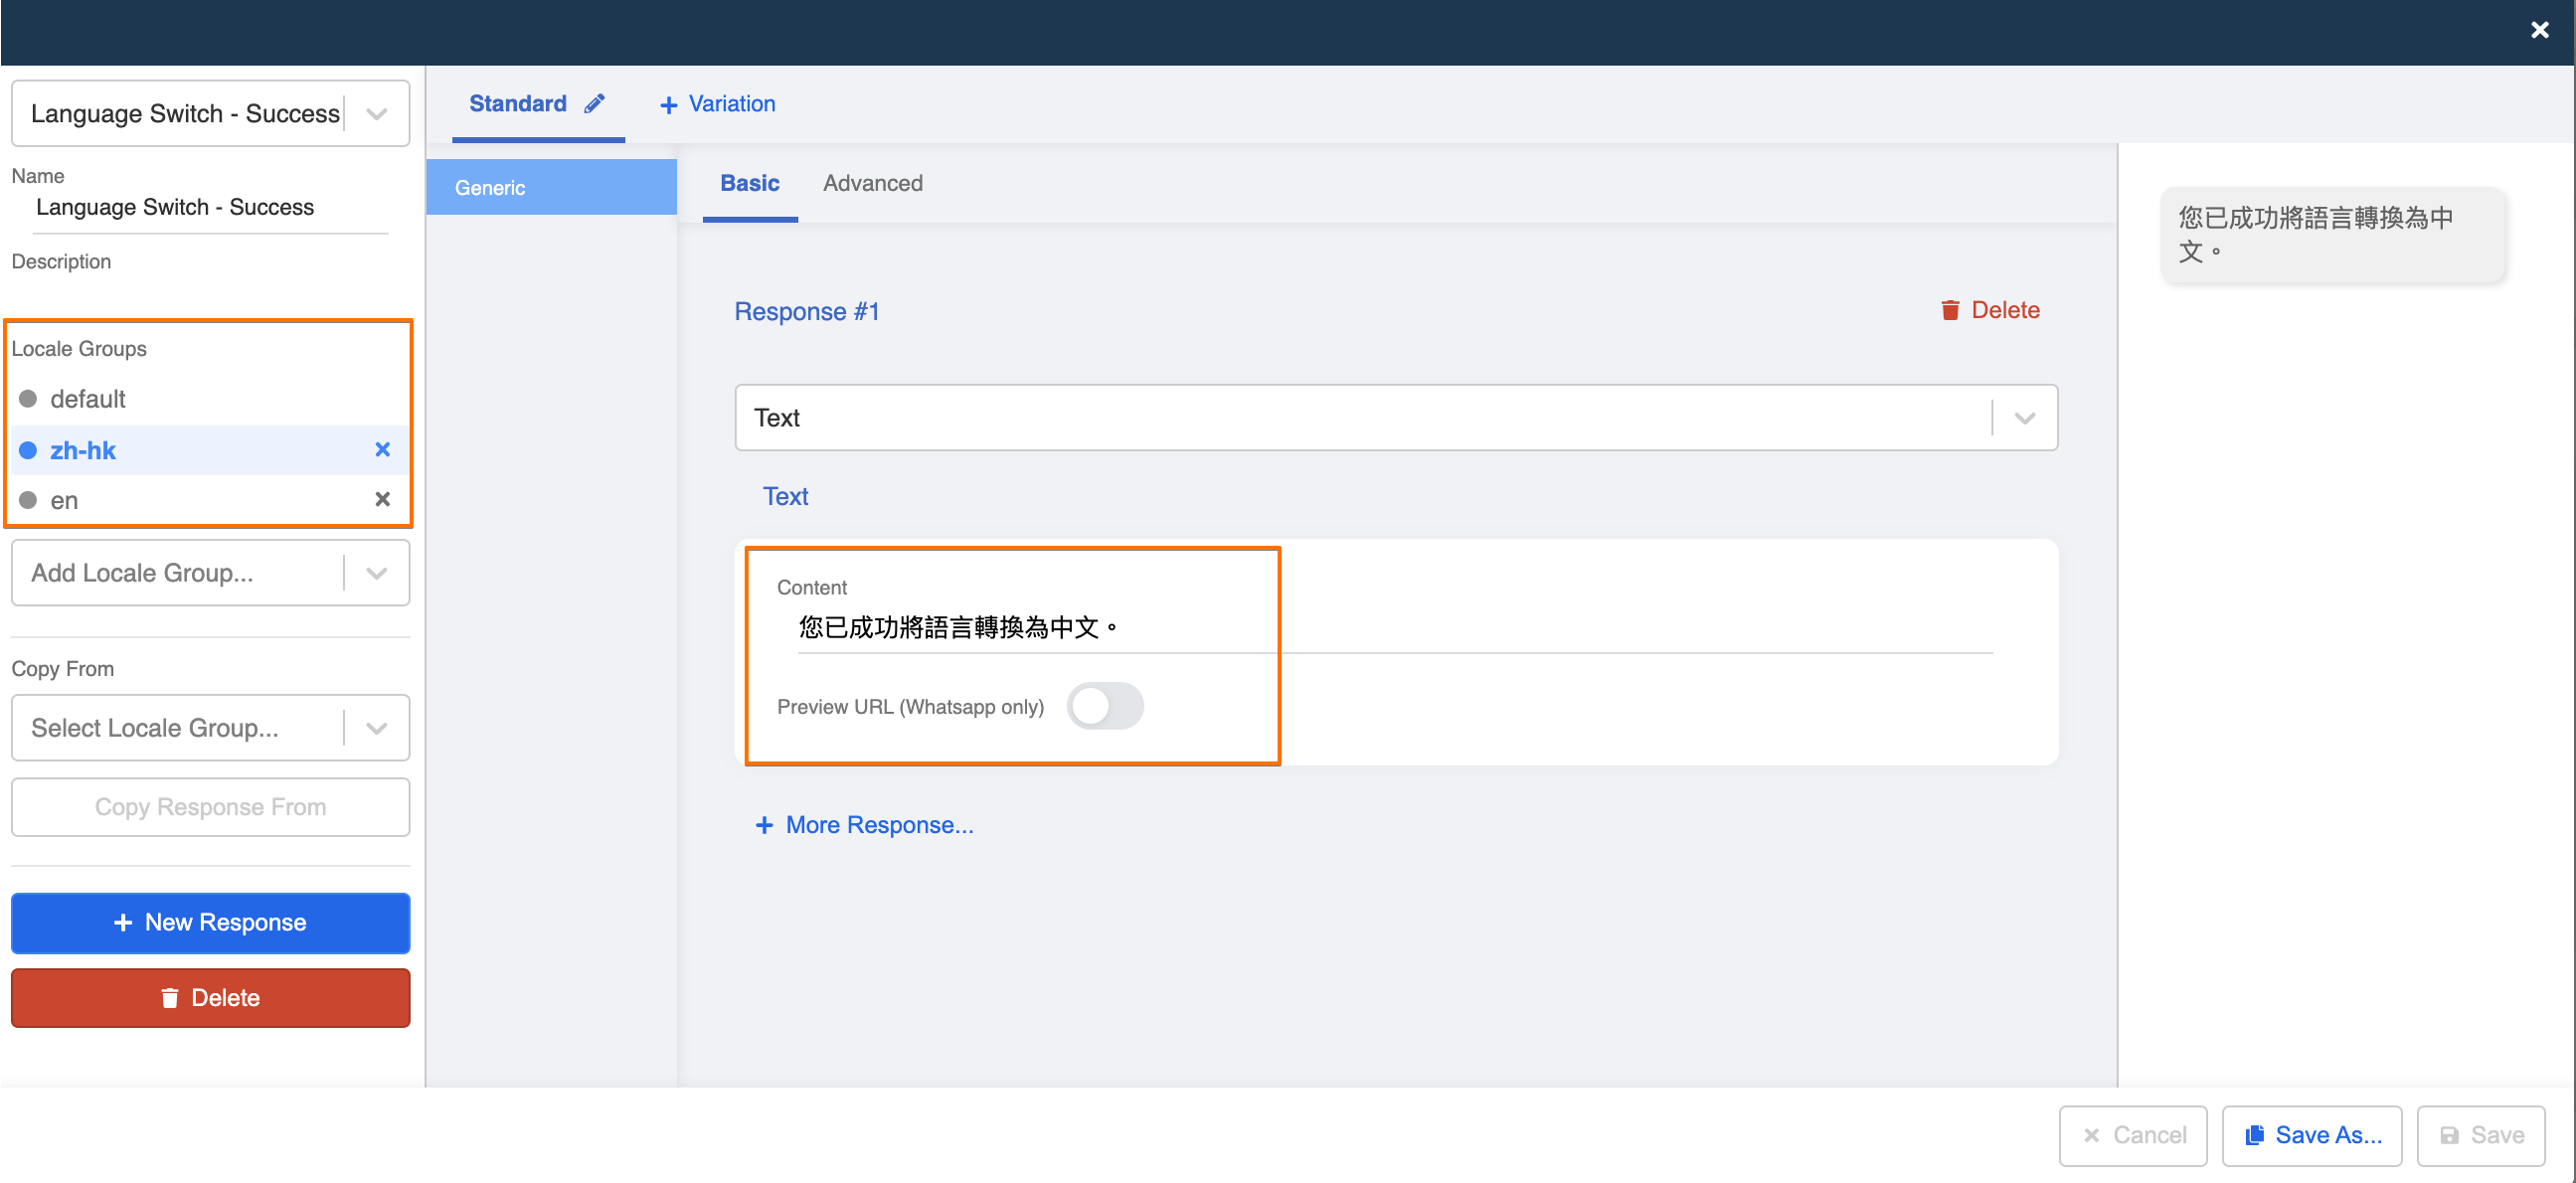
Go to any tree and create a Tree Node. Then, rename is as "Language Switch - Success". This Tree Node is for informing user that the chatbot language has been switched successfully.
Create 1 text response with 3 different locale variations - "Default", "en" and "zh-HK". Rename the response as ""Language Switch - Success". Default is the fallback language in case the system fails to recognize a language. We will assume the default as the same English. Below is some sample text for your use:
- "en": You have successfully converted to English.
- "zh-HK": 您已成功將語言轉換為中文。
- Save this response and Tree Node.
Create a Global Node - "Chinese Switch Global"
Create a Global Node and rename is as "Chinese Switch Global". This node is to trigger the custom locale action for switching the chatbot language to the "zh-HK" locale.
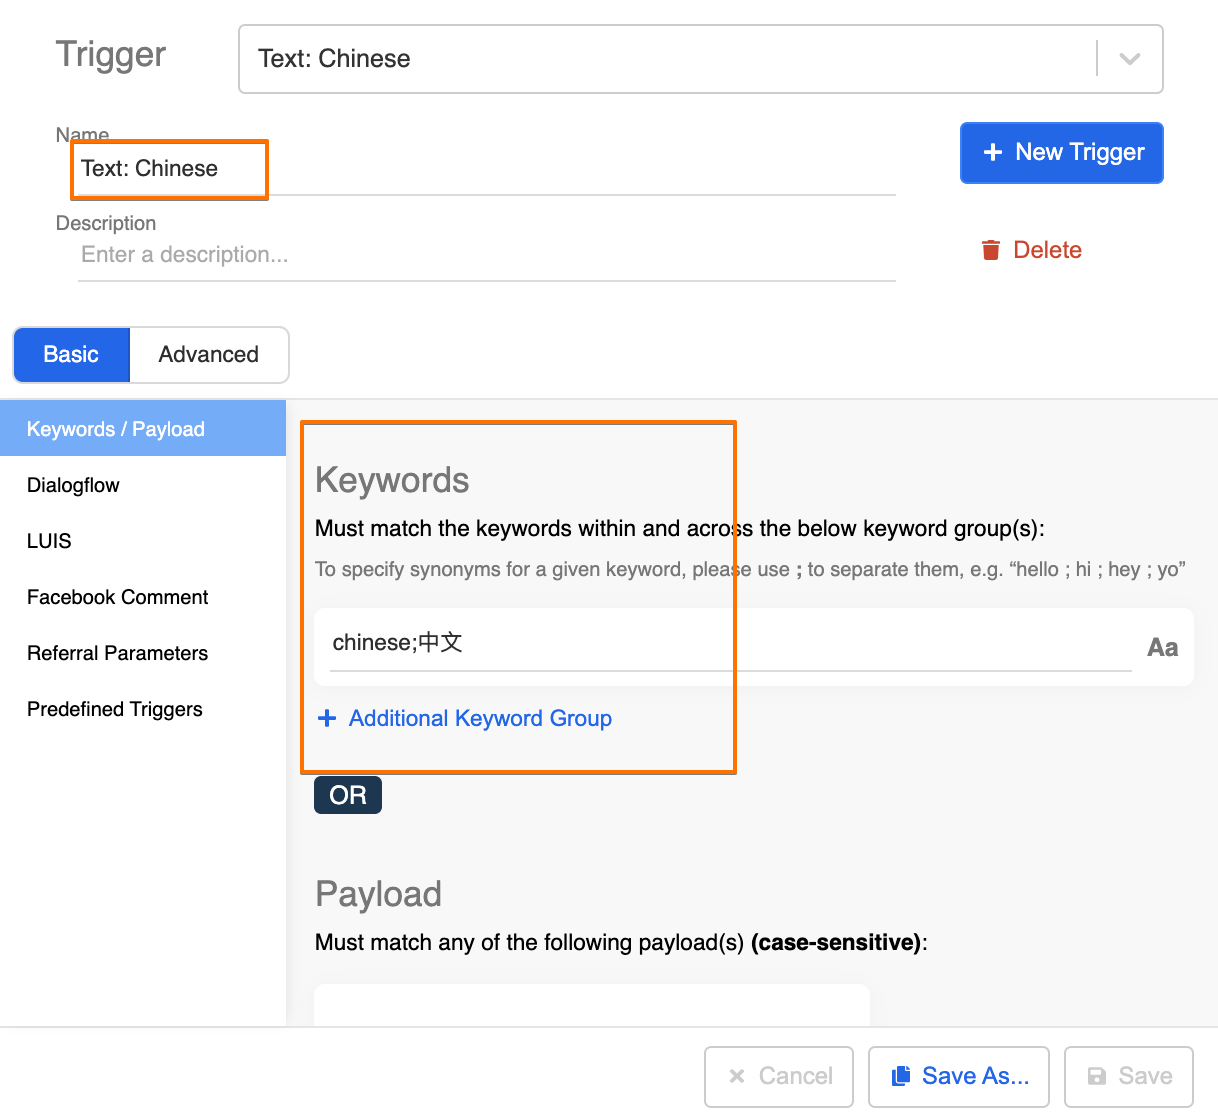
Create a Trigger with a specific keyword. You can use "Chinese" or "中文".
- Create an Action with the following code:
return new Promise((resolve) => {
  this.member.customLocale = "zh_HK"
  resolve({ member: this.member })
})
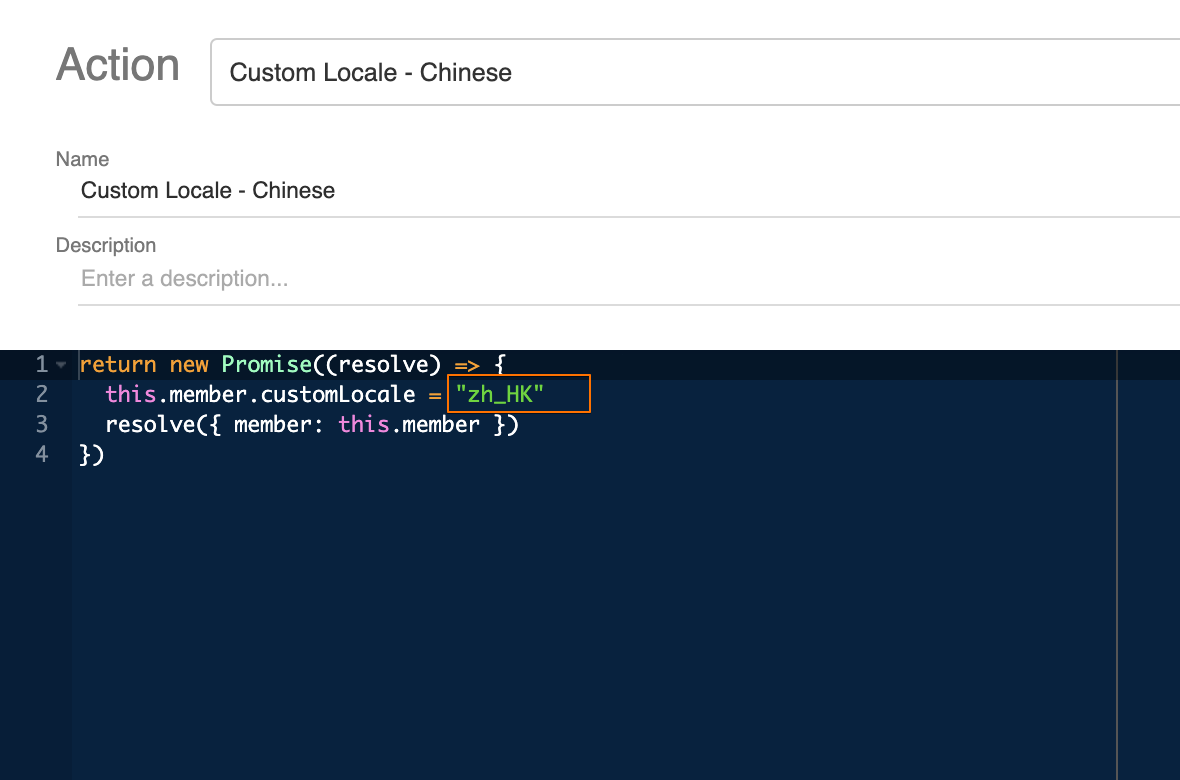
If you wish to change to another locale, you may change the array behind this.member.customLocale in the code. You may check for the Supported Locale.
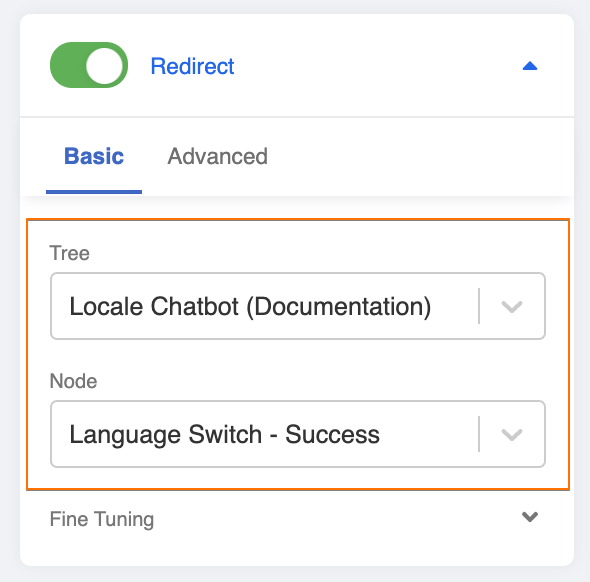
- Toggle on the redirect to the Tree Node - "Language Switch - Success".
Create a Global Node - "English Switch Global"
Create a Global Node and rename is as "English Switch Global". This node is to trigger the custom locale action for switching the chatbot language to the "zh-HK" locale.
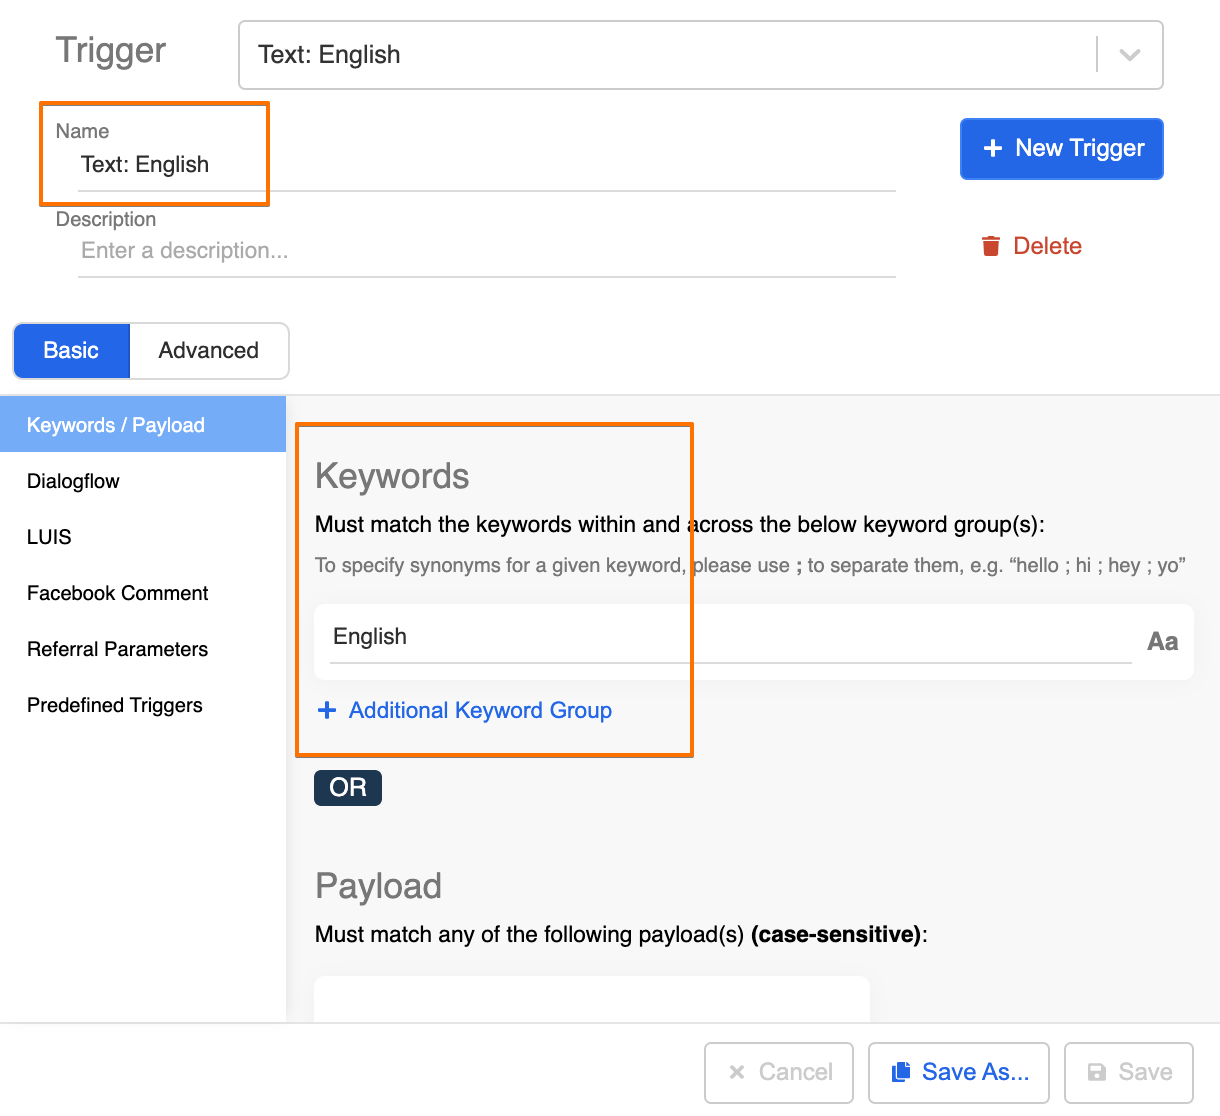
Create a Trigger with a specific keyword. You can use "English".
- Create an Action with the following code:
return new Promise((resolve) => {
  this.member.customLocale = "en"
  resolve({ member: this.member })
})
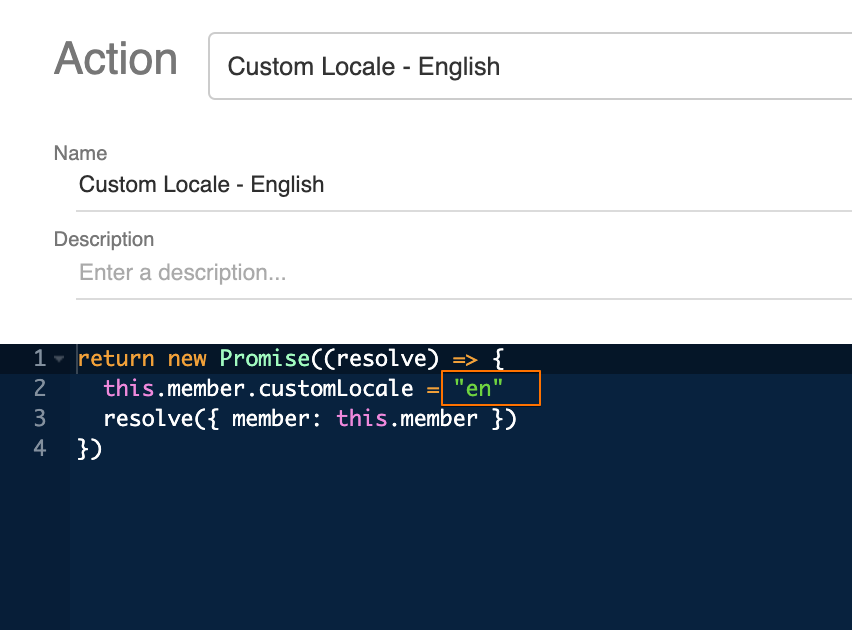
If you wish to change to another locale, you may change the array behind this.member.customLocale in the code.
- Toggle on the redirect to the Tree Node - "Language Switch - Success".
- Check and see if you can reproduce the expected outcome.