WABA Setup (Old Automation)
The WABA Automation can be used in next.stella.sanuker.com , while the Embedded Sign up Flow can be used in build.stellabot.com.
Please note that the old onboarding flow will be deprecated by the end of 2021. Embedded sign up will be the recommended onboarding flow.
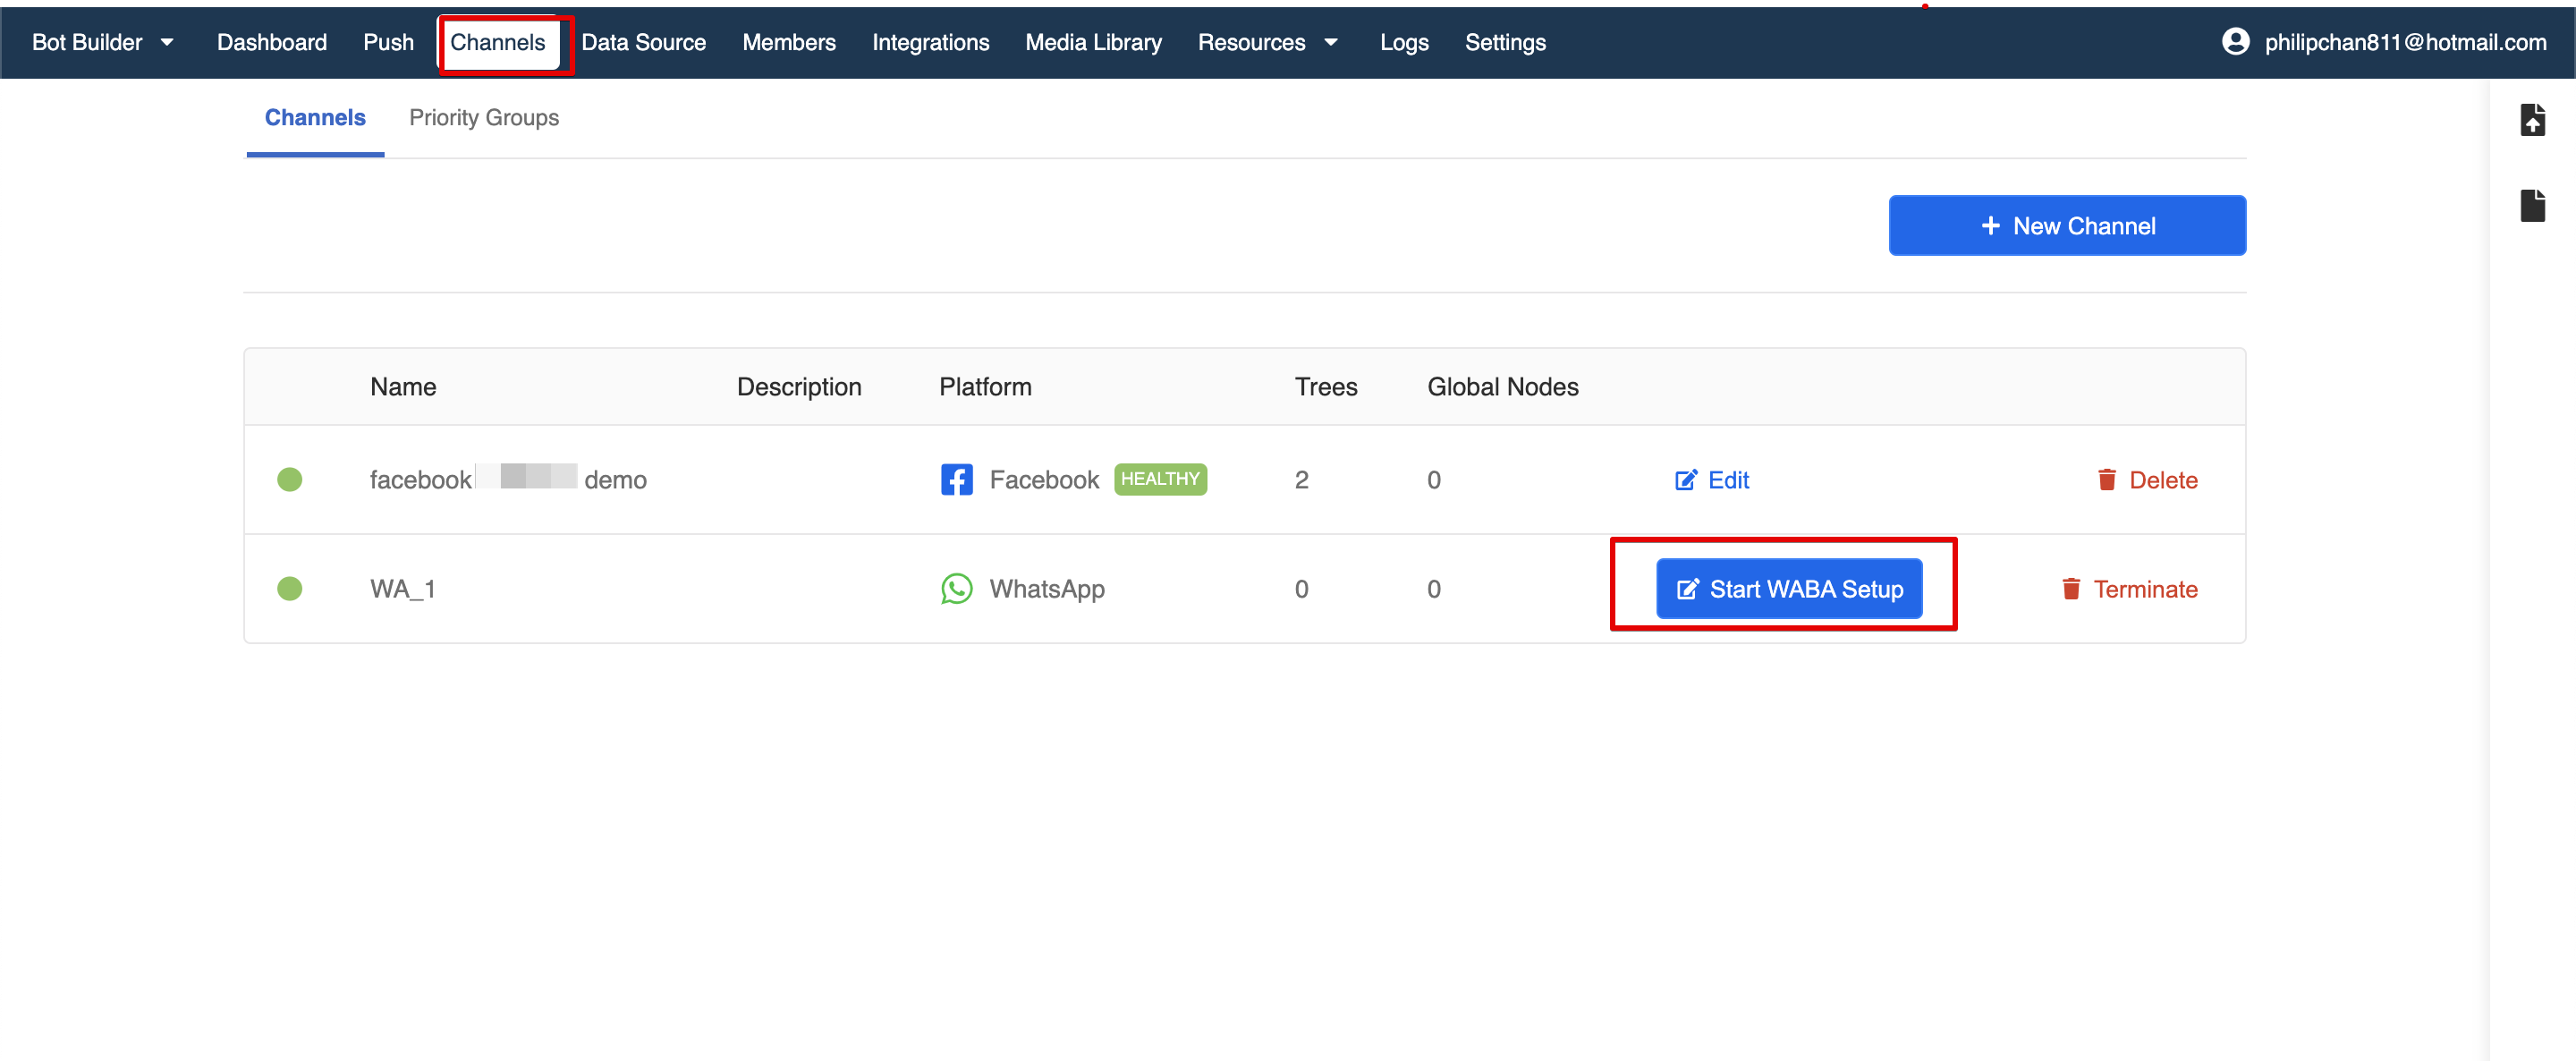
Once you have subscribed to our reserved plan or a WhatsApp channel, you can now connect your WABA on our Stella Chatbot Builder to make sure you can perform the development in the latter steps. You could do the connection in Channels.
What is your Result?

Connected to WhatsApp (Sanuker demo screenshot)
| Property | Description |
|---|---|
Successful Result | You should be able to see get a green checking in health check status for your WABA. |
Getting Hands-on
Here are the procedures to complete your WhatsApp Business API channel:
WABA Automation
- After you have subscribed a WhatsApp channel on Stella, a WhatsApp channel will be automatically created in your Stella app. Please head to "Channels" and proceed by clicking "Start WABA Setup".
WhatsApp Business API Channel
- If you are registering a new WABA, please fill in the verified Facebook Business Manager ID, legal name of your business, WhatsApp number and preferred WhatsApp display name. If you are adding a new phone number to their existing WABA , please select your "WABA", then fill in WhatsApp number and preferred WhatsApp display name only.
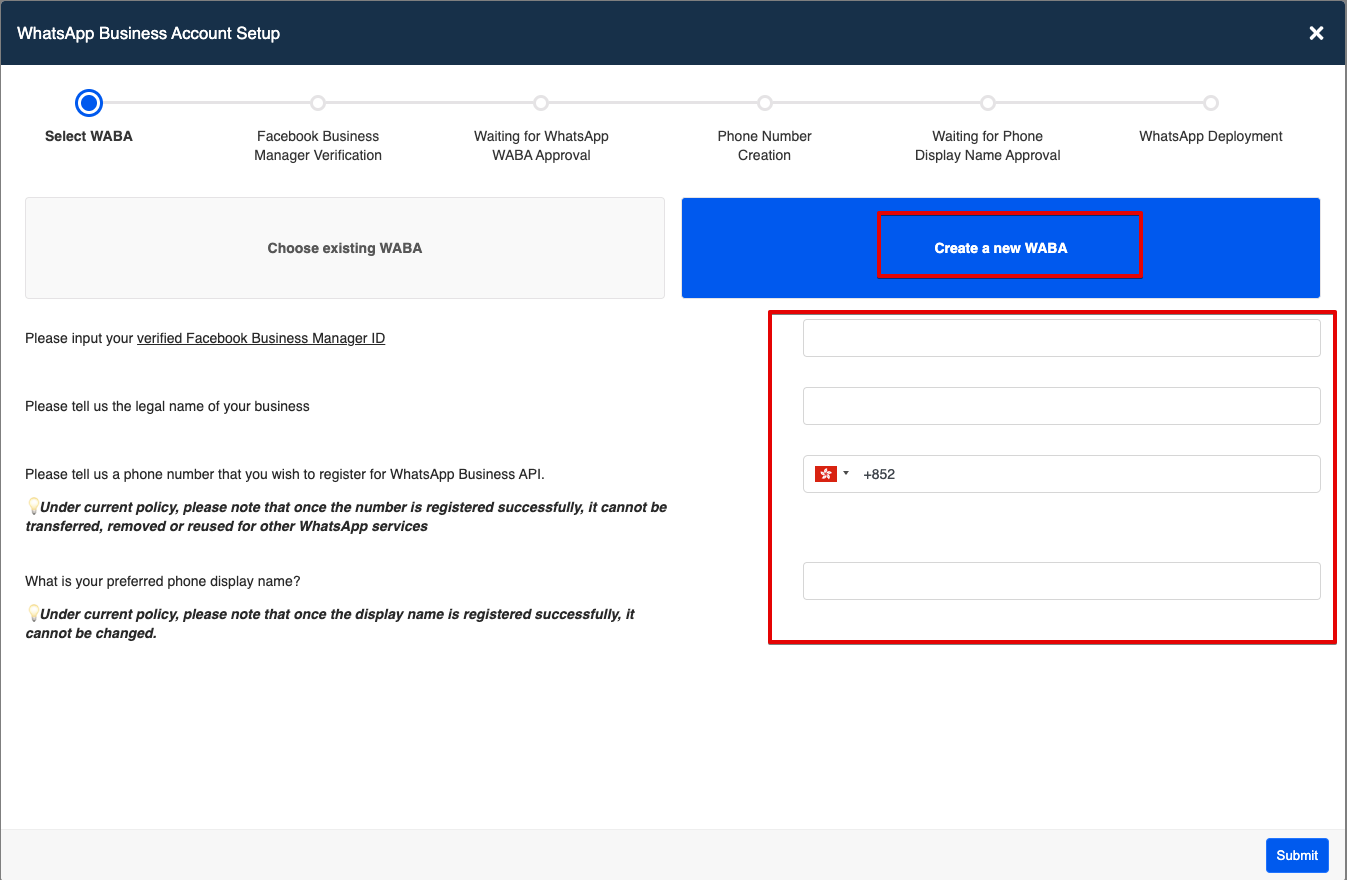
New WABA Submission
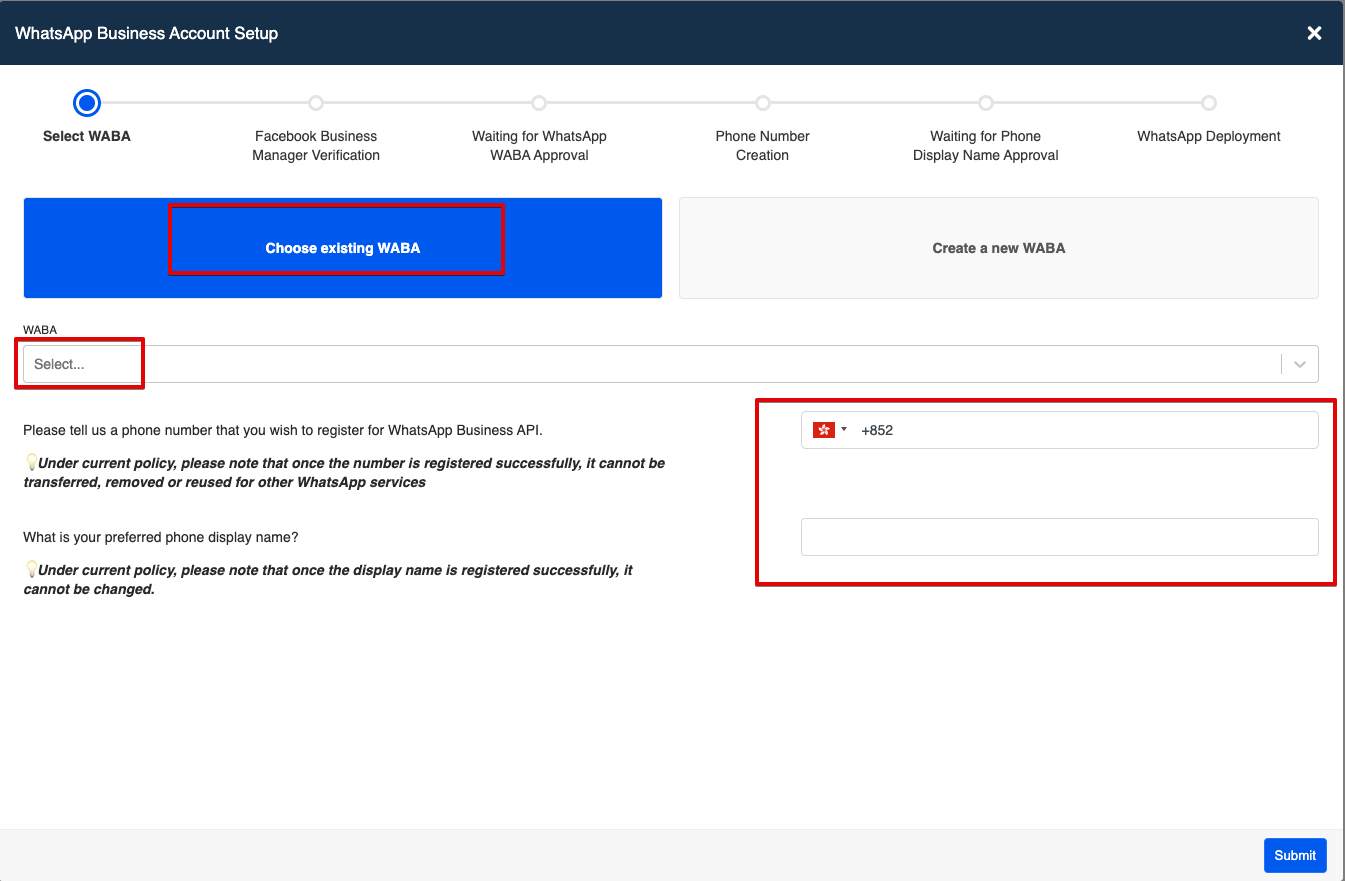
New Phone Number Submission
- Once you have submitted, you will need to access your "Facebook Business Manager" and accept a request for allowing "Sanuker Inc. Limited" to manage your WABA account. This stage is called "Facebook Business Manager Verification" on your WABA channel setup. The request will be processed in around 1 working day.
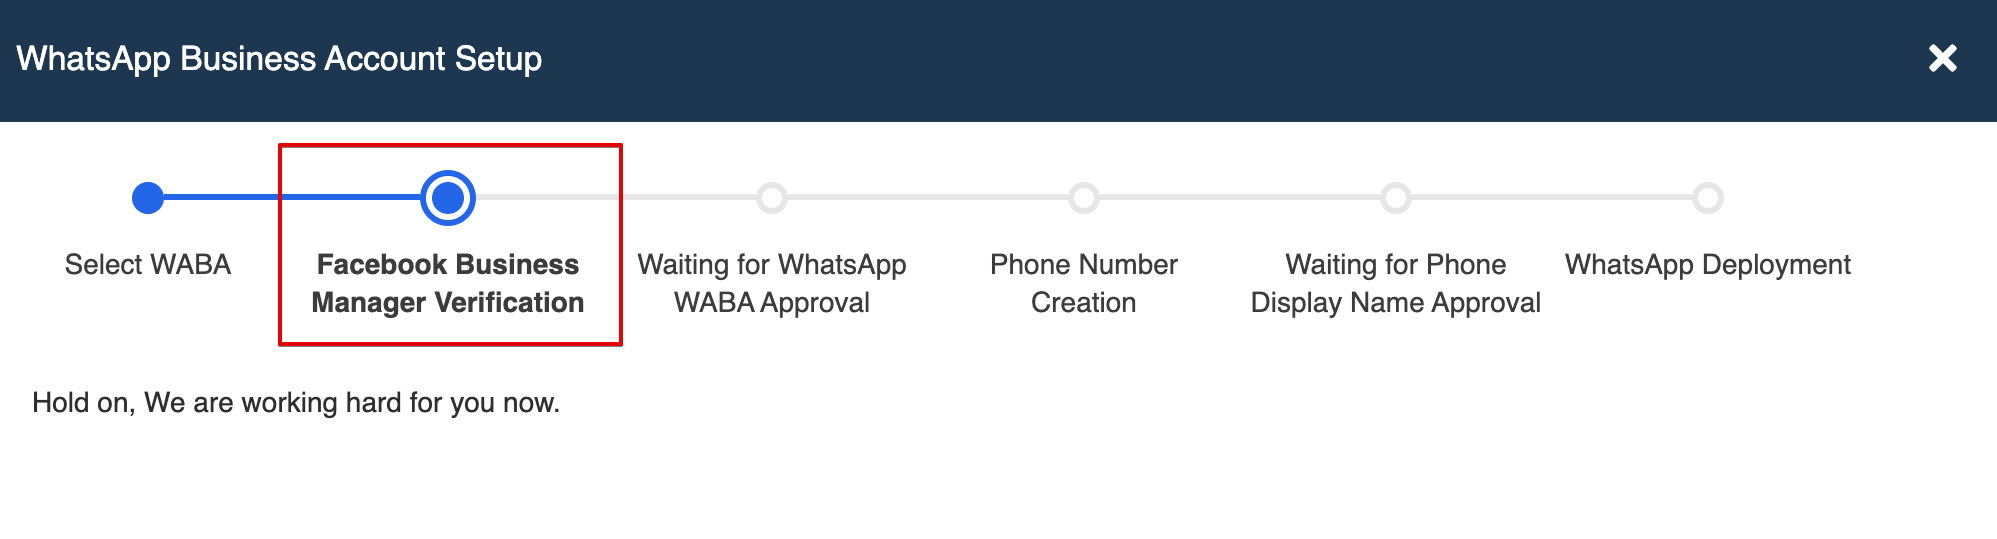
Awaiting for Request Acceptance by Client
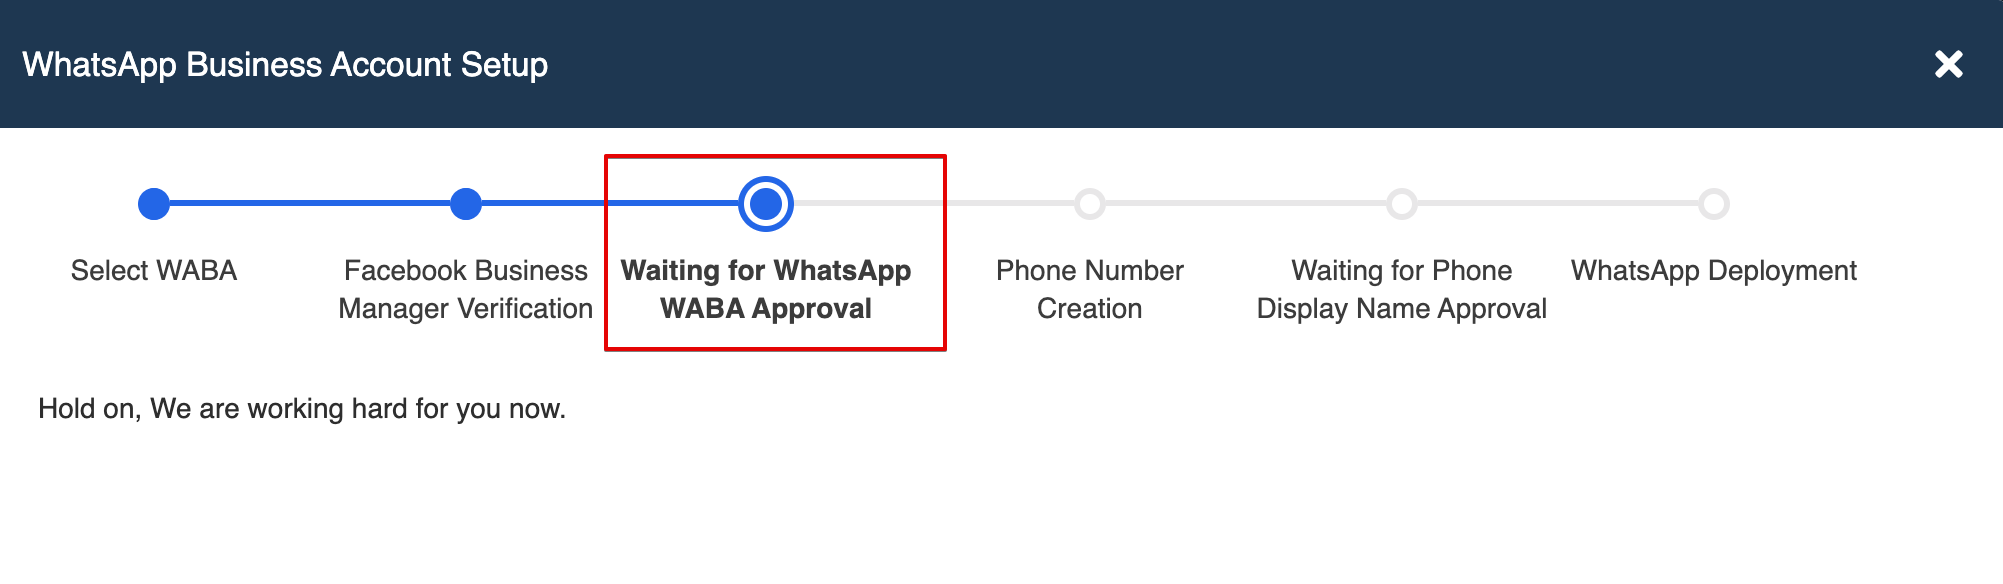
- Once the request is processed, you can check the progress on your WABA channel setup and it should show "Waiting for WhatsApp WABA Approval". This will take around 3 to 7 working days for Facebook's approval.
Waiting for WhatsApp WABA Approval
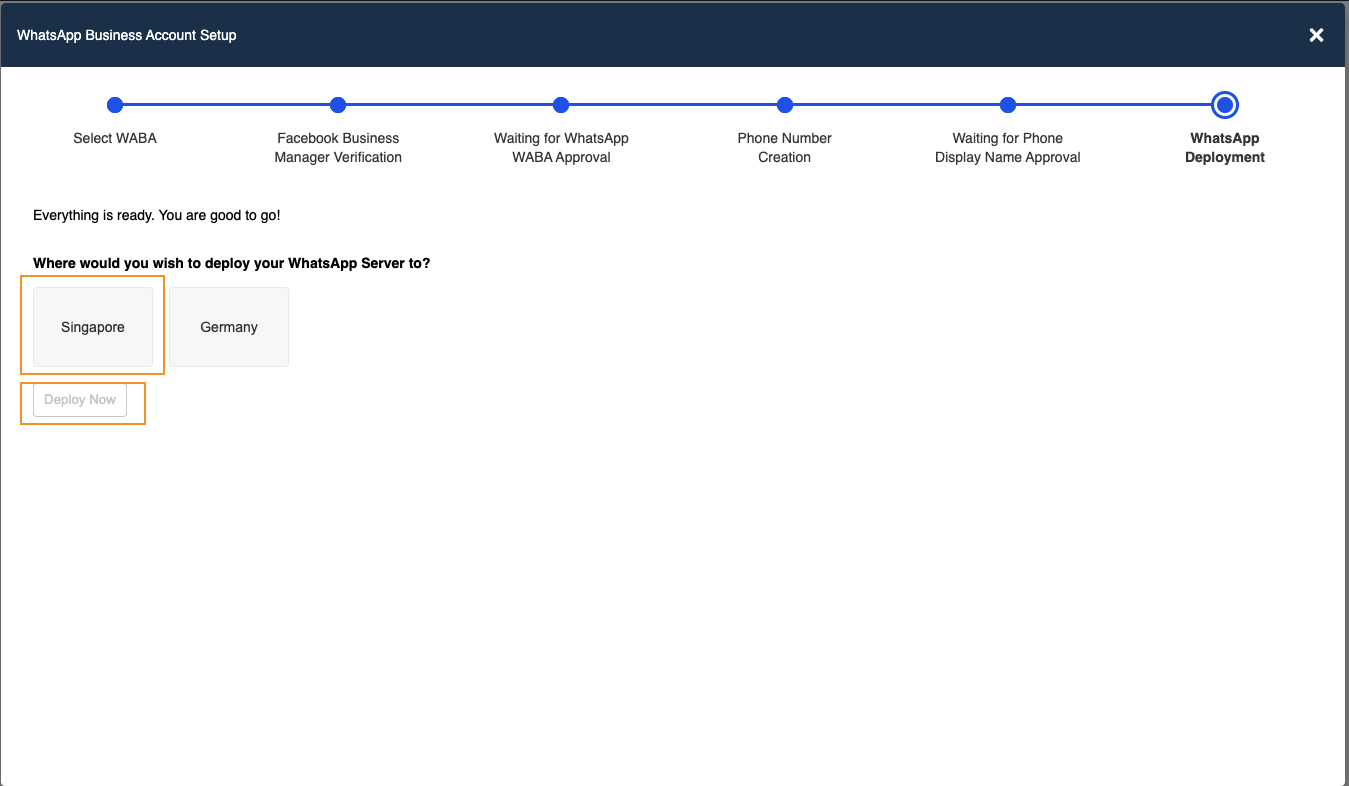
- Once Facebook has approved your WABA, your WhatsApp phone number & display name will be processed next automatically. Once the phone numbers and display name are approved, you can choose "Singapore" and click "Deploy Now" to complete your WABA setup.
WABA Deployment
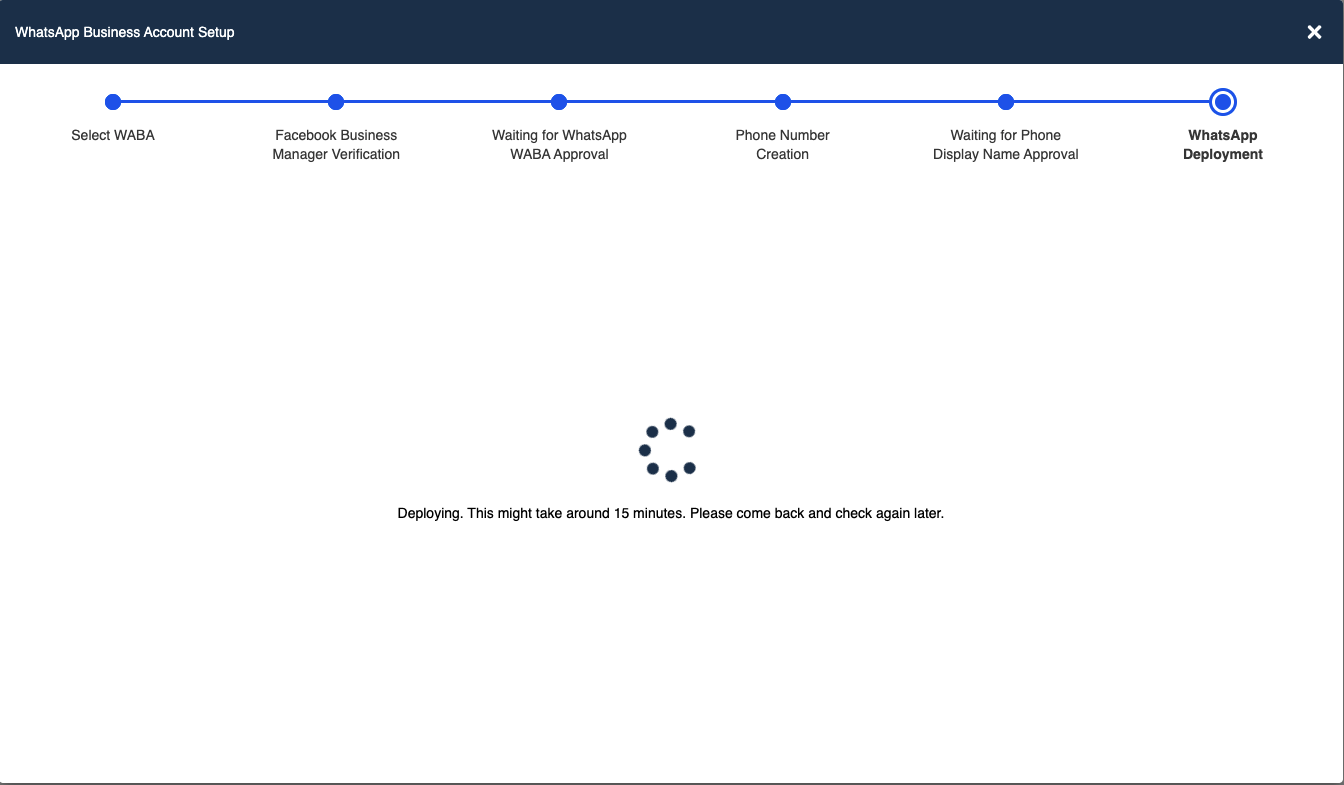
Deploying
- If you encounter an error while deploying your WABA, you can click on "Deploy Again" for retrying. Please contact our support if the error persists.
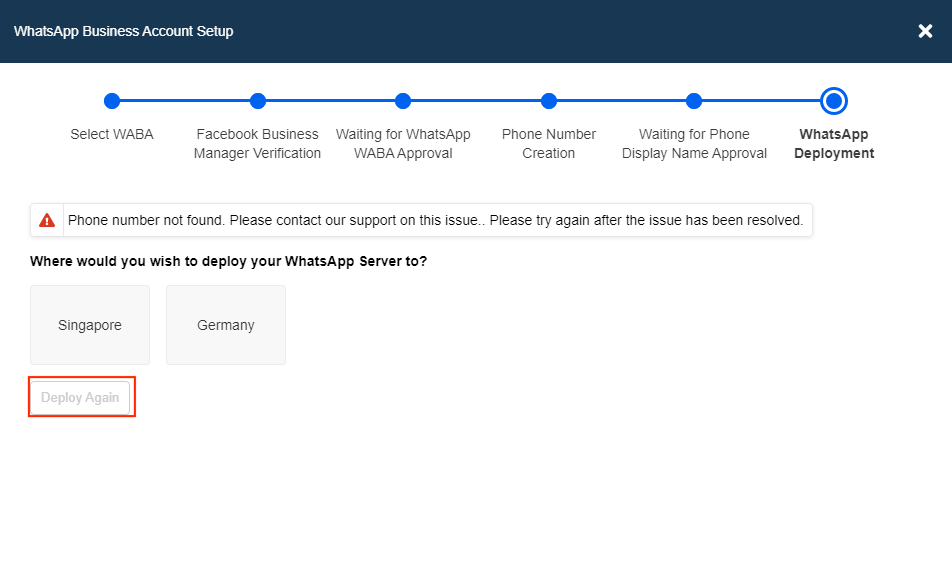
Deploy Again
Phone Number Verification
- Finally, you can verify your WhatsApp phone number under "Platform" in your channel. Click "Connect" and a registration window will pop up.
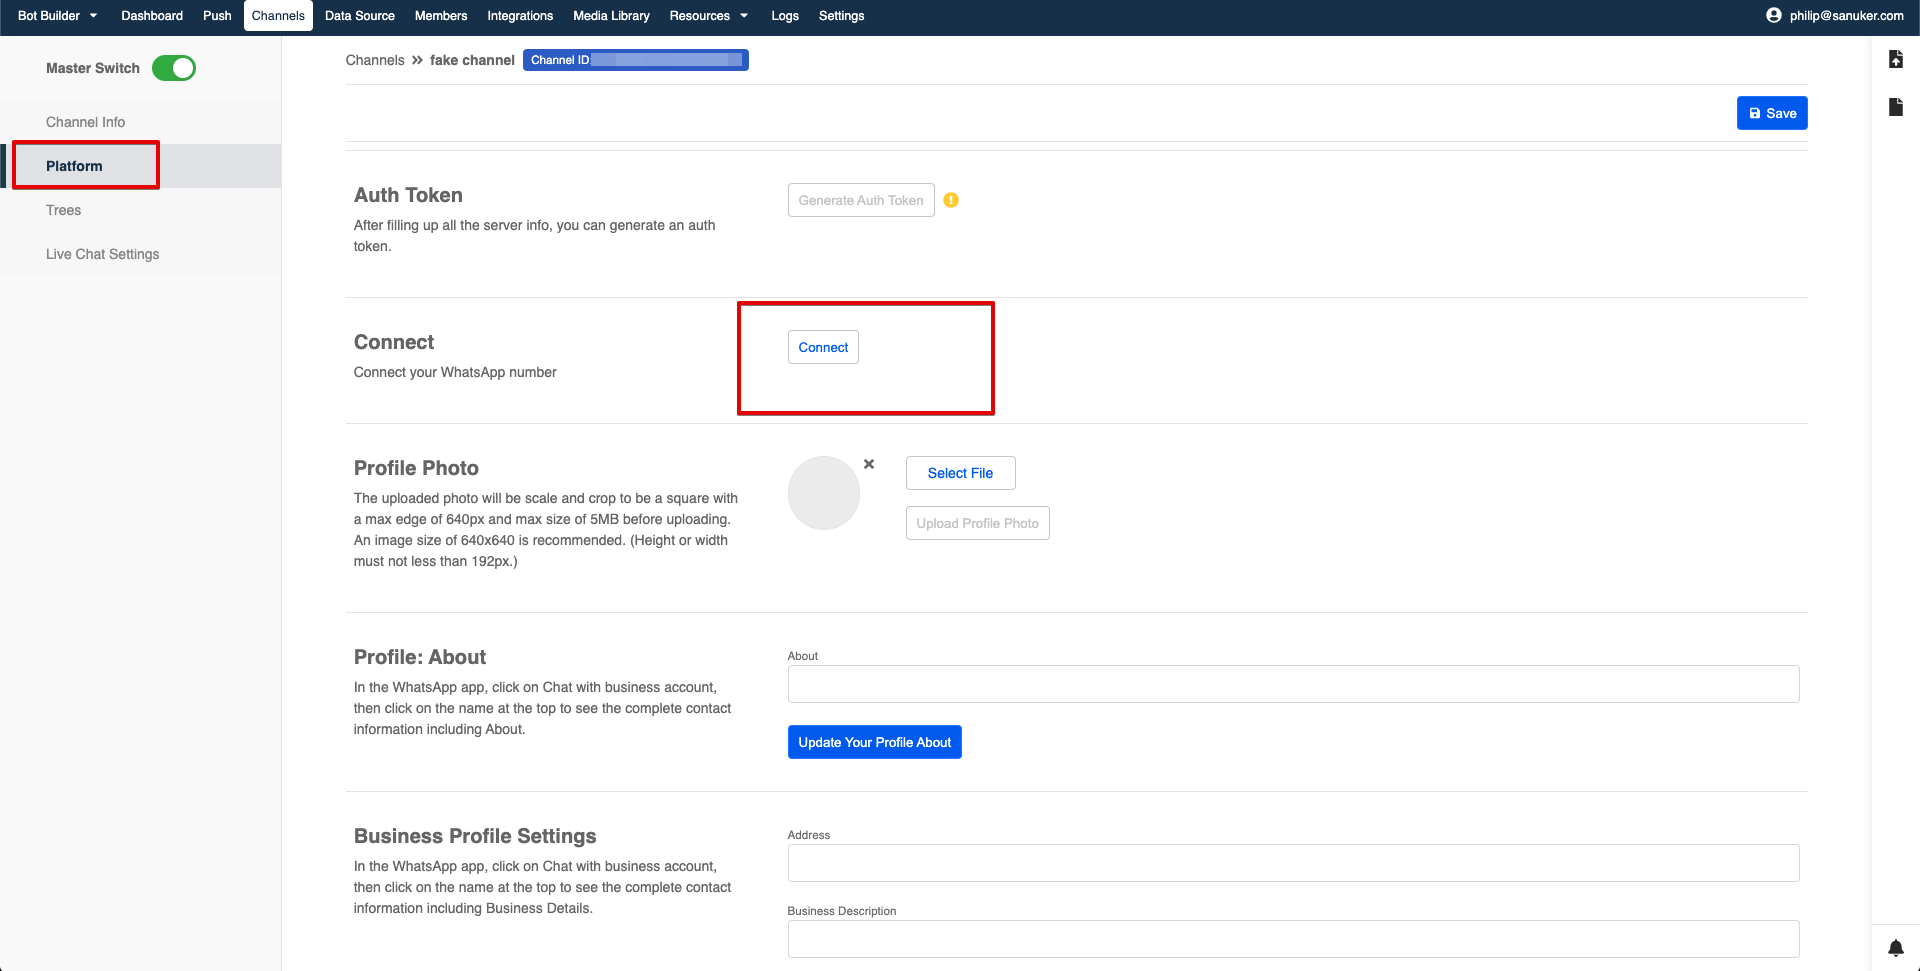
Connect WhatsApp Number
- In "1. Register a phone number", please select the correct integrations and phone number that you'd like to connect to the WhatsApp Business API Client.
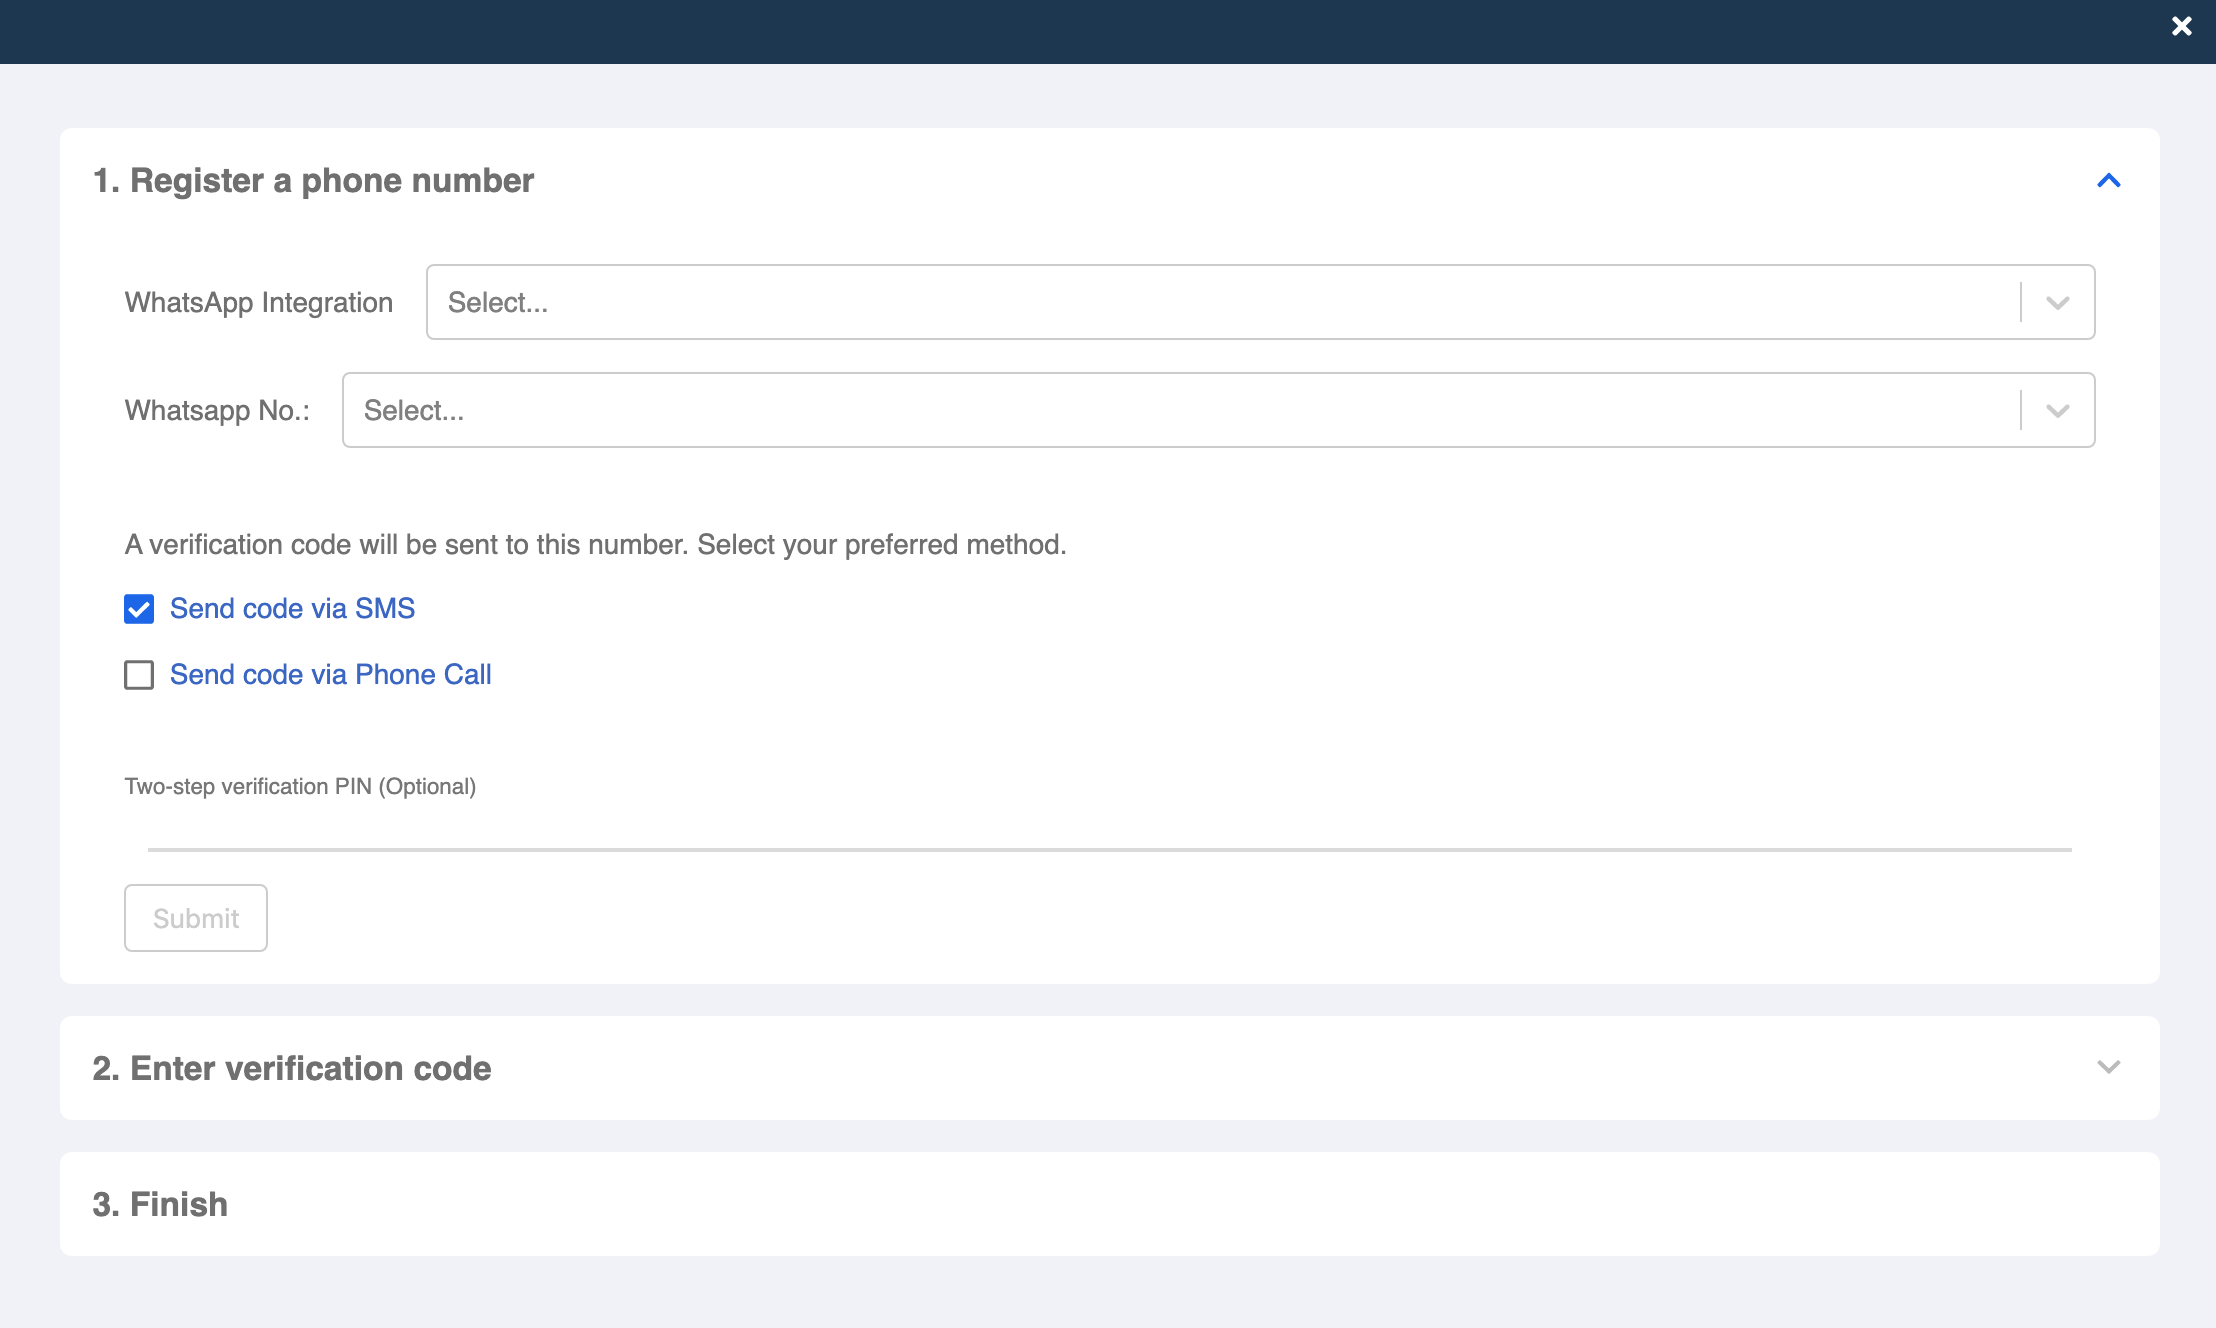
WhatsApp number registration
- Select the method to receive verification code:
- Send code via SMS, or
- Send code via Phone Call
- Please wait for the verification code sent to your SMS or phone call and enter the code in "2: Enter Verification Code".
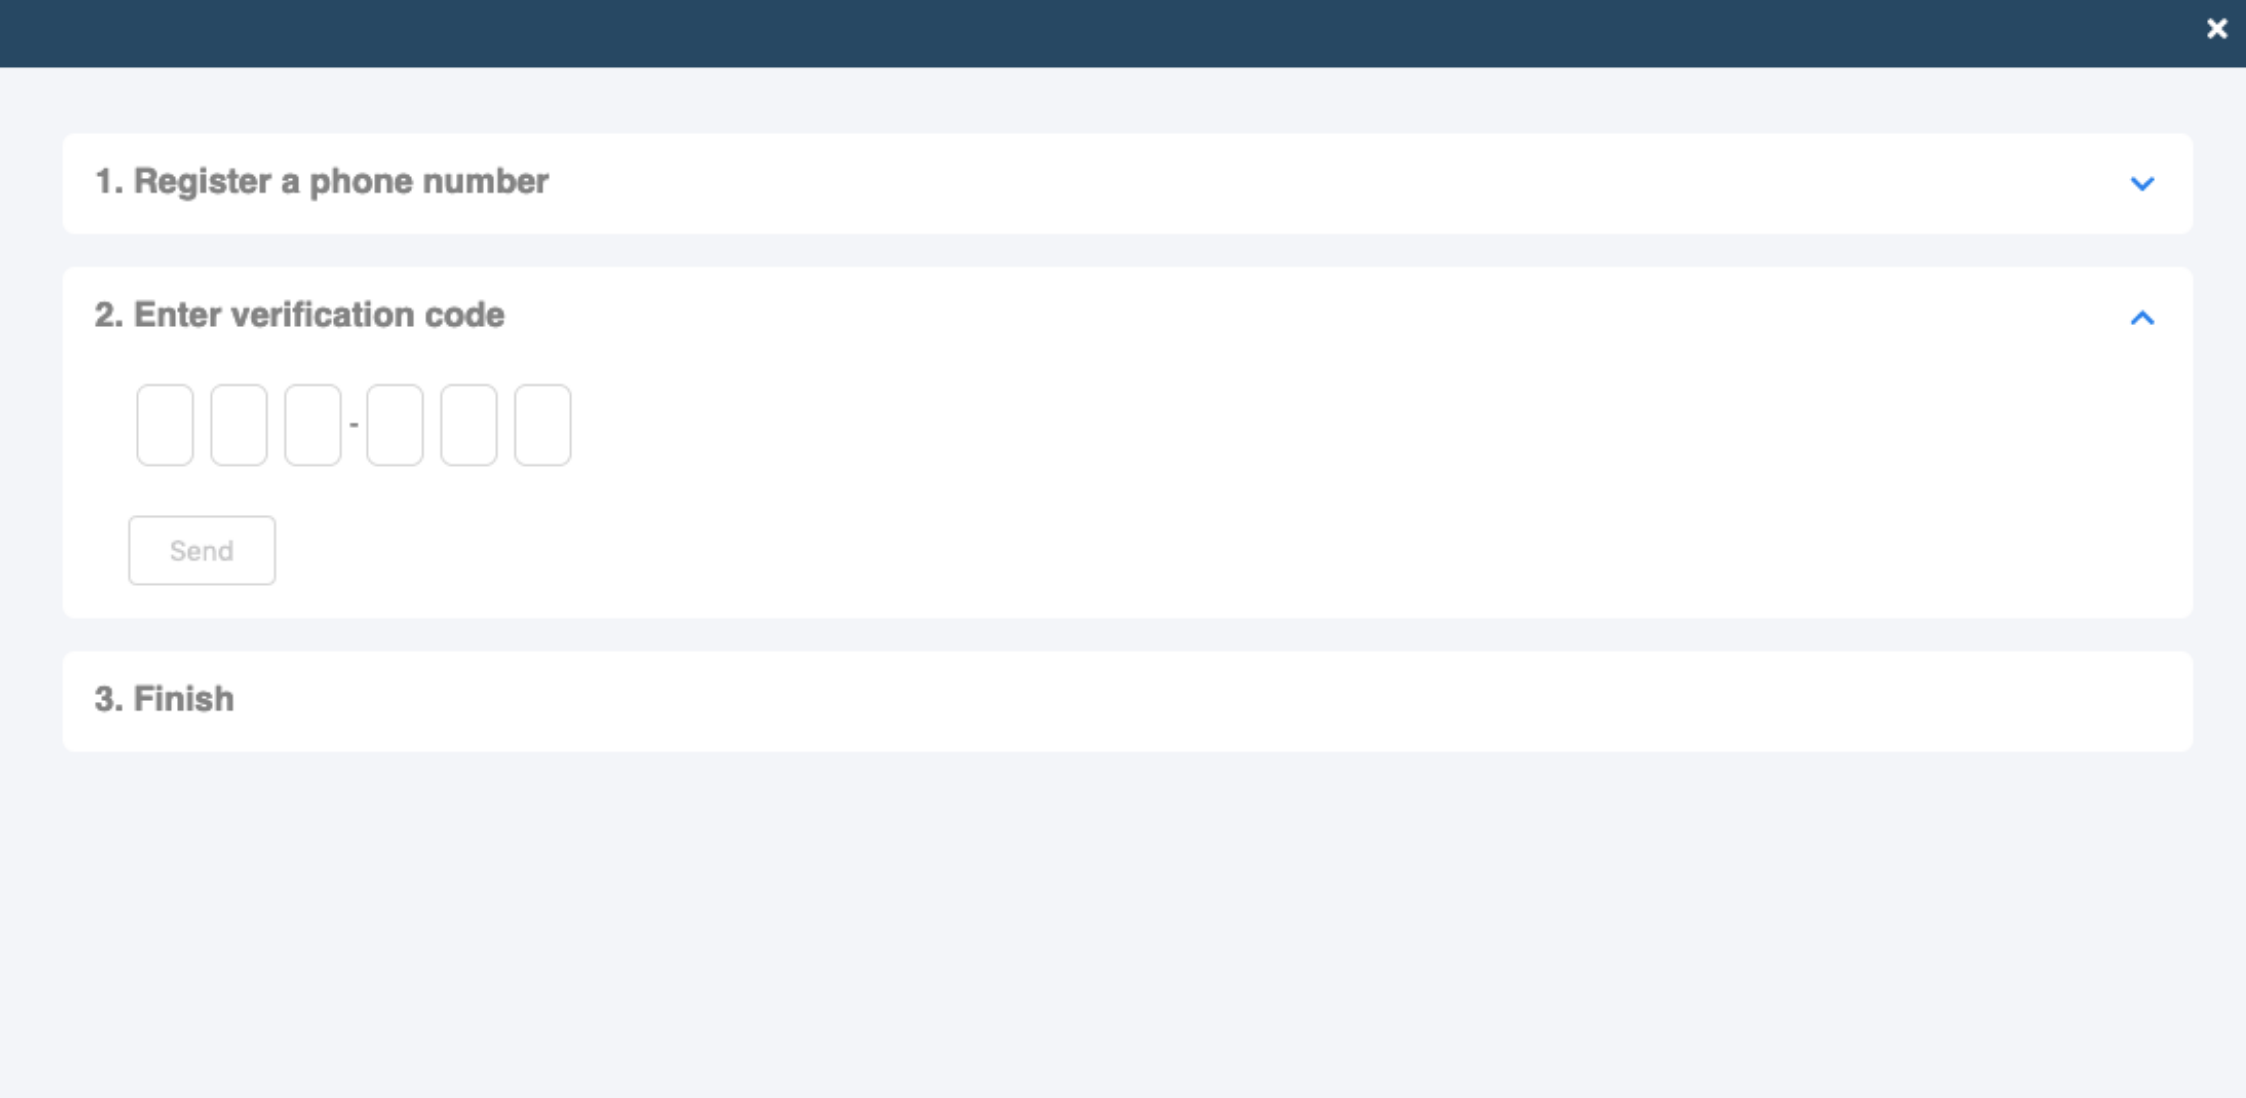
Enter verification code
- Click "Send" after you have entered the verification code. If everything works well, a success message will be shown in "3: Finish".
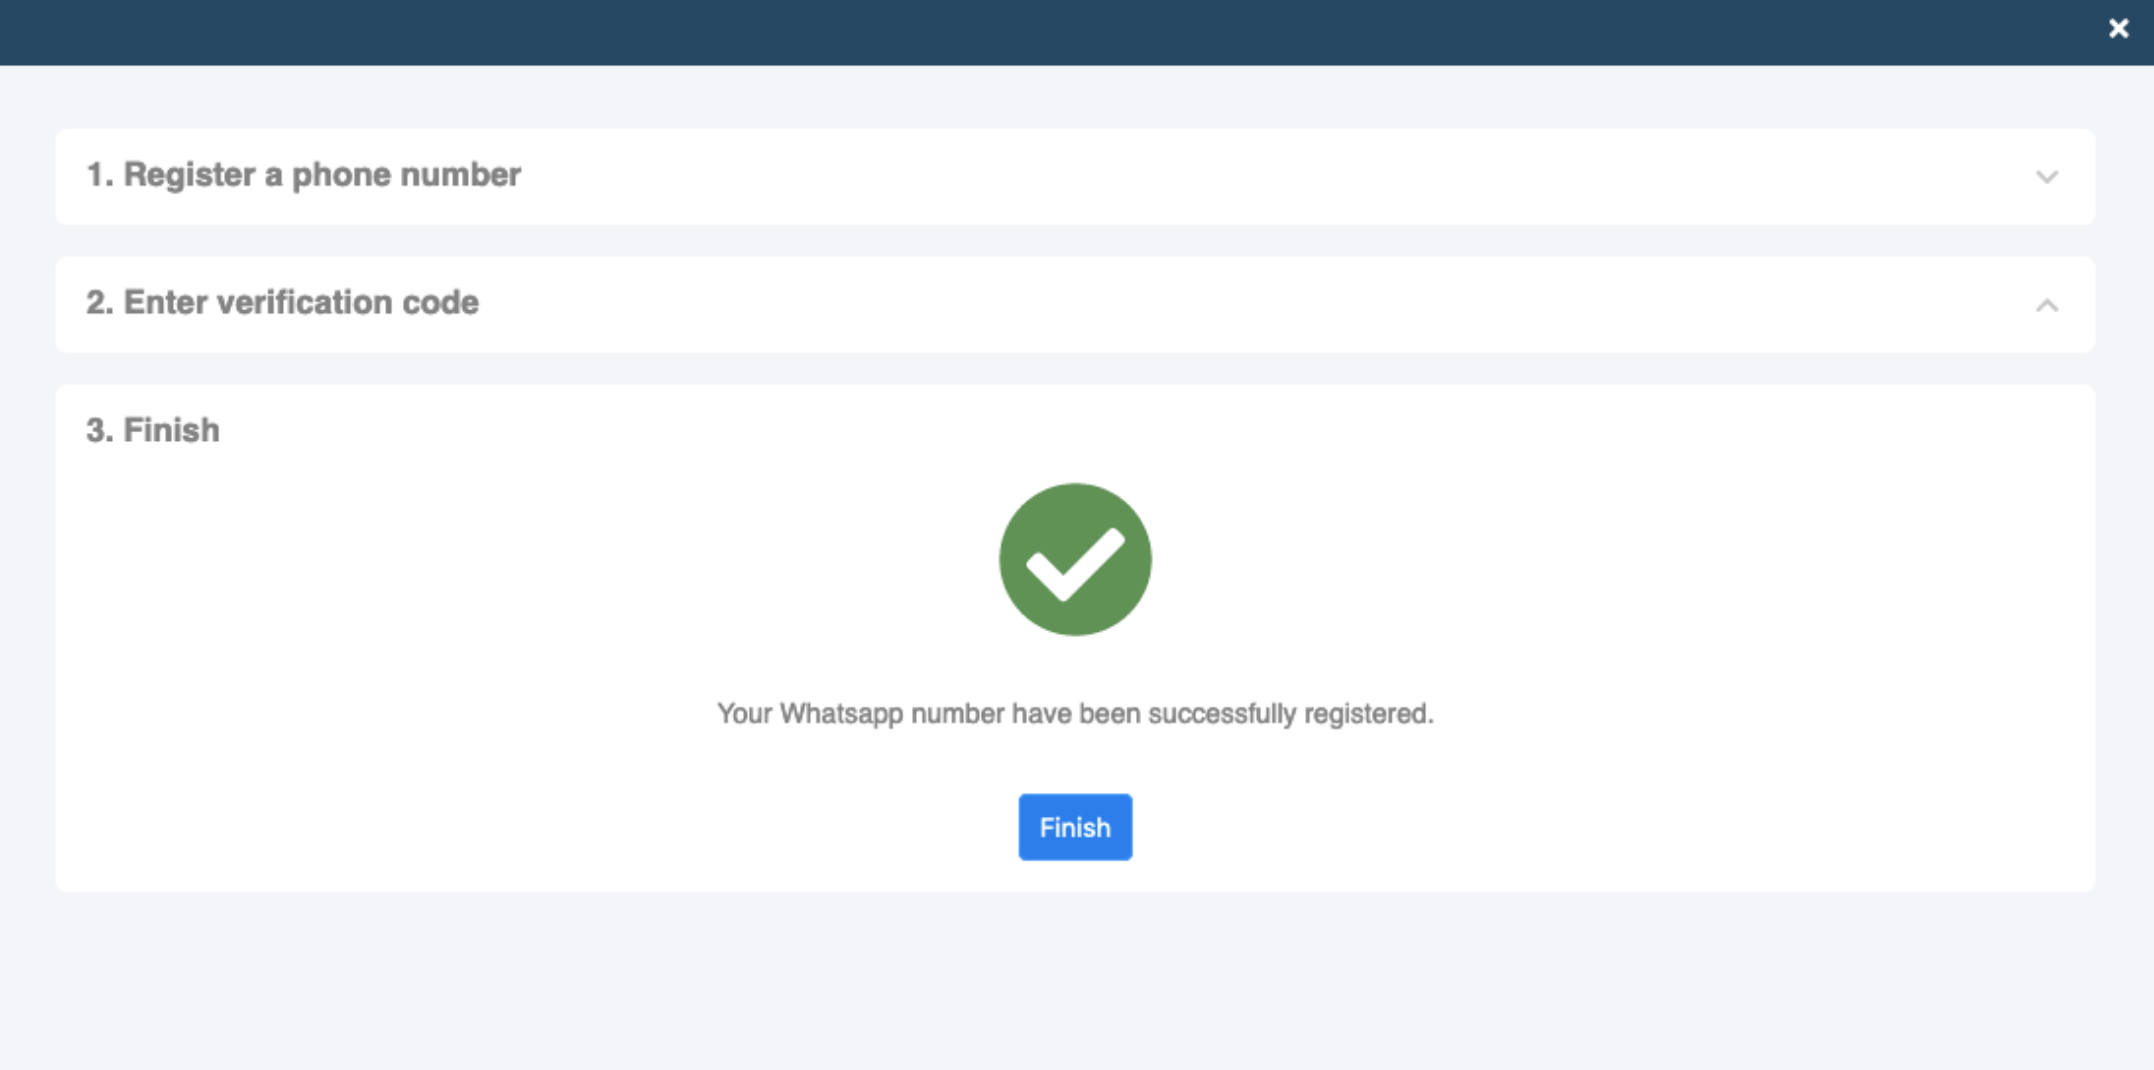
Successful registration
- Click "Finish" to close the registration window. You should be able to see the registered phone number info under section "Connect" now.

Connected to WhatsApp (Sanuker demo screenshot)
- Congratulations! You're all set. You may also access the WhatsApp Server Info & API Path in this page if you want to customize the endpoint. For more information, please refer to our WhatsApp Channel Documentation.