Ticketing
In Slack Inbox, a Ticket refers to a Live Chat Request. A Ticketing Channel is where the agents can find and accept a Live Chat Request, different ticketing channels can be created for different teams in your business.
In general, there are 3 ways to initiate a Live Chat Request in Stella Inbox.
- Ticket initiated by user: The user can trigger a live chat request from the chatbot.
- Ticket transferred from you to another Team: You can assign a ticket to another team.
- Ticket transferred from another agent to you: Agents from other teams can assign a ticket to your team.
In this section, you will learn how the ticketing system functions in all 3 situations.
Sometimes, a customer's enquiry may be related to another team. In this case, an agent can transfer the Live Chat Ticket to another team in Stella Inbox. The request would be passed to another agent when the Ticket is accepted in the Ticketing Channel of another team.
What is your Result?
An agent from technical team has accepted the transfer ticket and take over the chat.
Getting Hands-on
Before getting started, you need to create and set up a ticketing channel for your team in order to work with the ticketing system.
Default Ticketing Channel
Upon successful installation in the Stella Inbox Portal, two ticketing channels will be automatically created for you. You can start setting up based on these default channels, instead, you can also create a ticketing channel from scratch.

Create Ticketing Channel
In Stella Inbox, Ticketing Channel is where you can receive and accept live chat request. Once an ticket is accepted by an agent, he/she can proceed with the conversation in a Inbox Channel created by Stella Inbox.
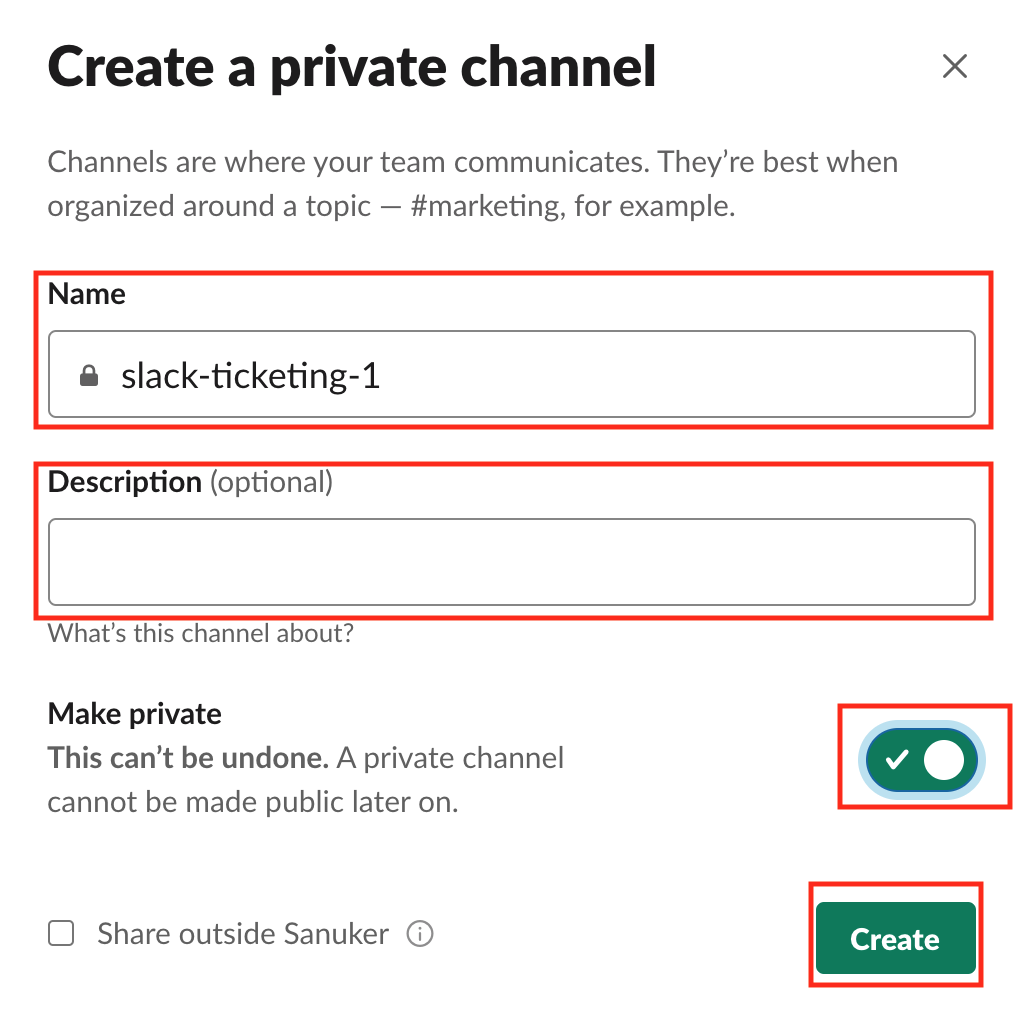
- In your Slack workspace, click the Add channels, and then Create a new channel to create a new Slack channel as your ticketing channel for Stella Inbox.

- Fill in the basic information for your new ticketing channel, including channel name and channel description. Toggle on “Make private” if you want to create a private ticketing group. Then click “Create”.
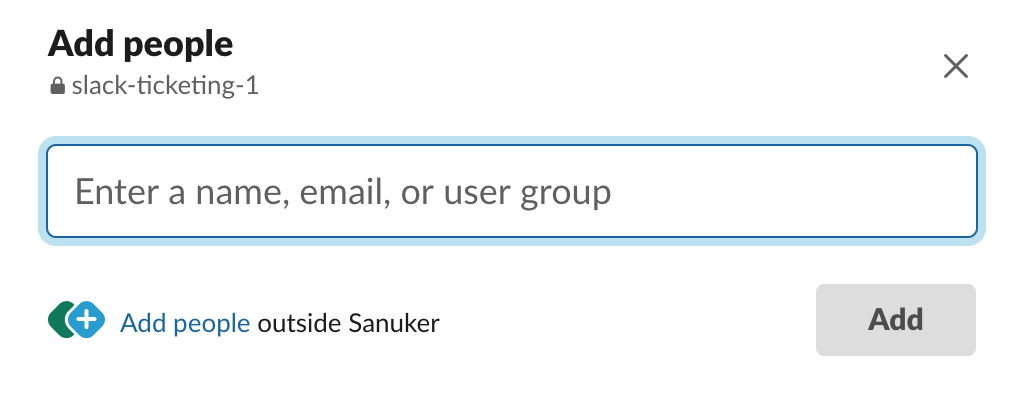
- Add your corresponding teammates who will be handling live chat enquiries to your newly created channel.
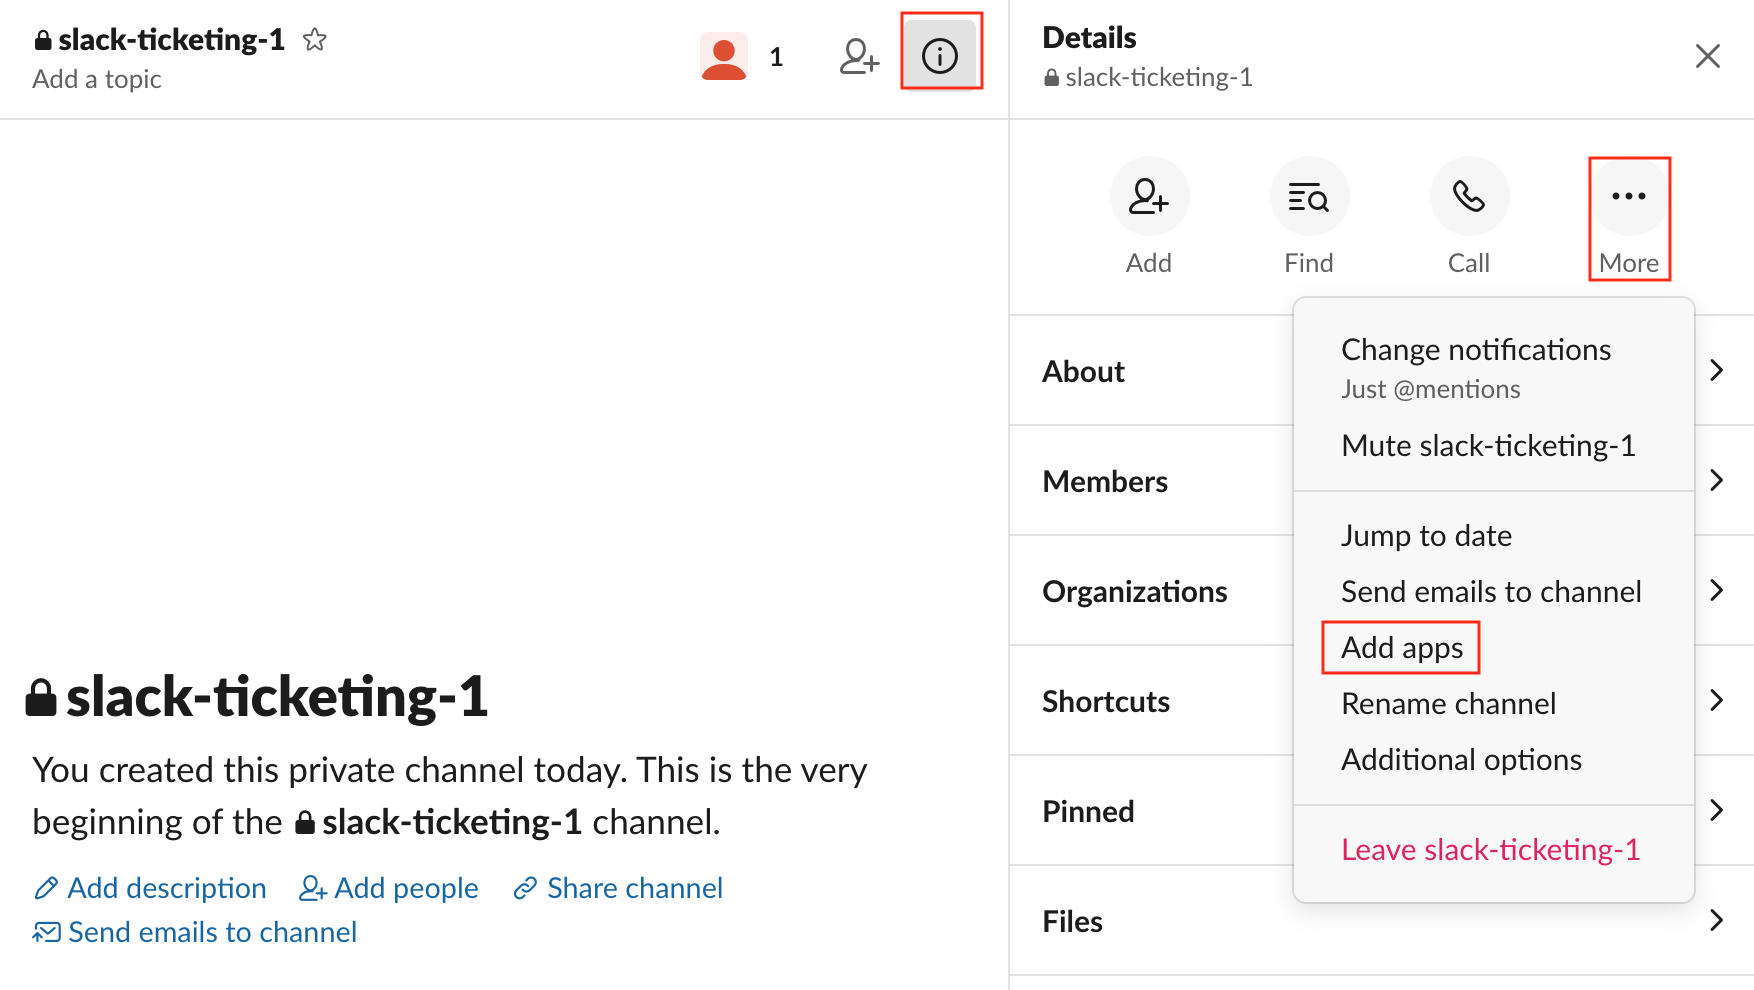
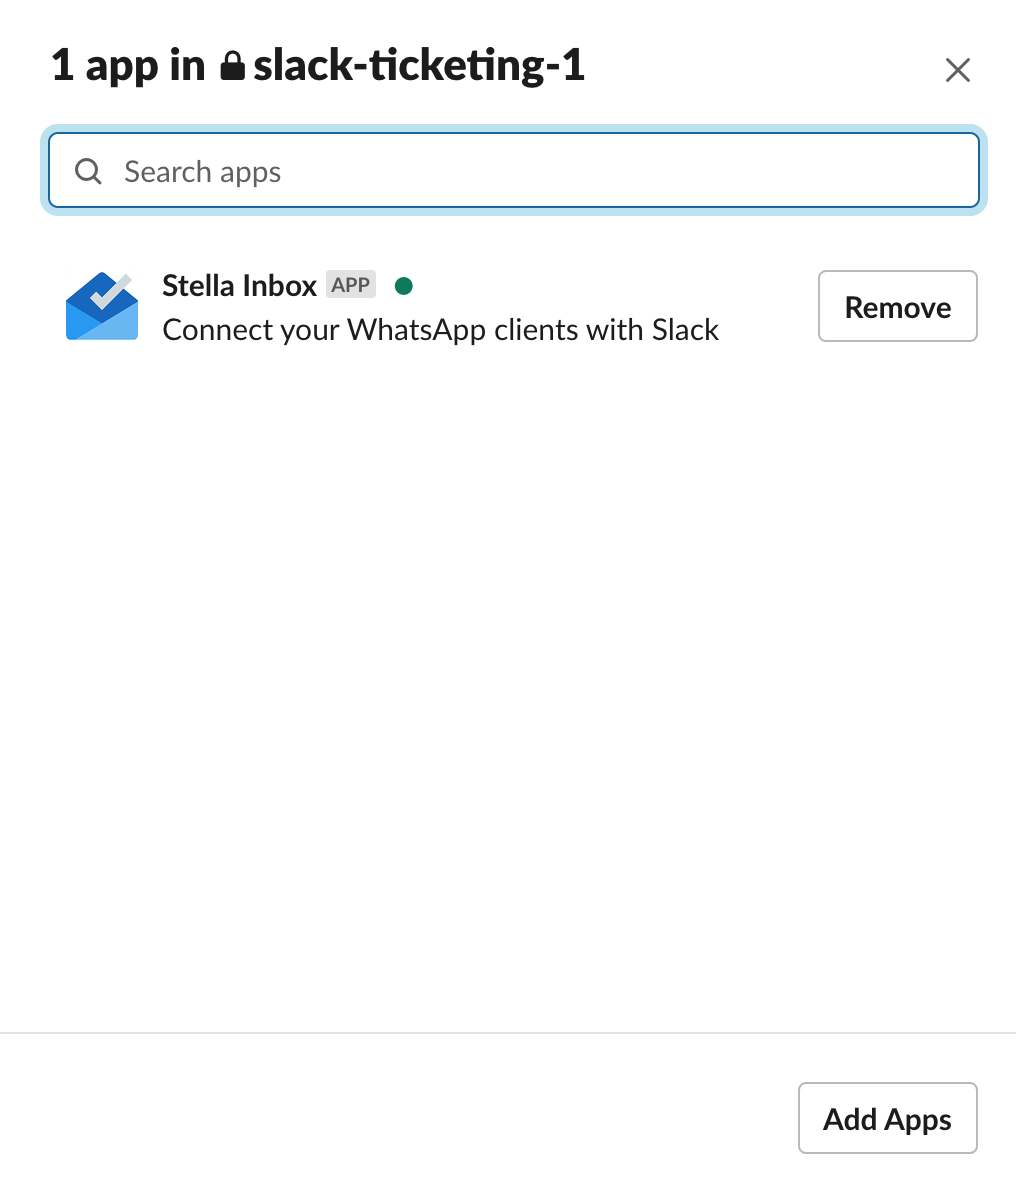
- In order to add the Stella Inbox App to your ticketing channel, click “i” at the top right corner of your Slack workspace and then click “More". Then, select “Add apps”.
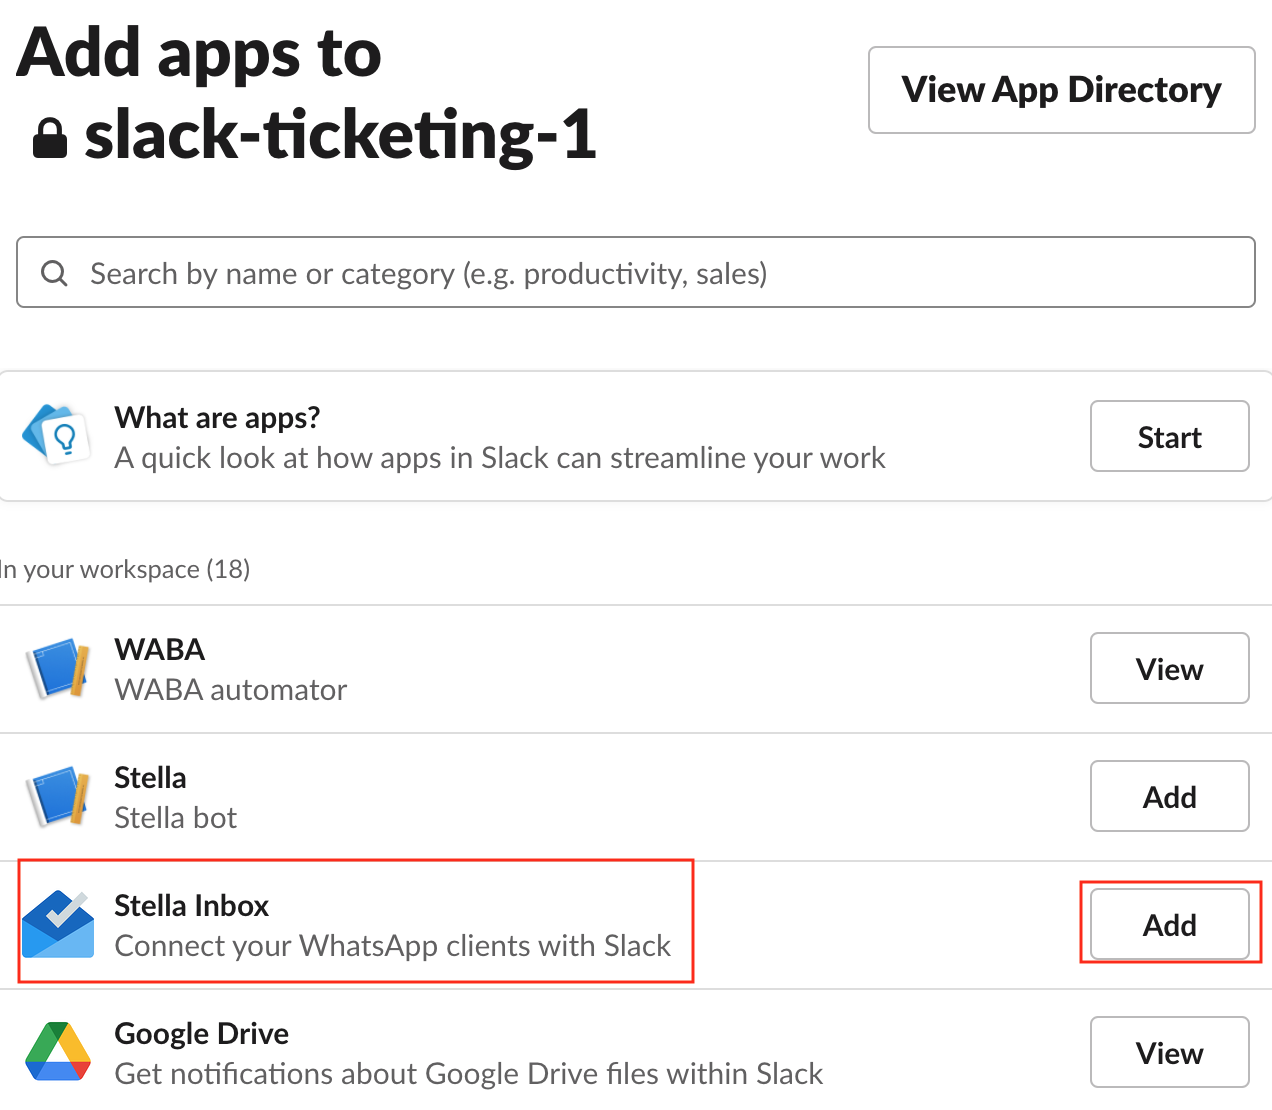
- Find the Stella Inbox App or your custom Slack app you have previously installed to your workspace. Select "Add" to add the corresponding app into your ticketing channel.
- By selecting "View 1 app in your channel" in the channel menu, you should be able to view the Stella Inbox App or your Slack custom app being added to your channel.
- In your channel, you can type "@Stella Inbox" and click "Enter" to test if Stella Inbox has been added to this channel.
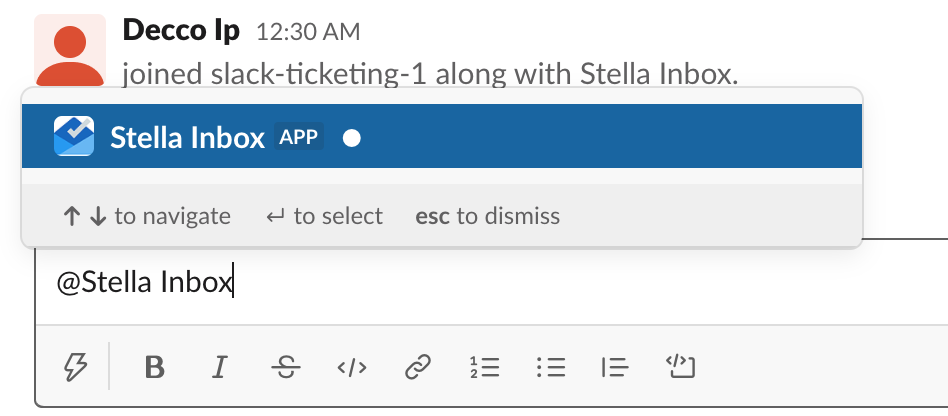
- Now you have created a ticketing channel and have Stella Inbox added to your channel.
Private Priority Group
In order to get the ticketing system working, you will need to adjust the settings in the Admin Panel, you can learn how to get access to the panel in the past section.
- You should find the Admin Panel as shown below.

- Select Private Channel Priority Group, add your teammates who are responsible for handling live chat request. They would be notified first when a live chat request is created, while all the members in the channel can view the conversation.

Please do not add "Single-Channel Guests" to your Prviate Channel Priority Group to avoid potential error when new inbox channels are created. You can click here know more about the difference between "Single-channel Guest" and "Multi-channel Guests".
- In Stella Inbox, newly added admins and members are unable to view conversation that started before they join. If you want this new member to participate in an existing conversation, you need to first add them to the the Inbox Channel by selecting the member lists at the top right, then select "Add people".

- Select Ticketing Channel Settings, you can add, edit or delete ticketing channels. Channel refers to the name of your ticketing channel, while Label refers to the name of corresponding team, i.e. "Business Team". You can add multiple ticketing channels. Remember to add the ticketing channel you just created, input your team name in Label.

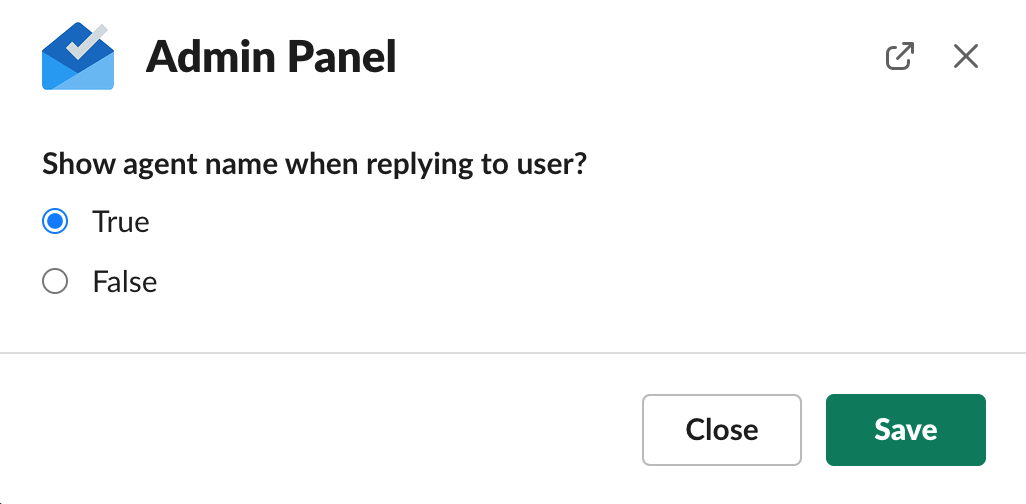
- Select Show Agent Name, you can determine whether you want the agent's name to be visible to the user. Select True to show or False to hide it.
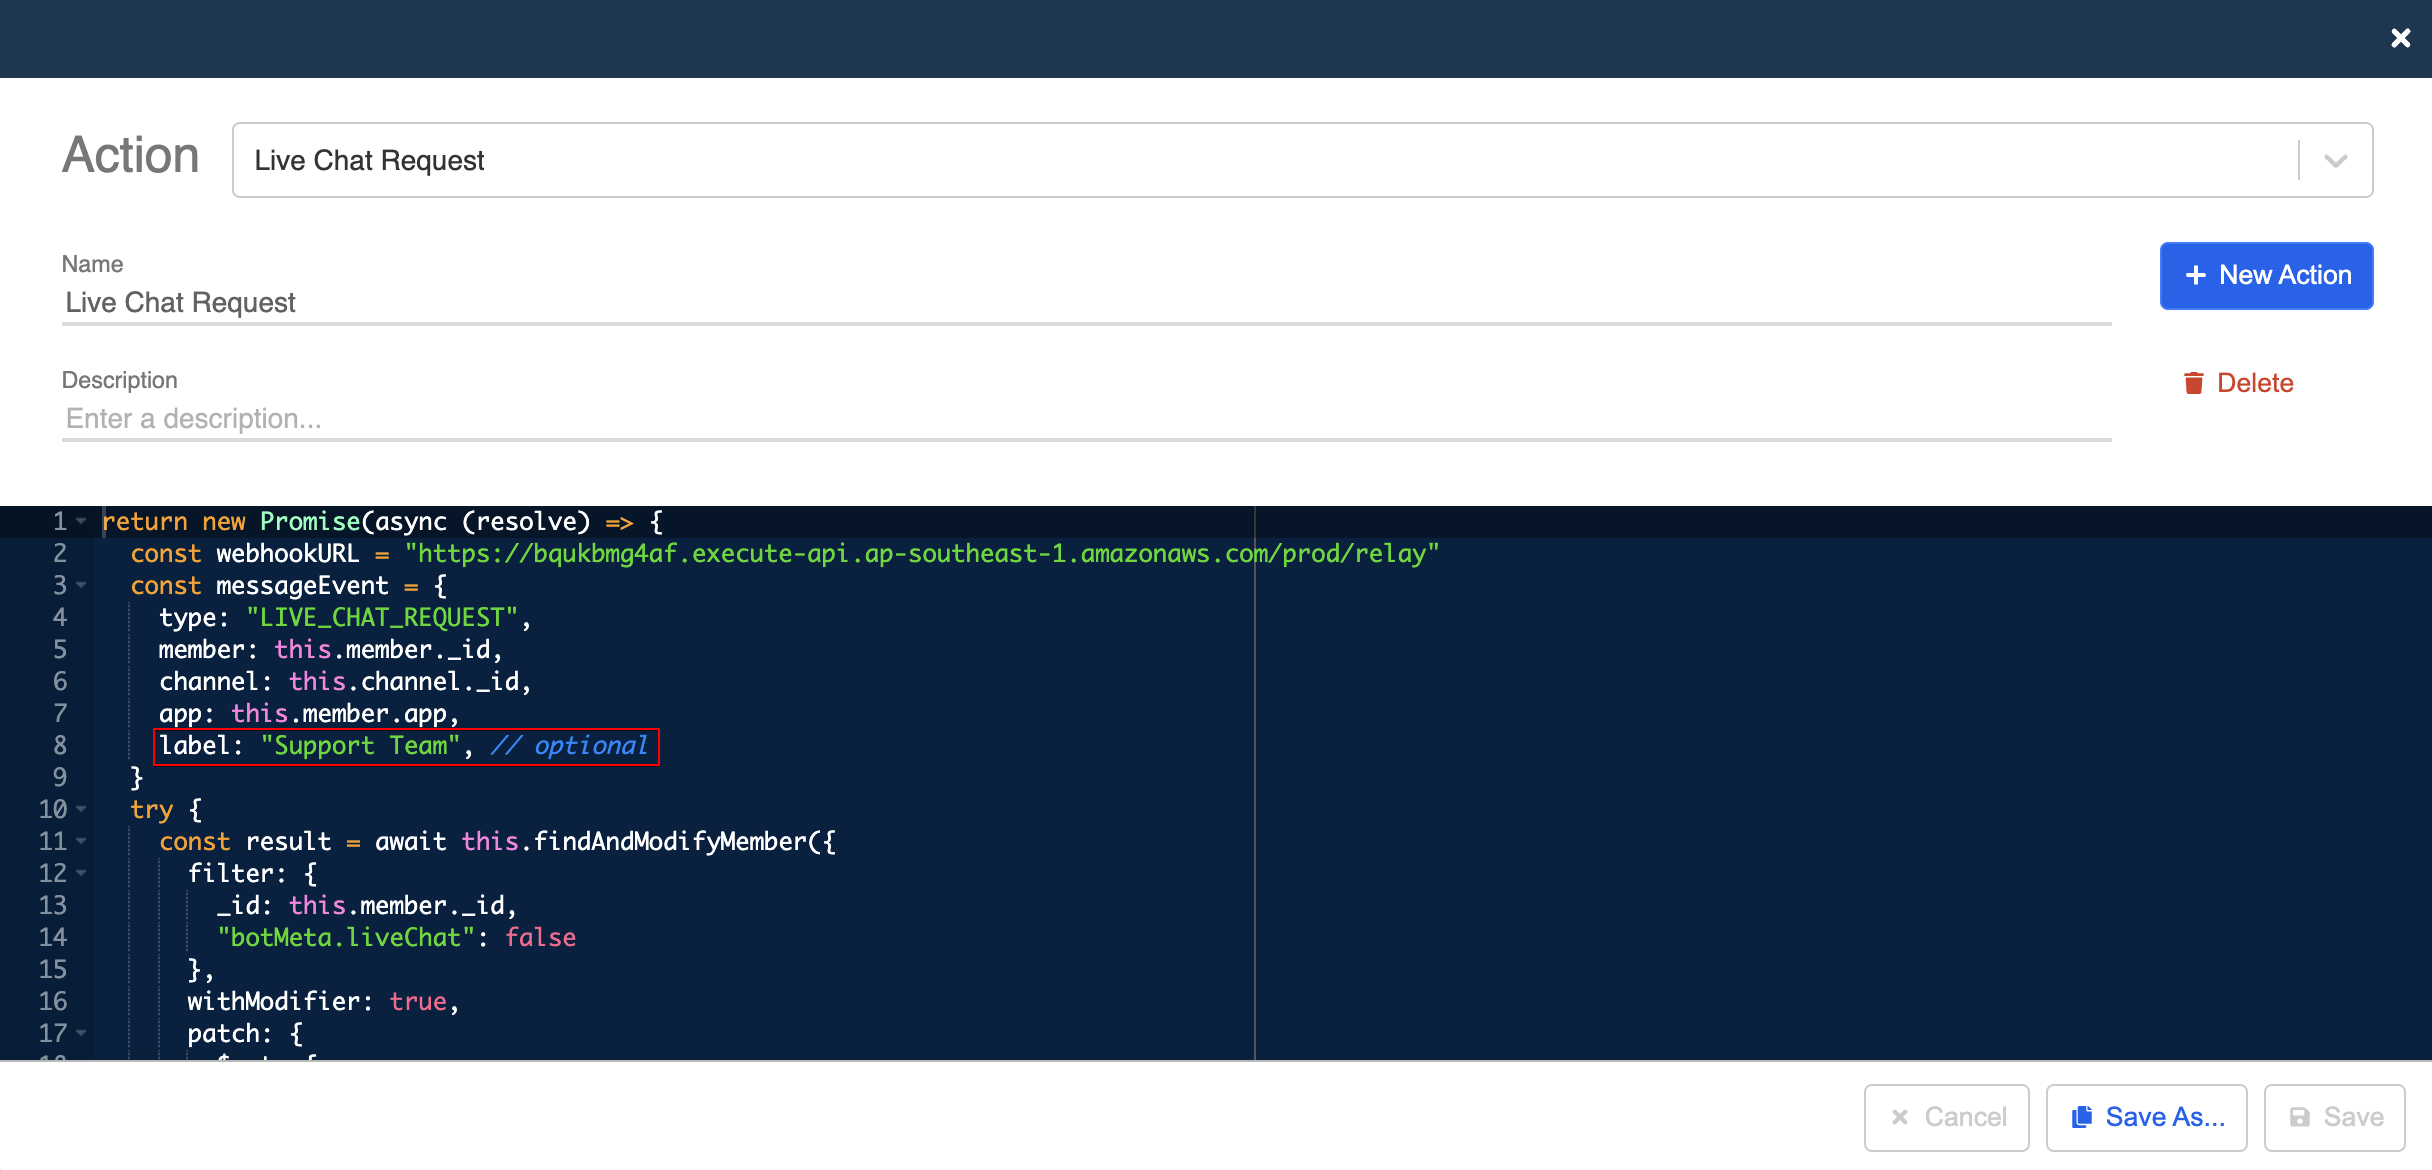
Set up for User Initiated Ticket
In order to let user initiate a live chat request while interacting with the chatbot. You need to add a pre-action in to the corresponding tree node of your chatbot.
- Log in Stella, go to Bot Builder, create a tree node for the user to initiate Live Chat Request.

- In the node inspector on the right side, select Pre-Action, then select + New Action to create a pre-action.
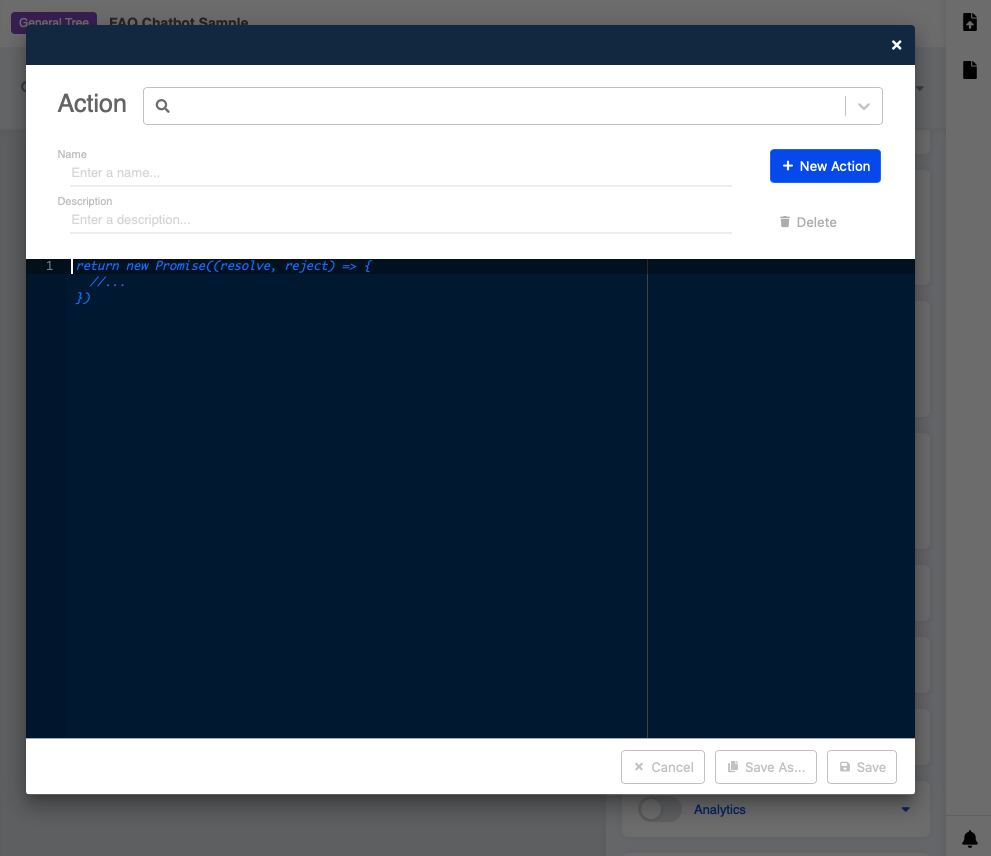
- Copy the following code and paste it into Pre-actions. Remember to match the "label" with the label you have created for you ticketing channel in step 12. Click Save when you are done. Now, your customer can request a live chat while interacting with your chatbot in WhatsApp.
Please refer to the following sample if you are using the Core Version v2.6 or below.
return new Promise(async (resolve, reject) => {
  try {
    const webhookURL = "https://bqukbmg4af.execute-api.ap-southeast-1.amazonaws.com/prod/relay"
    const messageEvent = {
      type: "LIVE_CHAT_REQUEST",
      member: this.member._id,
      channel: this.channel._id,
      app: this.member.app,
      label: "Support Team", // optional
    }
    try {
      const result = await this.findAndModifyMember({
        filter: {
          _id: this.member._id,
          "botMeta.liveChat": false
        },
        withModifier: true,
        patch: {
          $set: {
            "botMeta.liveChat": true
          }
        }
      })
      if (result.value) {
        await this.fetch(webhookURL, {
          method: "POST",
          headers: {
            "Content-Type": "application/json",
          },
          body: JSON.stringify(messageEvent)
        })
        this.member.botMeta.liveChat = true
      } else {
        throw new Error("ticket creation in progress")
      }
    } catch (err) {
      console.log("webhook url error", err)
      throw new Error(err)
    }
    resolve({ member: this.member })
  } catch (e) {
    reject(e)
  }
})
Please refer to the following sample if you are using the Core Version v2.7 or v2.8.
return new Promise(async (resolve, reject) => {
  try {
    let groupName = "live chat group name_"
    let requestText = "request text sending to ticketing group or admin"
    let summary = "a summary send to admin in a live chat channel"
    let ticketButtonTitle = "Chat with user"
    const result = await this.findAndModifyMember({
      filter: {
        _id: this.member._id,
        "botMeta.liveChat": false
      },
      withModifier: true,
      patch: {
        $set: {
          "botMeta.liveChat": true
        }
      }
    })
    if (!result.member) {
      throw new Error("Ticket creation in process")
    }
    this.createAssignment({
      history: true,
      member: this.member,
      assignmentDetails: {
        summary,
        groupName: groupName,
        relayMessage: {
          slack: {
            type: "BUTTON",
            text: requestText,
            buttons: [{
              type: "postback",
              title: ticketButtonTitle,
              payload: {
                payload: "PICK_TICKET"
              }
            }]
          }
        }
      },
      label: "default"
    }).then((json) => {
      console.log(json)
      this.member.assignmentId = json.assignmentId
      resolve(json)
    })
  } catch (e) {
    reject(e)
  }
});
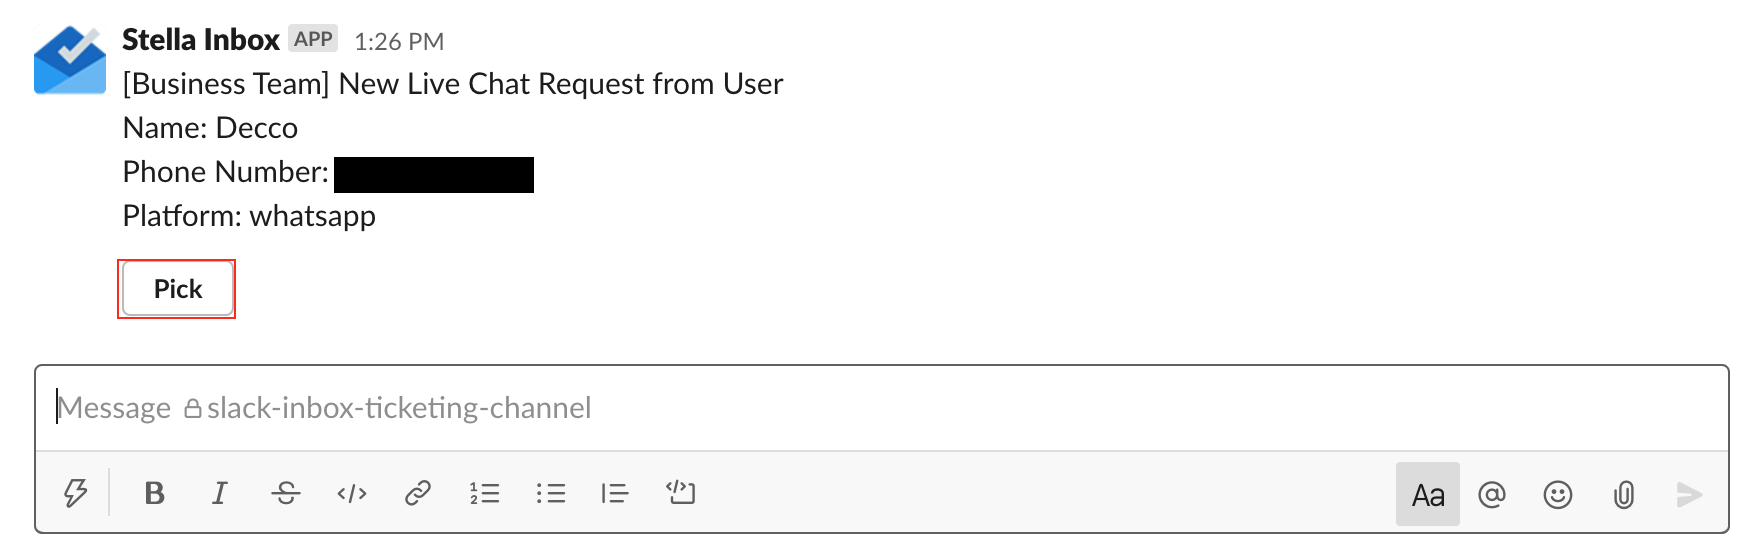
Accept Ticket
A user can initiate a live chat request while interacting with the chatbot, then an agent can accept the ticket and enter live chat mode.
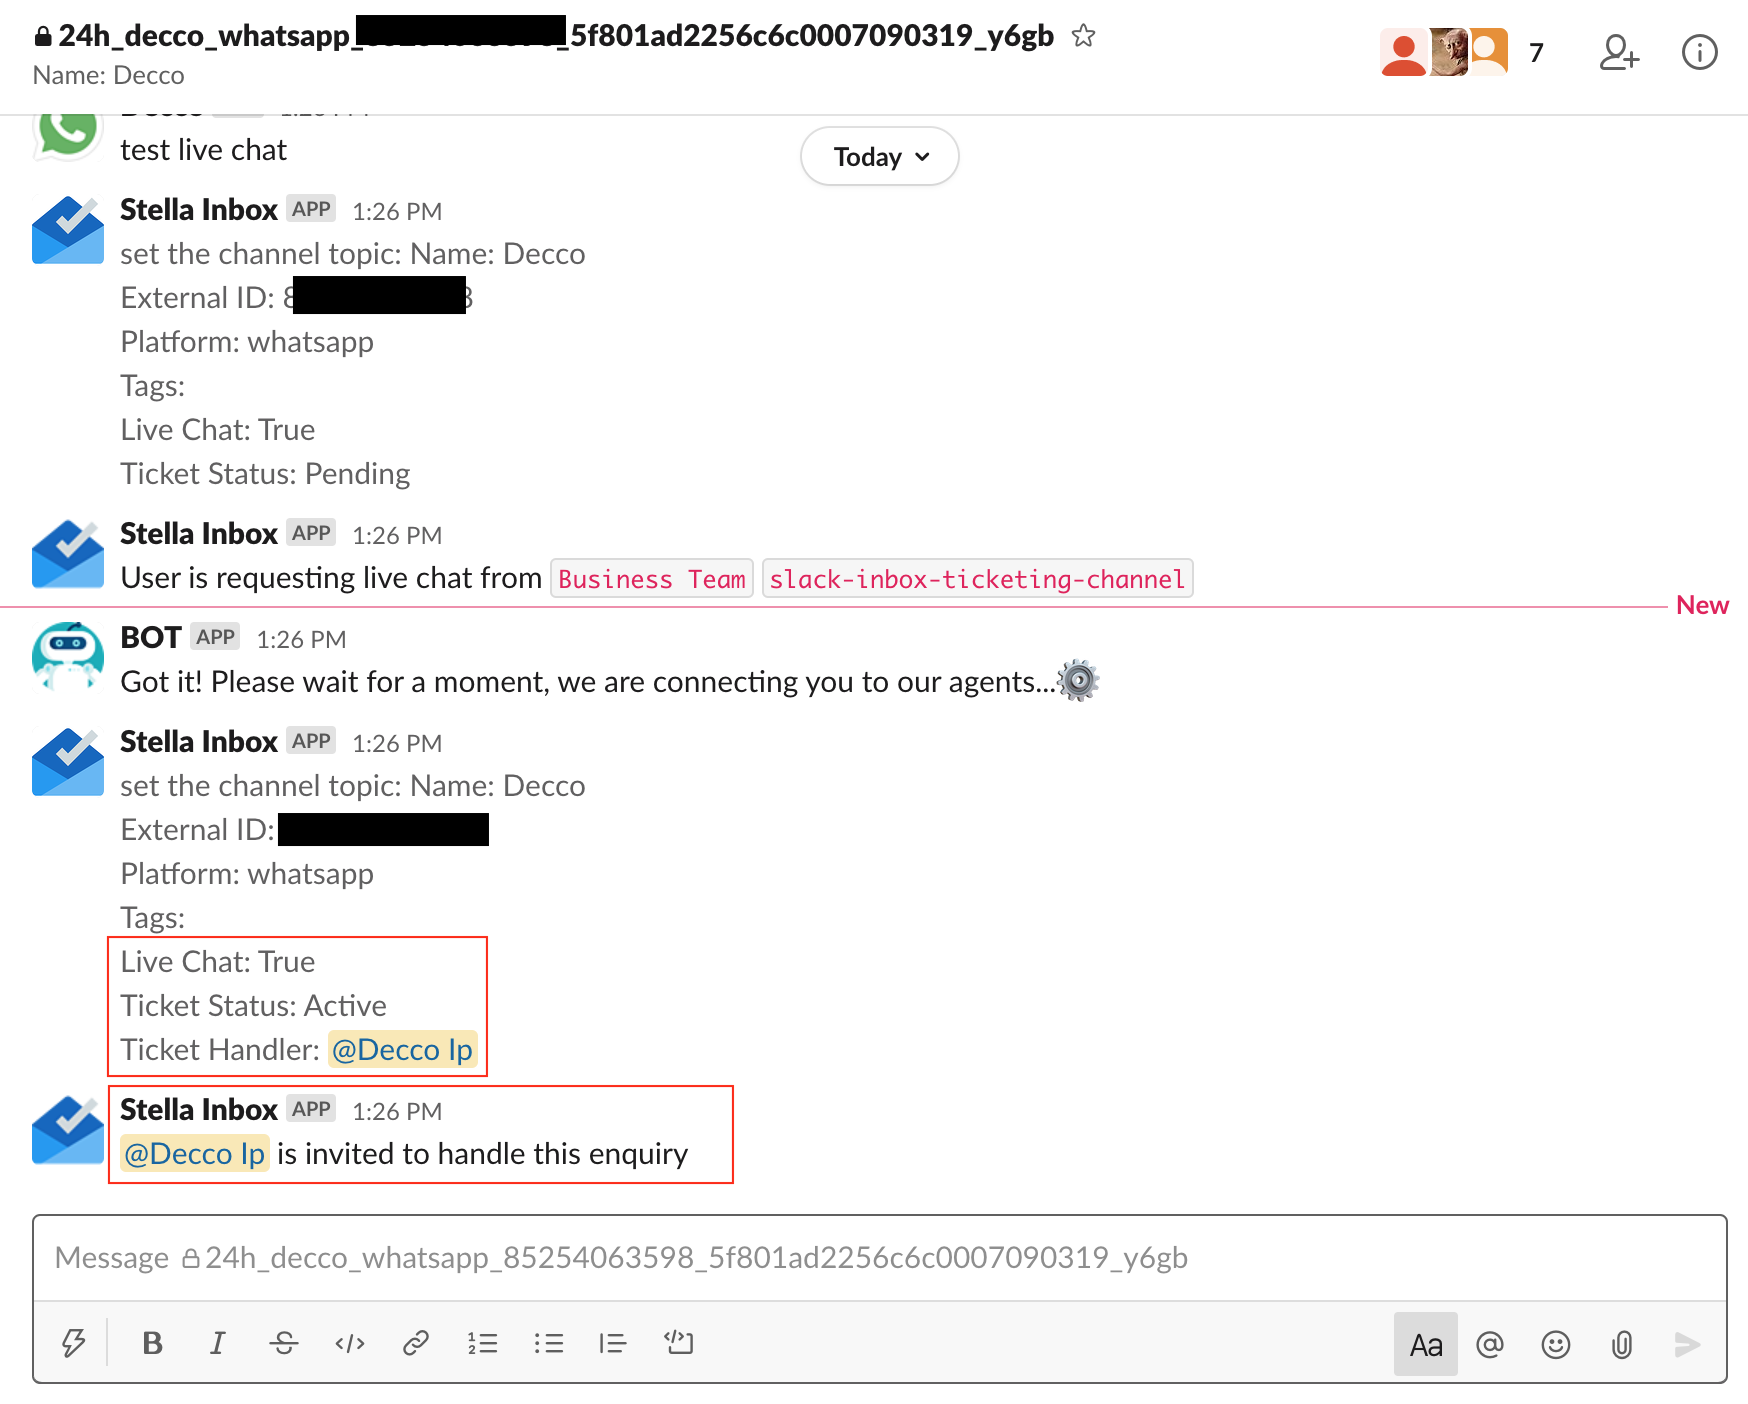
- When a user sends a Live Chat Request, a Ticket would appear in the Ticketing Channel. The agent can select "Pick" to accept the ticket.
- After an agent accepts a Ticket, the "Pick" would become "Processing by [Agent Name]". The link shown below is the link to its Inbox Channel.
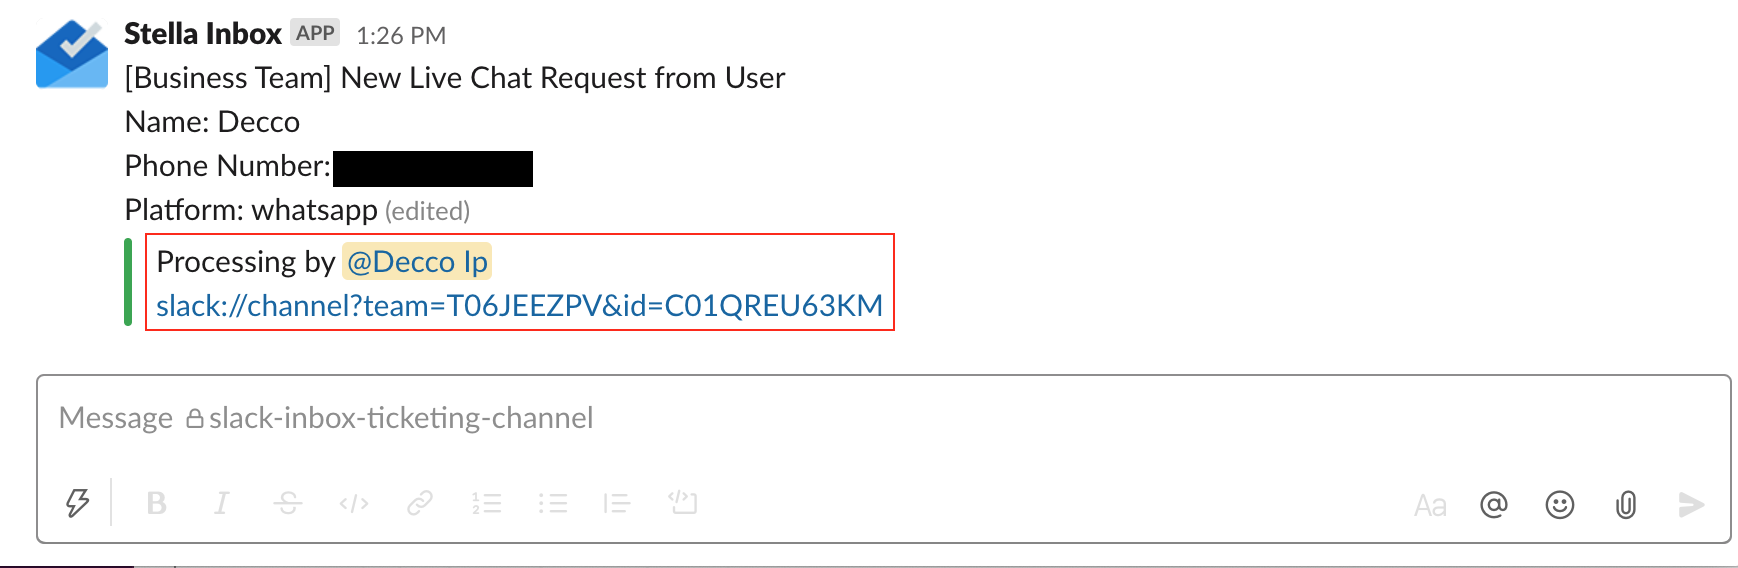
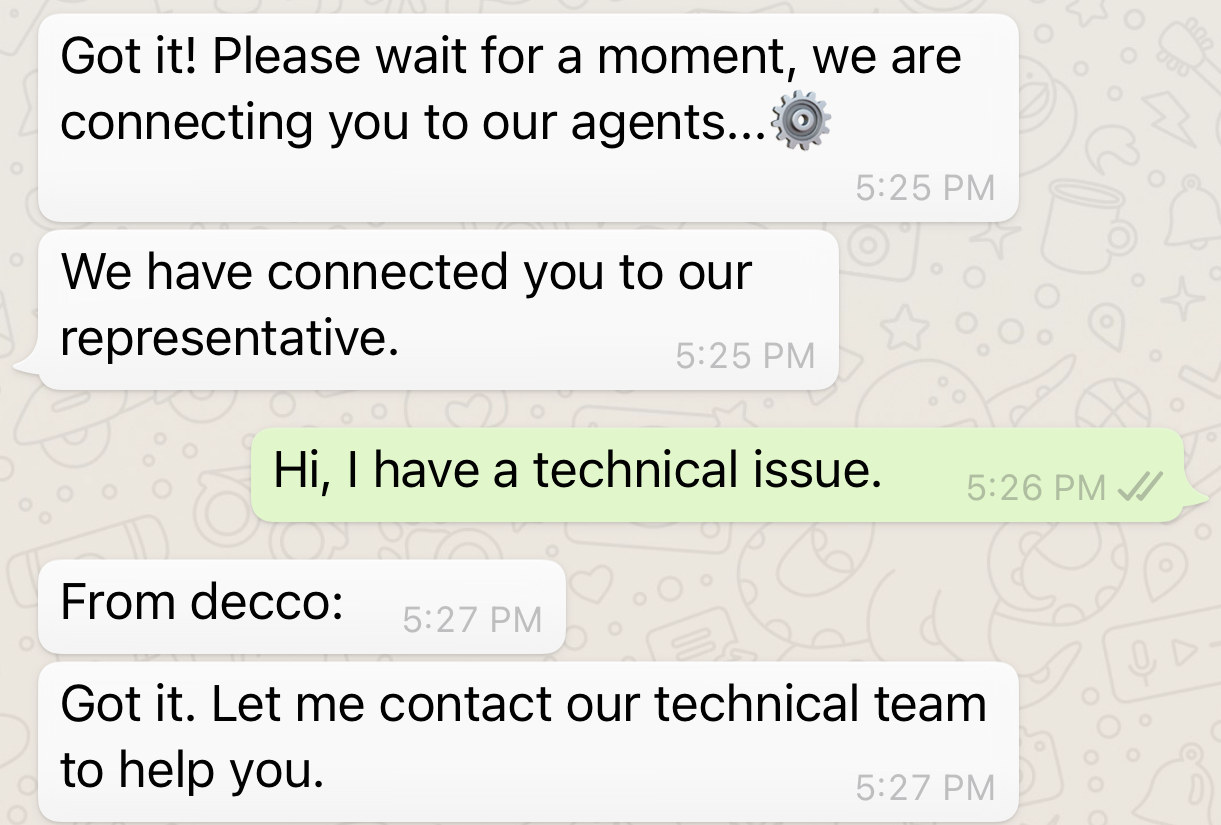
- The agent can view the Inbox Channel now. Stella Inbox has stated the information of the user and the name of the ticket handler. When a ticket is accepted, the Live Chat Mode is turned on automatically. Therefore, the live chat status is "True". Now, you can chat to the user directly.
- When you finish the enquiry, you can end the live chat, then the chatbot mode would resume. You can refer back to End Live Chat Mode.
Transfer Ticket
The agent encounters an equiry which should be handled by another team, and the agent decides to transfer the Ticket to another agent.
- Hover over a message in the inbox channel, select "More actions" on the right, then select "More message shortcuts".
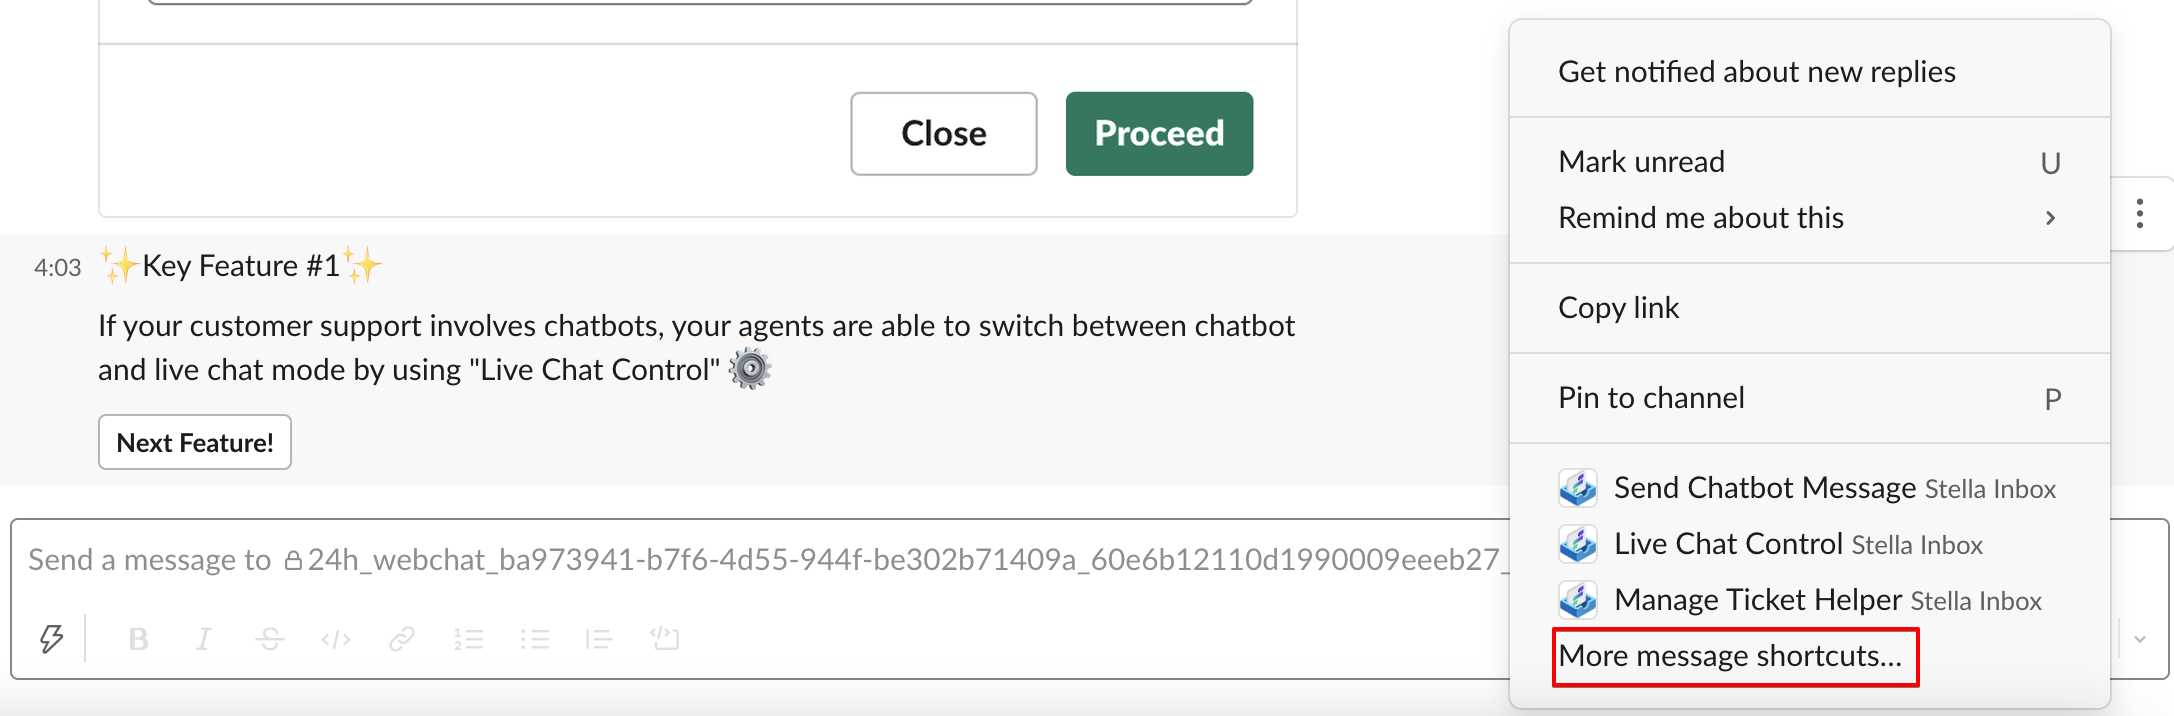
- You can see a list of Message Shortcuts in the menu. Select Live Chat Control.
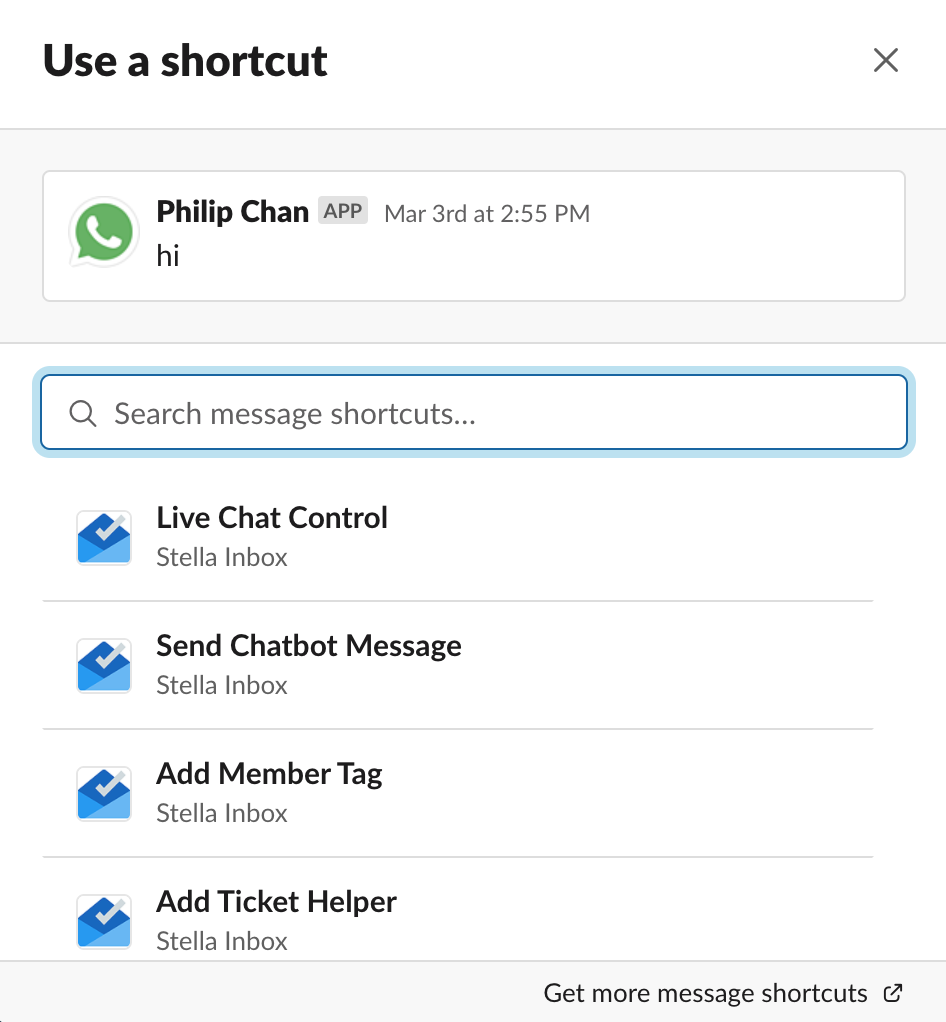
- You can see the panel of Live Chat Control now.

- In Live Chat Control, open the dropdown list and select the Ticketing Channel of the corresponding team. Then select "Proceed".
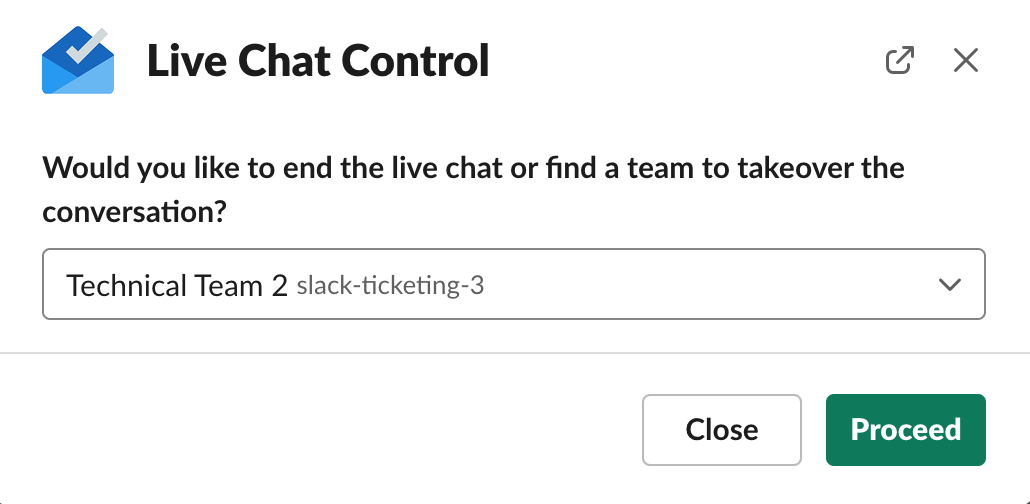
- When the Live Chat Ticket is transferred, Stella Inbox would notify you about the Label and Name of the target ticketing channel. As the agent from another team has not accepted the ticket, the ticket status shown is "Pending". (Remember to set up the Label and Name in the ticketing channel settings.)
![]()
- You can see Stella Inbox notification about the change in the Inbox Channel. When an agent from the Technical Team 2 accpets the ticket, the ticket status becomes "Active". A Customizable Message is also displayed in user's WhatsApp. (You can set up your own customizable message here.)
If another agent transfers a ticket to your team, you can repeat steps 17 - 20 in Accept Ticket.
Check and see if you can produce the expected outcome.