Build Child Nodes
Let's continue to follow the tree diagram to build the remaining child nodes and you are very close to completing your first chatbot!
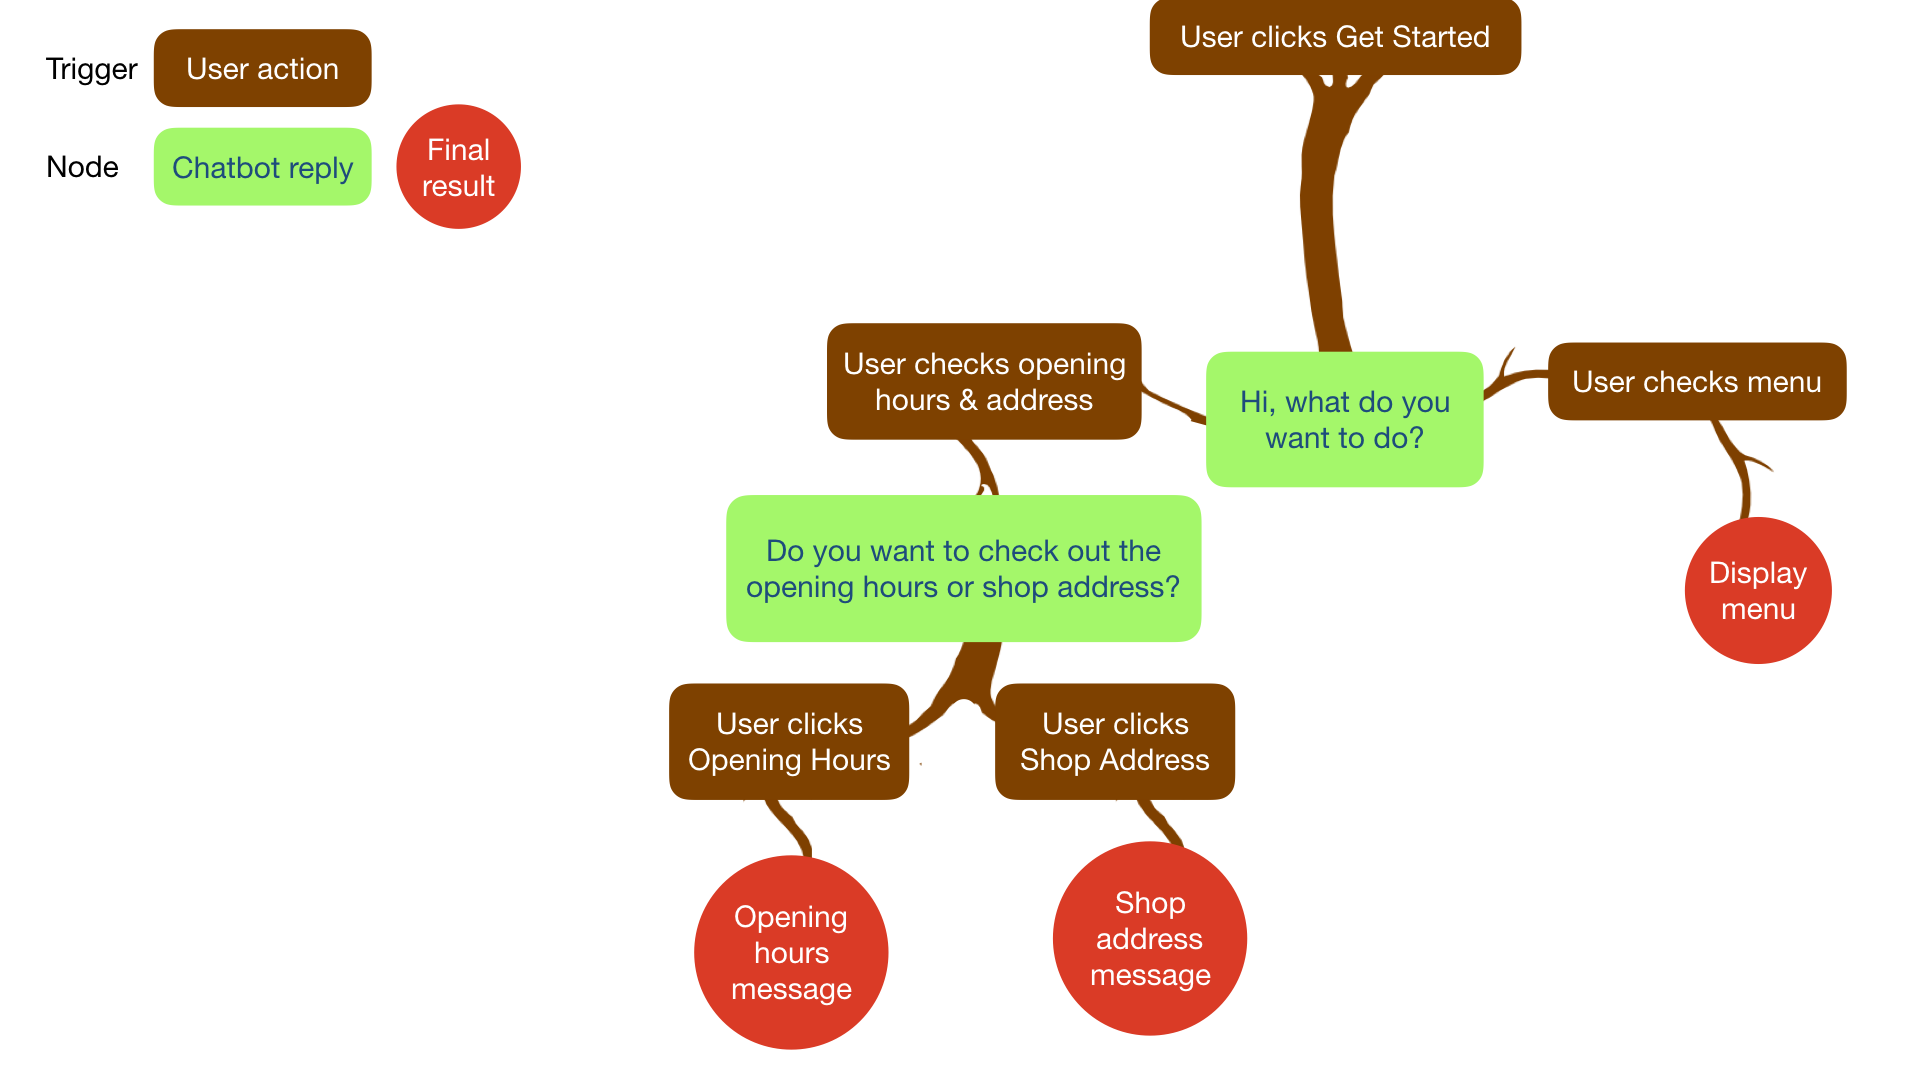
Child Nodes are the nodes that come after the first node and they can be in the second layer, the third layer or even the layers after. Users cannot access any Child Node if they are not on the designated path.
In the above example, "Opening Hours message" is the Child Node of "Do you want to check out the opening hours or shop address?" and can only be triggered when user clicks "Opening Hours".
What is your Result?

| Property | Description |
|---|---|
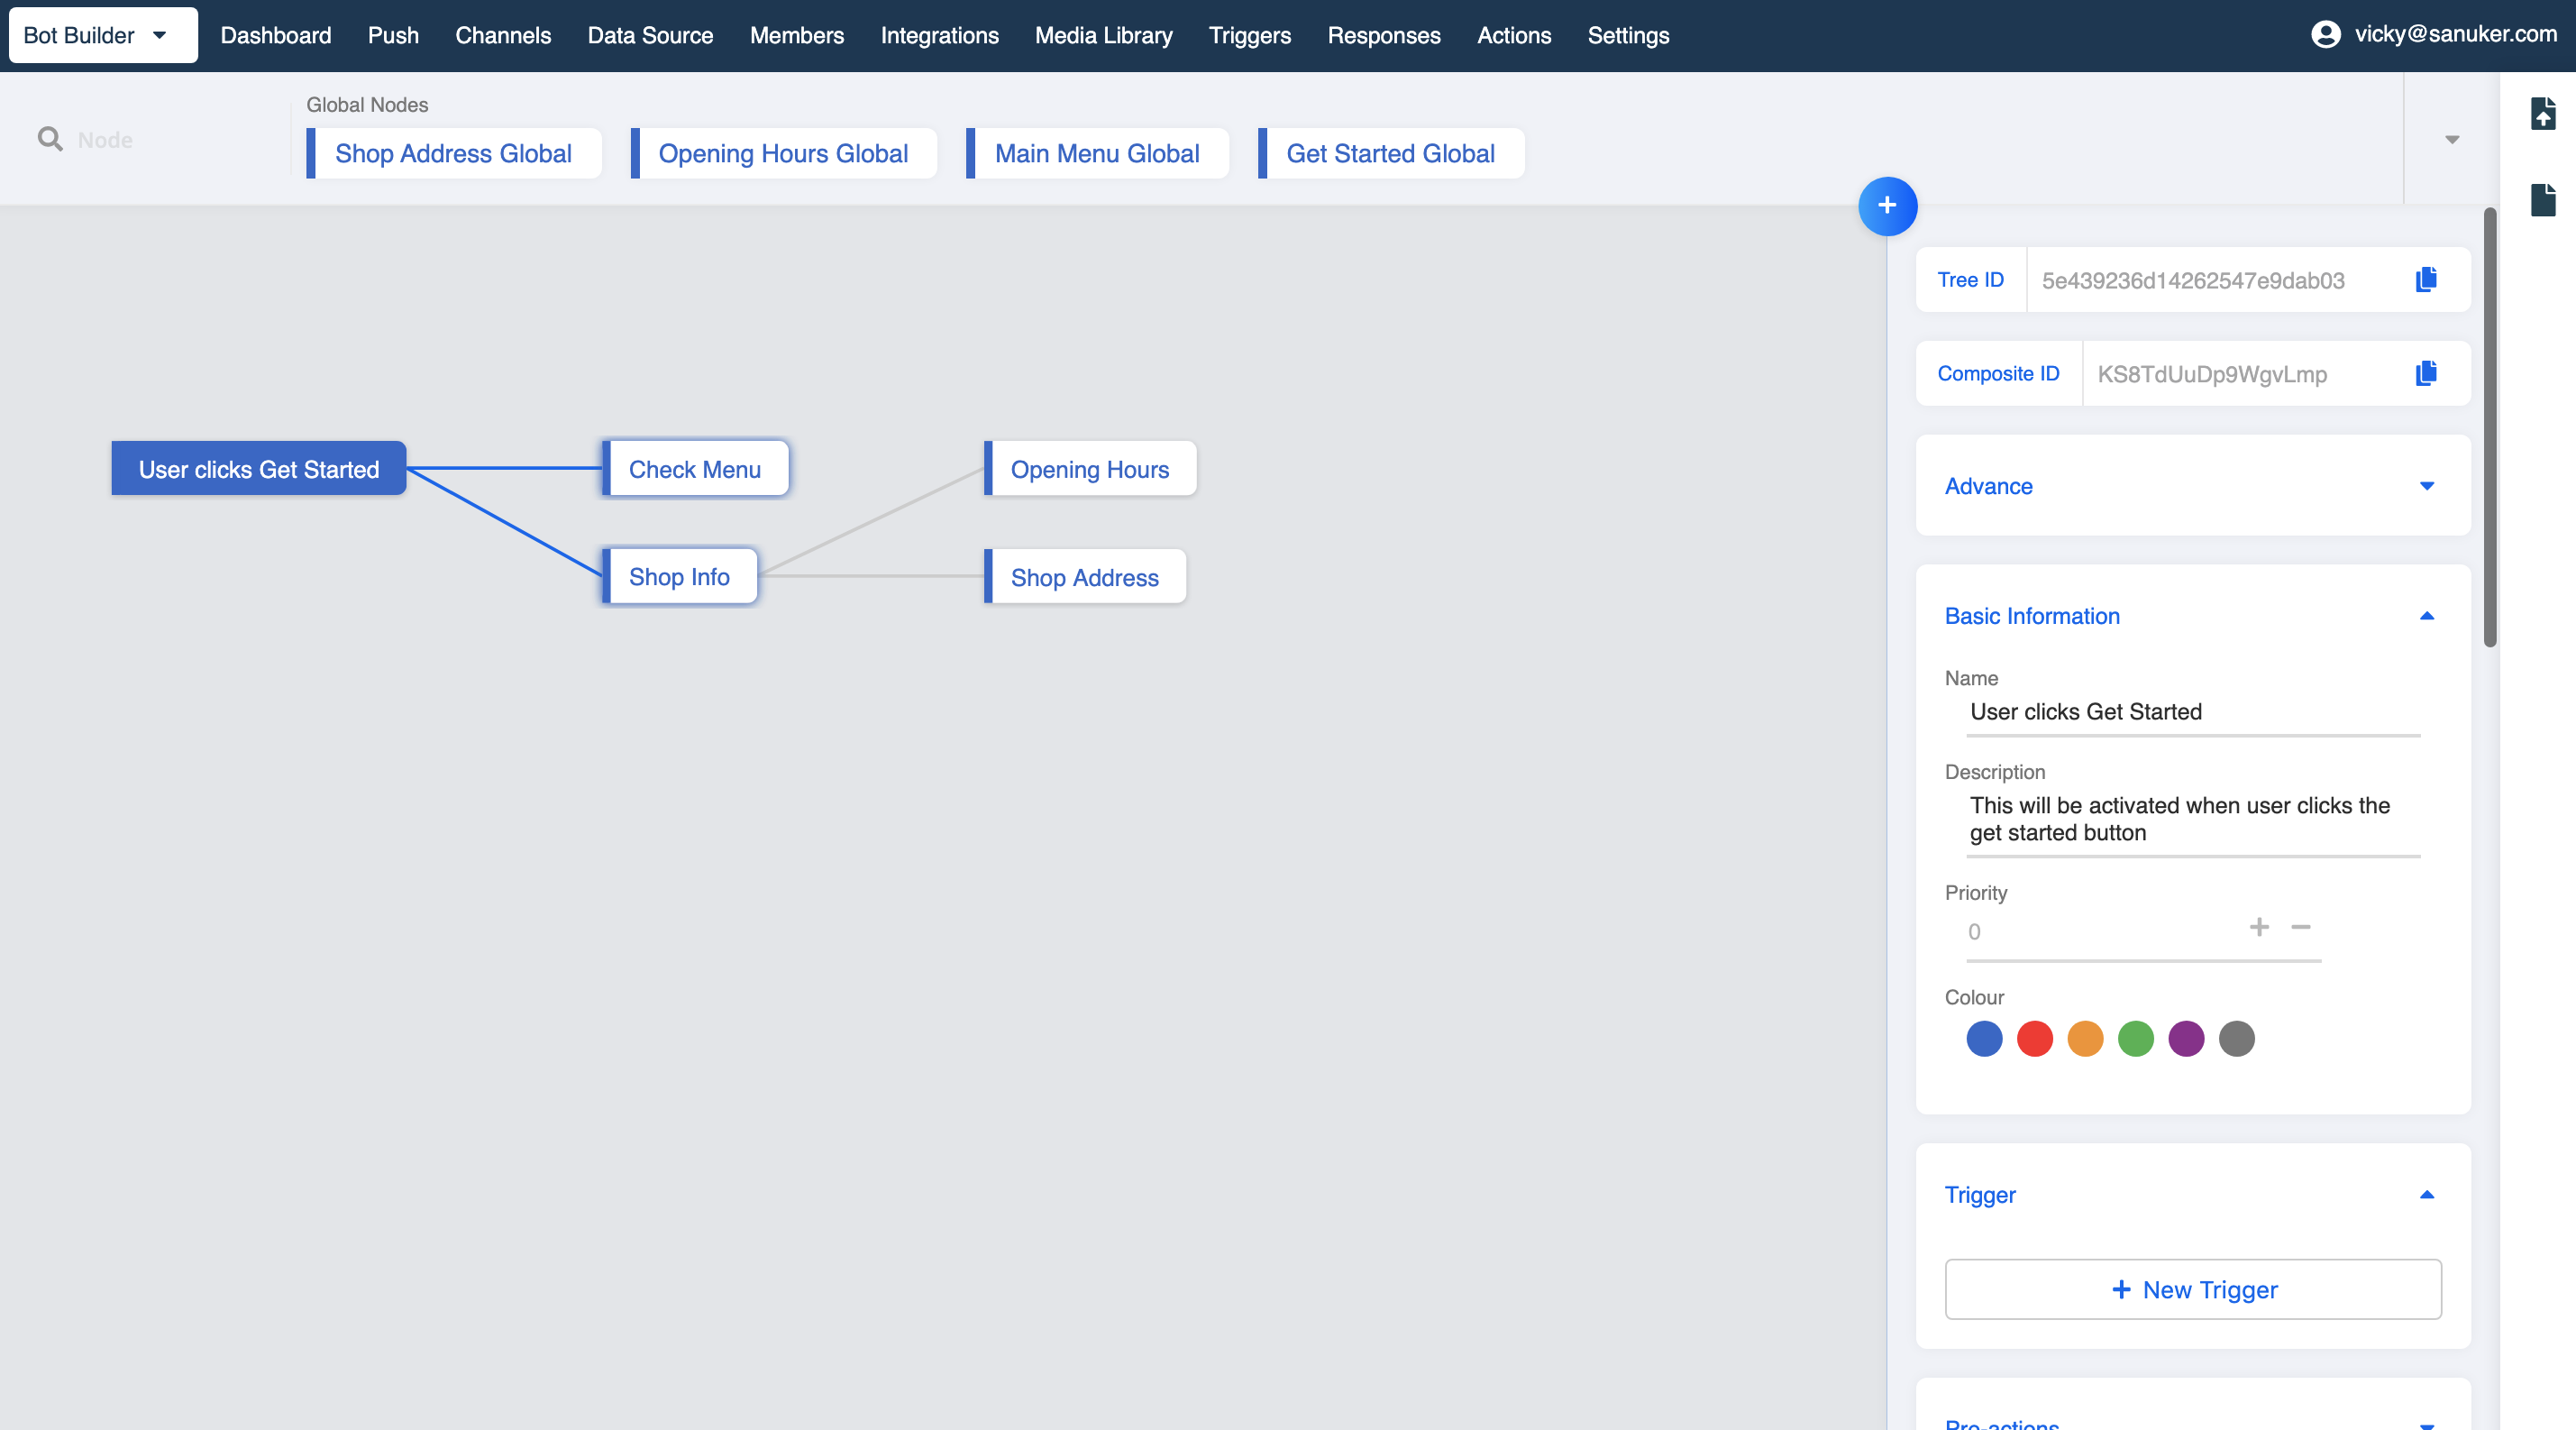
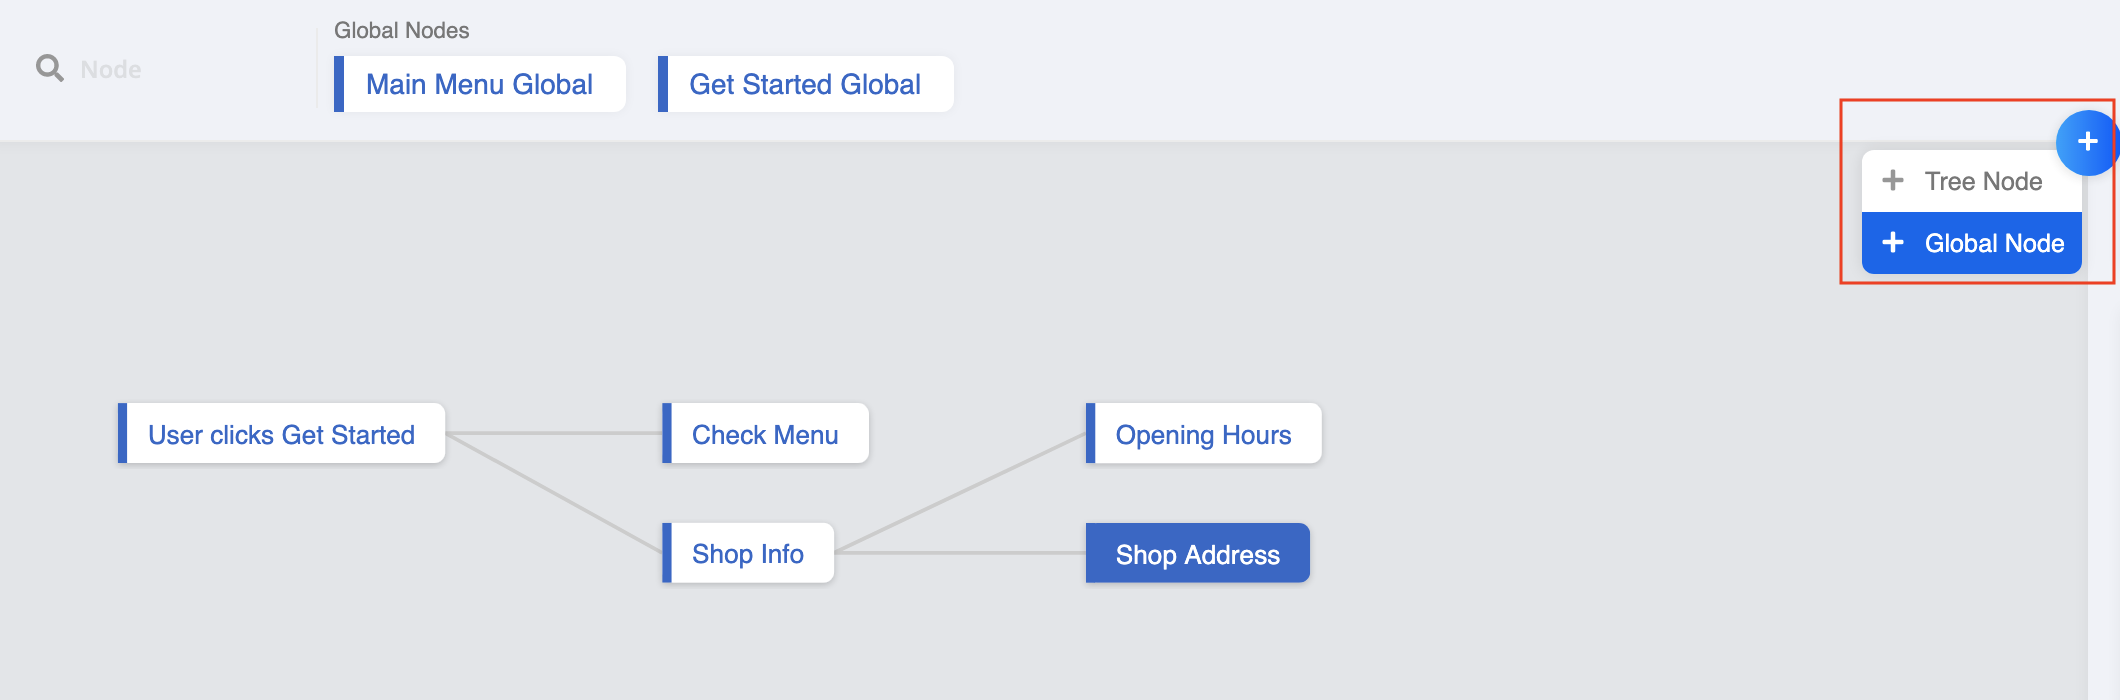
Successful Result | You will get a complete conversation tree graph on your workspace. There will be in total 5 tree nodes and 4 global nodes. You can also try your first chatbot in the testing environment! |
You may also right click Save As to download a sample result tree here to cross check with your chatbot!
Getting Hands-on
Enter your Bot Builder here.
Build 2nd-Layer Child Node: Check Menu
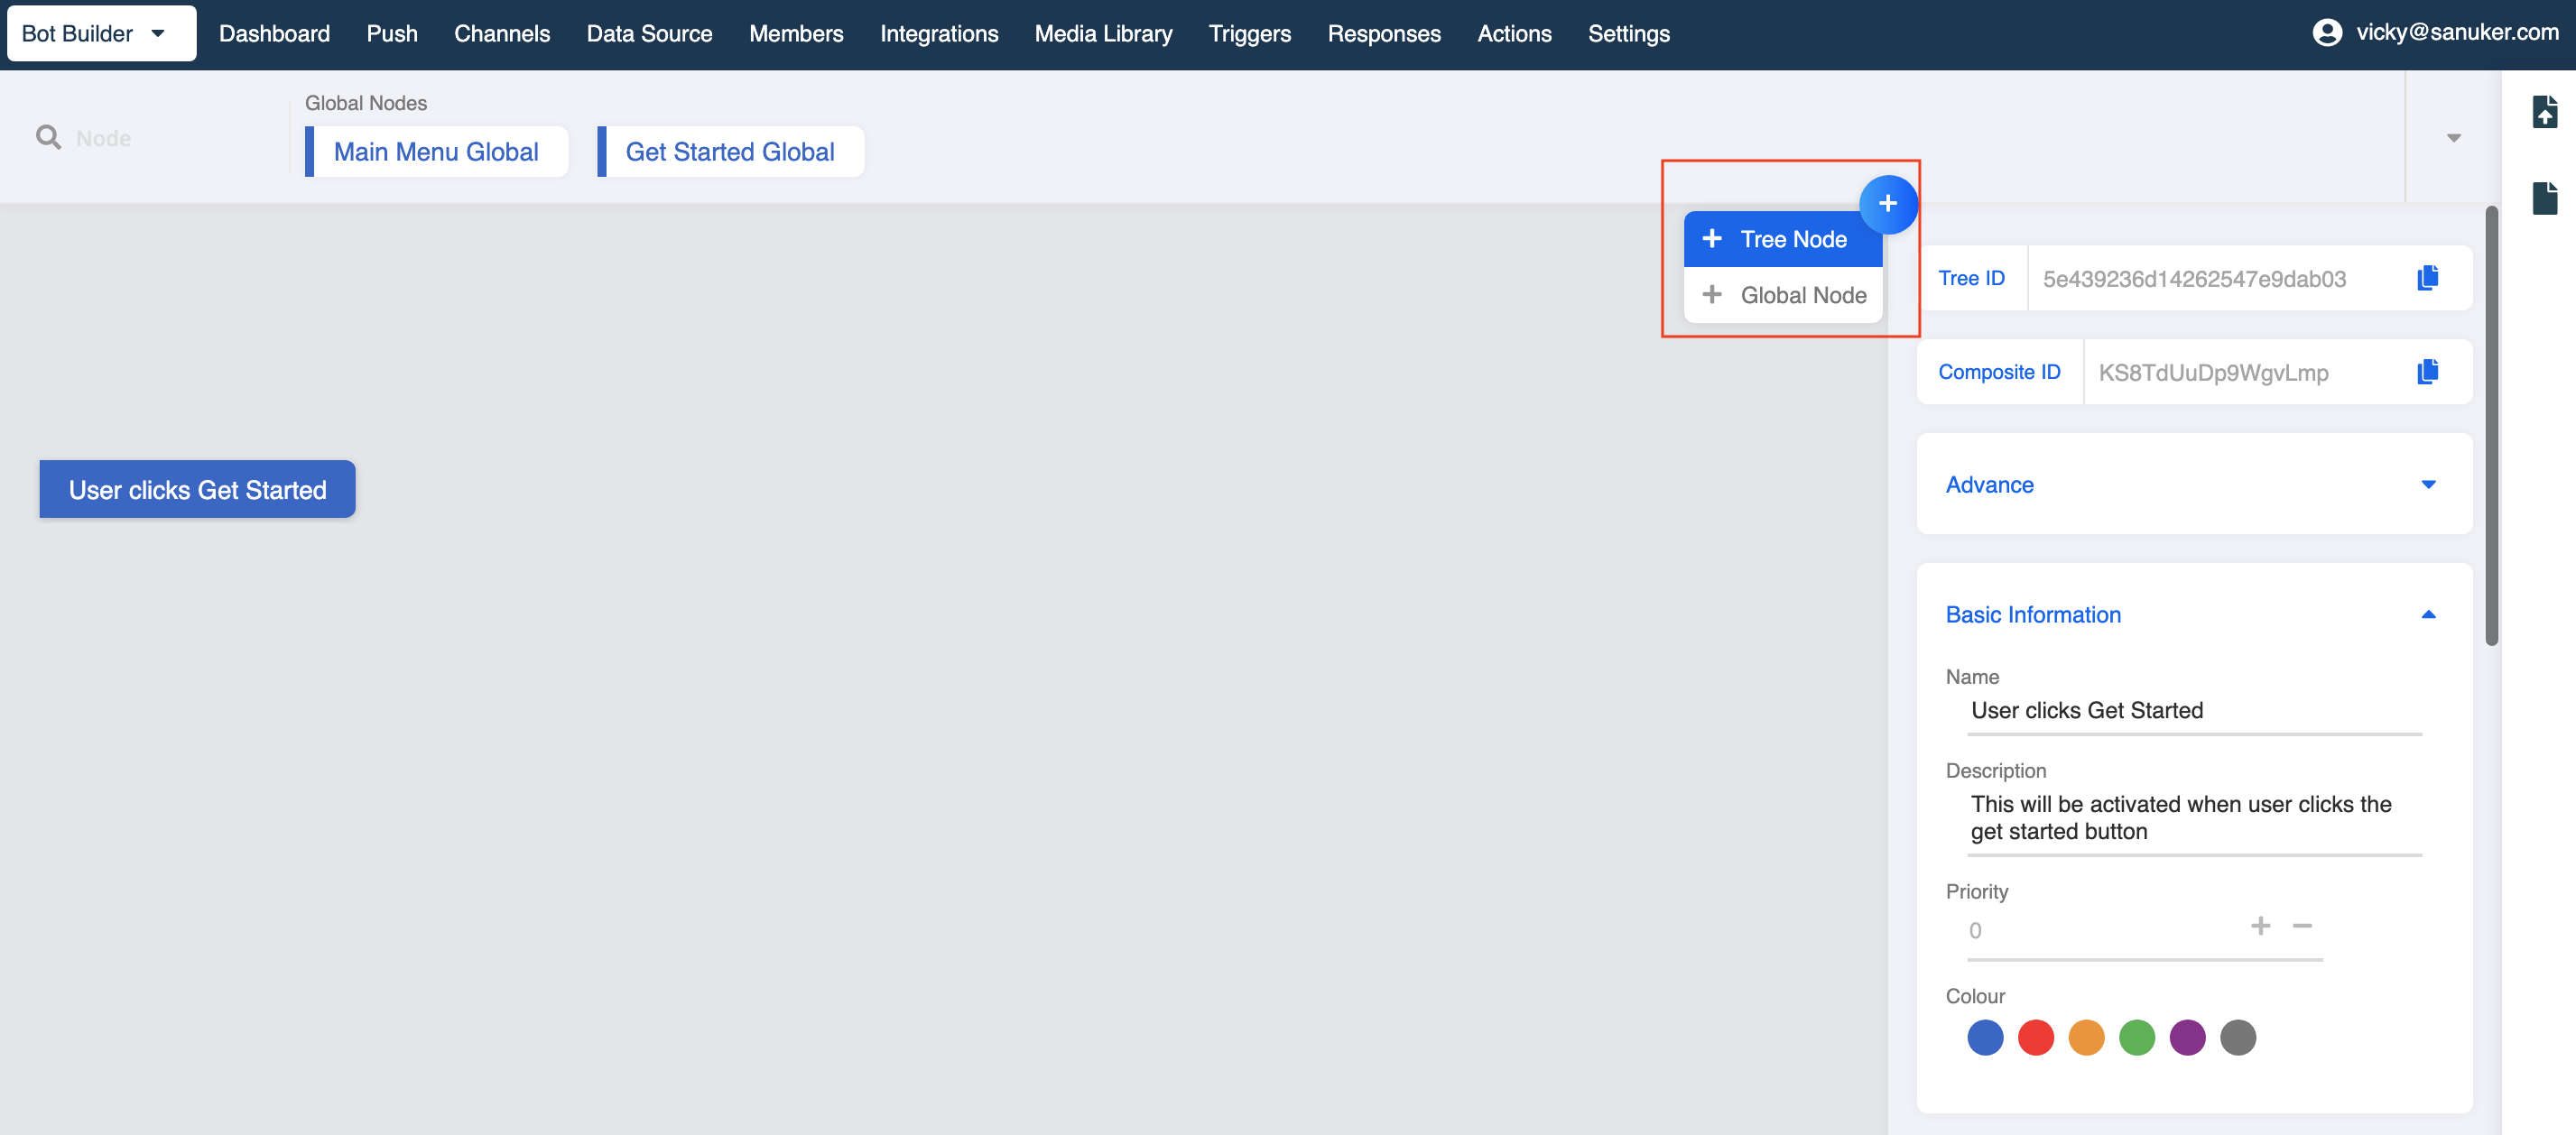
- Select your First Node User clicks Get Started and add a new tree node after it. Remember you must always select the Parent Node to create the child node that comes after.
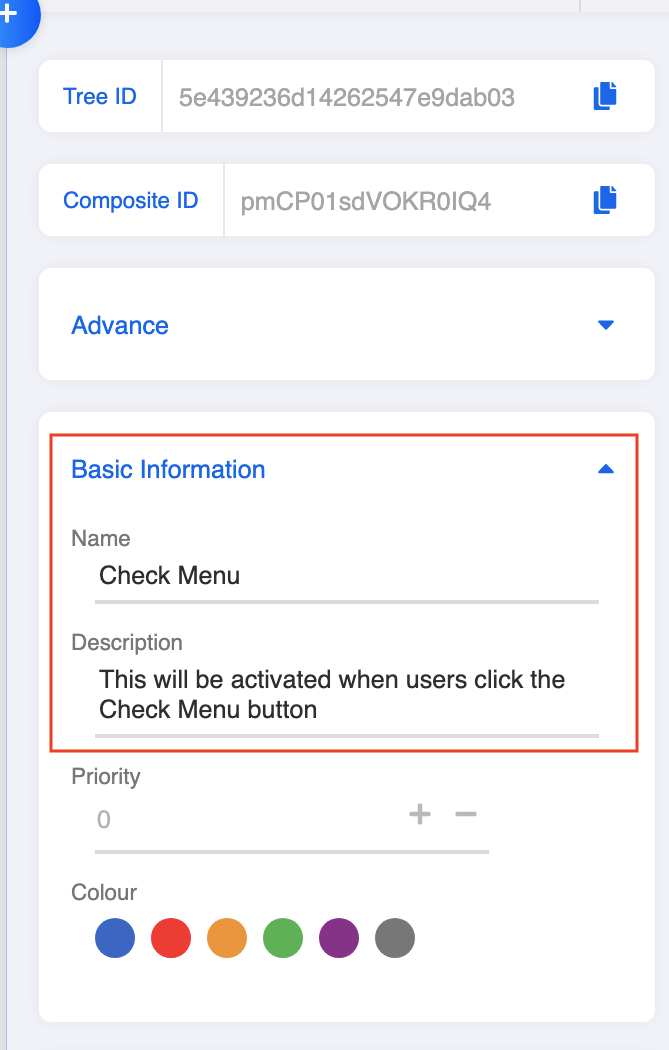
- Go to "Node Inspector" and fill in the node details.
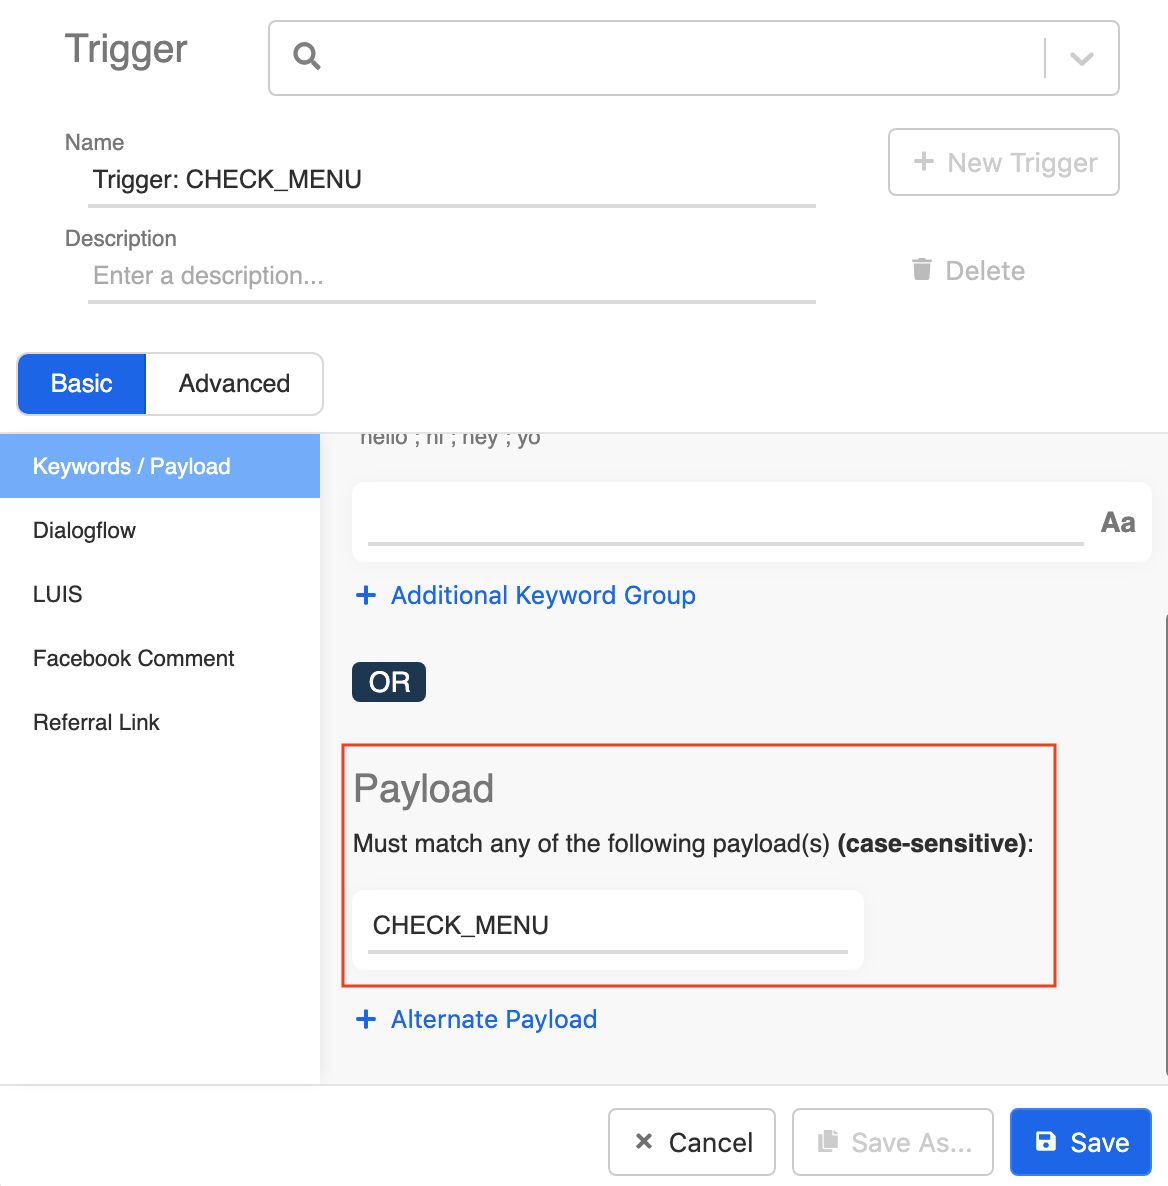
- Create a trigger that allows user to activate the check menu message. Remember the payload we set in 1.3? It's "CHECK_MENU".
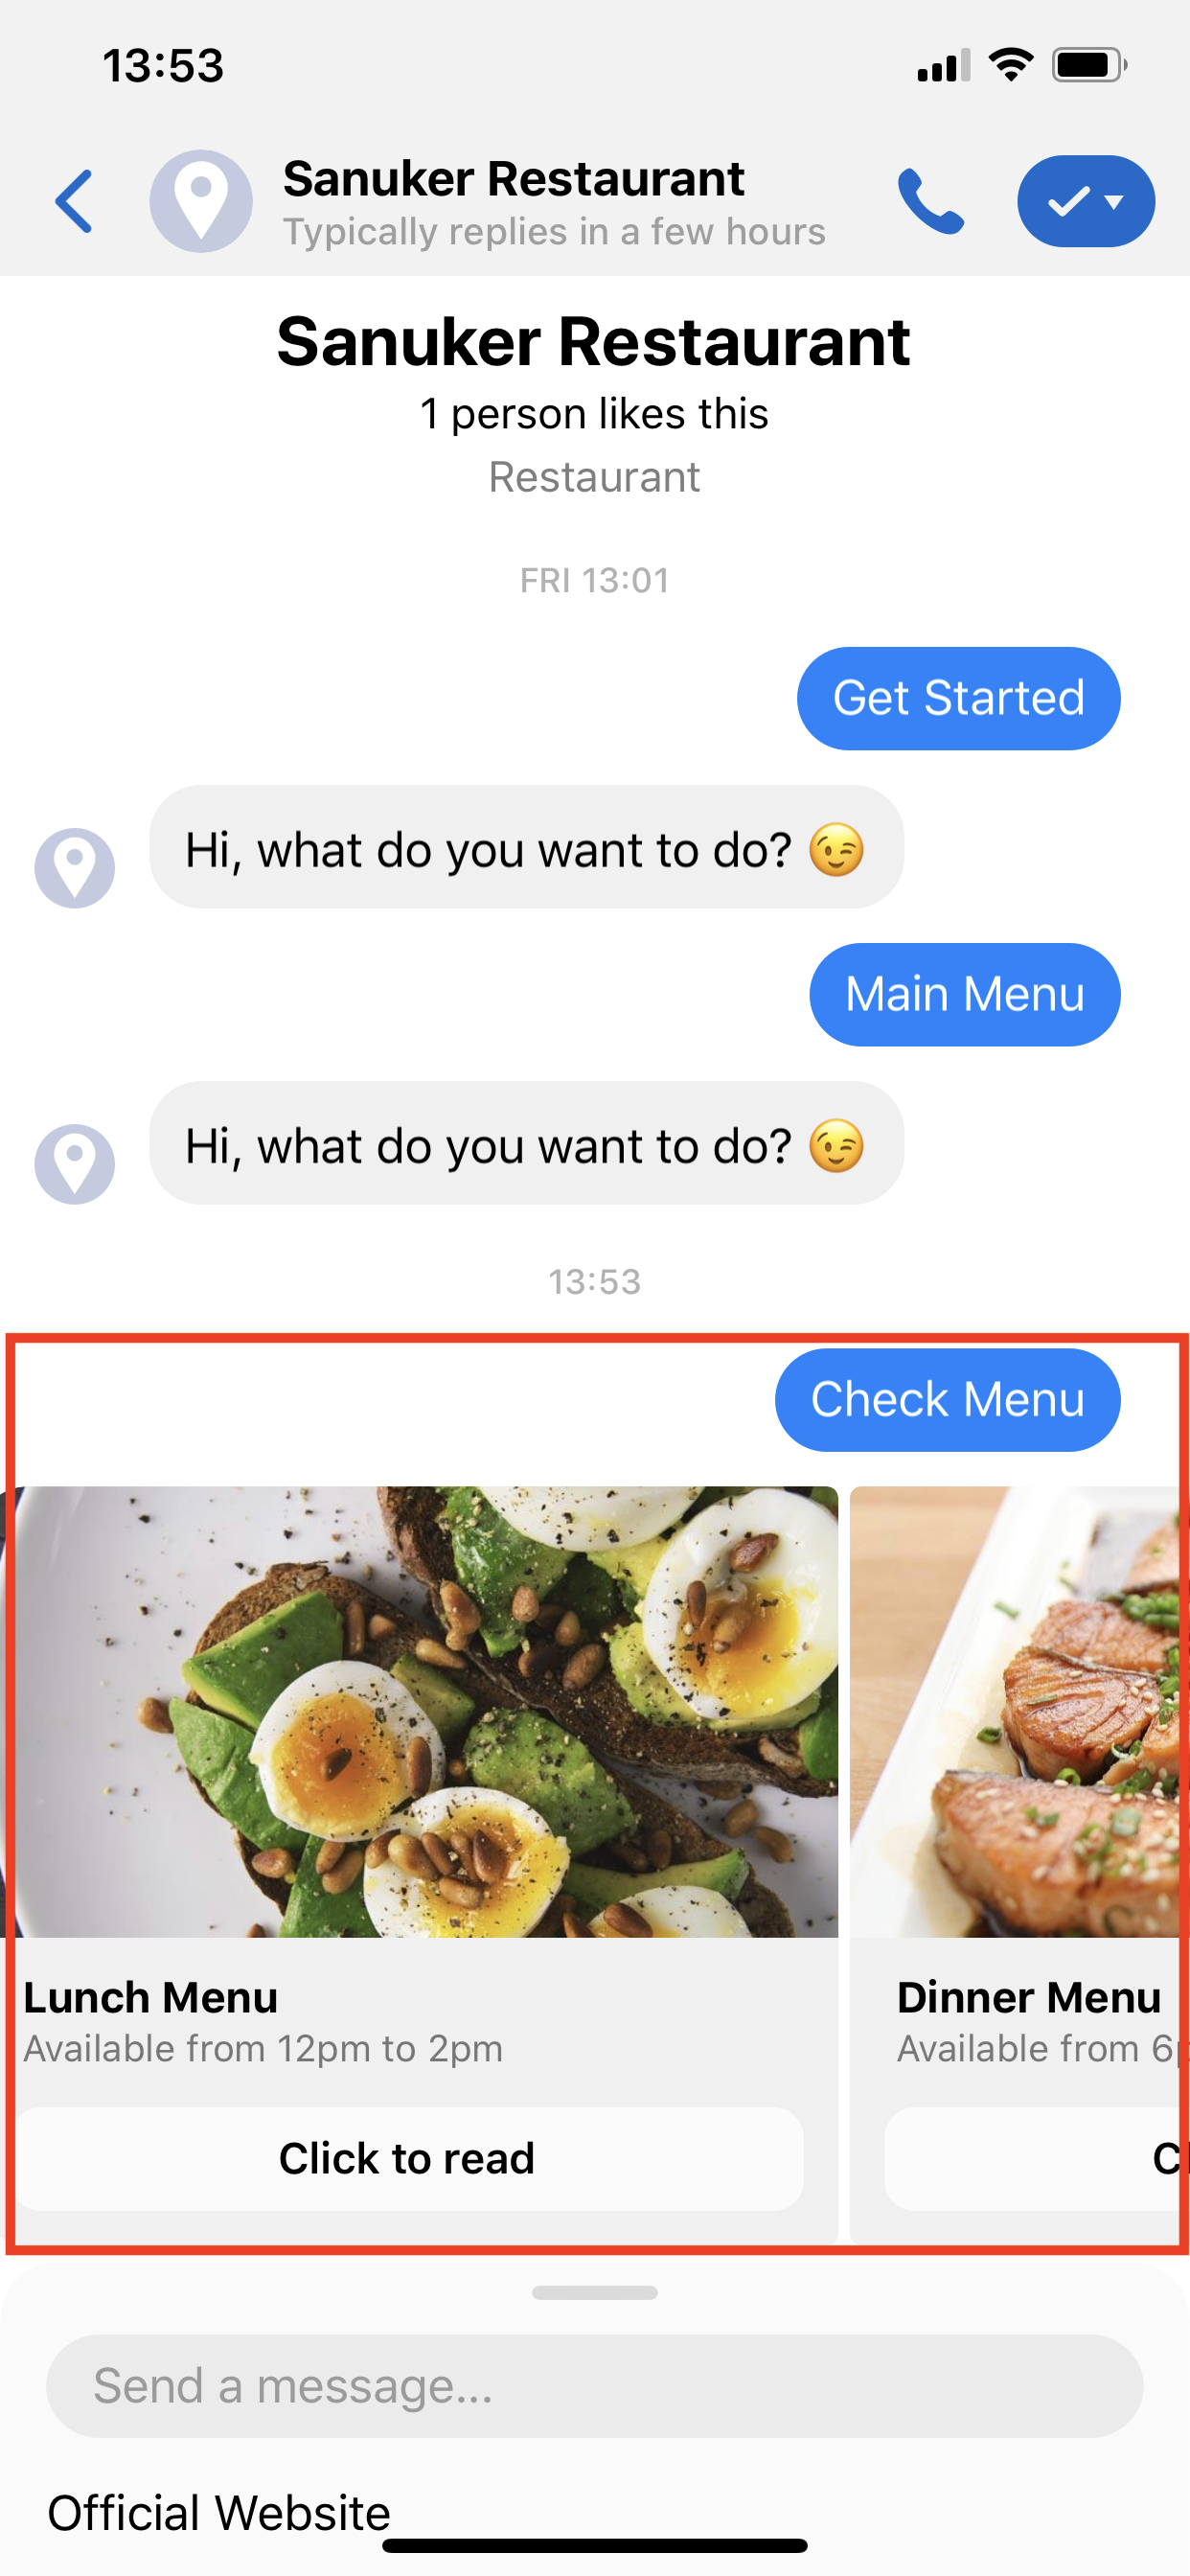
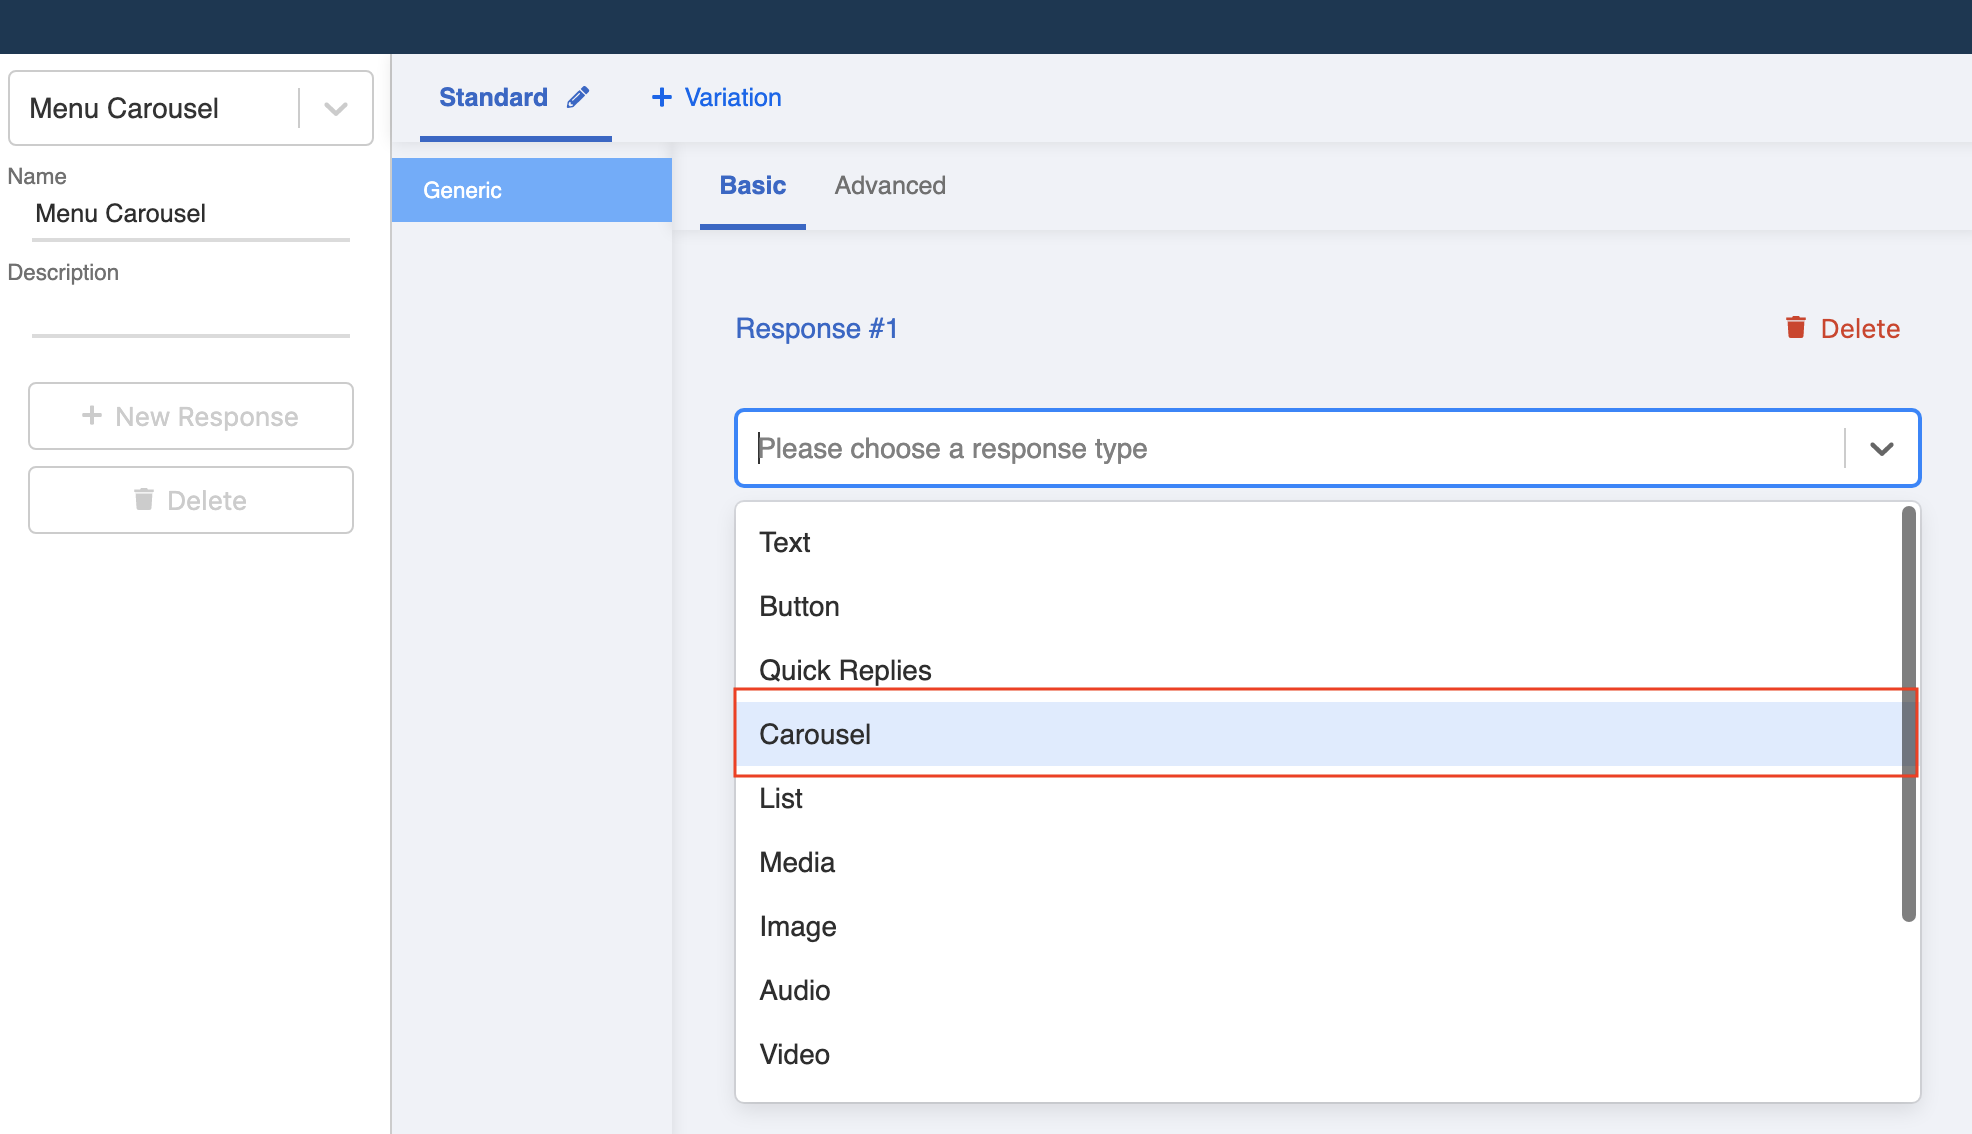
- Create a response to display your restaurant menu. I would suggest to use Carousel as the message type because it looks a lot nicer.
- Click "+ Carousel" to add a new carousel item.
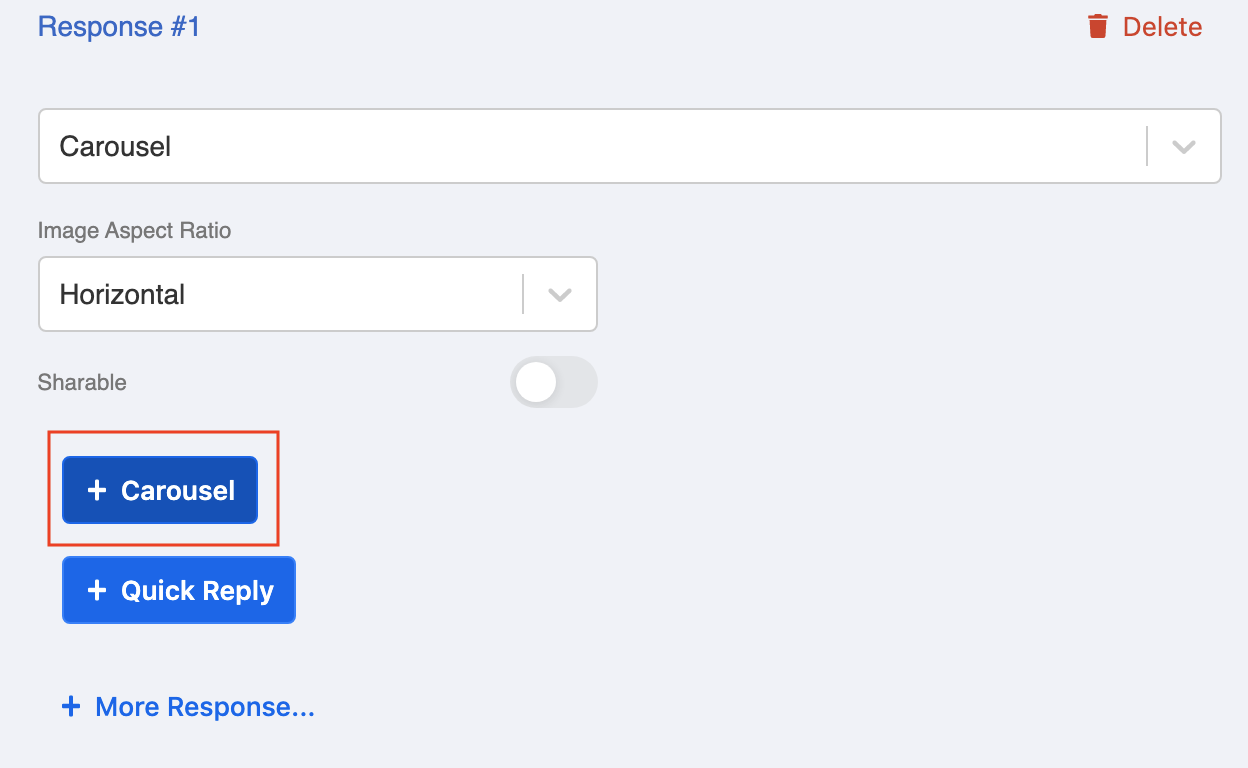
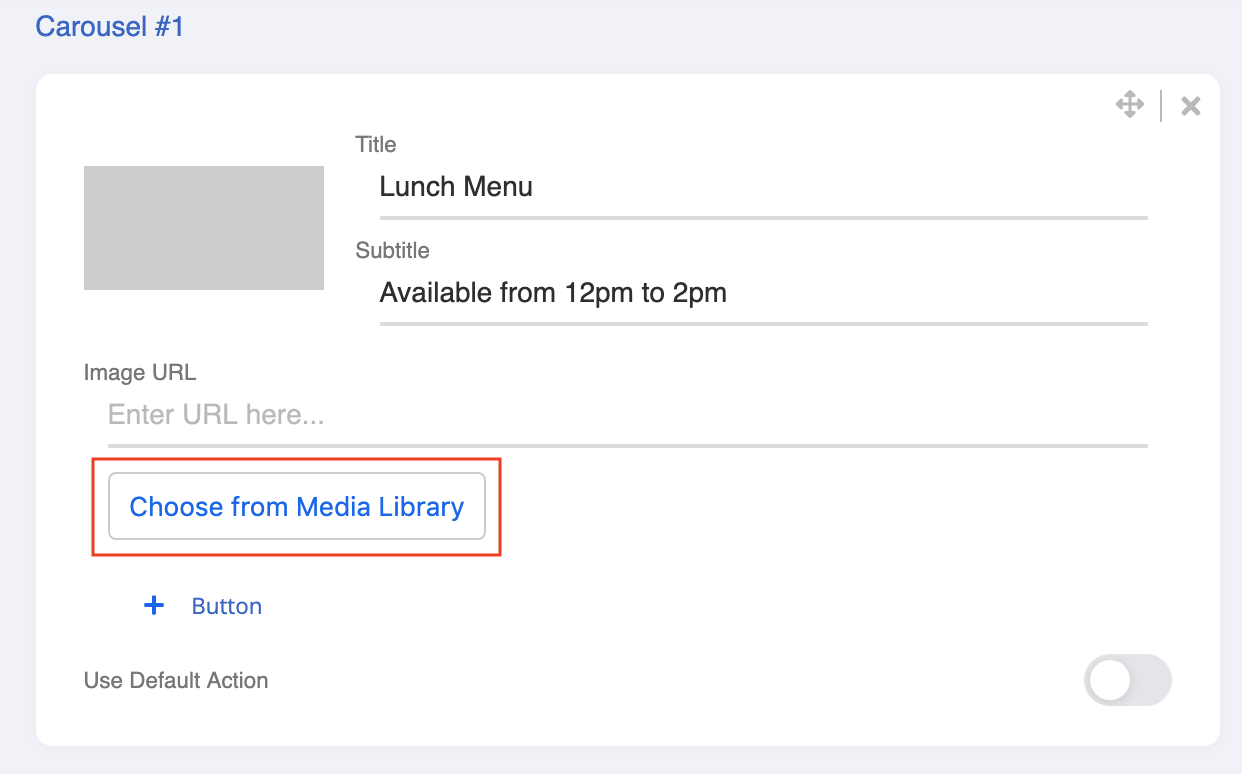
Fill in the details new carousel item. Under Title, put down "Lunch Menu". Under Subtitle, put down "Available from 12pm to 2pm".
Click "Choose from Media Library" to upload your carousel cover.
- A new window of Media Library will be opened. You can upload media files to be used on the chatbot here. Click "Upload a file".

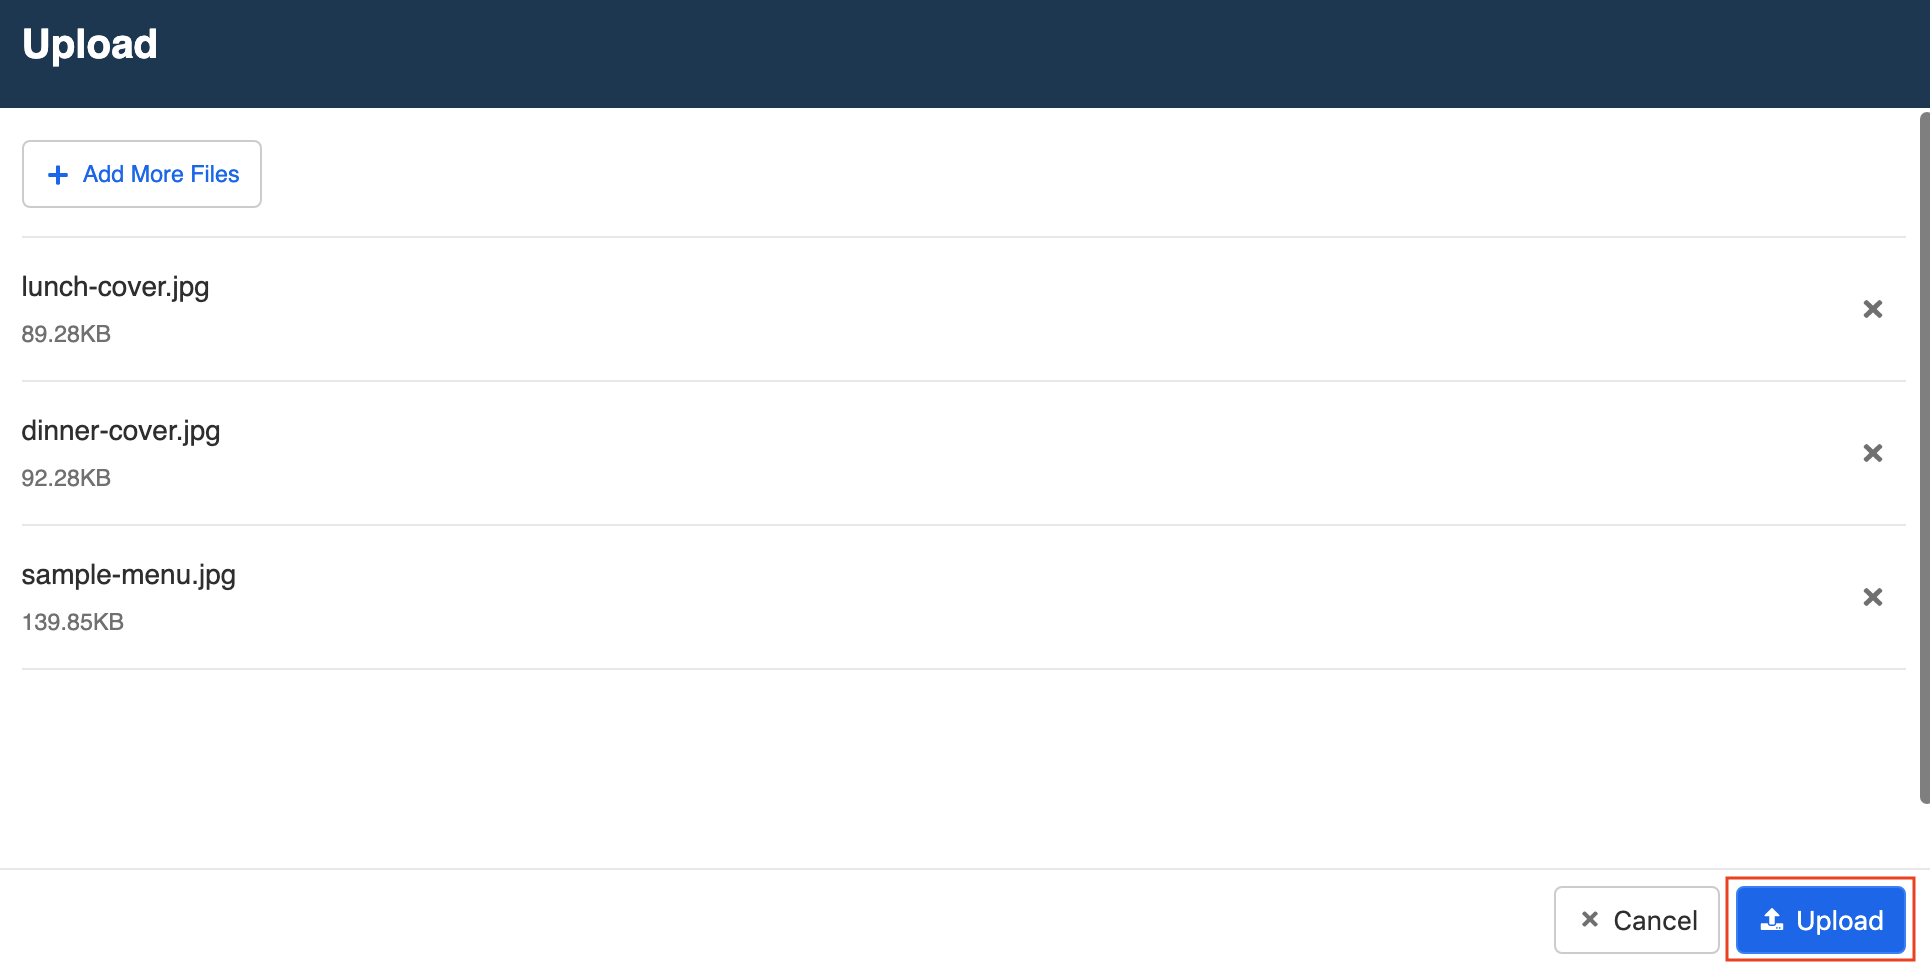
- Another new window of Media Library Upload Window will be opened. Click the middle icon to select files and upload.

- Selected files will be displayed in a list view. Click "Upload" to upload all files at once.
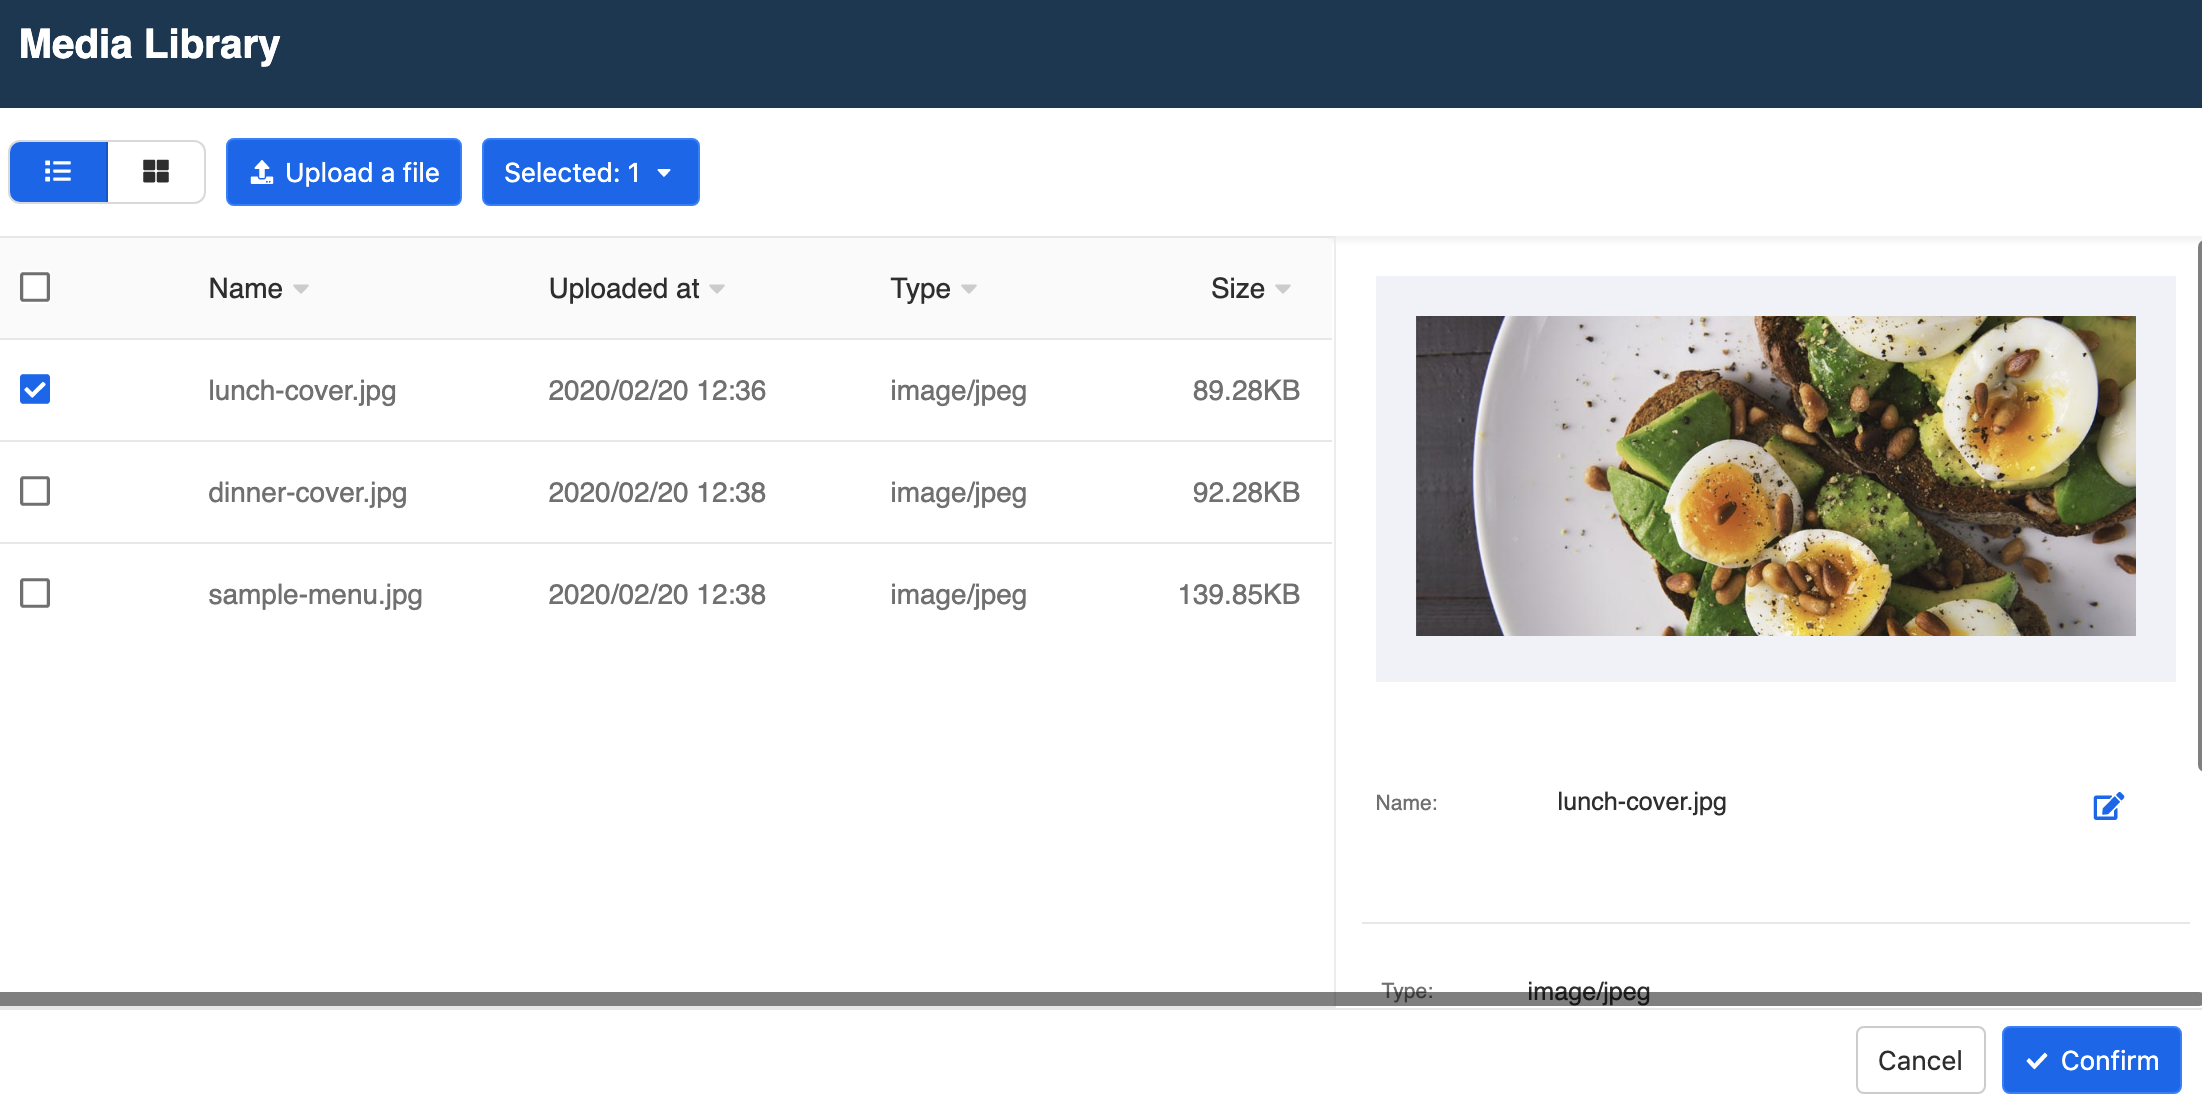
- Select lunch-cover.jpg and click "Confirm".
- Once clicked confirm, the cover image will appear in the carousel item. Now, click "+ Button" to add a button to allow customers to click to view the lunch menu.

- Fill in the button details. Under Title, fill in "Click to read". Select Web URL as your button type.
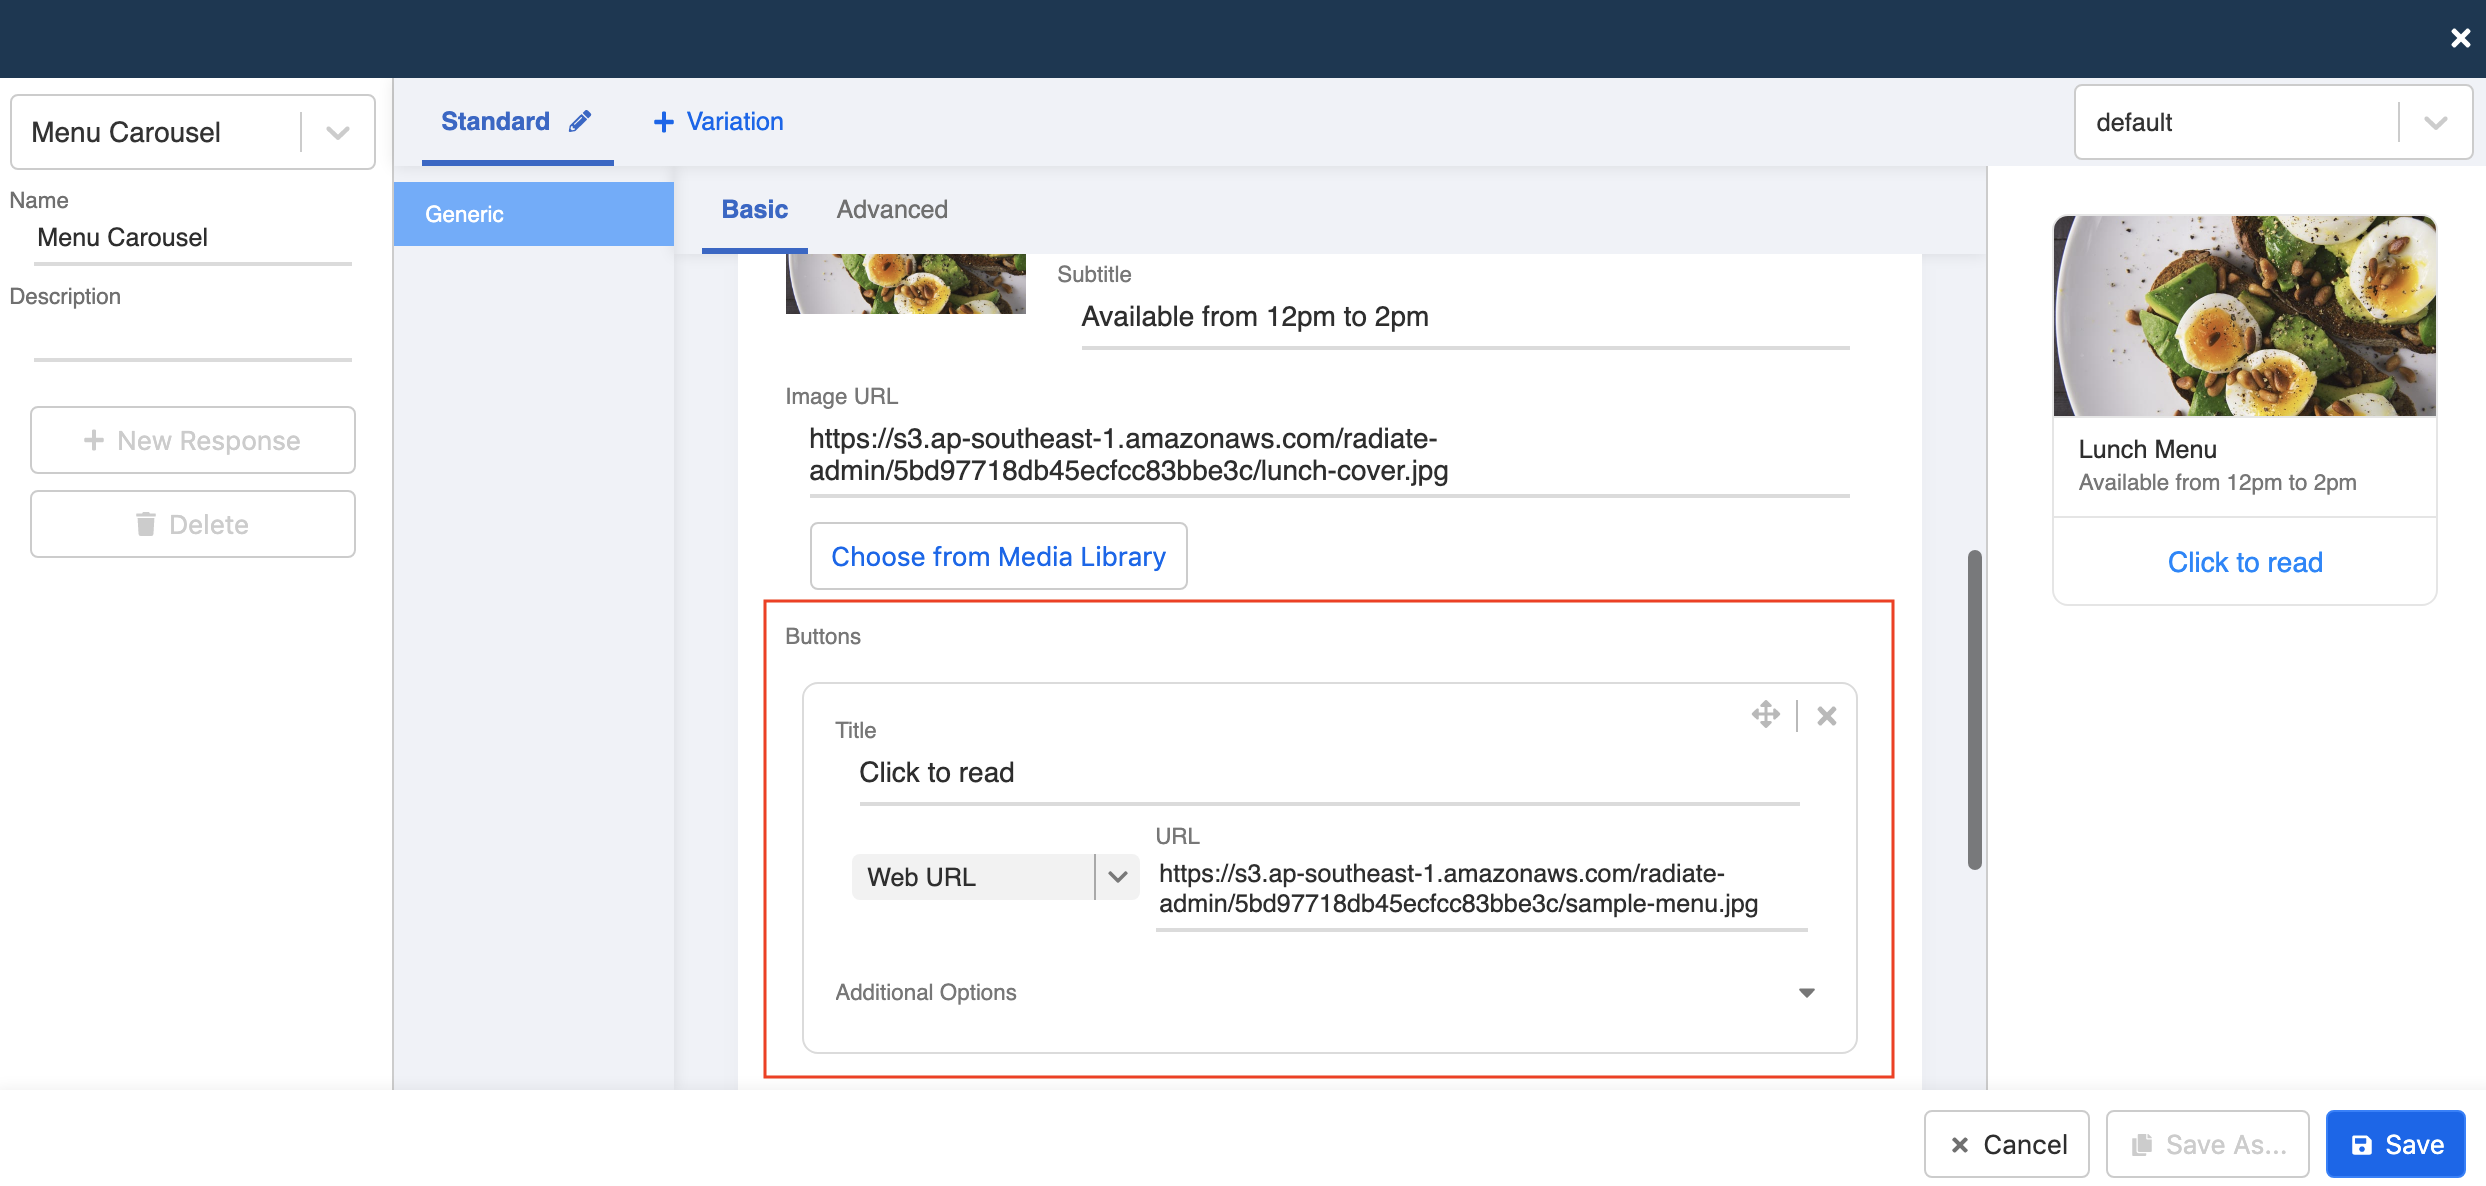
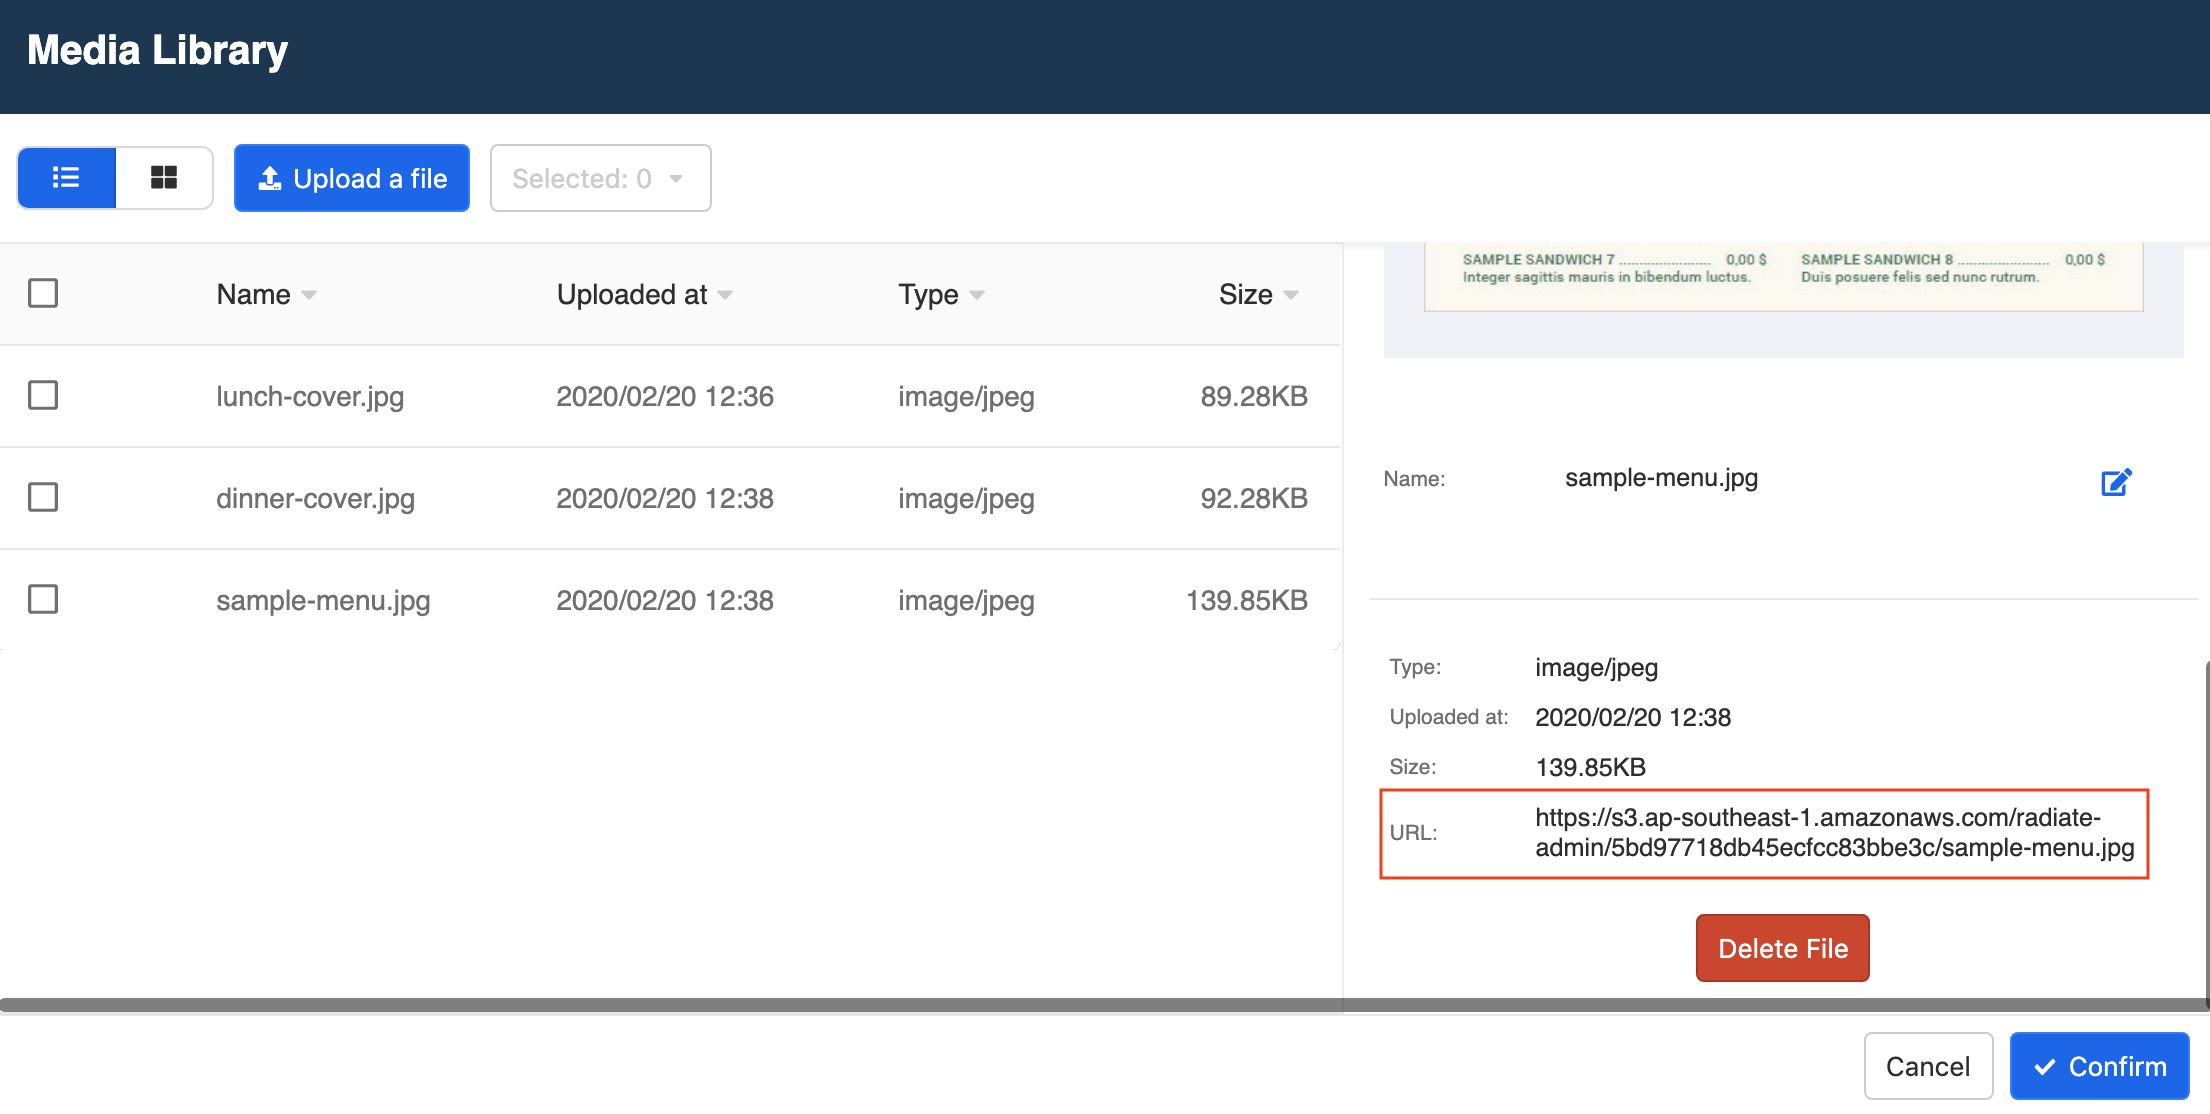
- To find the URL of your lunch menu, go back to the Media Library window. Click on sample-menu.jpg and scroll down to find the URL. Copy the URL and paste it back in the carousel item.
Now, repeat step 5, step 11 and step 14 to add another carousel item, select dinner-cover.jpg as the cover image and add back the dinner menu URL.
Under Title, put down "Dinner Menu". Under Subtitle, put down "Available from 6pm to 10pm".

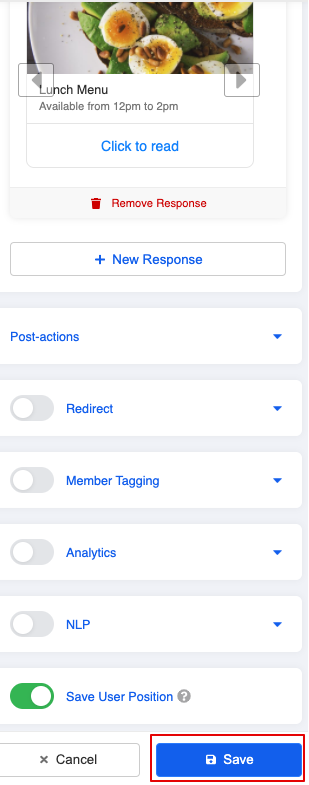
- Your menu carousel is done now. Check the message preview to see if it is set up properly. Click "Save" to save your carousel.

- Click "Save" to save your first child node.
Build 2nd-Layer Child Node: Shop Info
- Now you can follow the same steps and build your second child node: Shop Info.

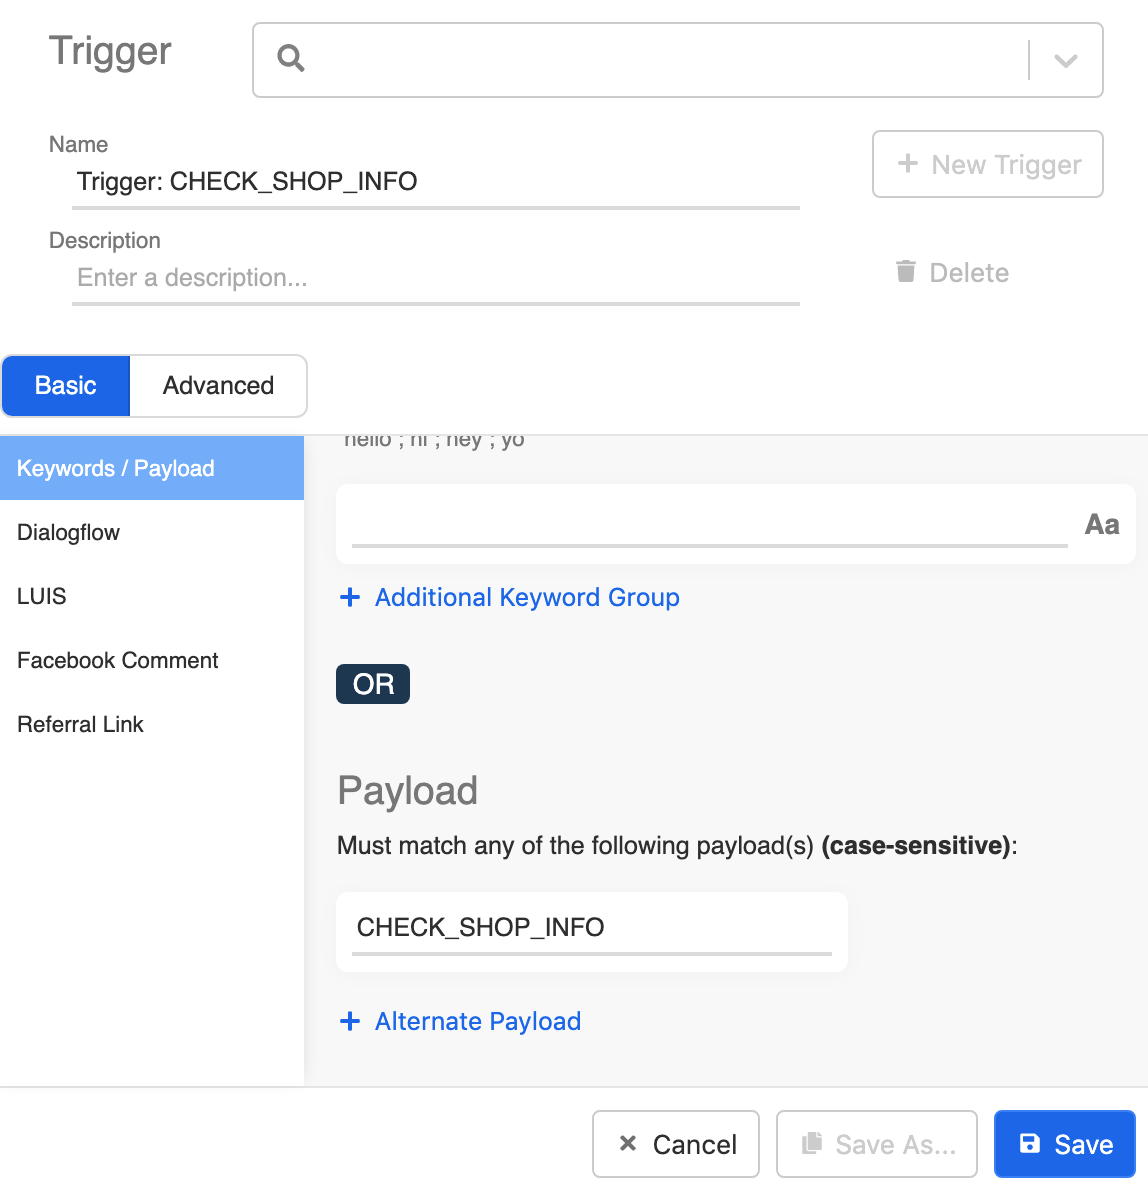
- Create a trigger for "CHECK_SHOP_INFO".
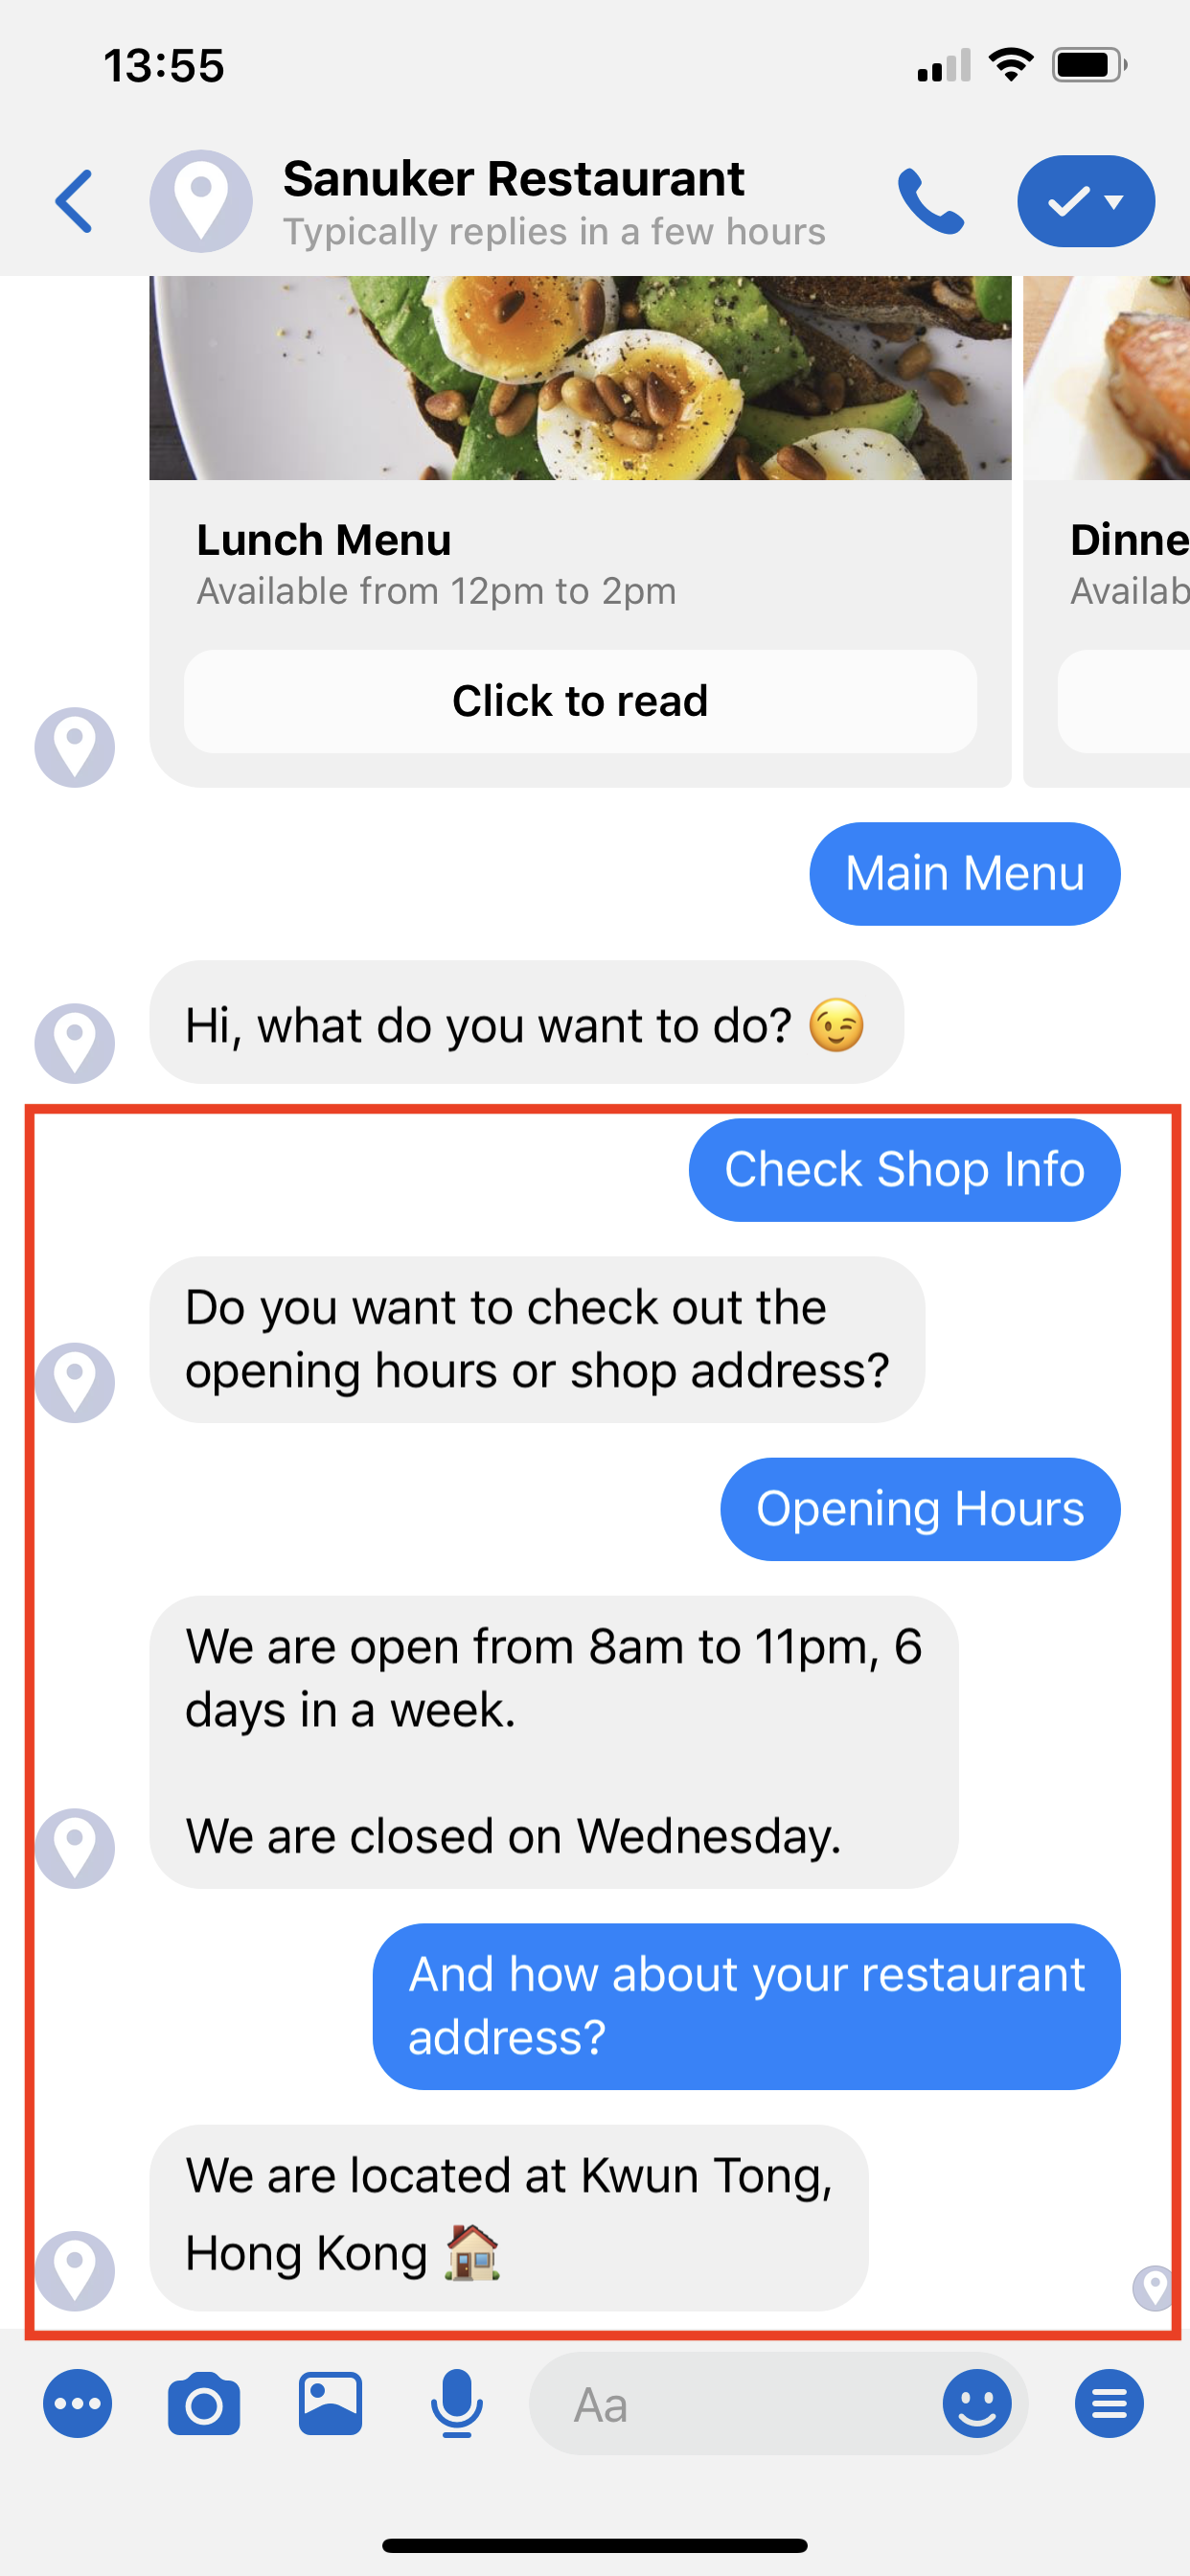
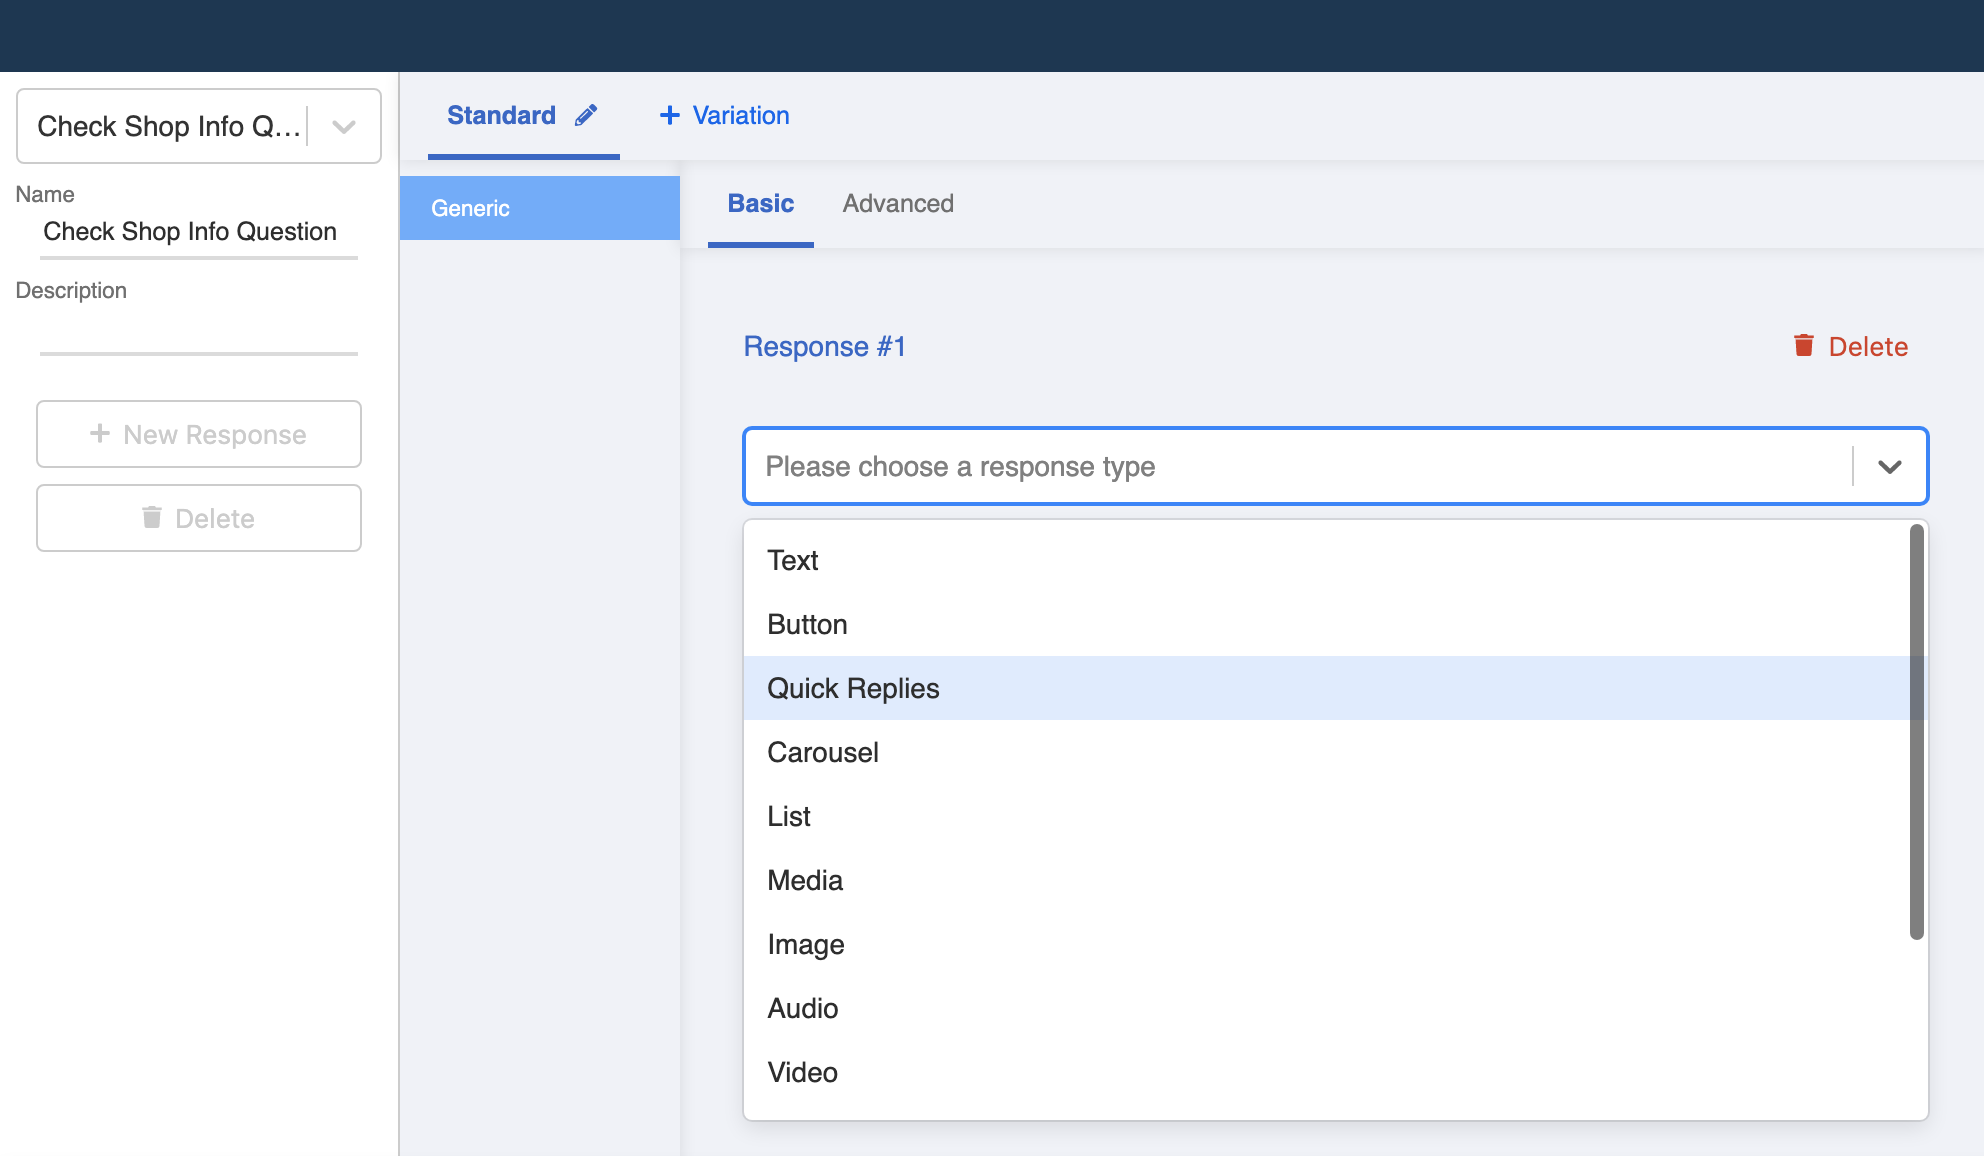
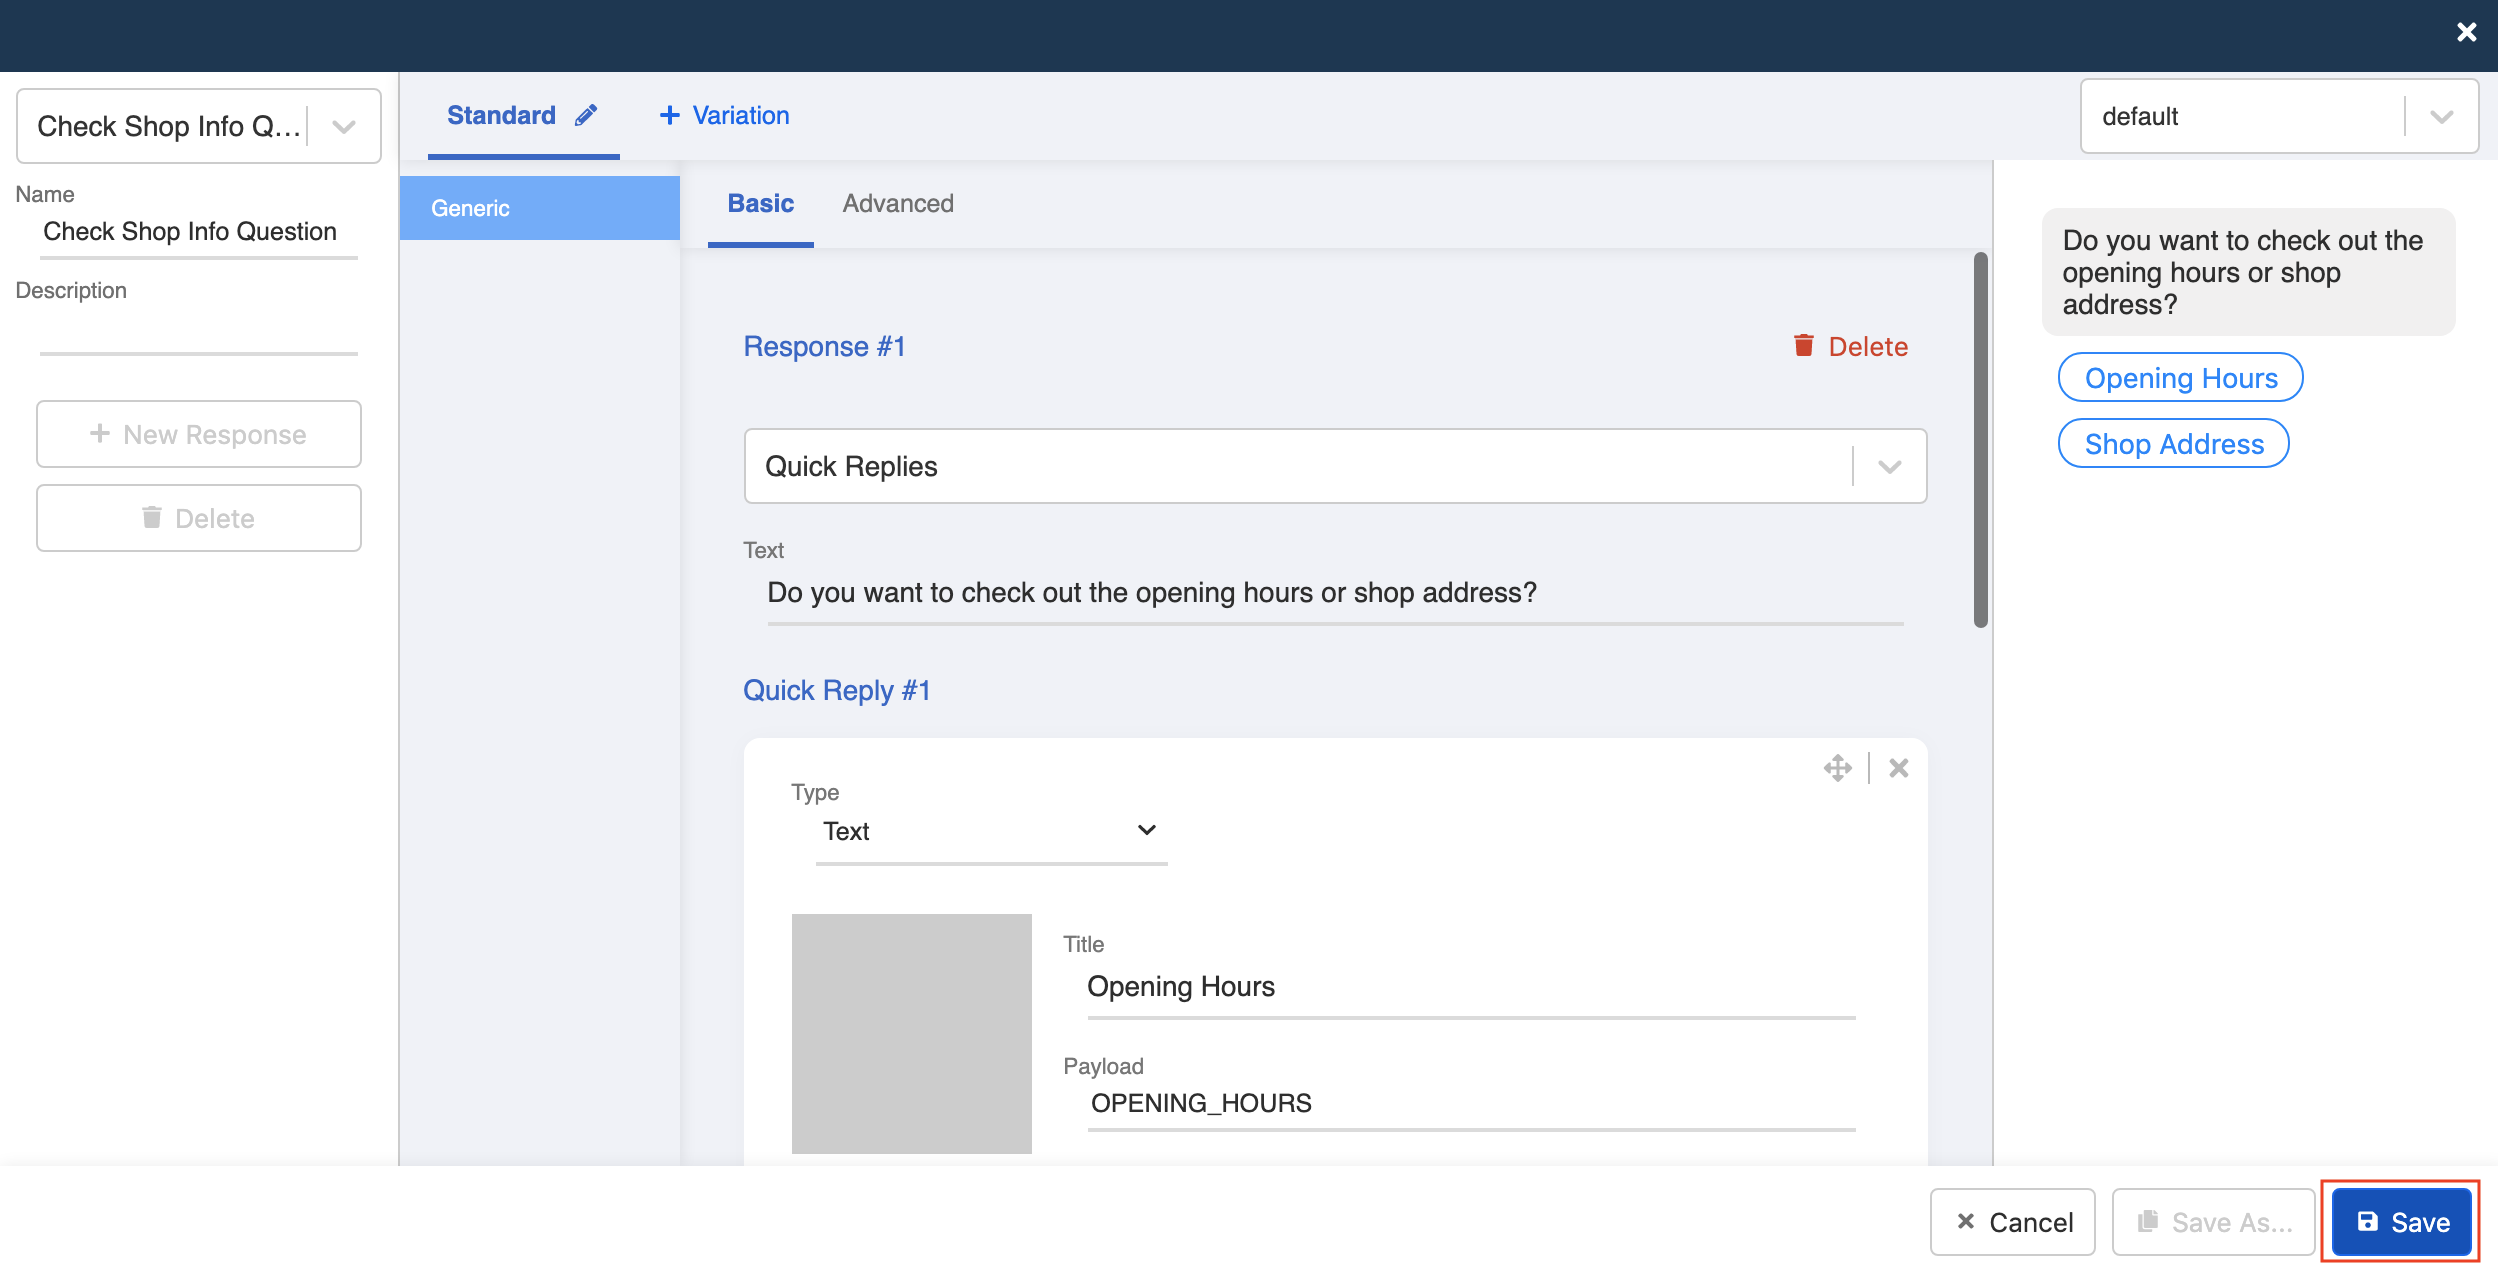
- Create Quick Replies for the question "Do you want to check out the opening hours or shop address?".
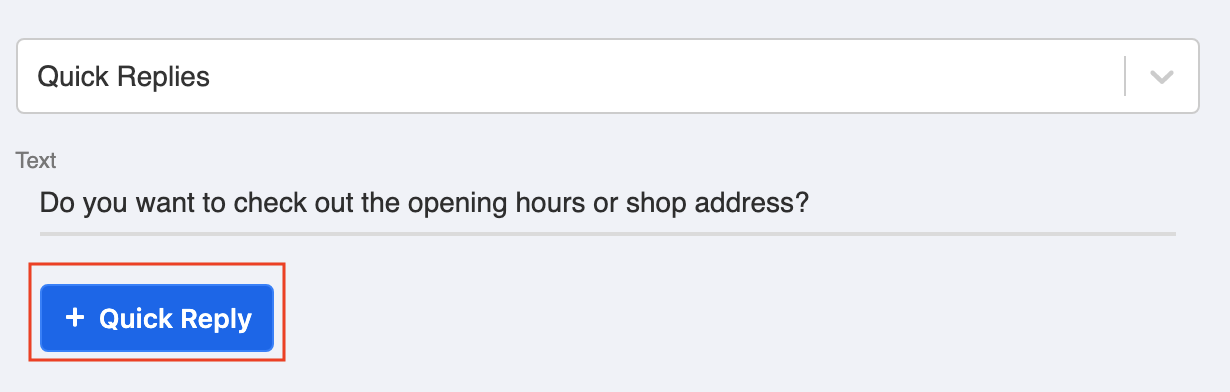
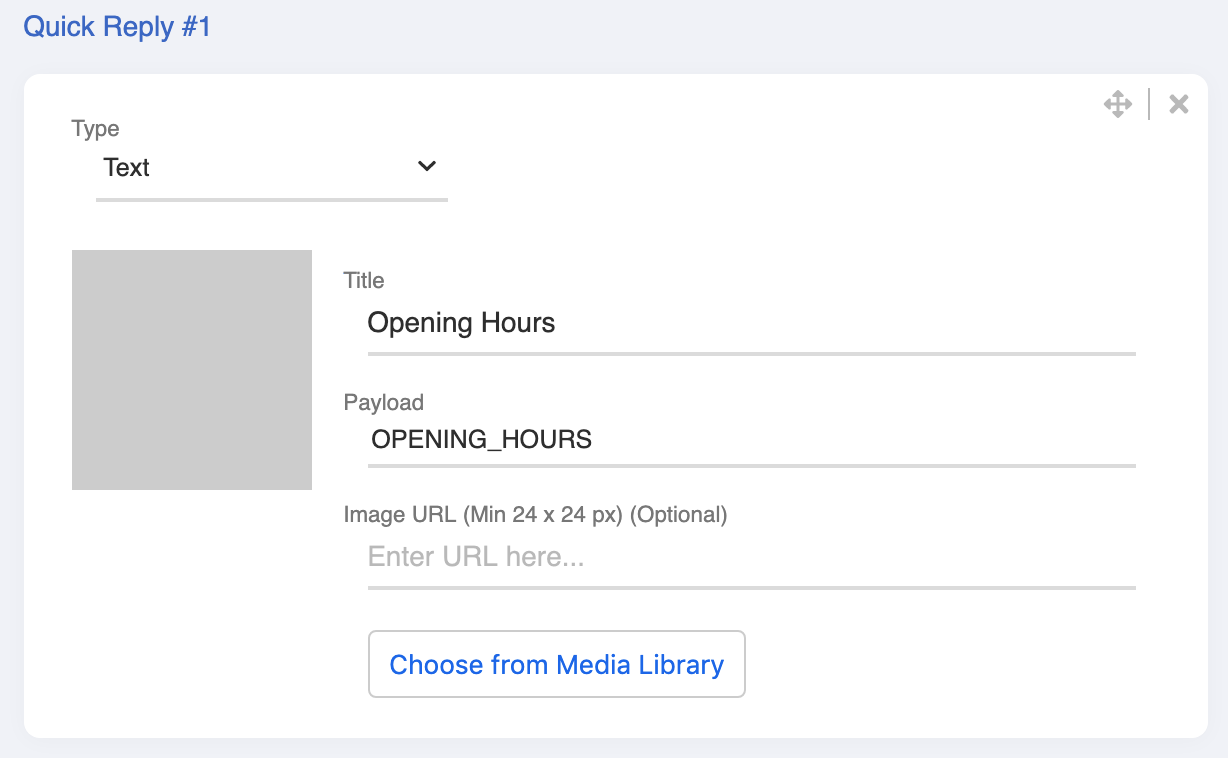
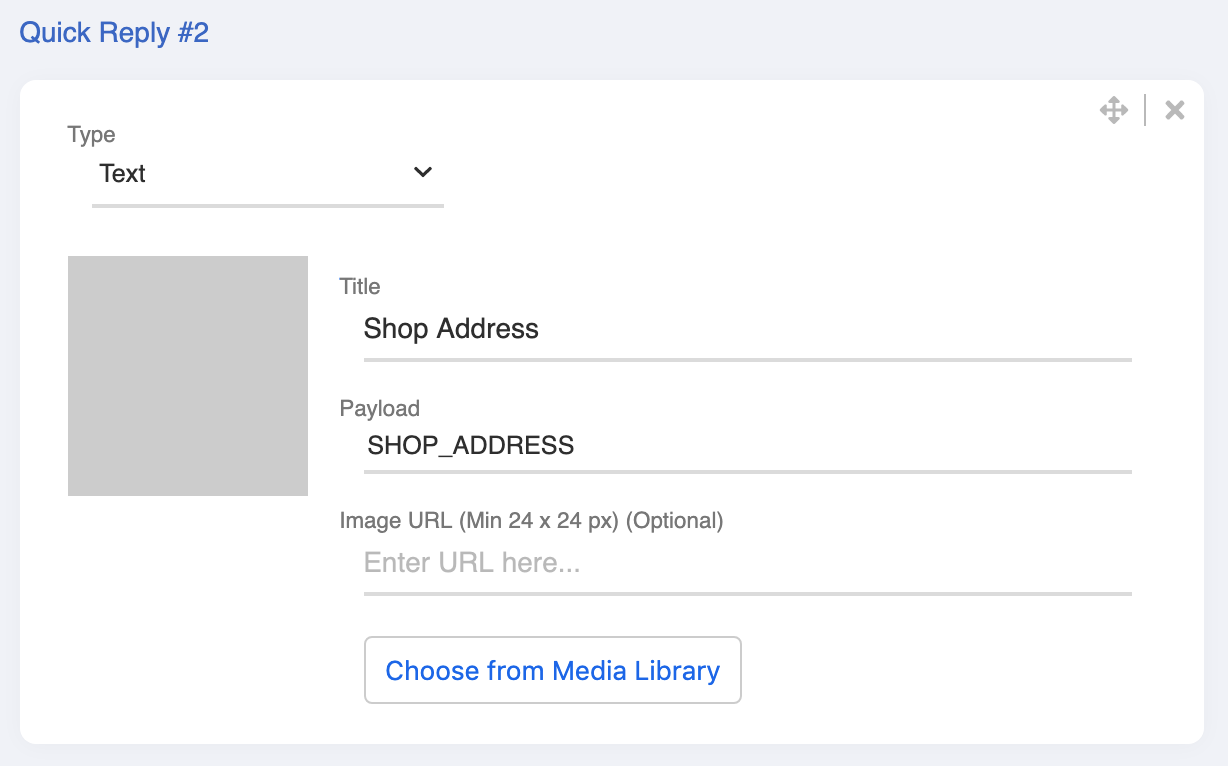
- Add the quick reply buttons for OPENING_HOURS and SHOP_ADDRESS.
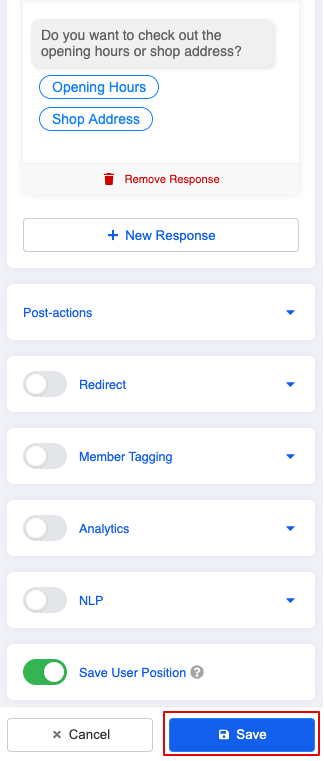
- Check your message preview for Shop Info quick reply. Click "Save" to save the response.
- Click "Save" to save the second child node.
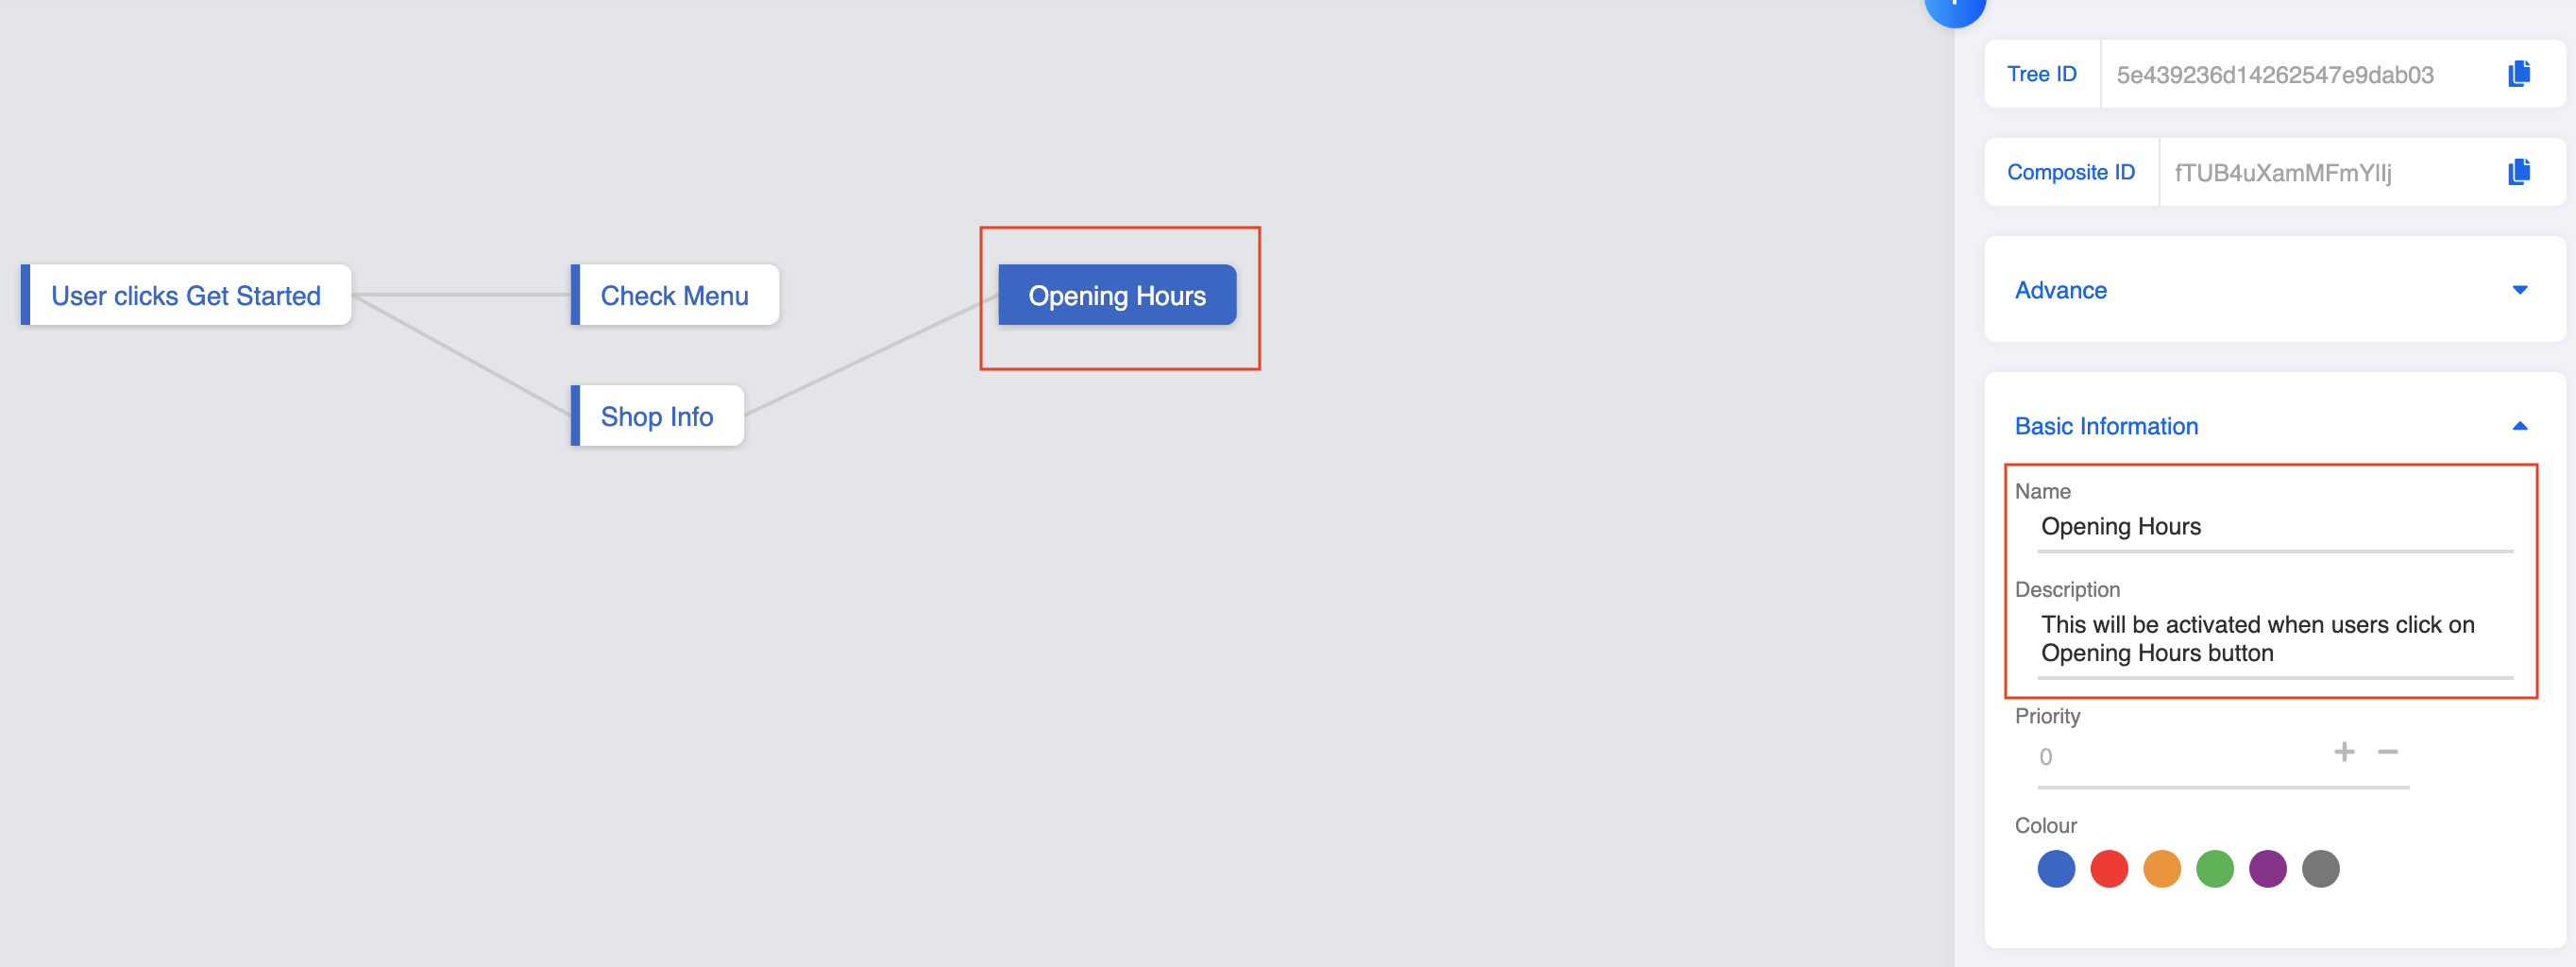
Build 3rd-Layer Child Node: Opening Hours
- It's time to go on to the next layer. Repeat the same steps and build your third child node in the third layer: Opening Hours.
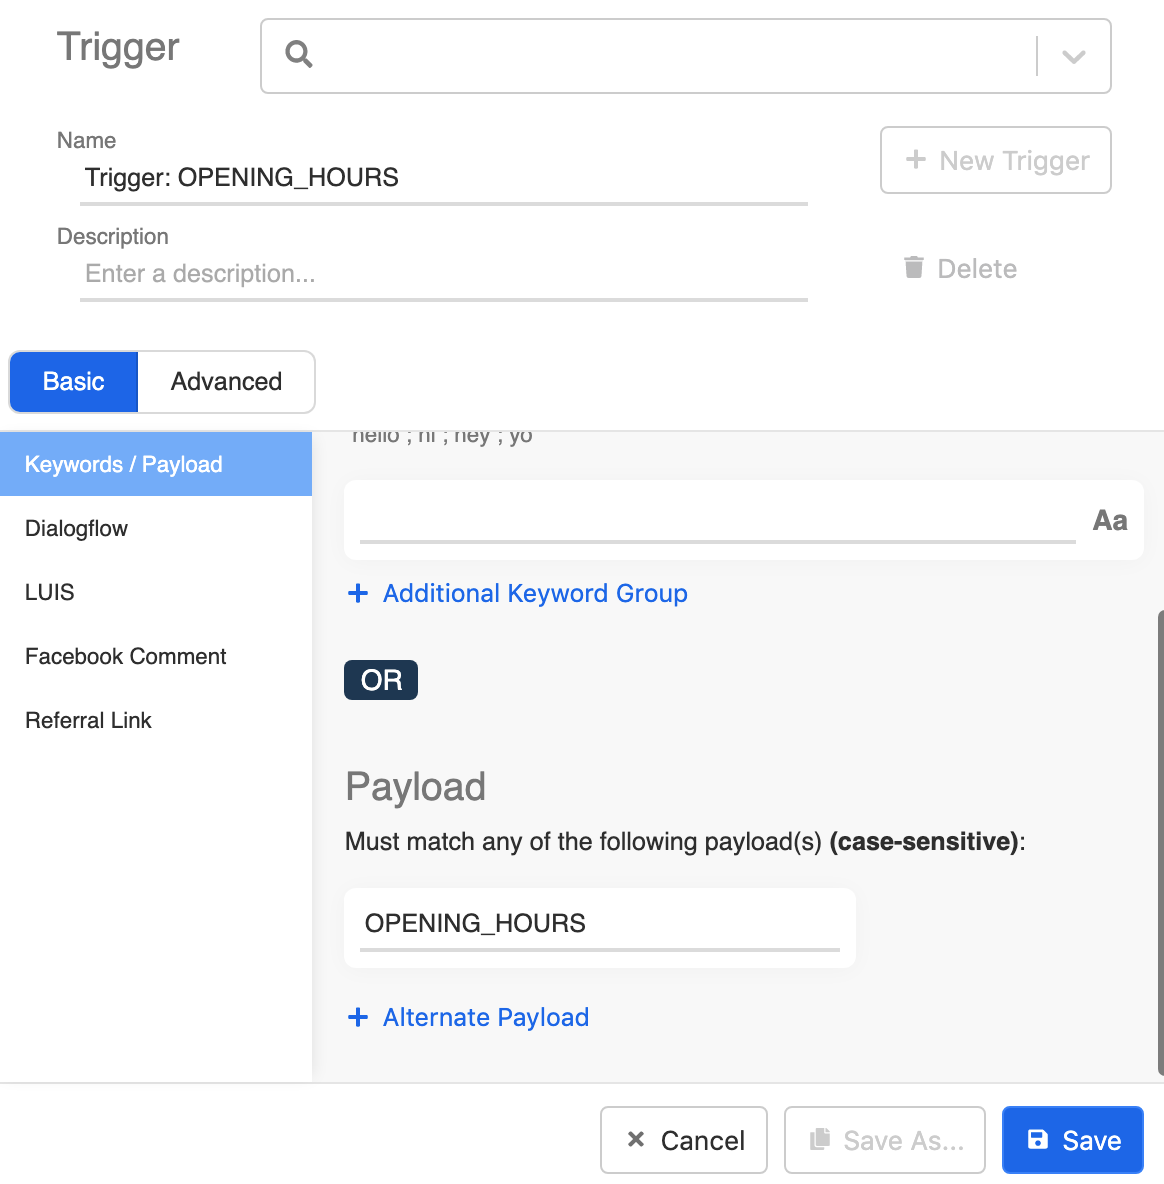
- Create a trigger for "OPENING_HOURS".
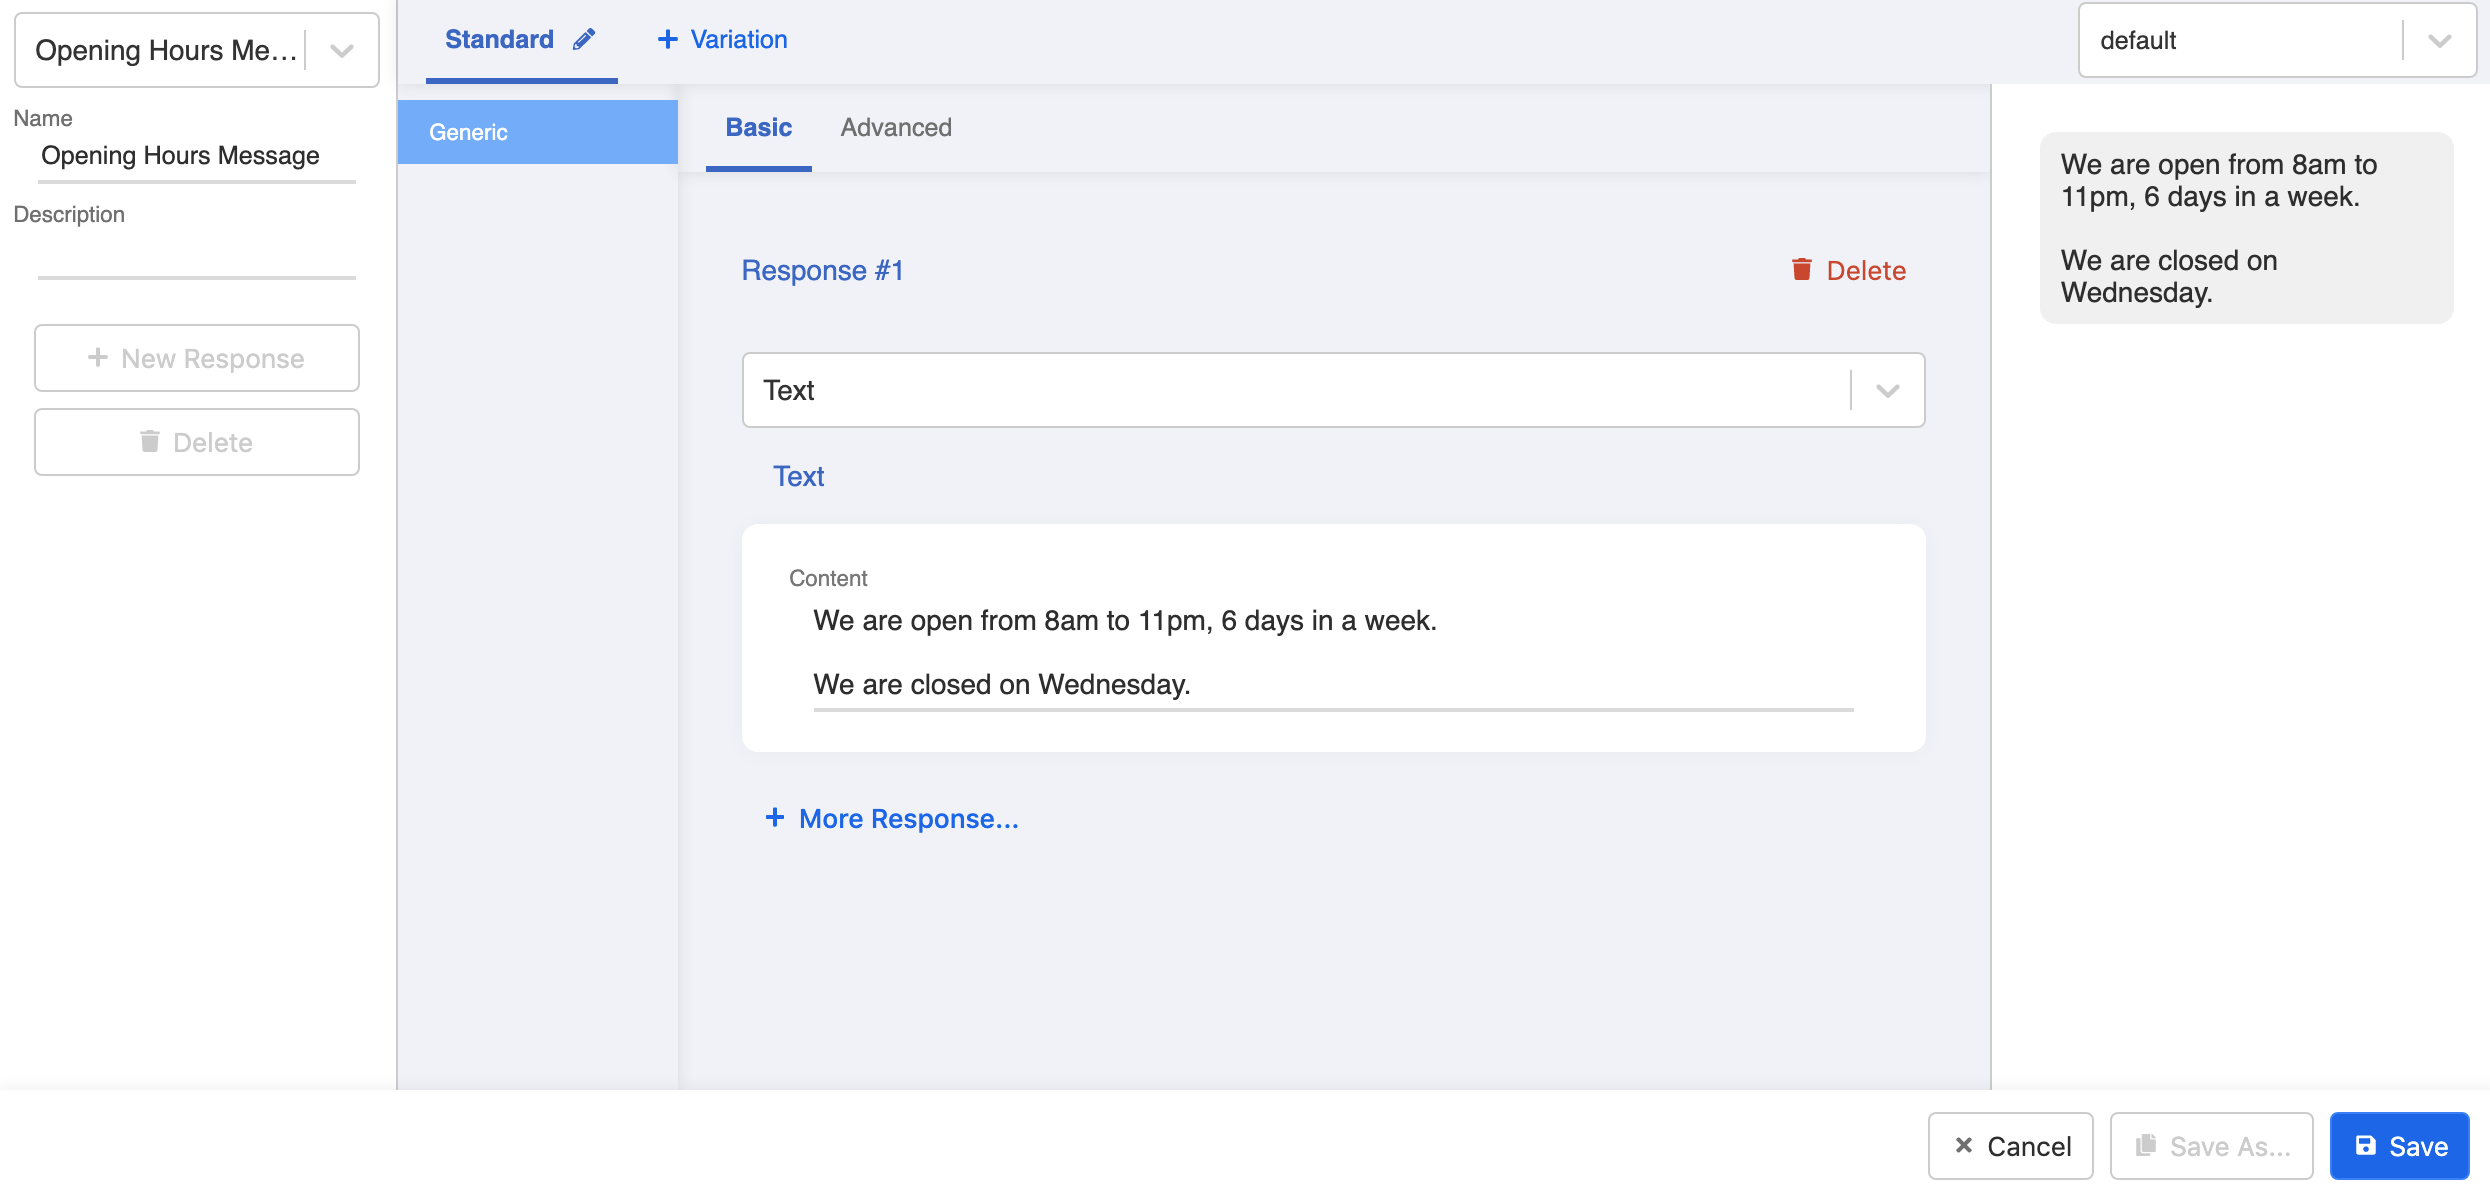
- Create a text response: "We are open from 8am to 11pm, 6 days in a week. We are closed on Wednesday."
- Click "Save" to save the third child node.
Build 3rd-Layer Child Node: Shop Address
- Similarly, repeat the same steps and build your third child node in the third layer: Opening Hours.

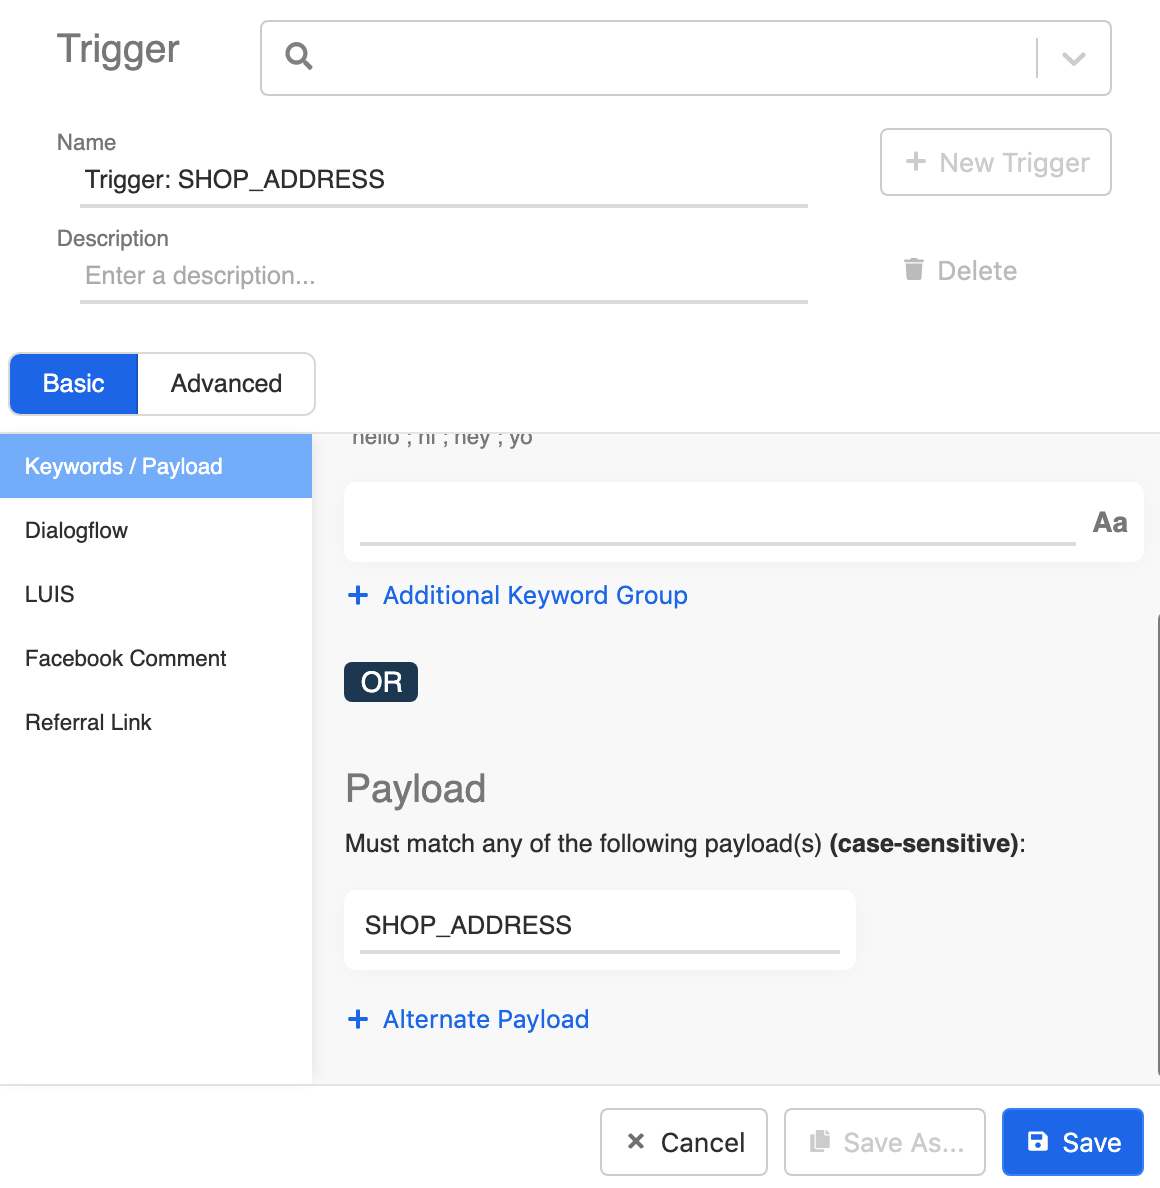
- Create a trigger for "SHOP_ADDRESS".
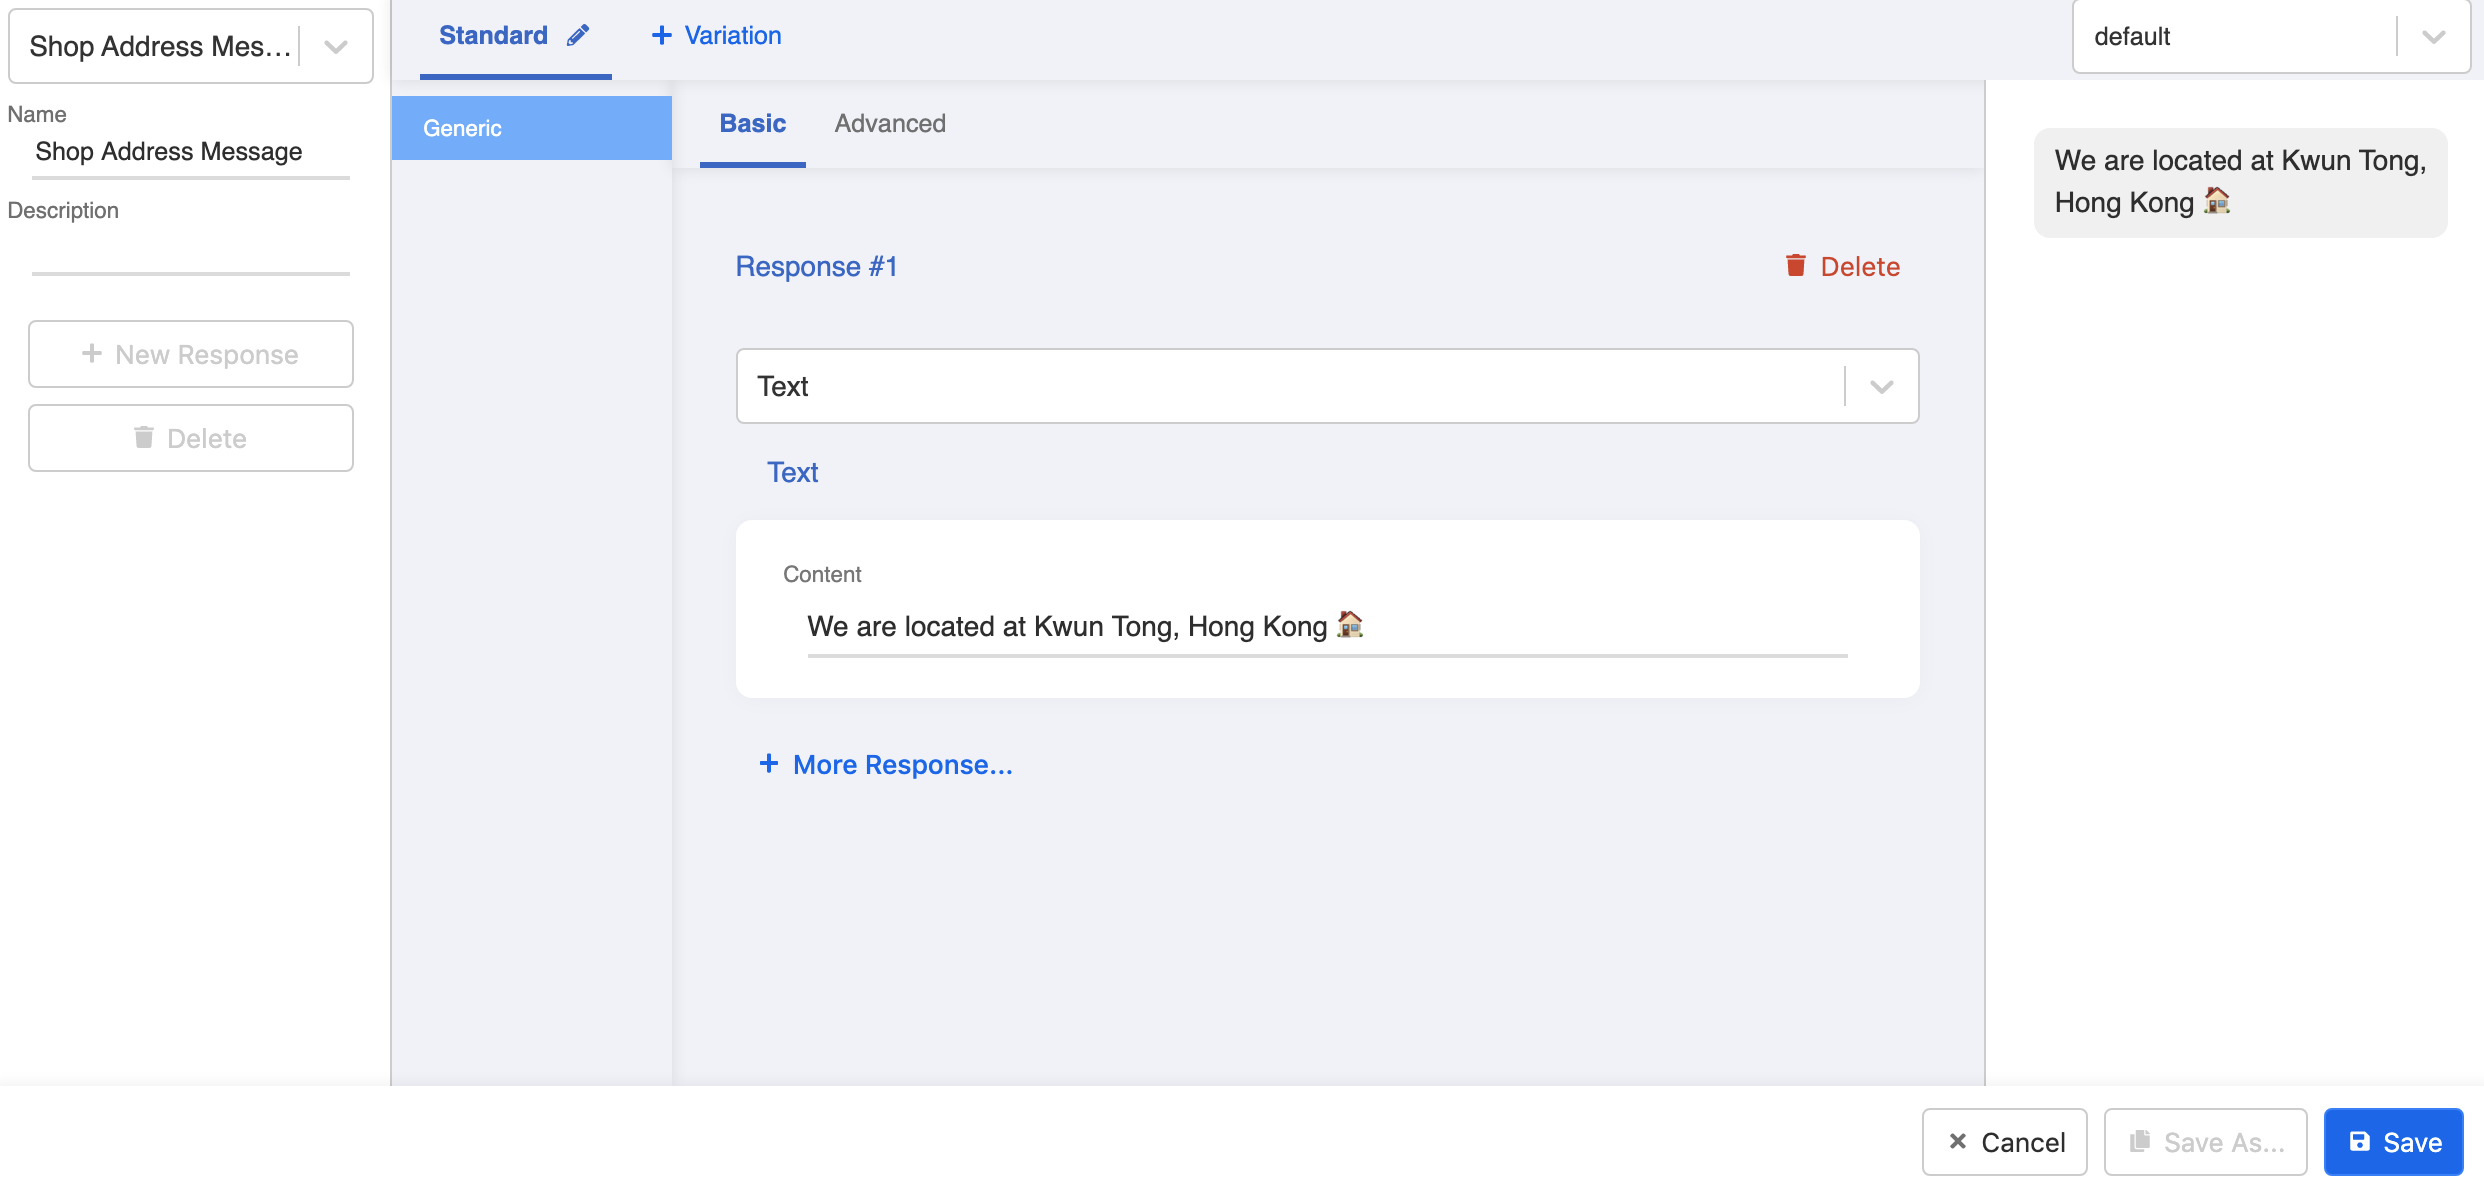
- Create a text response: "We are located at Kwun Tong, Hong Kong 🏠"
- Click "Save" to save the fourth child node.
Create Other Global Nodes
Apart from adding payload trigger, you should also allow customers to type in certain keywords to trigger the relevant response. Let's do this by creating global nodes!
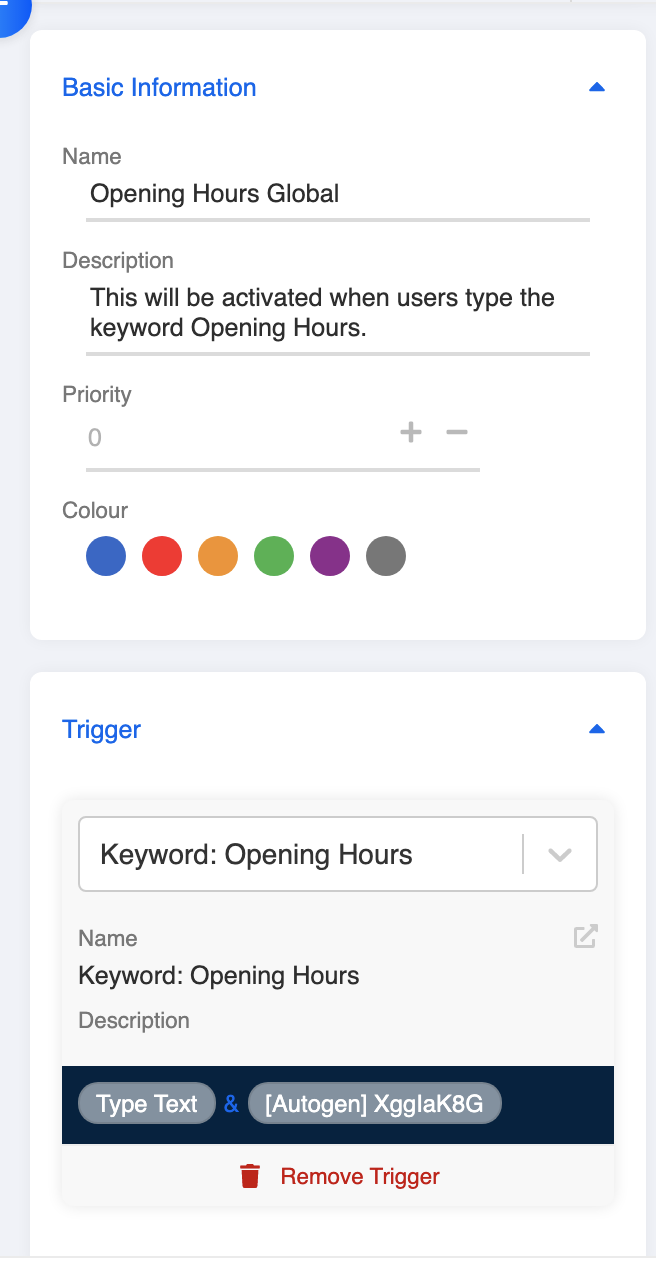
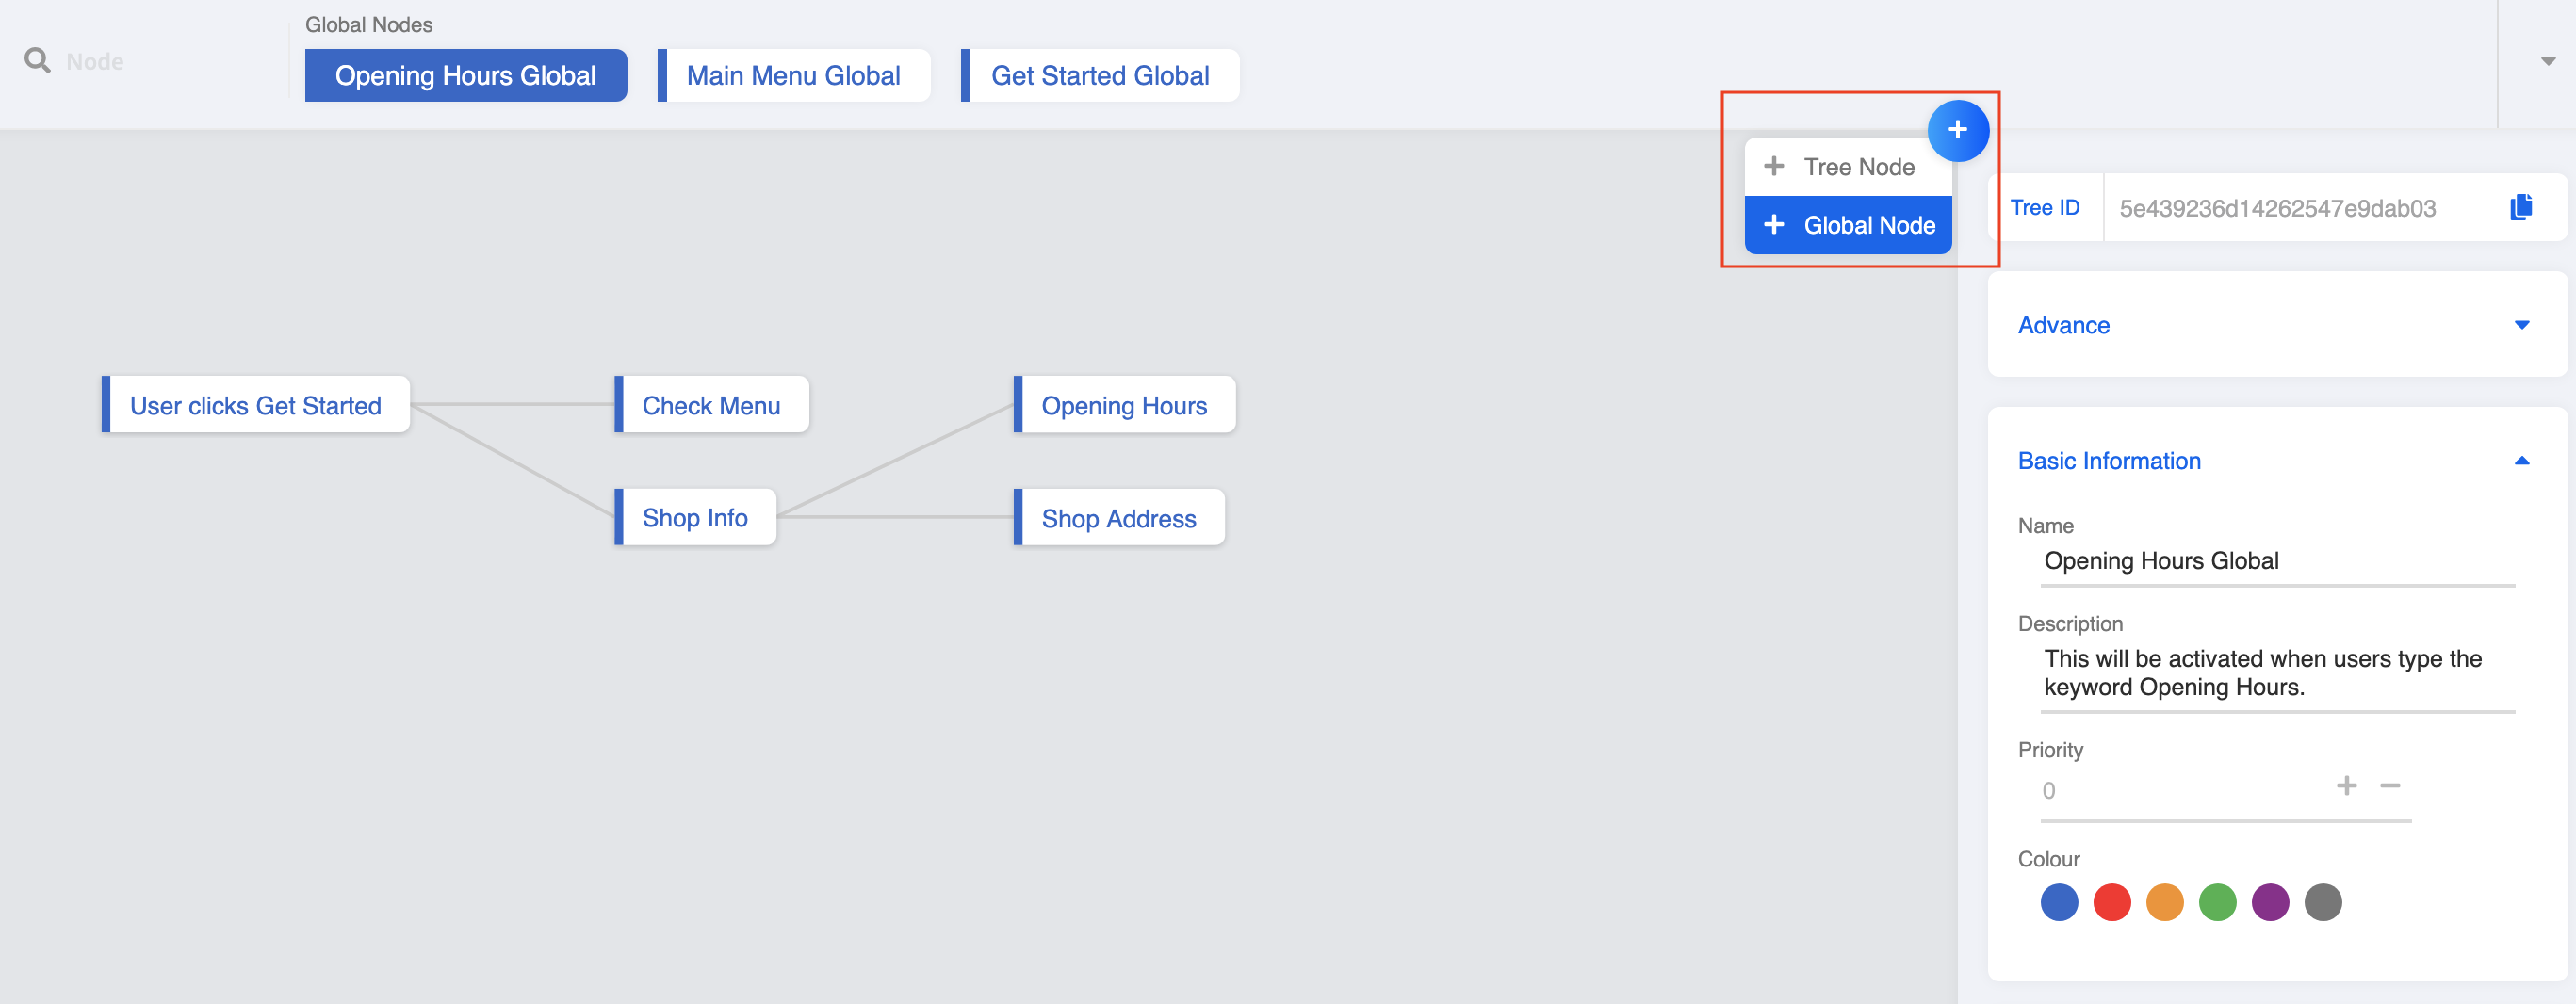
Click "+ Global Node" to create a new global node for opening hours. Name is "Opening Hours Global".
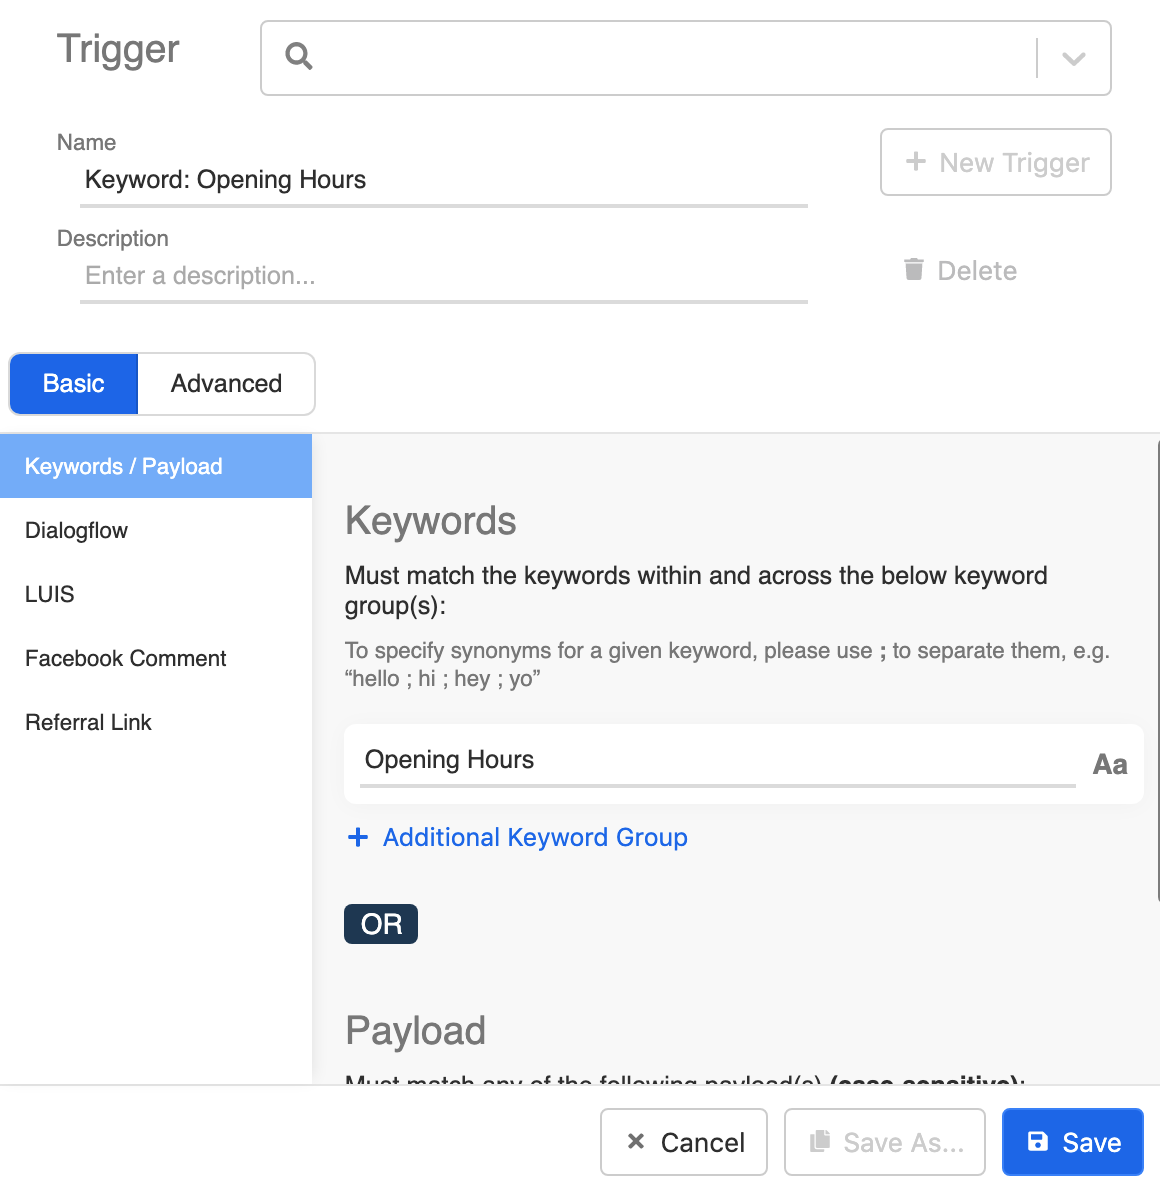
- Create a keyword trigger for this global node. Under Keyword, put down "Opening Hours".
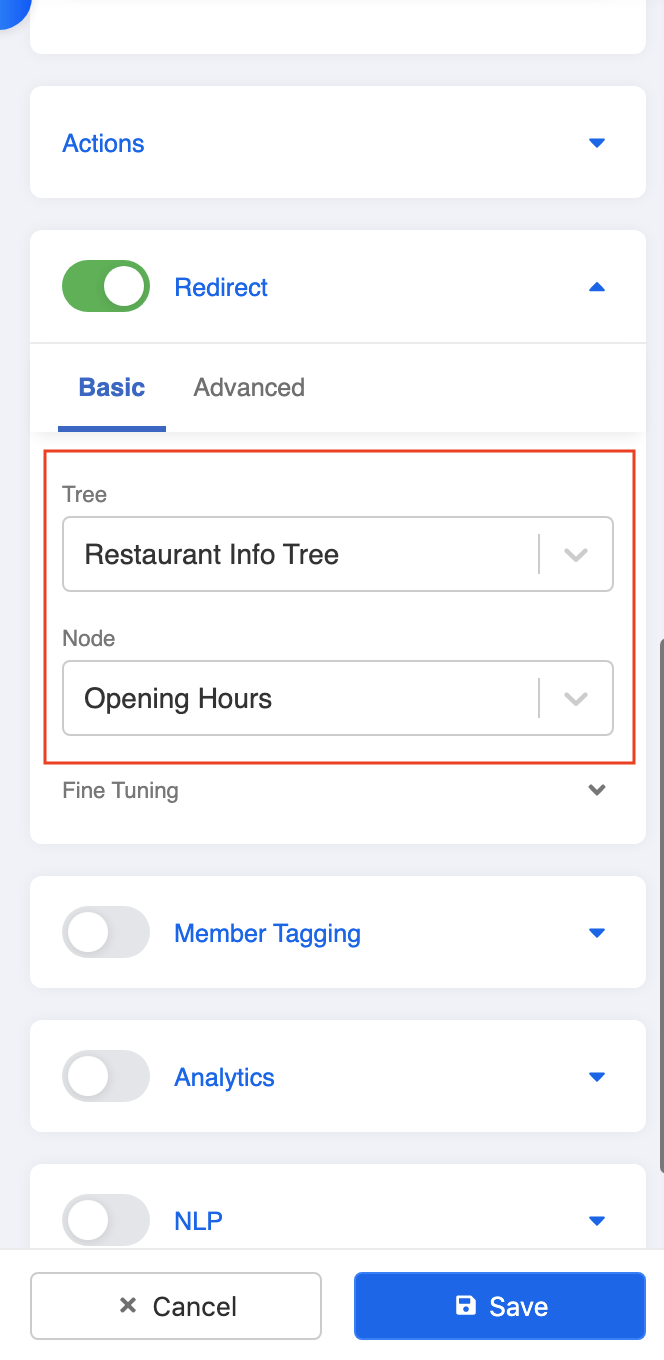
- Under Redirect, select the Opening Hours tree node. Click "Save" to save the global node.
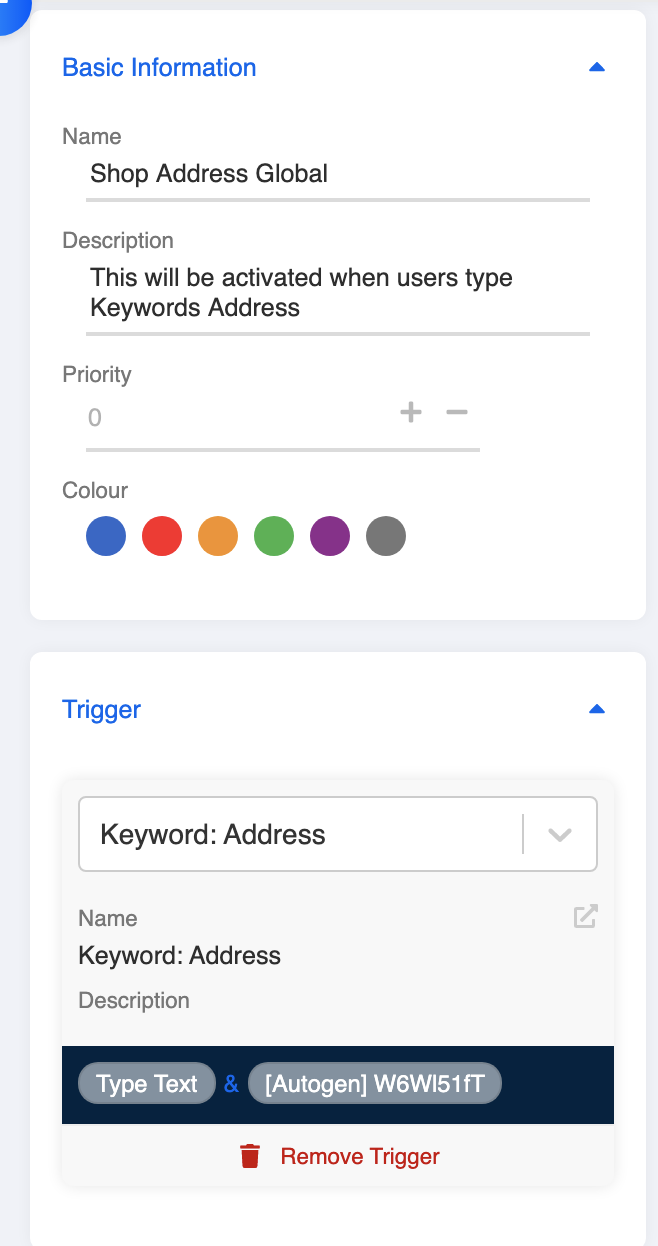
- Repeat steps 30 to 33 to create another global child node: "Shop Address Global".
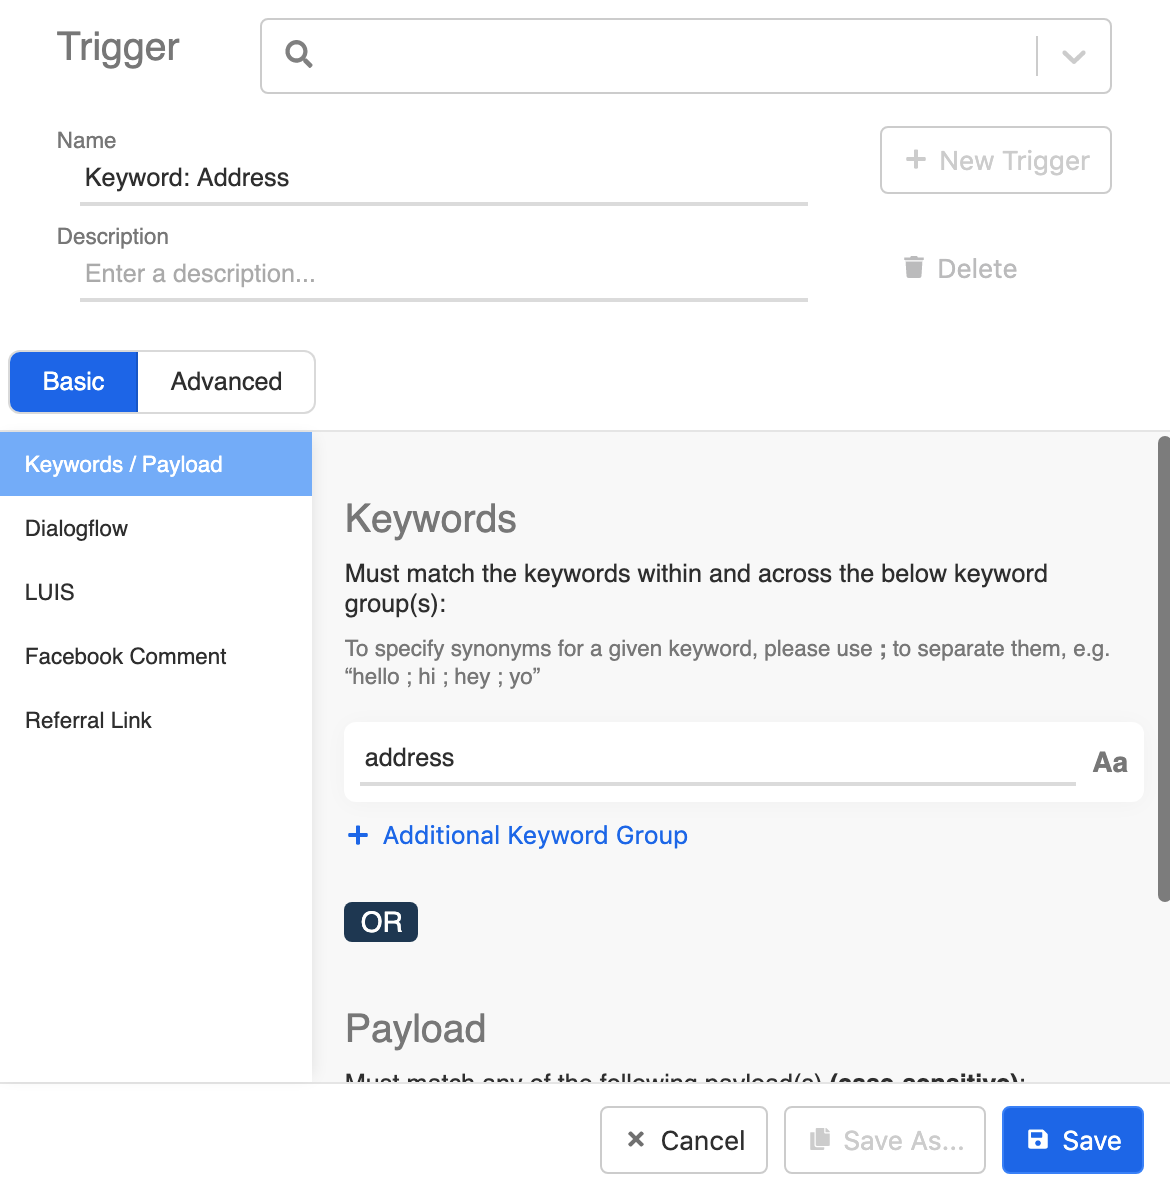
- Create a keyword trigger for this global node. Under Keyword, put down "address".
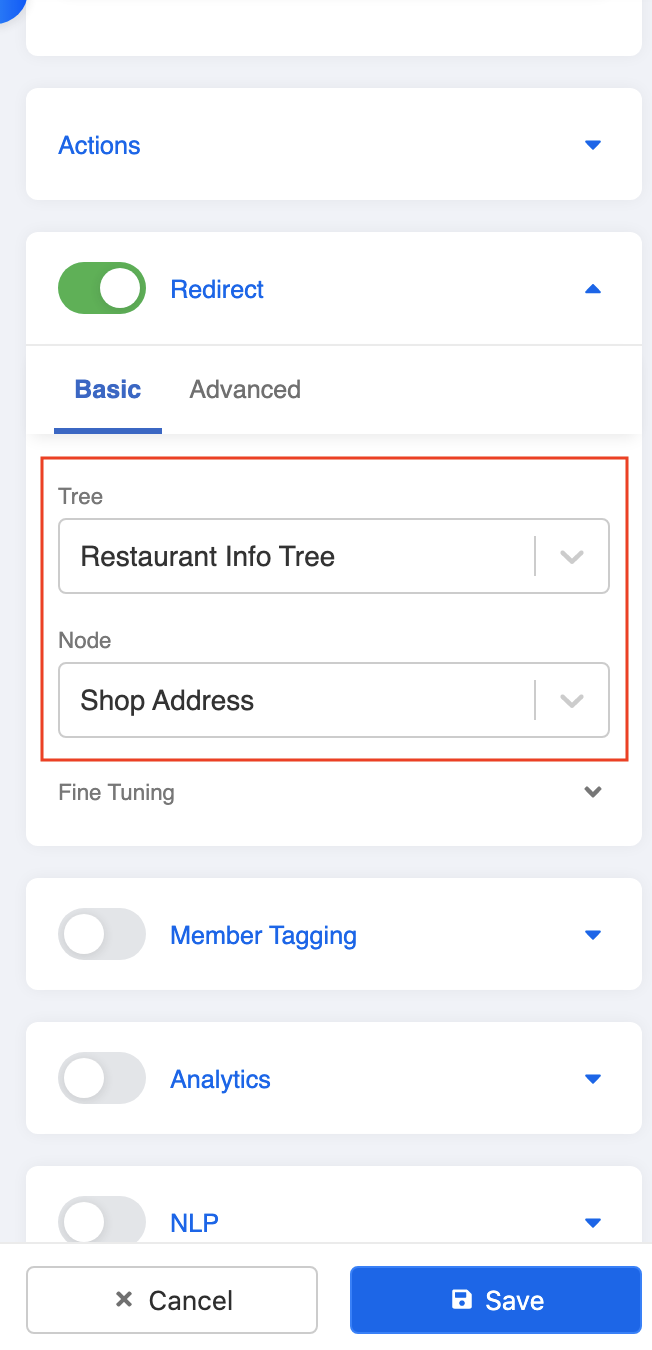
- Under Redirect, select the Shop Address tree node. Click "Save" to save the global node.
Add Global Nodes into Channels
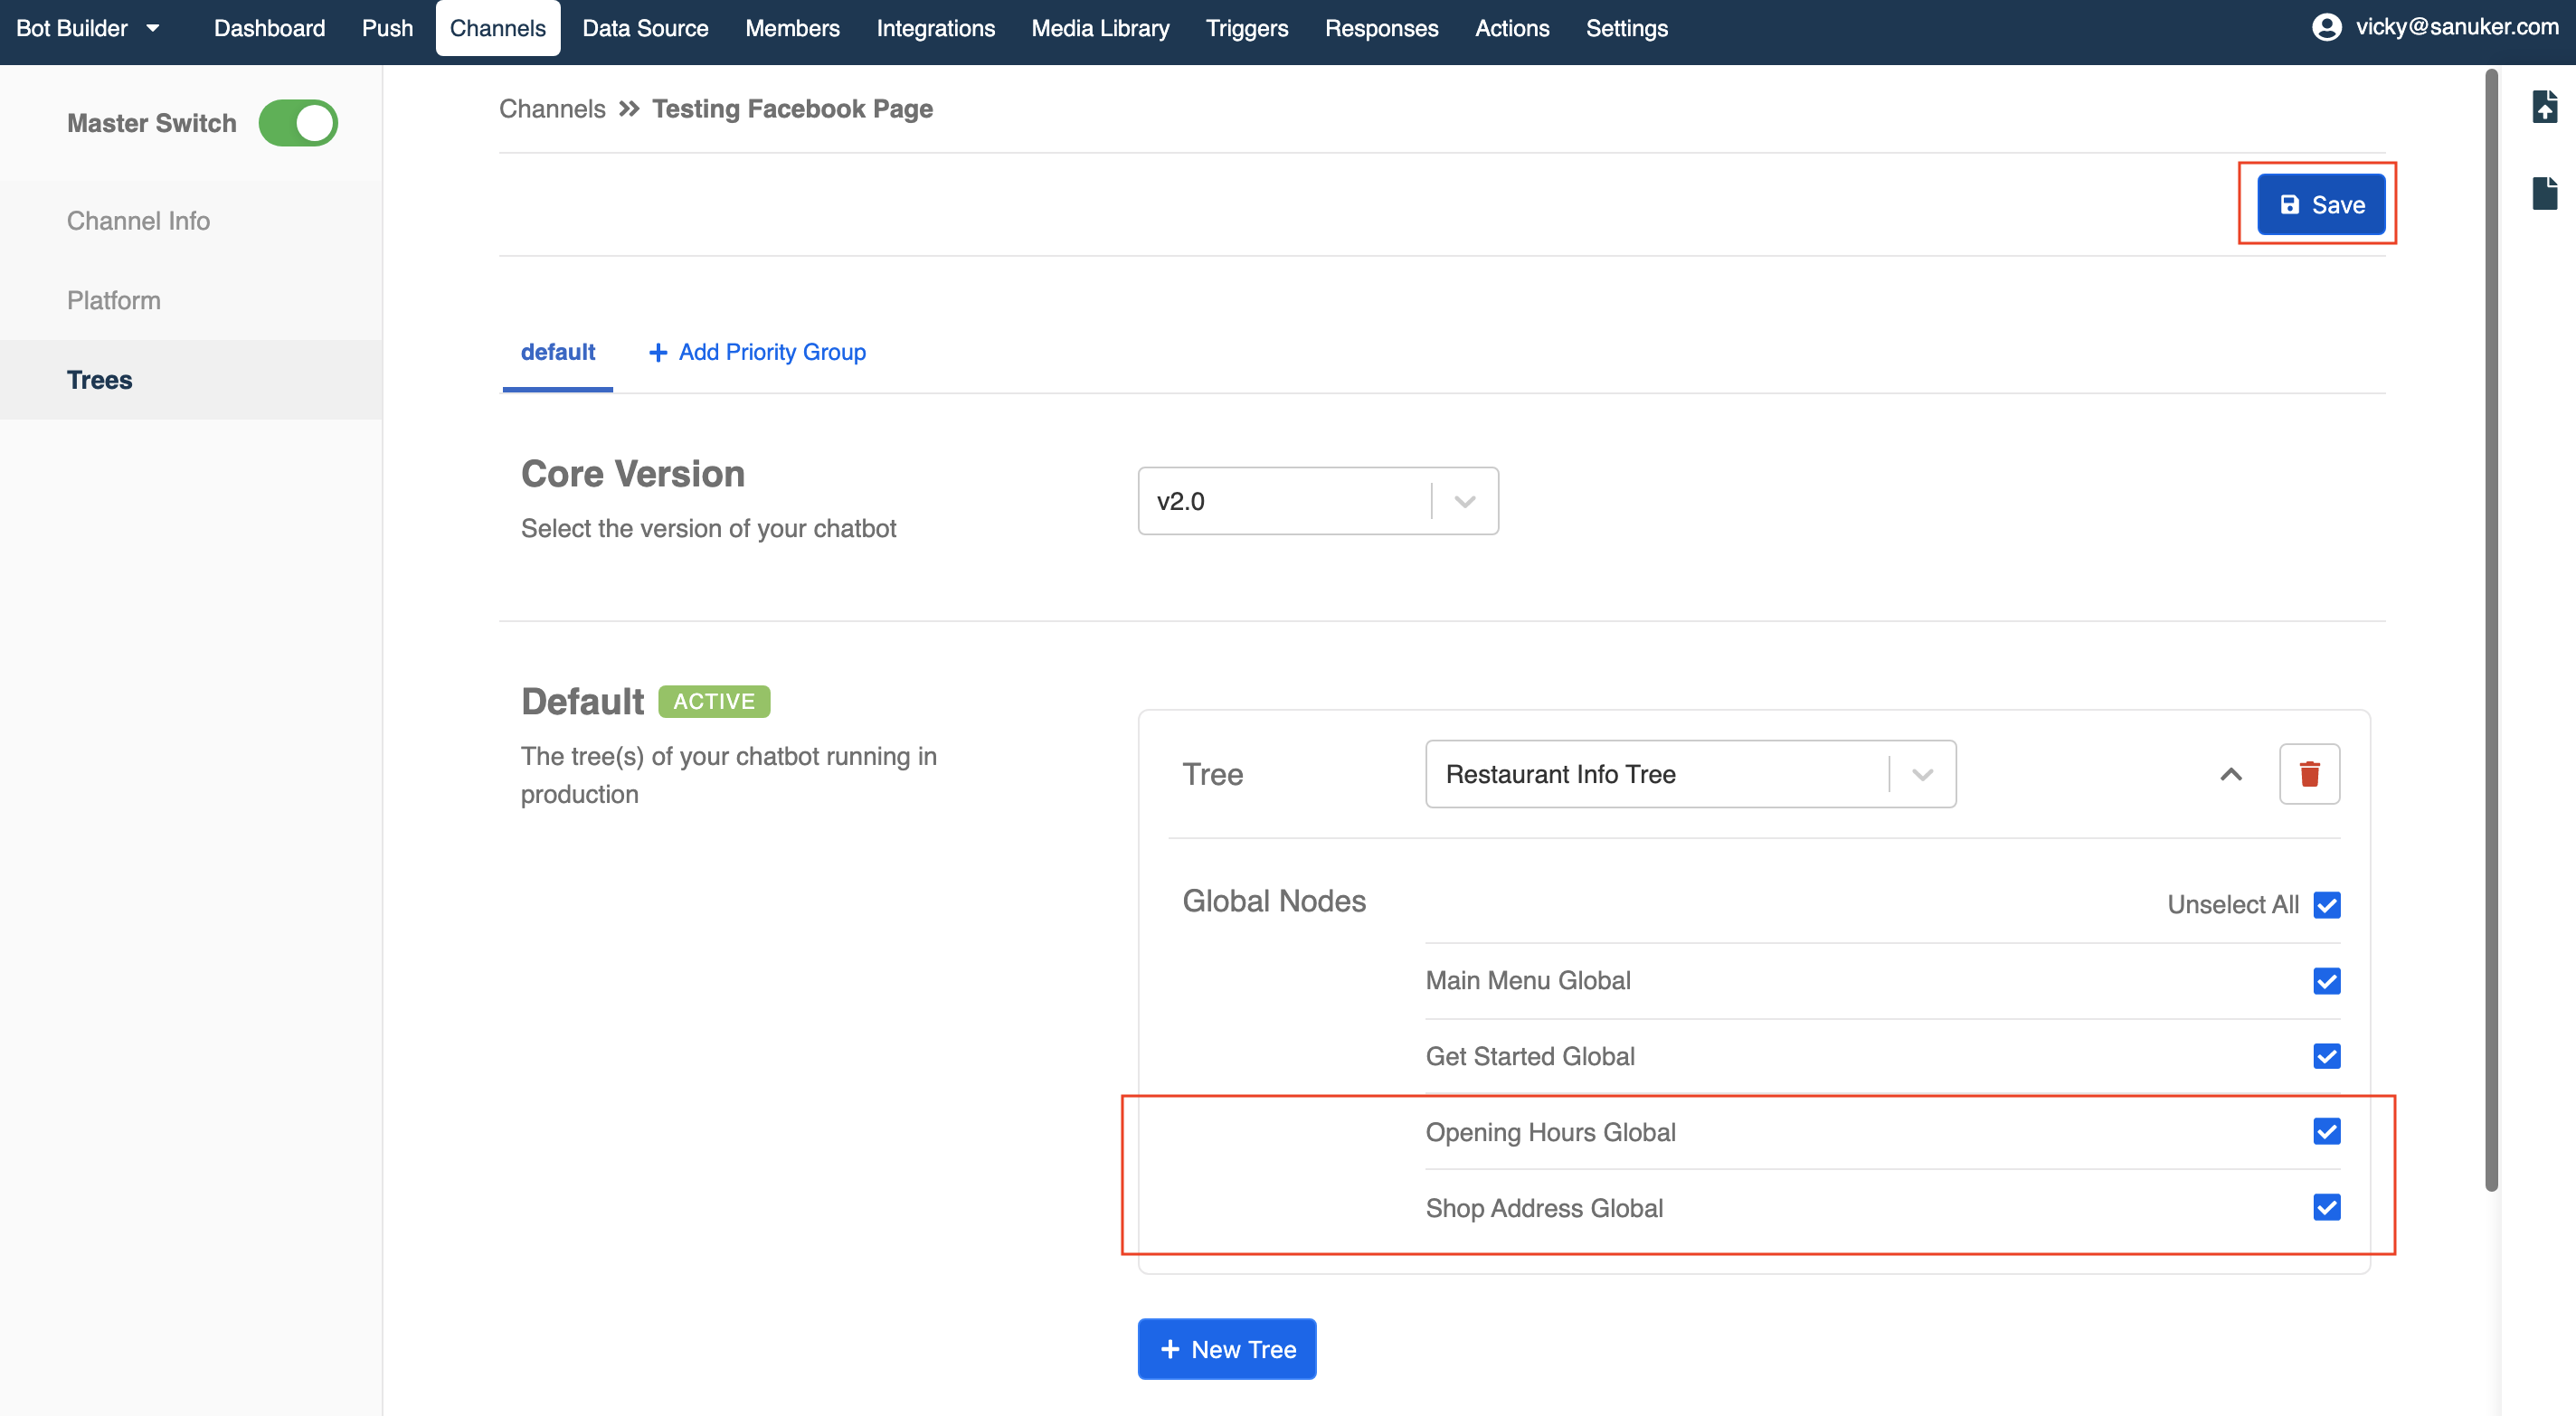
- Now go back to your testing channel and add back the two additional global nodes into the channel. Click "Save" to save the settings
- You should now have all your child nodes set up properly. You have created your first bot! Check if you can get a successful result 🎉