Apply Agenda to Chatbot
Agenda is a scheduling system within Stella that will run a specific node for a member in a specific time. In simple words, it is a timer, when the countdown is finished, a message is sent.
You can apply Agenda to create a scheduled message, while the scheduled period and the response are all up to you. You can use the scheduled message for updating application status, confirming transaction, etc. To make your conversation flow more flexible, you can also remove the agenda and proceed to another tree node.
In this session, you will learn how to set up Agenda in Stella, and build a sample conversation flow that will send a scheduled reminder to idled users.
Expected Outcome
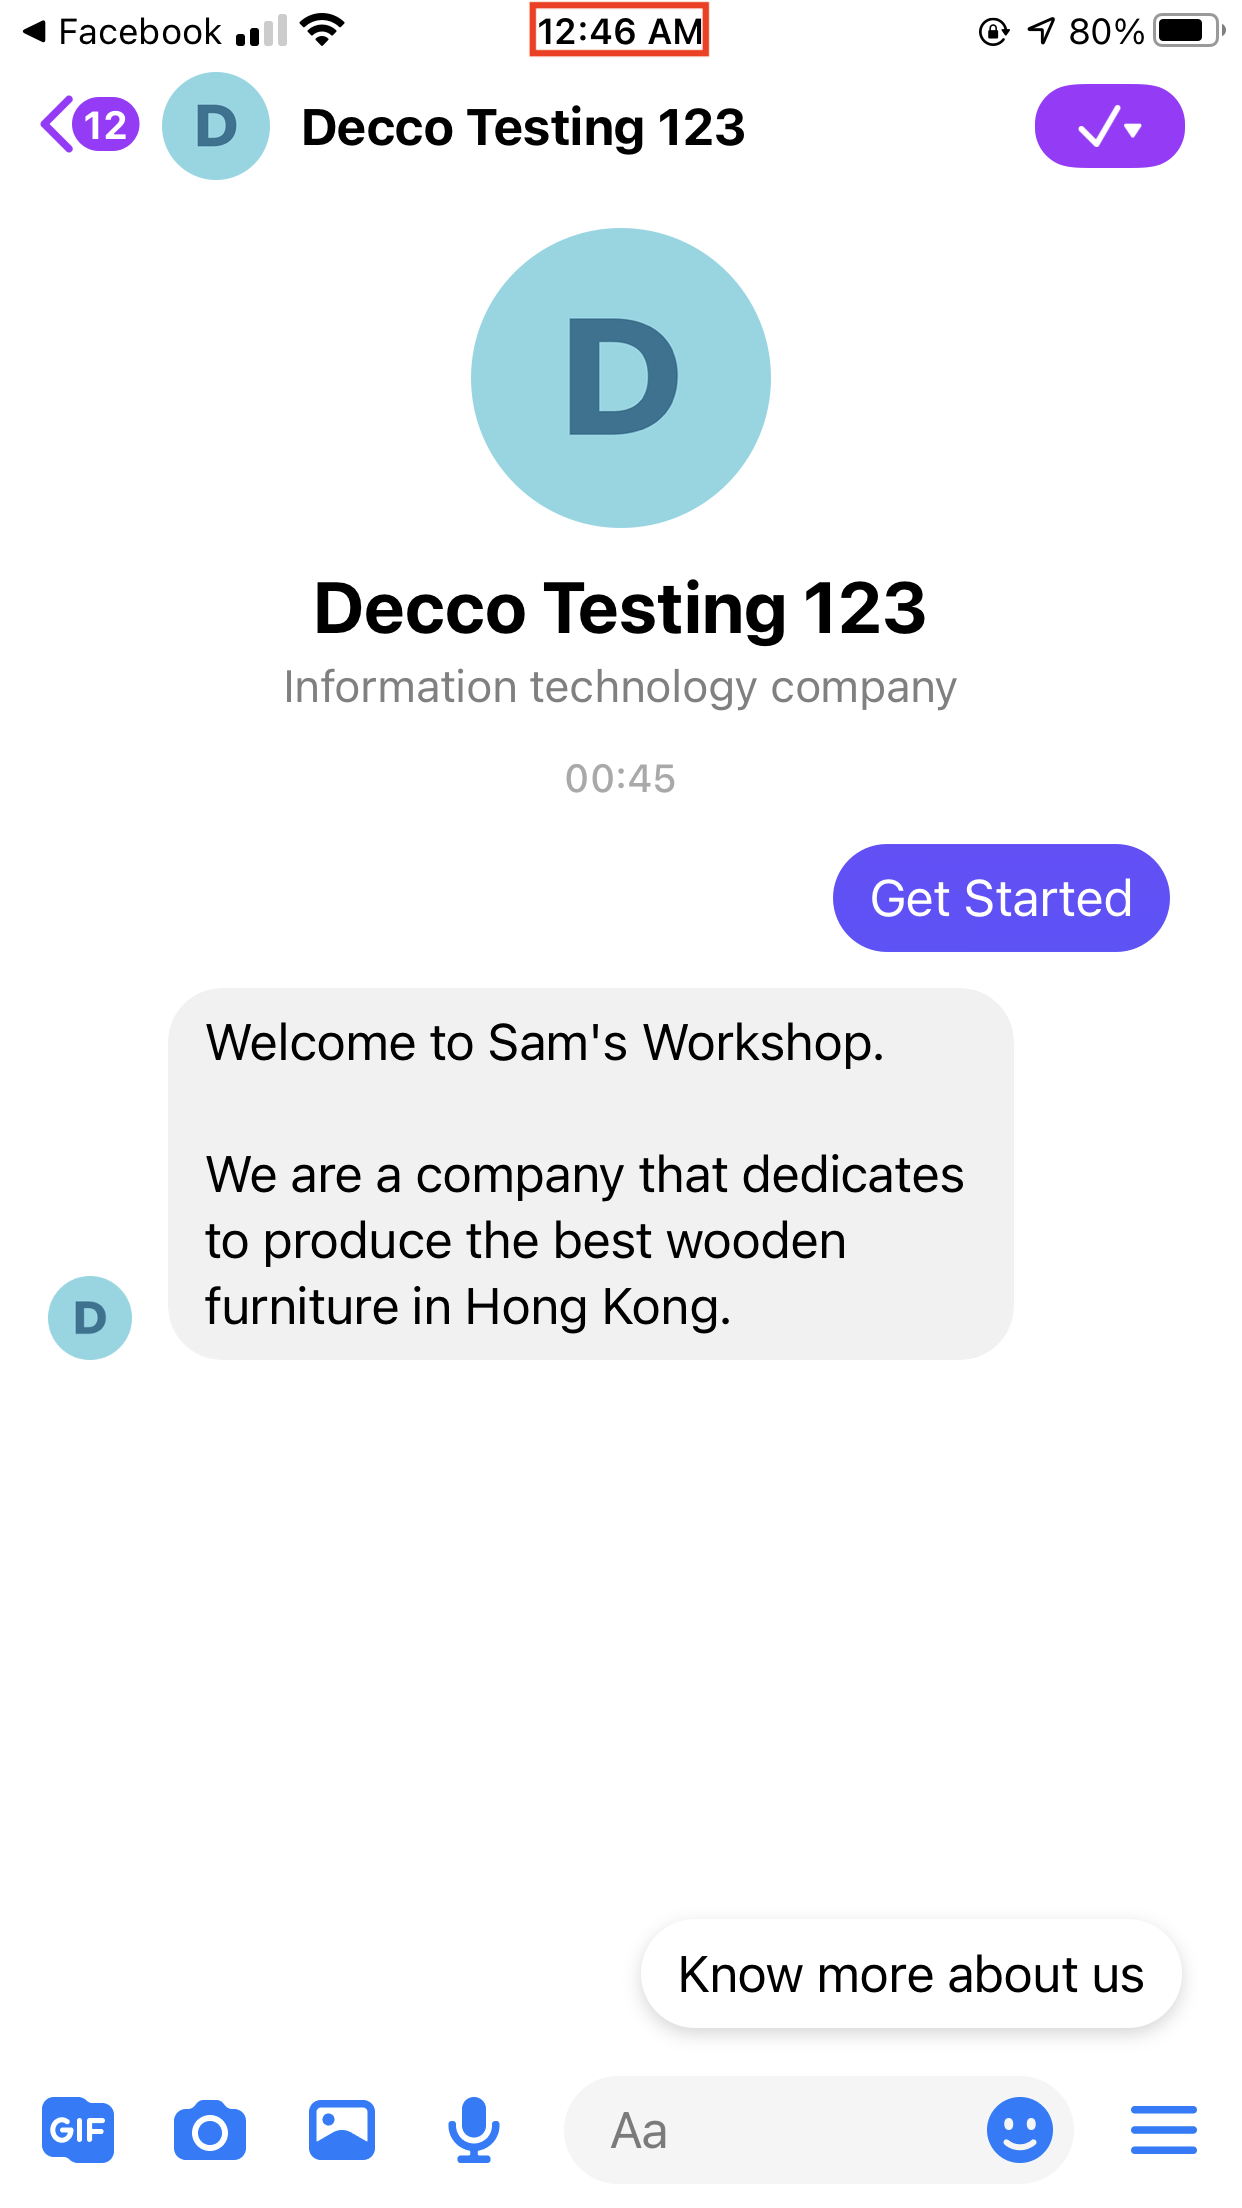
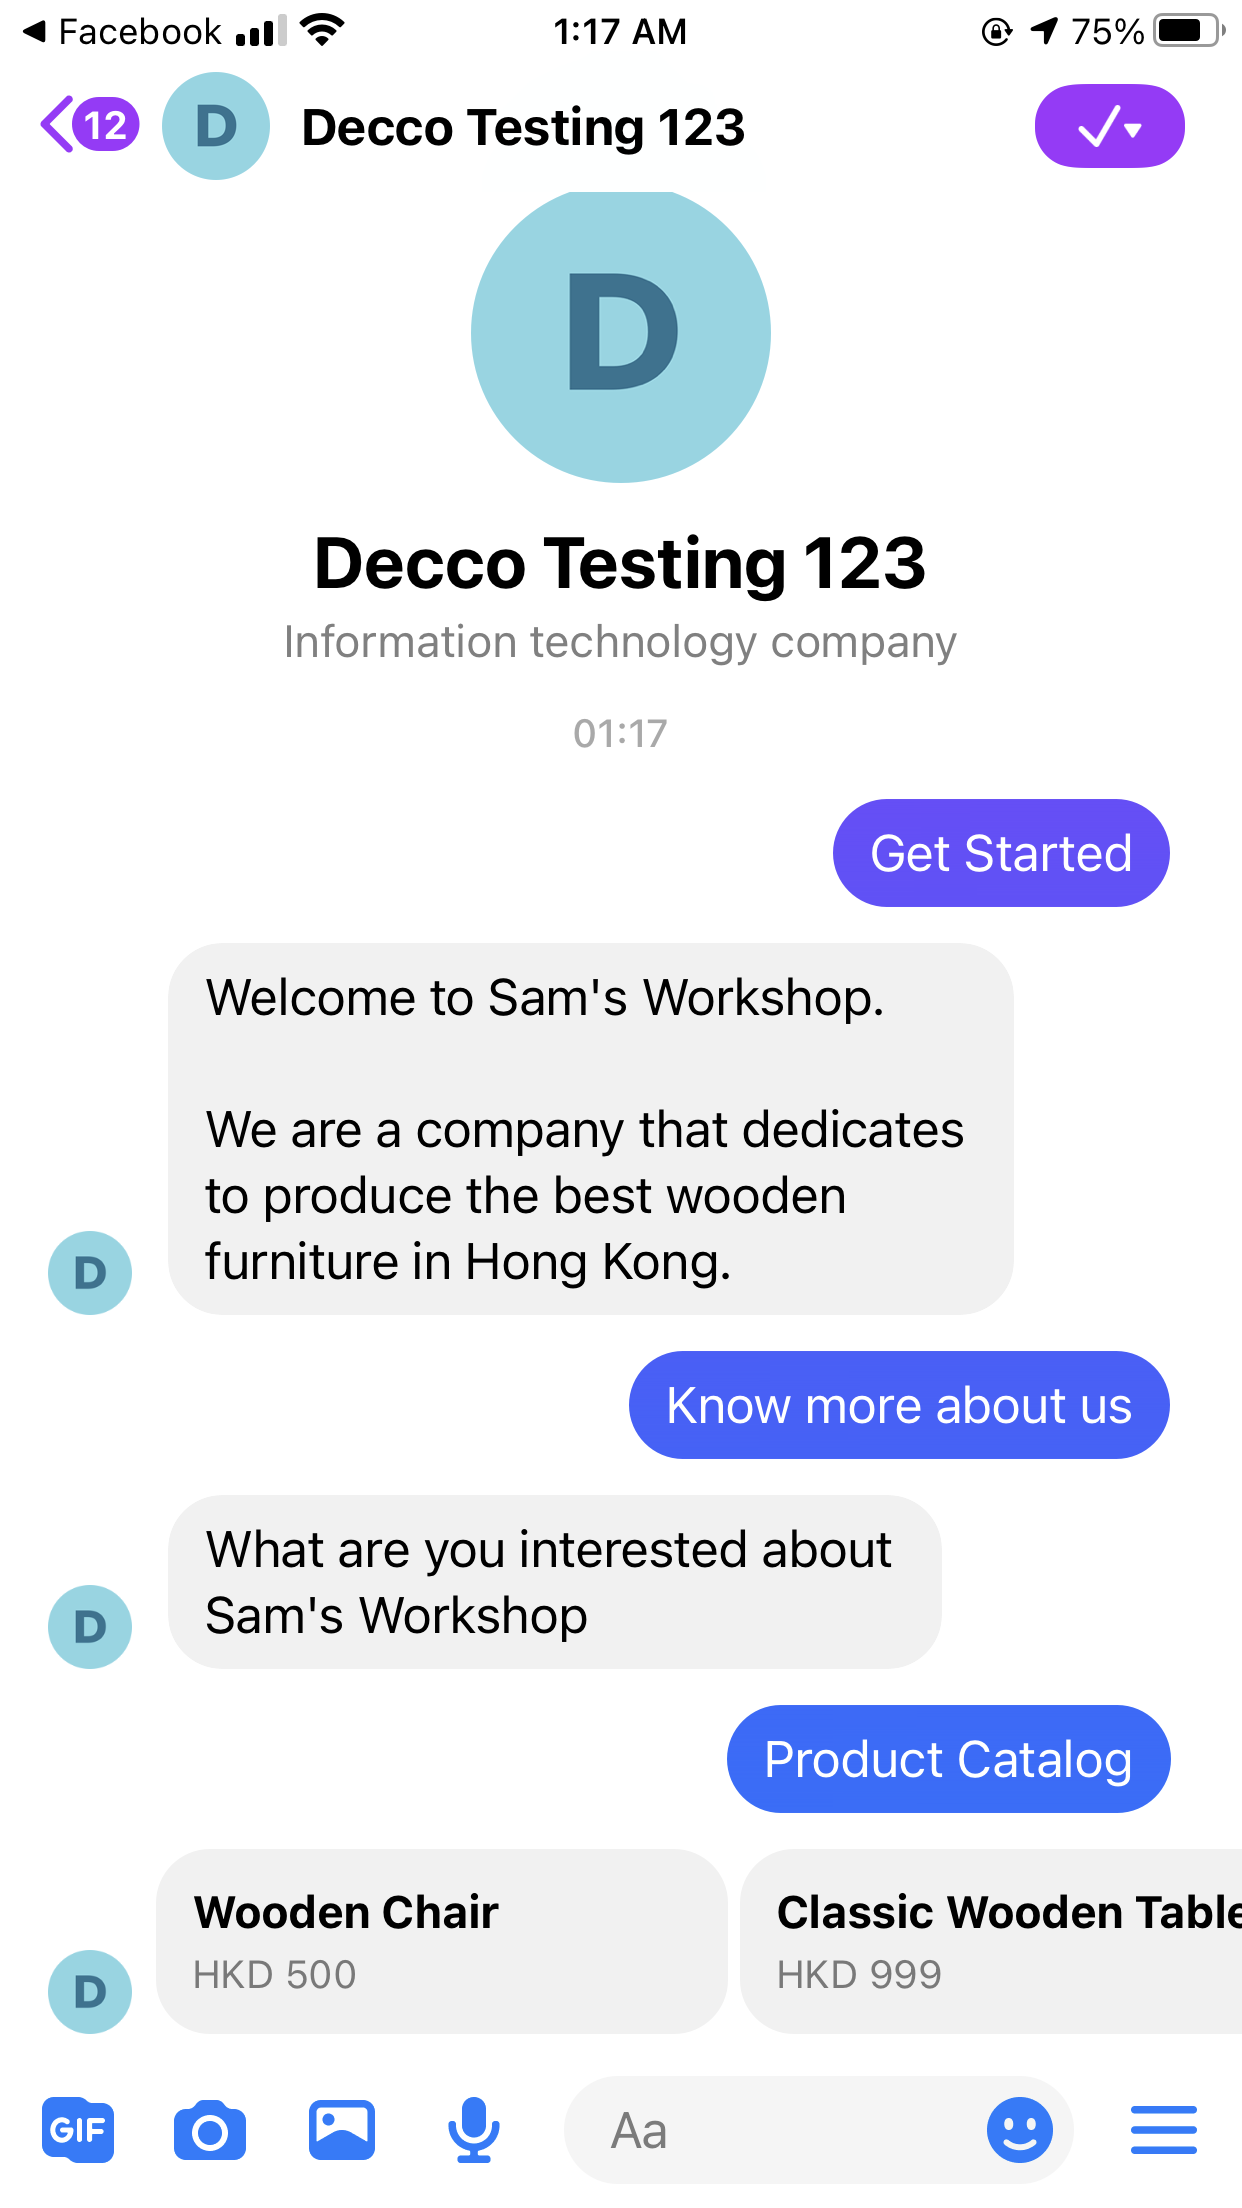
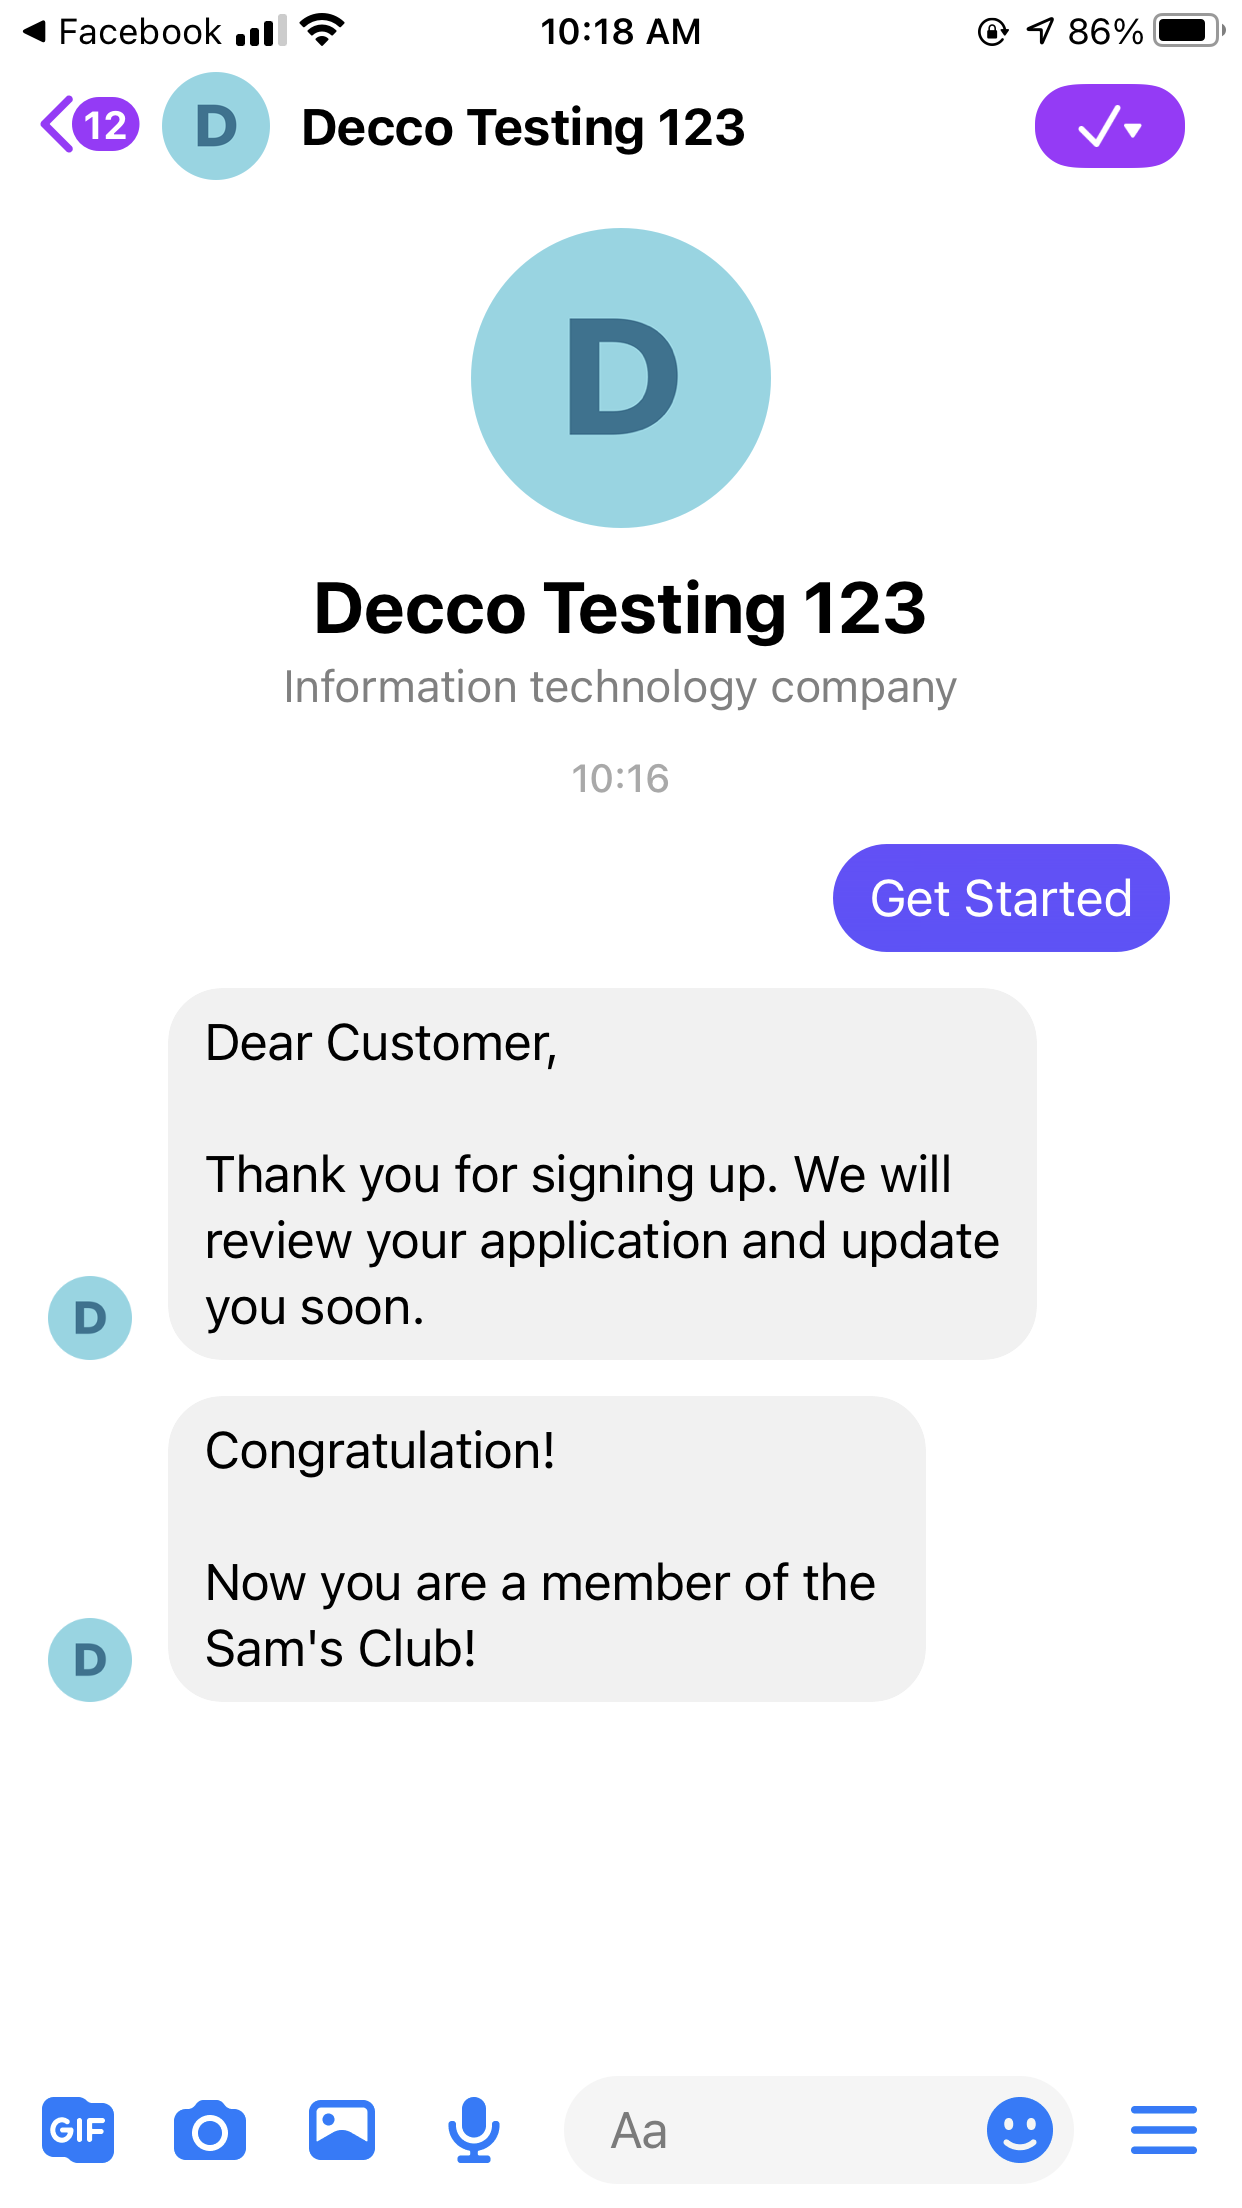
Imagine you have a chatbot for customer service. When a customer enters your conversation flow but does not move on to the next conversation for 5 minutes, you want to send a reminder message to encourage the idled user to proceed with the conversation flow.

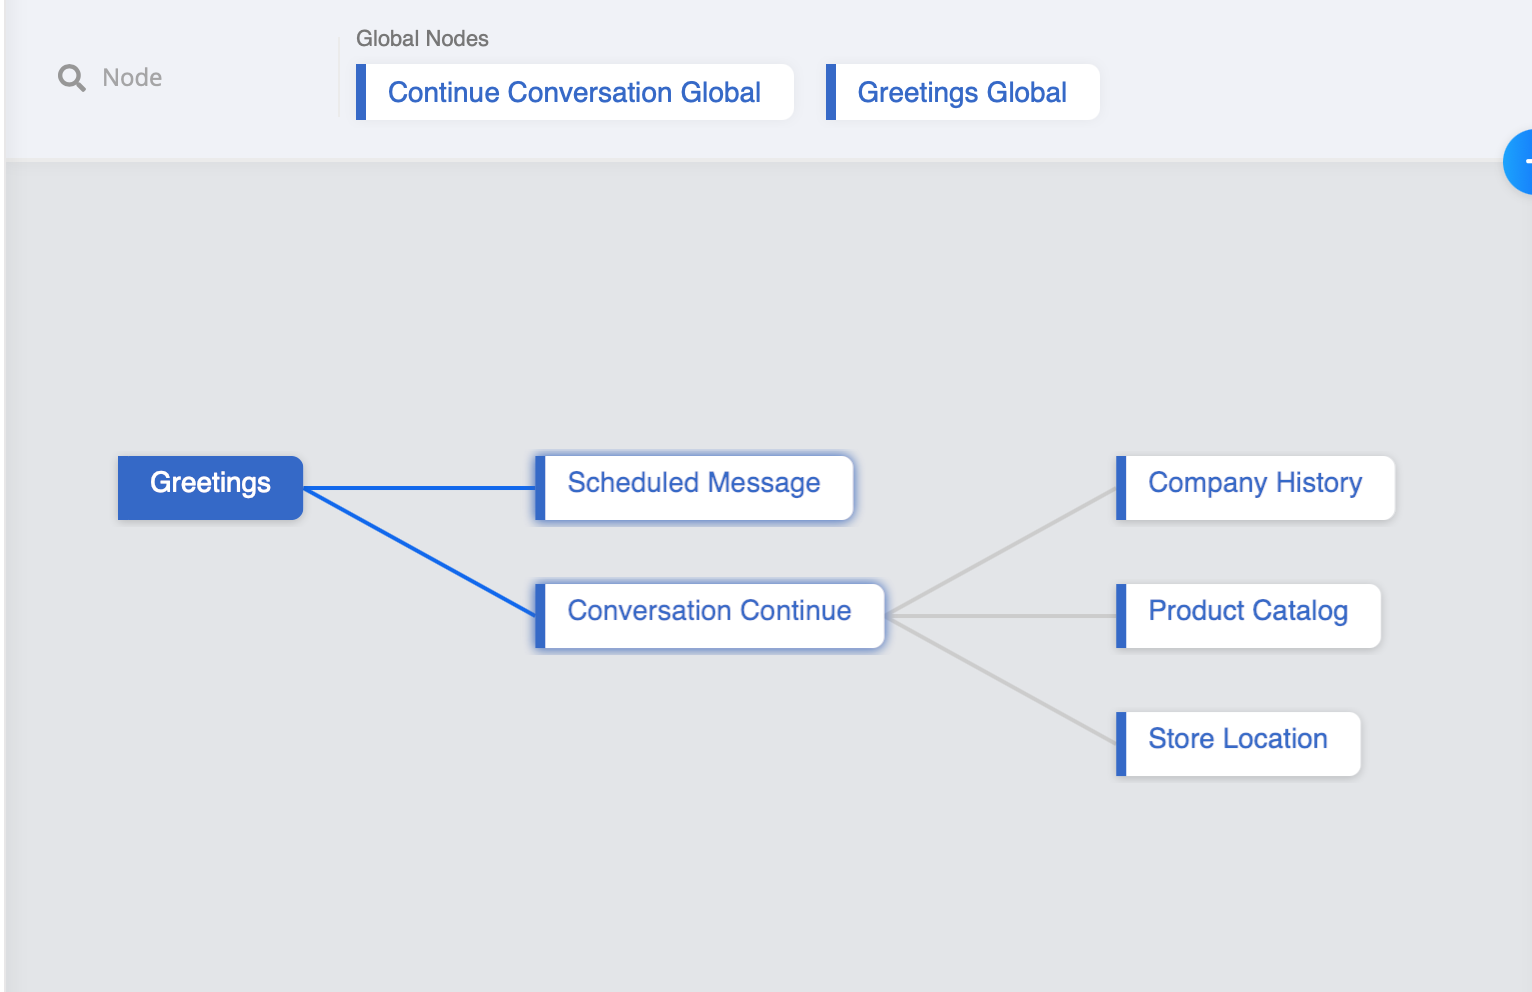
Sample Tree Structure
Getting Hands-on
Click here to enter the Bot Builder.
Set up Agenda in a Tree Node
Create the 1st tree node, name it as "Greetings". This is the entry point of your conversation flow. In this case, we will apply the Agenda to this tree node.
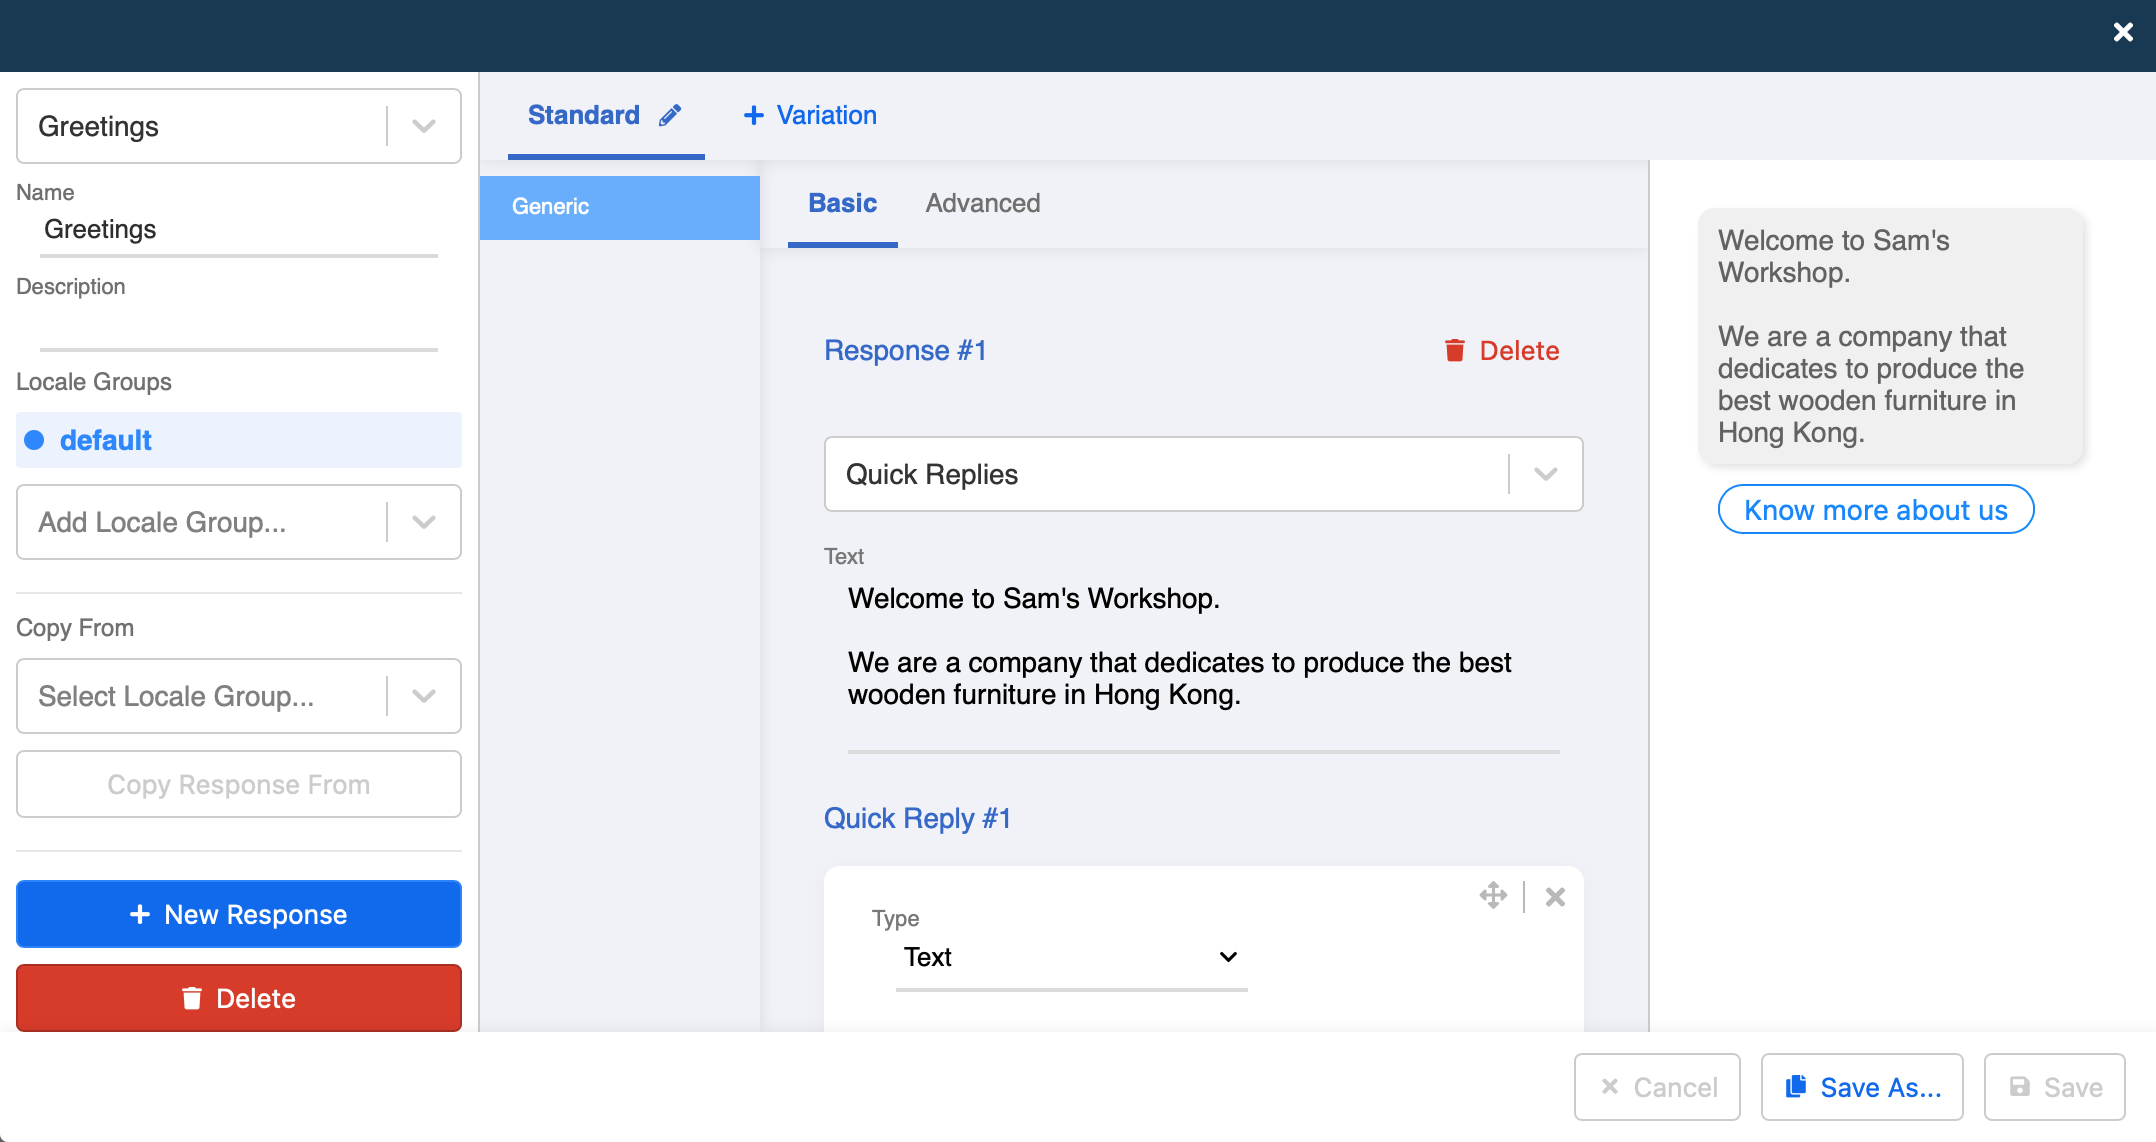
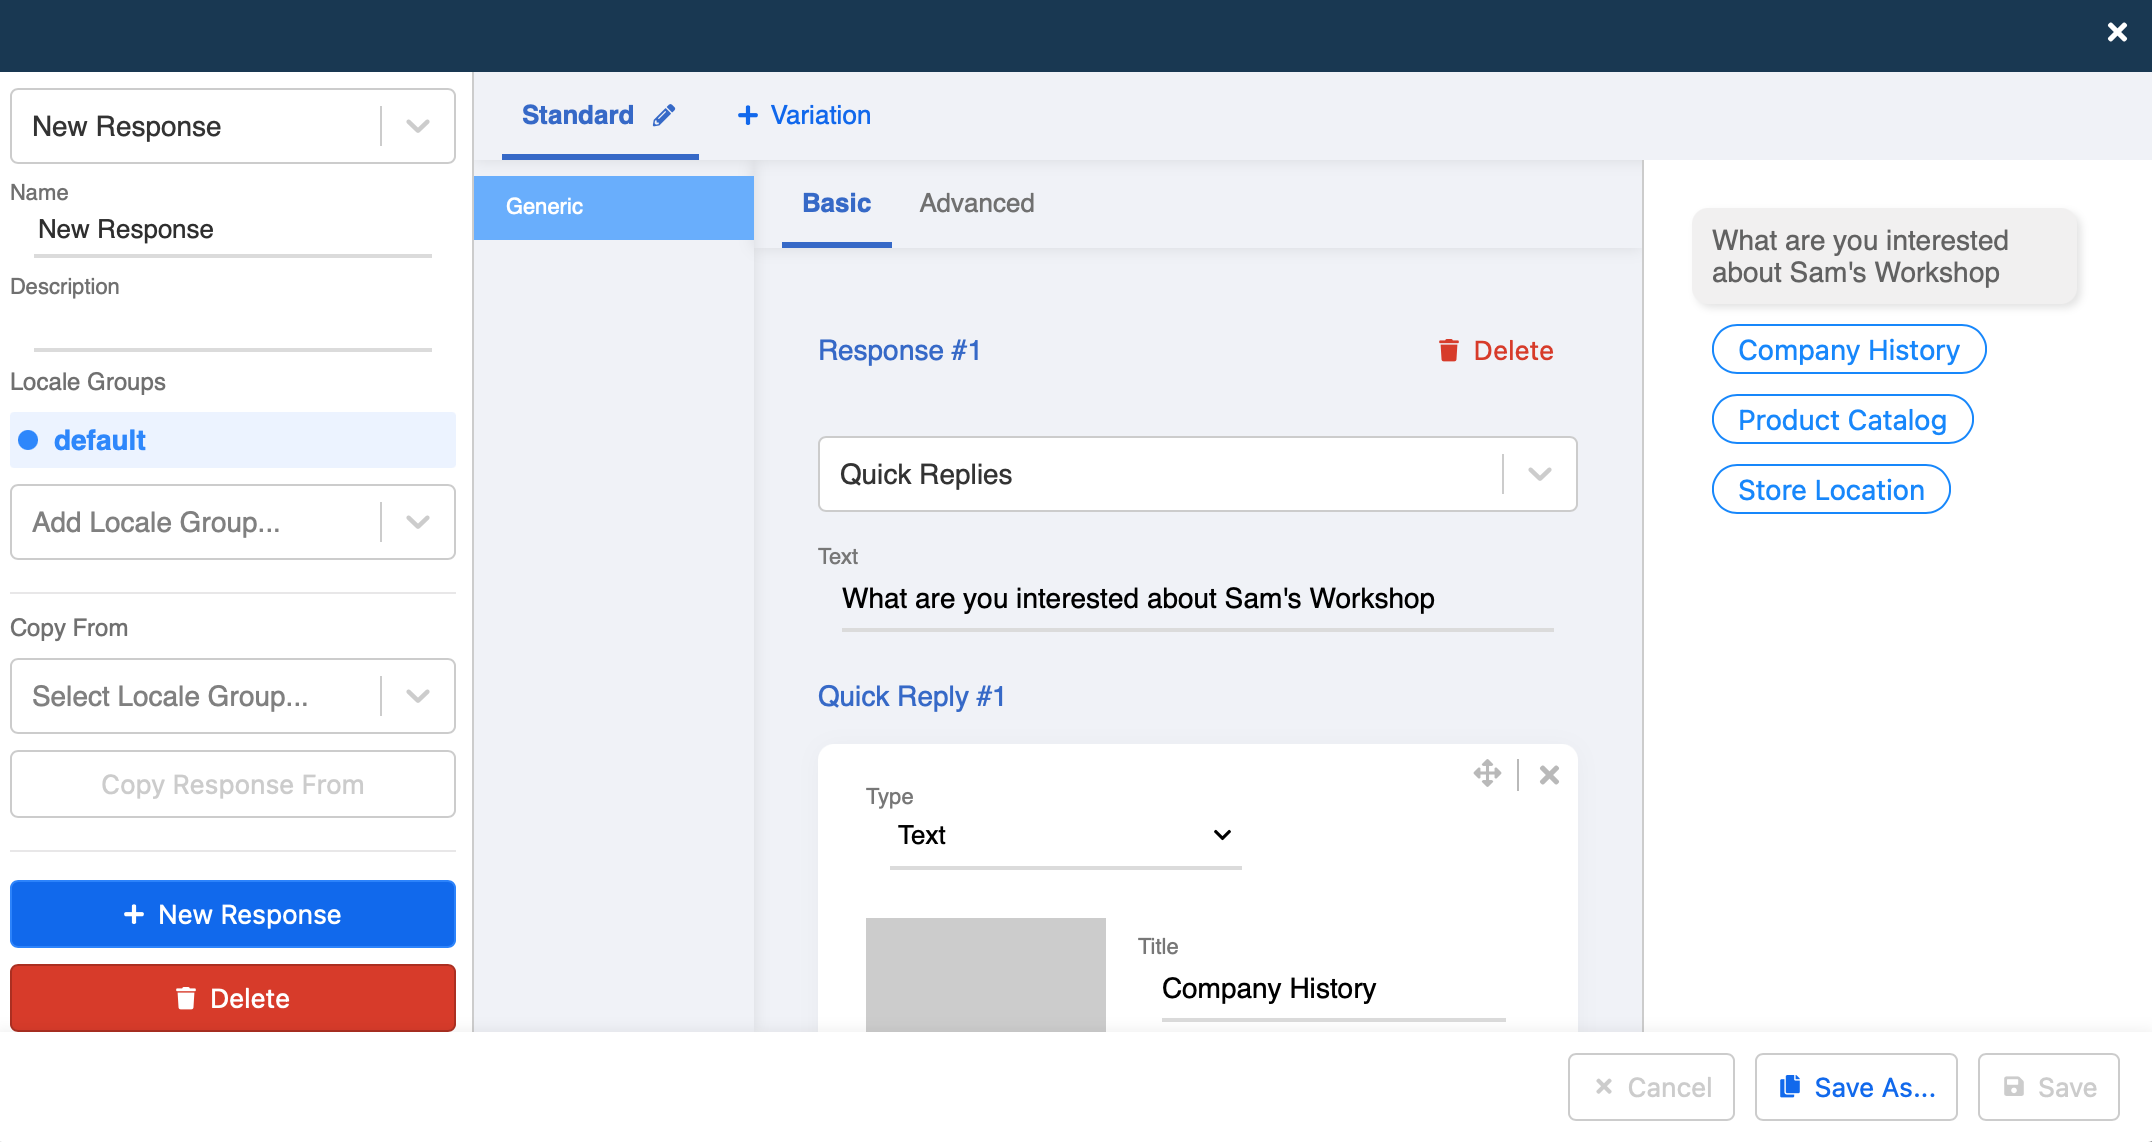
Create a Response to greet the customer. Click "Save".
Add Pre-action
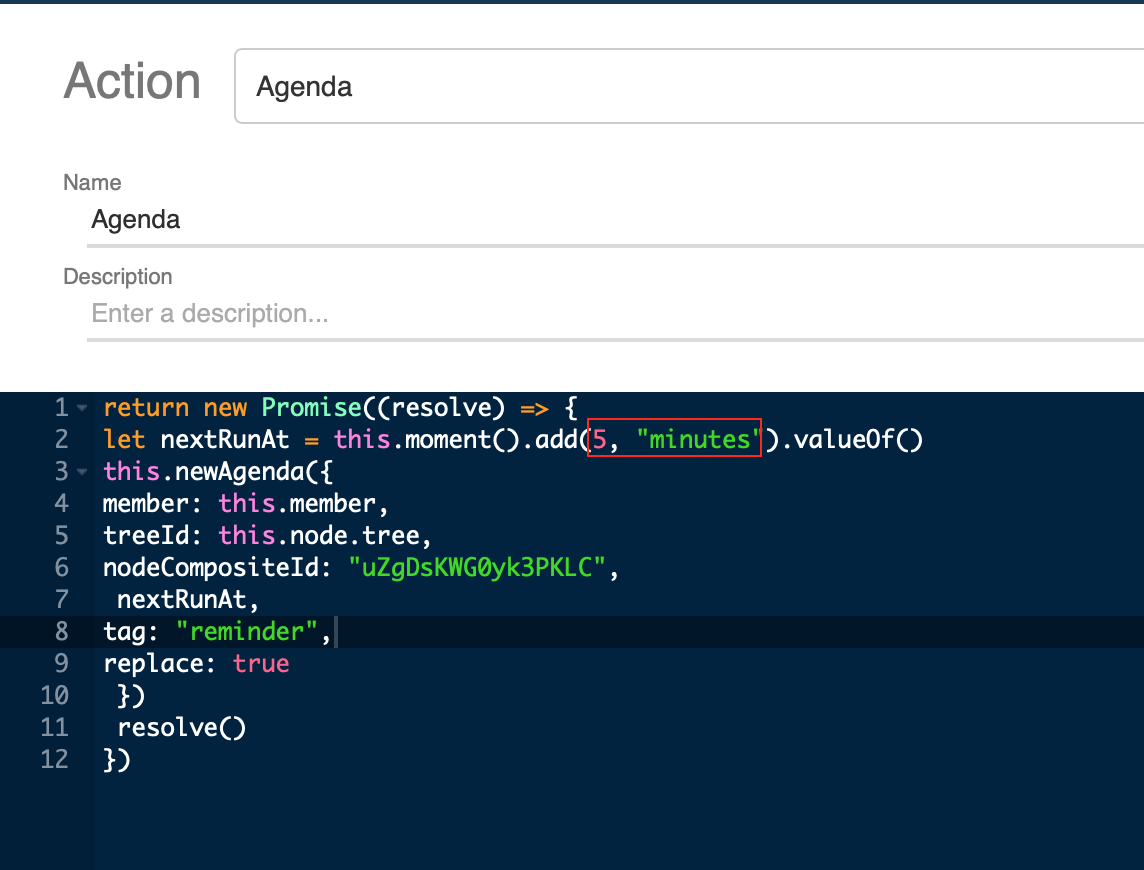
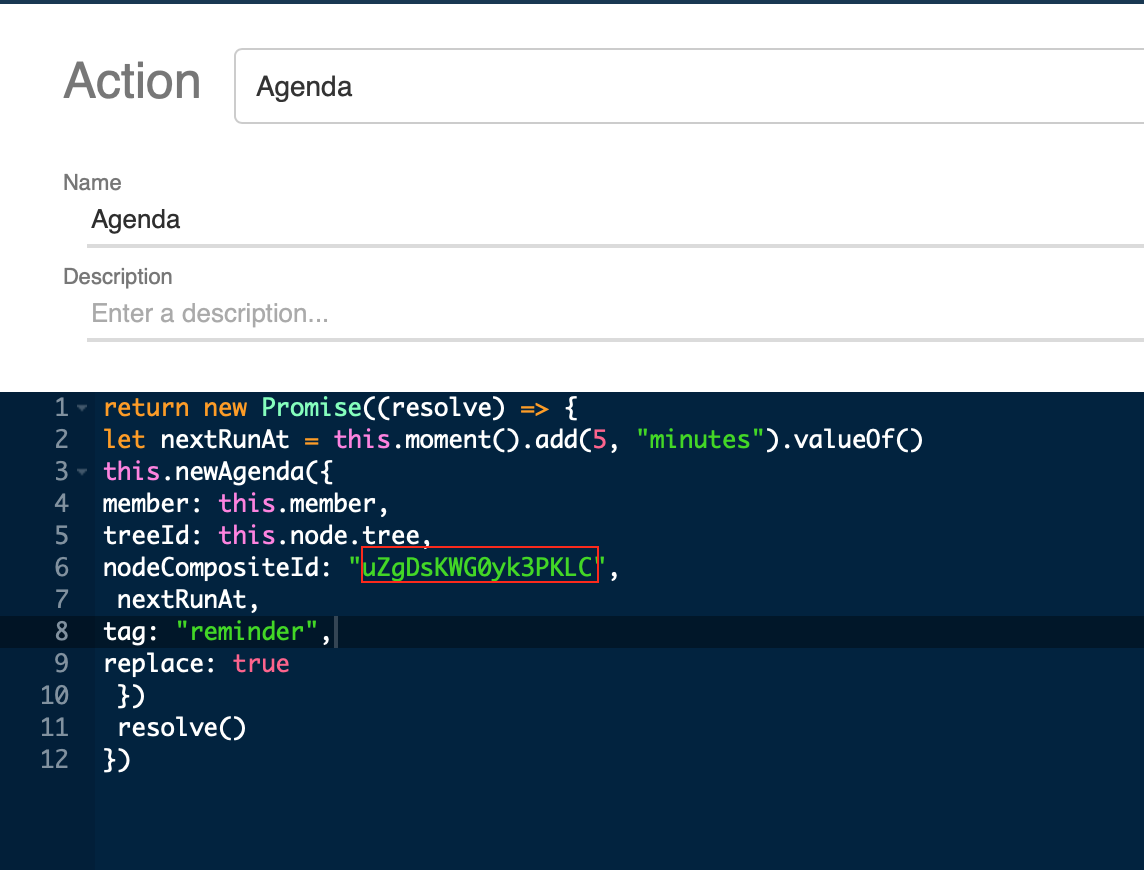
- Add a new Pre-action, name it as "Agenda". Then input the following code.
this.newAgendacreates an agenda for a member. The agenda will be executed at the specified time: thenextRunAtfield for a single run, or thepatternfield for multiple runs. The agenda would start counting down whenever a customer goes through this tree node.
return new Promise((resolve) => {
  let nextRunAt = this.moment().add(5, "minutes").valueOf()
  this.newAgenda({
    member: this.member,
    treeId: this.node.tree,
    nodeCompositeId: "FPl8vZRflSPBU9XD",
    nextRunAt,
    tag: "reminder",
    replace: true
  })
  resolve()
})
Input Time
- Input a scheduled time. The number must be integers, and the units can be "minutes", "hours", "days" or "weeks", remember to keep the units in plural form. The minimum scheduled time allowed is 1 minute.
Input TreeID
- Input the TreeID of the tree that your scheduled message belongs to. If it is in the same tree, input "this.node.tree". If it is different tree, input the TreeID, for instance, "6054b3e99cfe3e84ee174e88".
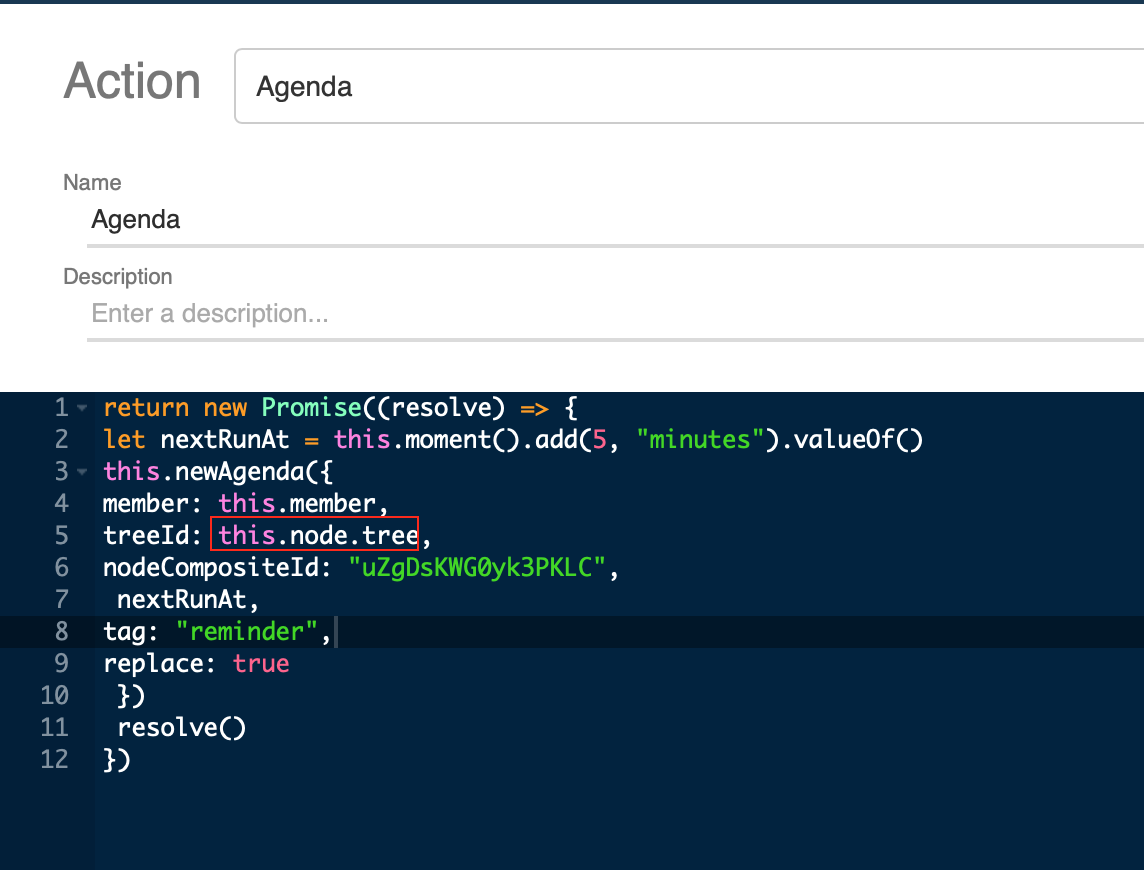
CompositeID is the unique ID for a tree node. We will edit the Composite ID later.
Input Tag
- The
tagfield is used for tagging the agenda. Input a tag for your agenda, let's name it "reminder". It can be used to identitfy this agenda for other actions. Then click "Save".
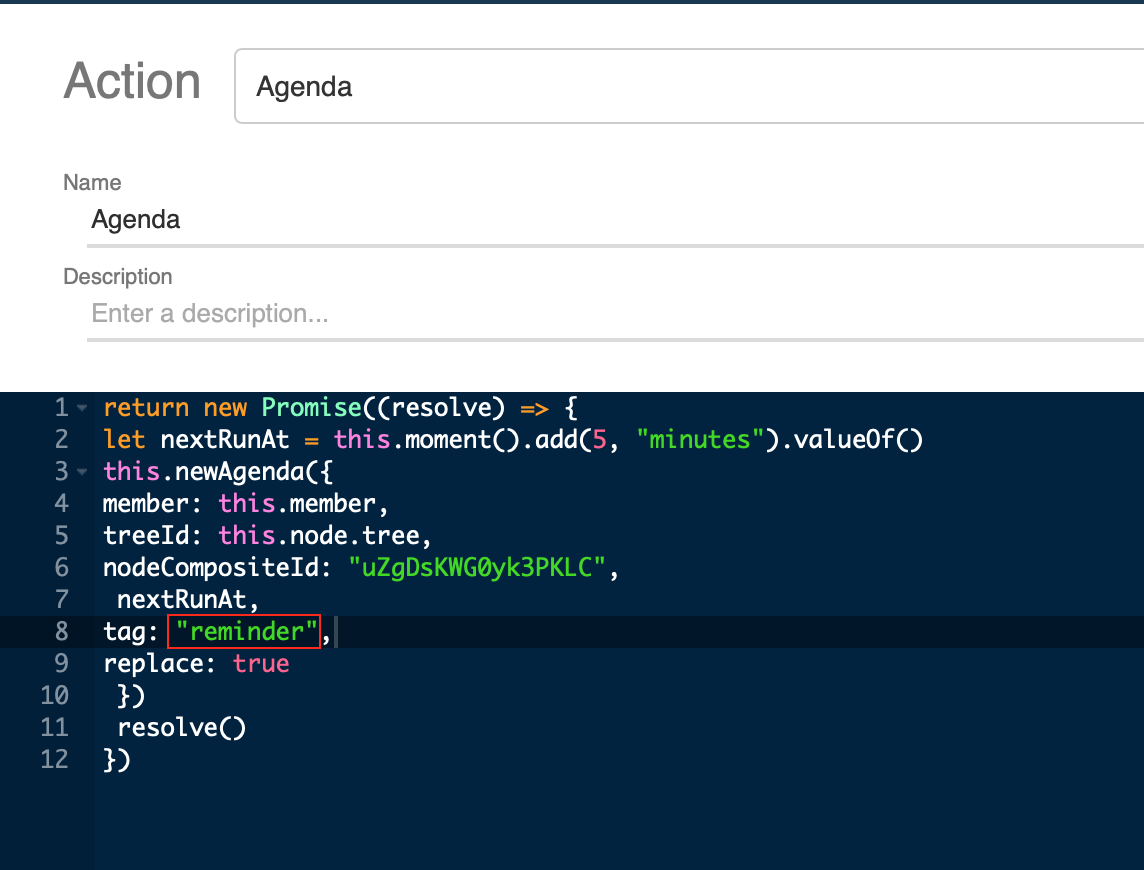
Replace Agenda
- The tag created can be used with the
replacefield which, when creating a new agenda with thereplacefield as true, will remove any old agendas with the same tag of the same member, and replace it with the new agenda.

Create Scheduled Message
Create a new tree node, name it as "Scheduled Message". We will create the reminder message in this tree node.
Create a response or a follow-up questioin for your customer who is unresponsive for a specific period of time.
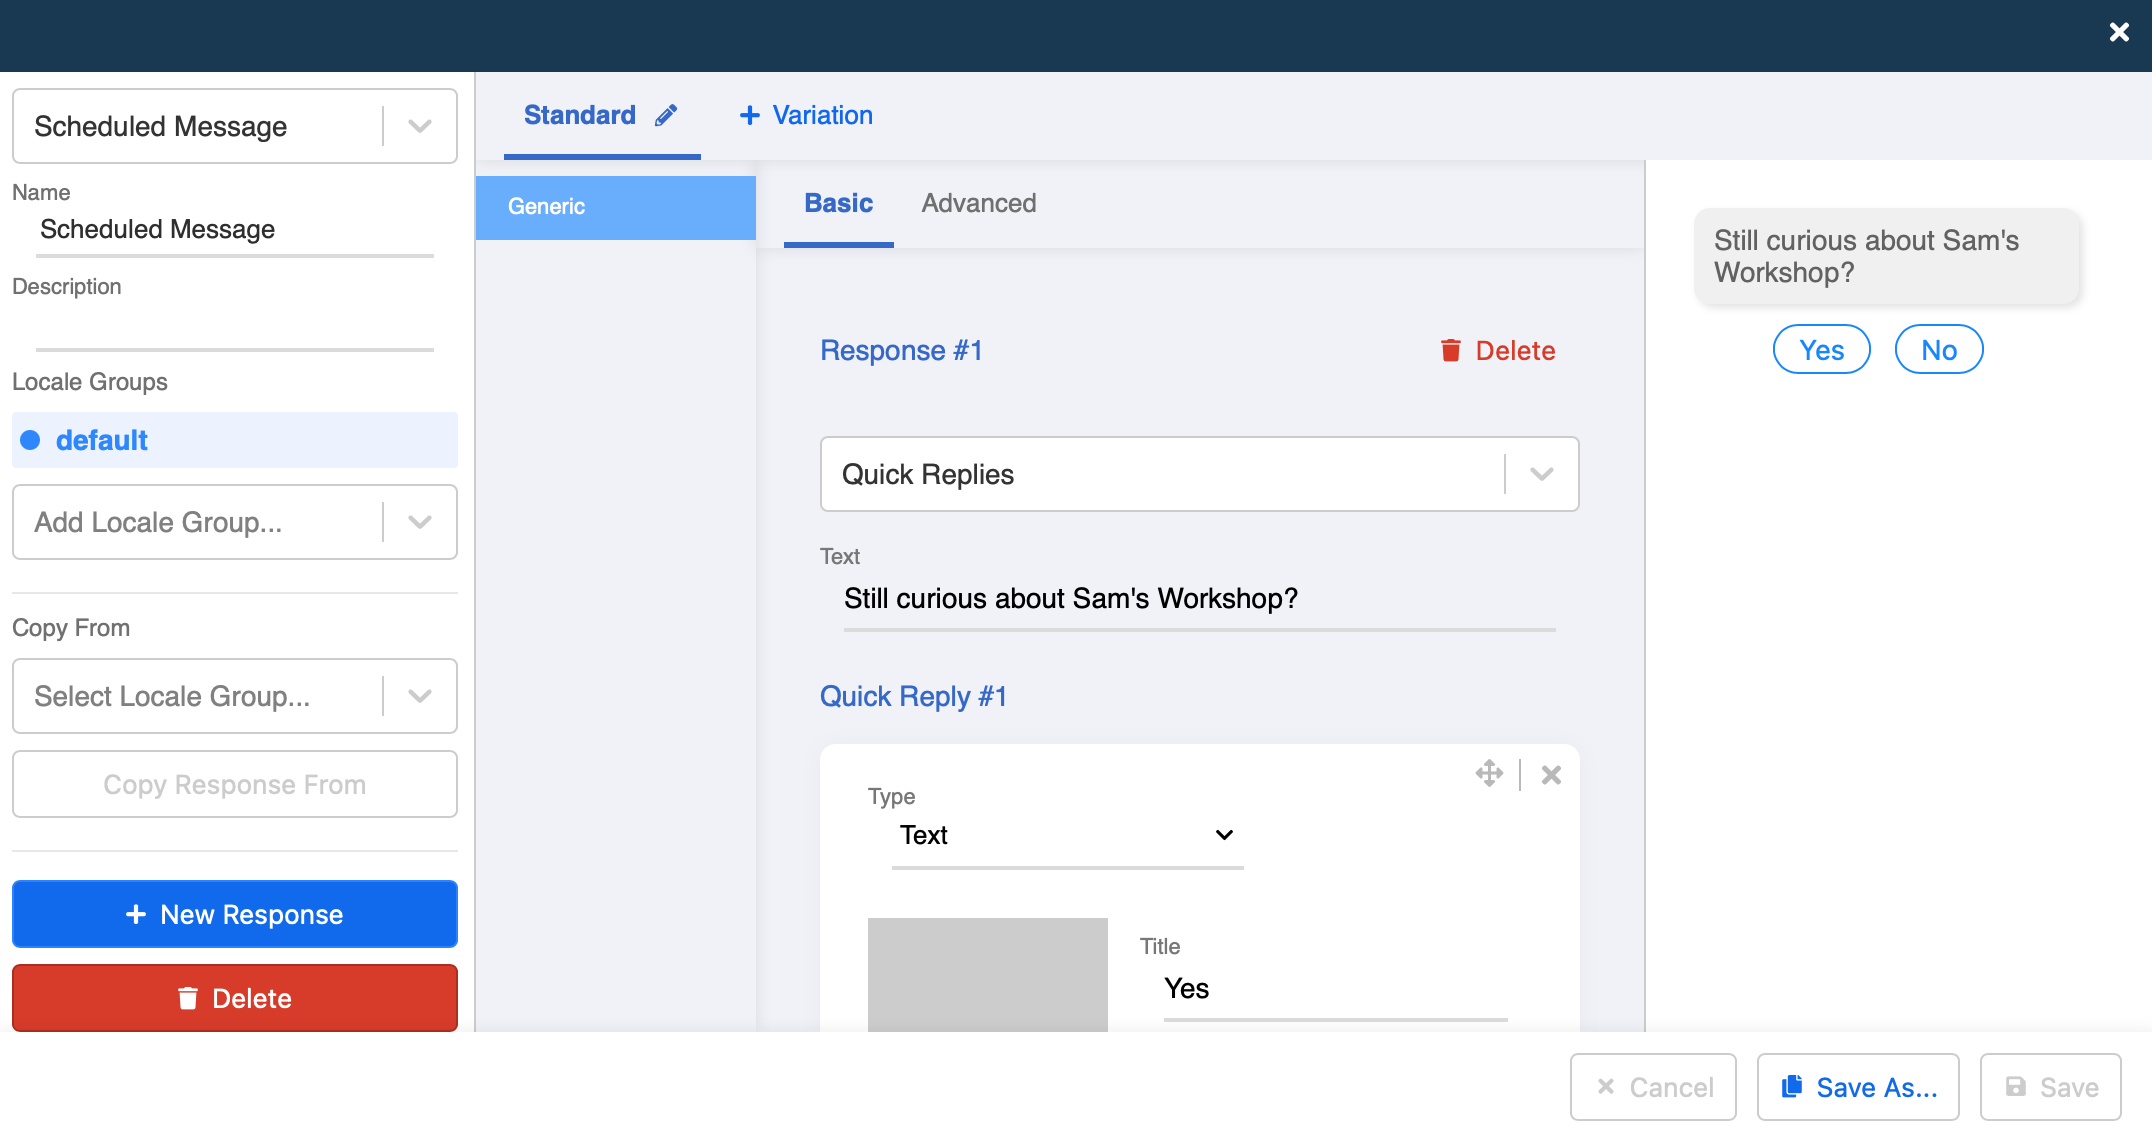
- If needed, you can also bring your customer back to the normal conversation flow. In this case, you can create a global node, and redirect to the conversation if the customer selects "Yes" for the follow-up question.
Input CompositeID
- Copy the Composite ID of the your scheduled message node.
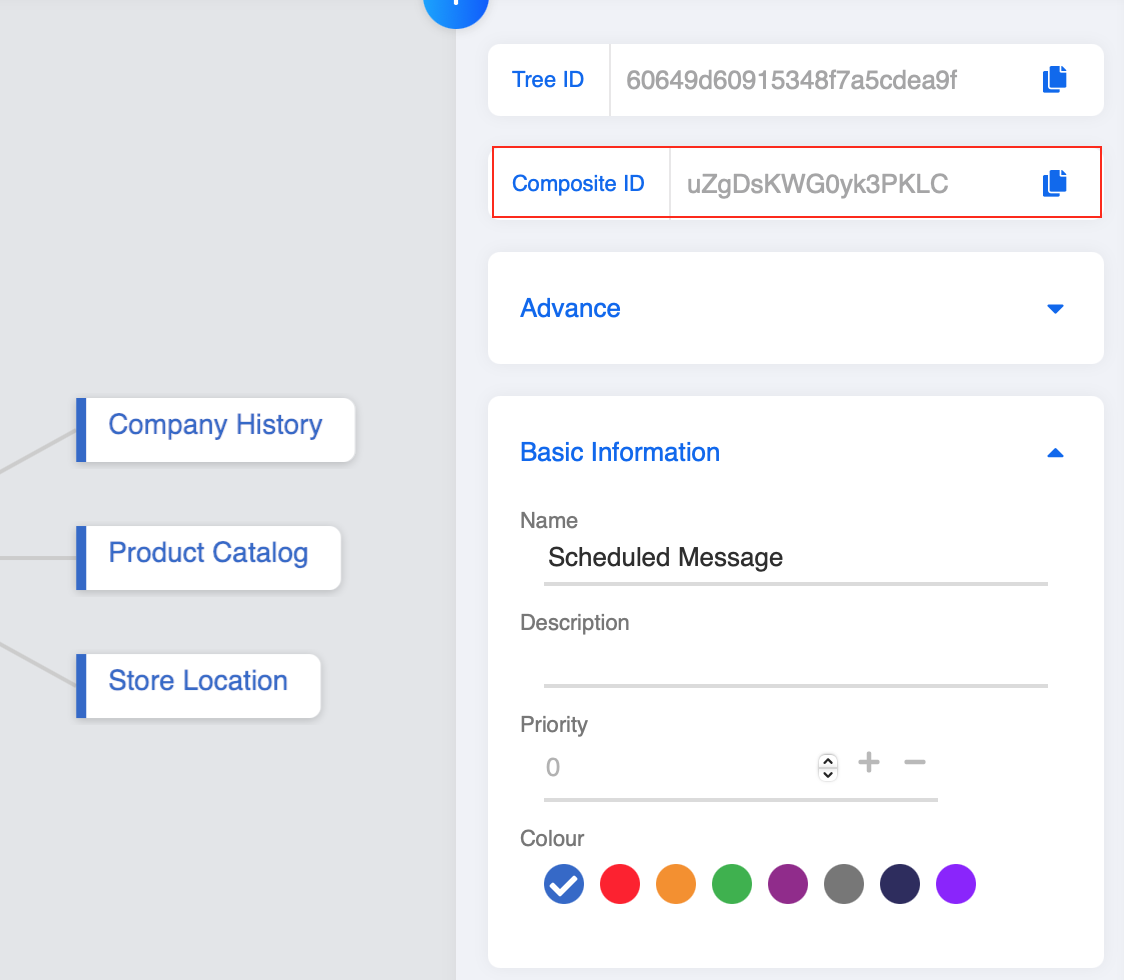
- Go back to the node where you set up the agenda, then select Pre-actions, replace the Composite ID with the new one. Now the agenda will trigger the Scheduled Message when the timer stops.
- Check and see if you can produce the expected outcome.
Remove Agenda
You want to send the reminder message to the idled users, without disturbing the responsive users. When the customer responds within the specific period of time, you want him to continue with the normal conversation flow. Therefore, you need to retract the reminder message by removing the agenda.
Expected Outcome
If the customer continues with the conversation flow within 5 minutes, the scheduled message will not be displayed.
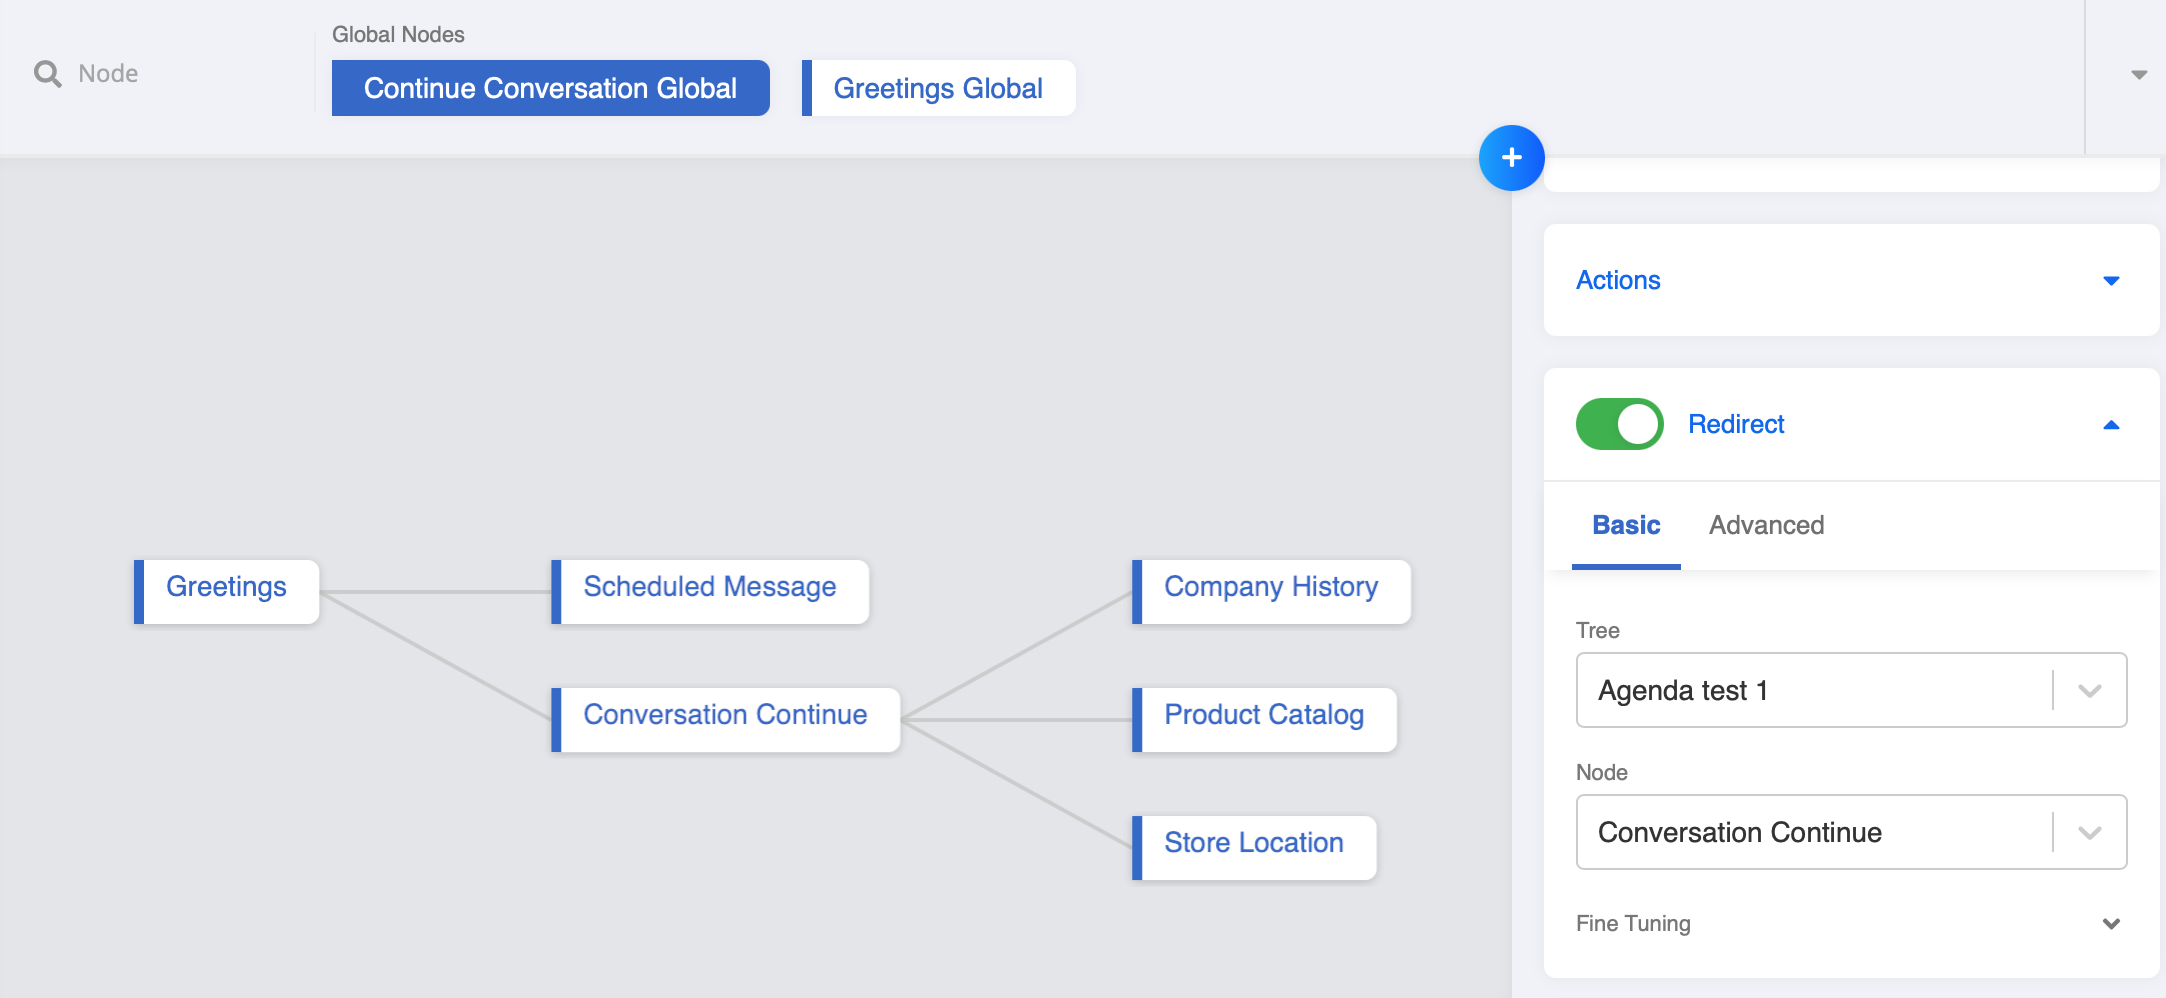
- Create a new tree node following "Greetings", let's name it as "Conversation Continue". Then, create a Response for your customer who moves on with the conversation.
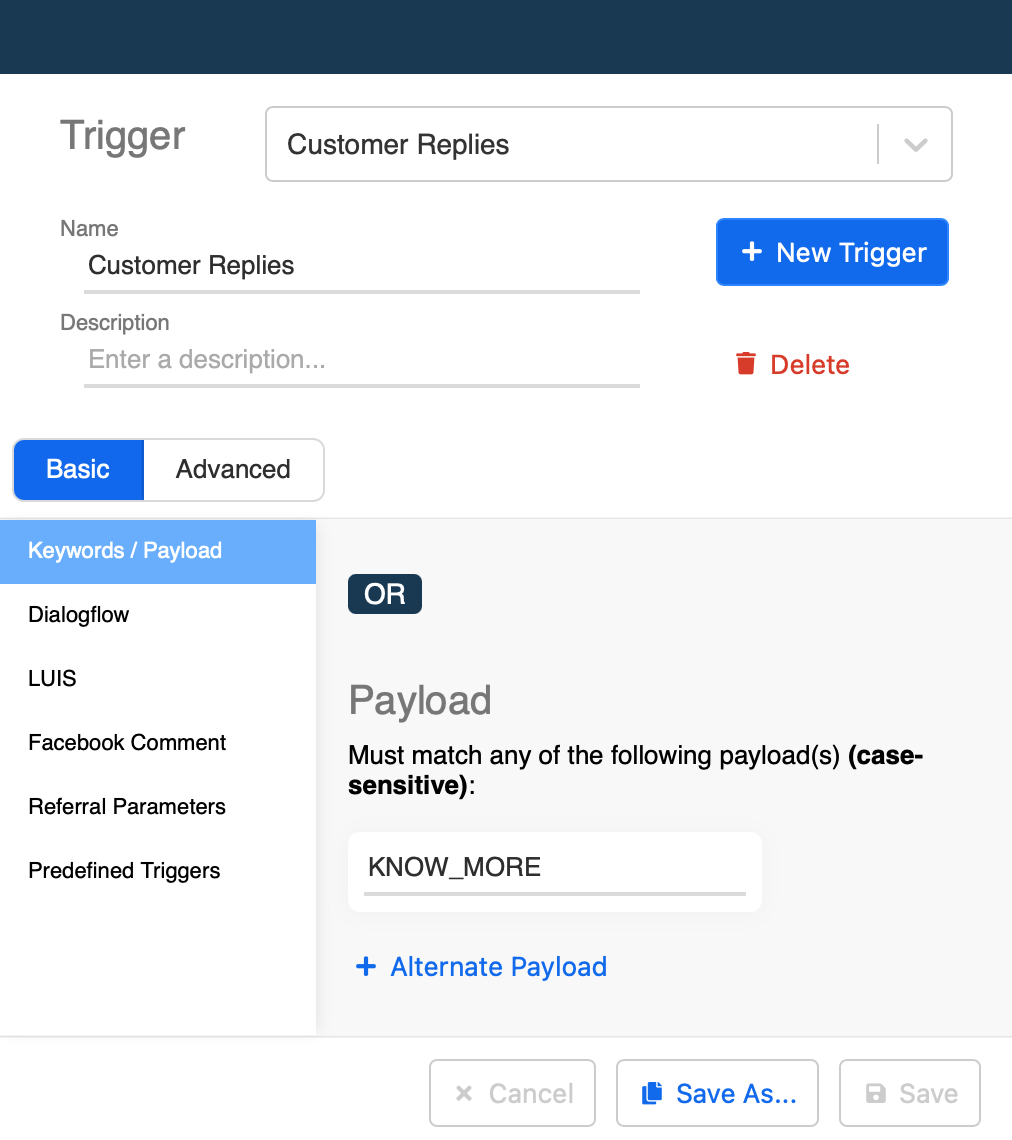
- Add a new trigger to "Conversation Continue". Then this node would be triggered when the customer selects "Know more about us".
Add Post-action
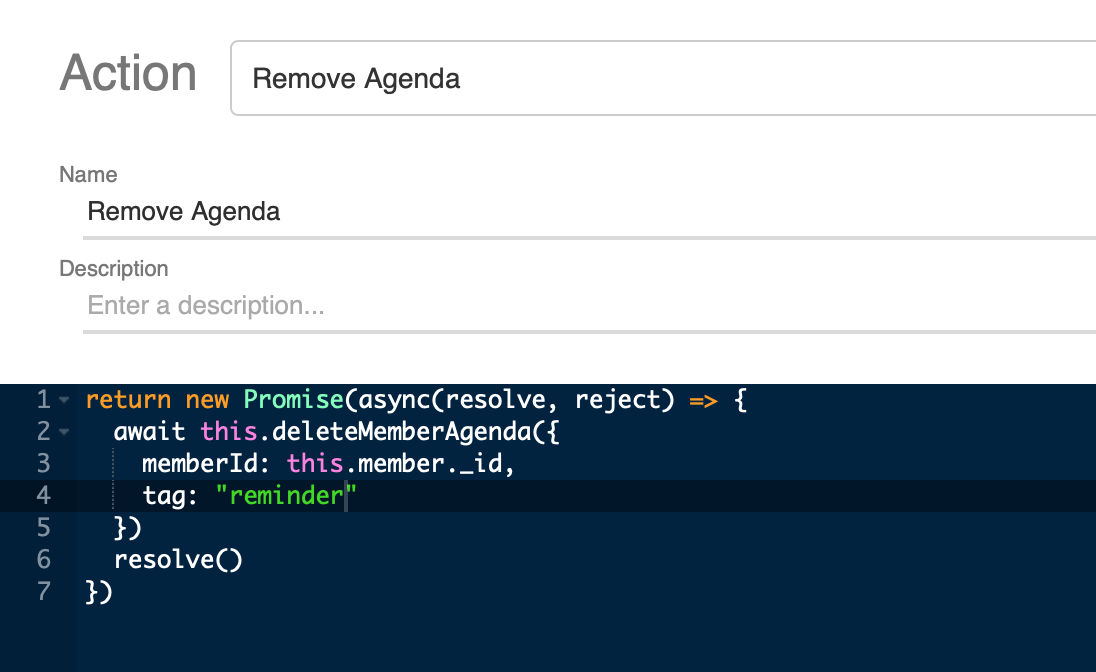
- Create a new Post-action in this node, let's name it as "Remove Agenda", then input the following code. When this node is triggered within the scheduled time, the conversation flow continues and this post-action can remove the previous agenda.
return new Promise(async(resolve, reject) => {
  try {
    await this.deleteMemberAgenda({
      memberId: this.member._id,
      tag: "reminder"
    })
    resolve()
  } catch (e) {
    reject(e)
  }
})
- Input the agenda tag "Last" you created in step 6, then the agenda with the same tag would be removed when this tree node is triggered.
- Check and see if you can produce the expected outcome.
Facebook Message Tag
In Facebook Messenger, businesses are encouraged to respond to their customers within 24 hours. If you decide to send a scheduled message to a customer after 24 hours, you need to include the specific Message Tag in the agenda.
Expected Outcome
An "Account Update" message is sent to notify the customer about change of application status.
Add Message Tag
- Go back to "Greetings" node, or any of your node that contains the agenda. Select Pre-action, add the following code to the agenda.
meta: {
  messagingTag: "ACCOUNT_UPDATE",
  messagingType: "MESSAGE_TAG"
}
- The field
metacan be used to save information in the agenda. In meta, enter the Message Tag and Message Type. Click here to find other Message Tags that match with the nature of your message.
Please make sure your message sent on Facebook Meseenger follows the guidelines of Facebook and the Message Tag Policy, for example, avoid sending promotional content frequently and sending push message to audience who has unsubscribed or disagreed to receive.

- Check and see if you can produce the expected outcome.
Whatsapp Message Template
For agenda, the scheduled time can be more than 24 hours. If your chatbot is on WhatsApp, you are also bind by their 24-hour customer care window. If you decide to send a scheduled message 24 hours after the last response from the customer. You need to make use of WhatsApp Message Template.
- Go to "Scheduled Message" node, change the Response Type to WhatsApp Message Template, then select from your approved message template.
