Stella Platform Documentation

Stella Platform Documentation

  • Docs
  • Procedures
  • Reference
  • FAQ
  • Bot API
  • API
  • Languages iconEnglish
    • 中文

›Advanced Chatbot Application

Get Started

  • Build your First Chatbot

Basic Facebook Chatbot Setup

  • Overview
  • 1.1: Connect to Channels
  • 1.2: Create New Tree
  • 1.3: Build the First Node
  • 1.4: Create a Global Node
  • 1.5: Build Child Nodes
  • 2.1: Production Channel
  • 3.1: Draft a Post
  • 3.2: Create Comment Reply

Basic Instagram Chatbot Setup

  • Overview
  • 1.1: Connect to Channels
  • 1.2: Create New Tree
  • 1.3: Build the First Node
  • 1.4: Create Global Node
  • 1.5: Build Child Nodes
  • 2.1: Create Story Mention
  • 2.2: Create Comment Reply
  • 2.3: Send Push Message

Basic Web Chat Chatbot Setup

  • Overview
  • 1.1: Connect to Channels
  • 1.2: Create New Tree
  • 1.3: Build the First Node
  • 1.4: Create a Global Node
  • 1.5: Build Child Nodes

Basic WhatsApp Chatbot Setup

  • Overview
  • 1.1: WABA Subscription
  • 1.2: Connect WABA
  • 1.3: Check Approval Status of WABA
  • 1.4: Setup WABA with Used WhatsApp Number
  • 1.5: Reset / Terminate WABA
  • 2.1: Create New Tree
  • 2.2: Build the First Node
  • 2.3: Create a Global Node
  • 2.4: Build Child Nodes
  • 2.5: Connect to Datasource
  • 3.1: Create Priority Group
  • 4.1: Create Product Message

Common Use Case Application

  • Overview
  • 1.1: Apply Fail-Safe to Chatbot
  • 1.2: Apply Member Unsubscription Flow to Chatbot

Advanced Chatbot Application

  • Overview
  • Apply Datasource to Chatbot
  • Apply Payload Value to Chatbot
  • Apply API to Chatbot
  • Apply Custom Locale to Chatbot
  • Apply Opt-in Flow to Chatbot
  • Apply Agenda to Chatbot
  • Apply Stella API to Chatbot
  • Apply Web Event to Webchat Chatbot

Error Handling

  • Handle Errors for Chatbot

Stella Partner Portal Setup

  • Overview
  • 1.1: Partner Portal Setup
  • 1.2: New Customer Onboarding
  • 1.3: WABA Setup
  • 1.4: Check Approval Status of WABA
  • 1.5: Setup WABA with Used WhatsApp Number
  • 1.6: Reset / Terminate WABA

Template Tree

  • Overview
  • Create Template Tree
  • Manage Proxy Tree

Chatbot Testing & Deployment

  • Overview
  • Stage One - Tree Building
  • Stage Two - Testing Stage
  • Stage Three - Production Deployment

Slack Live Chat Tree Setup

  • Overview
  • 1.1: Create Tree for Live Chat Assignment
  • 2.1: Set Up Pick Ticket Status
  • 2.2: Create Done Command
  • 2.3: Create Transfer Command
  • 2.4: Create Archive Function
  • 2.5: Create Member Tagging/Remarks Command
  • 3.1: Automatic End Live Chat Function

Zendesk Live Chat Tree Setup

  • Overview
  • 1.1: Create Tree for Assignment
  • 2.1: Create Done Command
  • 2.2: Auto End Live Chat Function

FAQ Chatbot Setup

  • Overview
  • 1.1: Exact Keyword Match
  • 1.2: Keyword Groups Match & Diversion
  • 2.1: Redirect to Existing Chatbot Tree
  • 2.2: Data Analytics for FAQ Chatbot
  • 2.3: NLP for FAQ Chatbot
  • 3.1: Filtering Questions for FAQ Chatbot

NLP Chatbot Setup

  • Overview
  • 1.1: Apply NLP to your Chatbot
  • 2.1: Set Up an NLP Fallback Tree
  • 3.1: NLP Fallback to Other Languages

Connect Shopify Store to Stella

  • Overview
  • 1.1: Integrate Stella to Shopify
  • 2.1: Setup Facebook Messenger Chatbot for Shopify
  • 2.2: Setup WhatsApp Chatbot for Shopify
  • 2.3: WhatsApp Customer Care Notification for Shopify

Stella Inbox Setup

  • Overview
  • 1.1: Connect Channel to Slack
  • 1.2: Access Control & Admin Panel
  • 1.3: Set up Customizable Message
  • 1.4: Inbox Channel
  • 2.1: Turn on Live Chat Directly
  • 2.2: End Live Chat Mode
  • 2.3: Ticketing
  • 2.4: Manage Ticket Helper
  • 2.5: Add Member Tag
  • 3.1: Send Chatbot Message

Apply Datasource to Chatbot

Data Source to upsert data from a chatbot flow to a data source or to fetch data from a data source and apply back on a chatbot flow. The following object(s) and method(s) will be used in the application of data source:

  • this.member.botMeta.tempData
  • this.fetchDataFromDataSource
  • this.upsertDataToDataSource

For more object or method references, please refer to the Reference documentation.


Expected Outcome

The following chatbot conversation is just an example for illustrating the application of data source. Please feel free to utilize the objects/code as you see fit.

  1. User replies the chatbot with user's email.
Save Email Sample Flow
  1. The email is recorded in the Data Source with these fields: psid, firstName, lastName, email.

Email Data Source
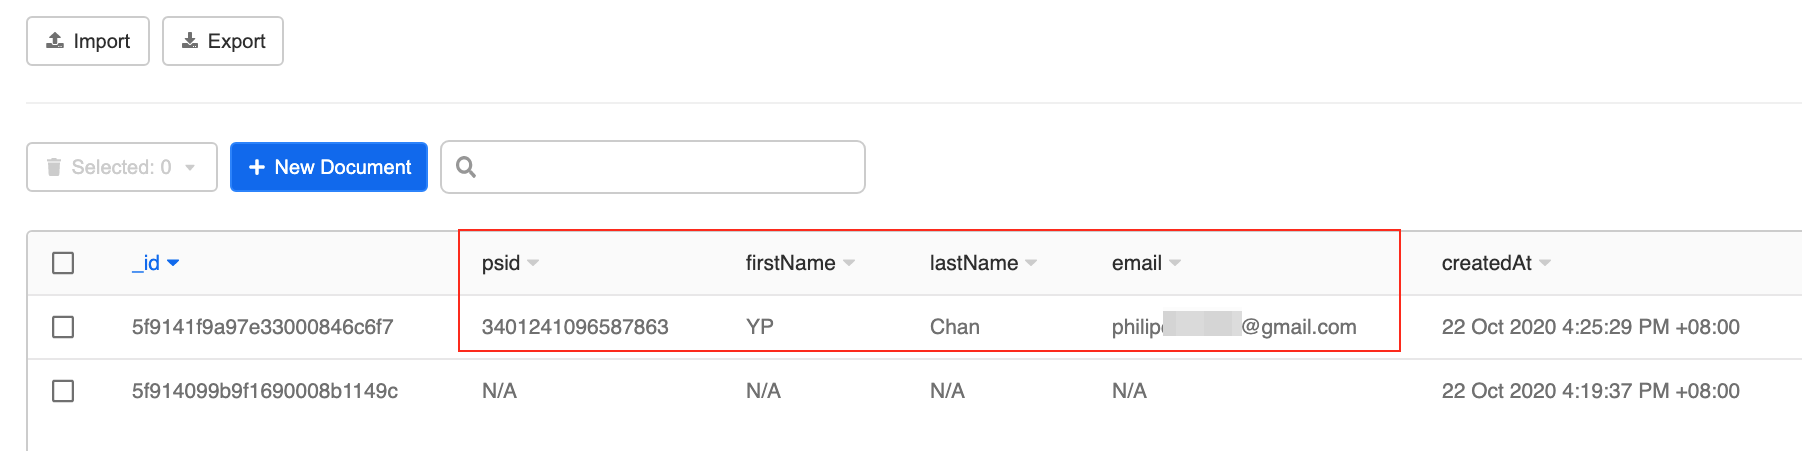
PSID is an unique ID assigned to you when you interacts with a Facebook page. Stella also makes use of PSID to identify Facebook members. For other platforms like WhatsApp, Stella makes use of member's WhatsApp number. In general, these IDs are called external ID.

Sample Tree Structure

Email Data Source Sample Tree Structure

Getting Hands-on

Click here to create your tree node.

Create the 1st Tree Node - Ask Email

  1. Create the 1st tree node and rename it as "Ask Email".

  2. Create a text or an Email quick reply (Messenger can retrieve your profile email and display on the quick reply if your privacy setting allows so) response to ask for the user's email address.

Email Quick Reply
  1. Save the tree node.

Create a Data Source

  1. Head to "Data Source" and create a new Data Source.
Add a New Data Source
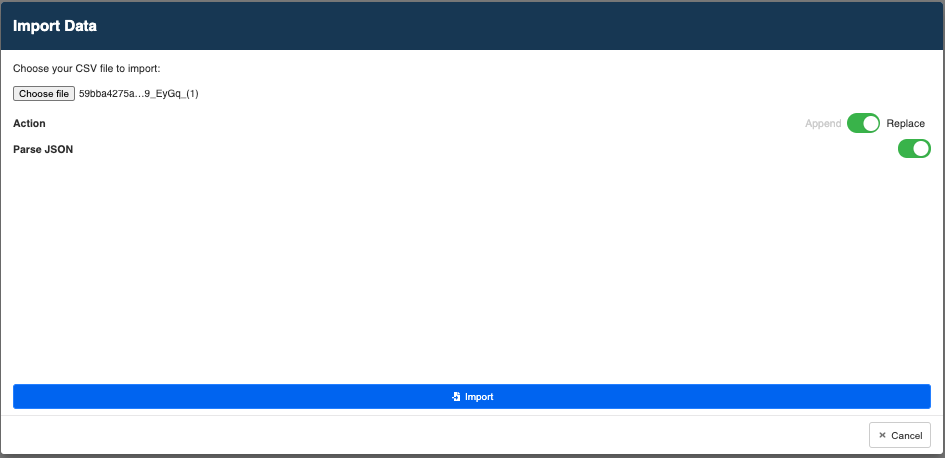
  1. Import this .CSV file to the data source. Remember to toggle on "Replace" for Action and "Parse JSON".
Import the Data Source File
  1. The fields (psid, firstName, lastName, email) will appear on the Data Source. Copy the "Data Source ID" for later use.

Email Data Source

Create the 2nd Tree Node - Save Email

  1. Add the 2nd tree node and rename it as "Save Email".
  2. Create the following trigger to check if the email payload or the email text has the correct email format.

Email Checking Trigger
  • Condition Group: "Type Payload" or "Type Text"
this.messageEvent.type === "PAYLOAD"
this.messageEvent.type === "TEXT"
  • Condition 2: "Email regex"
/^([a-zA-Z0-9.!#$%&'*+\/=?^_`{|}~-]+@[a-zA-Z0-9-]+[^@]*\.[a-zA-Z0-9-]+)*$/.test(this.messageEvent.data.text)
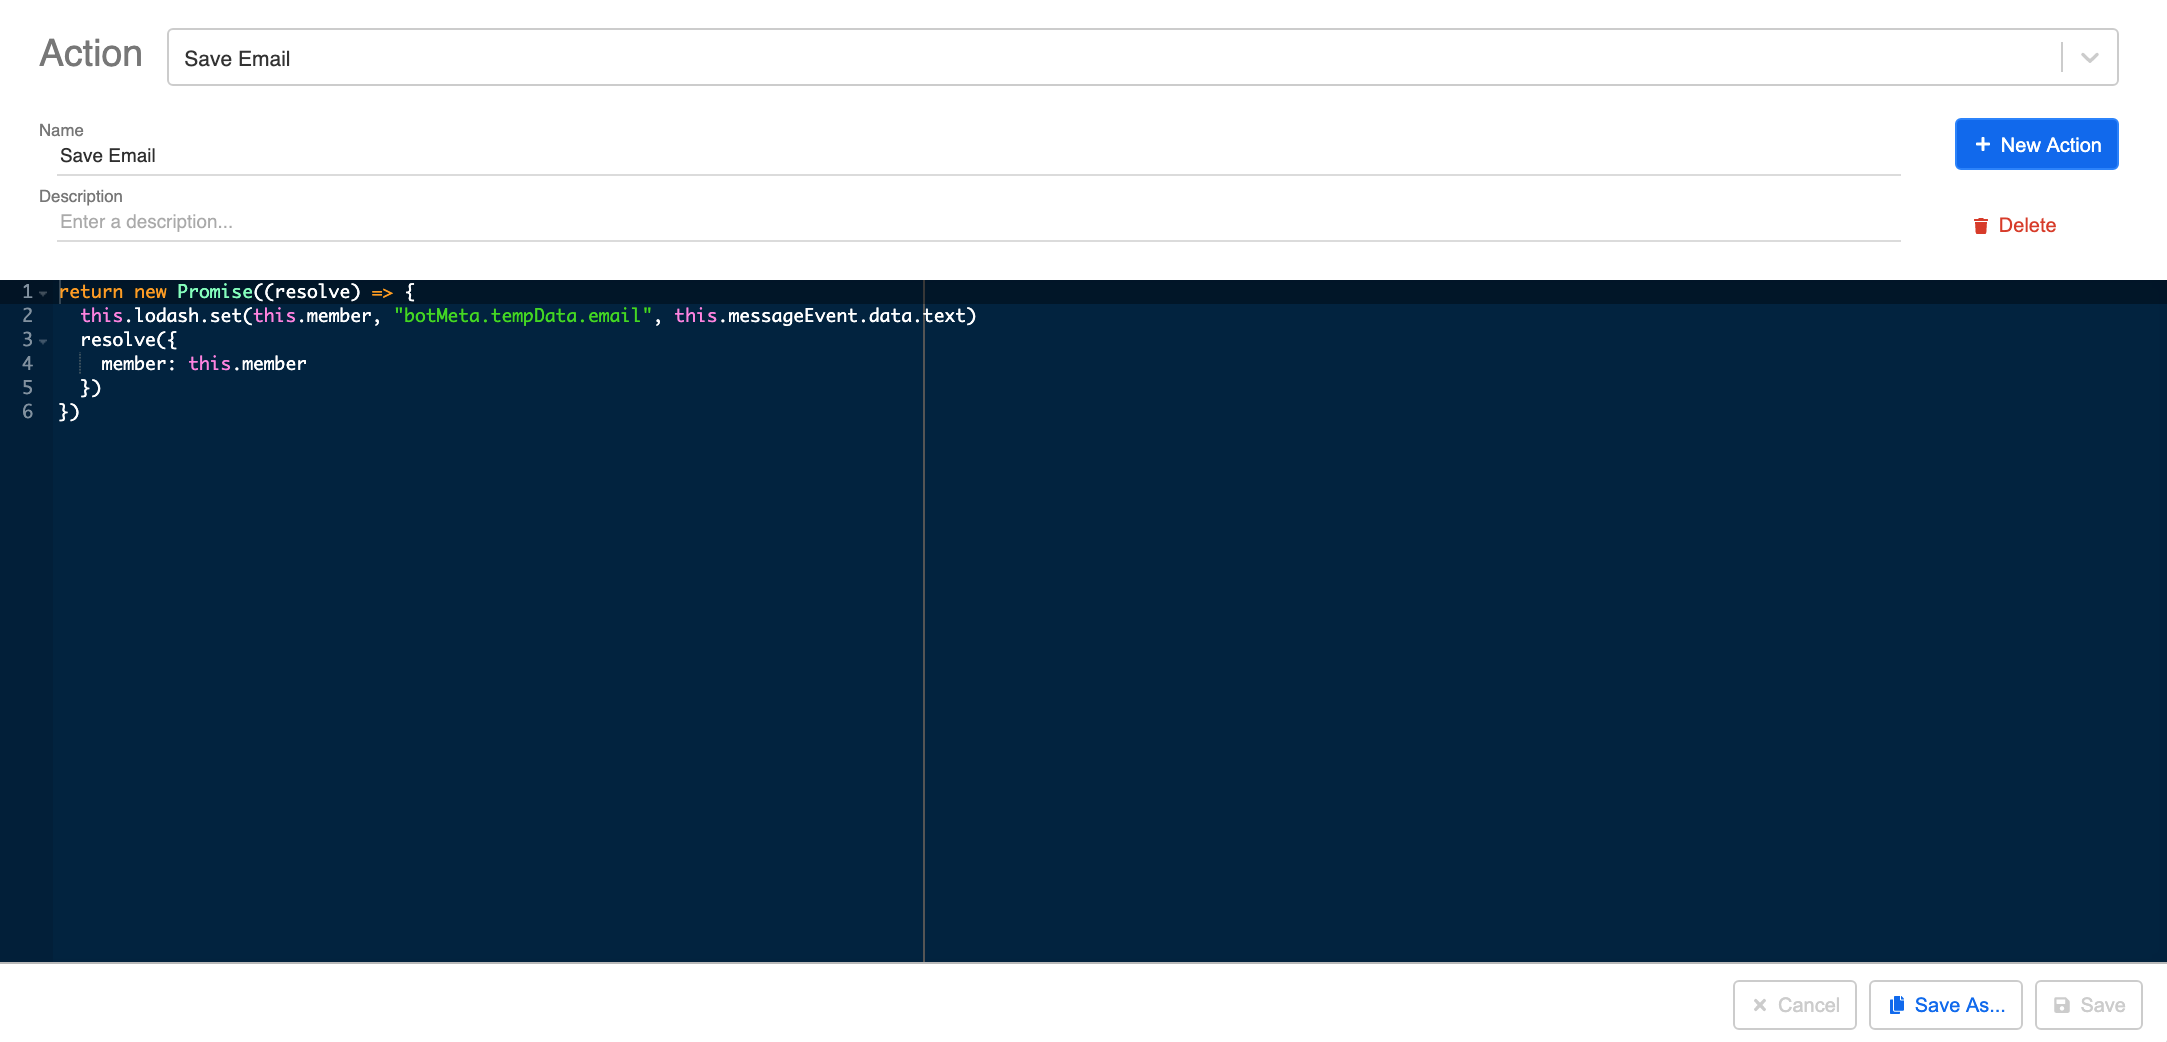
  1. Create the 1st pre-action to save the email address collected to tempData of the member and rename it as "Save Email". You may apply the following sample code:

Save Email Pre-action
return new Promise((resolve) => {
  this.lodash.set(this.member, "botMeta.tempData.email", this.messageEvent.data.text)
  resolve({
    member: this.member
  })
})

The above sample code saves the email address from the messageEvent as tempData in the member object, so that saved data can be reused in other nodes within the same Channel.
  1. Create the 2nd pre-action to save the email address to the data source. You may apply the following sample code:

Save Email to Data Source Pre-action
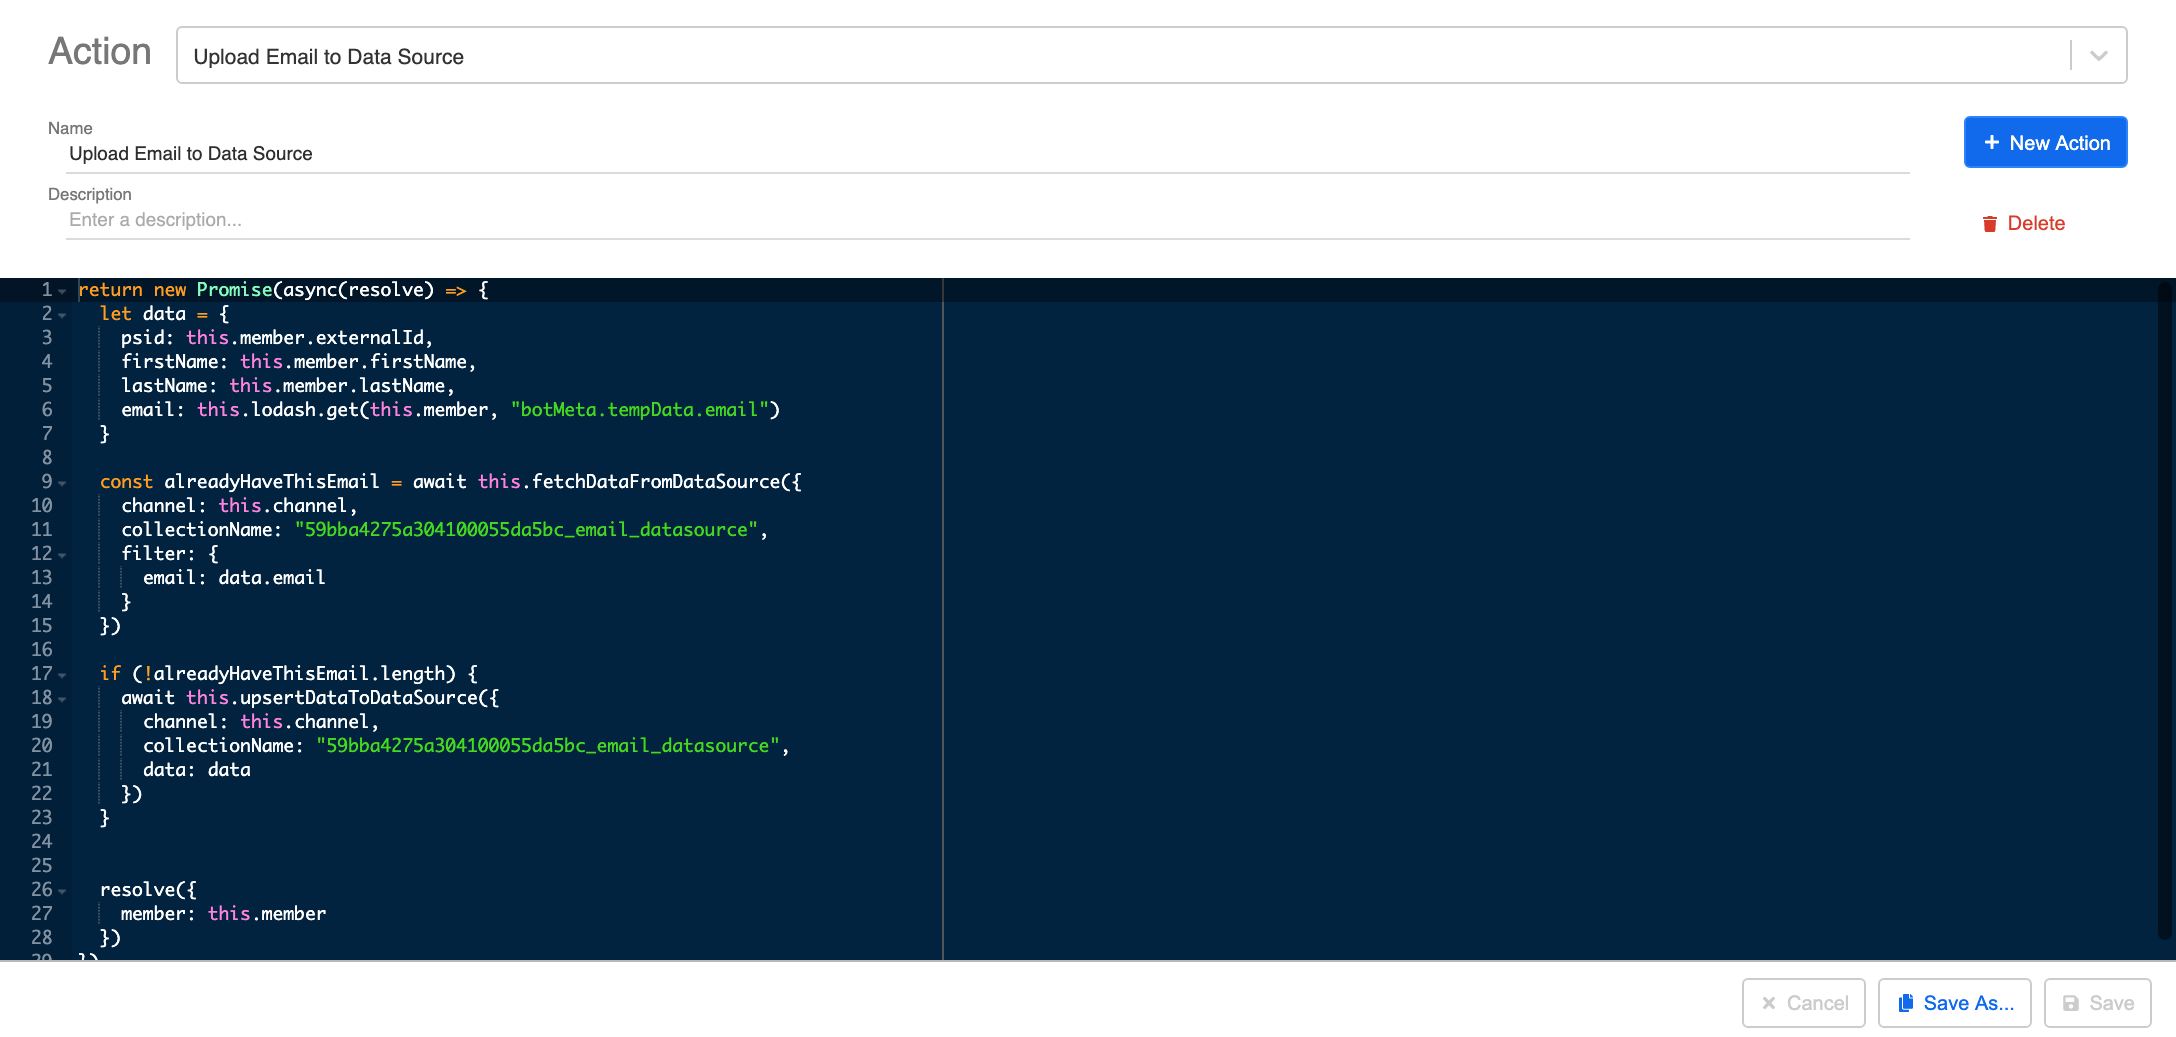
  • Please remember to change the value of collectionName in the code to the Data Source ID you copied earlier.
return new Promise(async (resolve, reject) => {
  try {
    let data = {
      psid: this.member.externalId,
      firstName: this.member.firstName,
      lastName: this.member.lastName, 
      email: this.lodash.get(this.member, "botMeta.tempData.email")
    }
    
    const alreadyHaveThisEmail = await this.fetchDataFromDataSource({
      collectionName: "Insert Your Data Source ID Here",
      filter: {
        email: data.email
      }
    })
    
    if (!alreadyHaveThisEmail.length) {
      await this.upsertDataToDataSource({
        channel: this.channel,
        collectionName: "Insert Your Data Source ID Here",
        data: data
      })
    }
    resolve({
      member: this.member
    })
  } catch (e) {
    reject(e)
  }
})
The above sample code fetches data from the data source to check if the email has already been saved. If the email has not been saved before, the data source will upsert the email address to the data source.
  1. If you want to display the saved email text on your chatbot response, you can apply the following code sample on the "Response Object":
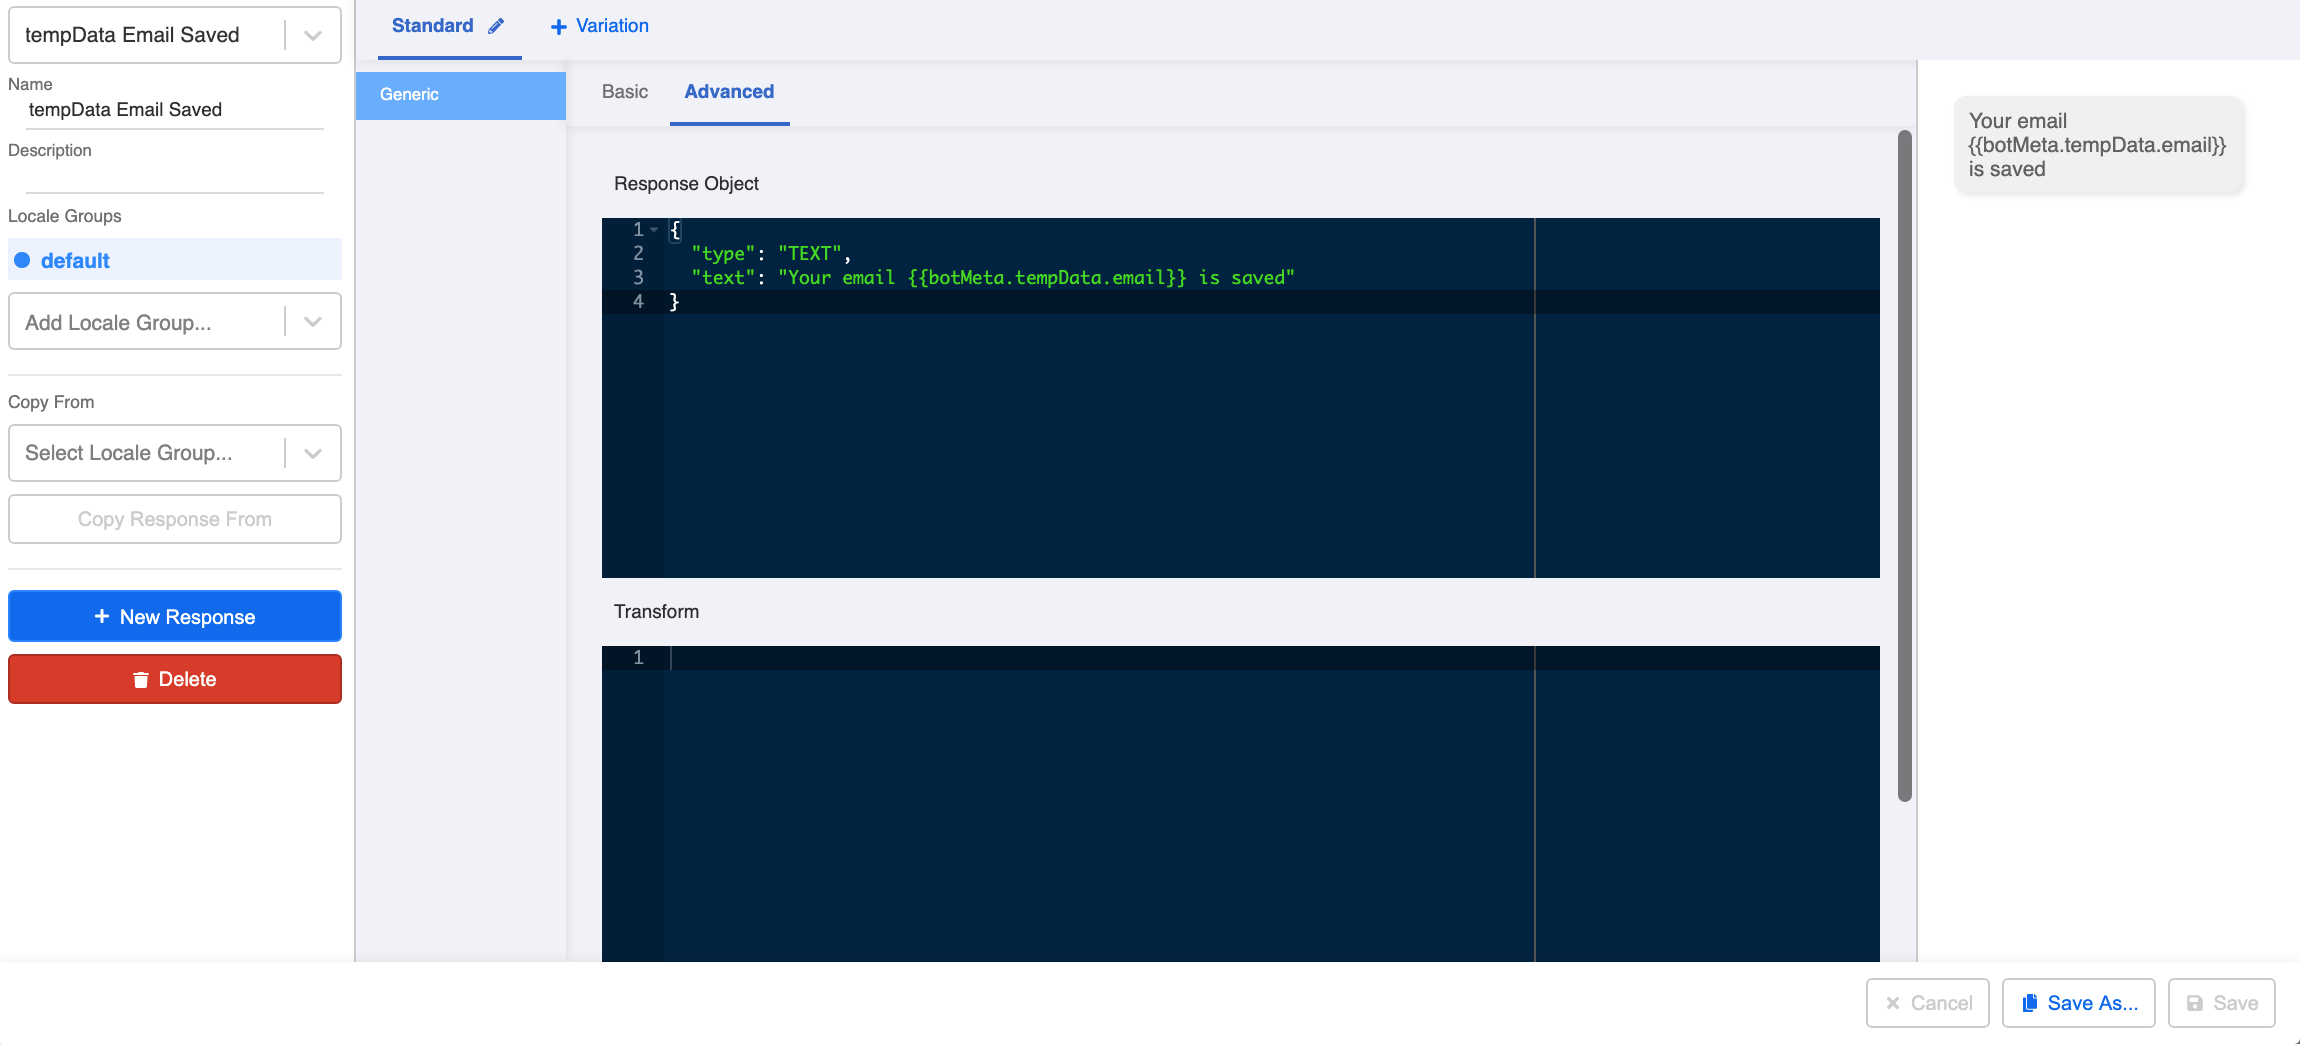
Create a Response with Saved Email
{
  "type": "TEXT",
  "text": "Your email {{botMeta.tempData.email}} is saved"
}
As the email text is saved in the tempData of the member object, the above format allows Stella to retrieve the data from member and display in the response. You can use {{}} instead of this.member in the response.
  1. Save the tree node.

  2. Check and see if you can produce a result similar to the expected outcome.

← OverviewApply Payload Value to Chatbot →
  • Expected Outcome
  • Sample Tree Structure
  • Getting Hands-on
    • Create the 1st Tree Node - Ask Email
    • Create a Data Source
    • Create the 2nd Tree Node - Save Email
Stella Platform Documentation
Docs
Get StartedBot API ReferenceAPI ReferenceStandard Procedures
Community
FAQUser ShowcaseChat with Us
Copyright © 2023 Sanuker Inc. Limited