Turn on Live Chat Directly
When a user sends a message to your chatbot, an Inbox Channel would be created. An agent can view user's conversation with the chatbot in the Inbox Channel. If needed, the agent can manually activate the Live Chat Mode and chat with user directly.
What is your Result?
When the agent thinks that the user's enquiry cannot be handled by the chatbot, the agent can toggle on the live chat mode and type text messages to interact with the user directly.
The agent switches off the chatbot and interact with the user directly
Getting Hands-on
The following section will teach you how to view inbox channel and toggle on live chat mode.
Open Live Chat Control
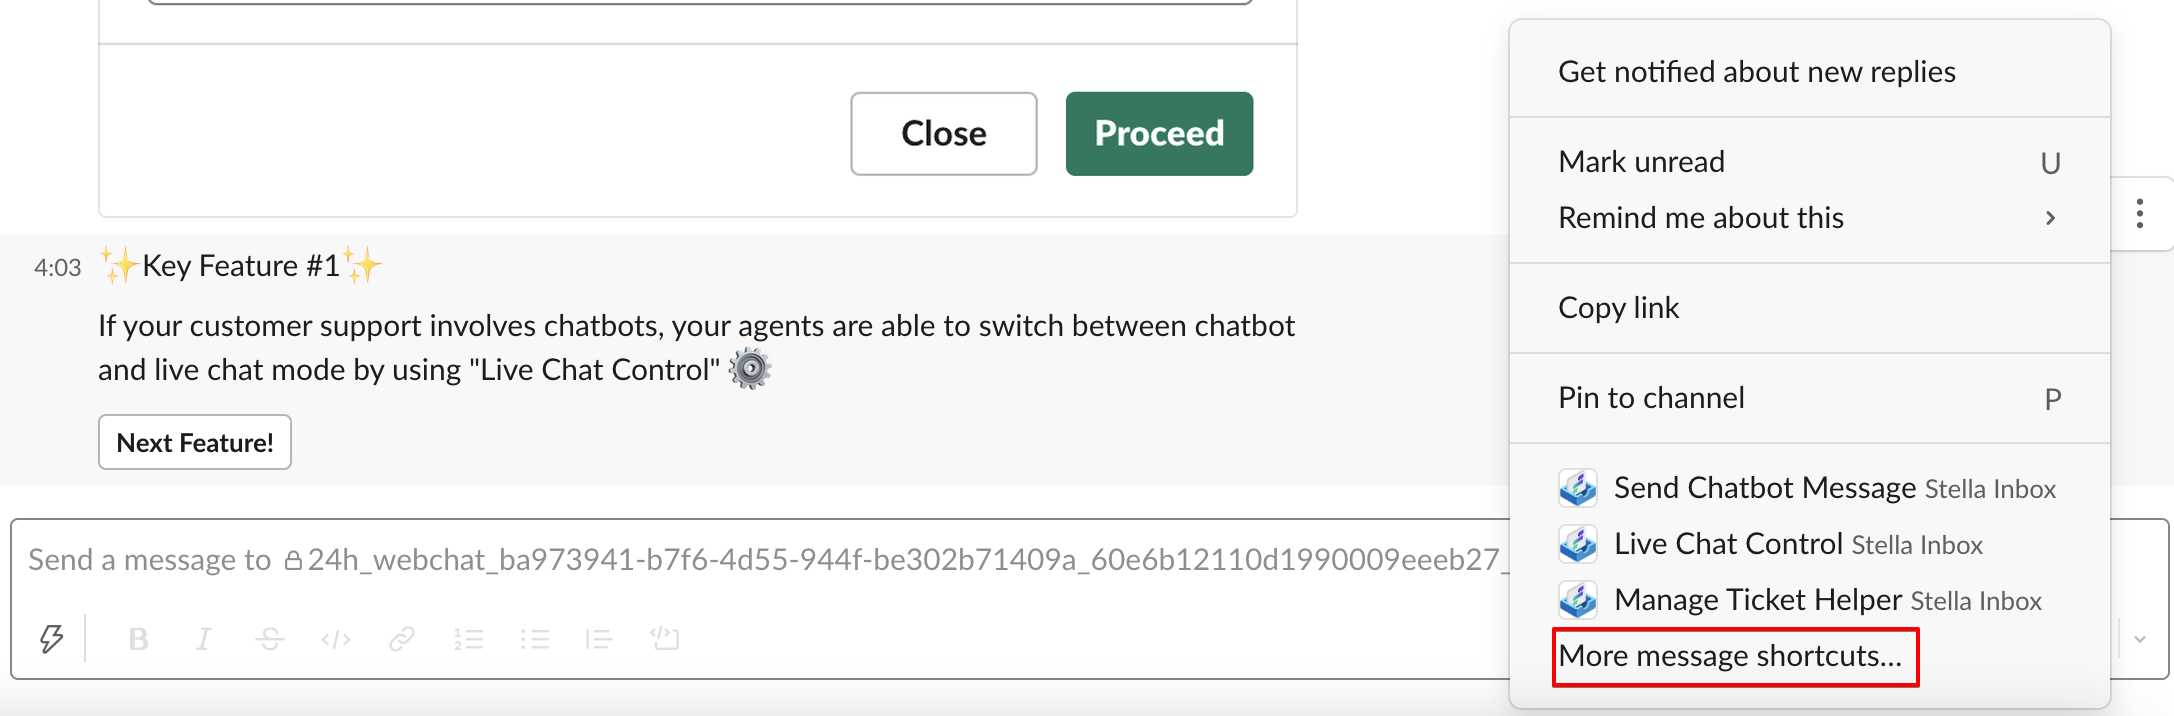
- If the agent decides to enter Live Chat Mode manually, hover over a message in the inbox channel, select "More actions" on the right, then select "More message shortcuts".
Open Live Chat Control - 1
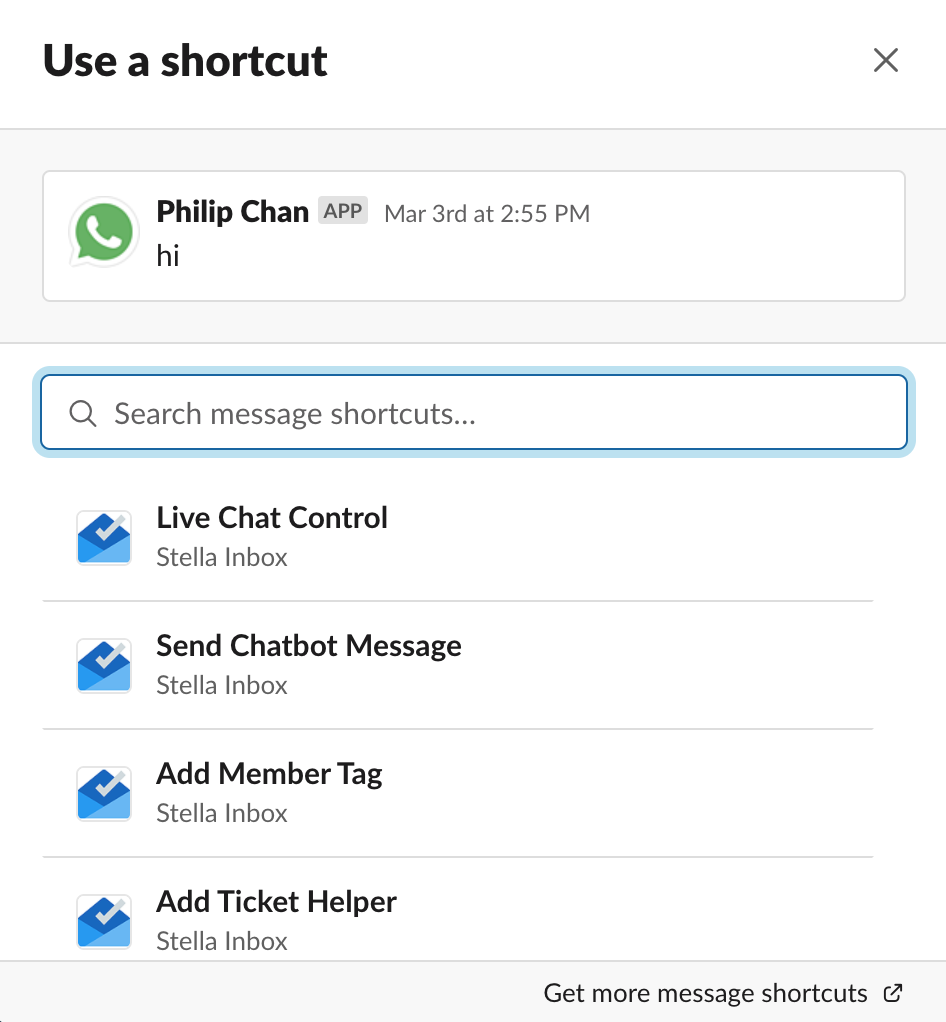
- You can see a list of Message Shortcuts in the menu. Select Live Chat Control.
Open Live Chat Control - 2
- You can see the panel of Live Chat Control now. "None" means that the agent would take over the conversation from the chatbot.

Open Live Chat Control - 3
Toggle on Live Chat Mode
- In Live Chat Control, open the dropdown list and select "None". Then select "Proceed".
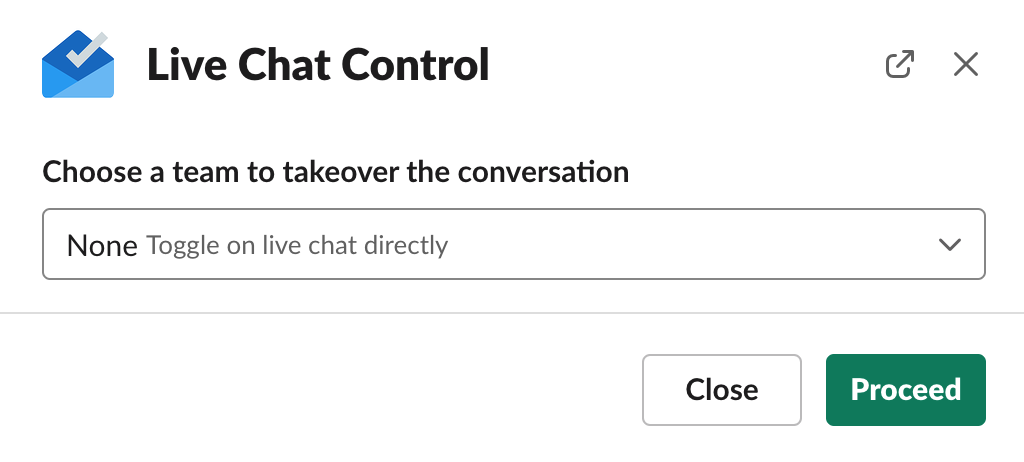
Toggle on Live Chat Mode
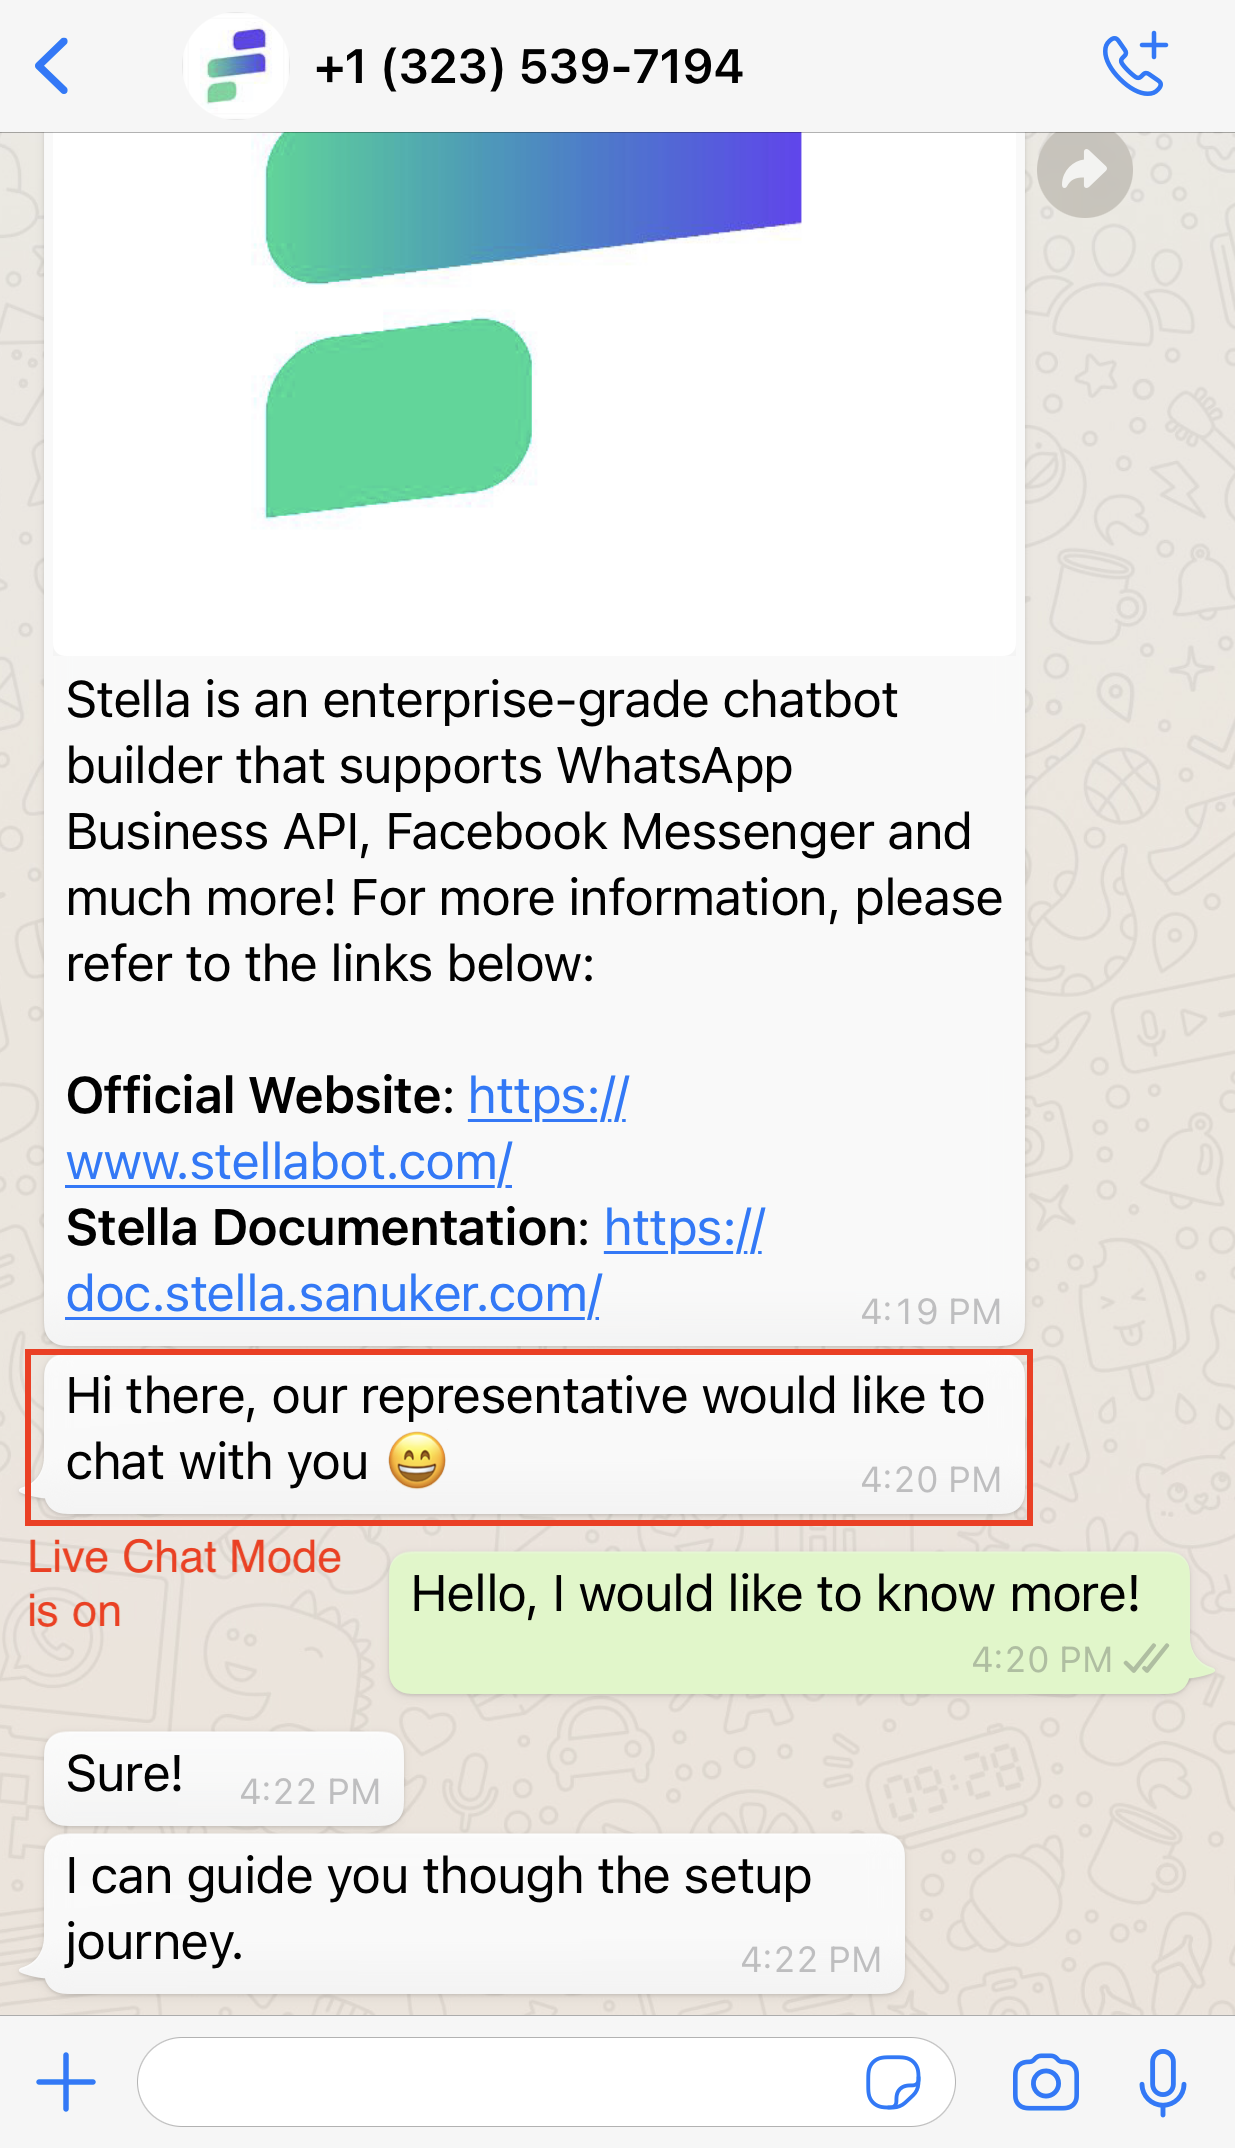
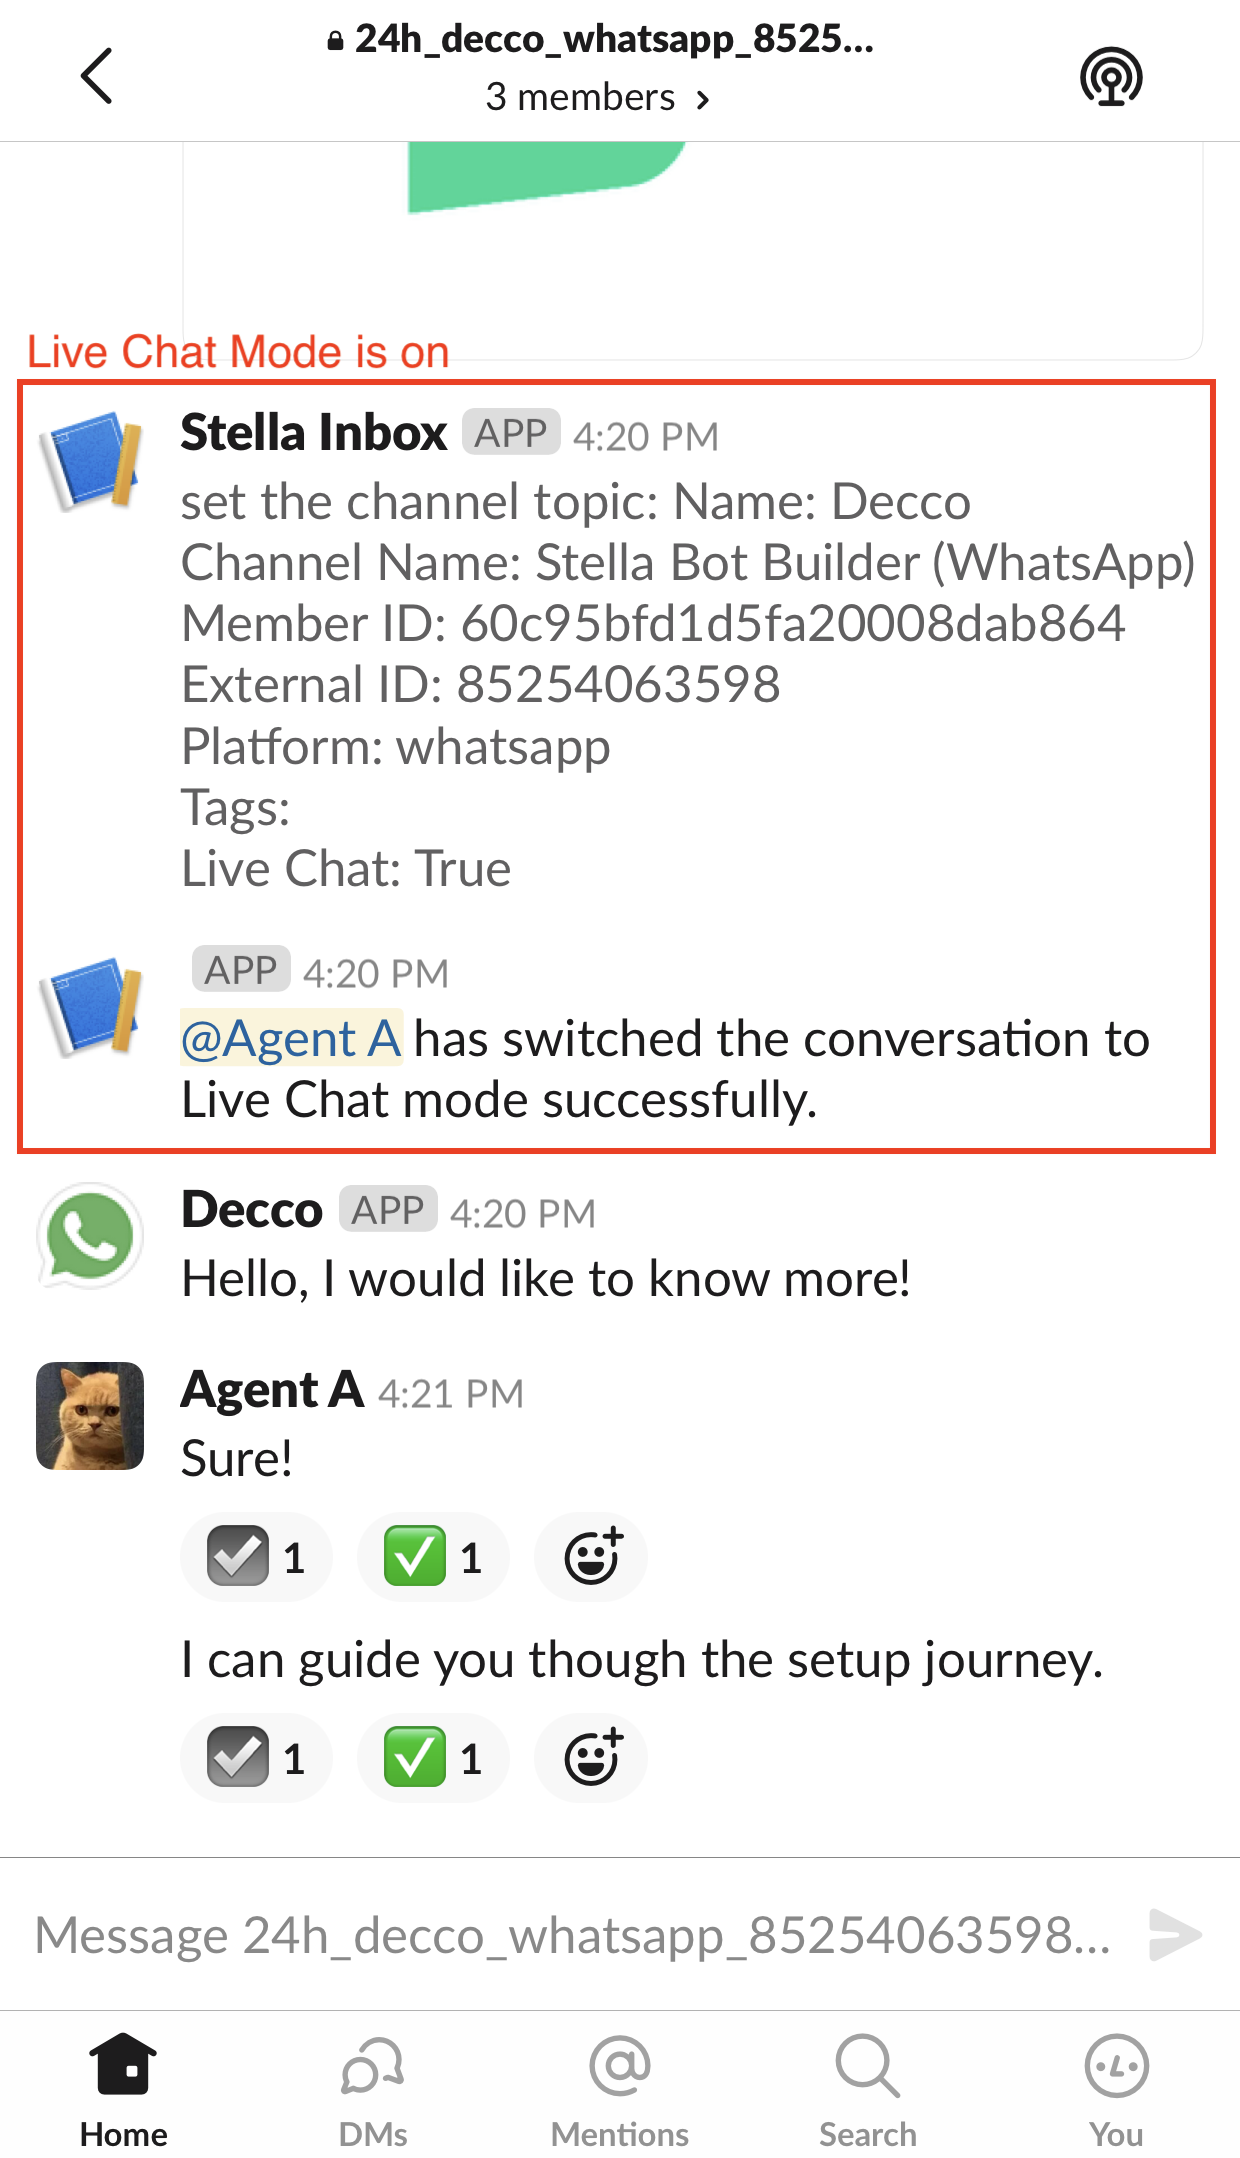
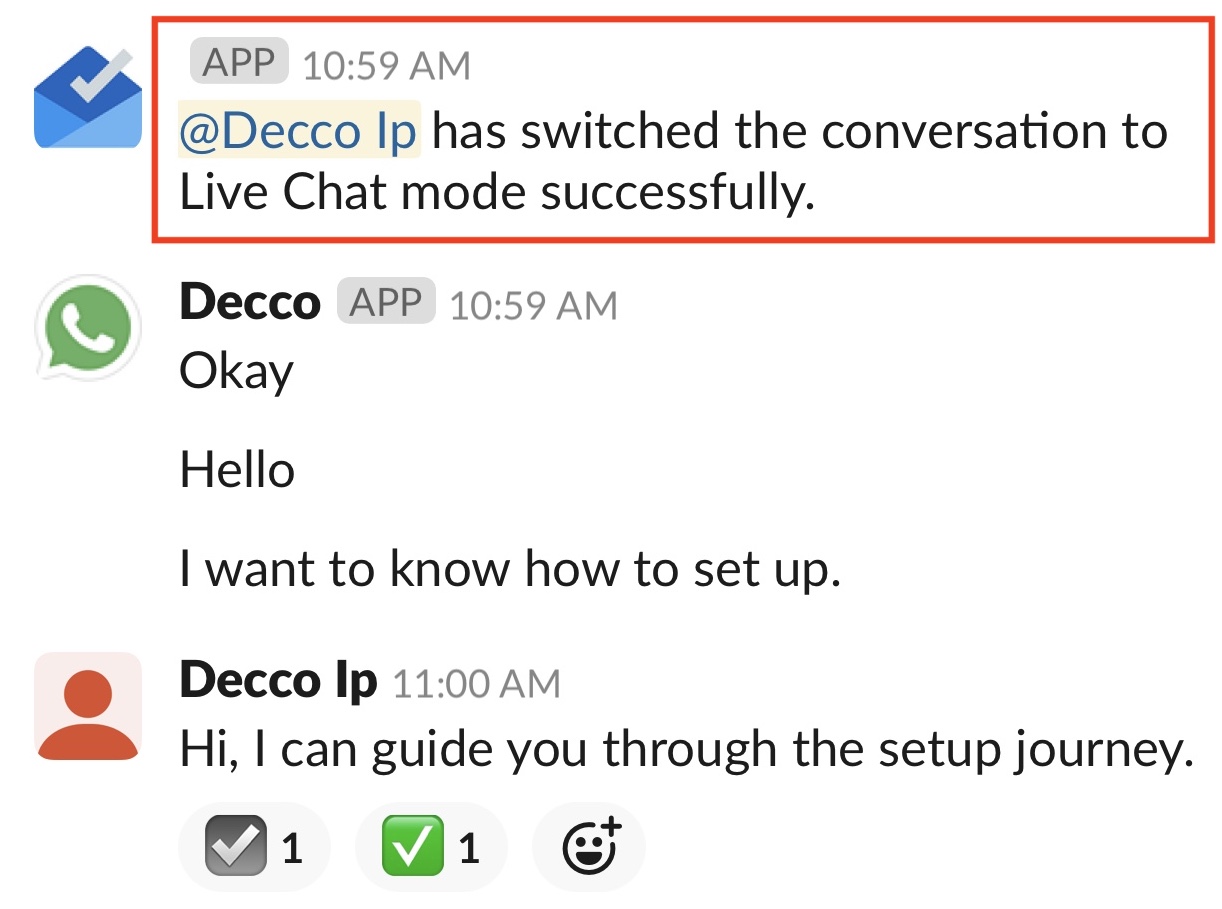
- You can see Stella Inbox notification about the change in the Inbox Channel. The chatbot is switched off and the Live Chat Mode is on. Now, you can chat with the user by typing text messages. In user's WhatsApp, a Customizable Message is displayed as well. You can set up your own customizable message here.
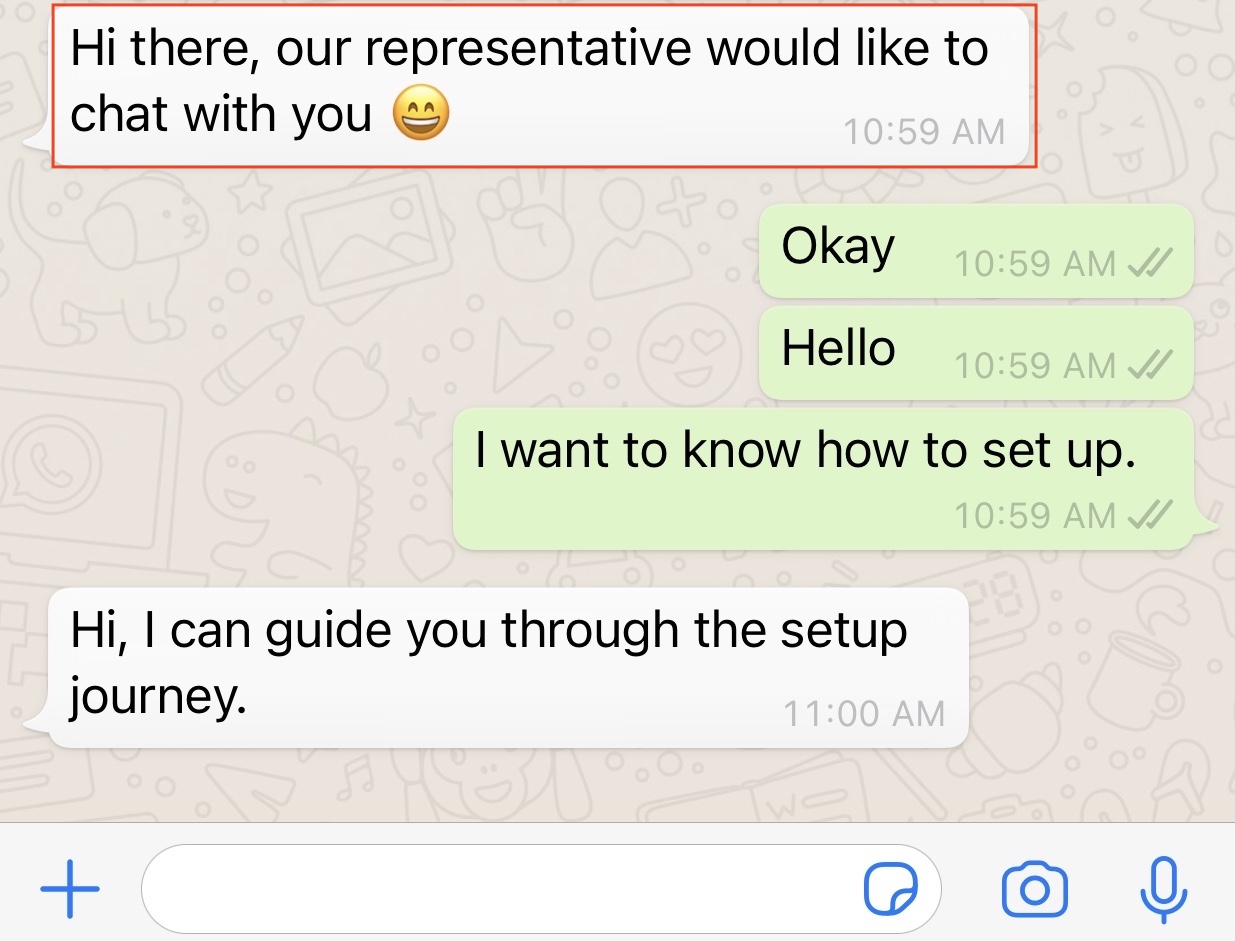
The Agent Chatting with the User Directly
- Check and see if you can produce the expected outcome.