Connect Your Web Chat to Channel
Once you got your Stella account, hold on and do no go ahead to build your chatbot. First and foremost, you should connect your account to one of the messaging platform to make sure the bot would work (and you could also test it if it doesn't). You could do the connection in Channels.
Follow me and set up your first chatbot on the Stella Web Chat Plug-in now.
What is your Result?
| Property | Description |
|---|---|
Successful Result | You should be able to see a Get Started button and also a Persistent Menu on your testing Facebook page. The menu button should be able to open an a new web page. |
Getting Hands-on
Deploy the Web Chat Plug-in
Create a new web page for testing purpose.
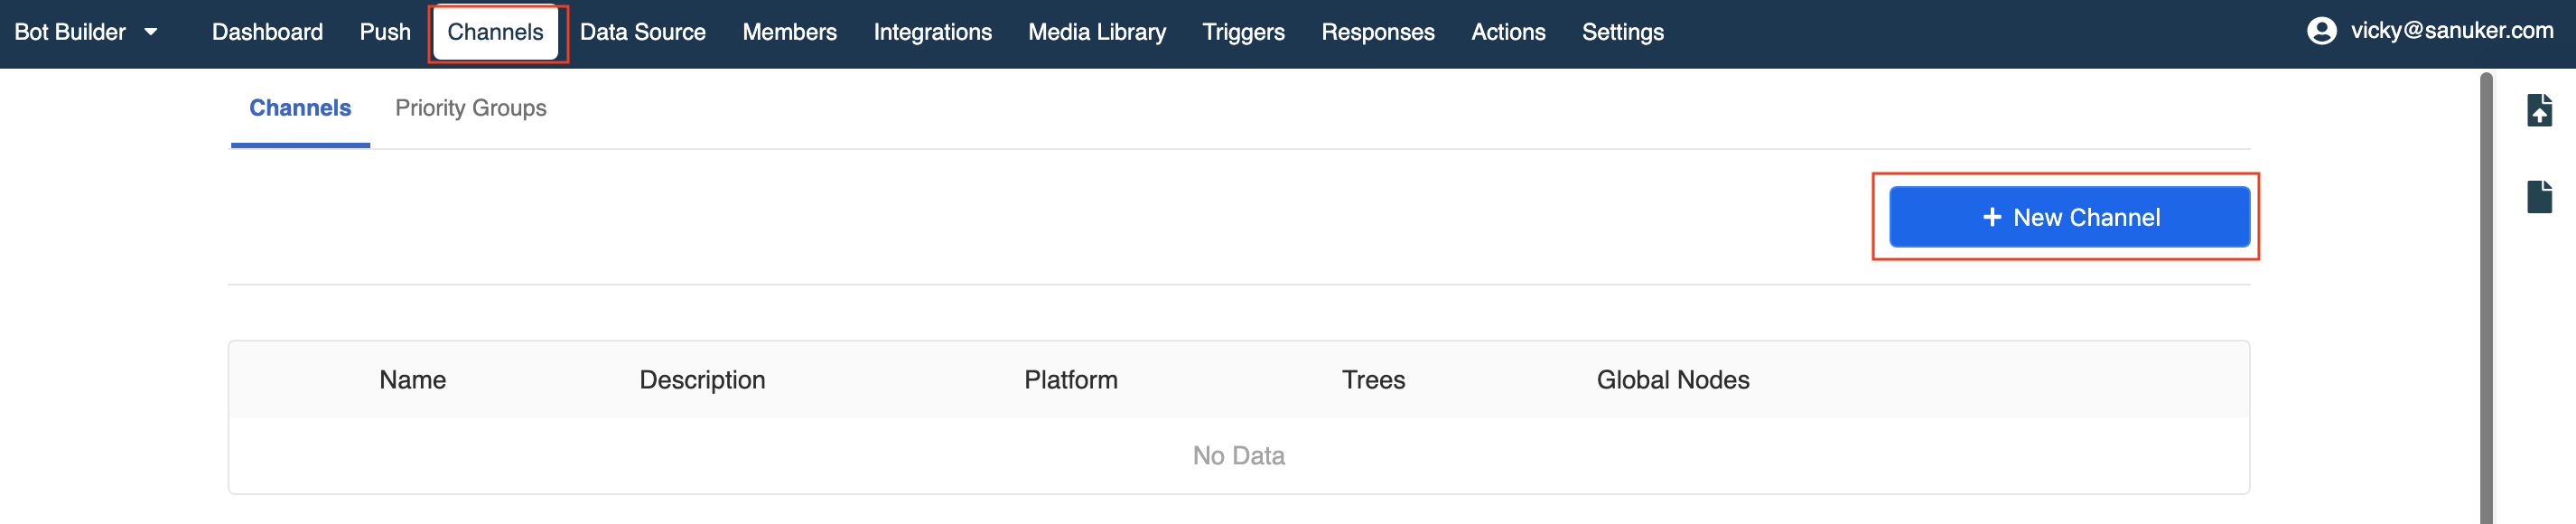
Now go back to Stella and click "Channels" on the top menu bar.
Click "+ New Channel".
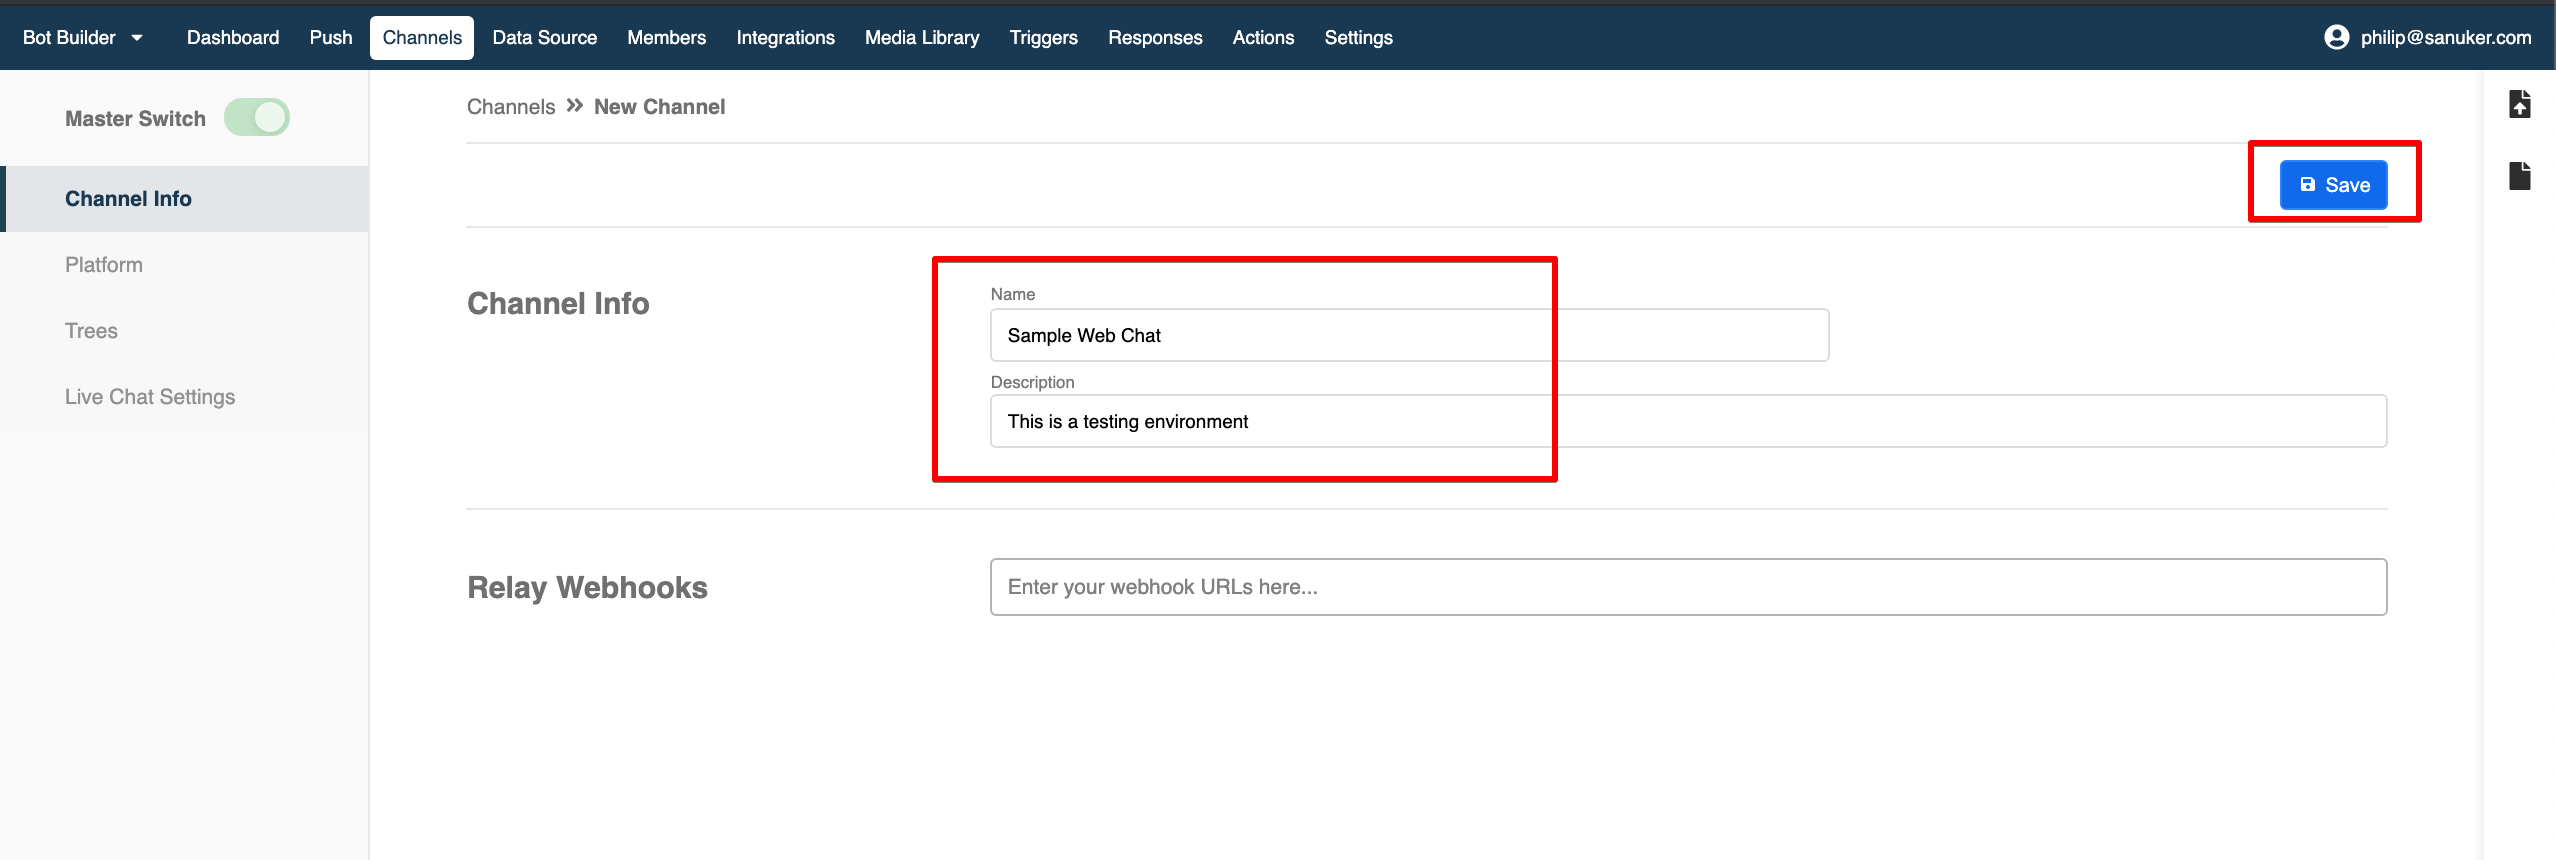
- You will enter into the channel creation workspace. Now, fill in the name and description of your new channel. Click "Save".
Go to "Platform" on the left menu, click on the "Web Chat icon".
A new section on Web Chat will be expanded.
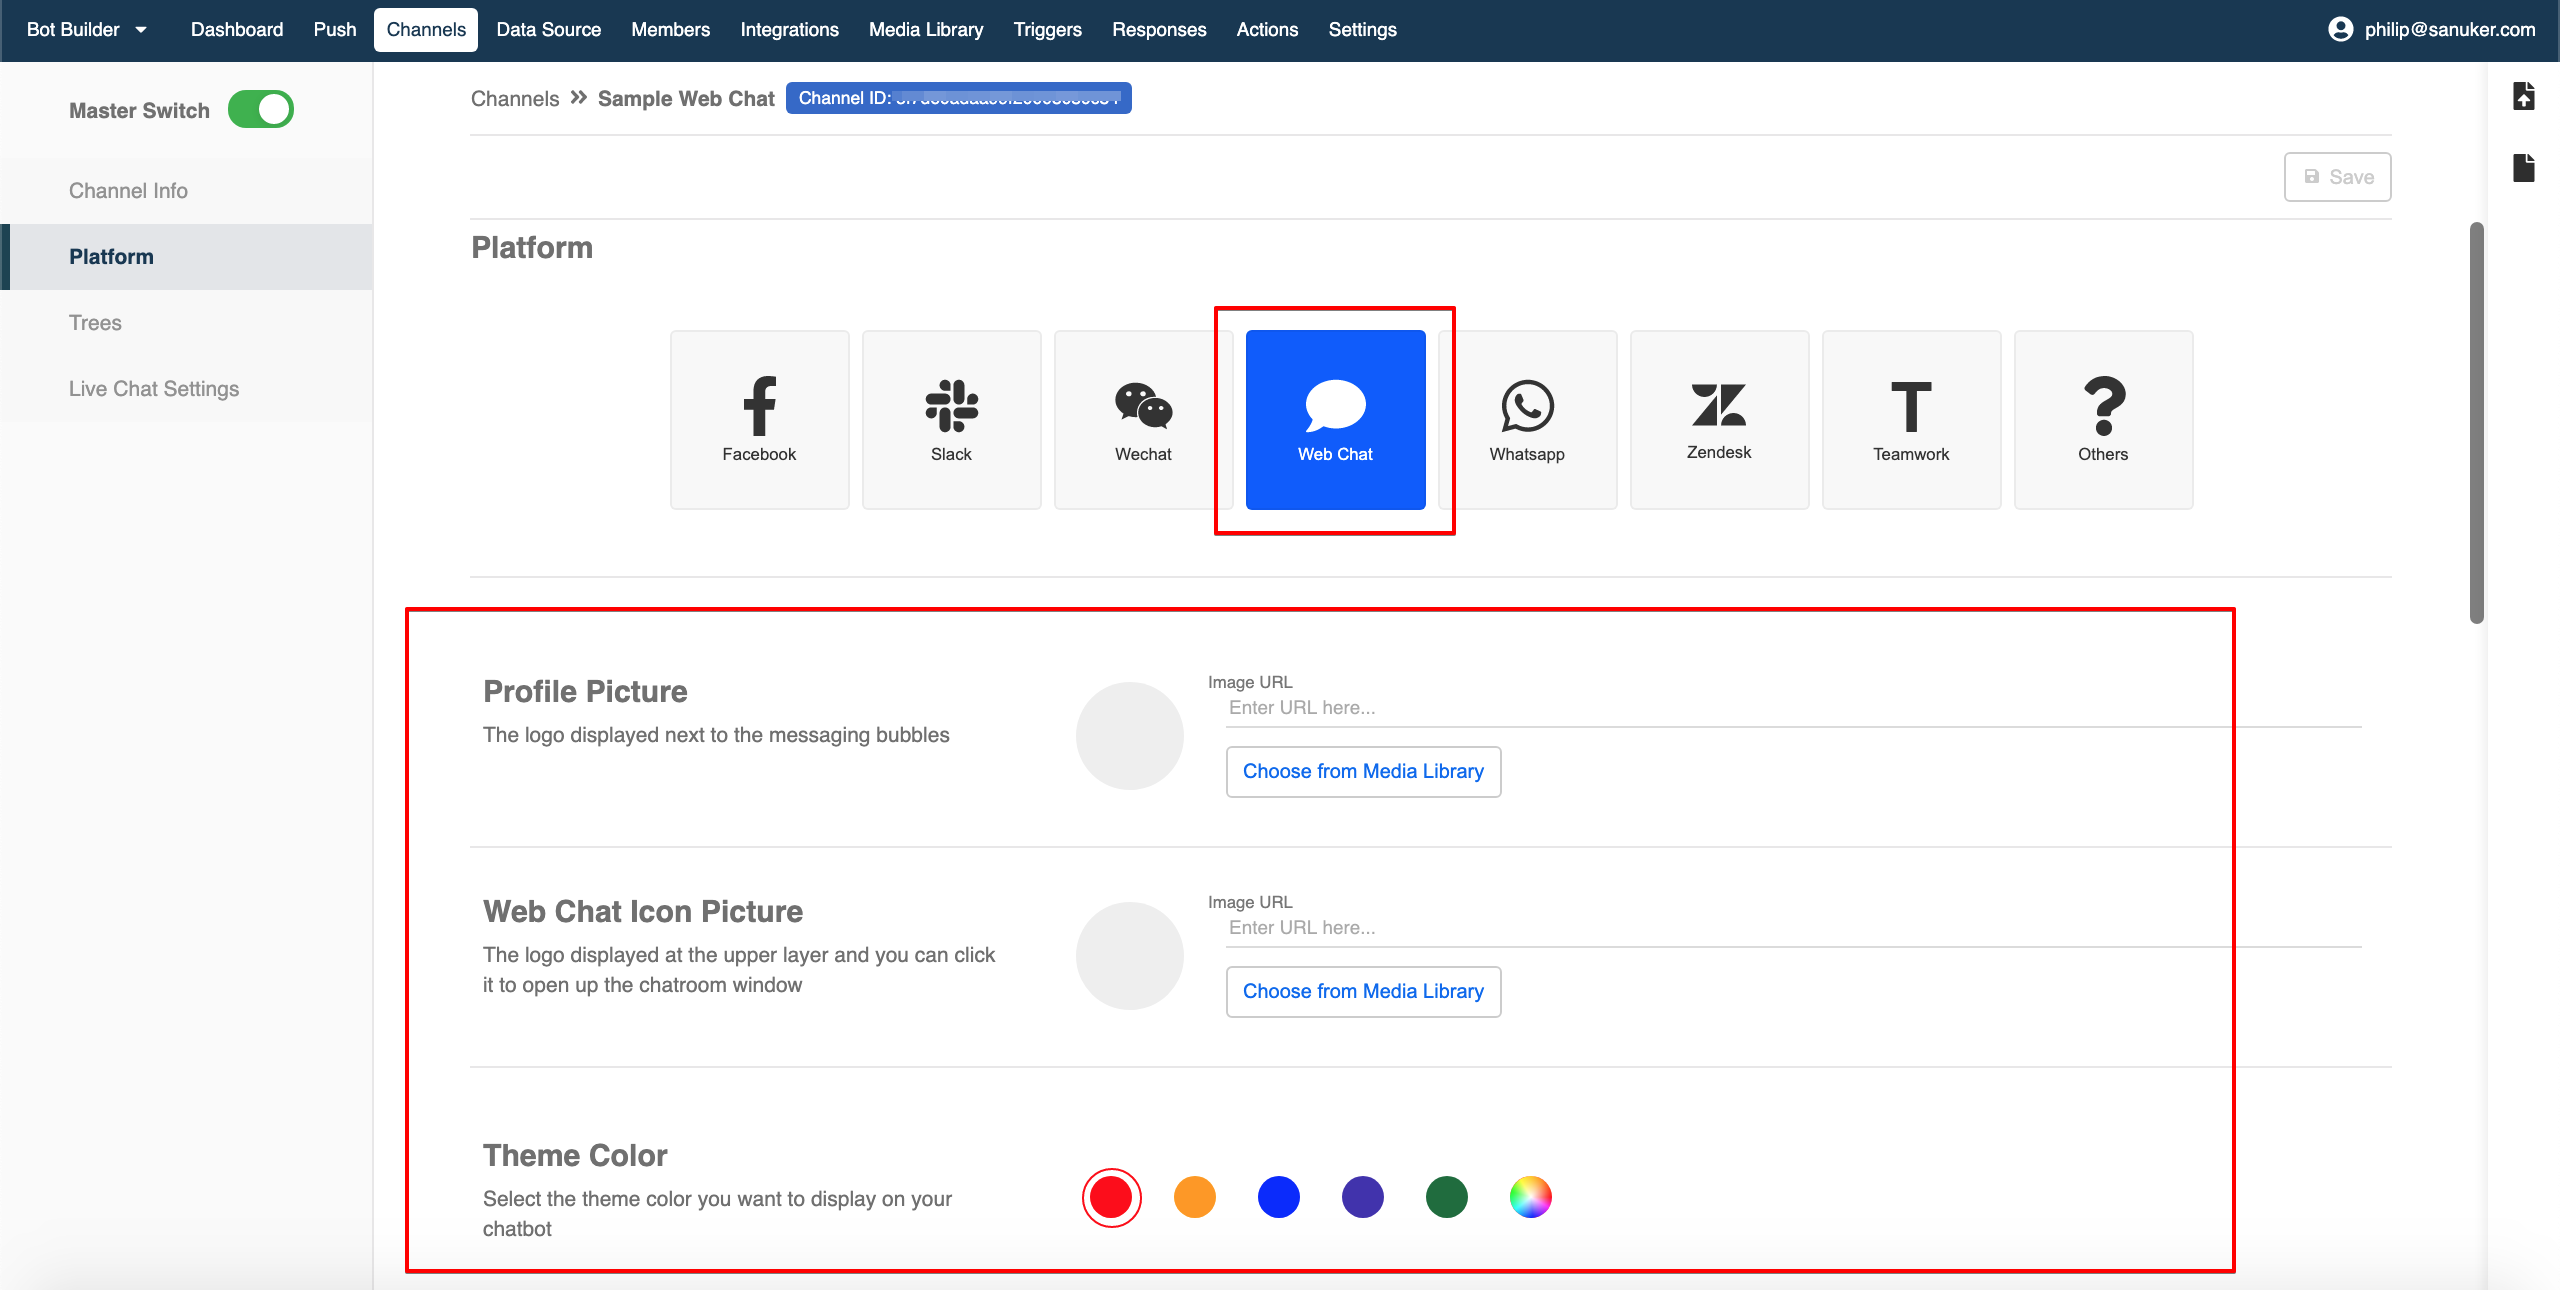
- Find and apply the "Head Script" & "Body Script" to your website.
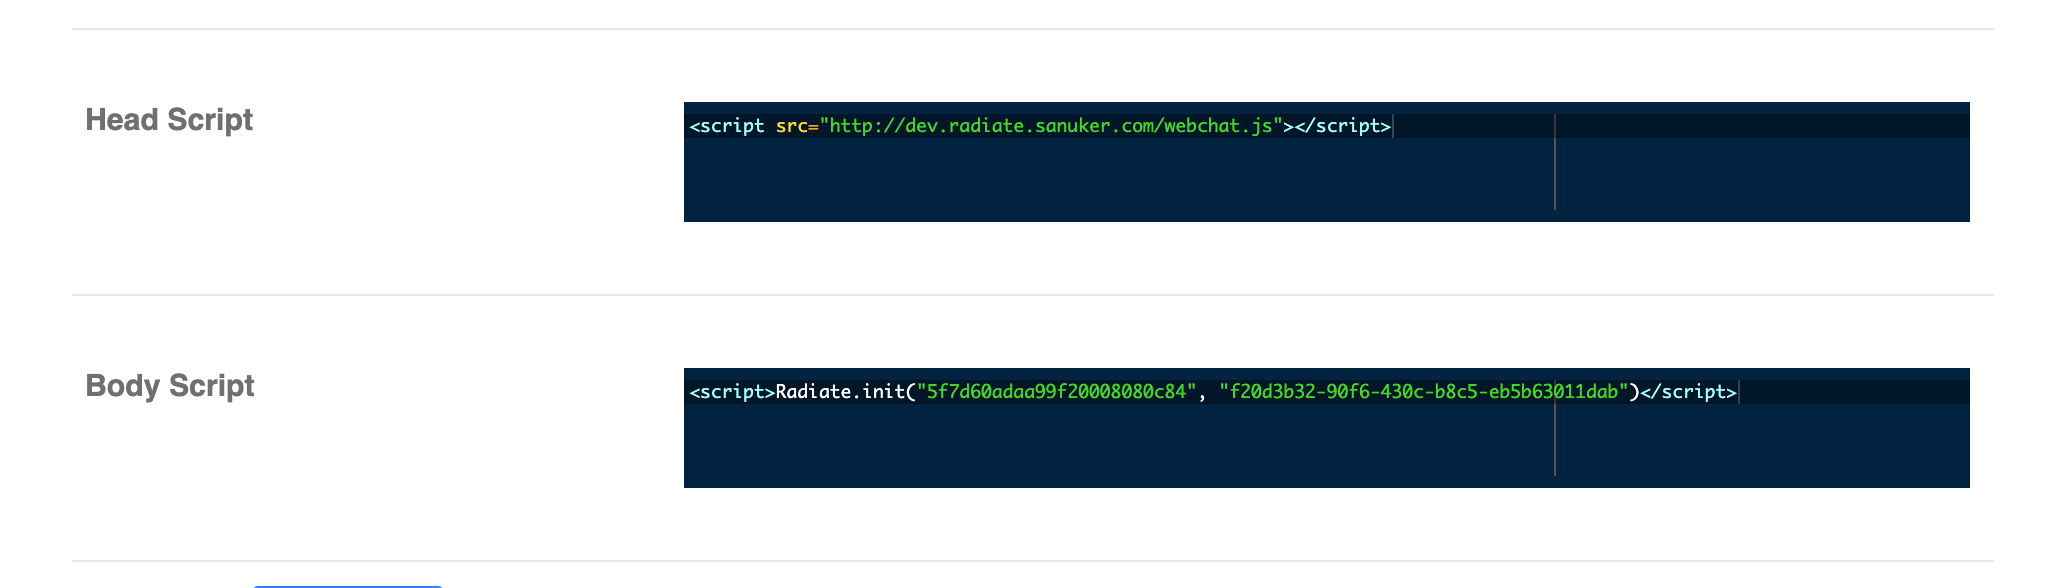
Head Script
<script src="http://dev.radiate.sanuker.com/webchat.js"></script>
Body Script
<script>Radiate.init("Insert Channel ID here", "Auto-Generated Token Here")</script>
- Alternatively, a sample link will be generated after you have set up the Bot Name and have "Saved" the Channel settings. With this sample link, you can access the full screen Web Chat directly.
https://webchat.stella.sanuker.com/messenger?c="Insert_Channel_ID_Here"&t="Insert_Token_Here"
You can find the Channel ID & the Token in the body script.
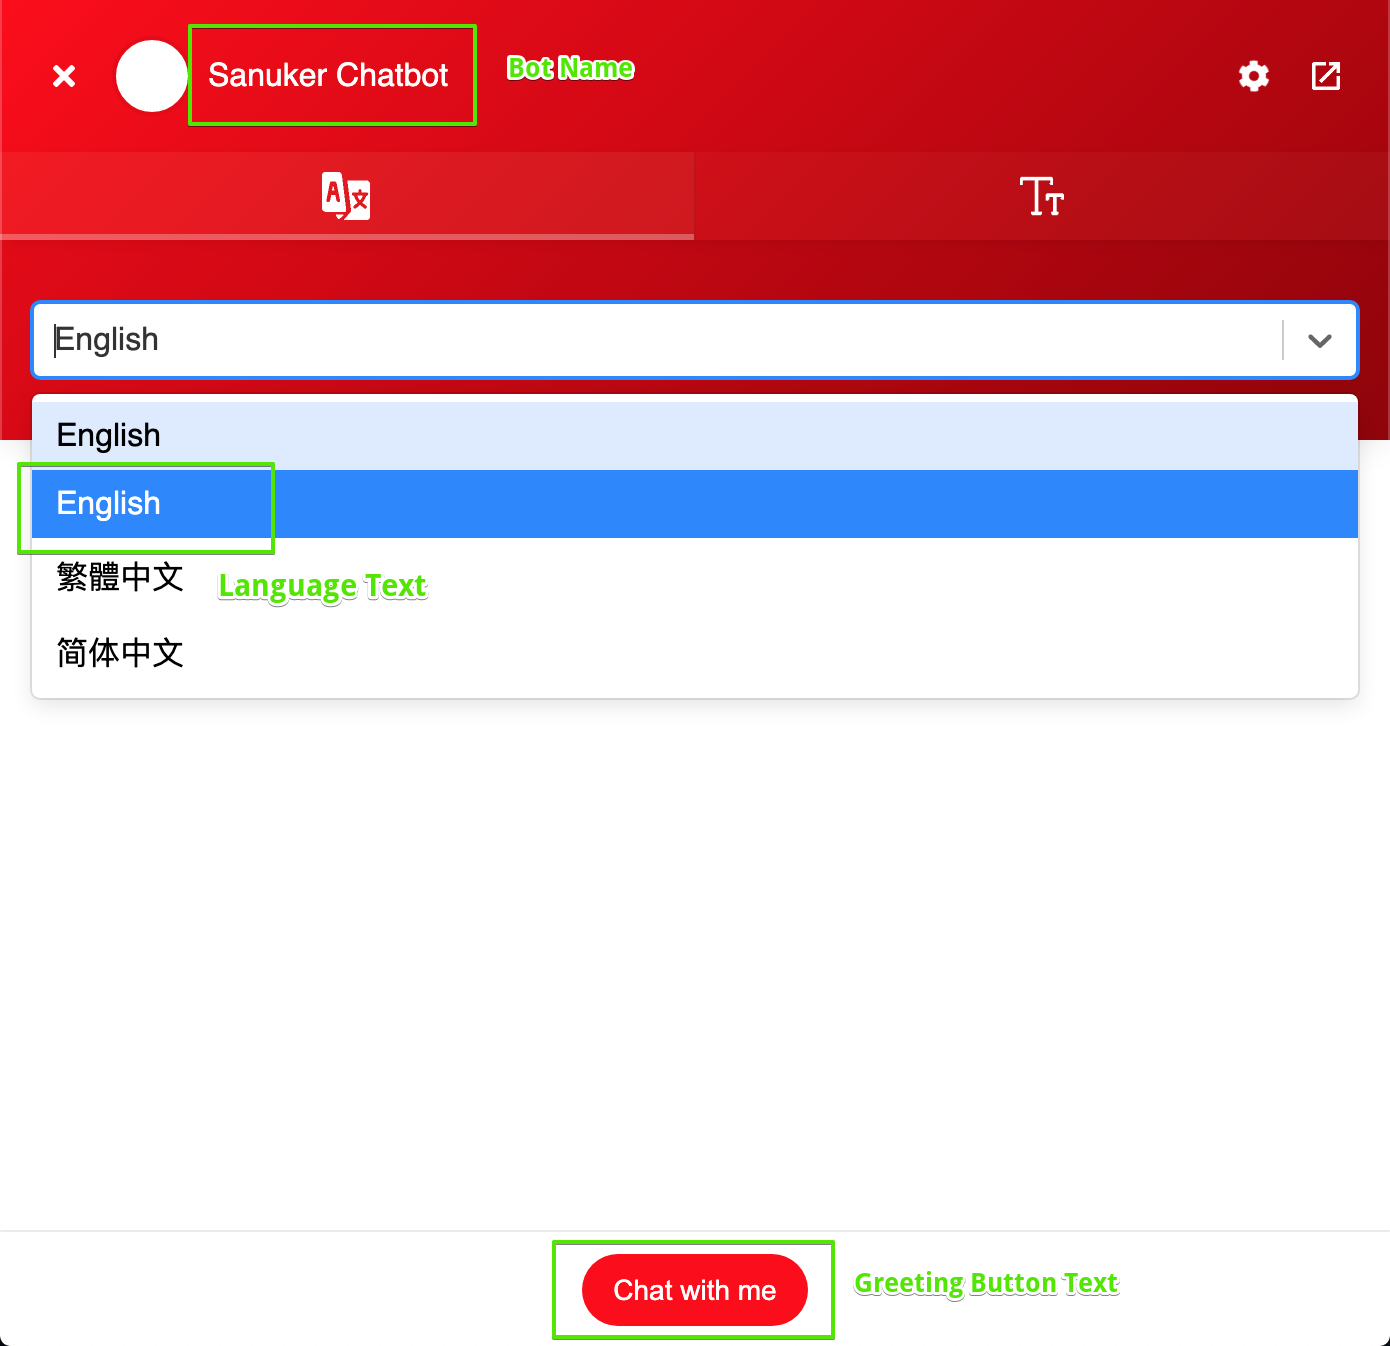
Set Greeting Button for Each Locale Group
Scroll down to "Language" and set the Greeting button of your chatbot for each Locale Group. For setting up the locale group, please click here to learn more.
The default payload for the Greeting Button is "GET_STARTED" which is hidden. You will apply this payload to your chatbot flow later and will not be able to change the payload for the Greeting Button.
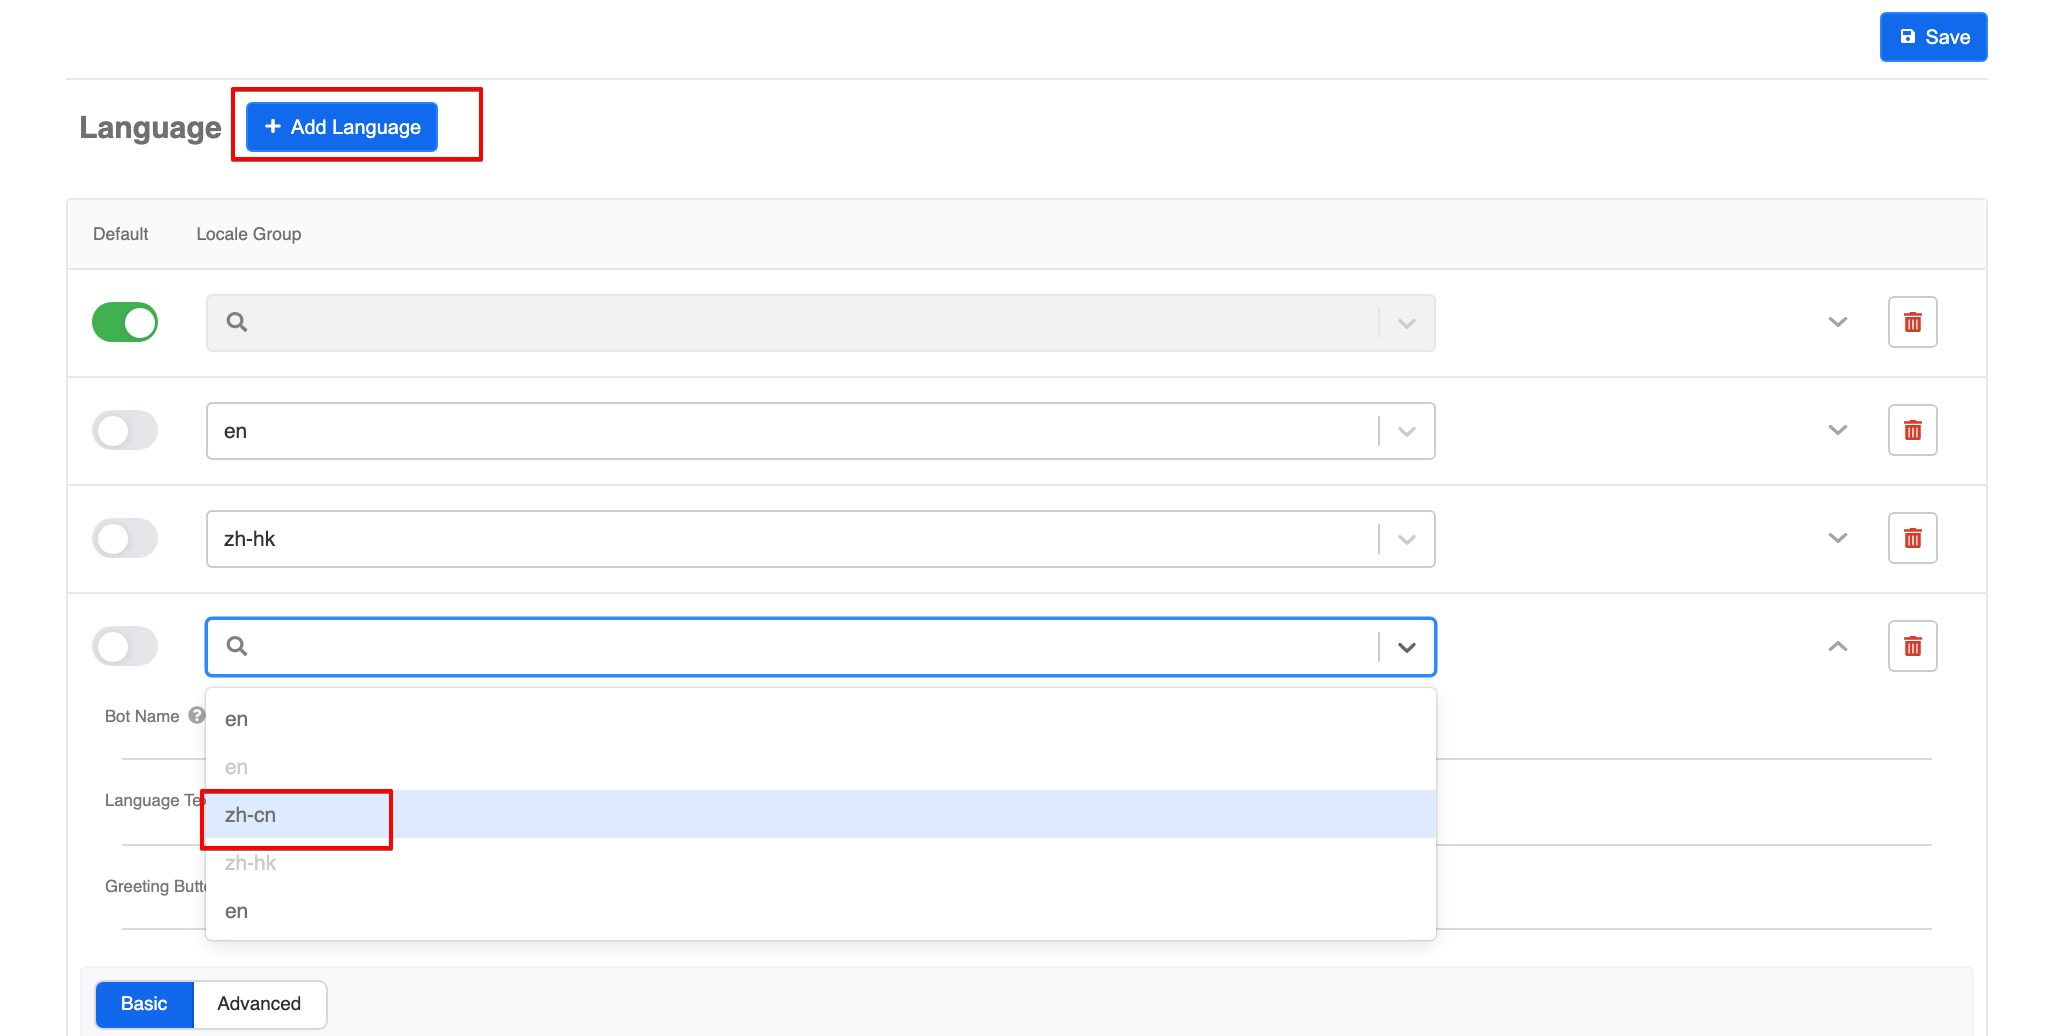
- Select Add Language and then select the Locale Group on the drop down menu. If you have not set up any Locale Group before, you may skip this step and stay in Default instead.
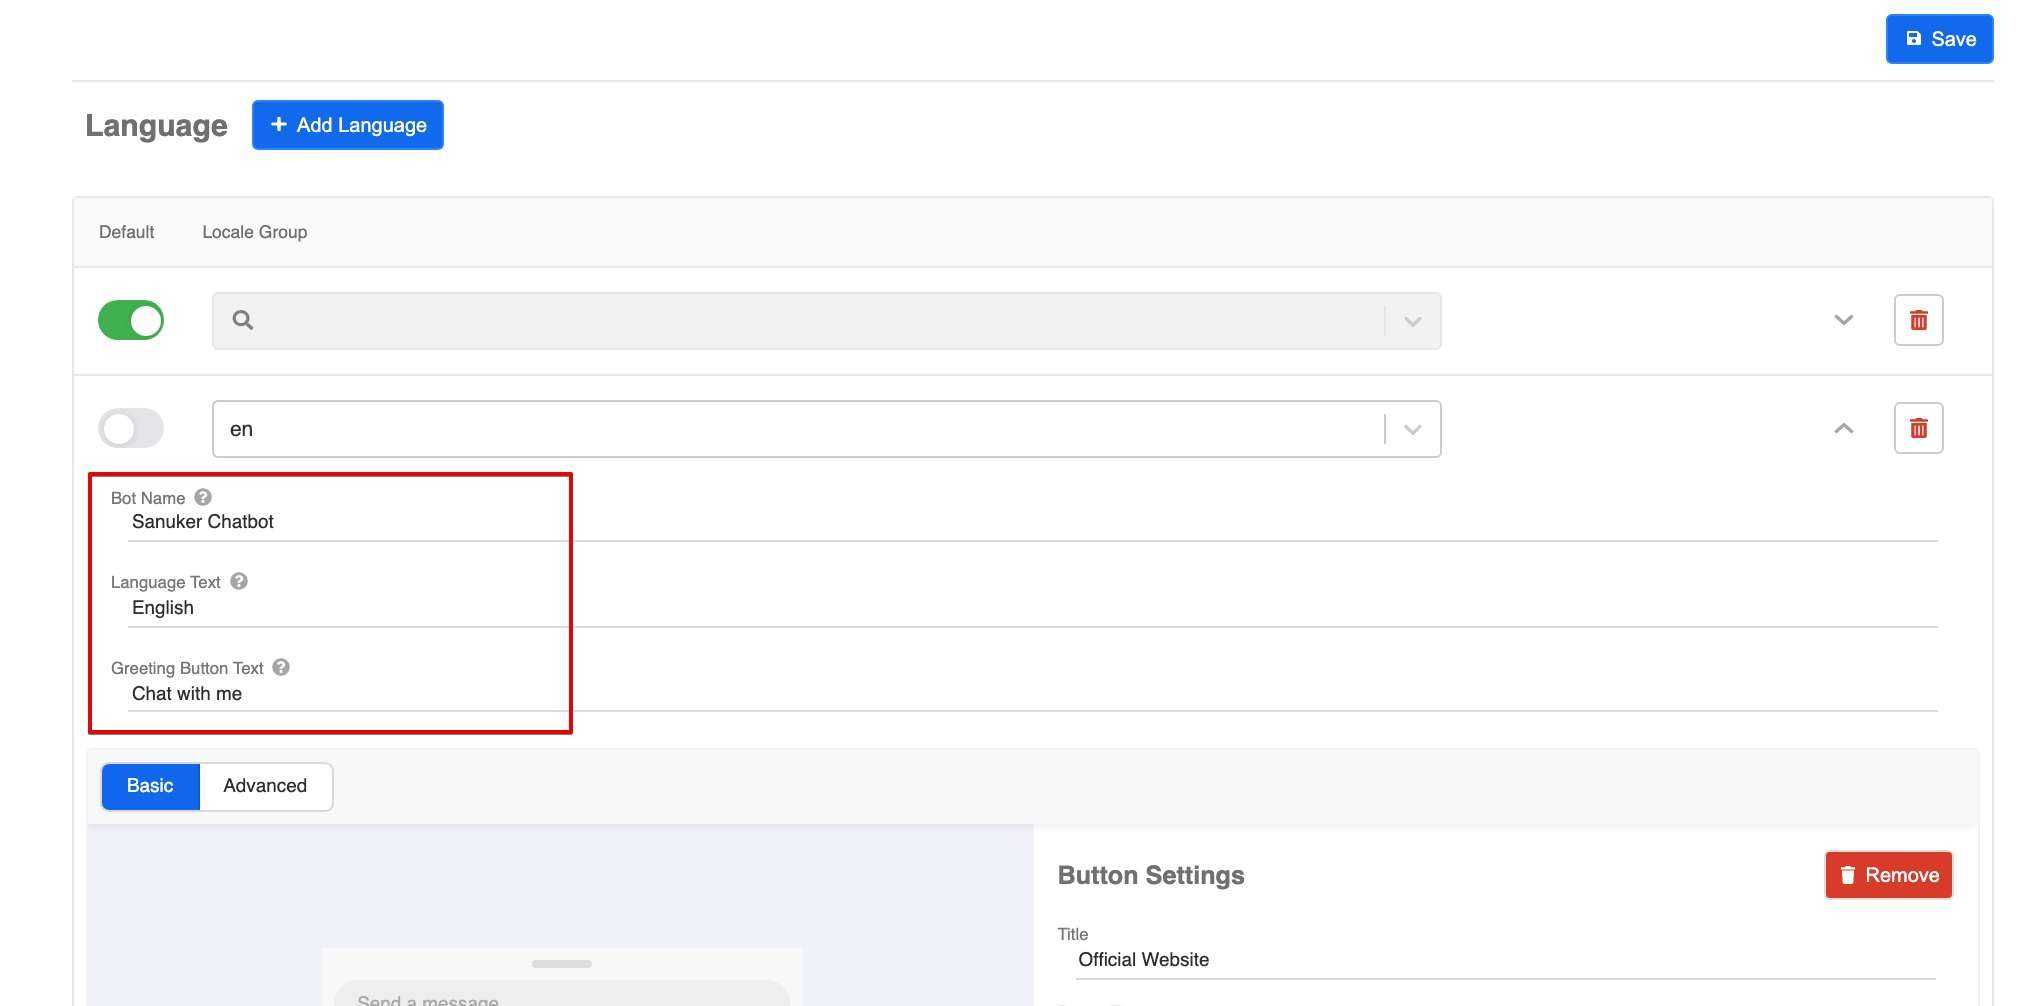
- Fill in the corresponding Bot Name, Language Text & Greeting Button Text.
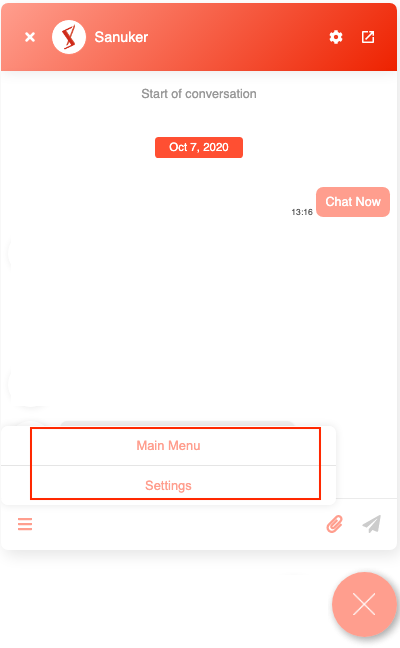
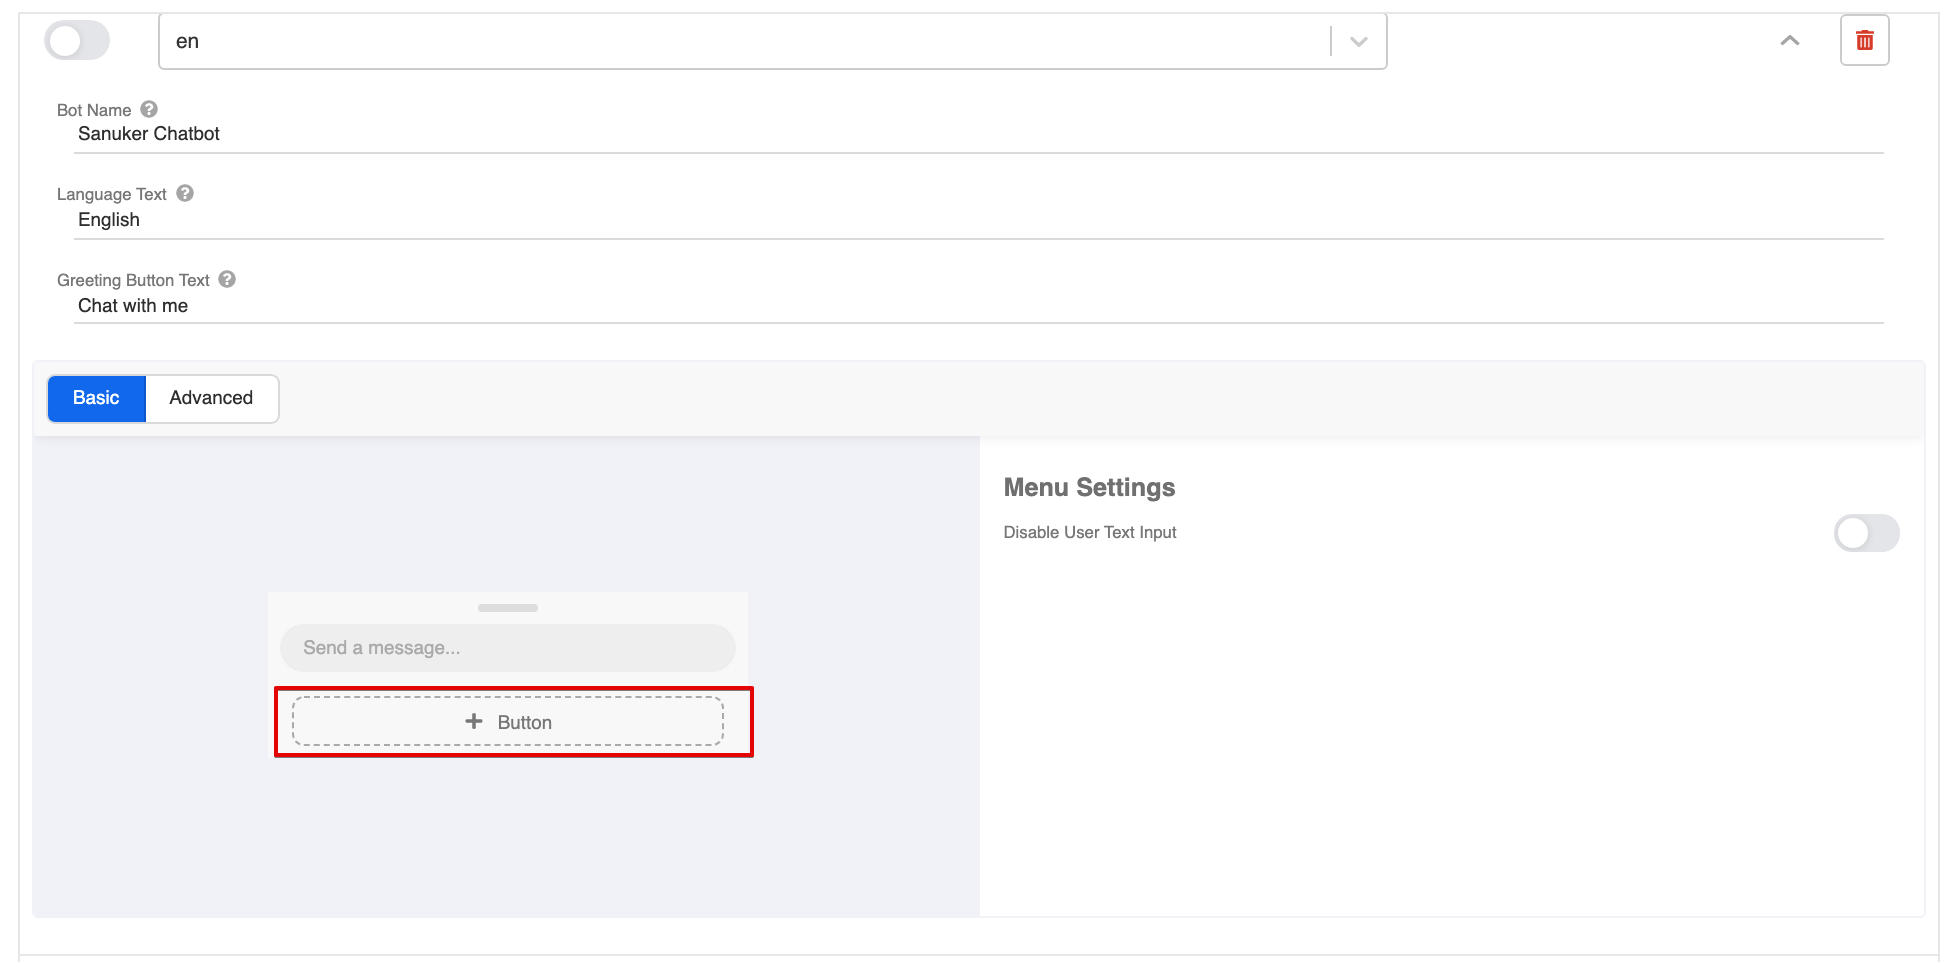
Set Persistent Menu
- Click "+ Button" to create a persistent menu button.
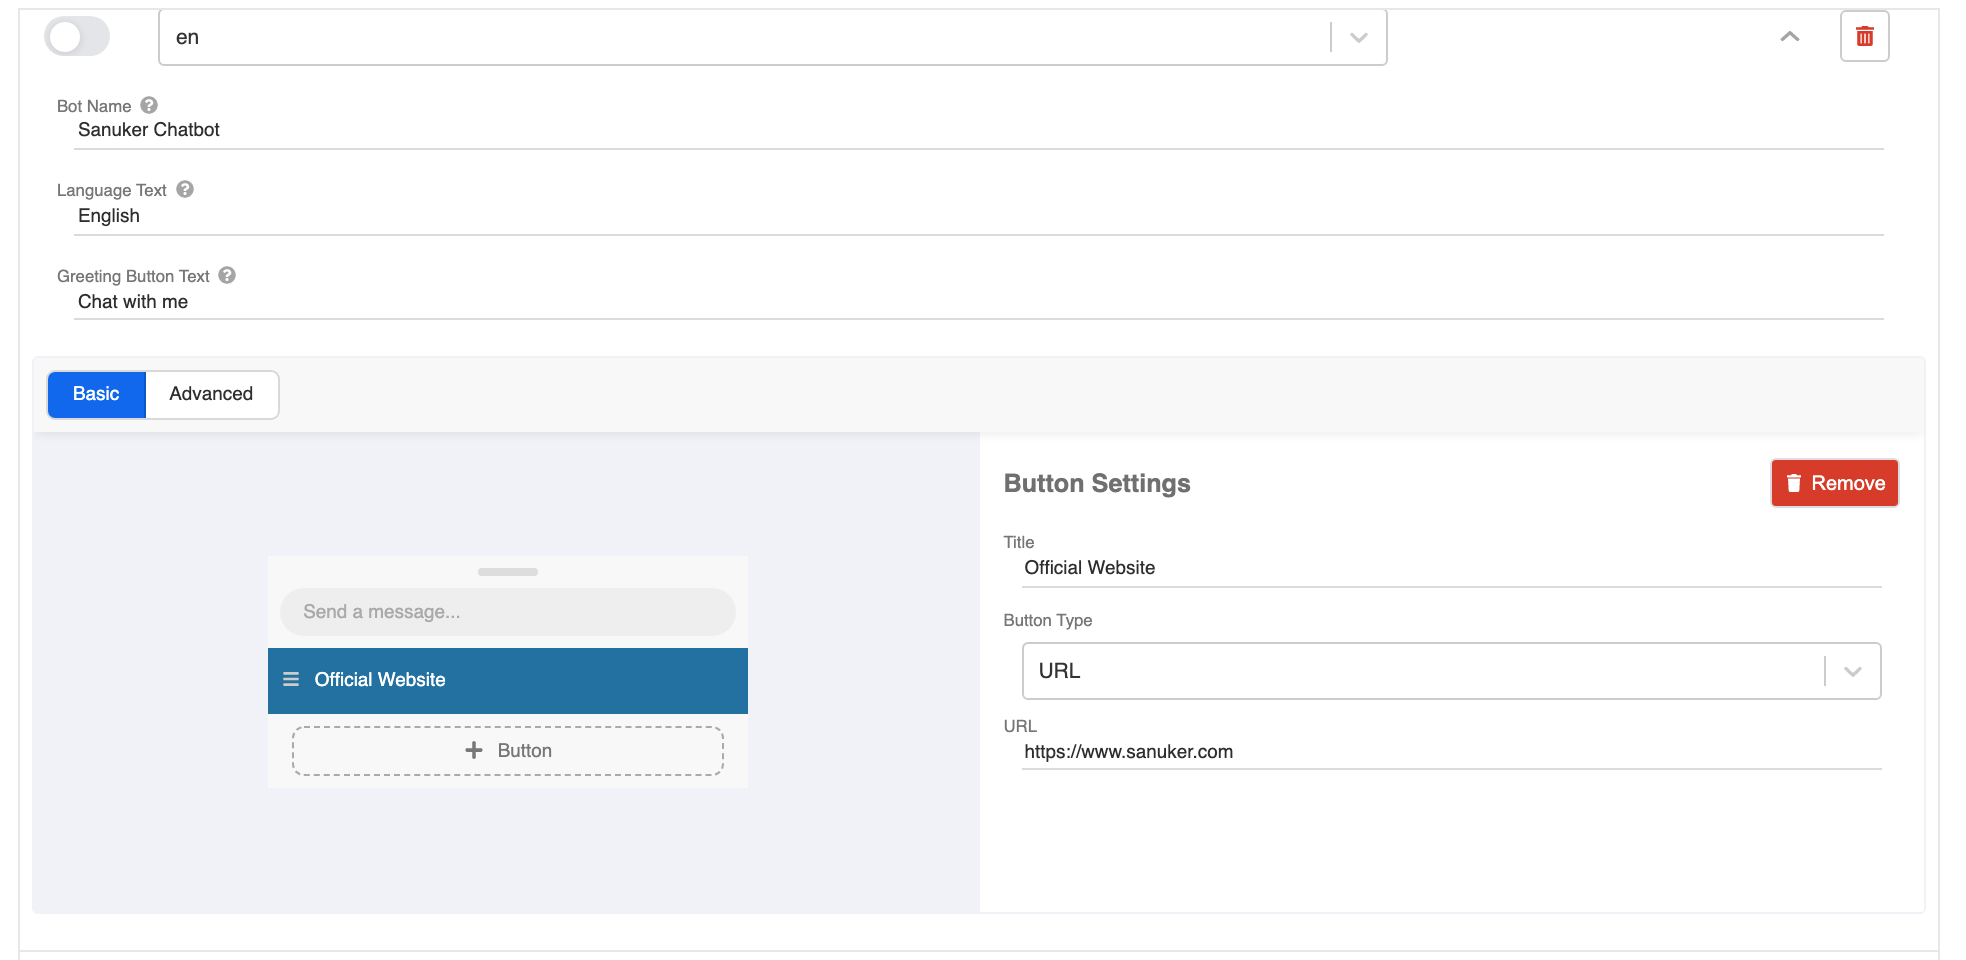
- The button details will be displayed on the right hand side. Fill in the title, select the URL button type, and put down the URL of your official website. Click "Save".
Now, go back to the top right and click the final "Save".
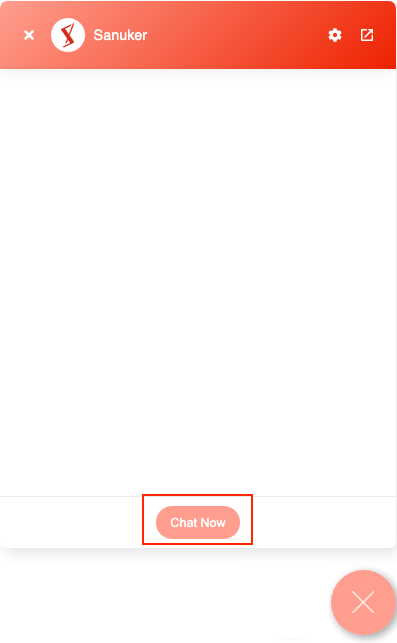
Go to your web site or full screen Web Chat and check if you can get a successful result 🎉
Connect to Different Platforms
For the detailed steps of connecting to all the messaging platforms, you may refer to the corresponding section: