Create Transfer Command
You can transfer your live chat to another team by simply typing a transfer command.
This is particular useful if a customer is asking questions that are not under your specialty and must escalate to another team for follow up.
Please set up this command in the Slack Command Tree you've created in 2.1.
What is your Result?
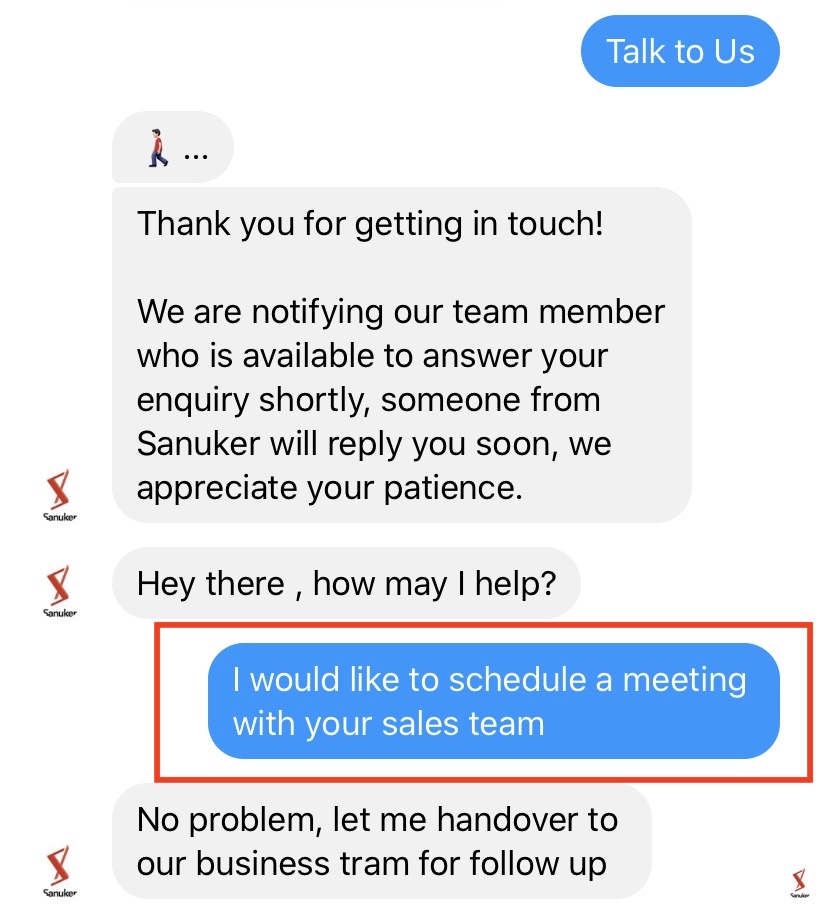
First, the customer requests another team handle this enquiry. Then, the agent types @[bot]transfer to choose which team to be transferred to.
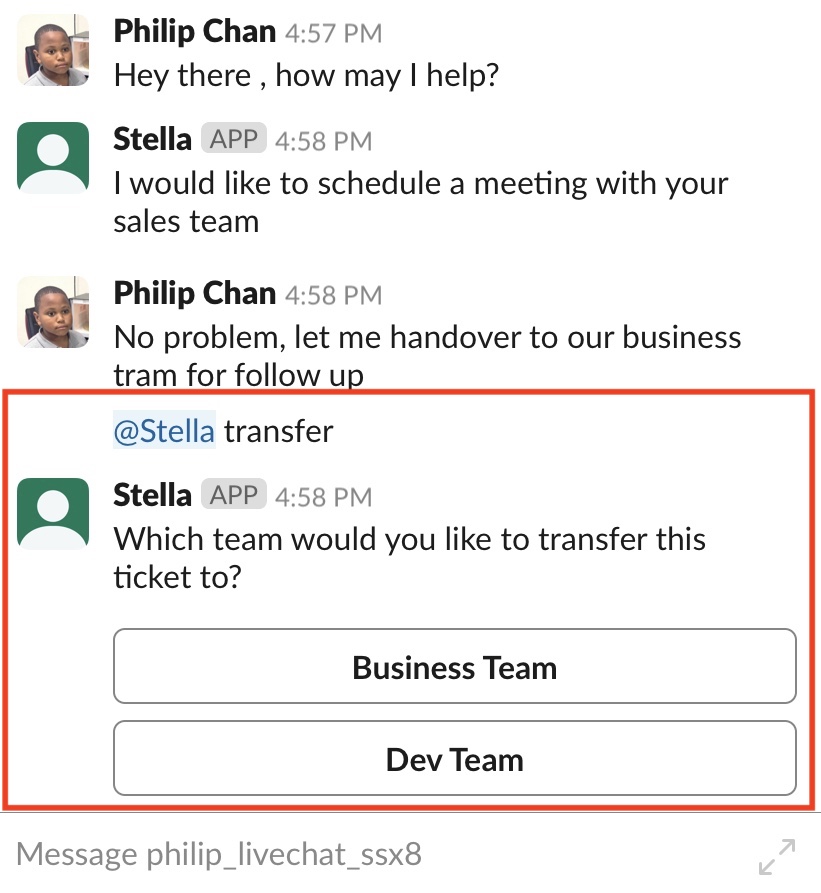
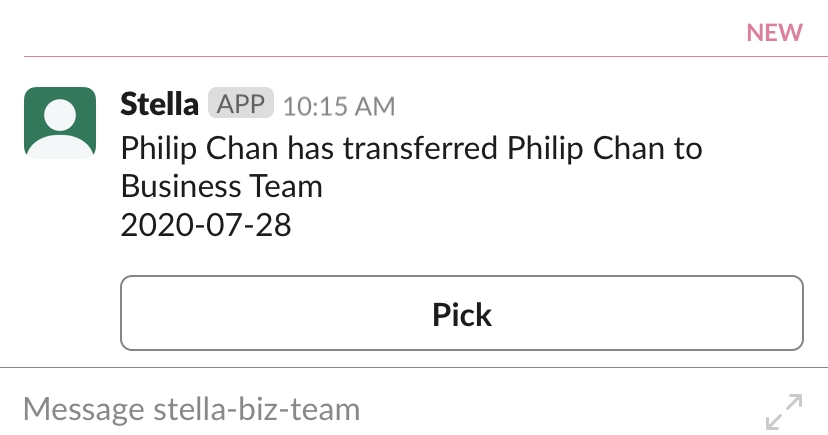
Second, the agent chooses which teams to be transferred (i.e. Business Team) and ends the original live chat.
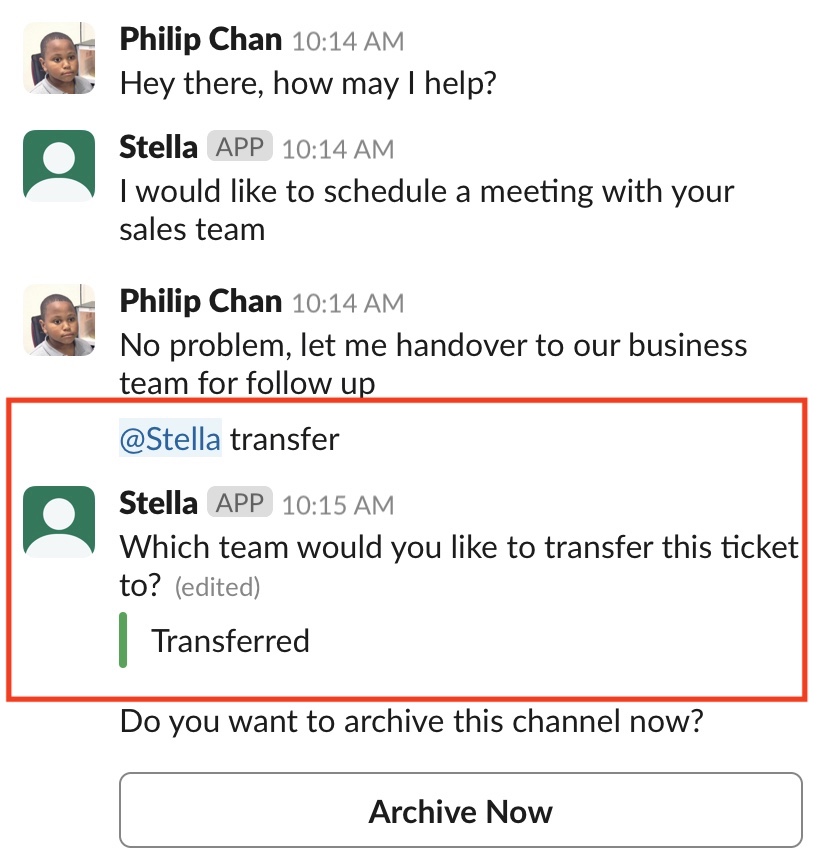
Third, the channel, to which the agent has made the transfer, receives the newly transferred ticket.
- Please remember to connect your Slack Channel on Stella before testing for the result.
Sample Tree Structure for Transfer Command
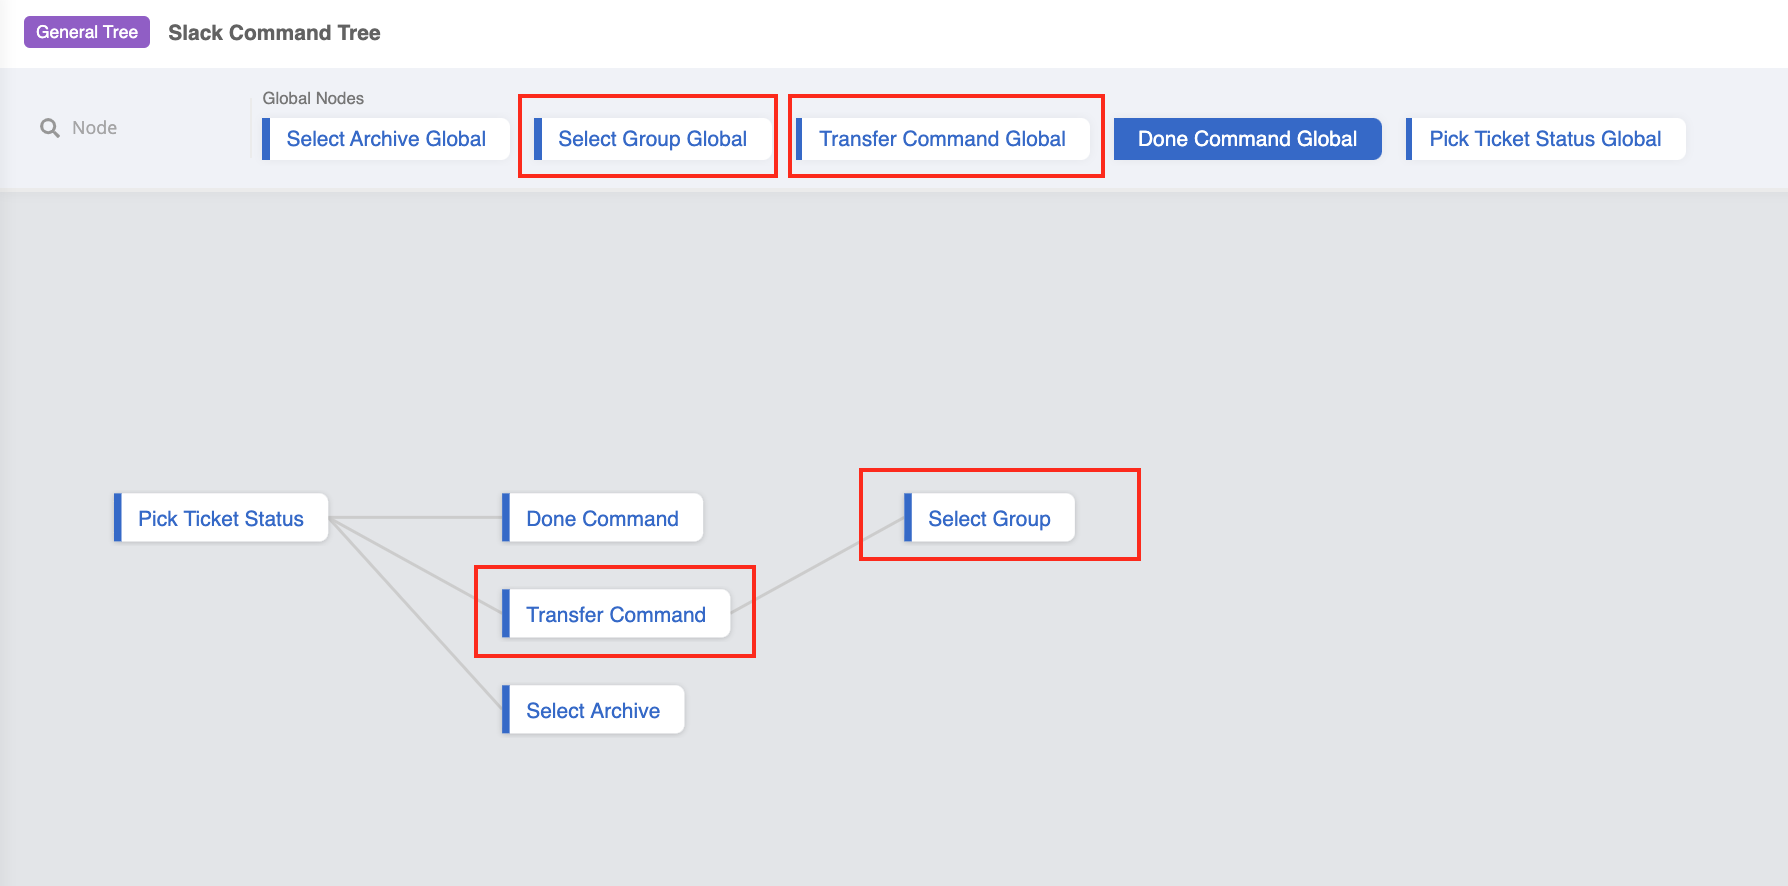
You can click here to download the sample tree.
Getting Hands-on
Click here to build your tree.
Create Tree Node - Transfer Command
- Create the 1st tree node and name it as "Transfer Command". Then, you can set up the message when chatbots asks the agent to select the follow-up team for ticket transfer. Input the following code in the pre-action :
return new Promise(async (resolve, reject) => {
  try {
    let labelArray = [
      {
        name: "Business Team",
        label: "biz"
      },
      {
        name: "Dev Team",
        label: "dev"
      },
    ]
    let group
    if (this.channel.exclusiveLiveChat === false) {
      group = await this.getGroupByExternalId({
        groupId: this.messageEvent.to,
        type: this.channel.type,
        channelId: this.channel._id,
      })
    } else {
      group = await this.getGroupByExternalId({
        adminExternalId: this.messageEvent.from,
        groupId: this.messageEvent.to,
        type: this.channel.type,
        channelId: this.channel._id,
      })
    }

    if (group.active === false) {
      resolve()
    } else {
      let buttons = this.lodash.map(labelArray, (label) => {
        return {
          type: "postback",
          title: label.name,
          payload: {
            payload: "SELECT_TRANSFER_GROUP",
            value: label.label
          }
        }
      })
      await this.sendMessageToOutletGroup({
        group,
        response: {
          type: "BUTTON",
          text: "Which team would you like to transfer this ticket to?",
          buttons,
        },
      })
      resolve()
    }
  } catch (e) {
    reject(e)
  }
})
The array of labels refer to the available follow-up channels that can receive transferred tickets. You may change the button name for each team on the field "Name". It can be set up/found in Broadcast Group
You may also change the message on the field "text" under "response".
Create Tree Node - Select Group
Create a 2nd tree node and name it as "Select Group".
In the following section, you will create the 3 actions. Please follow the steps of the procedure and put these actions under pre-action of this node with the exact order
Create the 1st action for sending the transfer message to inlet with the following code:
return new Promise(async (resolve, reject) => {
try {
let group
if (this.channel.exclusiveLiveChat === false) {
group = await this.getGroupByExternalId({
groupId: this.messageEvent.to,
type: this.channel.type,
channelId: this.channel._id,
})
} else {
group = await this.getGroupByExternalId({
adminExternalId: this.messageEvent.from,
groupId: this.messageEvent.to,
type: this.channel.type,
channelId: this.channel._id,
})
}
const member = await this.getMember({ memberId: group.member })
let response
if (/zh/g.test(this.lodash.get(member, "locale", ""))) {
response = {
type: "TEXT",
text: "請稍等,我們正安排另一位專員處理您的查詢。"
}
} else {
response = {
type: "TEXT",
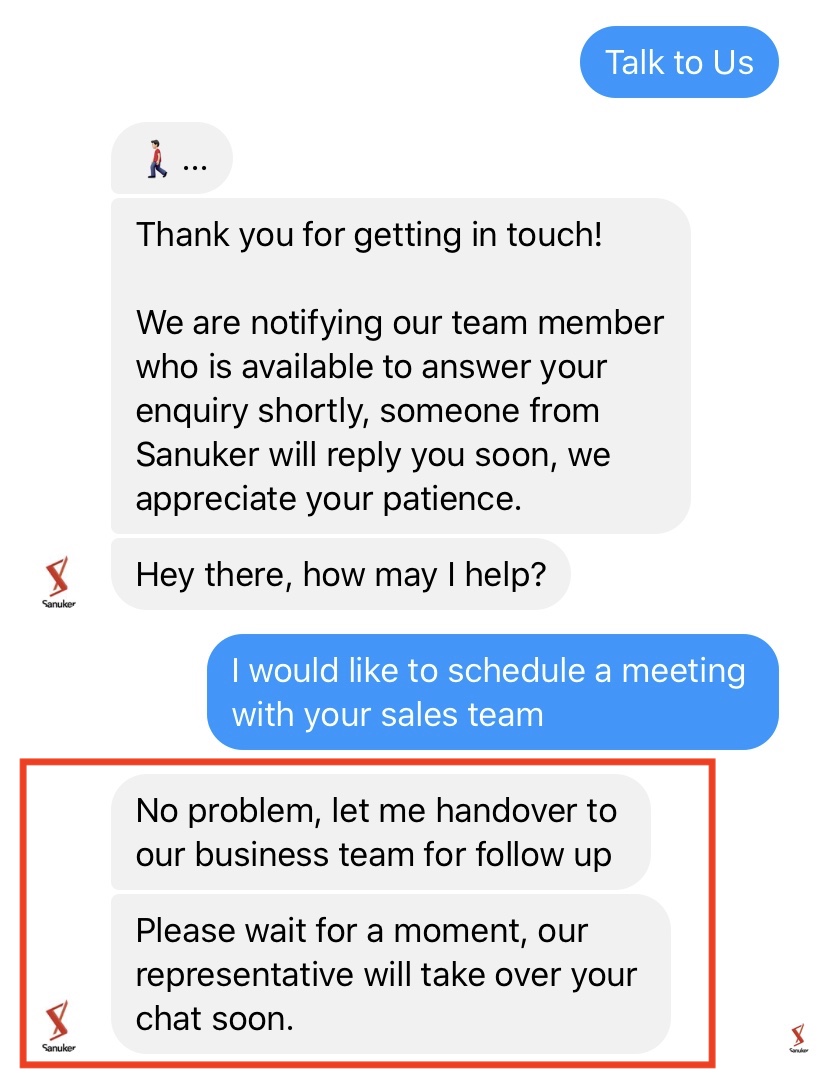
text: "Please wait for a moment, our representative will take over your chat soon."
}
}
await this.sendMessageToInlet({
messageEvent: this.messageEvent,
channel: this.channel,
response,
})
console.log("sending message to inlet")
this.member.group = group
this.member.inletMember = member
resolve({
member: this.member
})
} catch (e) {
reject(e)
}
})
You may feel free to change the message on the field of "text" under "response" to fit your tone & manner.
- Create the 2nd action for creating the transferred assignment to the new team with the following code:
return new Promise(async (resolve, reject) => {
  try {
    const assignment = await this.getAssignment({ assignmentId: this.member.group.assignment })
    console.log("assignment", assignment)
    let member = this.member.inletMember
    let labelArray = [
      {
        name: "Business Team",
        label: "biz"
      },
      {
        name: "Dev Team",
        label: "dev"
      }
    ]
    let oldLabel = this.lodash.find(labelArray, { label: assignment.label })
    if (!oldLabel) {
      oldLabel = {
        name: "General",
        value: "general"
      }
    }
    let newLabel = this.lodash.find(labelArray, { label: this.messageEvent.data.payload.value })
    let relayMessage = assignment.relayMessage
    let summary = ""
    let relayText
    if (/zh/g.test(this.lodash.get(member, "locale", ""))) {
      relayText = `${this.member.firstName} ${this.member.lastName} has transferred ${member.firstName} ${member.lastName} to ${newLabel.name}\n${this.moment().format("YYYY-MM-DD")}`
      summary = `姓名: ${member.firstName} ${member.lastName}\n此查詢由 ${oldLabel.name} 轉移到 ${newLabel.name}\n請按以下連結開啟對話紀錄:`
    } else {
      summary = `Name: ${member.firstName} ${member.lastName}\nThis ticket is transferred from ${oldLabel.name} to ${newLabel.name}\nPlease view conversation history at:`
      relayText = `${this.member.firstName} ${this.member.lastName} has transferred ${member.firstName} ${member.lastName} to ${newLabel.name}\n${this.moment().format("YYYY-MM-DD")}`
    }
    relayMessage.slack.text = relayText
    console.log("reassigning")
    await this.reassignAssignment({
      messageEvent: this.messageEvent,
      channel: this.channel,
      label: this.messageEvent.data.payload.value,
      relayMessage,
      summary,
    })
    console.log("reassigned message sent")
    resolve()
  } catch (e) {
    reject(e)
  }
})
You may feel free to change the following section to fit your tone & manner:
- summary
- relayText
- You may edit the label according to your set up in Broadcast Group
- Create the 3rd action for sending the transfer status to notify the agent who initiated the transfer with the following code:
return new Promise(async (resolve, reject) => {
  try {
    console.log("in send transfer successful to group")
    console.log("group", this.member.group)
    await this.sendMessageToOutletGroup({
      group: this.member.group,
      responseUrl: this.messageEvent.response_url,
      response: {
        type: "ATTACHMENT",
        text: this.messageEvent.data.originalMessage.text.replace(/\+/g, " "),
        attachments: [
          {
            text: "Transferred",
            fallback: "Transferred",
            color: "#36a64f"
          }
        ],
        replaceOriginal: true
      }
    })
    resolve()
  } catch (e) {
    reject(e)
  }
})
- Finally, create 2 responses in Advanced > Response Object with the following code:
The first response:
{
  "type": "TEXT",
  "text": "Your Transfer command has successfully sent. Thanks!"
}
The second response (this will only be activated once you have completed step 2.4):
{
  "type": "BUTTON",
  "buttons": [
    {
      "type": "postback",
      "payload": "ARCHIVE",
      "title": "Archive Now"
    }
  ],
  "text": "Do you want to archive this channel now?"
}
Create a Global Node - Transfer Command Global
- Create a global node and name it as "Transfer Command GLobal". Then, create a trigger with two conditions with the and operator:
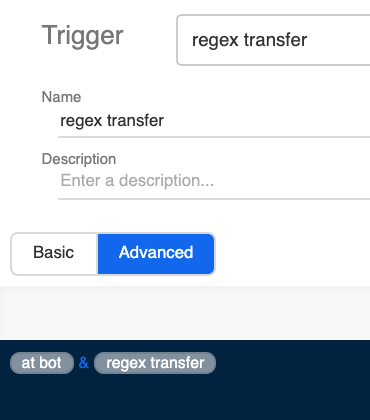
First condition - at bot:
new RegExp(`<@${this.channel.info.botId}`).test(this.messageEvent.data.text)
Second condition - regex transfer:
/transfer/i.test(this.messageEvent.data.text)
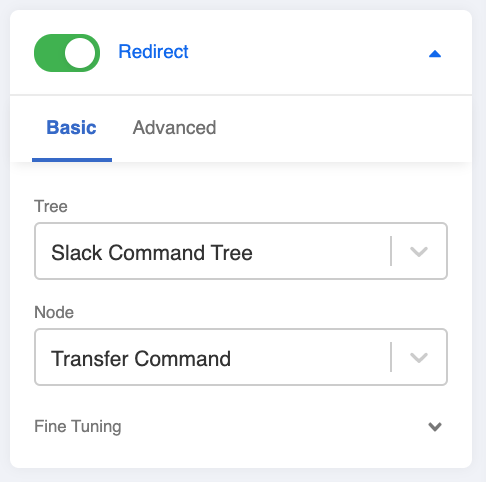
- Toggle Redirect to the "Transfer Command" tree node.
Create a Global Node - Select Group Global
- Create a global node and name it as "Select Group Global". Then, create a trigger with two conditions with the and operator:
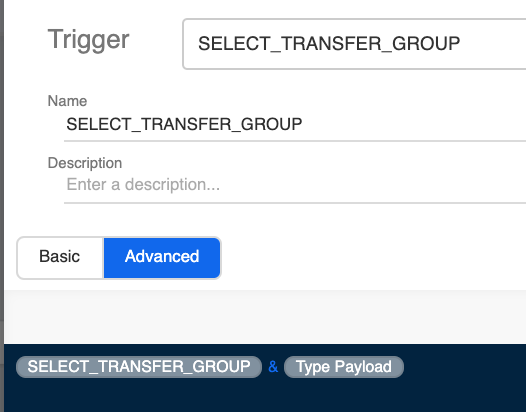
First condition - SELECT_TRANSFER_GROUP
this.lodash.get(this.messageEvent, "data.payload.payload") === "SELECT_TRANSFER_GROUP"
Second condition - Type Payload
this.messageEvent.type === "PAYLOAD"
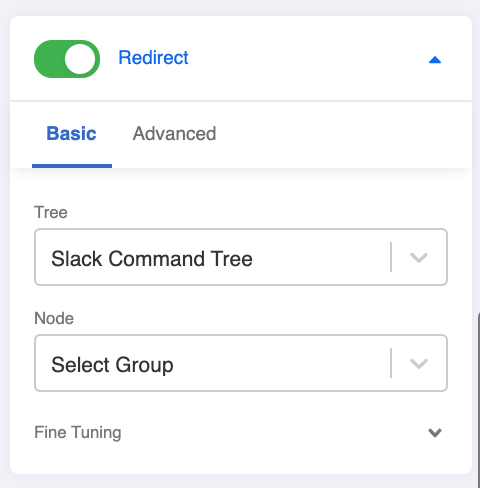
- Toggle Redirect to the "Select Group" tree node.
Before testing, please remember to update the tree and global node in the Slack Channel.
- Check and see if you can produce the expected outcome.