Stella Platform Documentation

Stella Platform Documentation

  • Docs
  • Procedures
  • Reference
  • FAQ
  • Bot API
  • API
  • Languages iconEnglish
    • 中文

›Slack Live Chat Tree Setup

Get Started

  • Build your First Chatbot

Basic Facebook Chatbot Setup

  • Overview
  • 1.1: Connect to Channels
  • 1.2: Create New Tree
  • 1.3: Build the First Node
  • 1.4: Create a Global Node
  • 1.5: Build Child Nodes
  • 2.1: Production Channel
  • 3.1: Draft a Post
  • 3.2: Create Comment Reply

Basic Instagram Chatbot Setup

  • Overview
  • 1.1: Connect to Channels
  • 1.2: Create New Tree
  • 1.3: Build the First Node
  • 1.4: Create Global Node
  • 1.5: Build Child Nodes
  • 2.1: Create Story Mention
  • 2.2: Create Comment Reply
  • 2.3: Send Push Message

Basic Web Chat Chatbot Setup

  • Overview
  • 1.1: Connect to Channels
  • 1.2: Create New Tree
  • 1.3: Build the First Node
  • 1.4: Create a Global Node
  • 1.5: Build Child Nodes

Basic WhatsApp Chatbot Setup

  • Overview
  • 1.1: WABA Subscription
  • 1.2: Connect WABA
  • 1.3: Check Approval Status of WABA
  • 1.4: Setup WABA with Used WhatsApp Number
  • 1.5: Reset / Terminate WABA
  • 2.1: Create New Tree
  • 2.2: Build the First Node
  • 2.3: Create a Global Node
  • 2.4: Build Child Nodes
  • 2.5: Connect to Datasource
  • 3.1: Create Priority Group
  • 4.1: Create Product Message

Common Use Case Application

  • Overview
  • 1.1: Apply Fail-Safe to Chatbot
  • 1.2: Apply Member Unsubscription Flow to Chatbot

Advanced Chatbot Application

  • Overview
  • Apply Datasource to Chatbot
  • Apply Payload Value to Chatbot
  • Apply API to Chatbot
  • Apply Custom Locale to Chatbot
  • Apply Opt-in Flow to Chatbot
  • Apply Agenda to Chatbot
  • Apply Stella API to Chatbot
  • Apply Web Event to Webchat Chatbot

Error Handling

  • Handle Errors for Chatbot

Stella Partner Portal Setup

  • Overview
  • 1.1: Partner Portal Setup
  • 1.2: New Customer Onboarding
  • 1.3: WABA Setup
  • 1.4: Check Approval Status of WABA
  • 1.5: Setup WABA with Used WhatsApp Number
  • 1.6: Reset / Terminate WABA

Template Tree

  • Overview
  • Create Template Tree
  • Manage Proxy Tree

Chatbot Testing & Deployment

  • Overview
  • Stage One - Tree Building
  • Stage Two - Testing Stage
  • Stage Three - Production Deployment

Slack Live Chat Tree Setup

  • Overview
  • 1.1: Create Tree for Live Chat Assignment
  • 2.1: Set Up Pick Ticket Status
  • 2.2: Create Done Command
  • 2.3: Create Transfer Command
  • 2.4: Create Archive Function
  • 2.5: Create Member Tagging/Remarks Command
  • 3.1: Automatic End Live Chat Function

Zendesk Live Chat Tree Setup

  • Overview
  • 1.1: Create Tree for Assignment
  • 2.1: Create Done Command
  • 2.2: Auto End Live Chat Function

FAQ Chatbot Setup

  • Overview
  • 1.1: Exact Keyword Match
  • 1.2: Keyword Groups Match & Diversion
  • 2.1: Redirect to Existing Chatbot Tree
  • 2.2: Data Analytics for FAQ Chatbot
  • 2.3: NLP for FAQ Chatbot
  • 3.1: Filtering Questions for FAQ Chatbot

NLP Chatbot Setup

  • Overview
  • 1.1: Apply NLP to your Chatbot
  • 2.1: Set Up an NLP Fallback Tree
  • 3.1: NLP Fallback to Other Languages

Connect Shopify Store to Stella

  • Overview
  • 1.1: Integrate Stella to Shopify
  • 2.1: Setup Facebook Messenger Chatbot for Shopify
  • 2.2: Setup WhatsApp Chatbot for Shopify
  • 2.3: WhatsApp Customer Care Notification for Shopify

Stella Inbox Setup

  • Overview
  • 1.1: Connect Channel to Slack
  • 1.2: Access Control & Admin Panel
  • 1.3: Set up Customizable Message
  • 1.4: Inbox Channel
  • 2.1: Turn on Live Chat Directly
  • 2.2: End Live Chat Mode
  • 2.3: Ticketing
  • 2.4: Manage Ticket Helper
  • 2.5: Add Member Tag
  • 3.1: Send Chatbot Message

Set Up Pick Ticket Status

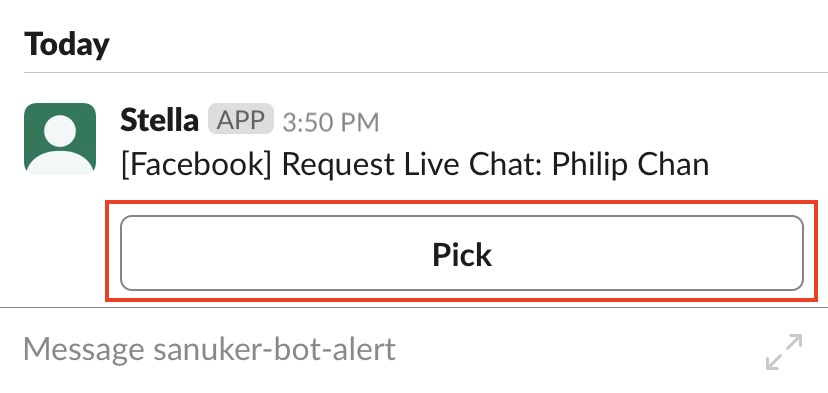
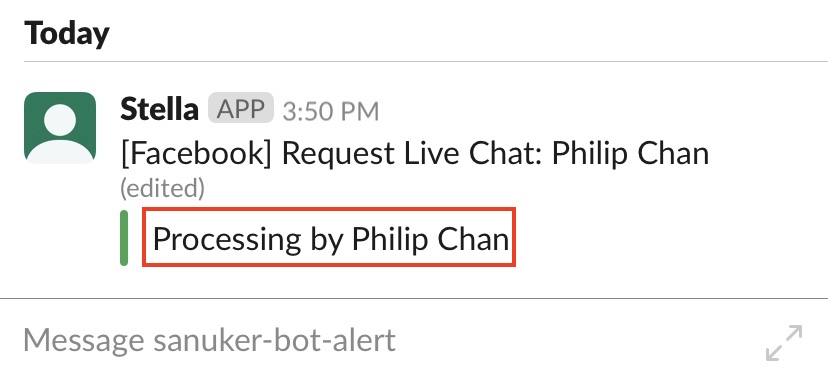
When an agent has picked up a ticket in the broadcast channel, it will be useful to display the ticket status to keep everyone in the channel on the same page.

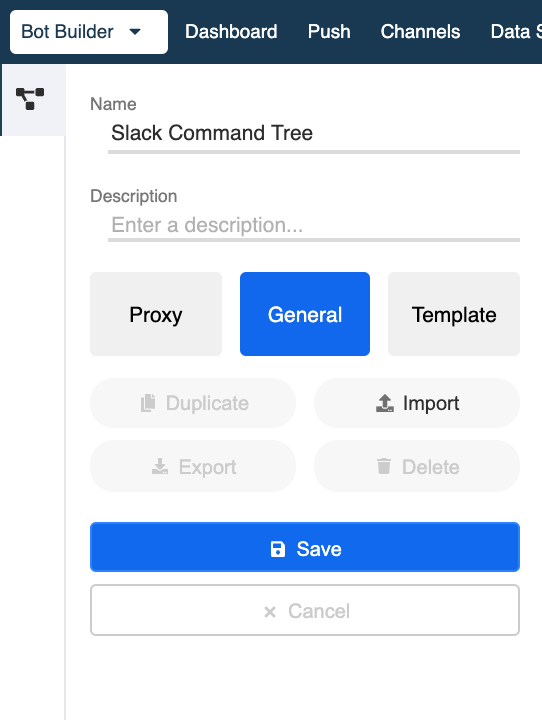
As this function is only applicable to Slack, you should create a new tree before proceeding. Please also set up the rest of the Slack commands in this tree.


What is your Result?

Ticket status before & after picking a ticket
  • Please remember to connect your Slack Channel on Stella before testing for the result.

Sample Tree Structure - Pick Ticket Status

Slack Command Tree Structure for Pick Ticket Status

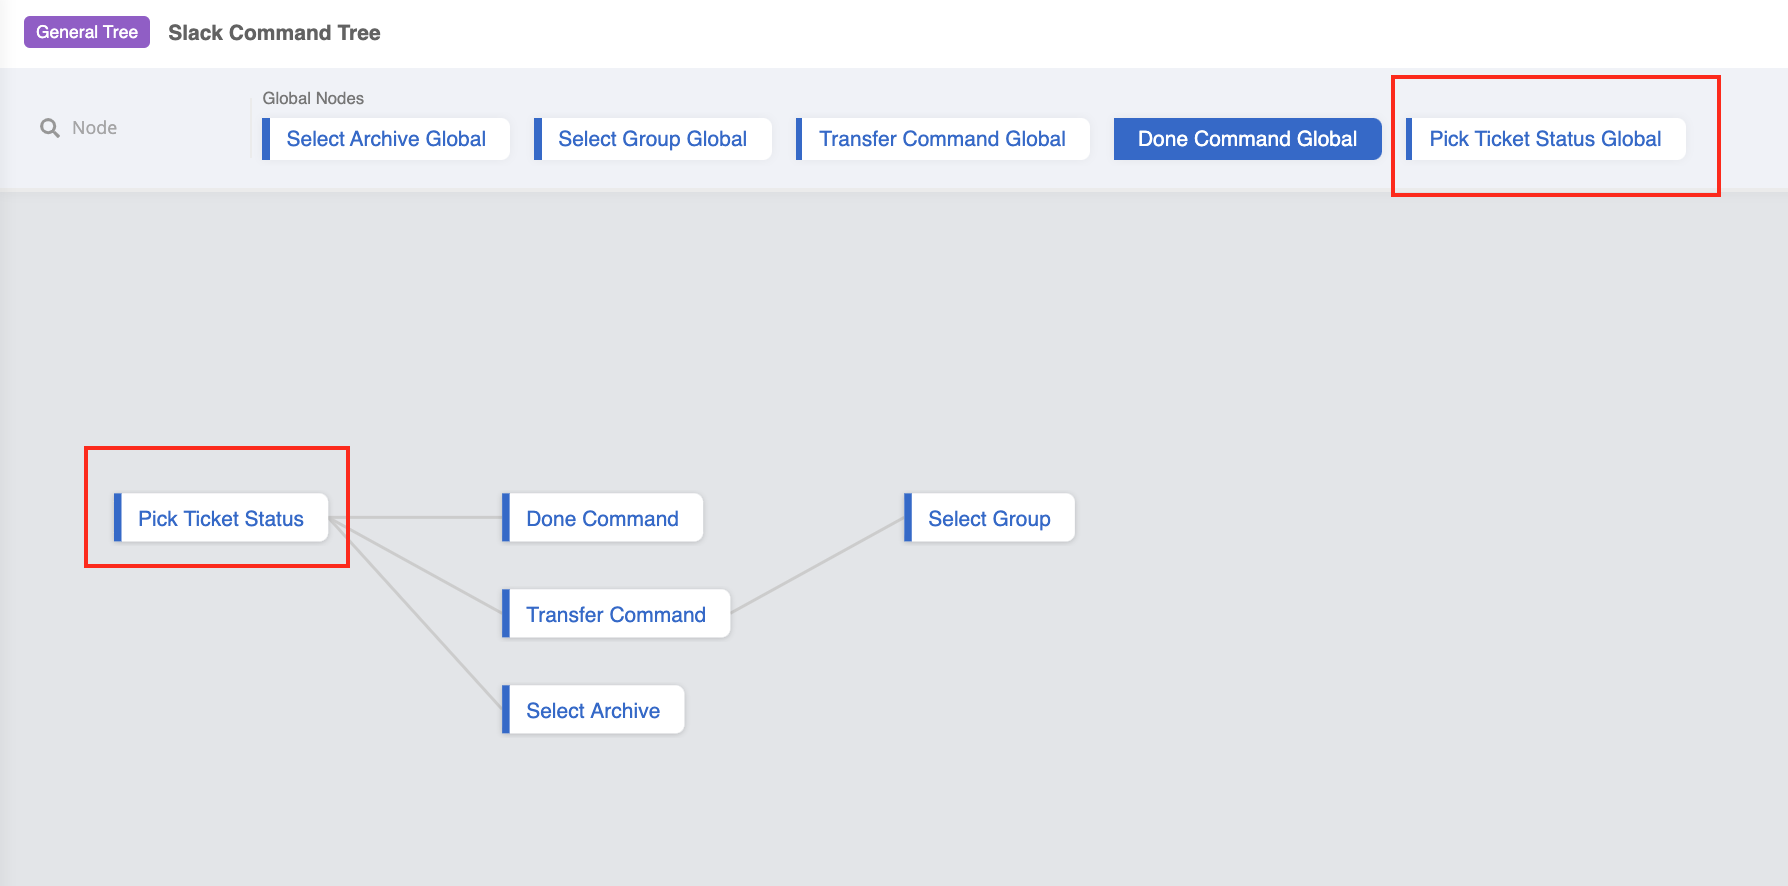
You can click here to download the sample tree.


Getting Hands-on

Click here to build your tree node.

Create a Tree Node - Pick Ticket

  1. Create a new tree for Slack commands and name it is "Slack Command Tree".

Create the Slack Command Tree
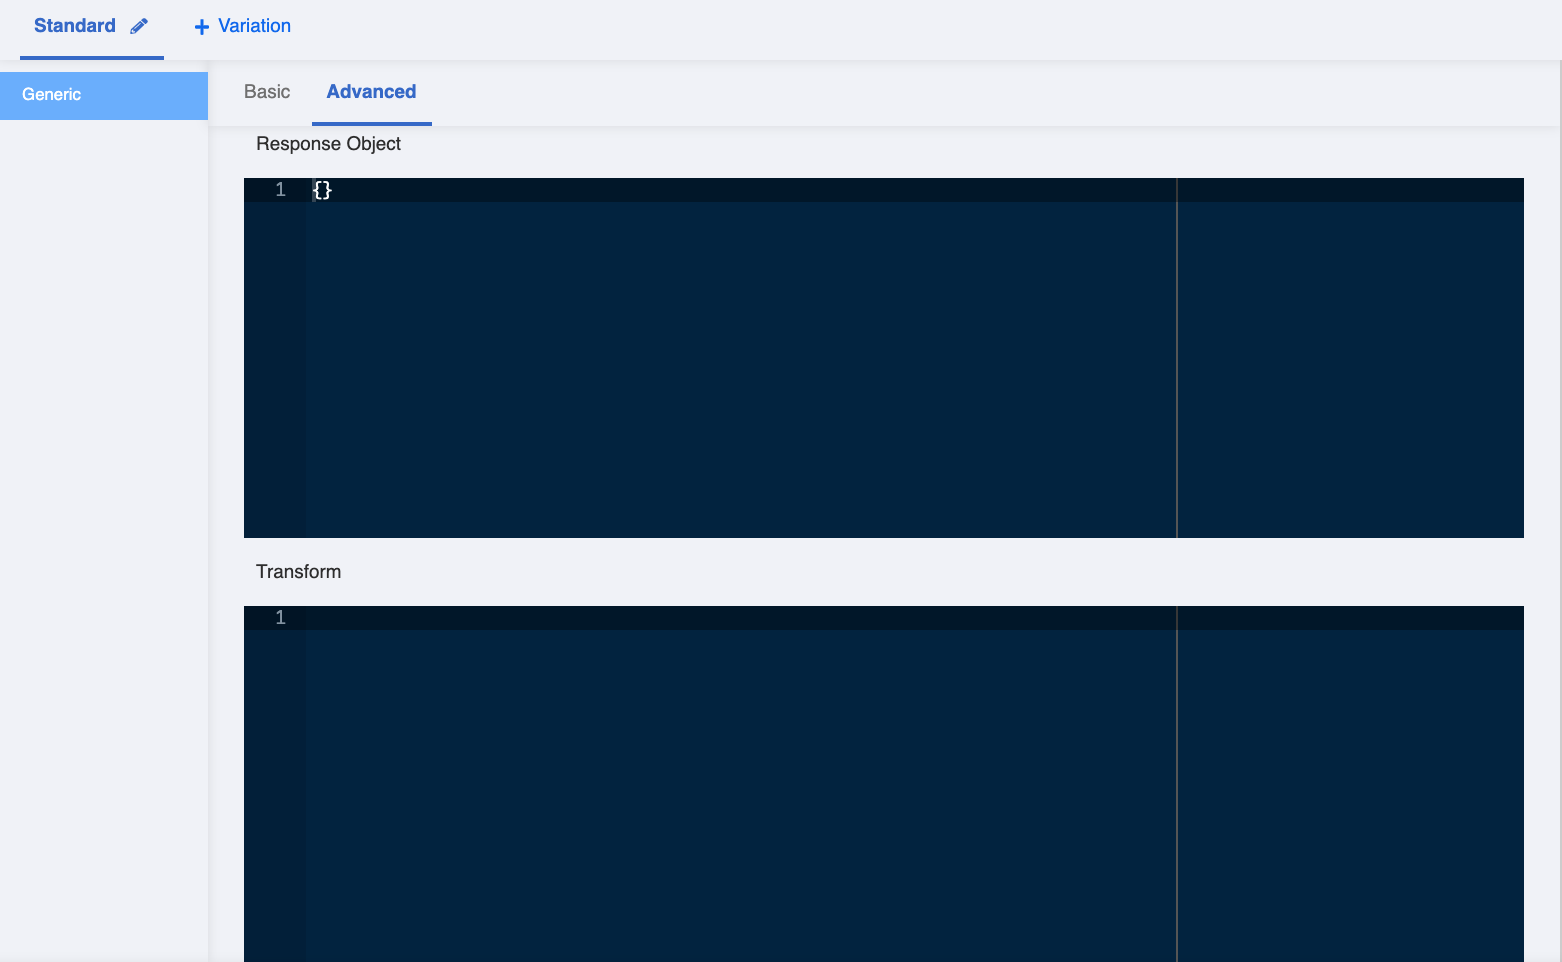
  1. In the "Slack Command Tree", create a tree node and create a response. Then, put the following code in Advanced -> Transform:

Add code to transformed response

The following code is for displaying the processing ticket status and a link to the conversation channel. You can change the processing text in "fallback" under "attachments".

return new Promise(async (resolve, reject) => {
 const assignmentId = this.messageEvent?.data?.payload?.value
 const assignment = await this.getAssignment({ assignmentId })
 const group = await this.getGroup({ groupId: assignment?.group })

 let name
 if (this.lodash.get(this.member, "profile.first_name")) {
   name = `${this.member.profile.first_name} ${this.member.profile.last_name || ""}`
 } else {
   name = this.lodash.get(this.member, "profile.real_name")
 }

  name = name + 'in [' + group.name+"] "+'\nslack.com/archives/'+group.externalId
   

 resolve({
   type: "ATTACHMENT",
   text: this.messageEvent.data.originalMessage.text.replace(/\+/g, " "),
   attachments: [
     {
       text: `Processing by ${name}`,
       fallback: `Processing by ${name}`,
       color: "#36a64f"
     }
   ],
   replaceOriginal: true
 })
})

Create Pick Ticket Message (Optional)

  1. If needed. you can also send an automated message to the user when a ticket is picked up by an agent. To do so, you can simply add the following code to the post-actions of the tree node.

    You can customize the text message in text under response.

return new Promise(async (resolve, reject) => {
  try {
    let assignmentId = null
    if (this.lodash.get(this.messageEvent, "data.payload.value") !== "GET_FIRST_ASSIGNMENT") {
      assignmentId = this.lodash.get(this.messageEvent, "data.payload.value", null)
    }
    if (assignmentId) {
      const assignment = await this.getAssignment({
        assignmentId
      })
      if (assignment.member) {
        const member = await this.getMember({ memberId: assignment.member })
        let response
        if (/zh_HK/g.test(this.lodash.get(member, "customLocale", this.lodash.get(member, "locale", "")))) {
          response = {
            type: "TEXT",
            text: "系統已為您聯繫了我們的專員。"
          }
        } else {
          response = {
            type: "TEXT",
            text: "We have connected you to our representative."
          }
        }
          
        await this.sendMessageToInlet({
          groupId: assignment.group,
          channel: this.channel,
          response,
        })
        console.log("sending message to inlet")
        this.member.group = assignment.group
        this.member.inletMember = member
        resolve({
          member: this.member
        })
      }
    }
    reject("Assignment or assignment member not found")
  } catch (e) {
    reject(e)
  }
})

Create a Global Node - Pick Ticket

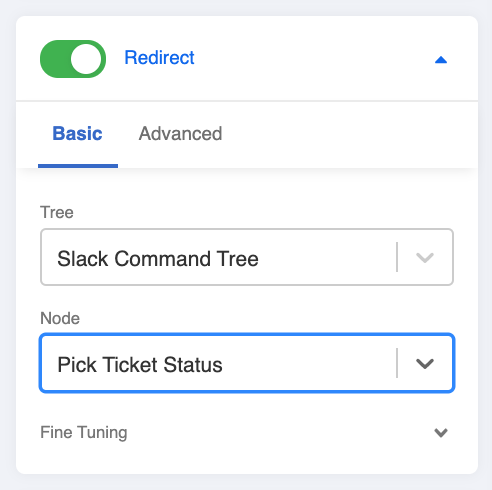
  1. Create a global node and then create a trigger with two conditions (for details on creating conditions, please click here) with the and operator:

Pick Ticket Status Trigger for Slack

First condition - Type Payload:

this.messageEvent.type === "PAYLOAD"

Second condition - Pick Ticket:

this.lodash.get(this.messageEvent, "data.payload.payload") === "PICK_TICKET"
  1. Toggle Redirect to the tree node you created for pick ticket.

Redirect to Pick Ticket Tree Node

Add Tree to Slack Channel

  1. When you finish building the tree forv picking ticket, please head to "Channels" and enter Slack channel you have created previosuly.

  2. In the Slack Channel, head to "Trees" -> "Settings", and add the tree under "Default Tree". Remember to select all the global nodes.

Add Tree to Slack Channel
  1. Check and see if you can produce the expected outcome.
← 1.1: Create Tree for Live Chat Assignment2.2: Create Done Command →
  • What is your Result?
  • Sample Tree Structure - Pick Ticket Status
  • Getting Hands-on
    • Create a Tree Node - Pick Ticket
    • Create a Global Node - Pick Ticket
    • Add Tree to Slack Channel
Stella Platform Documentation
Docs
Get StartedBot API ReferenceAPI ReferenceStandard Procedures
Community
FAQUser ShowcaseChat with Us
Copyright © 2023 Sanuker Inc. Limited