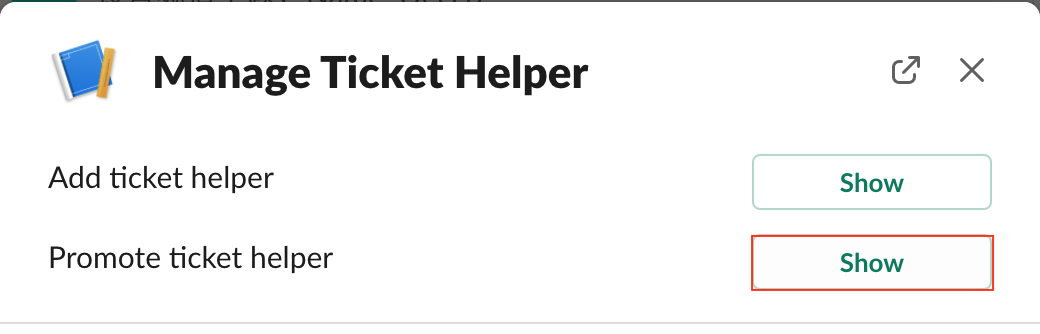
Manage Ticket Helper
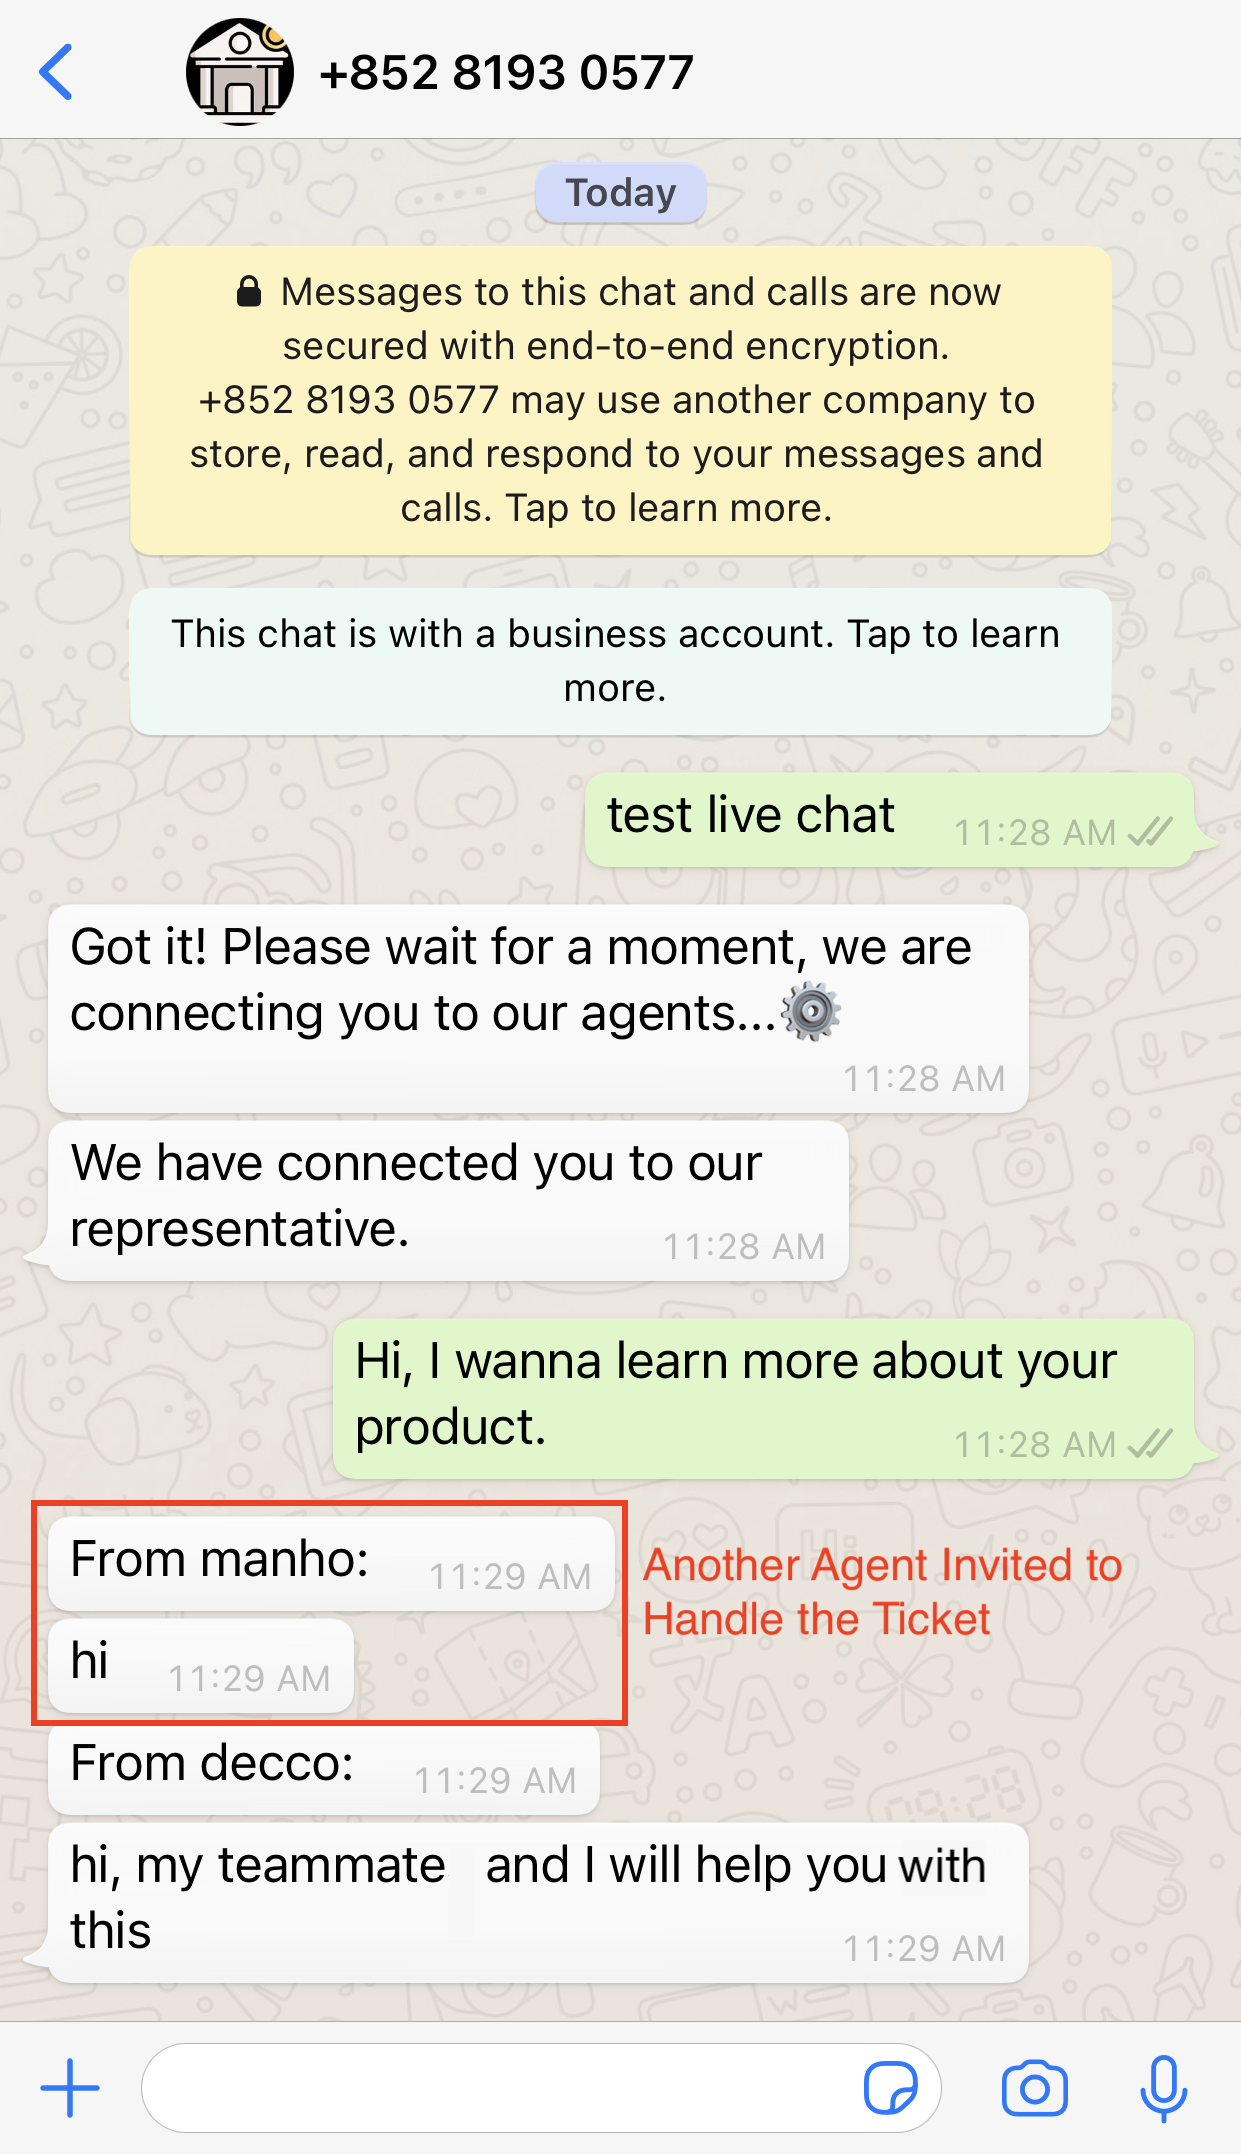
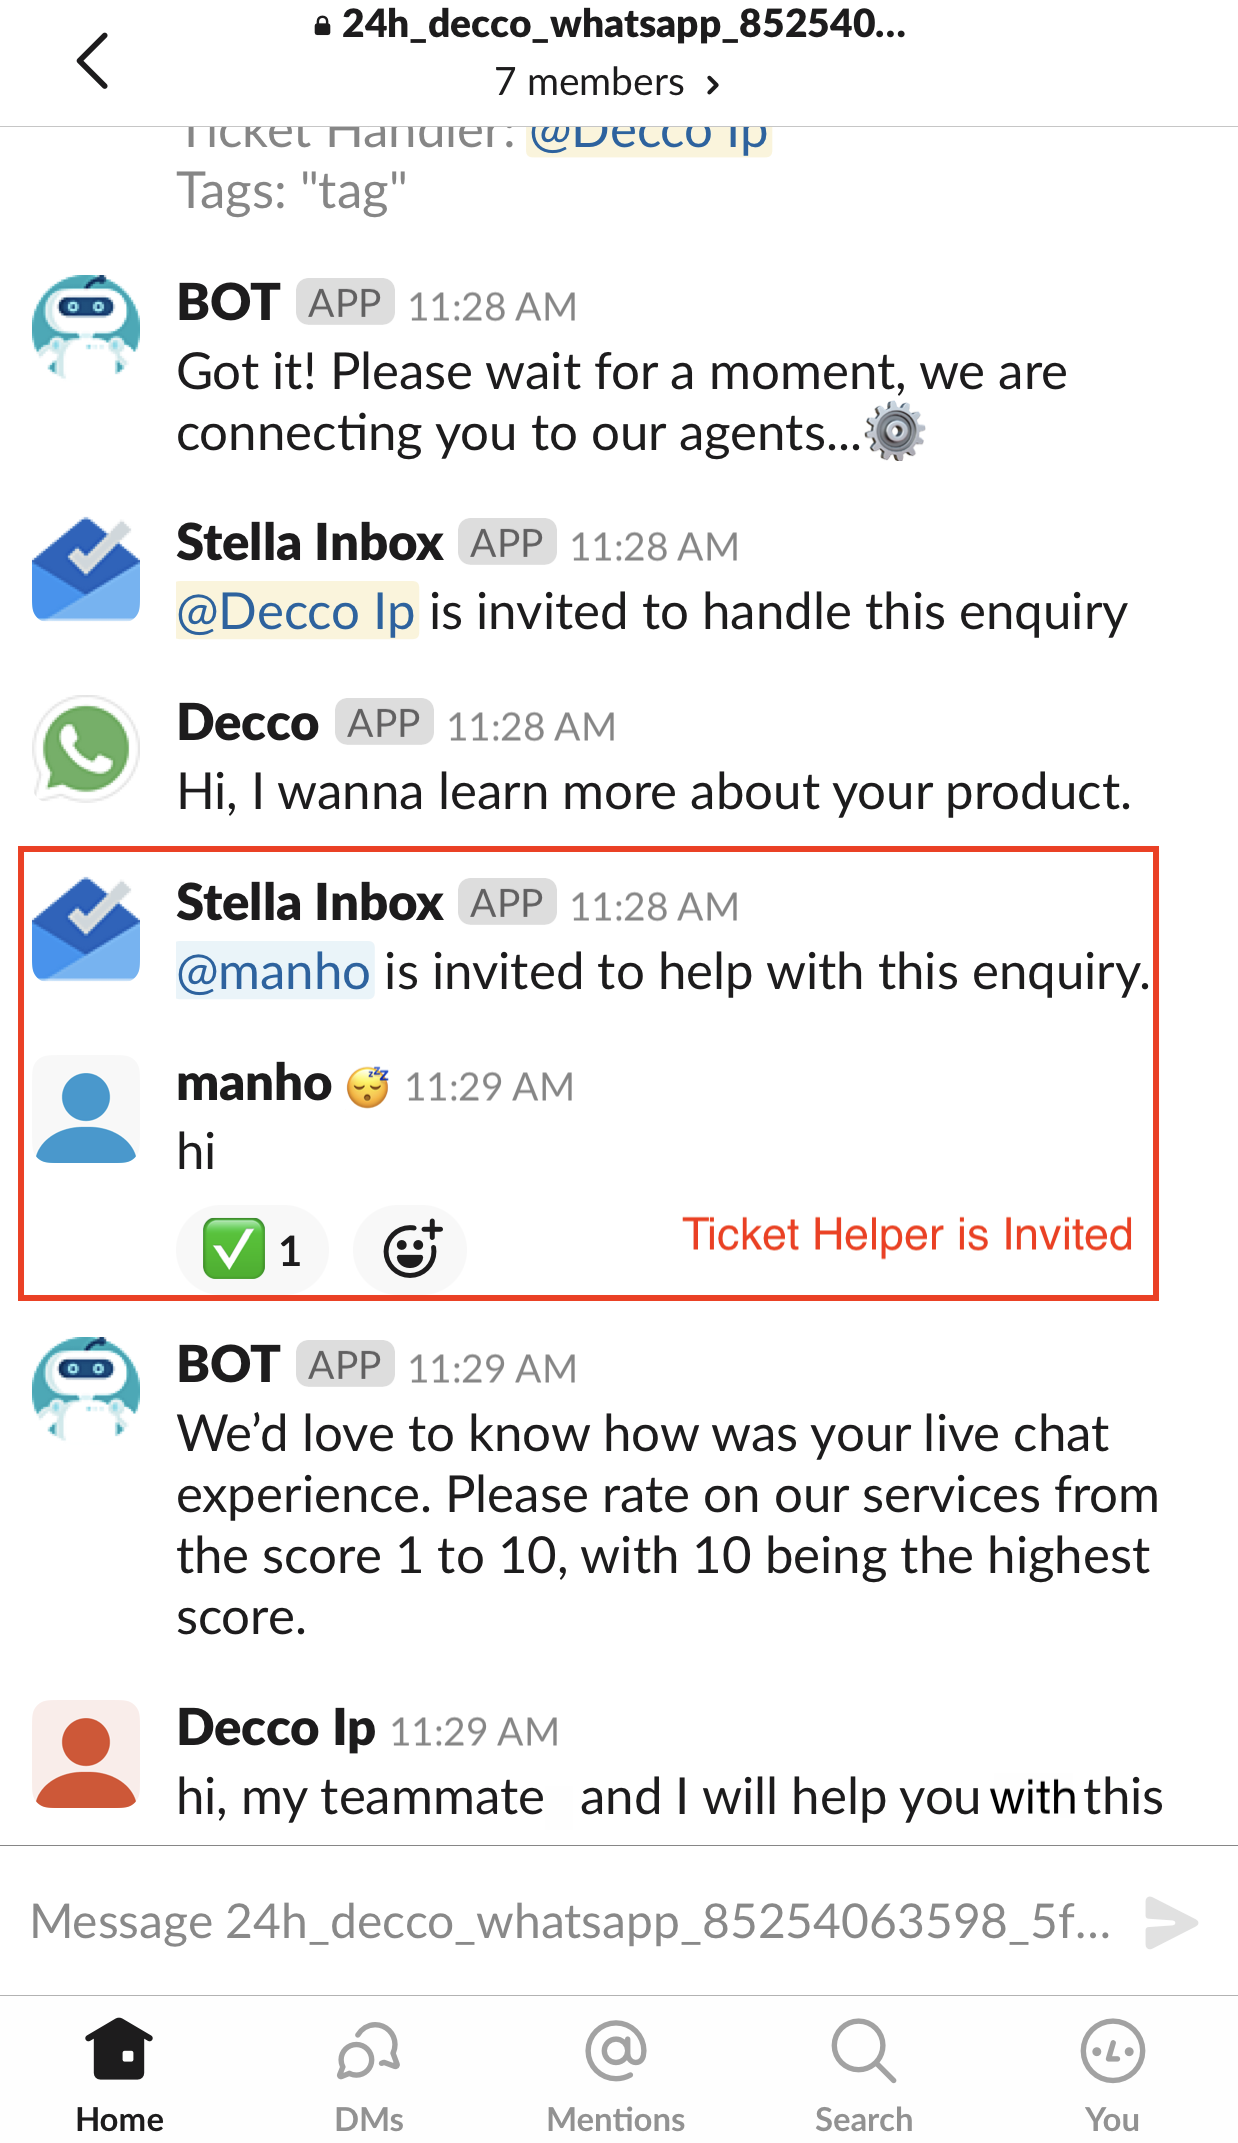
After picking up a ticket, the responsible agent can interact with the user in live chat. Other members in the private channel can also view the chat, but unable to be involved in the conversation. However, by adding Ticket Helper, the agent can assign another teammate to handle the case together. A Ticket Helper can type and reply to the end user.
What is your Result?
After an agent accepts a ticket, the agent decides to add a ticket helper. Then two agents can reply the user together in the live chat.
Getting Hands-on
Add Ticket Helper
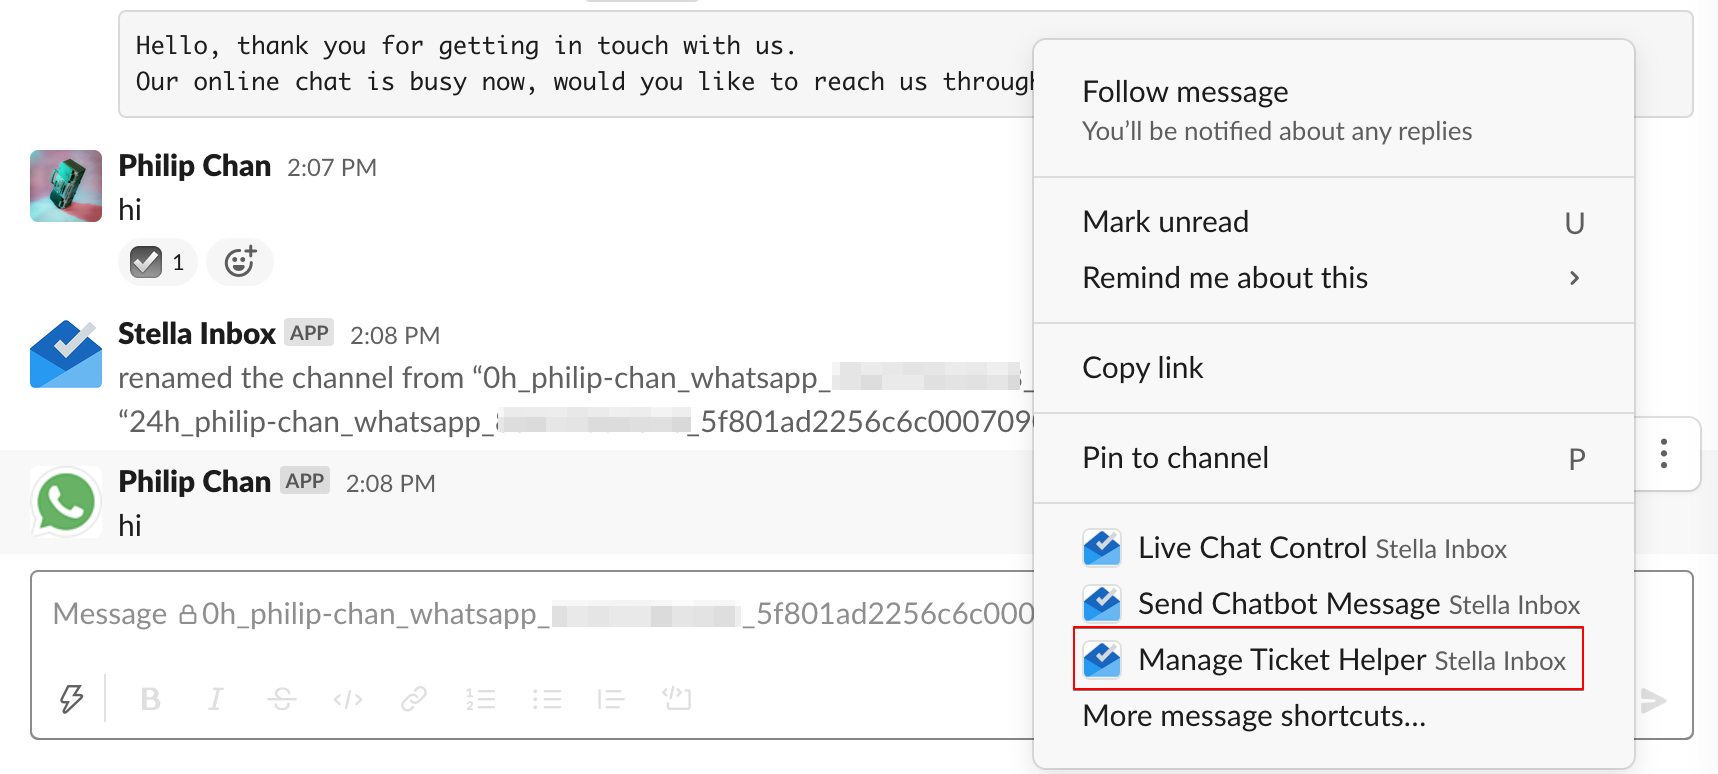
- Hover over a message in the inbox channel, select "More actions" on the right, then select "More message shortcuts". Select "Manage Ticket Helper"
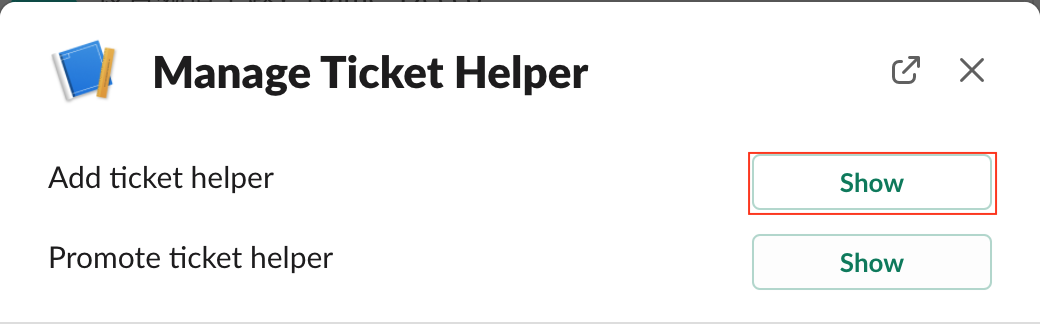
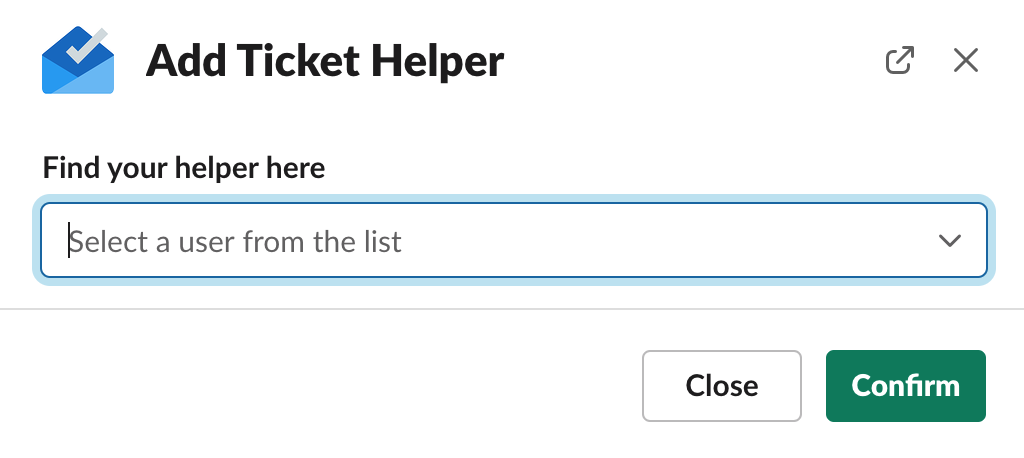
- Select "Show" next to "Add Ticket Helper" to assign another agent to be ticket helper.
- Select an agent from the list. A ticket helper can type and reply to the user.
- Check and see if you can produce the expected outcome.
Promote Ticket Helper
Once you have invited a ticket helper, you can also select "Show" next to "Promote Ticket Helper". When a ticket helper is promoted to a ticket handler, he will be able to end the live chat mode as well.
Error Message
You can only add ticket helper if you have accepted a ticket. If not, Stella Inbox would return the following message.
