Stella Platform Documentation

Stella Platform Documentation

  • Docs
  • Procedures
  • Reference
  • FAQ
  • Bot API
  • API
  • Languages iconEnglish
    • 中文

›Stella Inbox Setup

Get Started

  • Build your First Chatbot

Basic Facebook Chatbot Setup

  • Overview
  • 1.1: Connect to Channels
  • 1.2: Create New Tree
  • 1.3: Build the First Node
  • 1.4: Create a Global Node
  • 1.5: Build Child Nodes
  • 2.1: Production Channel
  • 3.1: Draft a Post
  • 3.2: Create Comment Reply

Basic Instagram Chatbot Setup

  • Overview
  • 1.1: Connect to Channels
  • 1.2: Create New Tree
  • 1.3: Build the First Node
  • 1.4: Create Global Node
  • 1.5: Build Child Nodes
  • 2.1: Create Story Mention
  • 2.2: Create Comment Reply
  • 2.3: Send Push Message

Basic Web Chat Chatbot Setup

  • Overview
  • 1.1: Connect to Channels
  • 1.2: Create New Tree
  • 1.3: Build the First Node
  • 1.4: Create a Global Node
  • 1.5: Build Child Nodes

Basic WhatsApp Chatbot Setup

  • Overview
  • 1.1: WABA Subscription
  • 1.2: Connect WABA
  • 1.3: Check Approval Status of WABA
  • 1.4: Setup WABA with Used WhatsApp Number
  • 1.5: Reset / Terminate WABA
  • 2.1: Create New Tree
  • 2.2: Build the First Node
  • 2.3: Create a Global Node
  • 2.4: Build Child Nodes
  • 2.5: Connect to Datasource
  • 3.1: Create Priority Group
  • 4.1: Create Product Message

Common Use Case Application

  • Overview
  • 1.1: Apply Fail-Safe to Chatbot
  • 1.2: Apply Member Unsubscription Flow to Chatbot

Advanced Chatbot Application

  • Overview
  • Apply Datasource to Chatbot
  • Apply Payload Value to Chatbot
  • Apply API to Chatbot
  • Apply Custom Locale to Chatbot
  • Apply Opt-in Flow to Chatbot
  • Apply Agenda to Chatbot
  • Apply Stella API to Chatbot
  • Apply Web Event to Webchat Chatbot

Error Handling

  • Handle Errors for Chatbot

Stella Partner Portal Setup

  • Overview
  • 1.1: Partner Portal Setup
  • 1.2: New Customer Onboarding
  • 1.3: WABA Setup
  • 1.4: Check Approval Status of WABA
  • 1.5: Setup WABA with Used WhatsApp Number
  • 1.6: Reset / Terminate WABA

Template Tree

  • Overview
  • Create Template Tree
  • Manage Proxy Tree

Chatbot Testing & Deployment

  • Overview
  • Stage One - Tree Building
  • Stage Two - Testing Stage
  • Stage Three - Production Deployment

Slack Live Chat Tree Setup

  • Overview
  • 1.1: Create Tree for Live Chat Assignment
  • 2.1: Set Up Pick Ticket Status
  • 2.2: Create Done Command
  • 2.3: Create Transfer Command
  • 2.4: Create Archive Function
  • 2.5: Create Member Tagging/Remarks Command
  • 3.1: Automatic End Live Chat Function

Zendesk Live Chat Tree Setup

  • Overview
  • 1.1: Create Tree for Assignment
  • 2.1: Create Done Command
  • 2.2: Auto End Live Chat Function

FAQ Chatbot Setup

  • Overview
  • 1.1: Exact Keyword Match
  • 1.2: Keyword Groups Match & Diversion
  • 2.1: Redirect to Existing Chatbot Tree
  • 2.2: Data Analytics for FAQ Chatbot
  • 2.3: NLP for FAQ Chatbot
  • 3.1: Filtering Questions for FAQ Chatbot

NLP Chatbot Setup

  • Overview
  • 1.1: Apply NLP to your Chatbot
  • 2.1: Set Up an NLP Fallback Tree
  • 3.1: NLP Fallback to Other Languages

Connect Shopify Store to Stella

  • Overview
  • 1.1: Integrate Stella to Shopify
  • 2.1: Setup Facebook Messenger Chatbot for Shopify
  • 2.2: Setup WhatsApp Chatbot for Shopify
  • 2.3: WhatsApp Customer Care Notification for Shopify

Stella Inbox Setup

  • Overview
  • 1.1: Connect Channel to Slack
  • 1.2: Access Control & Admin Panel
  • 1.3: Set up Customizable Message
  • 1.4: Inbox Channel
  • 2.1: Turn on Live Chat Directly
  • 2.2: End Live Chat Mode
  • 2.3: Ticketing
  • 2.4: Manage Ticket Helper
  • 2.5: Add Member Tag
  • 3.1: Send Chatbot Message

Add Member Tag

Member Tagging is a convenient function for you to identify users. During live chat, you can type in anything to be your tag. The member tag is stored in Stella, it is useful for tracking and performing analysis of your users.

What is your Result?

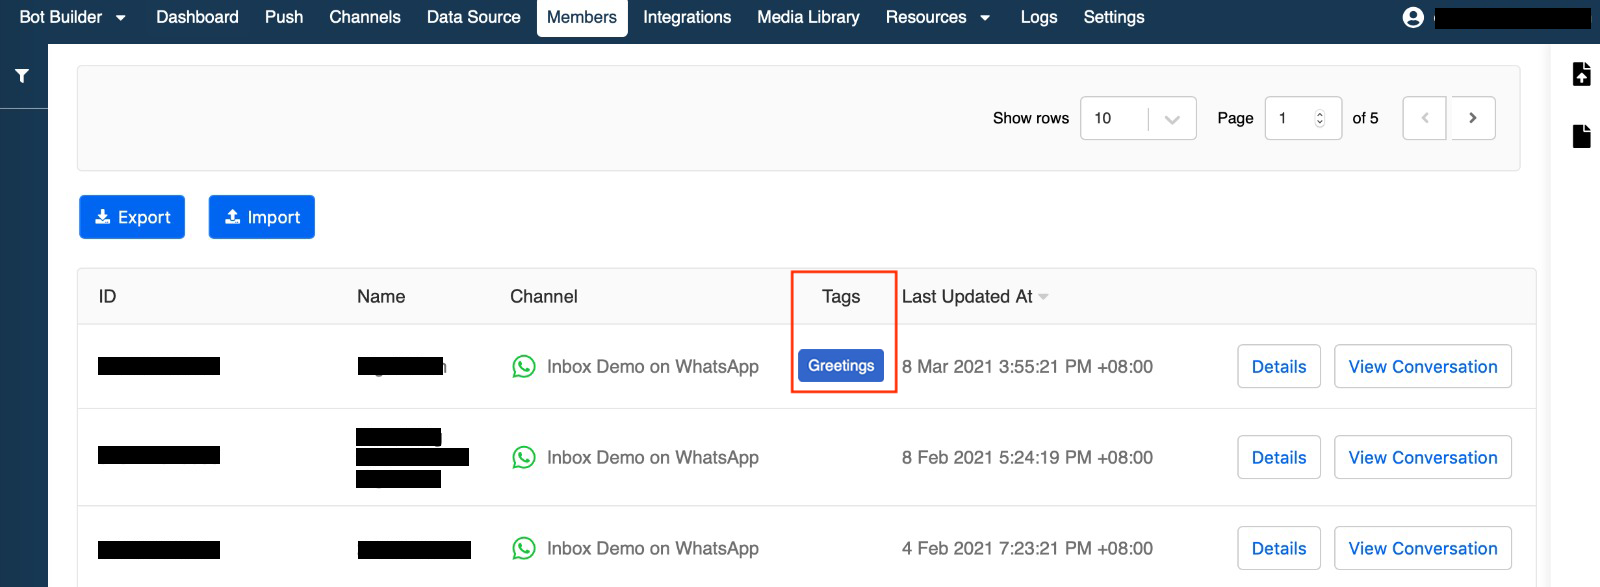
The Member Tag Stored in Stella

Getting Hands-on

Add Member Tag

  1. Hover over a message in the Inbox Channel, select "More actions" on the right, then select "More message shortcuts".

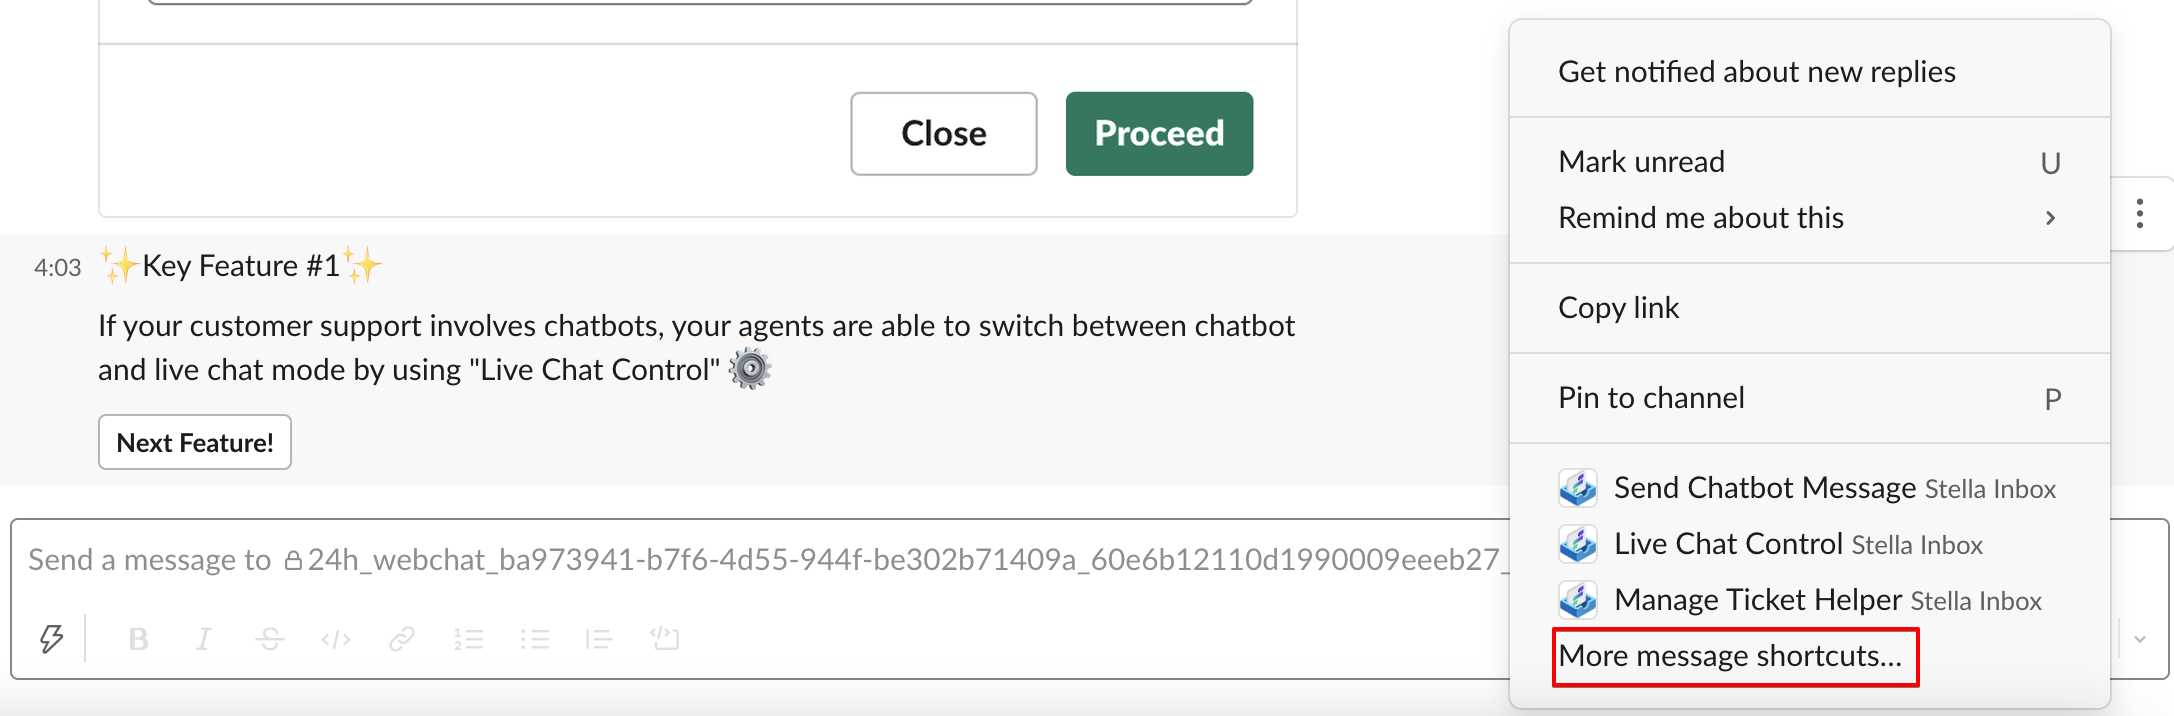
Open Message Shortcuts-1
  1. You can see a list of Message Shortcuts in the menu, then select Add Member Tag.

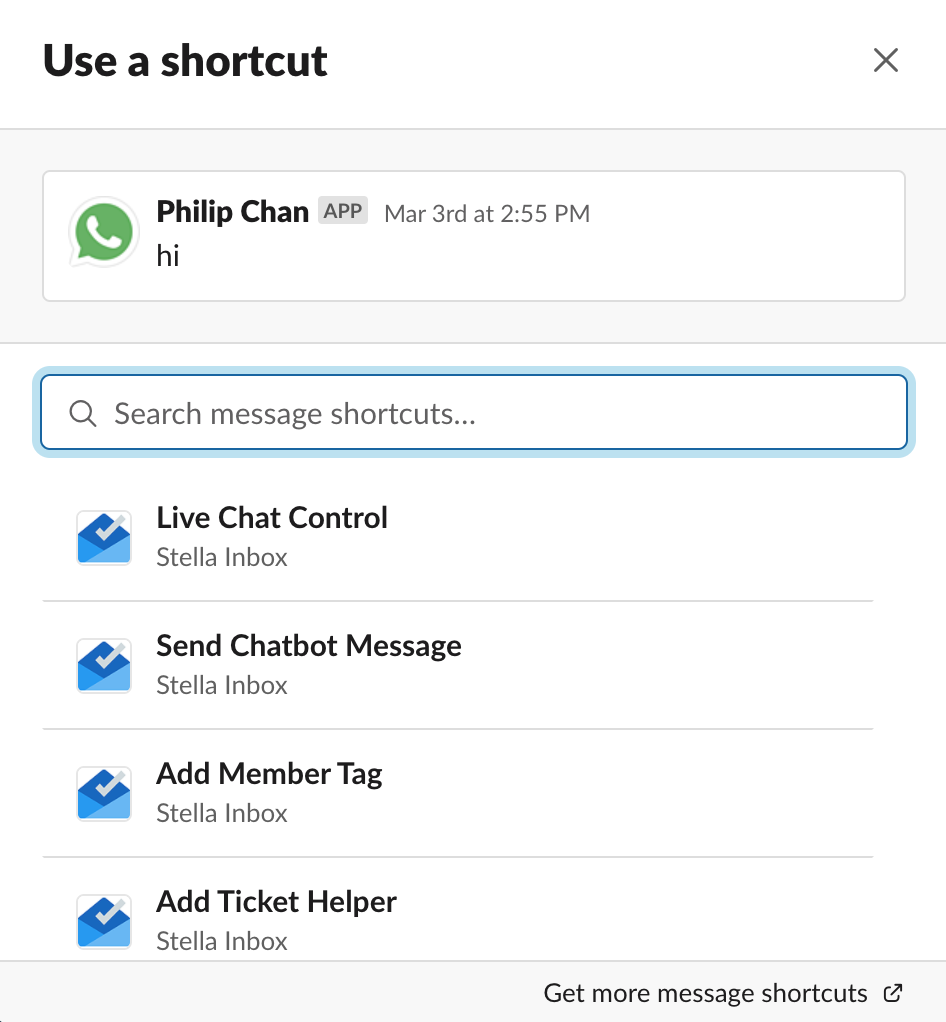
Open Message Shortcuts-2
  1. Input any text to be your Member Tag on the user, then select "Submit".
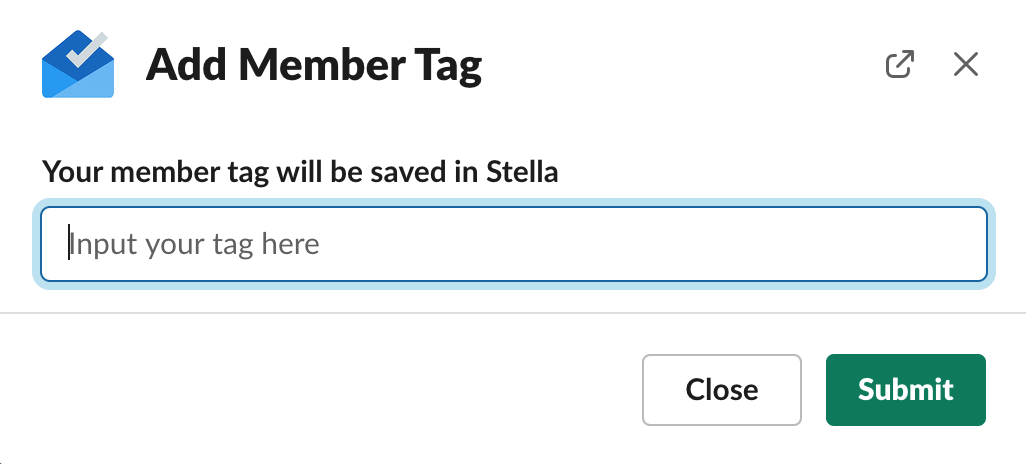
Add Member Tag-1
  1. Stella Inbox would notify you if the tag has been successfully added.

Add Member Tag-2
  1. Log in Stella, select Members from the top bar. The information of your users can be shown in this panel, including their member tags (if any).
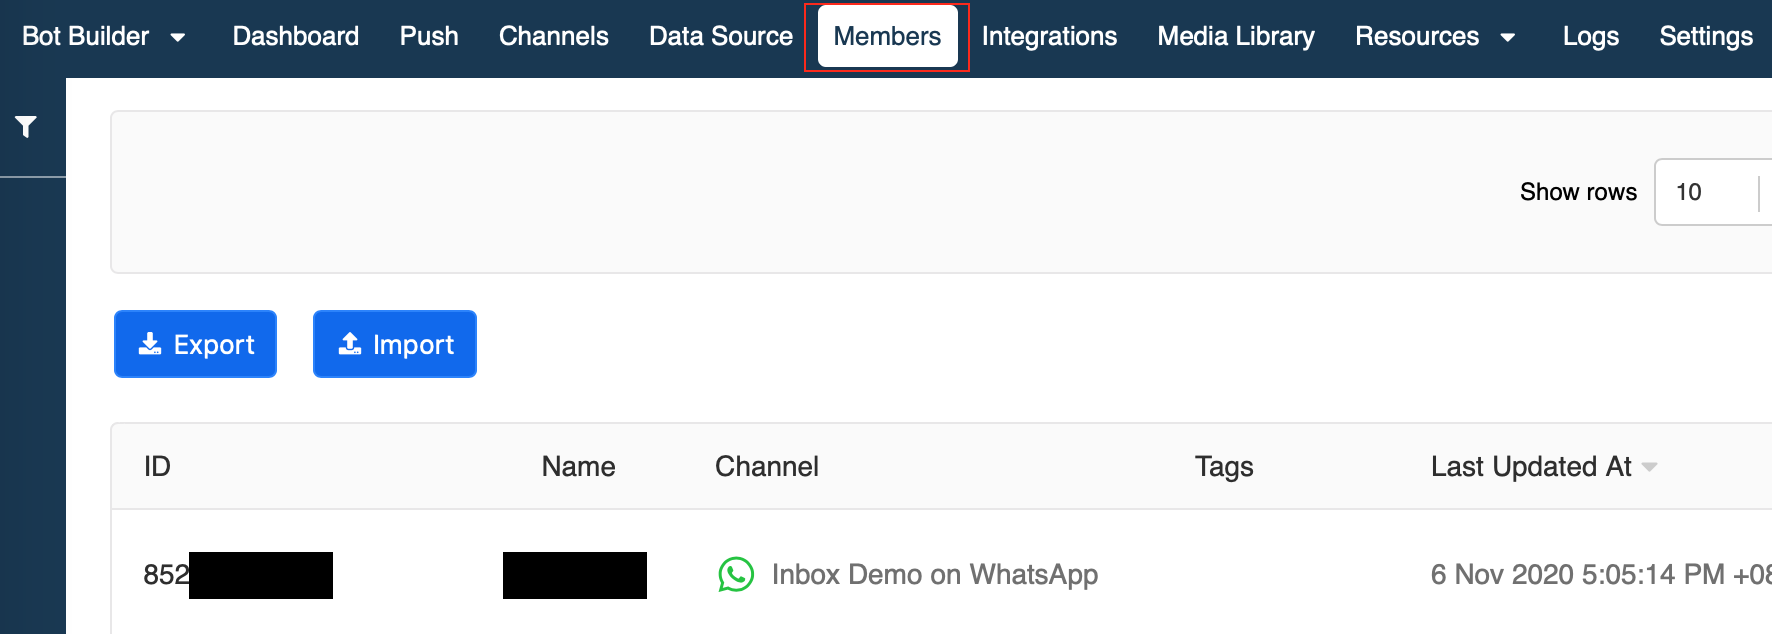
Members in Stella
  1. Check and see if you can produce the expected outcome.
← 2.4: Manage Ticket Helper3.1: Send Chatbot Message →
  • What is your Result?
  • Getting Hands-on
    • Add Member Tag
Stella Platform Documentation
Docs
Get StartedBot API ReferenceAPI ReferenceStandard Procedures
Community
FAQUser ShowcaseChat with Us
Copyright © 2023 Sanuker Inc. Limited