Create Comment Reply
Comment Reply is a feature that allows your bot to react to users' comments on a Facebook post.
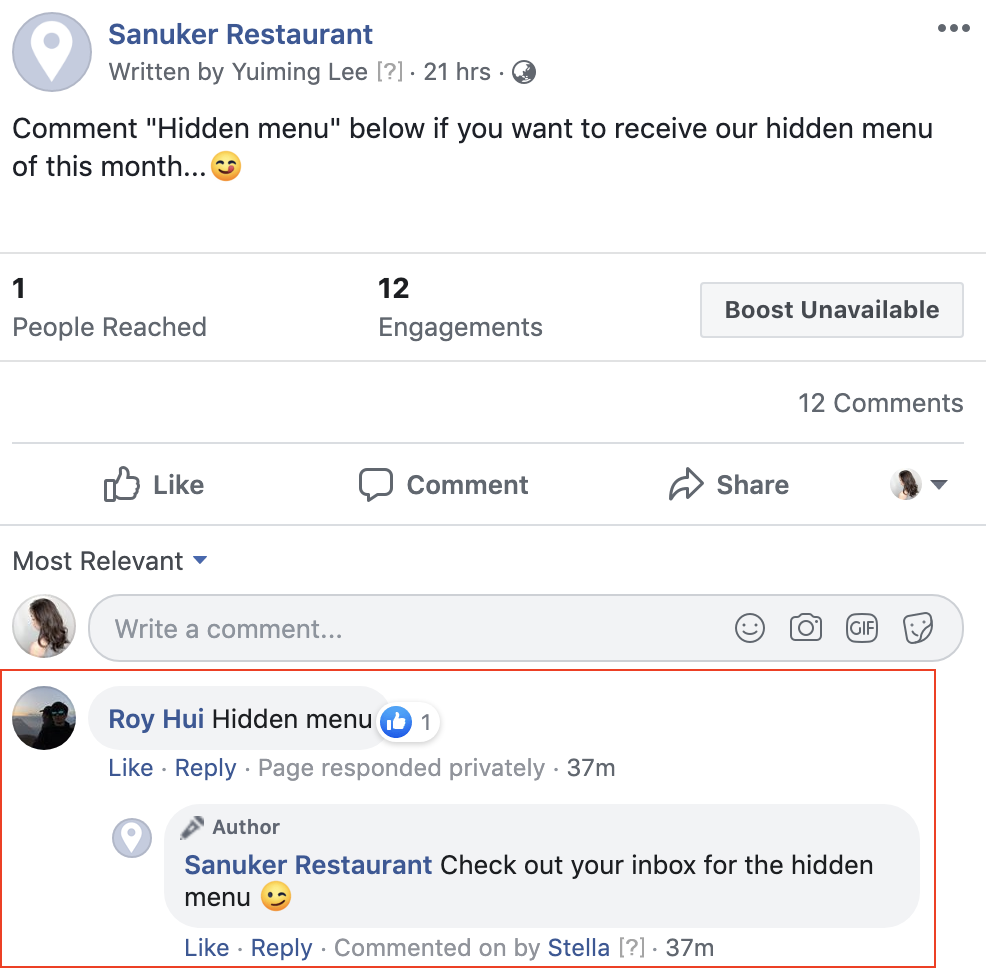
In short, Public Reply refers to the message which the bot will reply in your post's comment section. Apart from that, the bot can also inbox users privately on behalf of your Facebook page.
For this section, you will learn how to connect the chatbot to your Facebook posts on Stella.
What is your Result?
| Property | Description |
|---|---|
Successful Result | You will be able to connect the chatbot to your Facebook post, and successfully receive a public reply and an inbox reply. |
You may also right click Save As to download a sample result tree here to cross check with your chatbot!
Getting Hands-on
Click here to start working in the Bot Builder.
Create a Comment Reply Node
Create a new tree and name it as Comment Reply Tree. Check out the previous level if you forgot how to create a tree.
Then, create the first node of this tree. Fill in the node details. Check out the previous level if you forgot how to create a node.

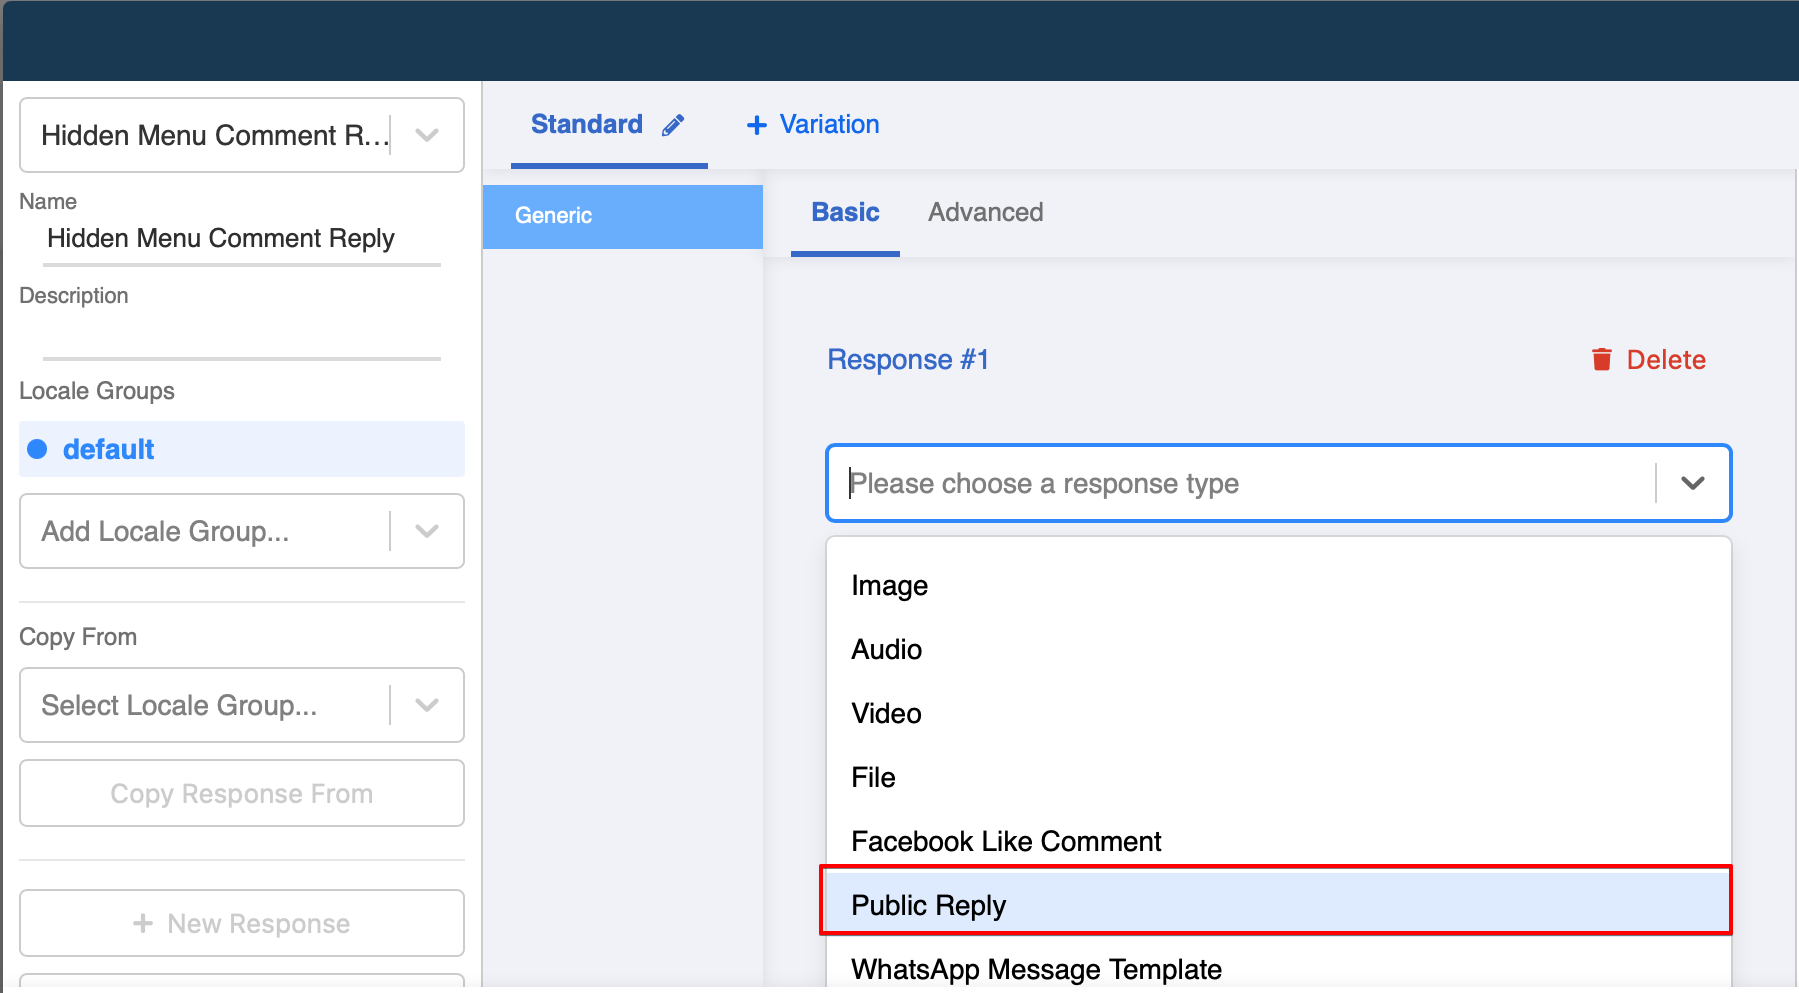
- Create a response under the type Public Reply.

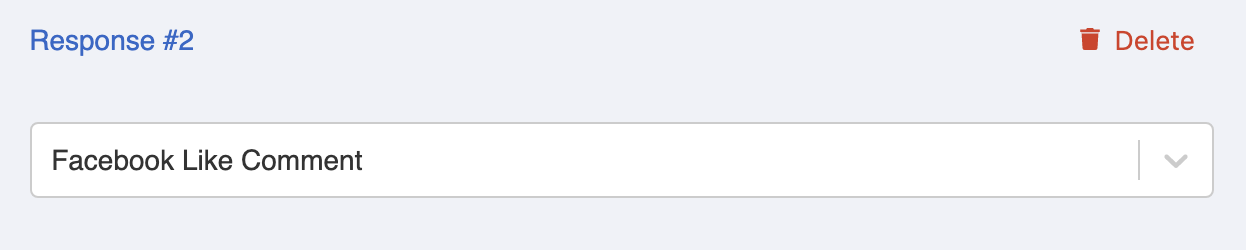
- Add another message response, this time create it under the type Facebook Like Comment. It means the bot will like the user comment as the page.
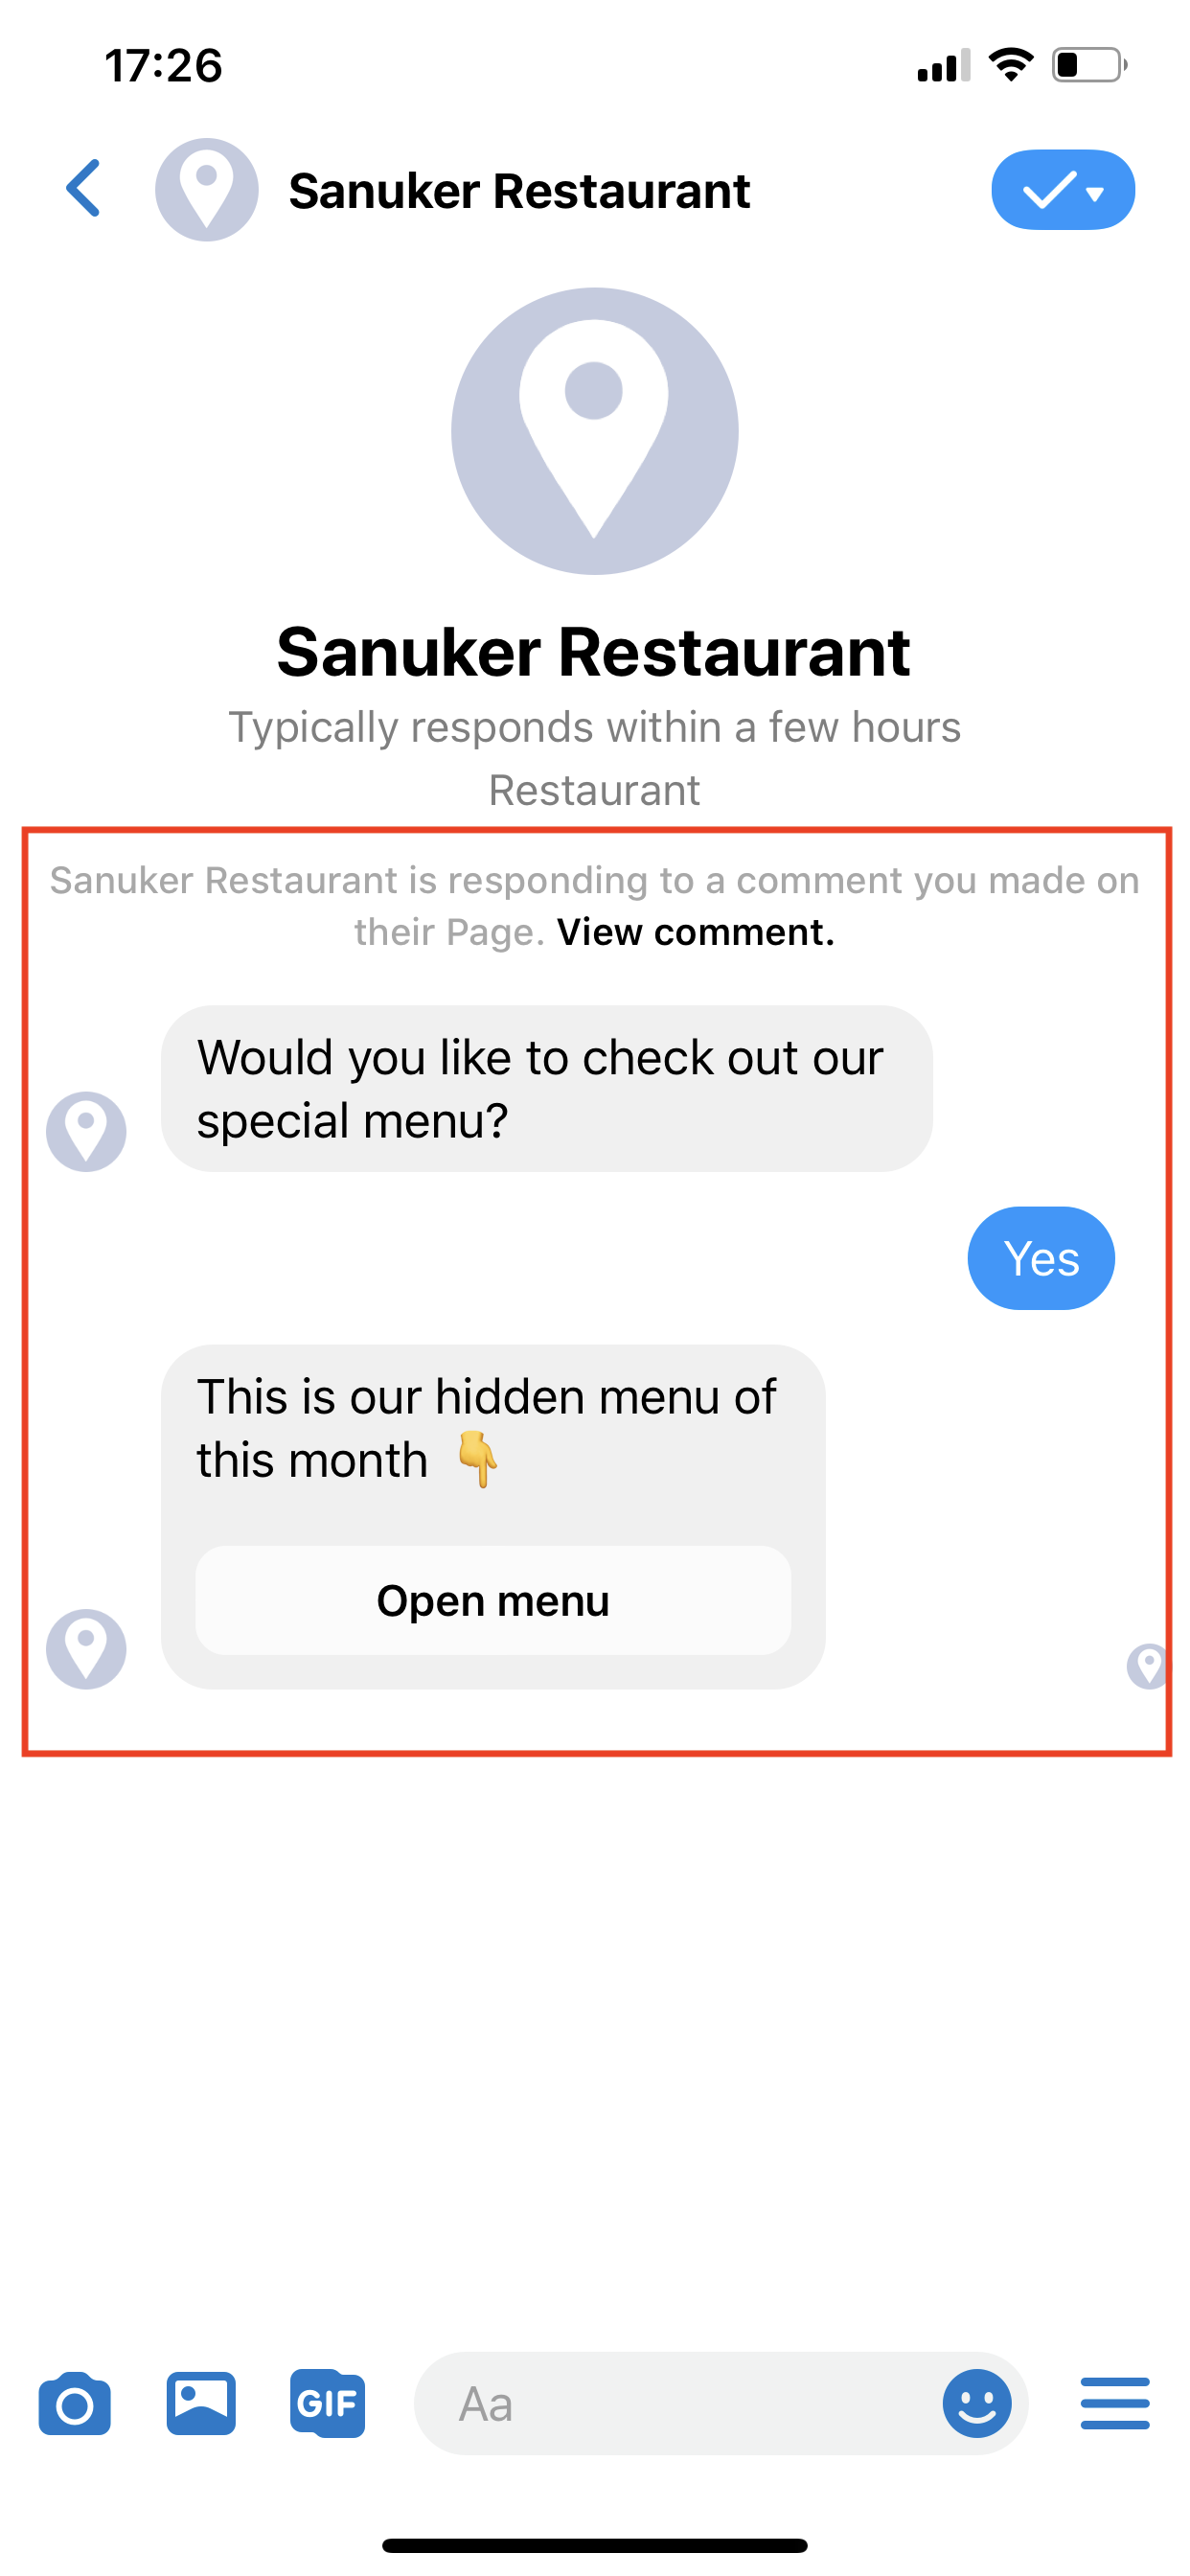
- Then add another message response and under the message type Quick Reply to invite users to click and receive your special menu. This will be sent to user's inbox.
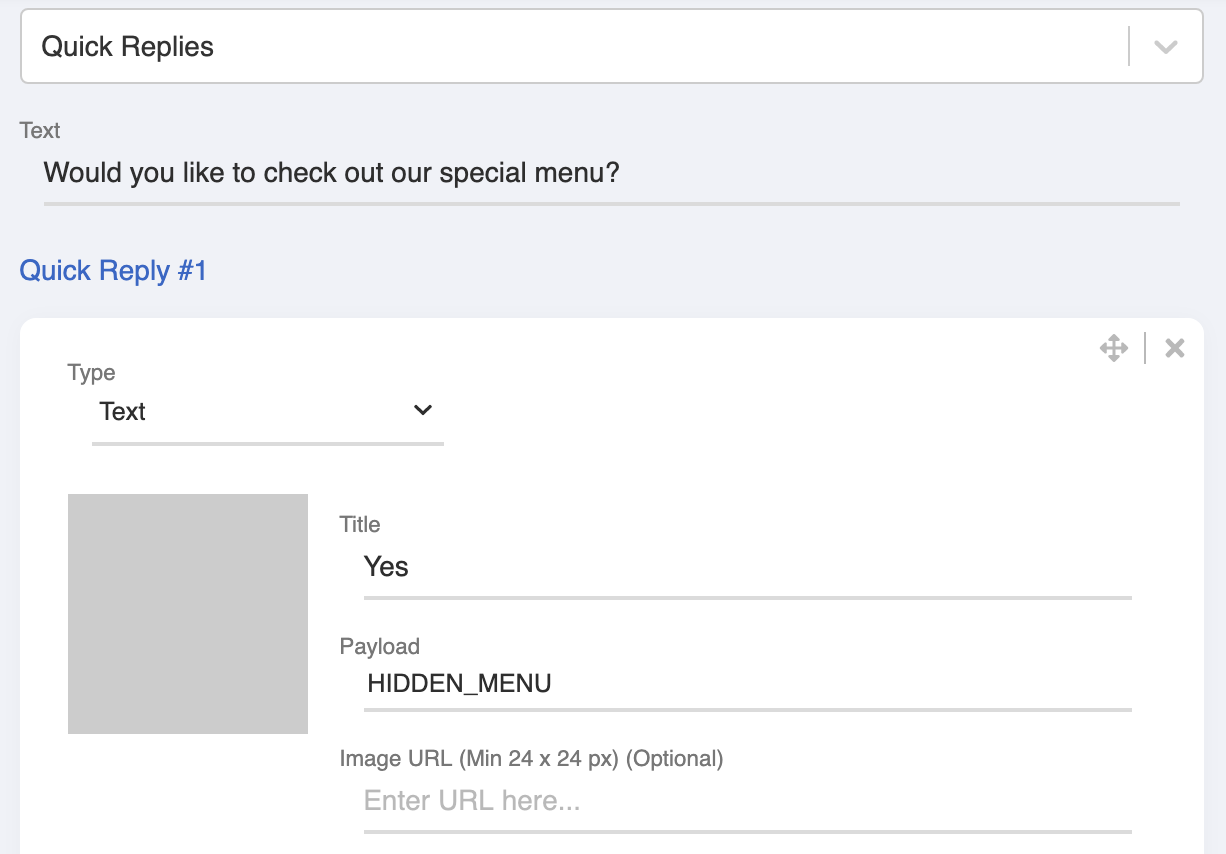
Save your response after you have created both the public reply and the inbox reply.
Save your first node.
Create a Global Node that will redirect back to this first node. Check out the previous level if you forgot how to create a global node.
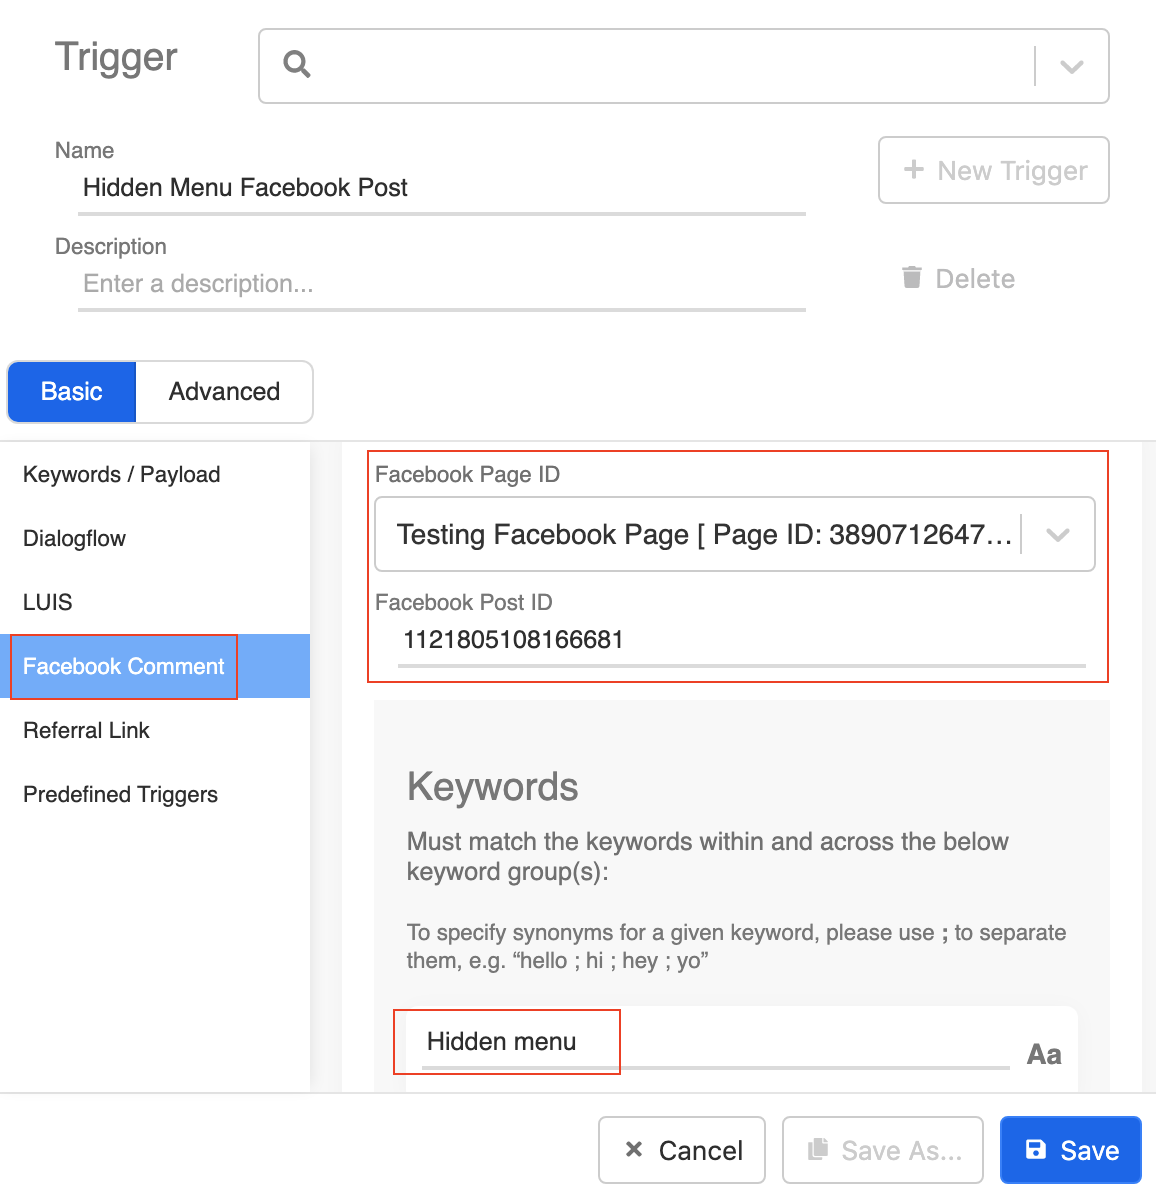
In this Global Node, Create a trigger under the type Facebook Comment.
Select your channel and input the Post ID.
Fill in the comment keywords "Hidden menu" as you specify on the post.
- Toggle on "Redirect" back to the first node and save this global node.
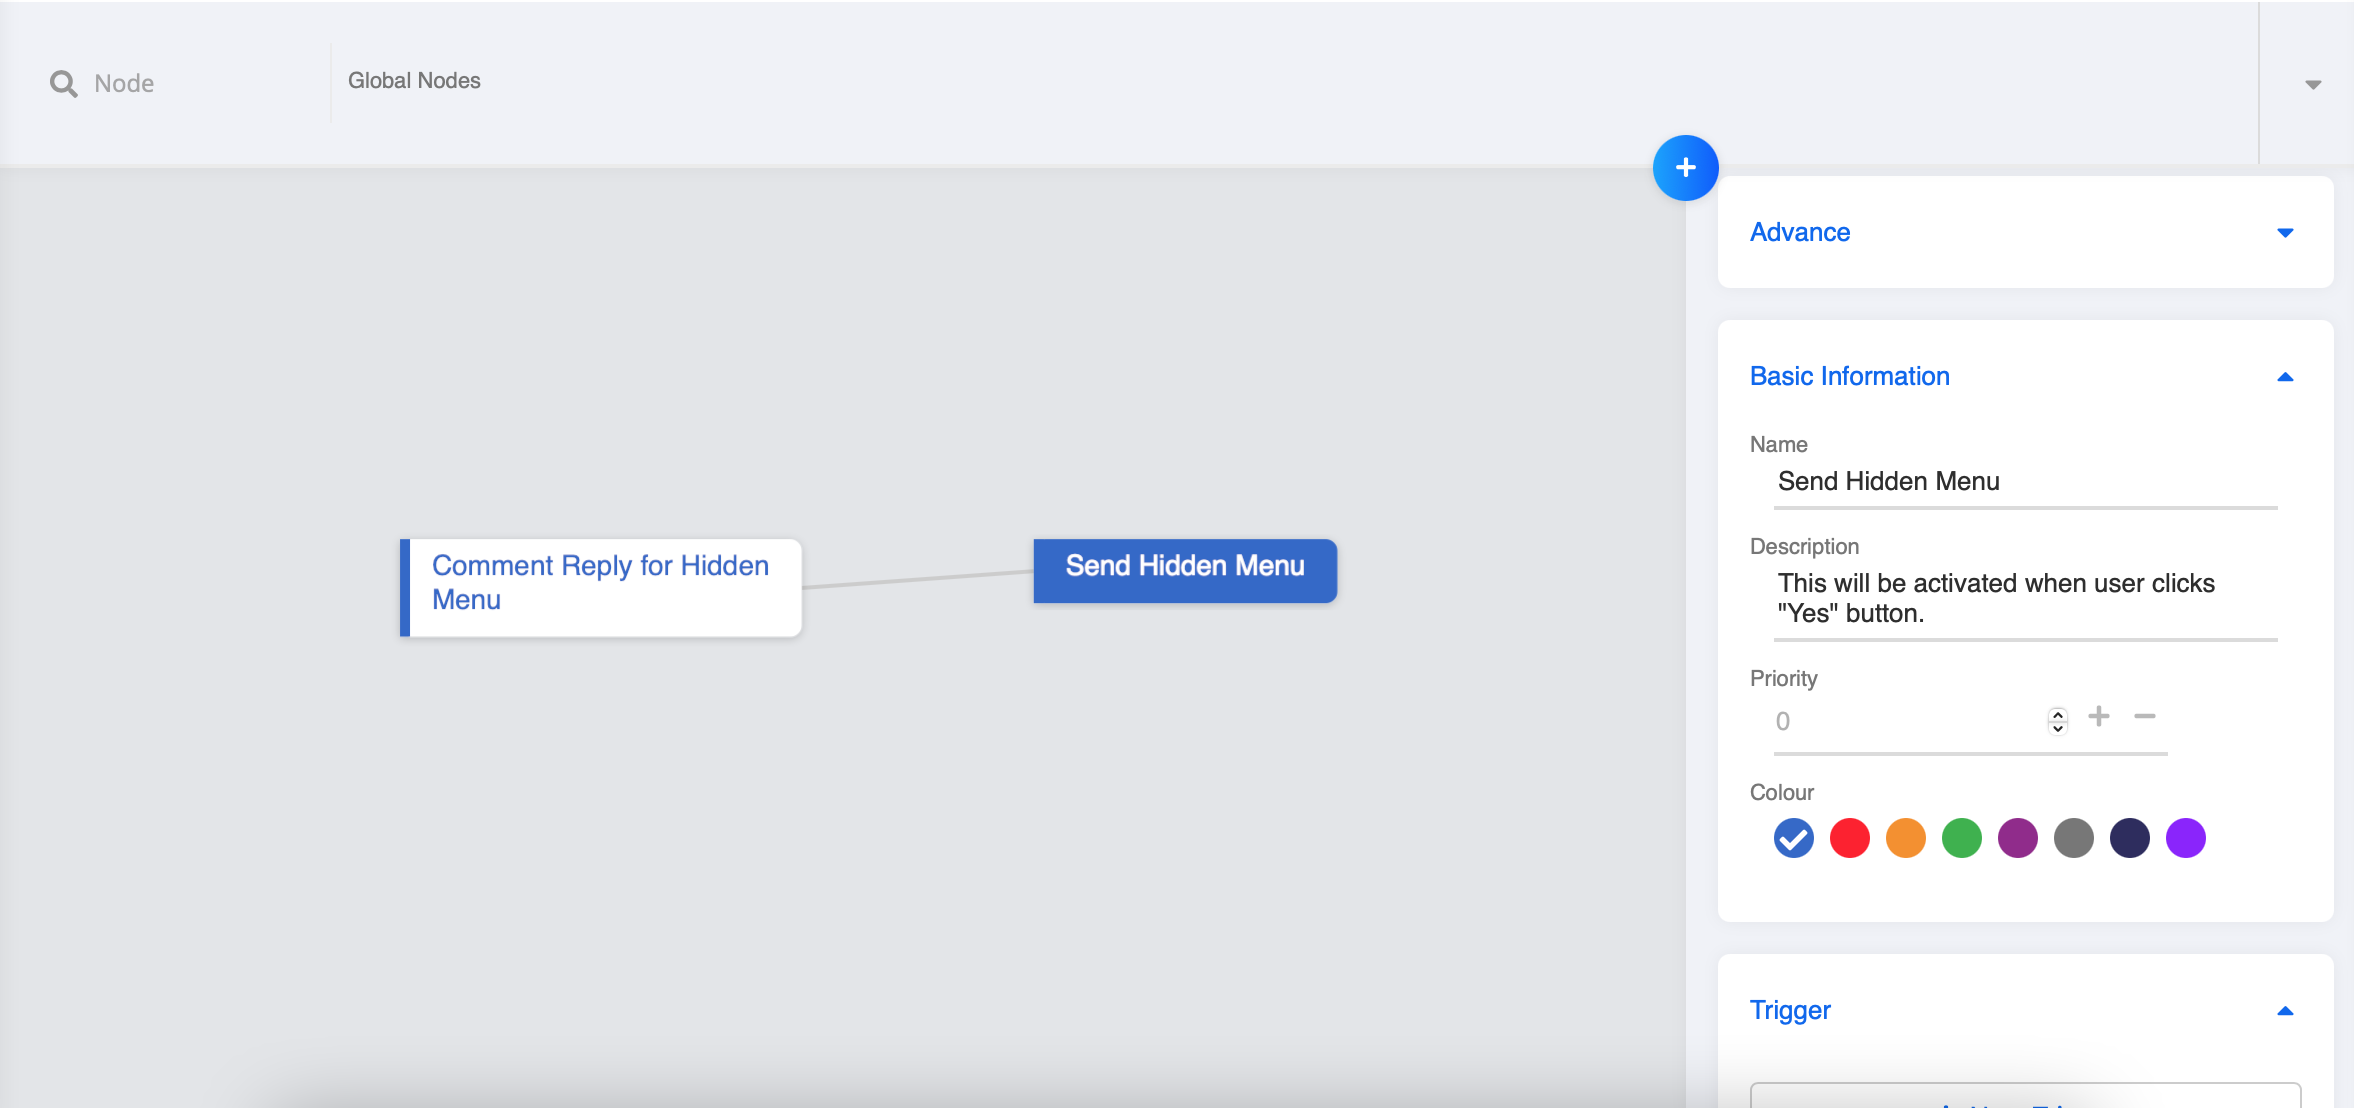
Create a Child Node to Send Hidden Menu
- Then, repeat the same steps to create the child node to send out the hidden menu.
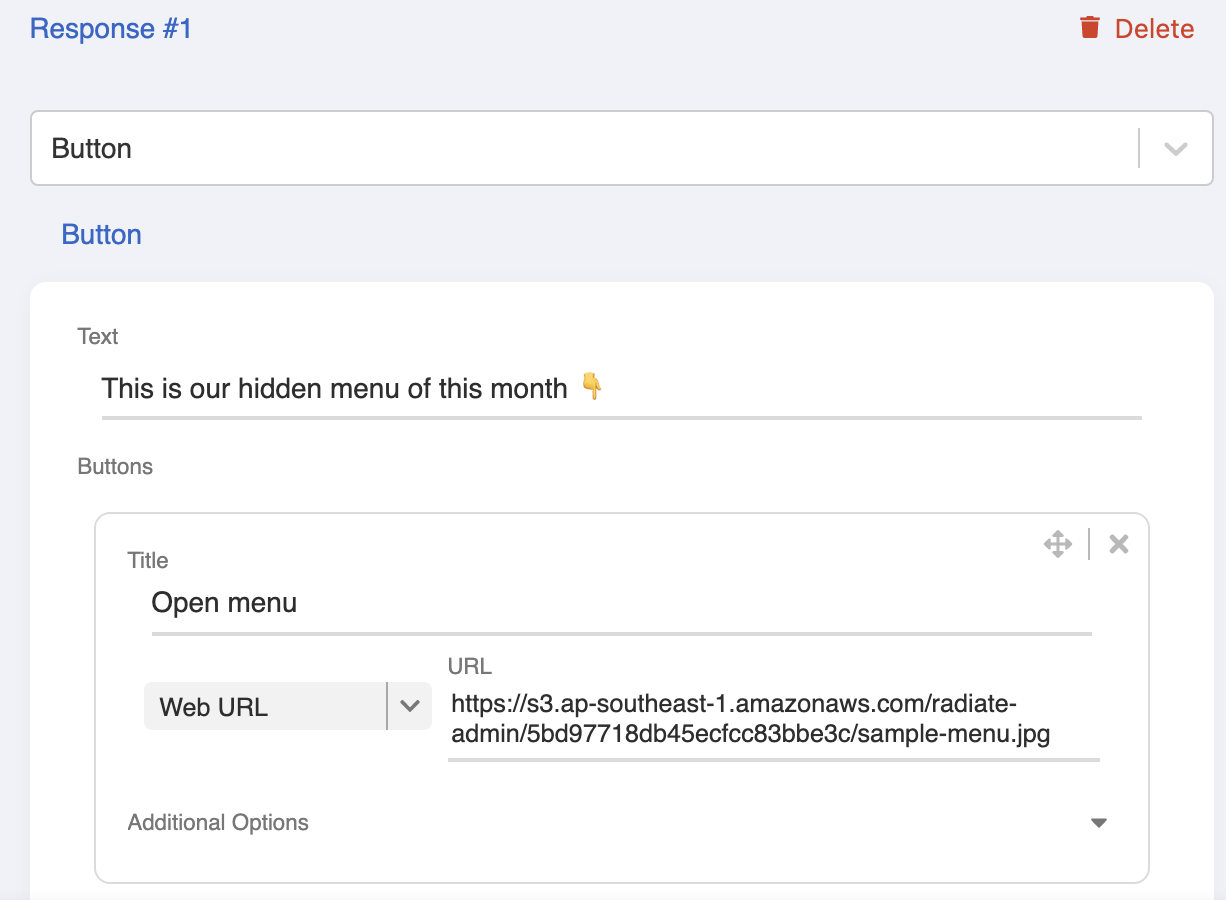
- Create the button response for the hidden menu.
Save your child node.
Create a Global Node that will redirect back to this child node.
In this Global Node, Create the payload trigger "HIDDEN_MENU".

- Toggle on "Redirect" back to the hidden menu child node and save this global node.
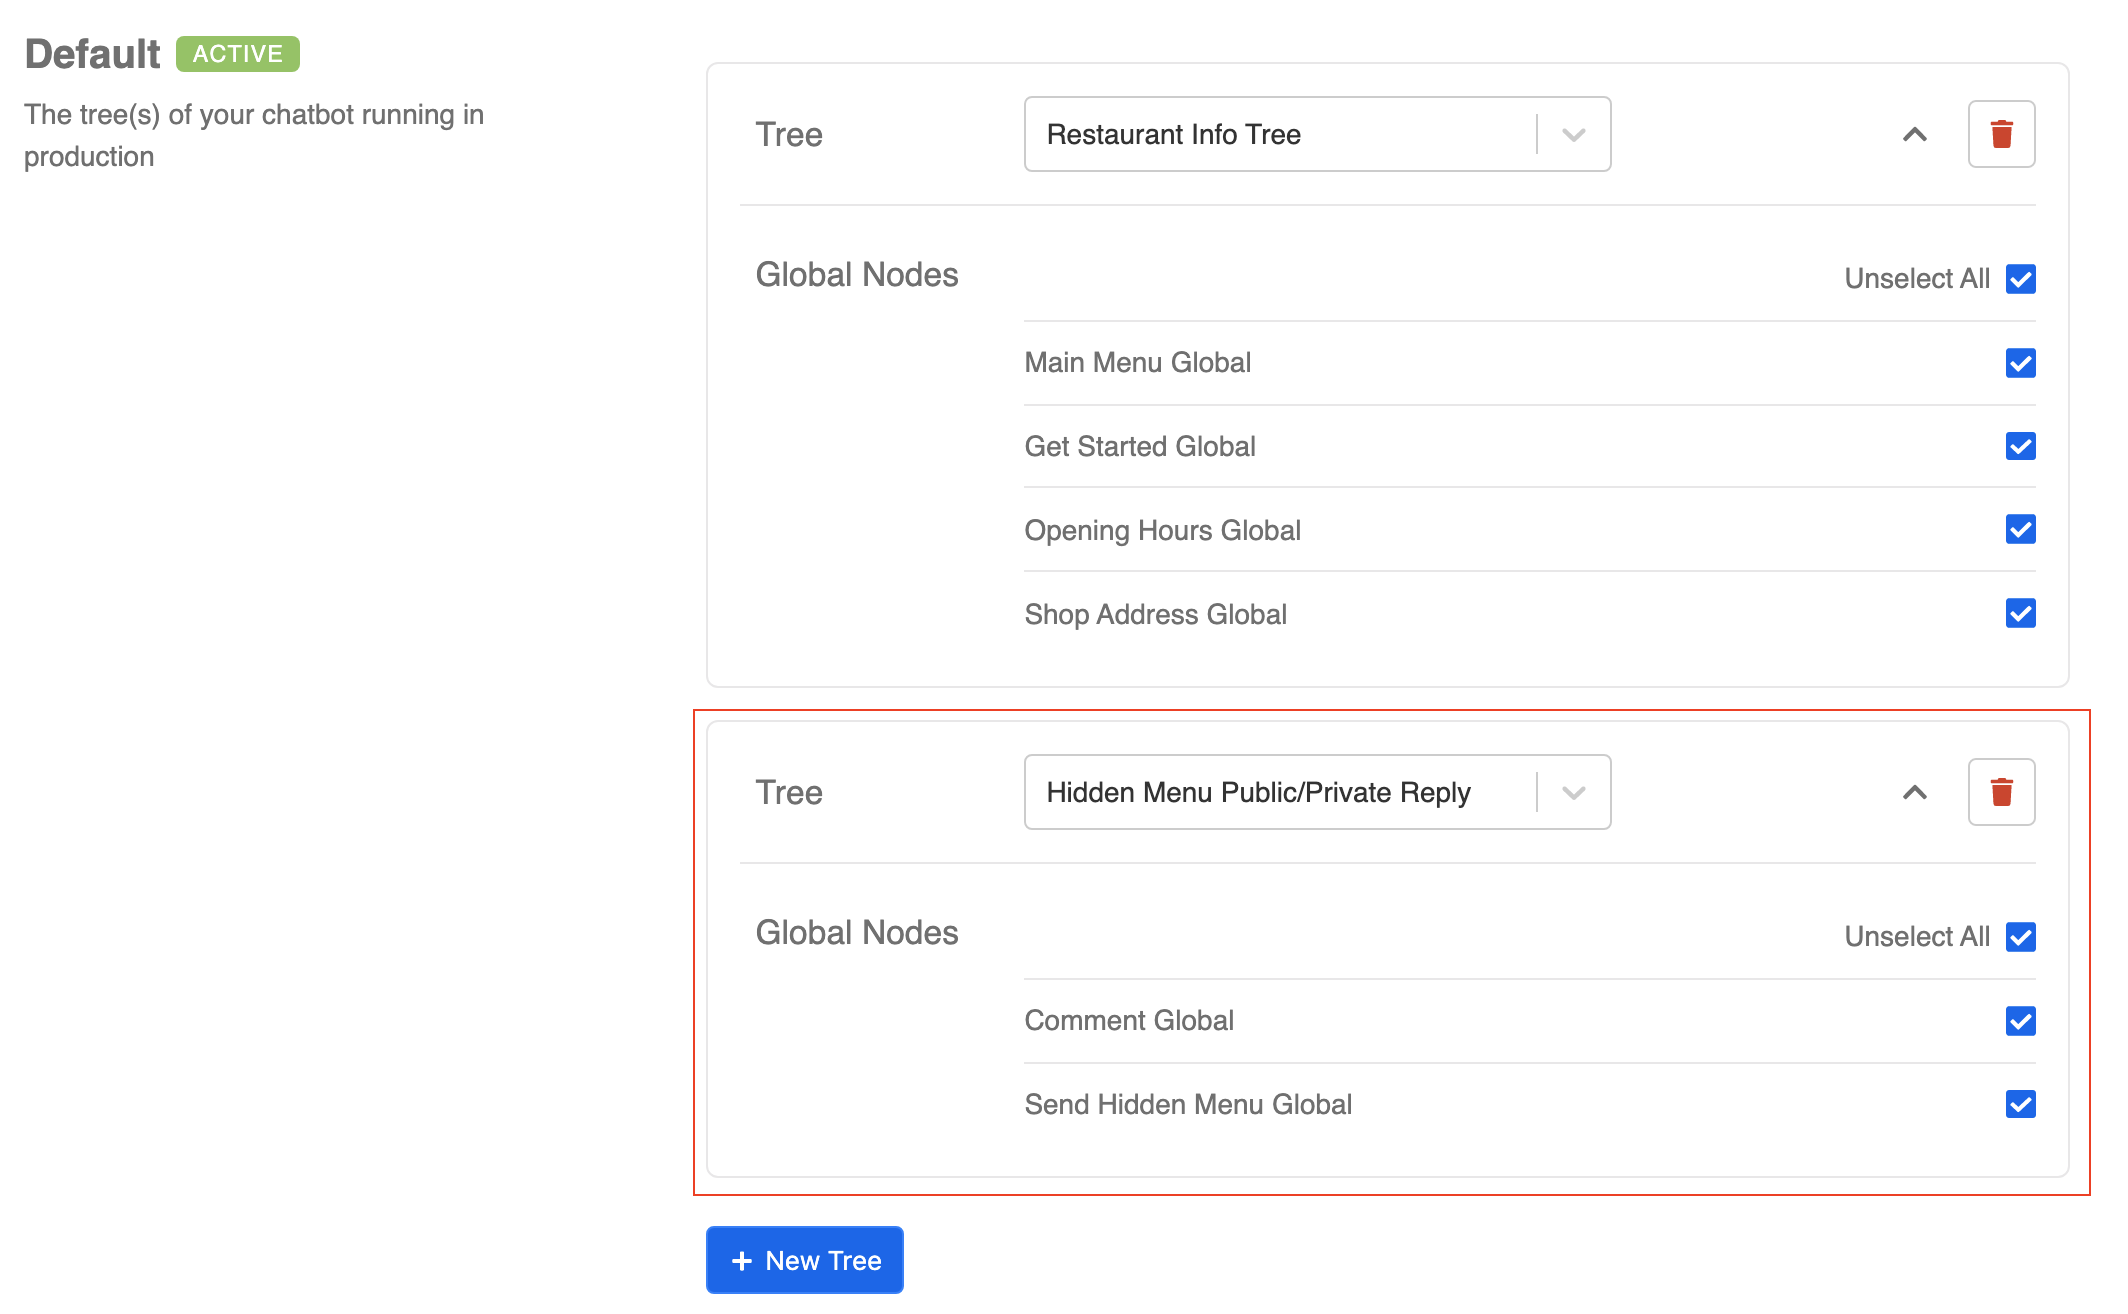
Add Tree into Channel
- Go to your corresponding channel and add back the tree you have just created for this public/private bot. Remember to select the global node and click "Save".
- You should now have connected the mini-chatbot to your Facebook post. Go to comment on the draft post and check if you can get a successful result 🎉