Create Product Message
Please note that WhatsApp Product Message is only available in Core Version v2.6 or above.
WhatsApp Product Message allos businesses to showcase their products and services in WhatsApp.
Product Messages include two types:
- Multi-Product Message: Message containing a selection of up to 30 products from the inventory.
- Single Product Message: Message containing one product from the inventory. The product is displayed as a Product Detail Page.
By uploading the inventory to the business's Facebook Commerce Manager and connecting it to WABA, customers can start a conversation with the business, then browse the items and add them to a shopping cart without even leaving the chat.
What is your result?
 Single Product Message
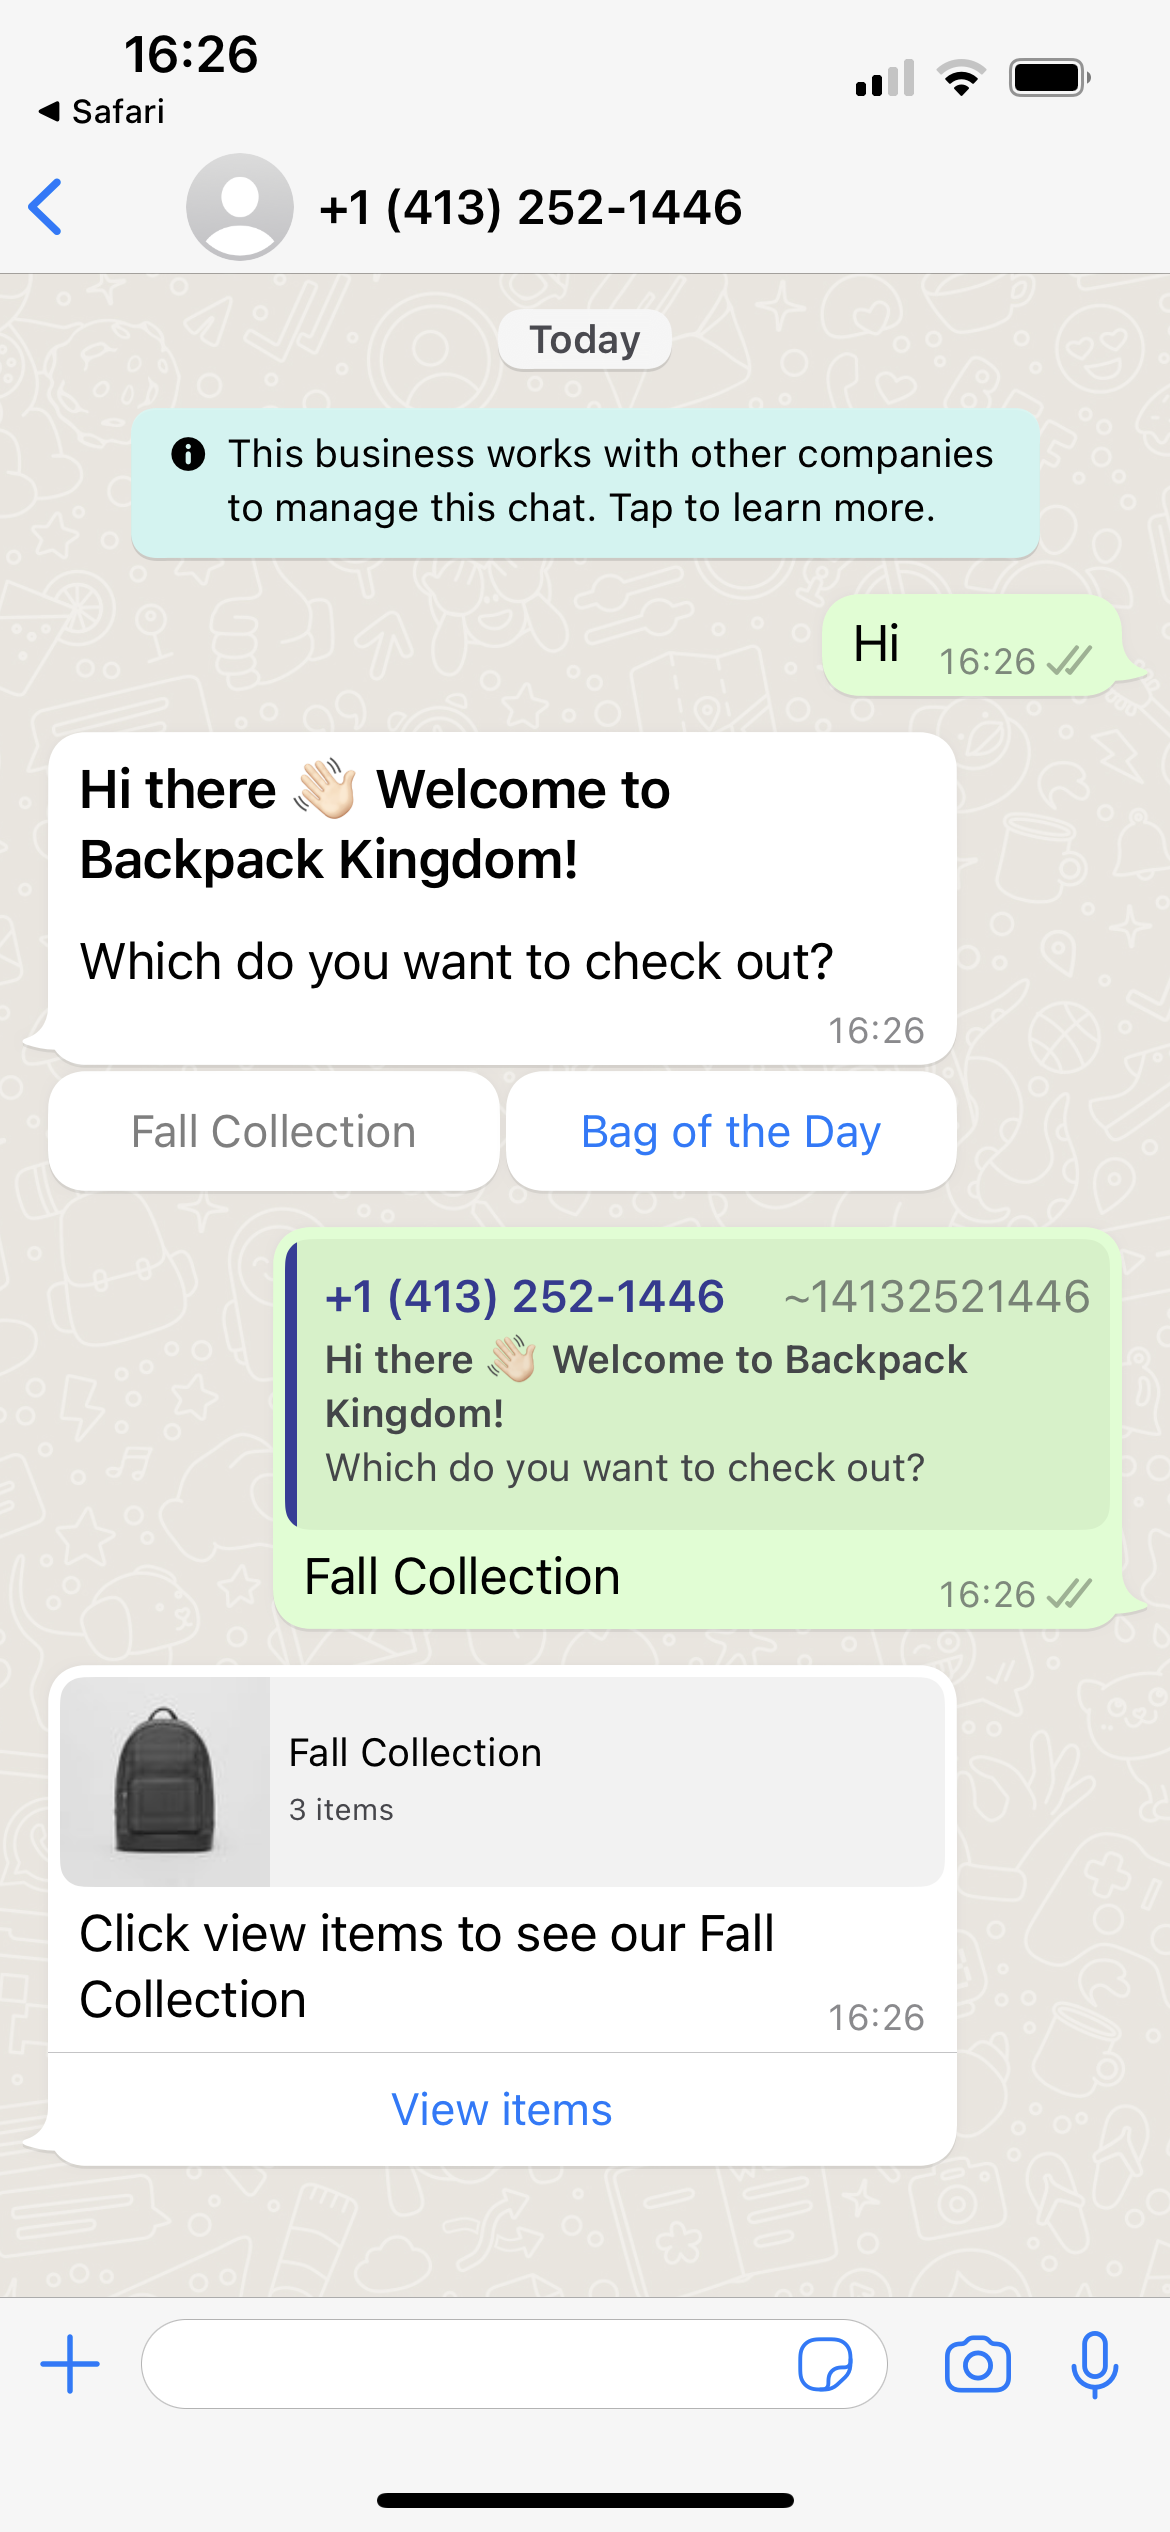
 Multi-Product Message
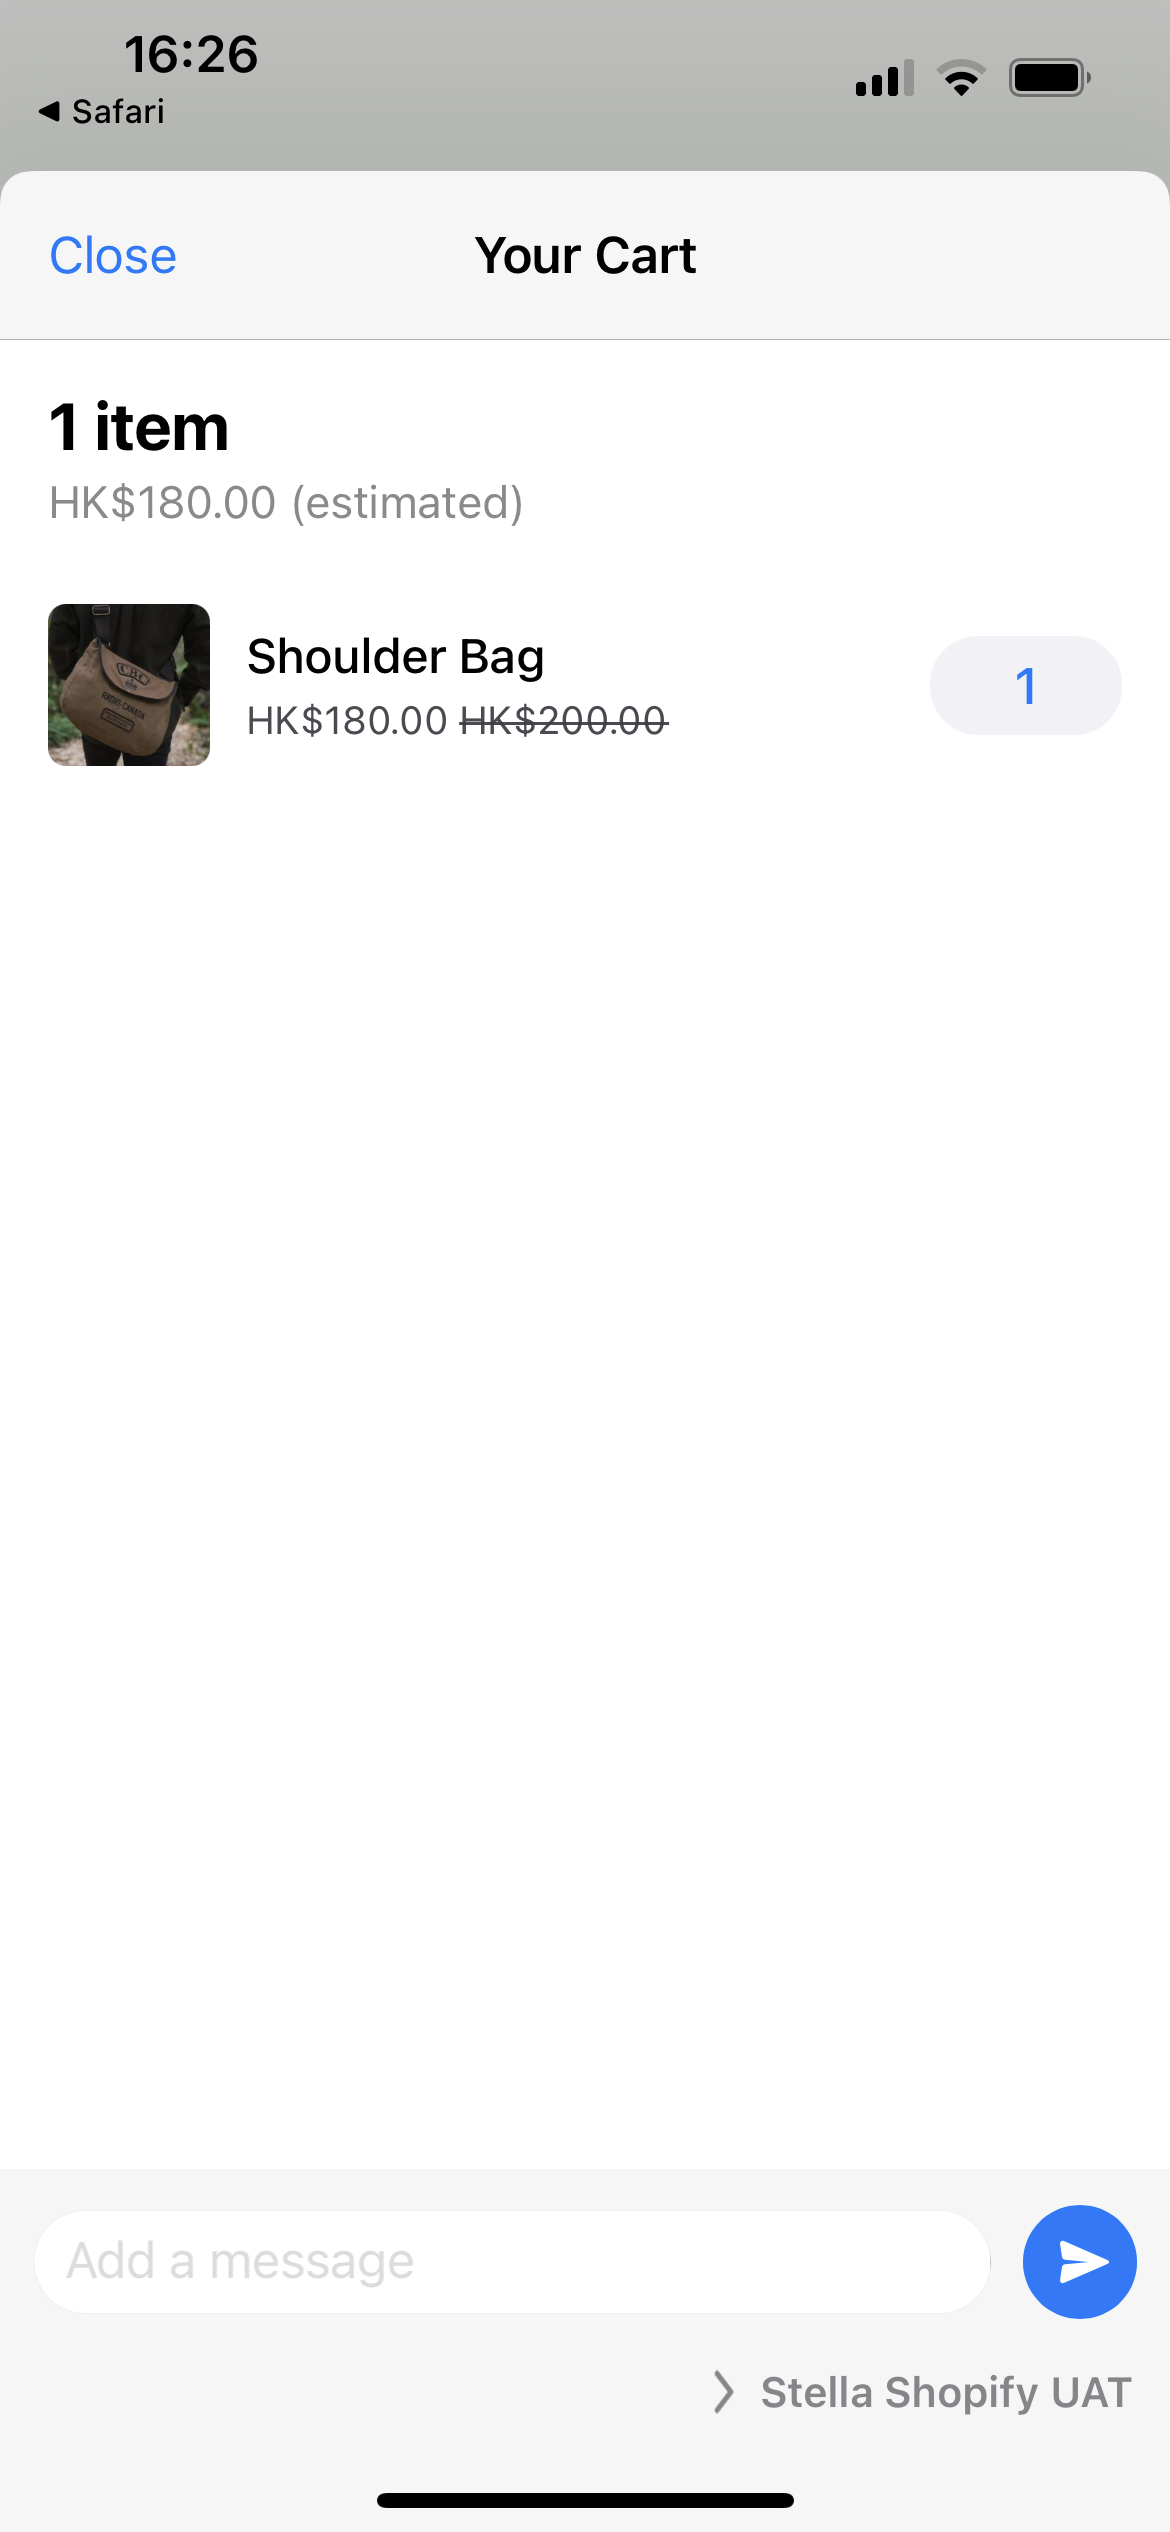 Add Item to Cart
 Cart is Sent
Upload Inventory to Commerce Manager
Before setting up the chatbot, the first step is to prepare a catalog in your Facebook Commerce Manager.
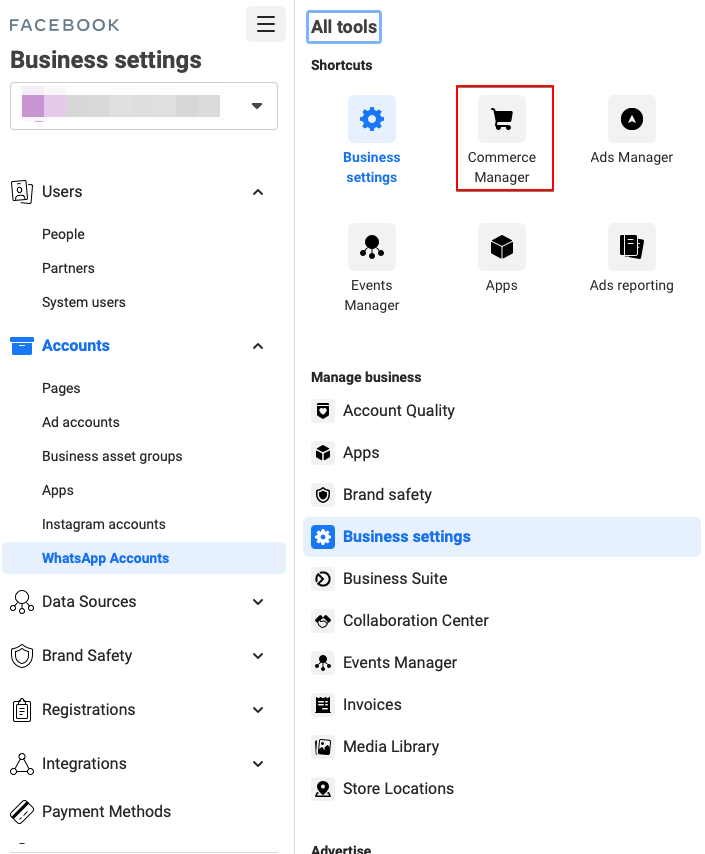
- In your Facebook Business Manager account, head to Commerce Manager under All Tools.
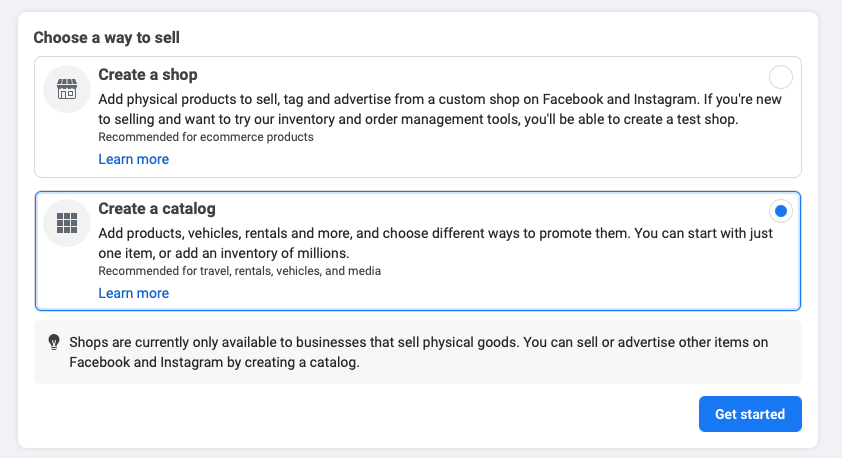
- Select Create a Catalog and then Get Started.
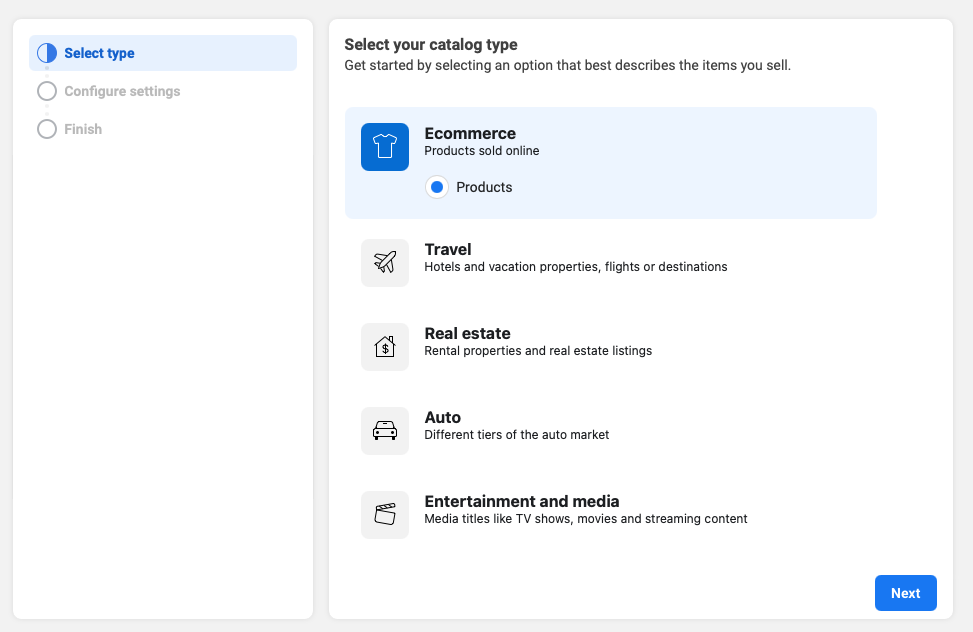
- Select a catalog type for your business.
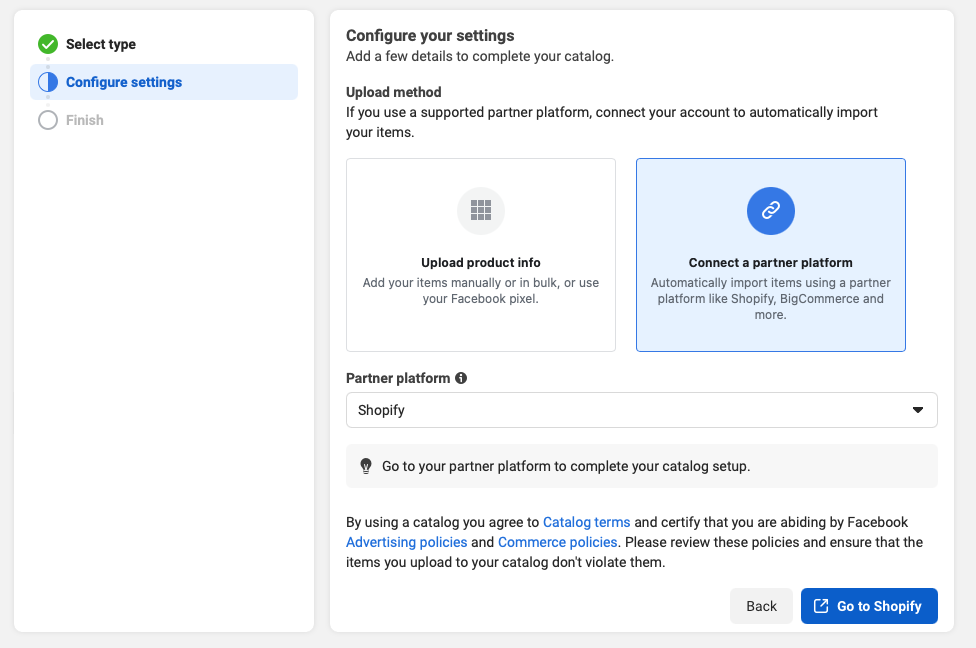
- You can choose uploading the product info manually. After that, choose the catalog owner and name the catalog.

Besides, you can also connect to a partner platform in order to sync the products to your catalog.
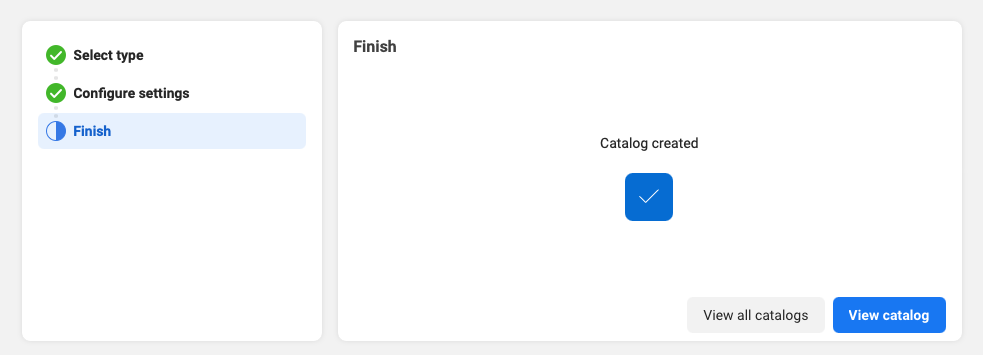
- You can view the catalog when it is created.
- In the catalog, head to Items, and select Add Items to start uploading the products. You can choose from different method.
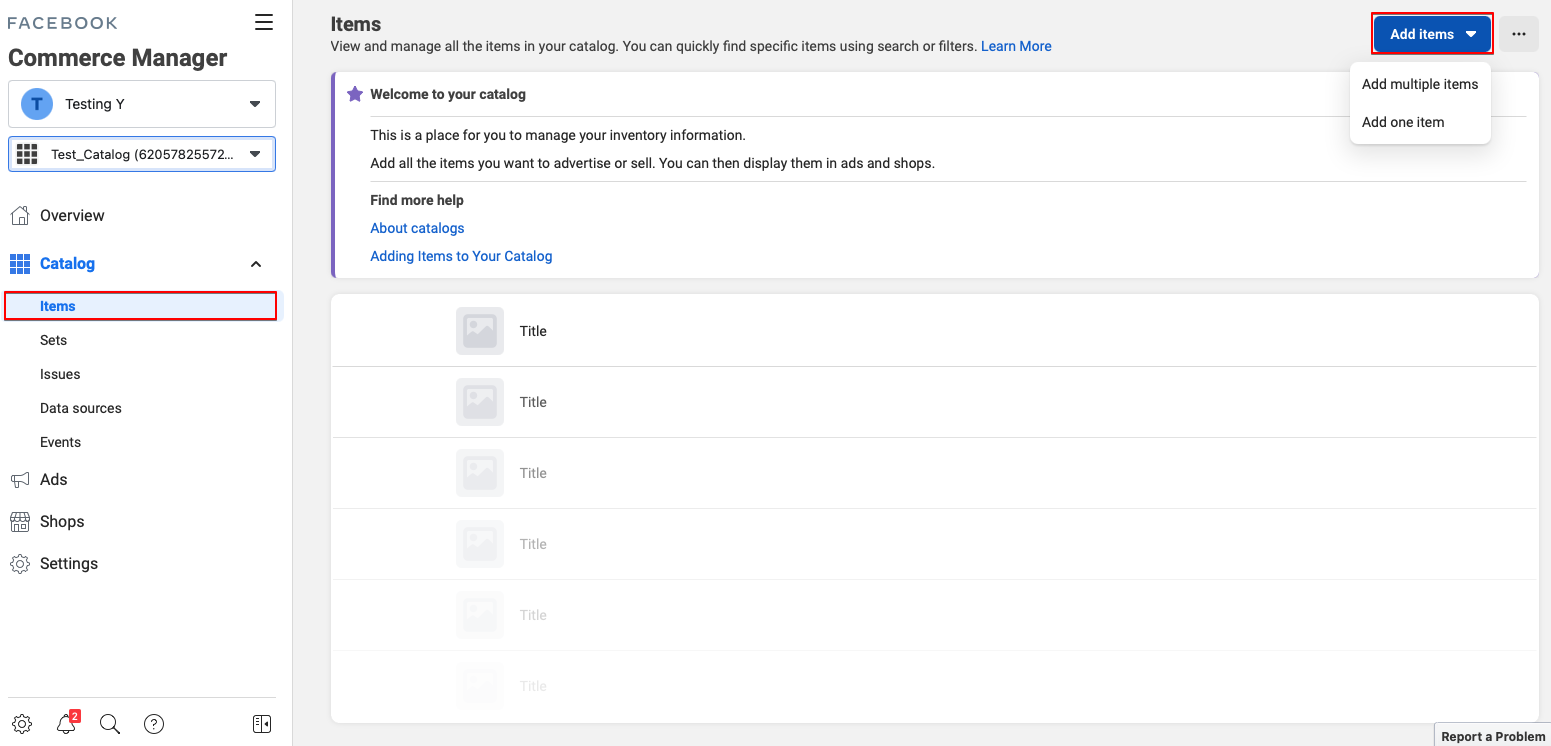
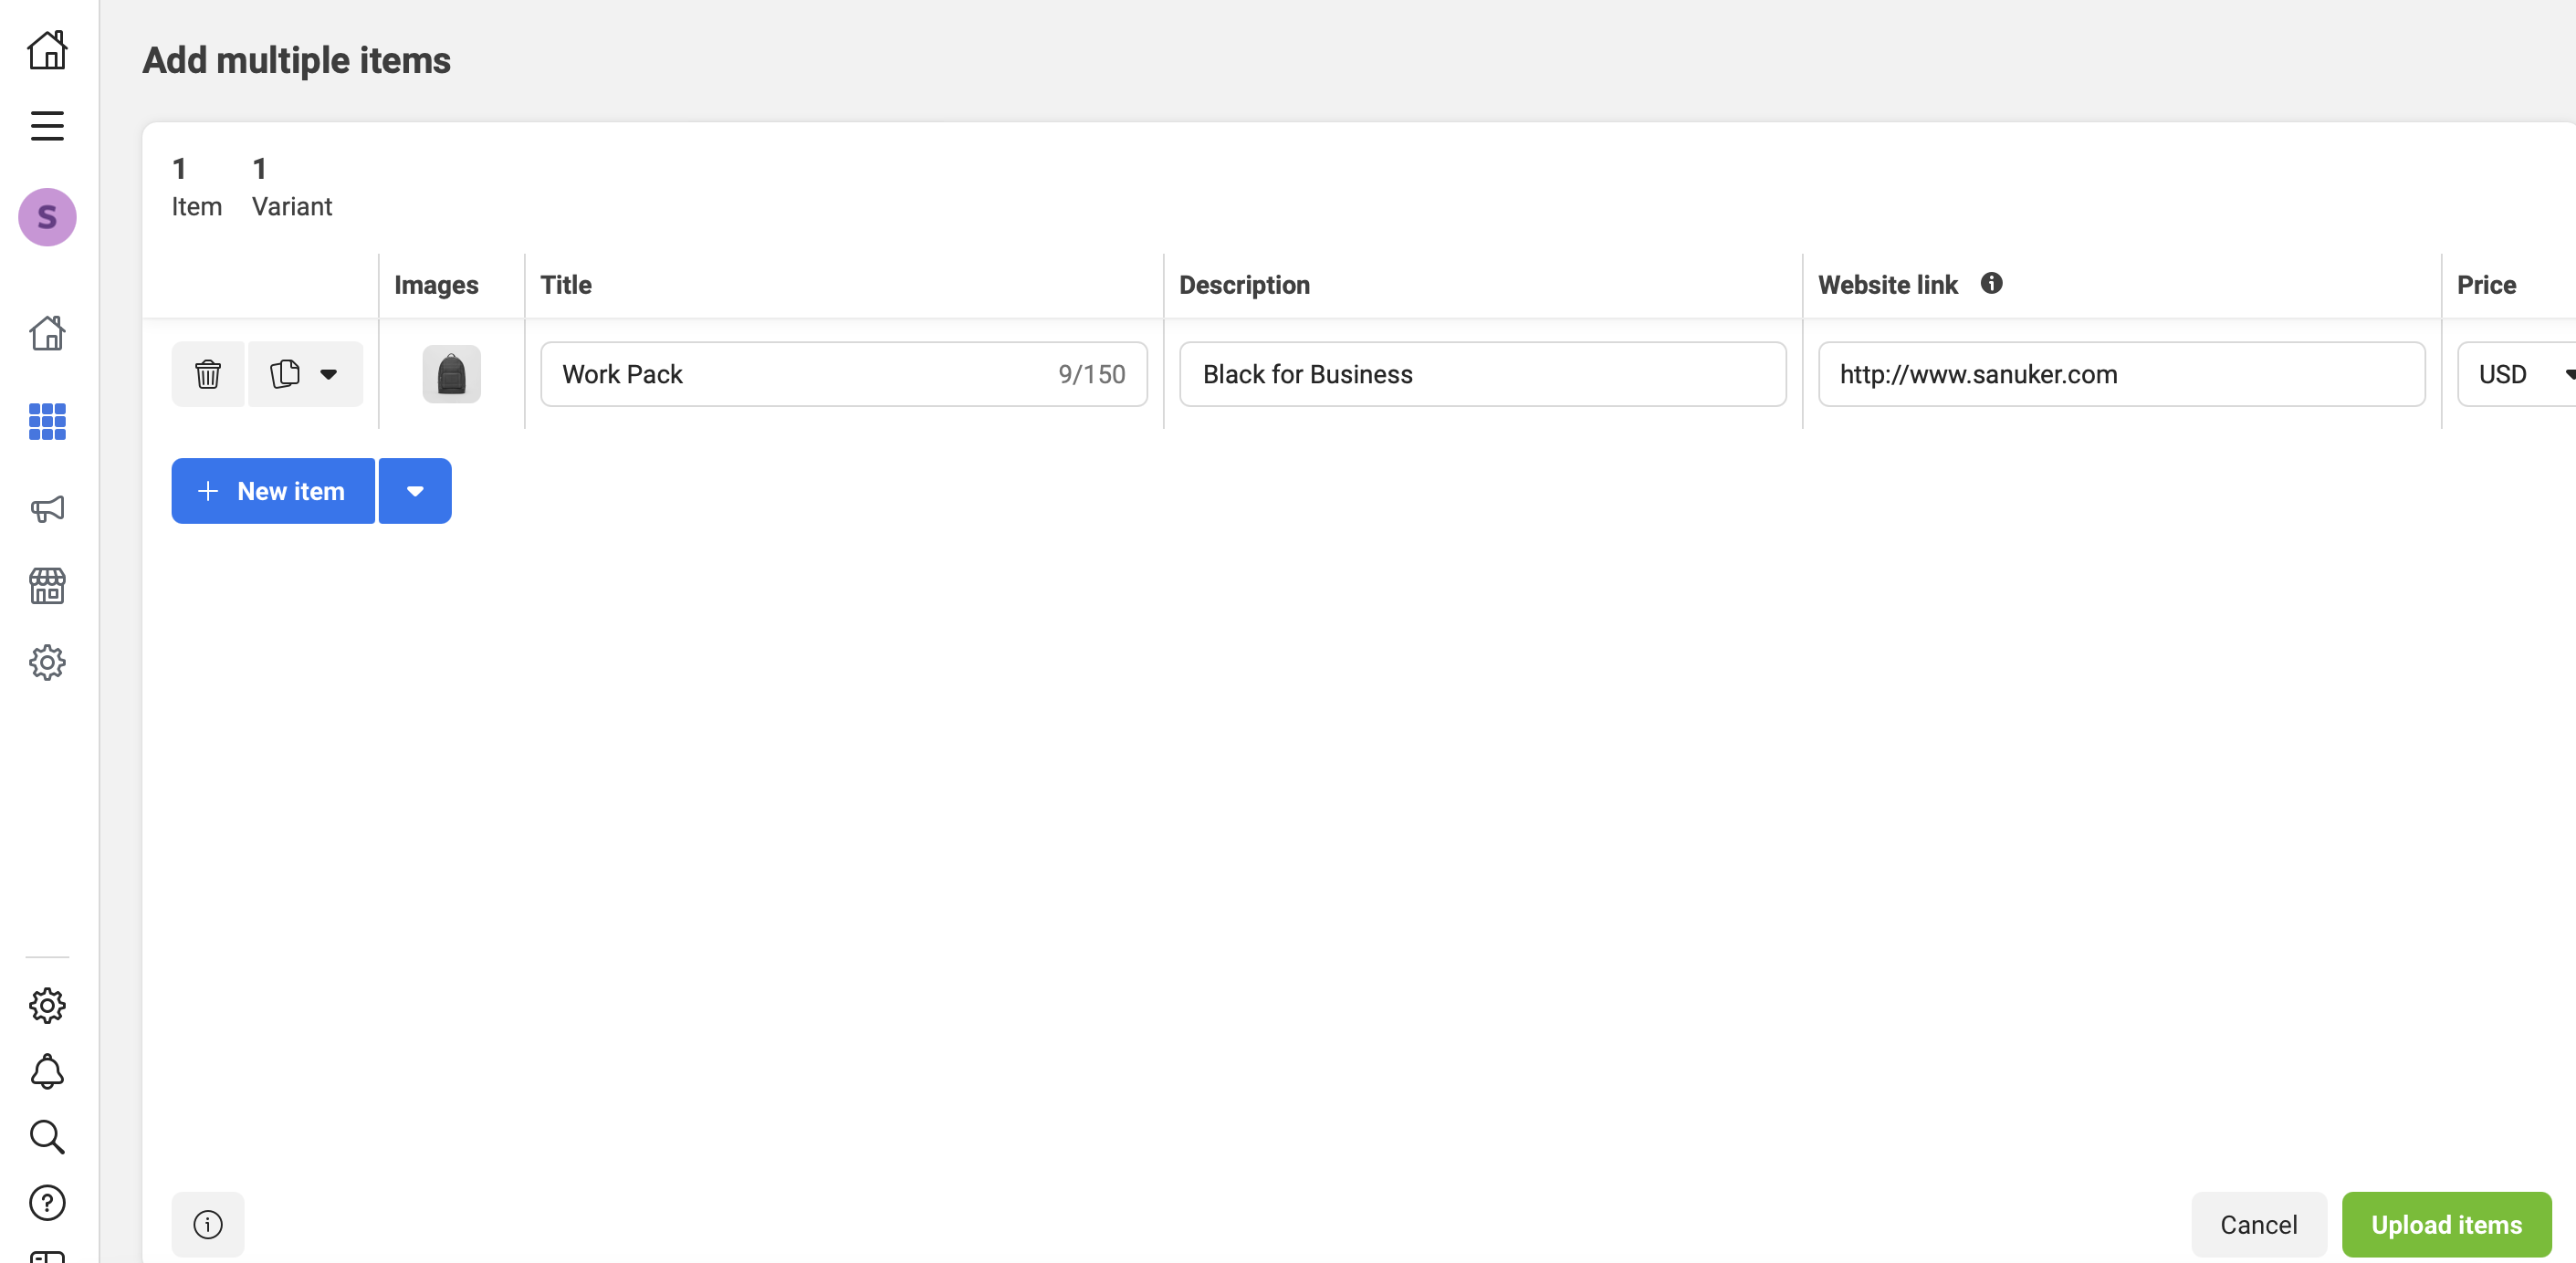
- You can manually upload the product to the catalog.
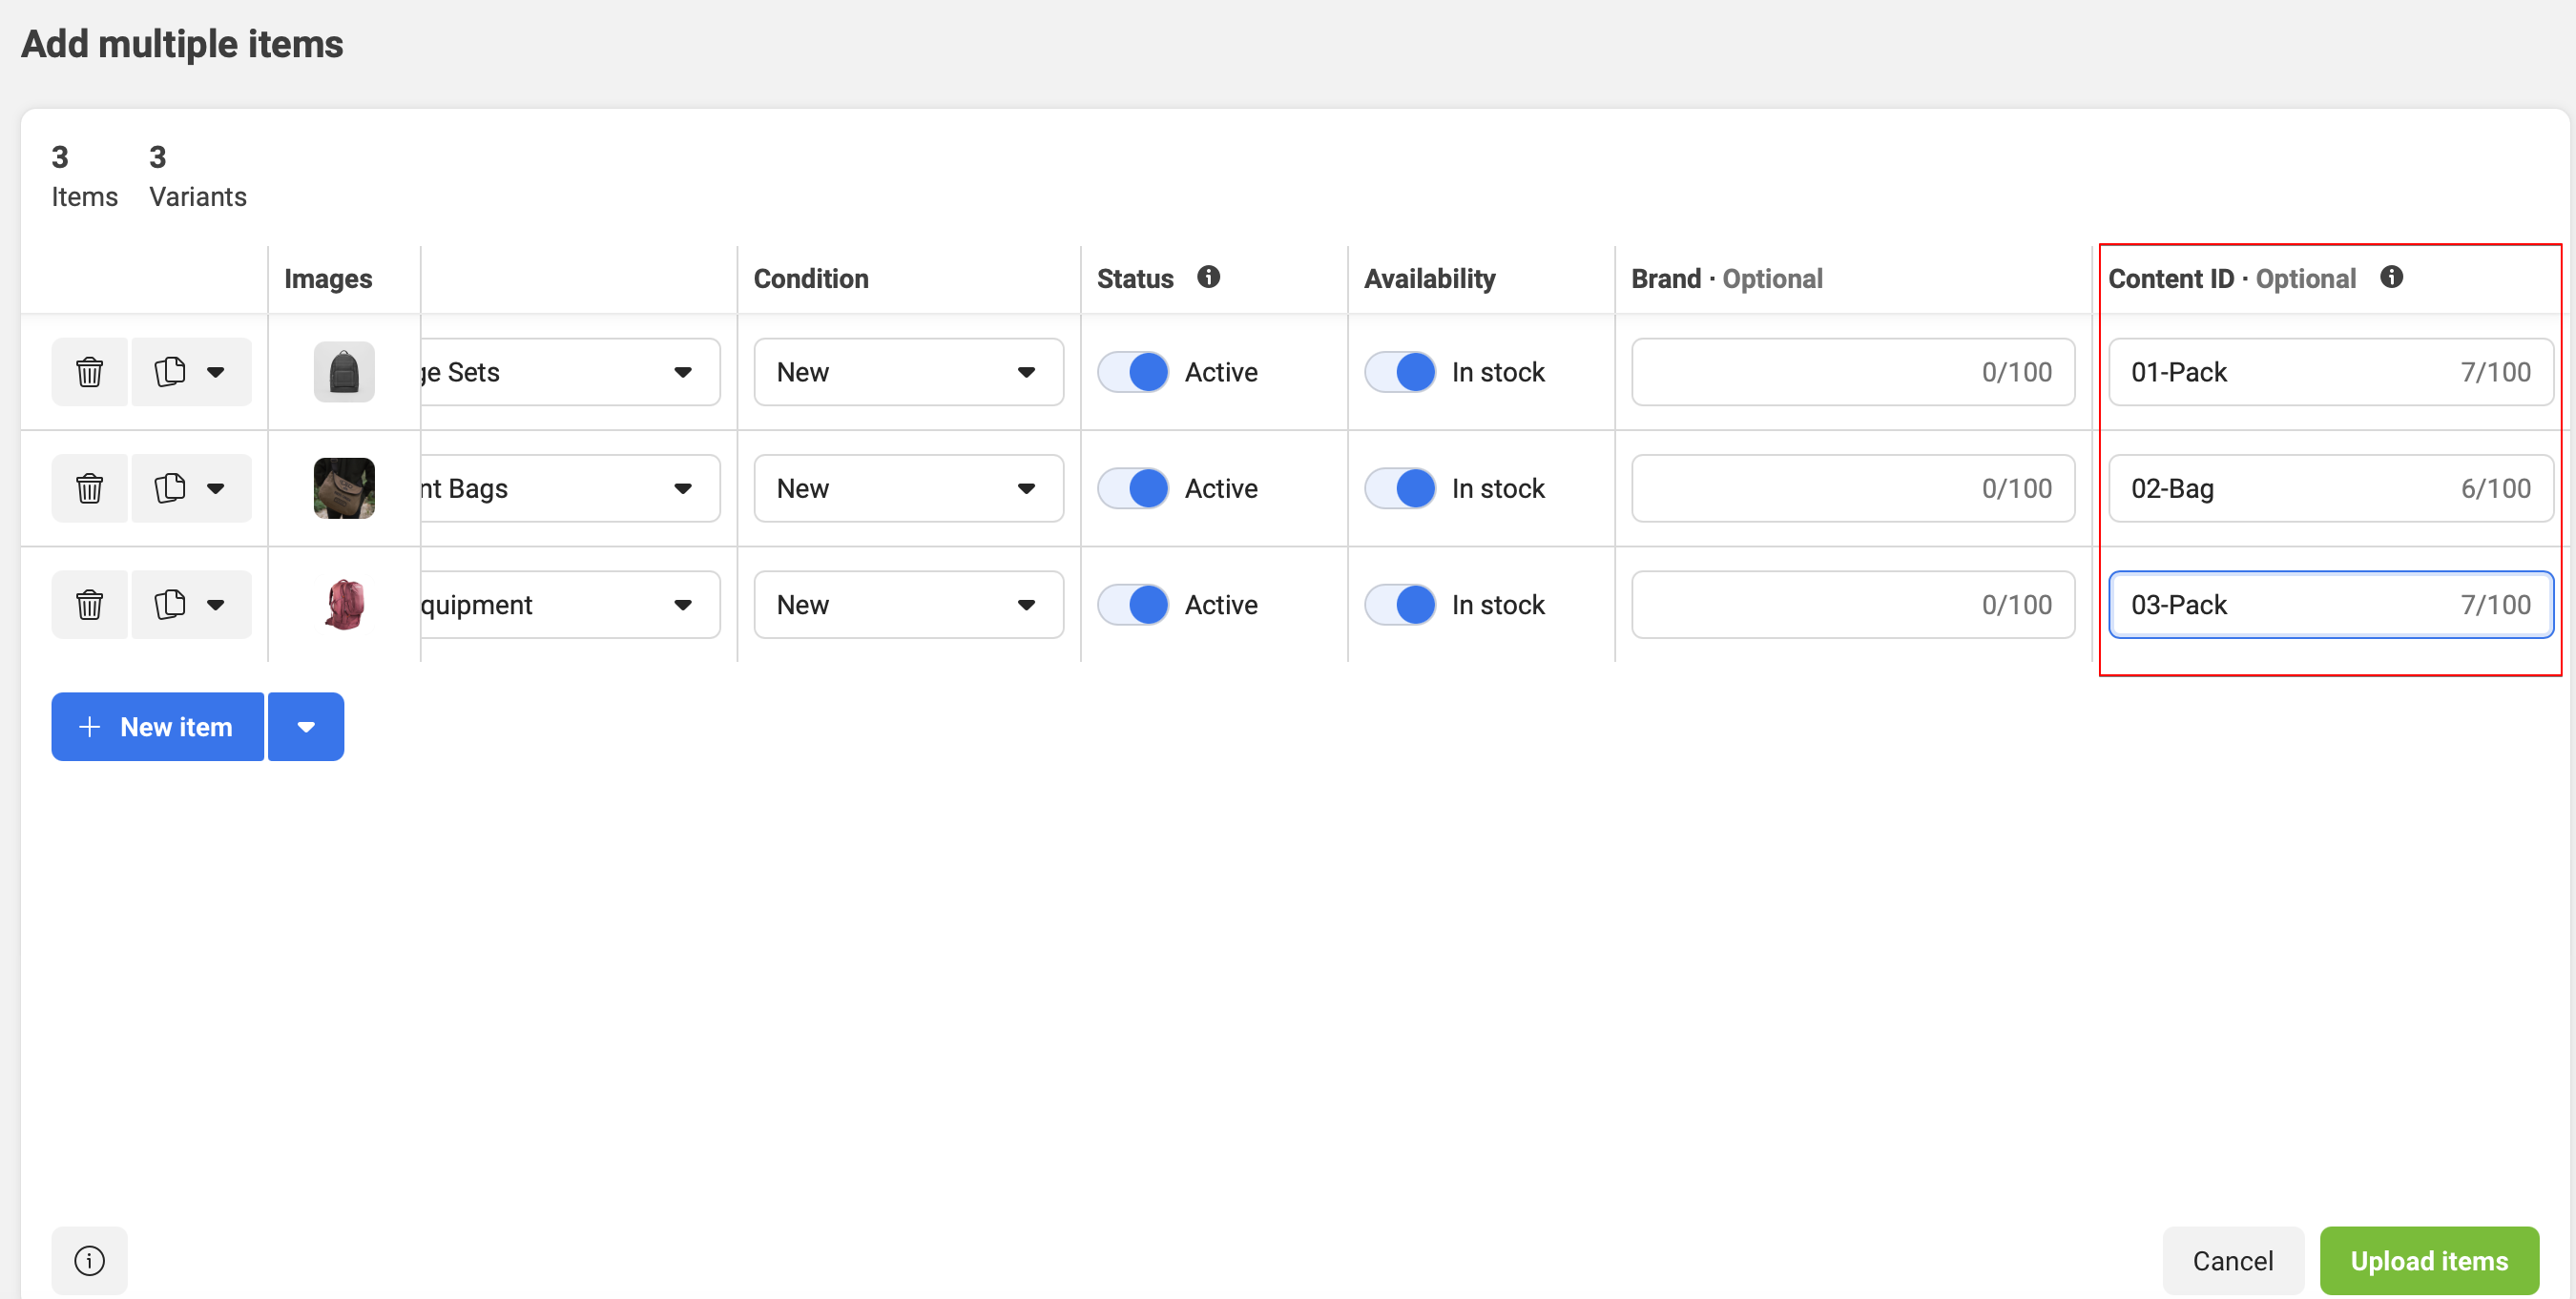
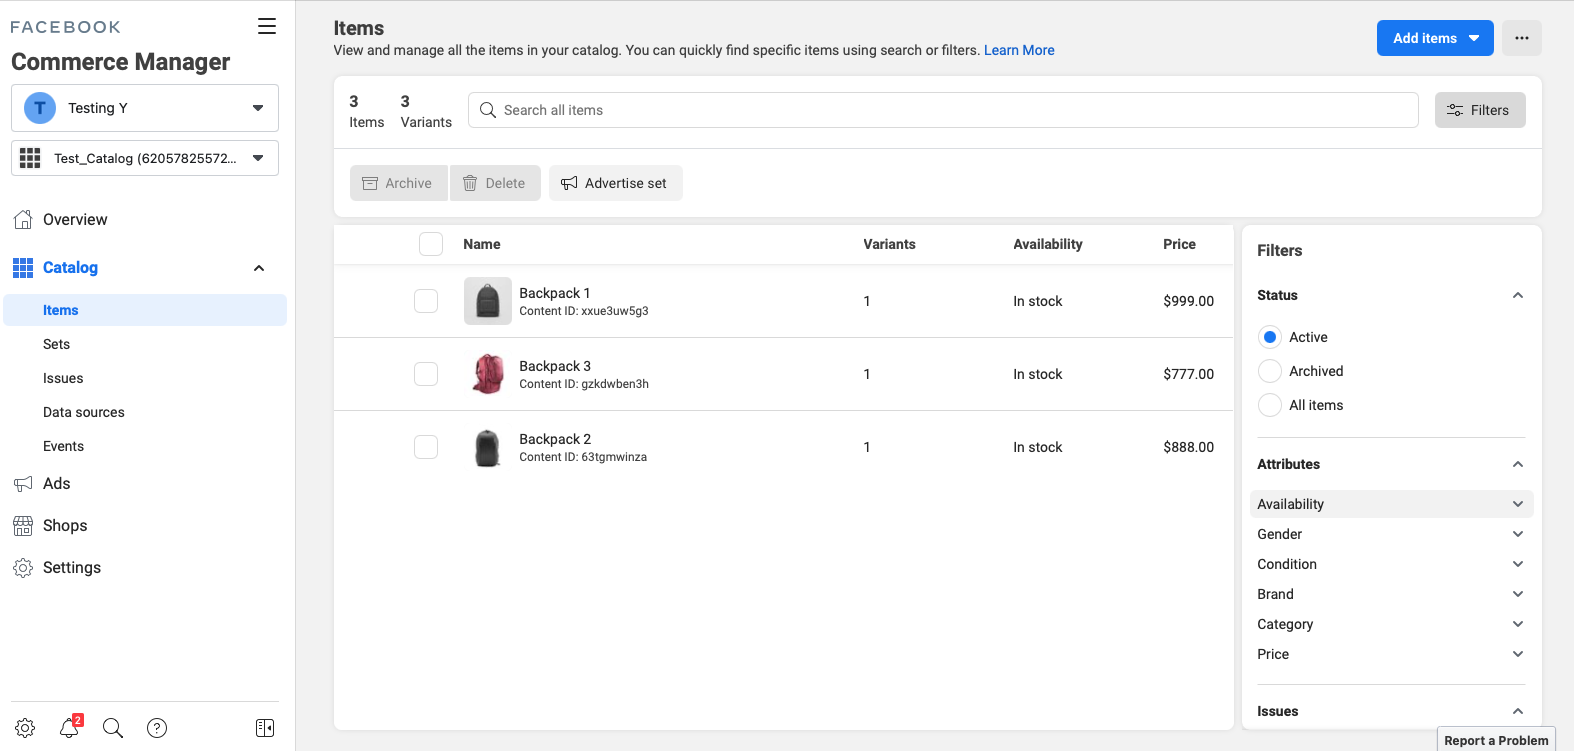
- For each product, remember to enter a Content ID for future use in the product message. This ID can be customized.
- Upon the completion of uploading products, you can view them in Items.
Connect Catalog to WABA
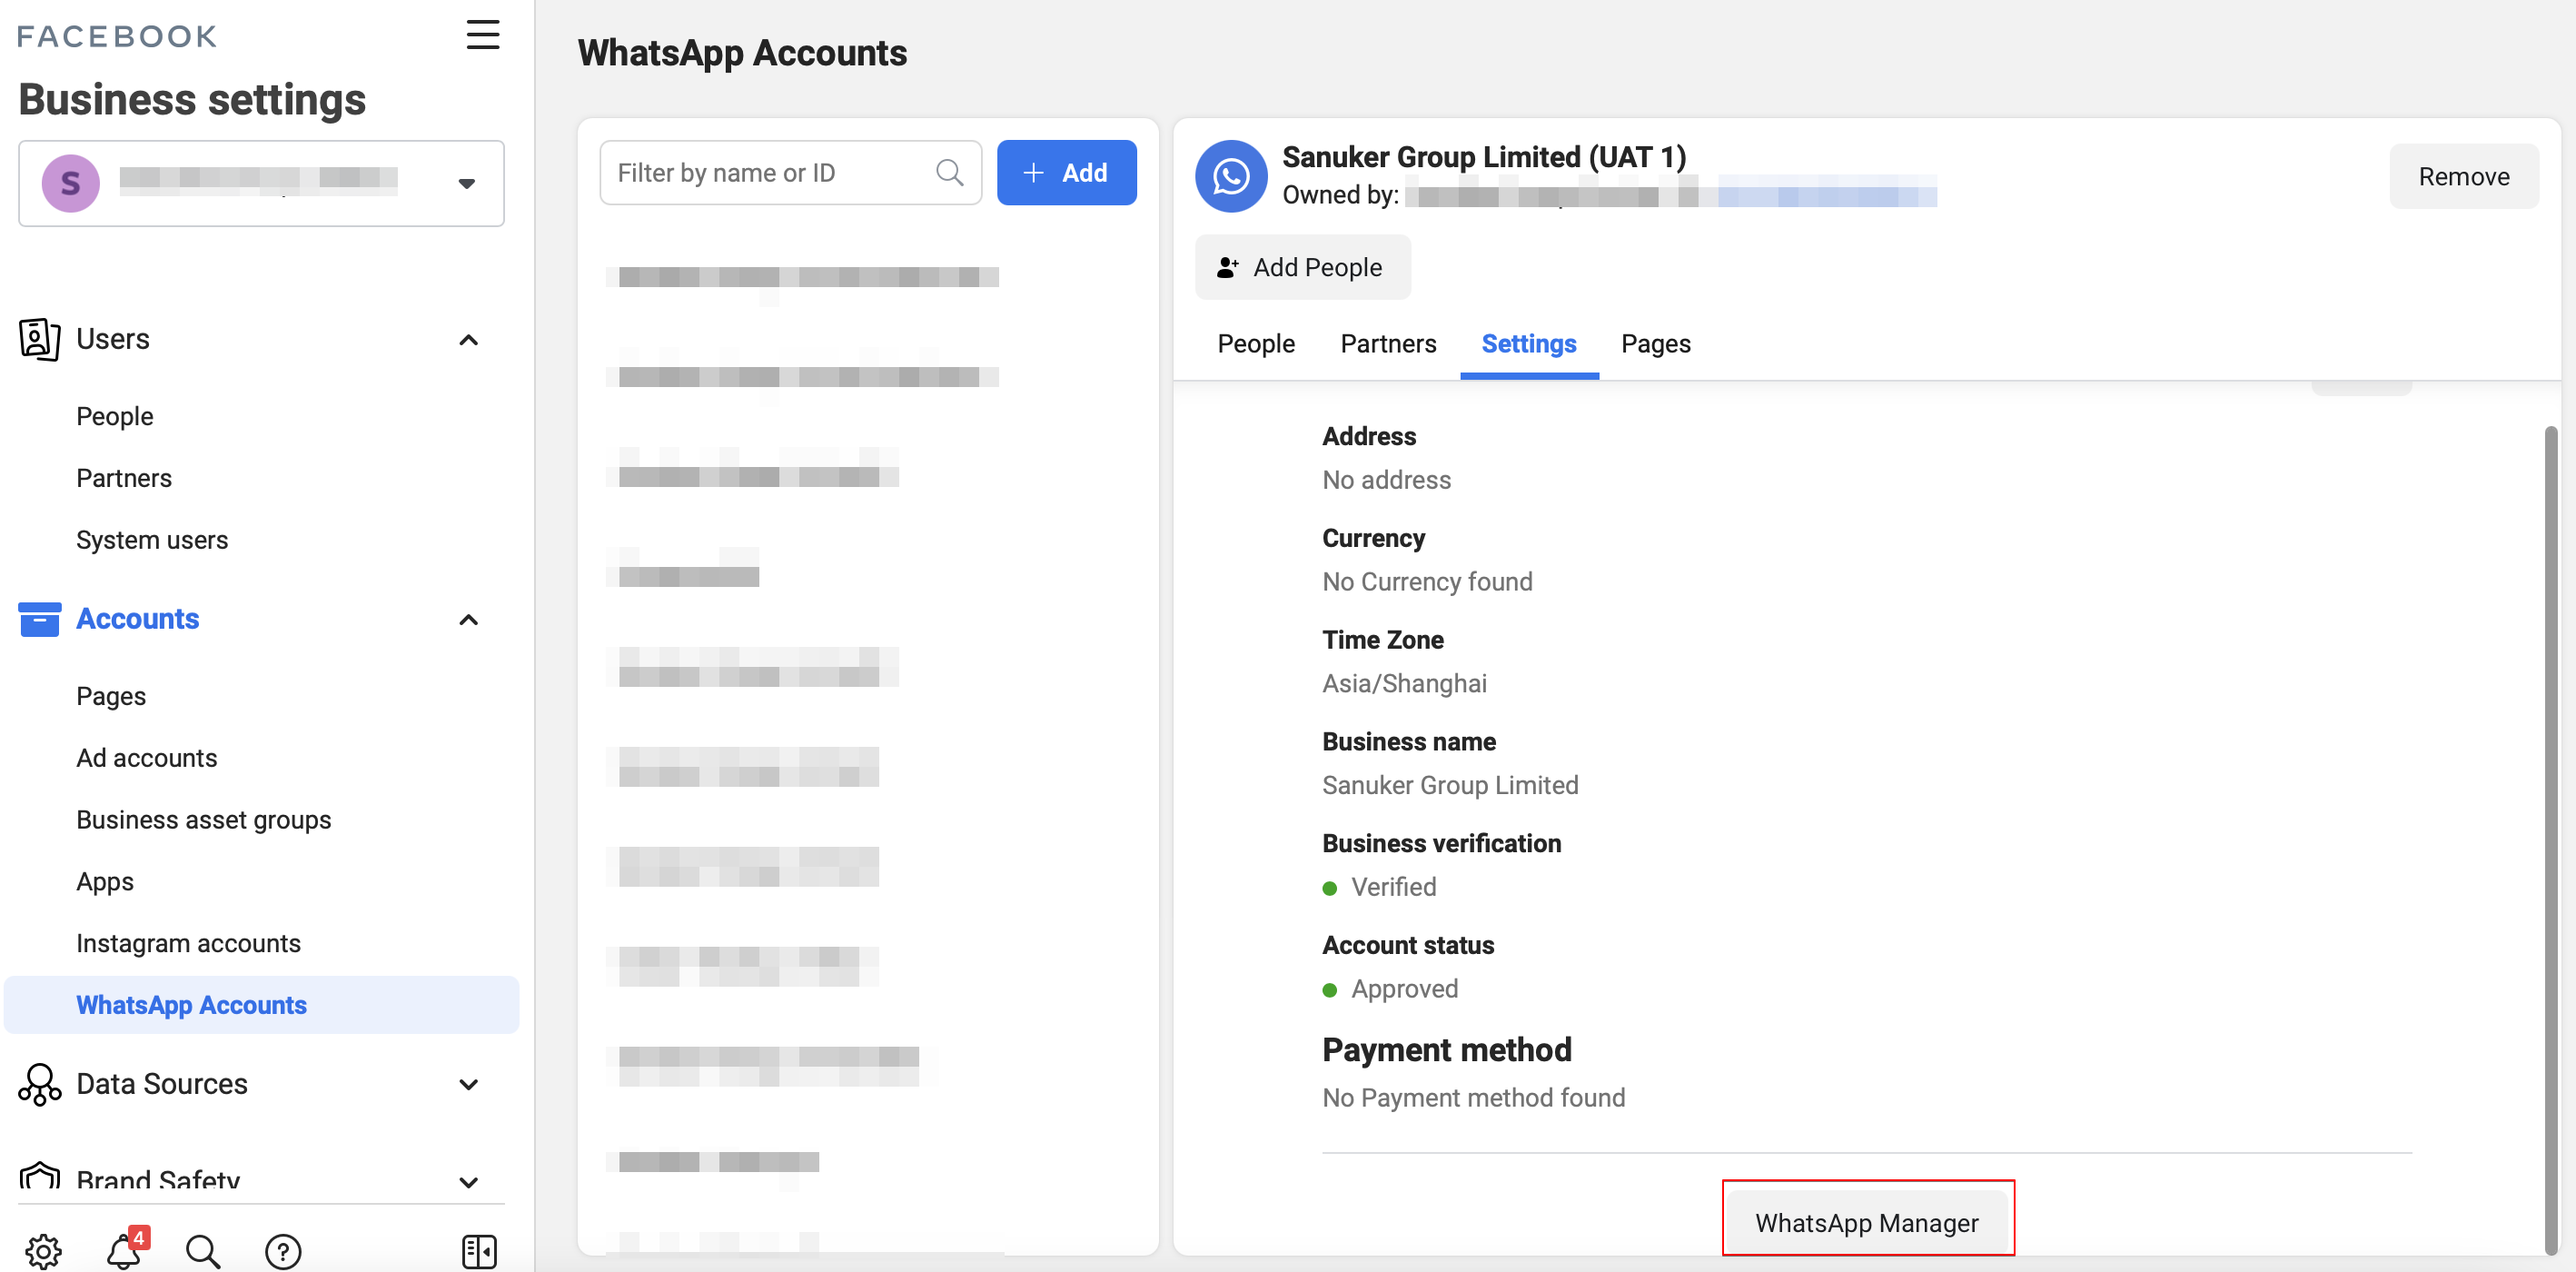
- Head back to WhatsApp Account in your Business Manager account, choose the WABA account and select WhatsApp Manager.
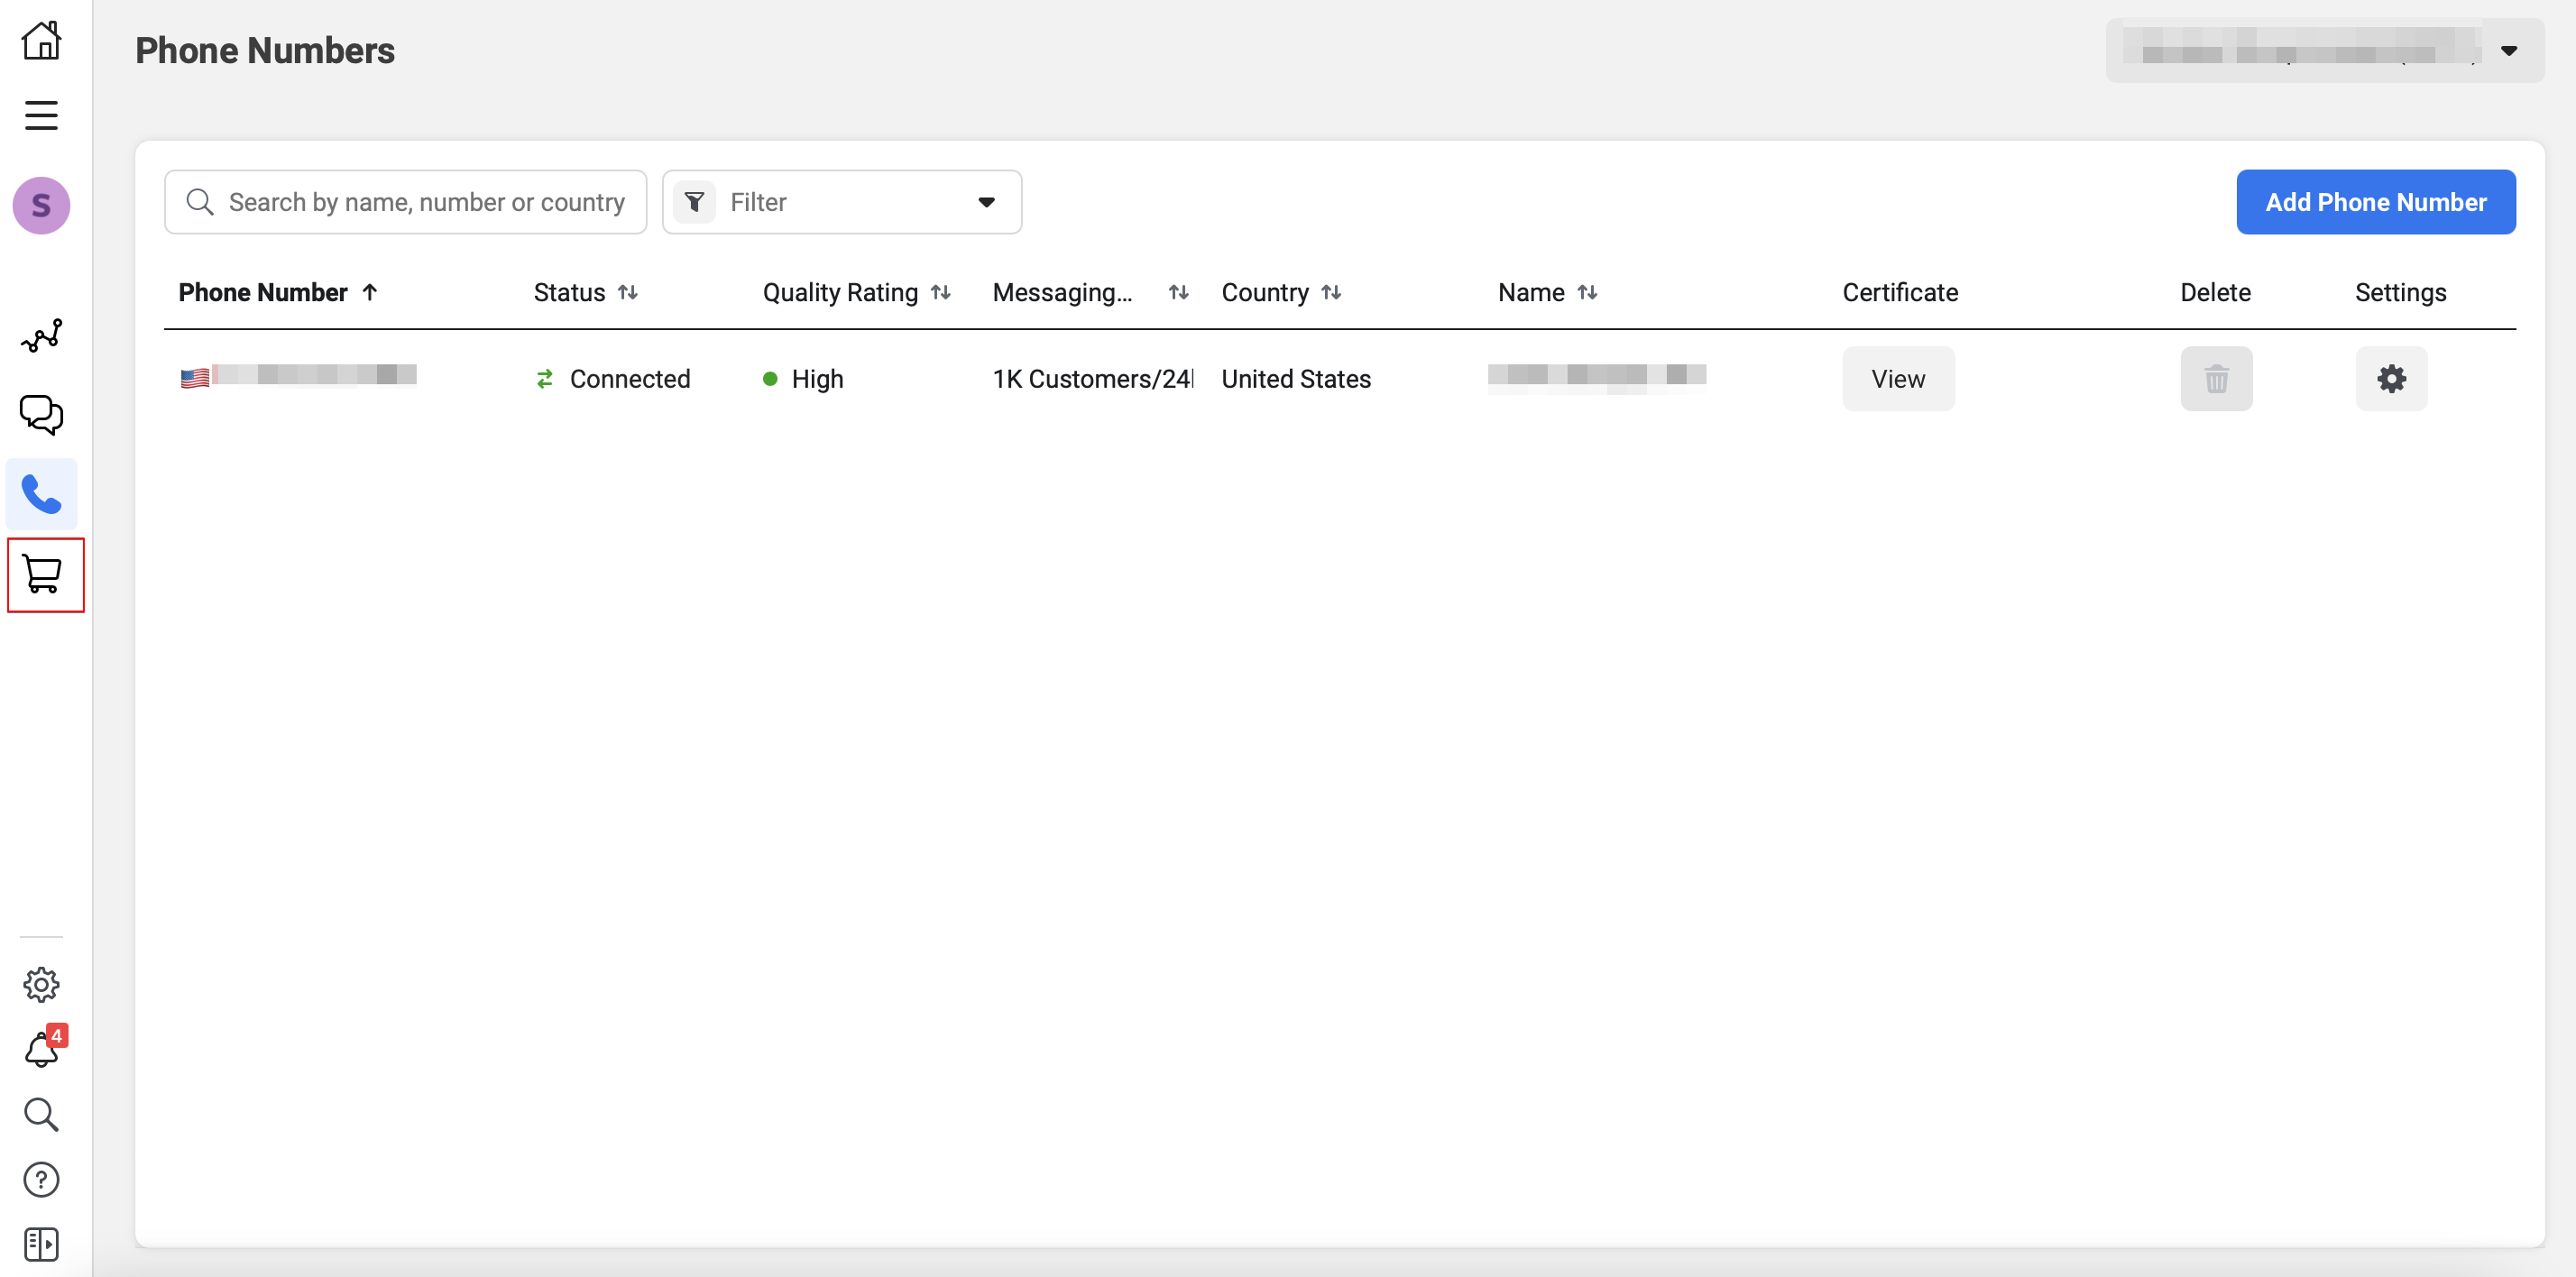
- Head to the Catelog page by clicking the shopping cart icon on the left.
- Select Choose a Catalog.
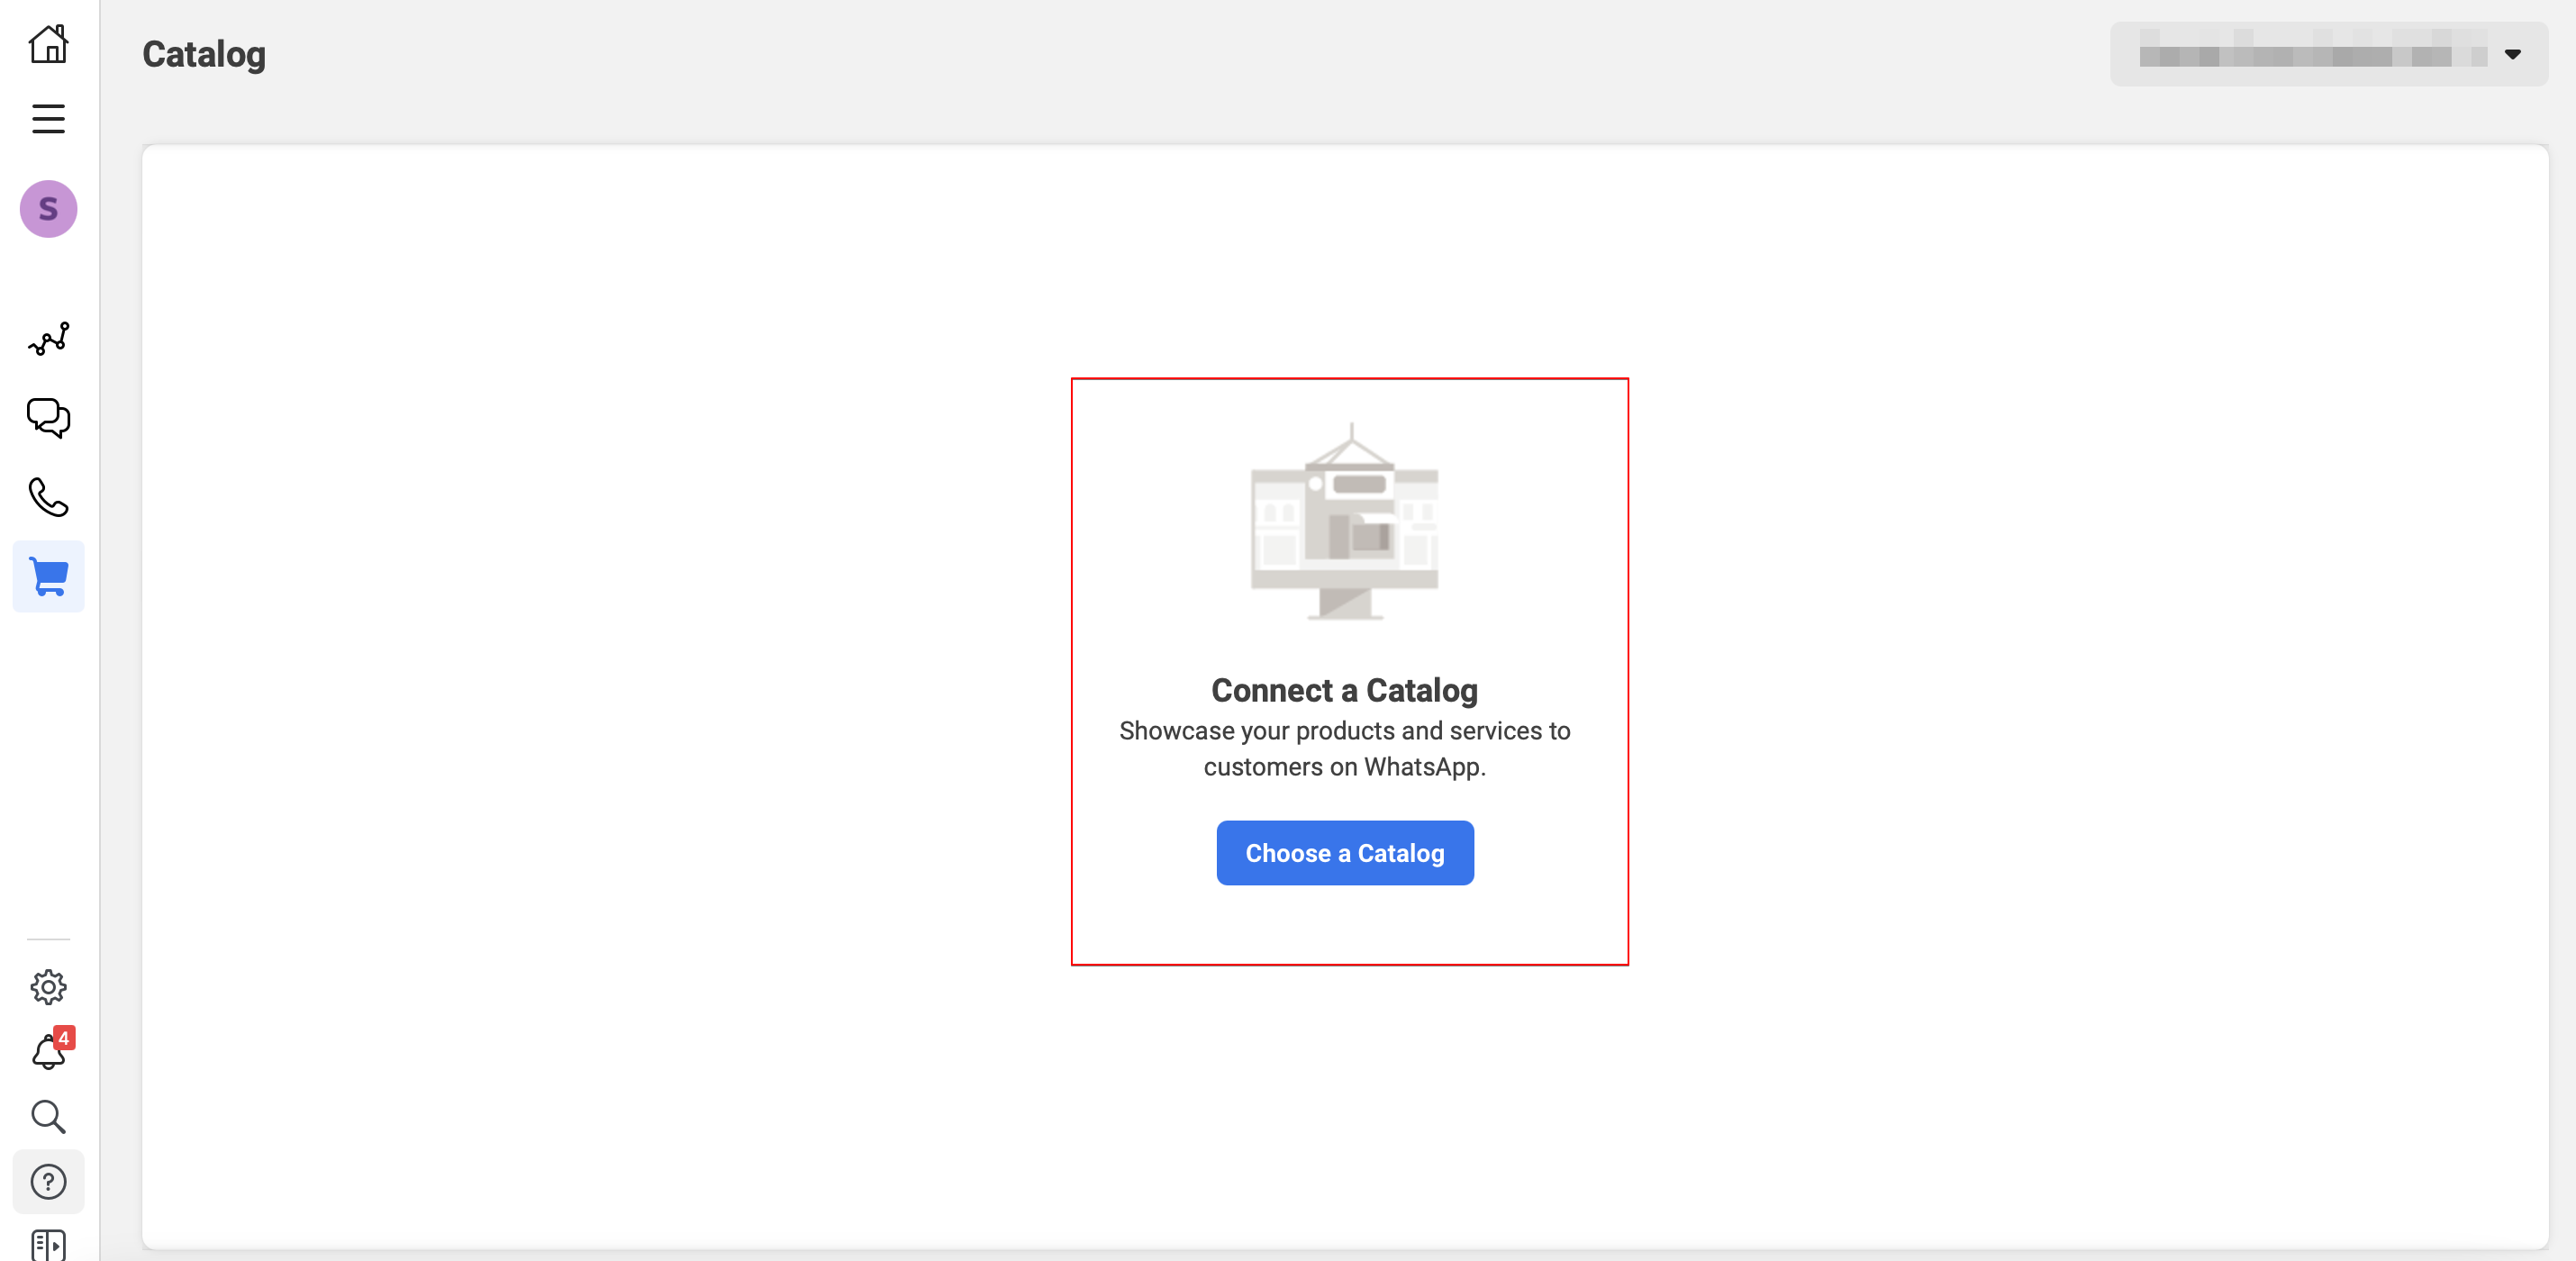
- Select the catalog you have created from the dropdown list. You can only choose from the catalog created in the same Business Manager account.

- The catalog is now connected to your WABA account.

Sample Tree Structure
Multi-Product Message
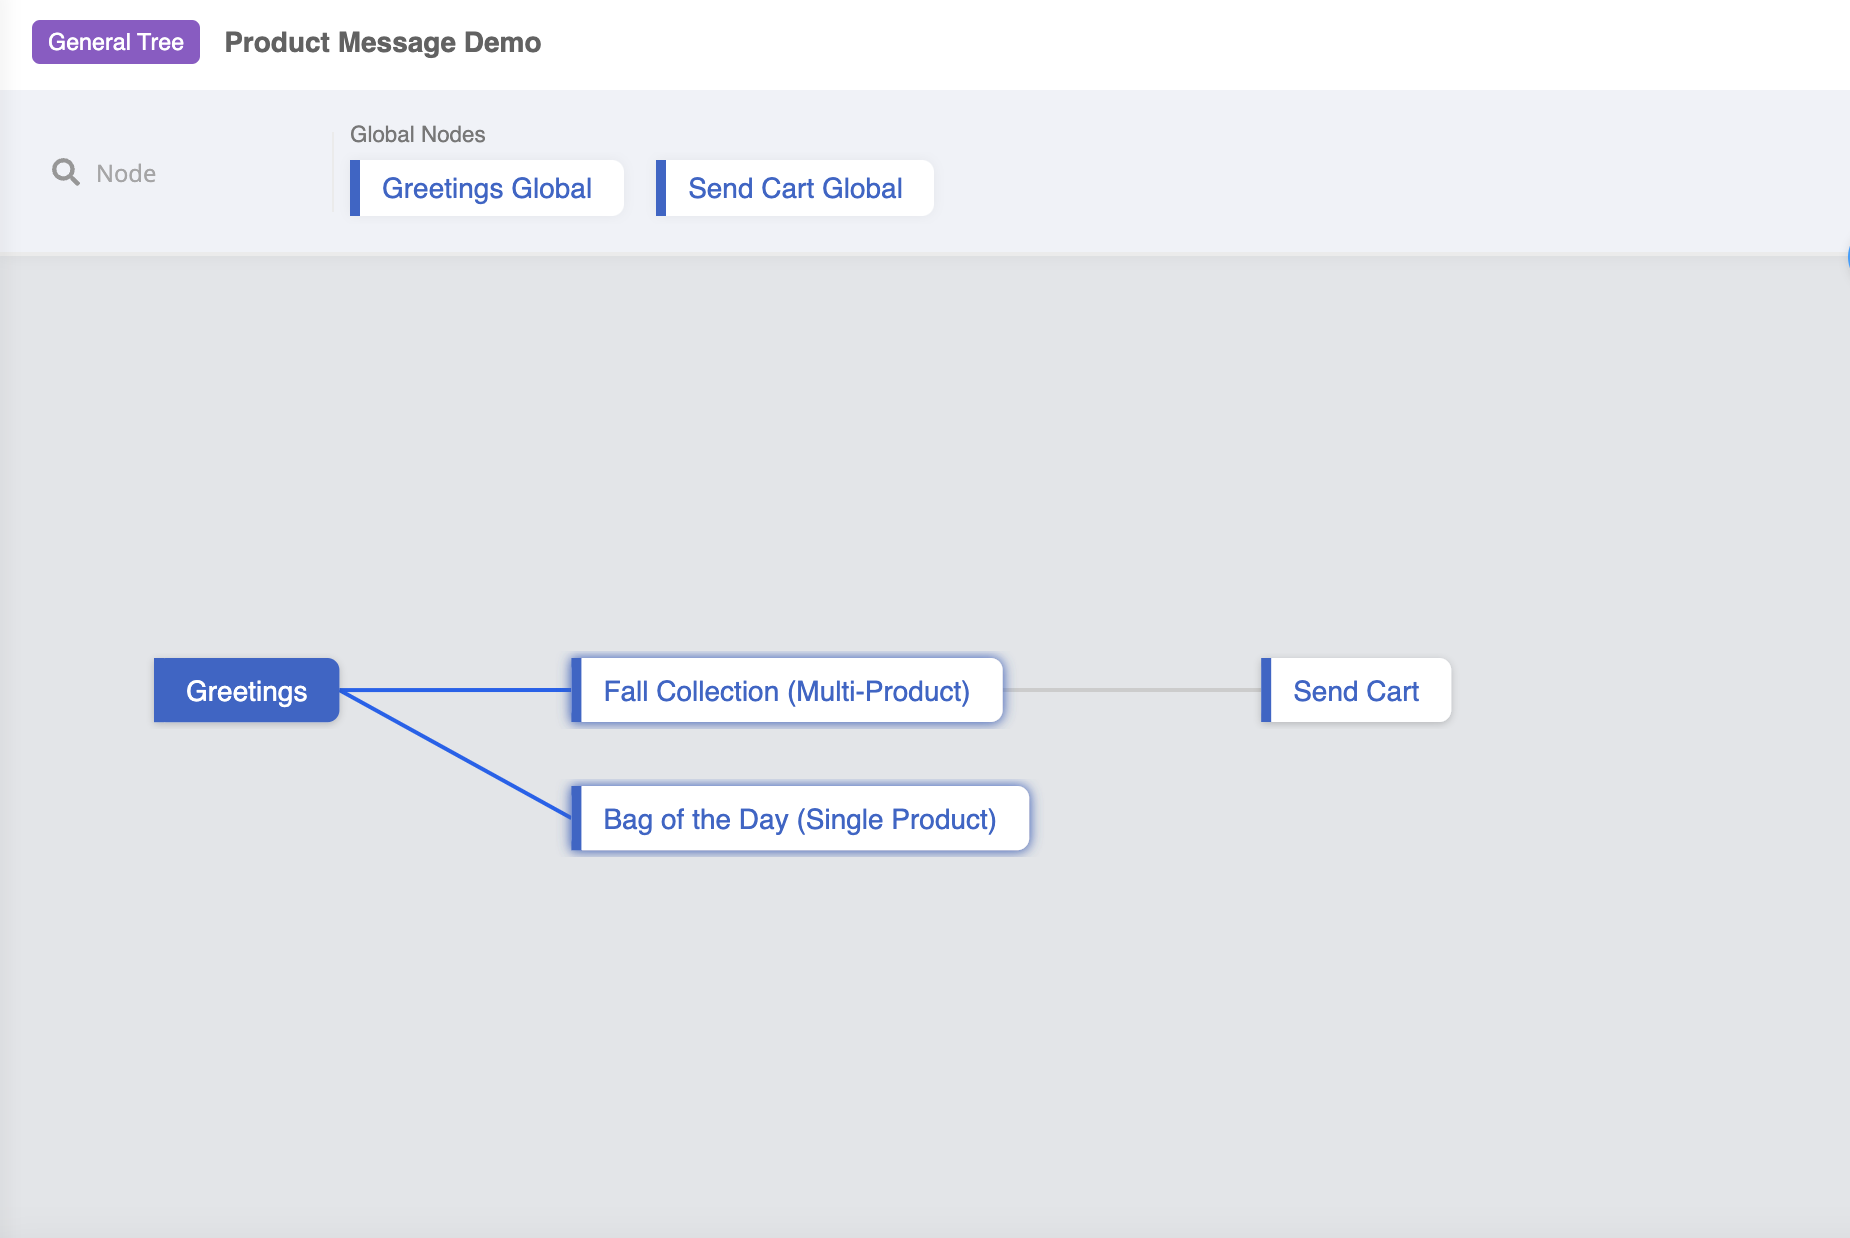
In this section, you will learn how to build an sample tree for the Product Message in WhatsApp.
First, create a new tree for the conversation flow for product message.
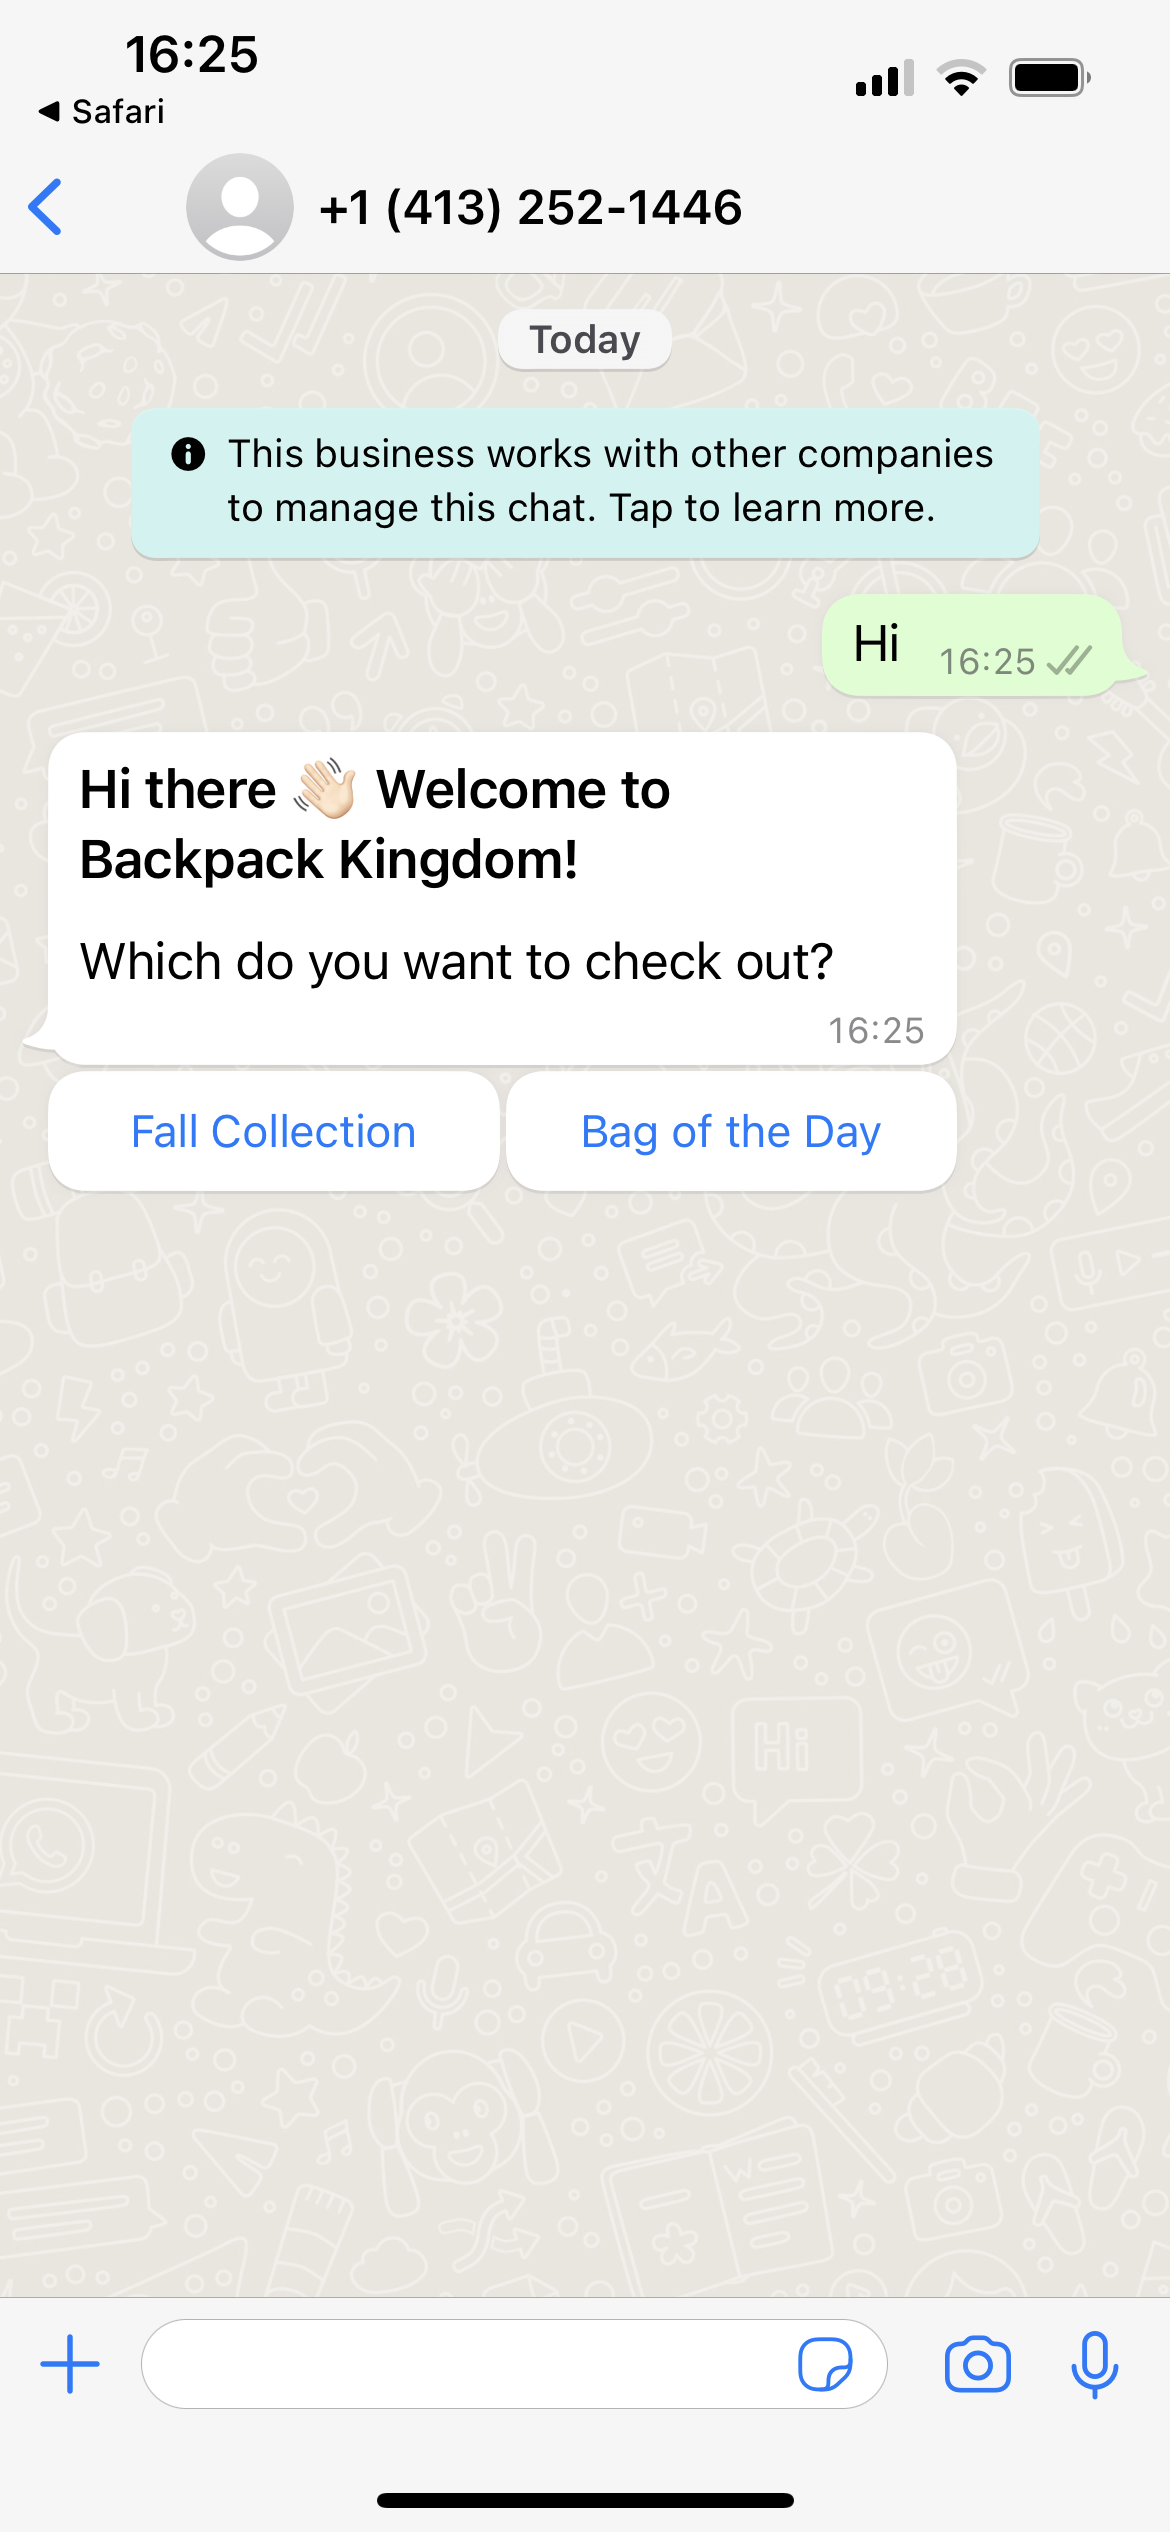
Create a tree node for the greeting message.

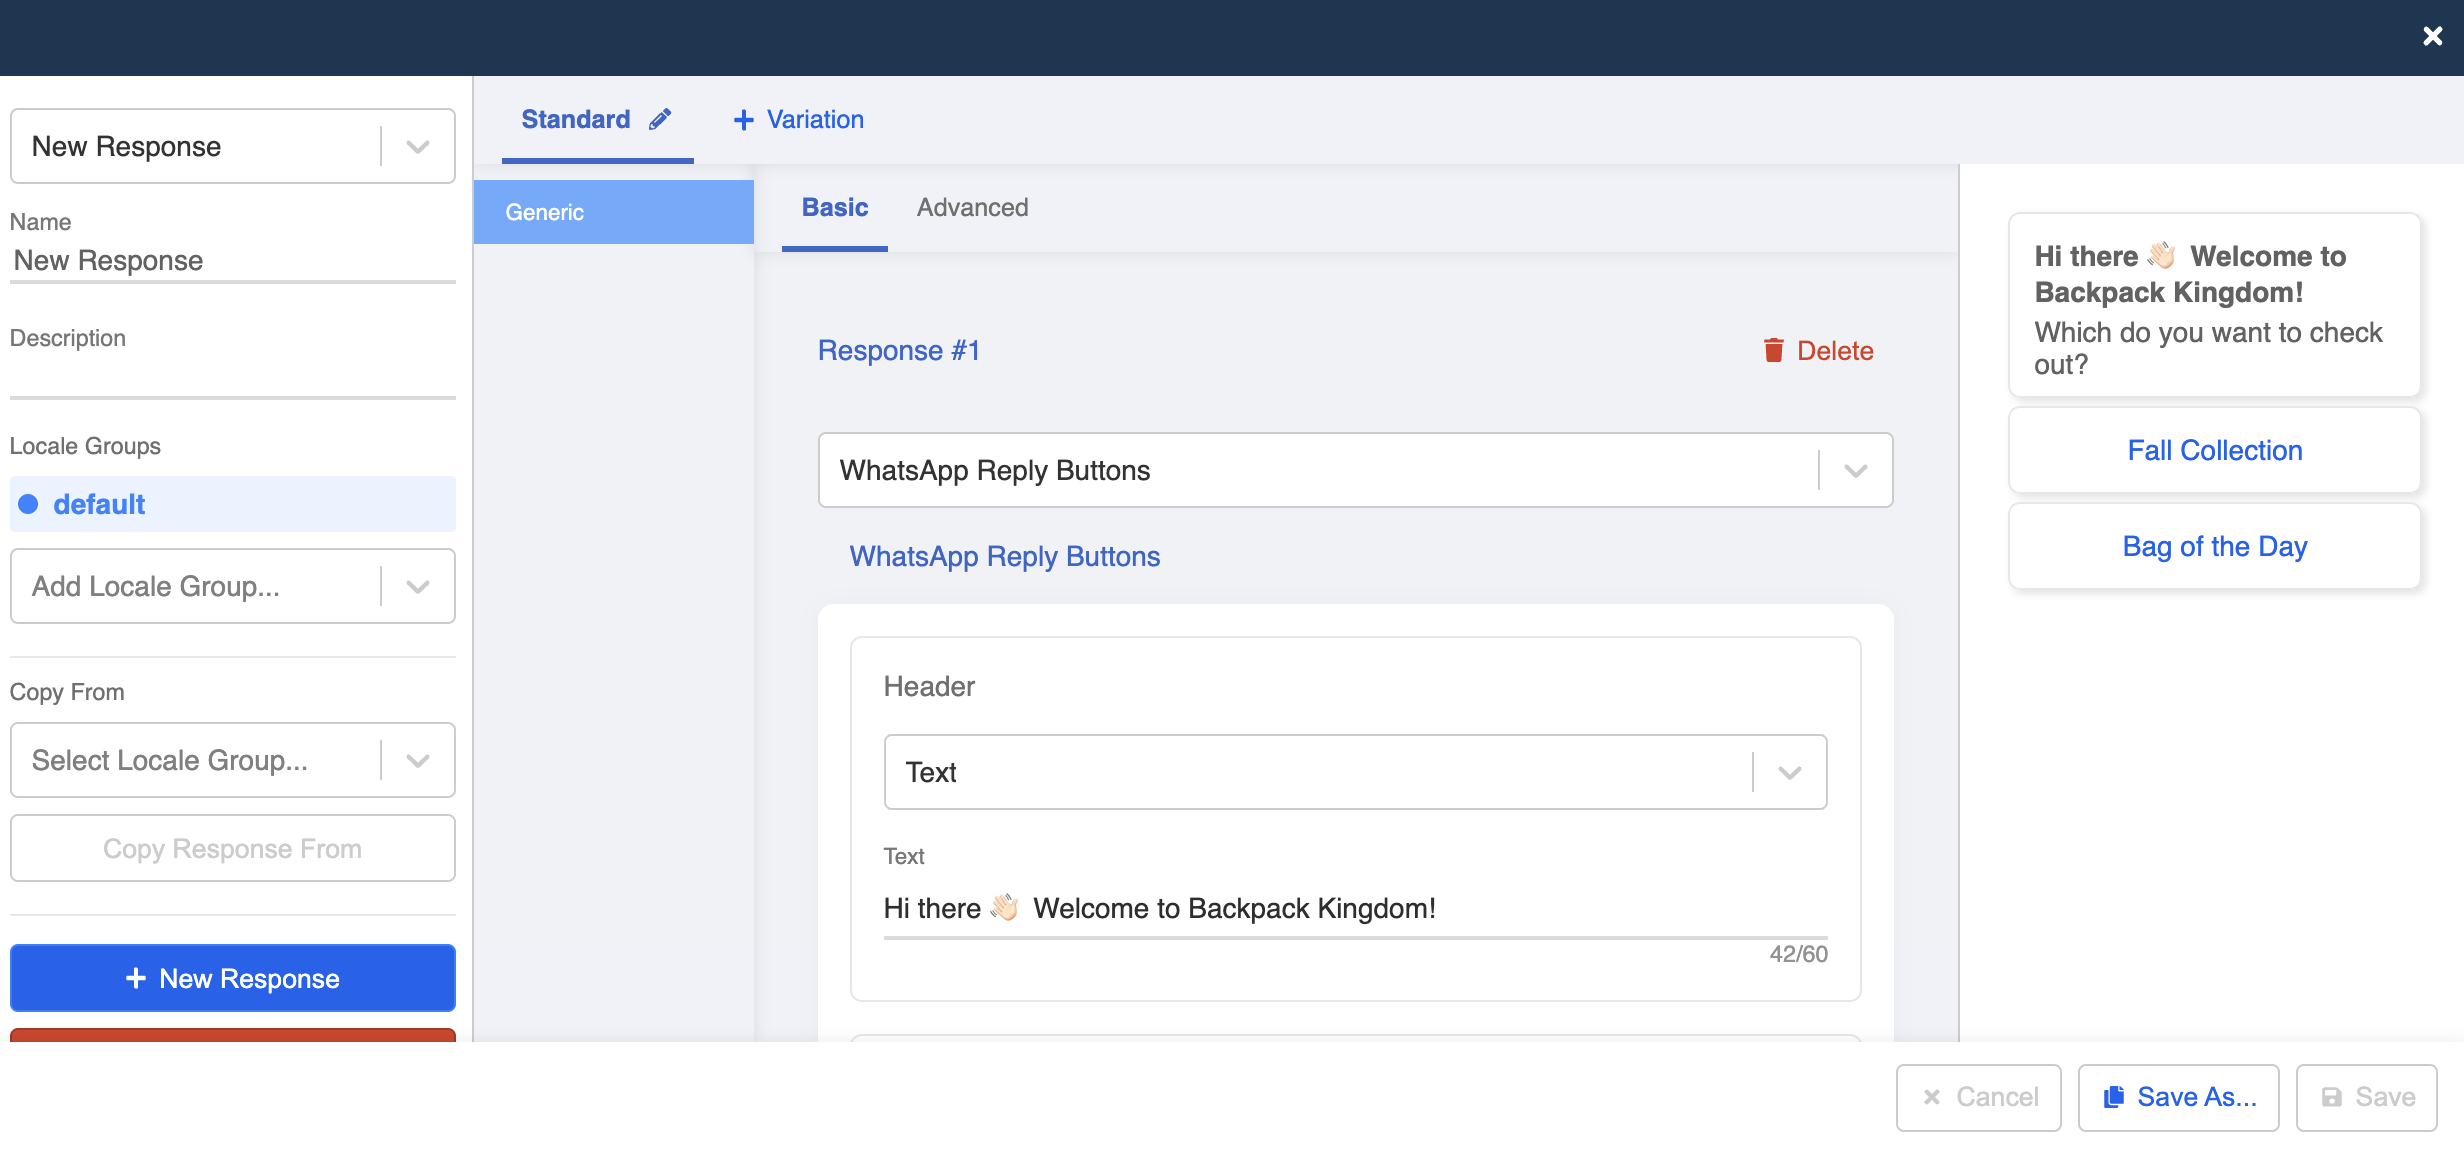
- Create a response.

- In this example, we will use WhatsApp Reply Buttons. Fill in the text content for the greeting message.
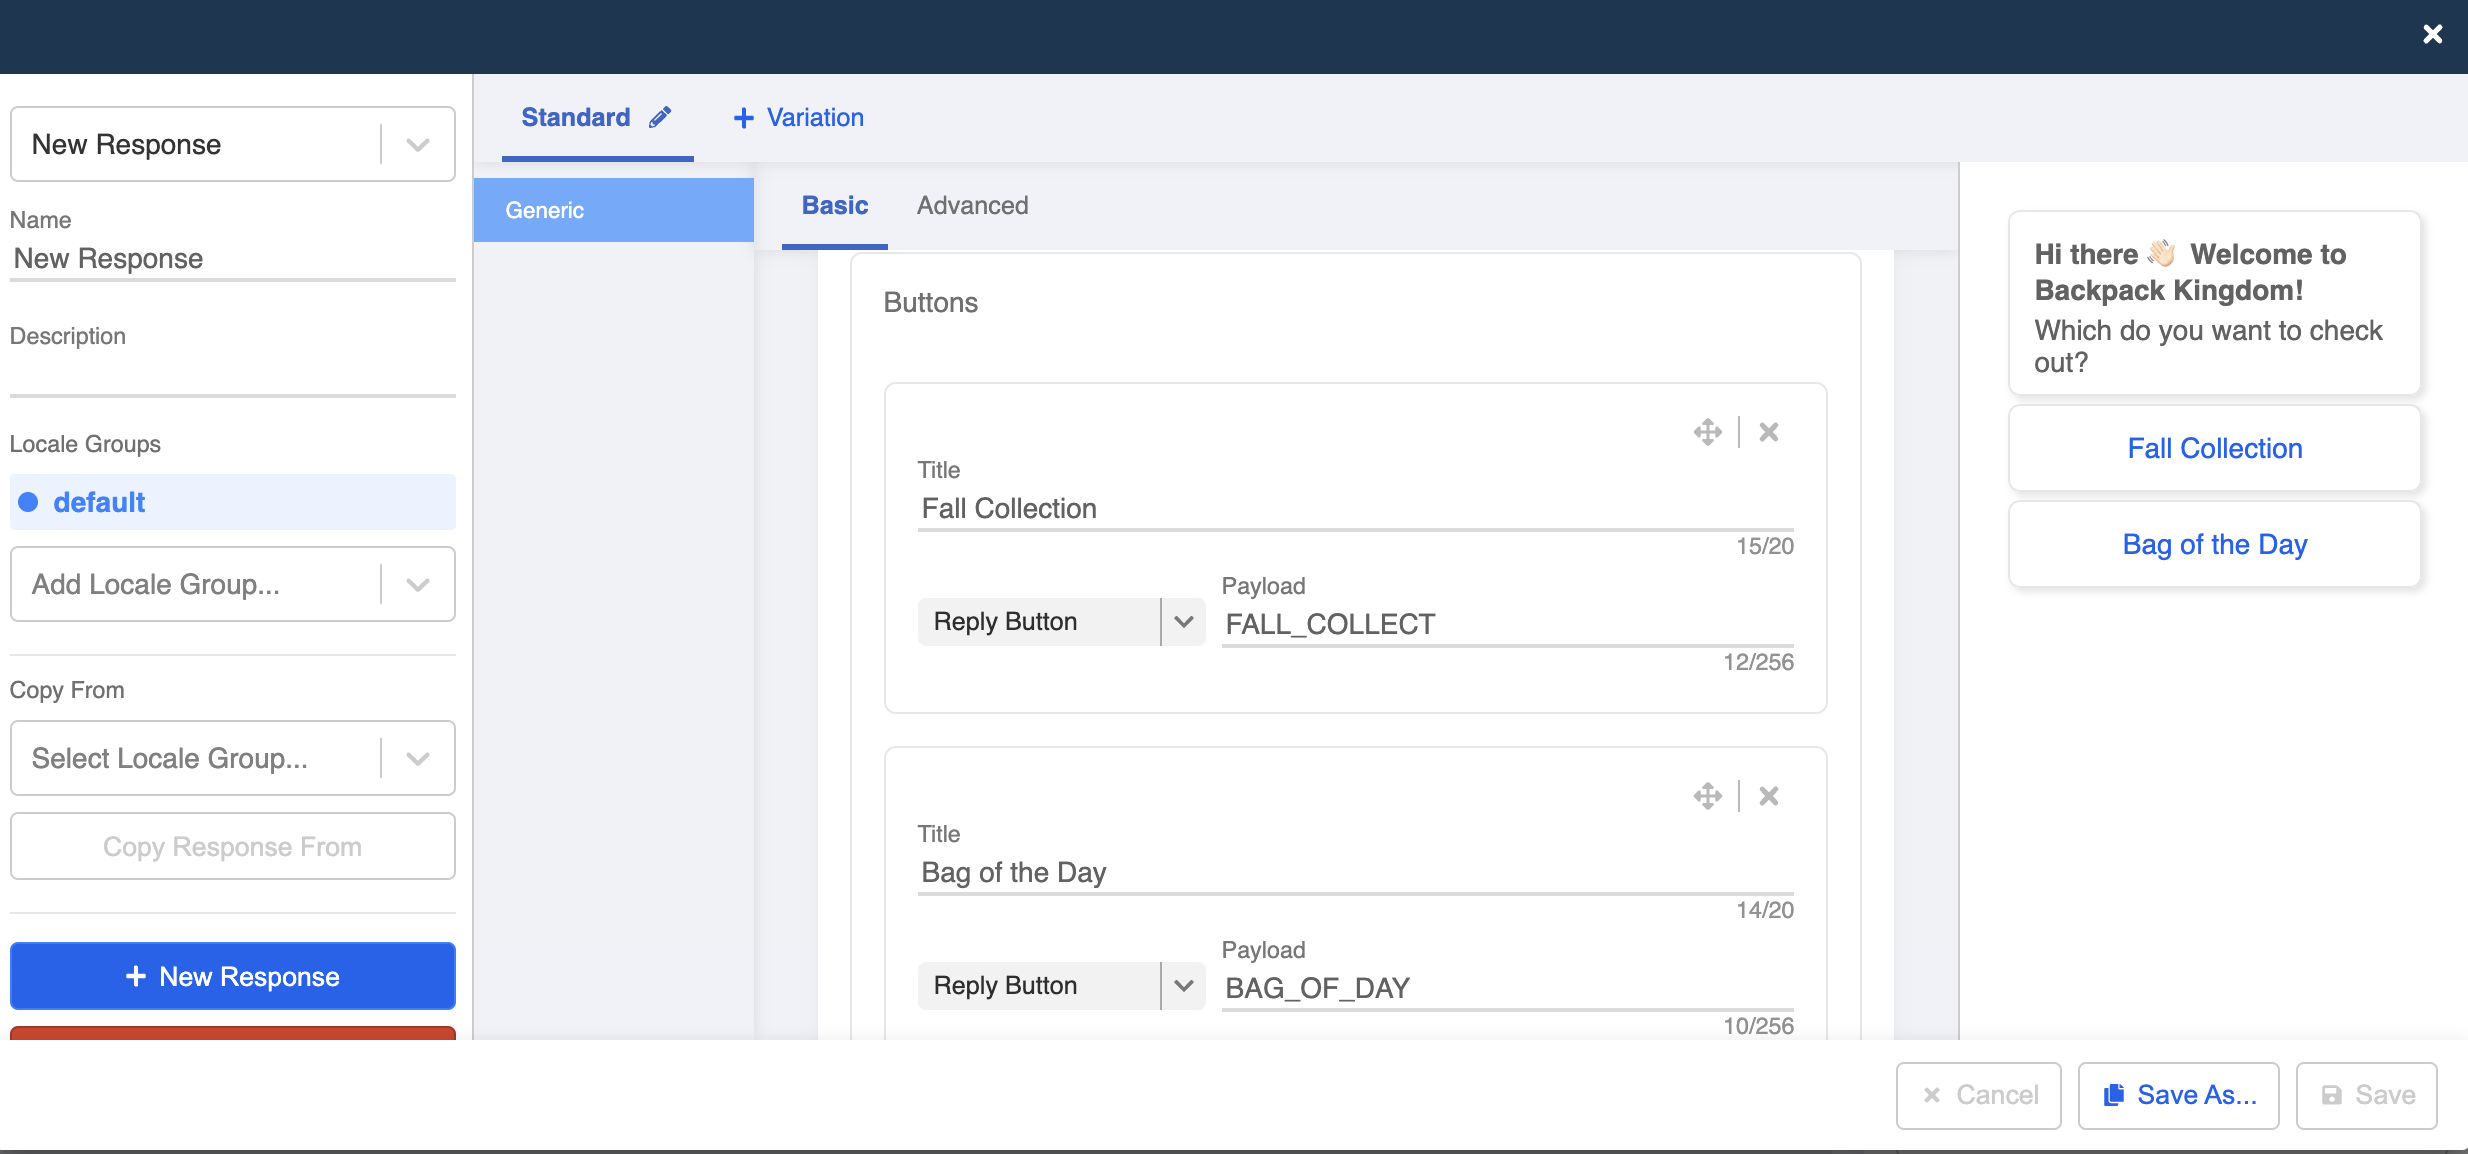
- Fill in the title of the button and assign a payload for each of them. Click "Save" to continue.
- Create a new global node, it will act as an entry point to the flow.

- Create a trigger for the entry point. In this example, let's use "hi" as a keyword to trigger the chatbot.
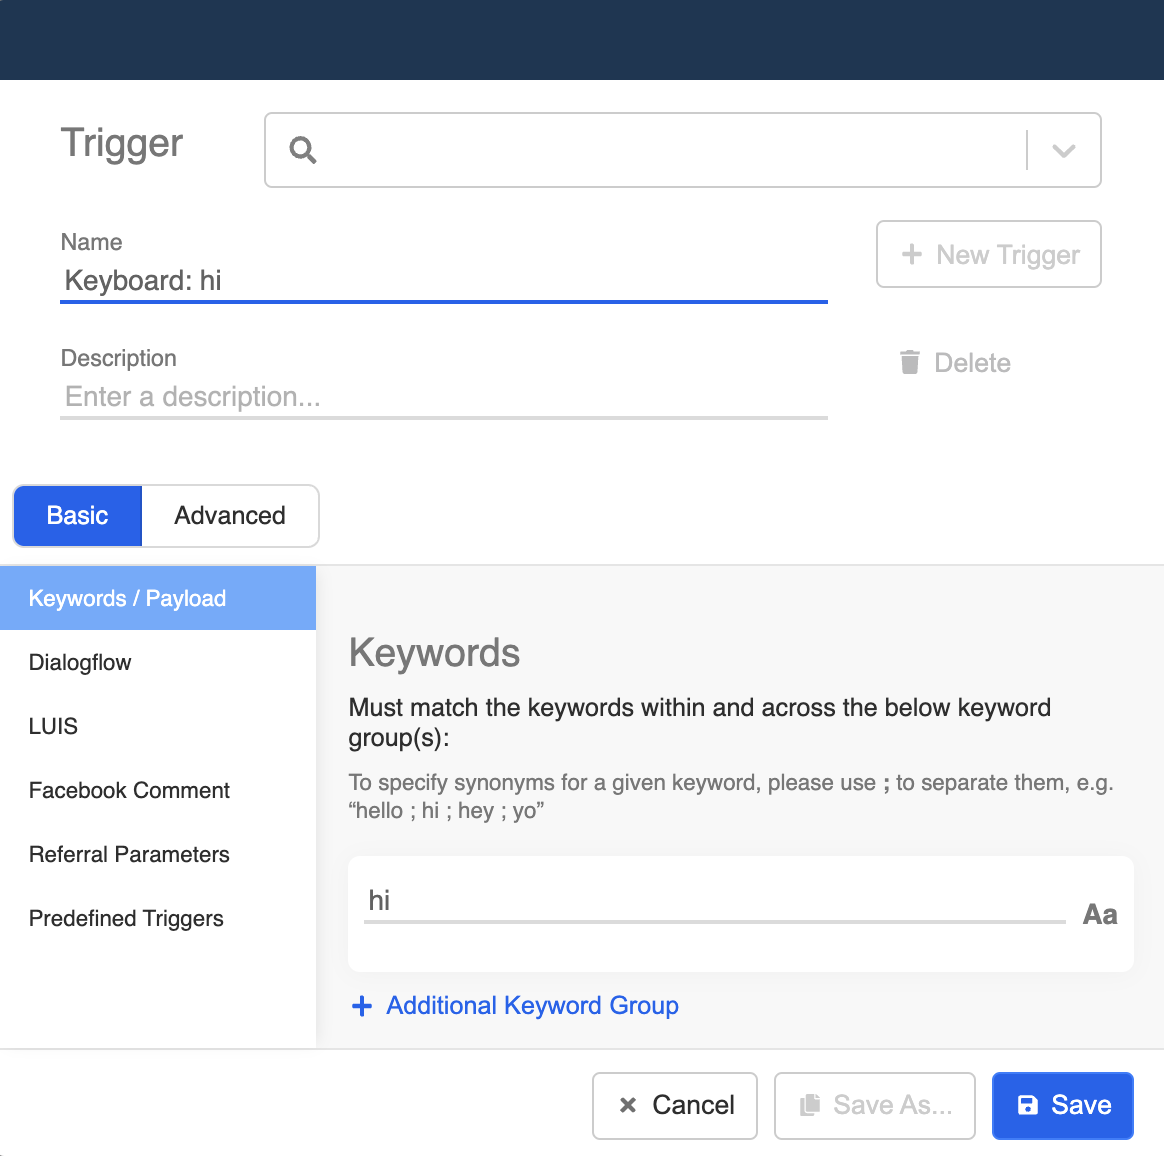
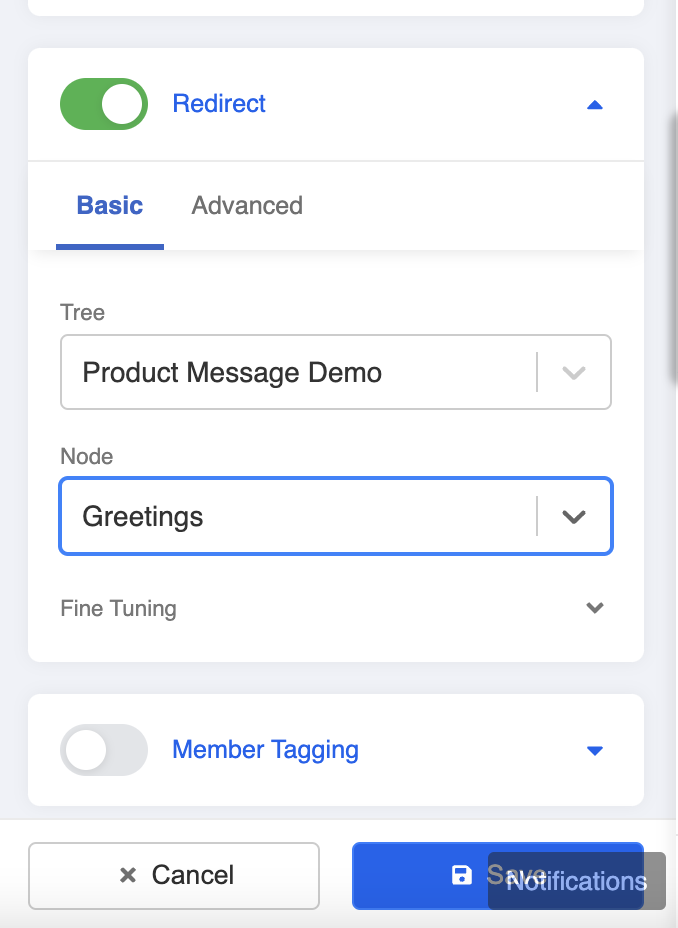
- Toggle on redirect, and redirect to the "Greetings" node that you have created.
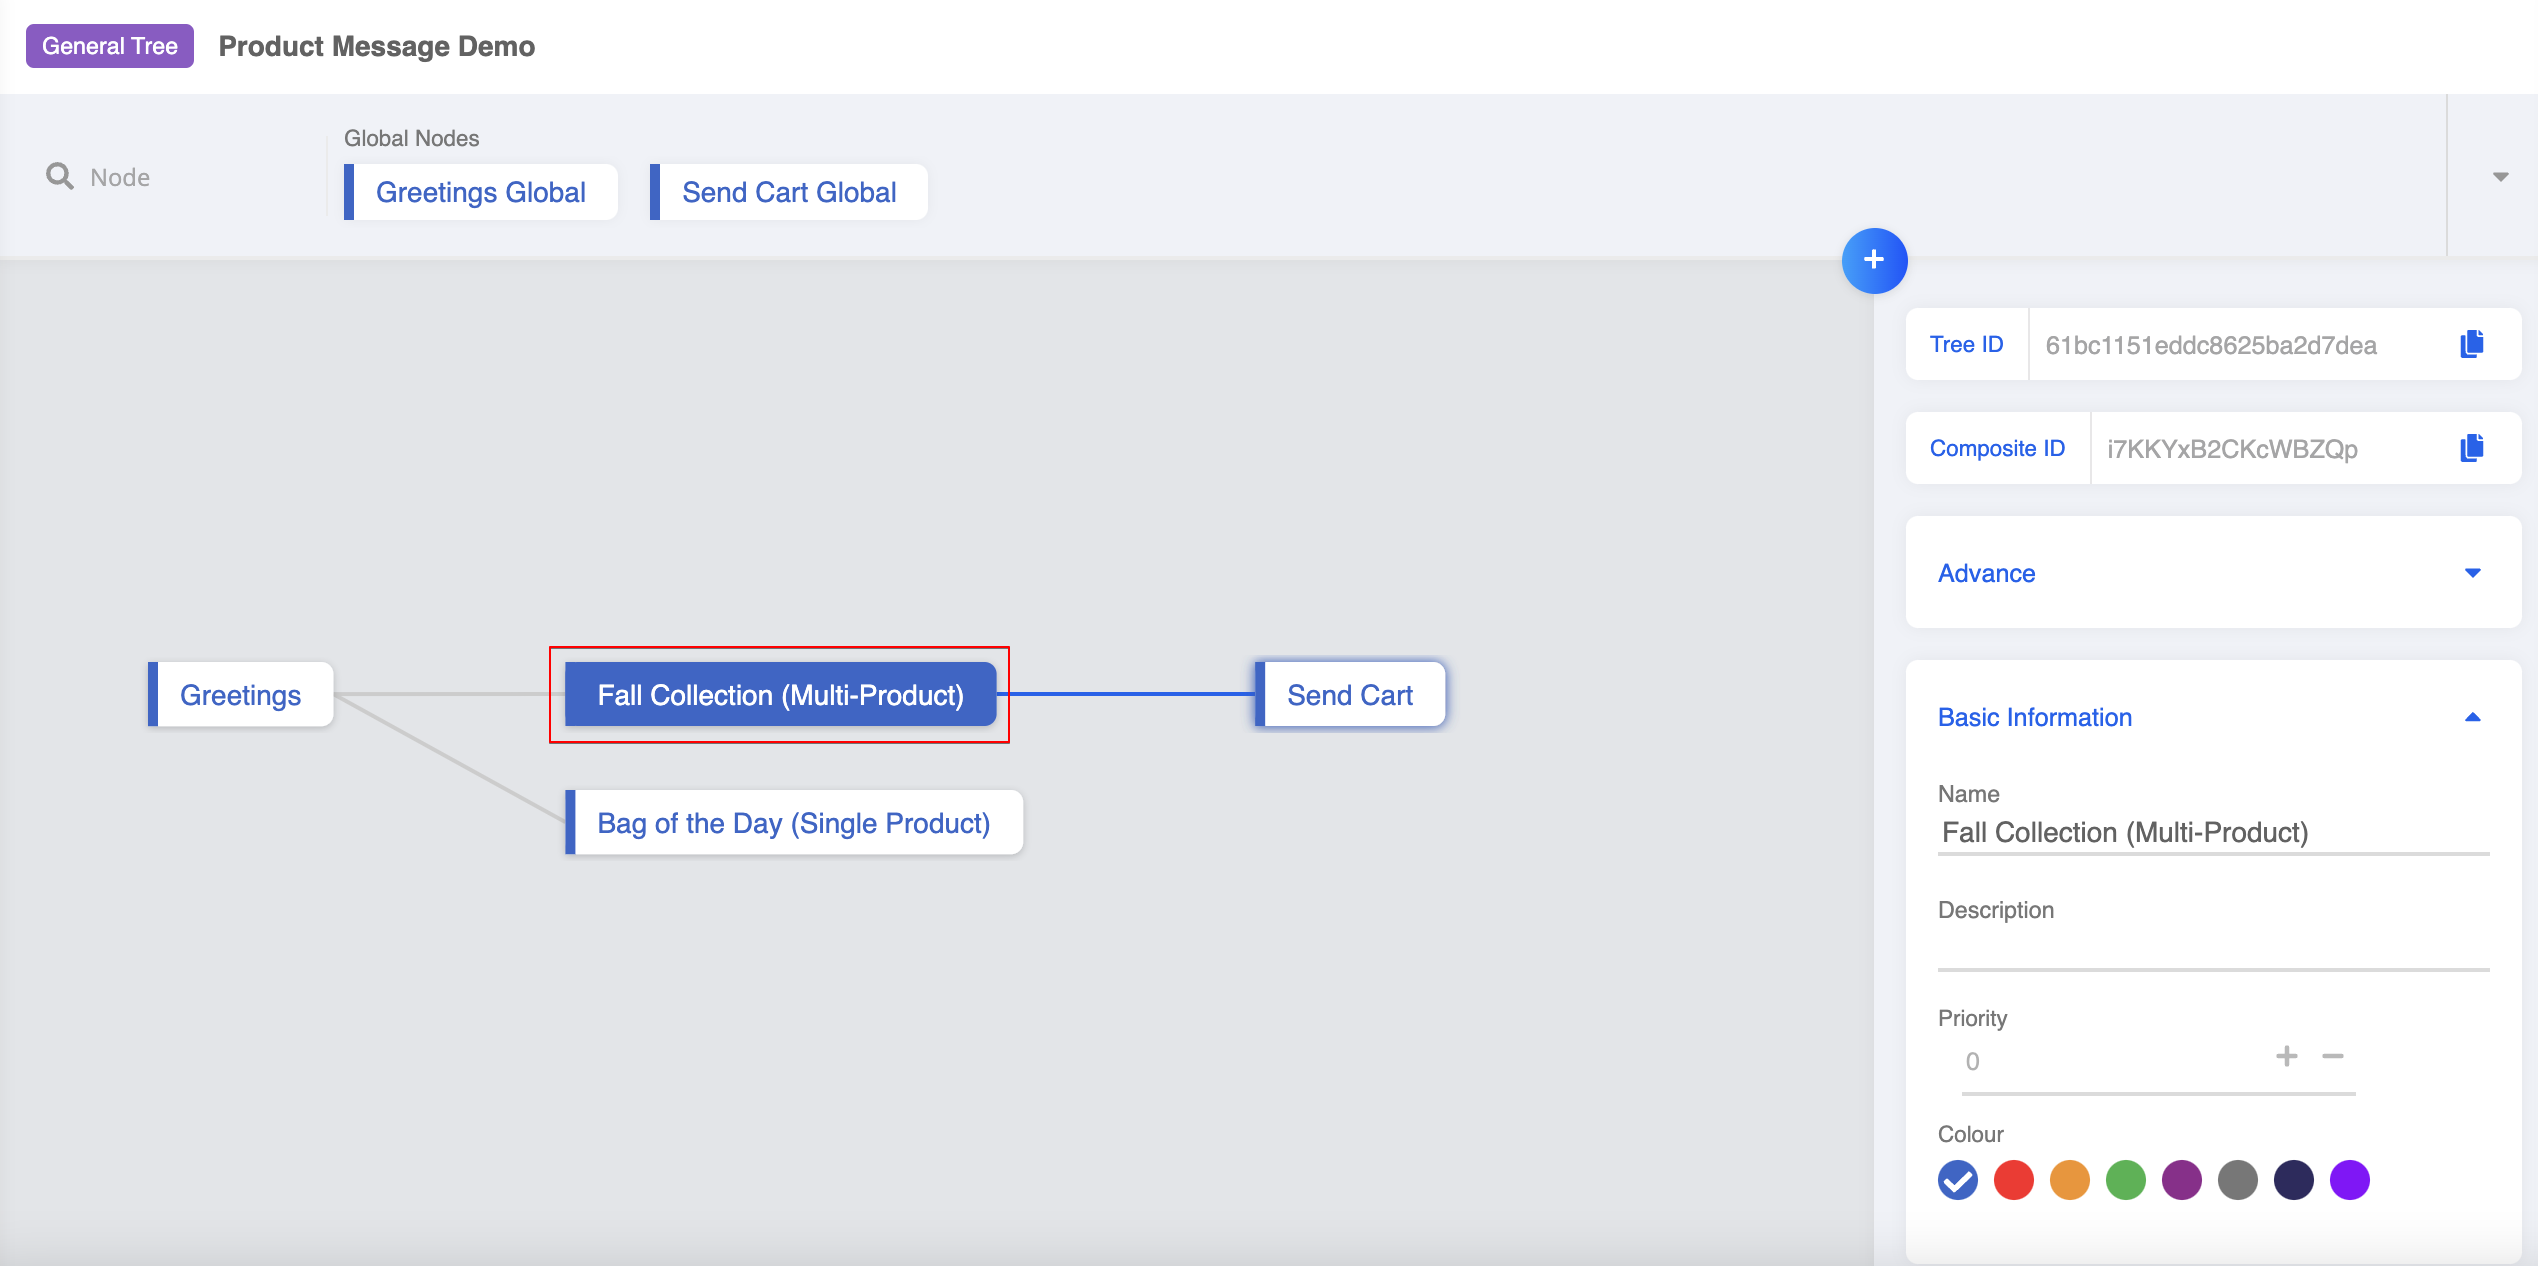
Create a Tree Node - Multi-Product
- Create a another tree node. This is for displaying the Multi-Product Message.
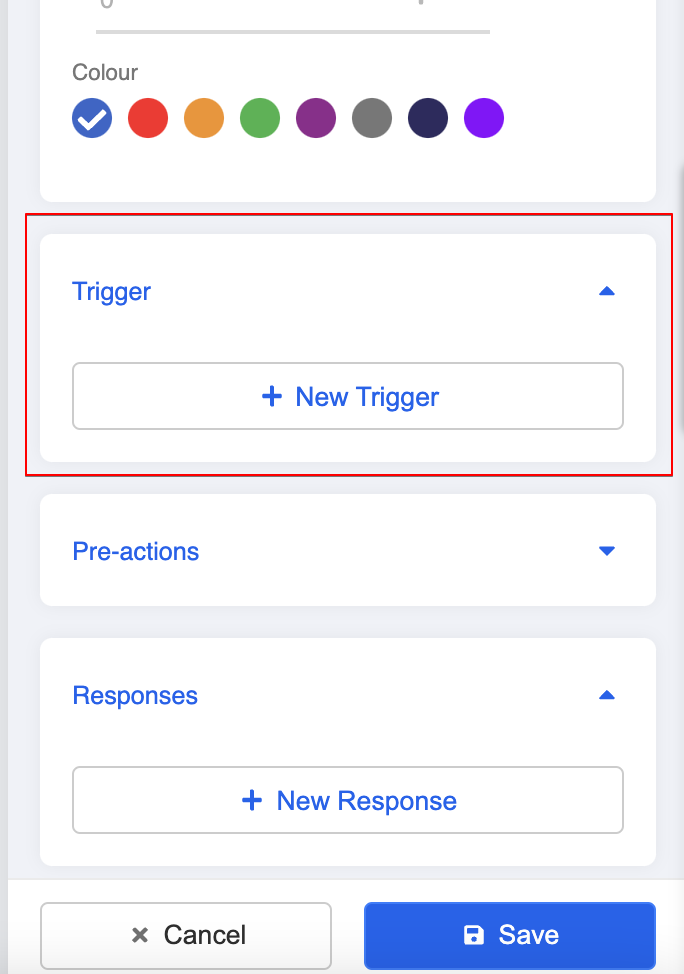
- Create a new trigger.
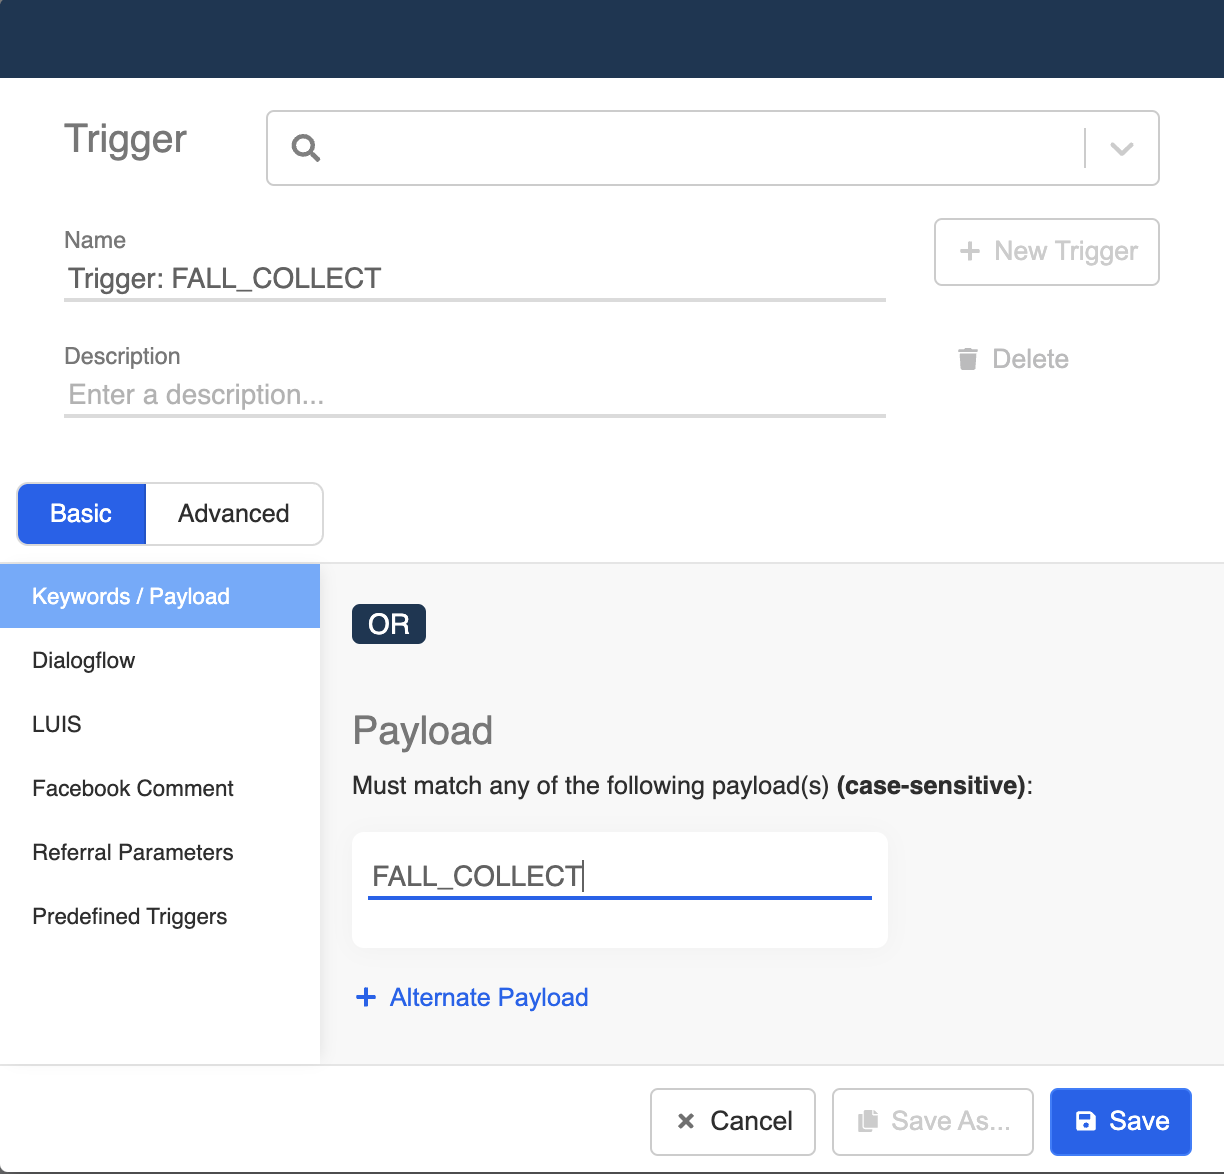
- In order to map to the button in the greeting message, we need to use Payload as the trigger. Please make the sure the self-defined payload mataches with what you have assigned to the button. Click "Save" to continue.
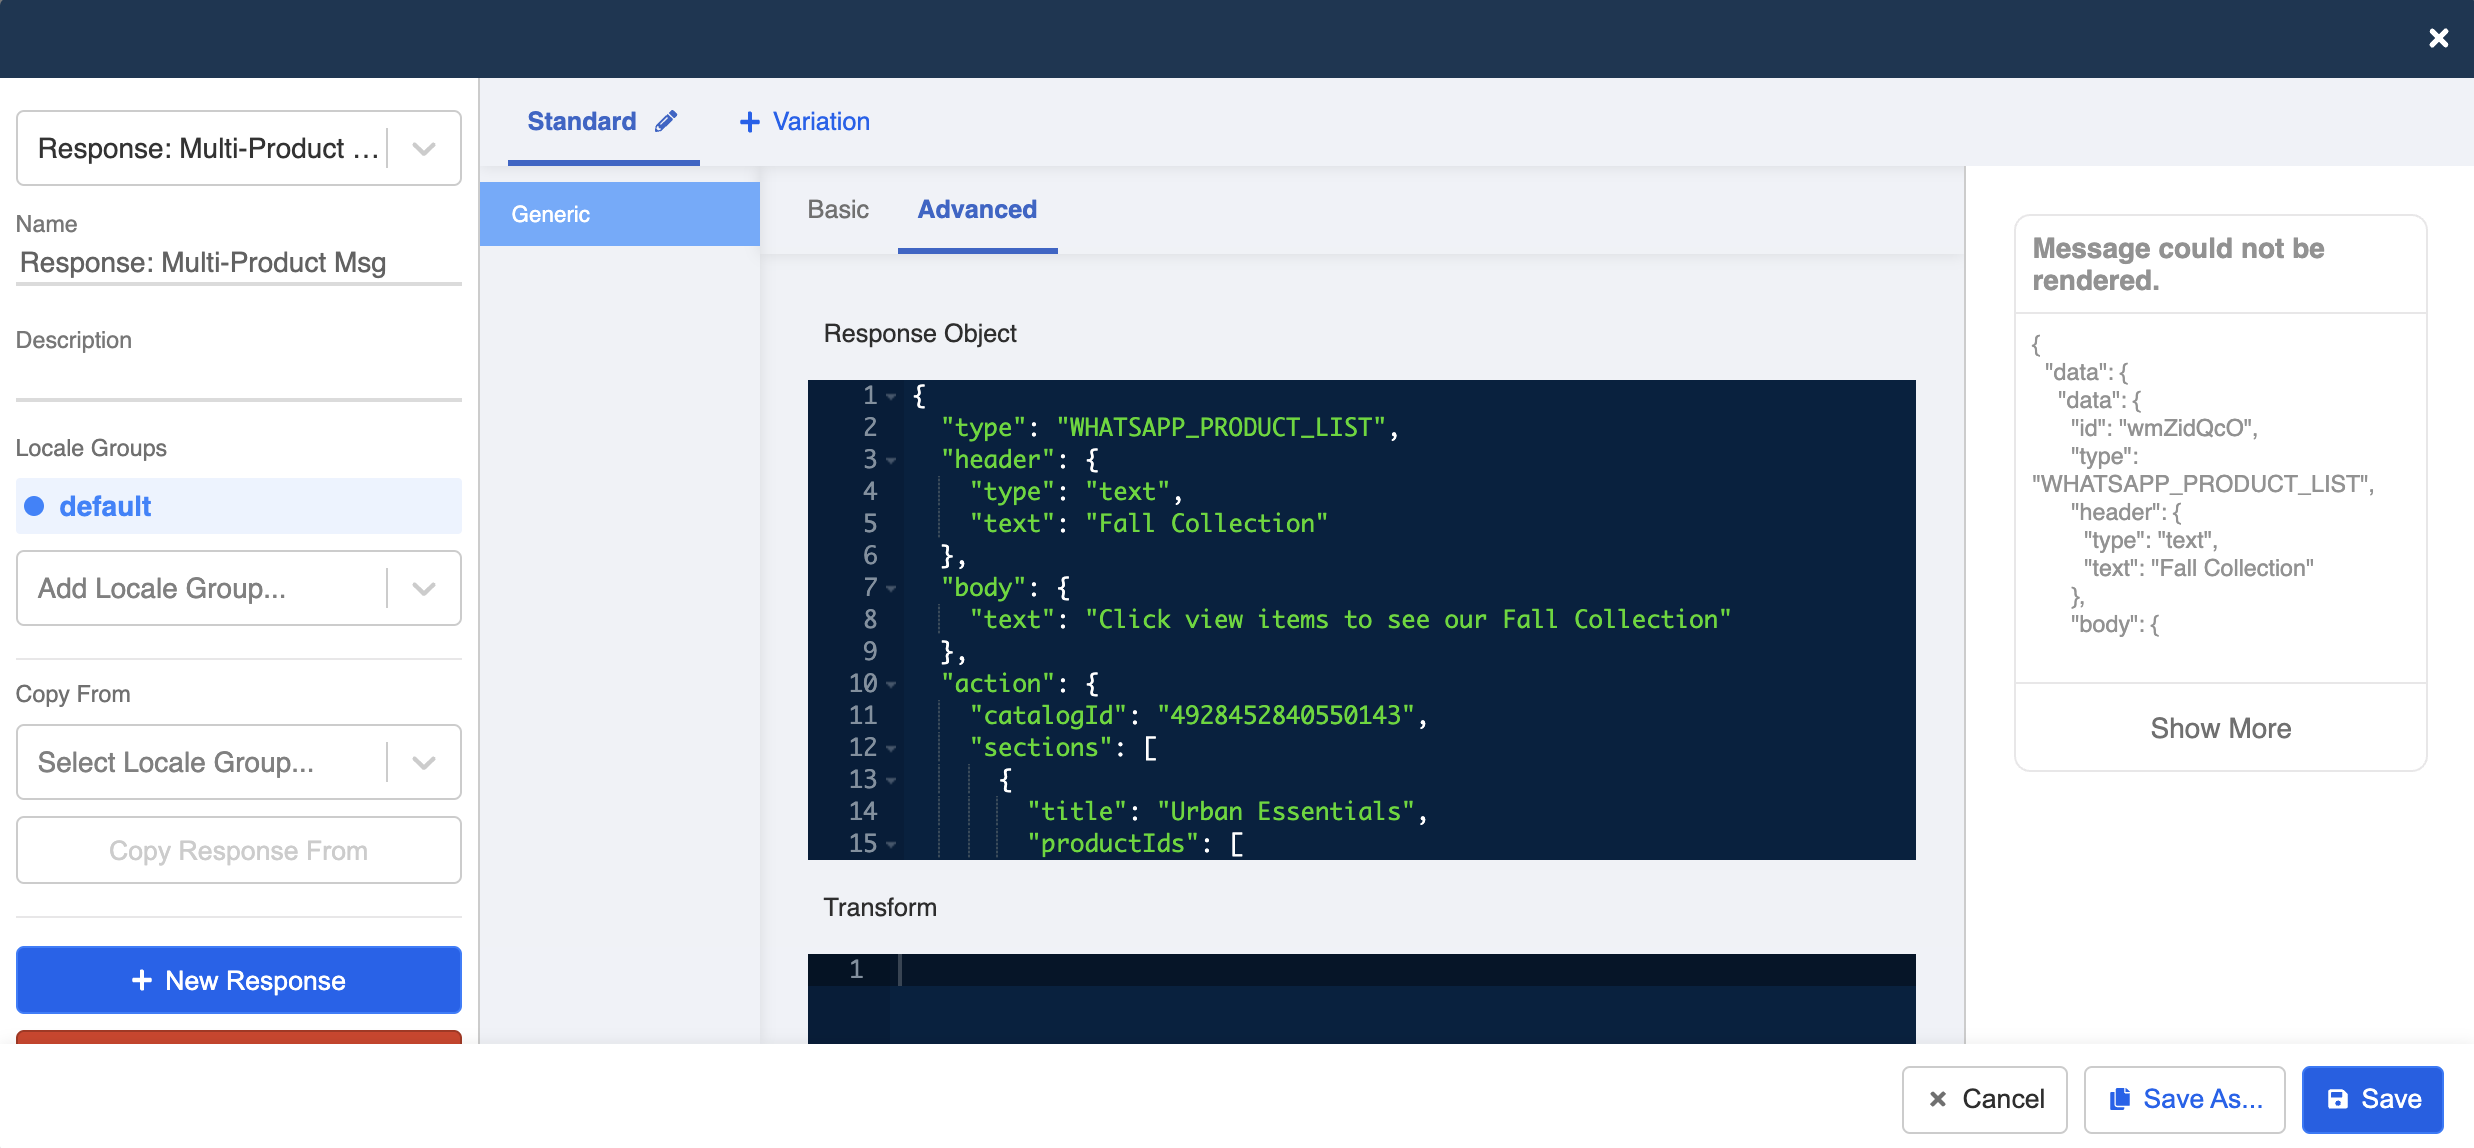
Then, head to Response, create a new response. Then, select Advanced, and enter the following code into the Response Object. This response can let you showcase multiple products by collections.
Please note that
catalogIDis the Catalog ID that can be found in your Commerce Manager andproductIdsis the Content ID of a product.
Your Multi-Product Message can only contain a selection of up to 30 products from the inventory.
{
  "type": "WHATSAPP_PRODUCT_LIST",
  "header": {
    "type": "text",
    "text": "Fall Collection"
  },
  "body": {
    "text": "Click view items to see our Fall Collection"
  },
  "action": {
    "catalogId": "4928452840550143",
    "sections": [
      {
        "title": "Urban Essentials",
        "productIds": [
          "01-Pack",
          "02-Bag"
        ]
      },
      {
        "title": "Hiking Essentials",
        "productIds": [
          "03-Pack"
        ]
      }
    ]
  }
}
Single Product Message
Create a Tree Node - Single Product
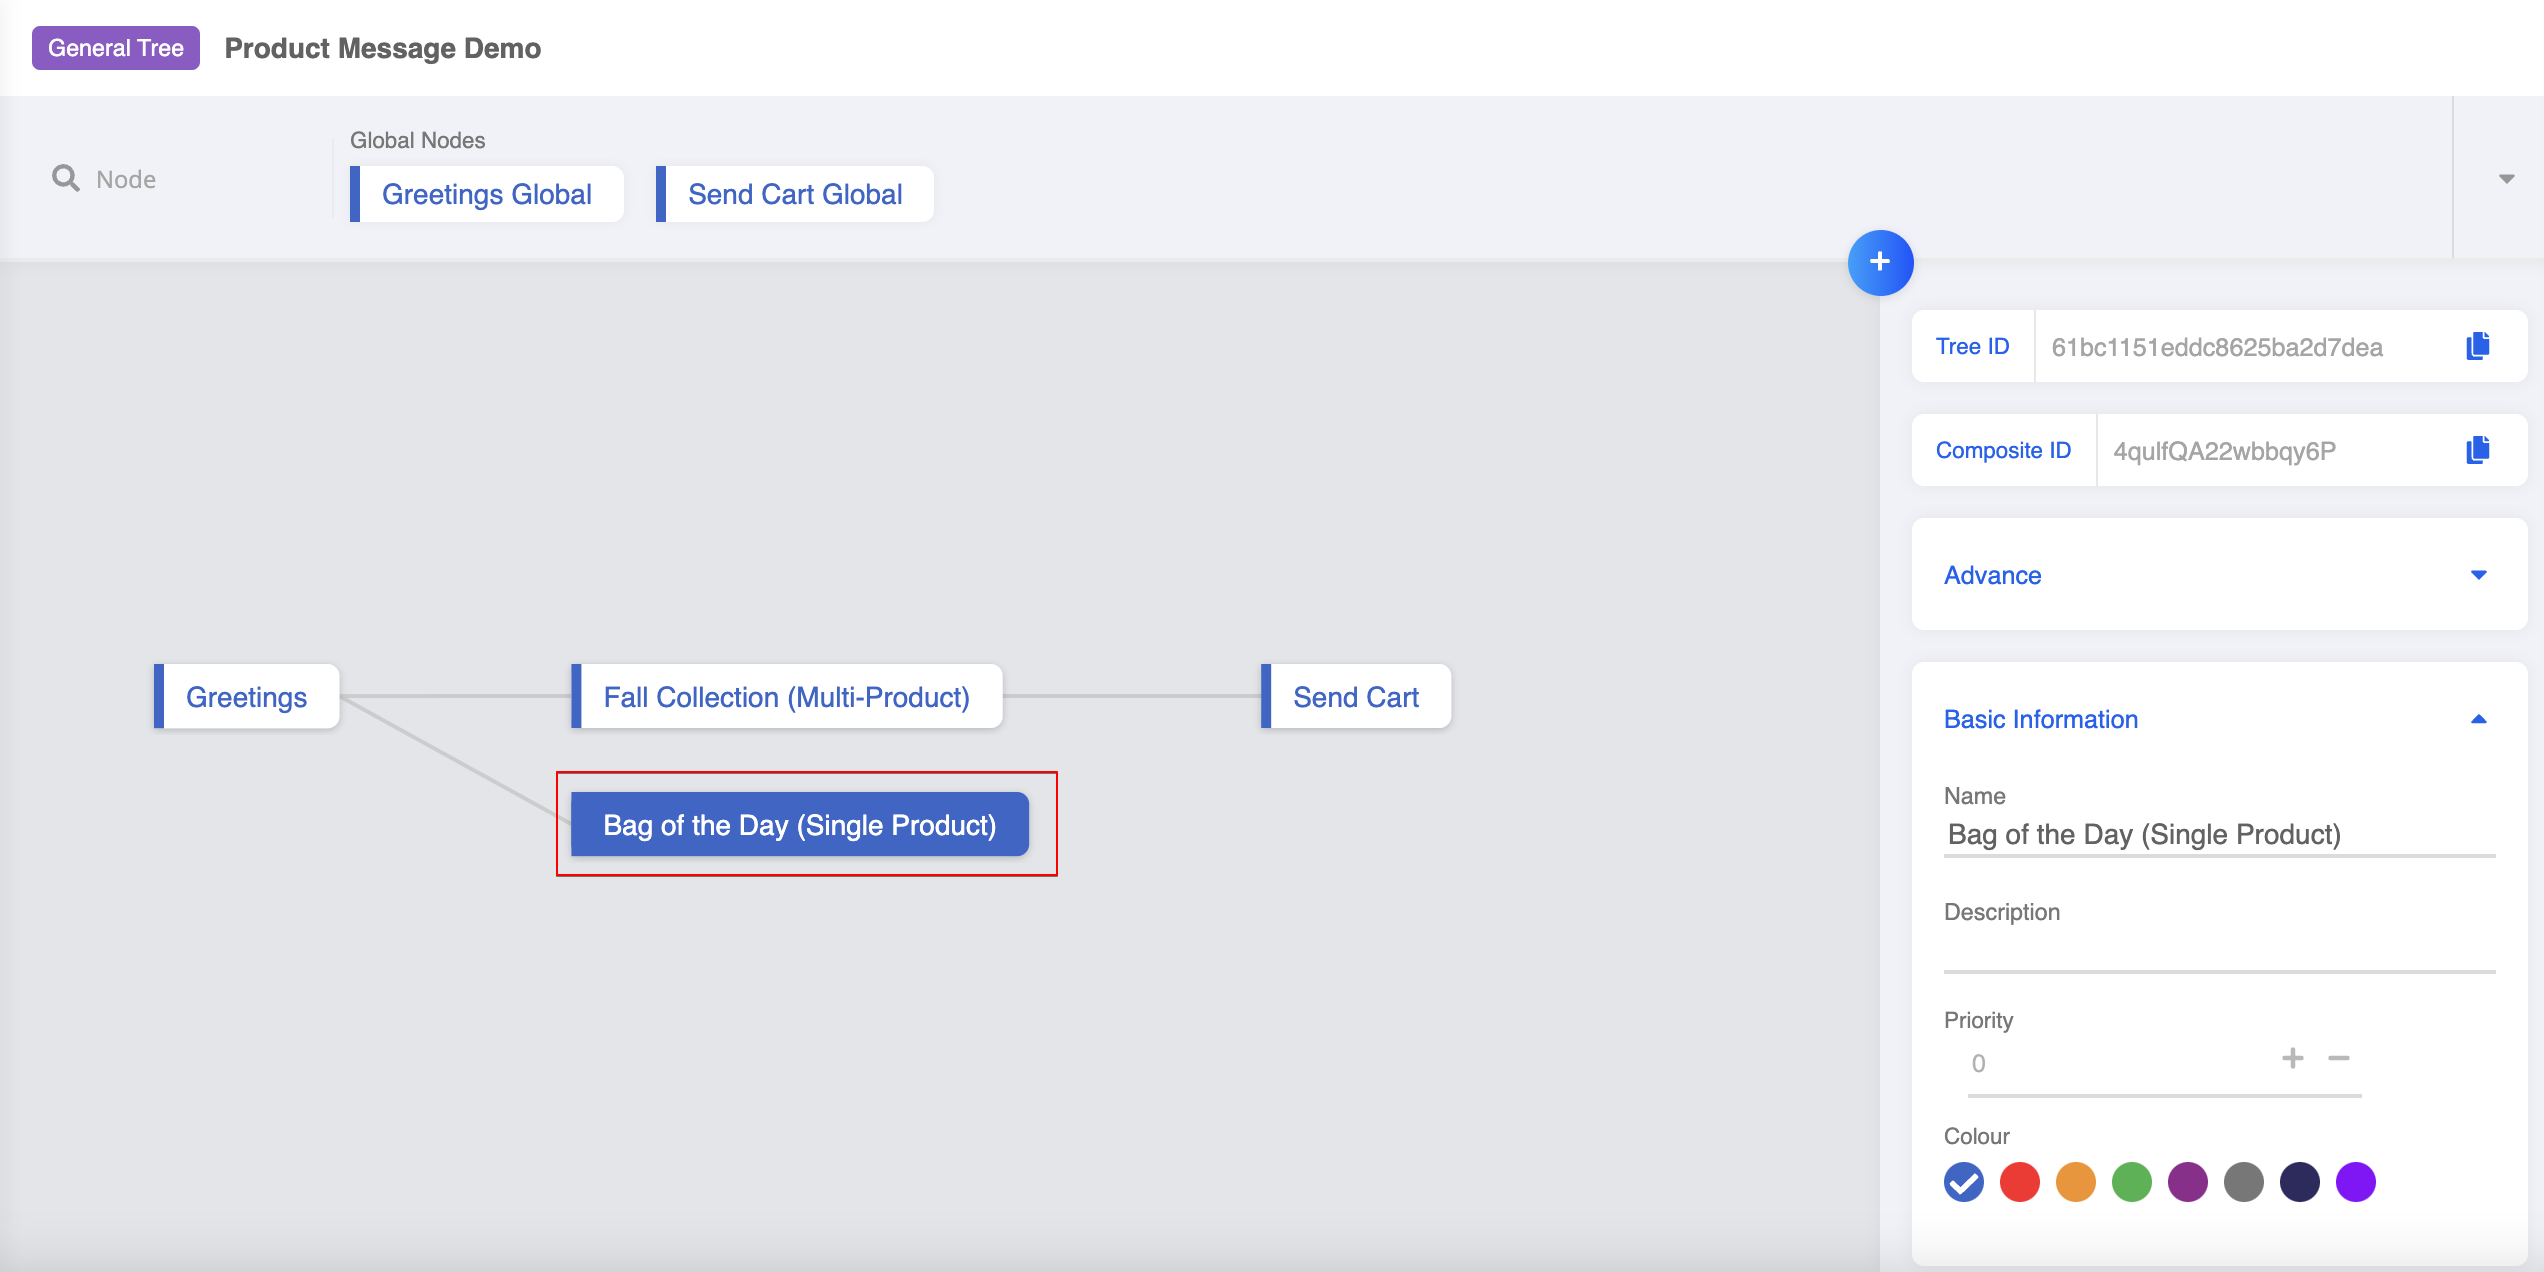
- Create another tree node for handling the Single Product Message.
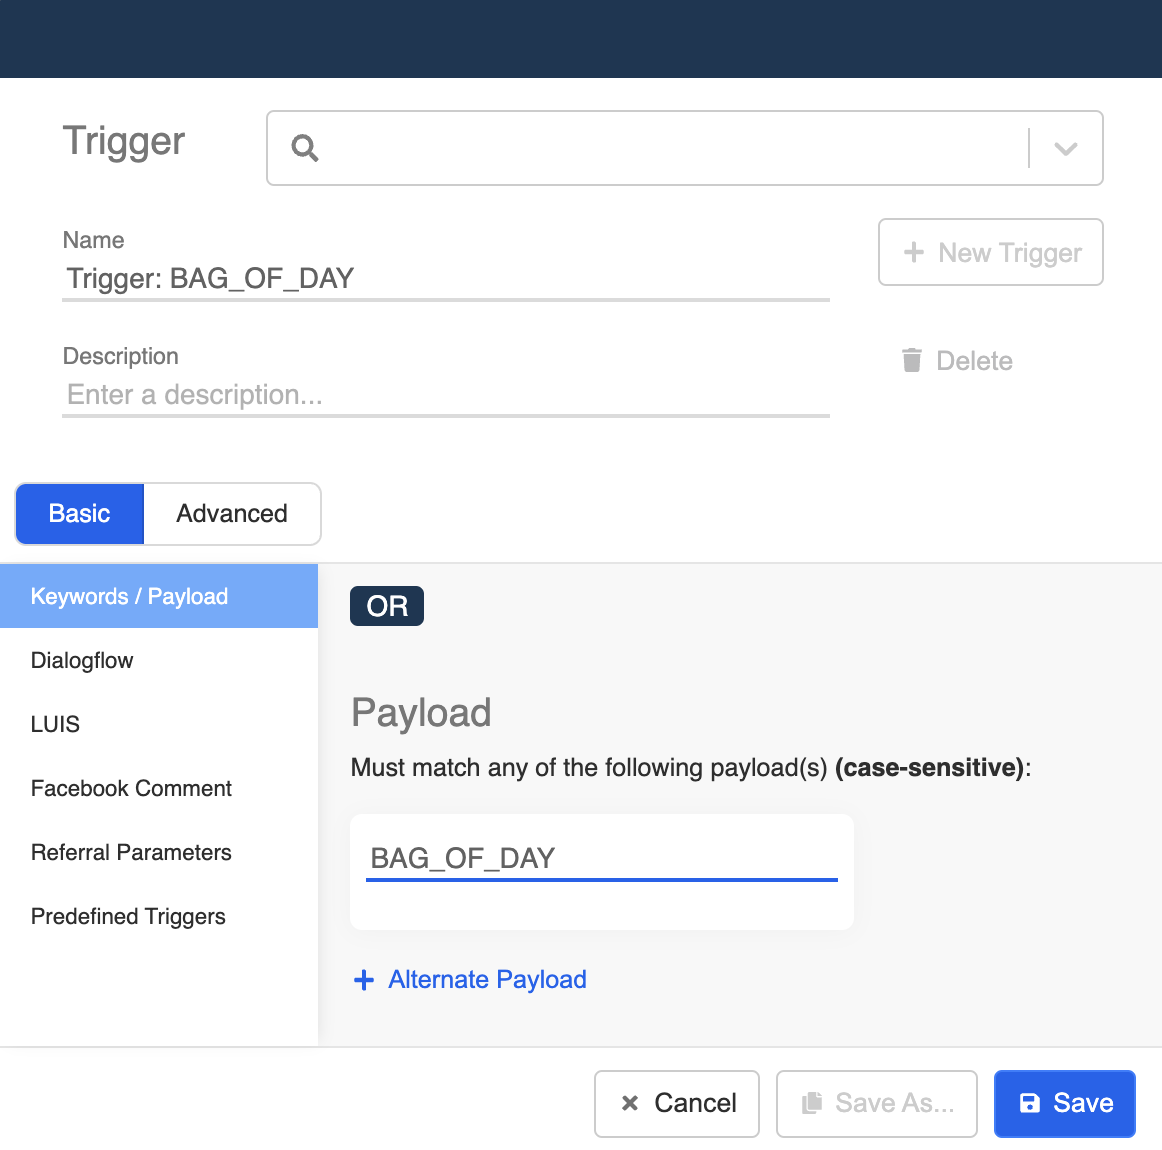
- Create a new trigger.
- In order to map to the button in the greeting message, we need to use Payload as the trigger. Please make the sure the self-defined payload mataches with what you have assigned to the button. Click "Save" to continue.
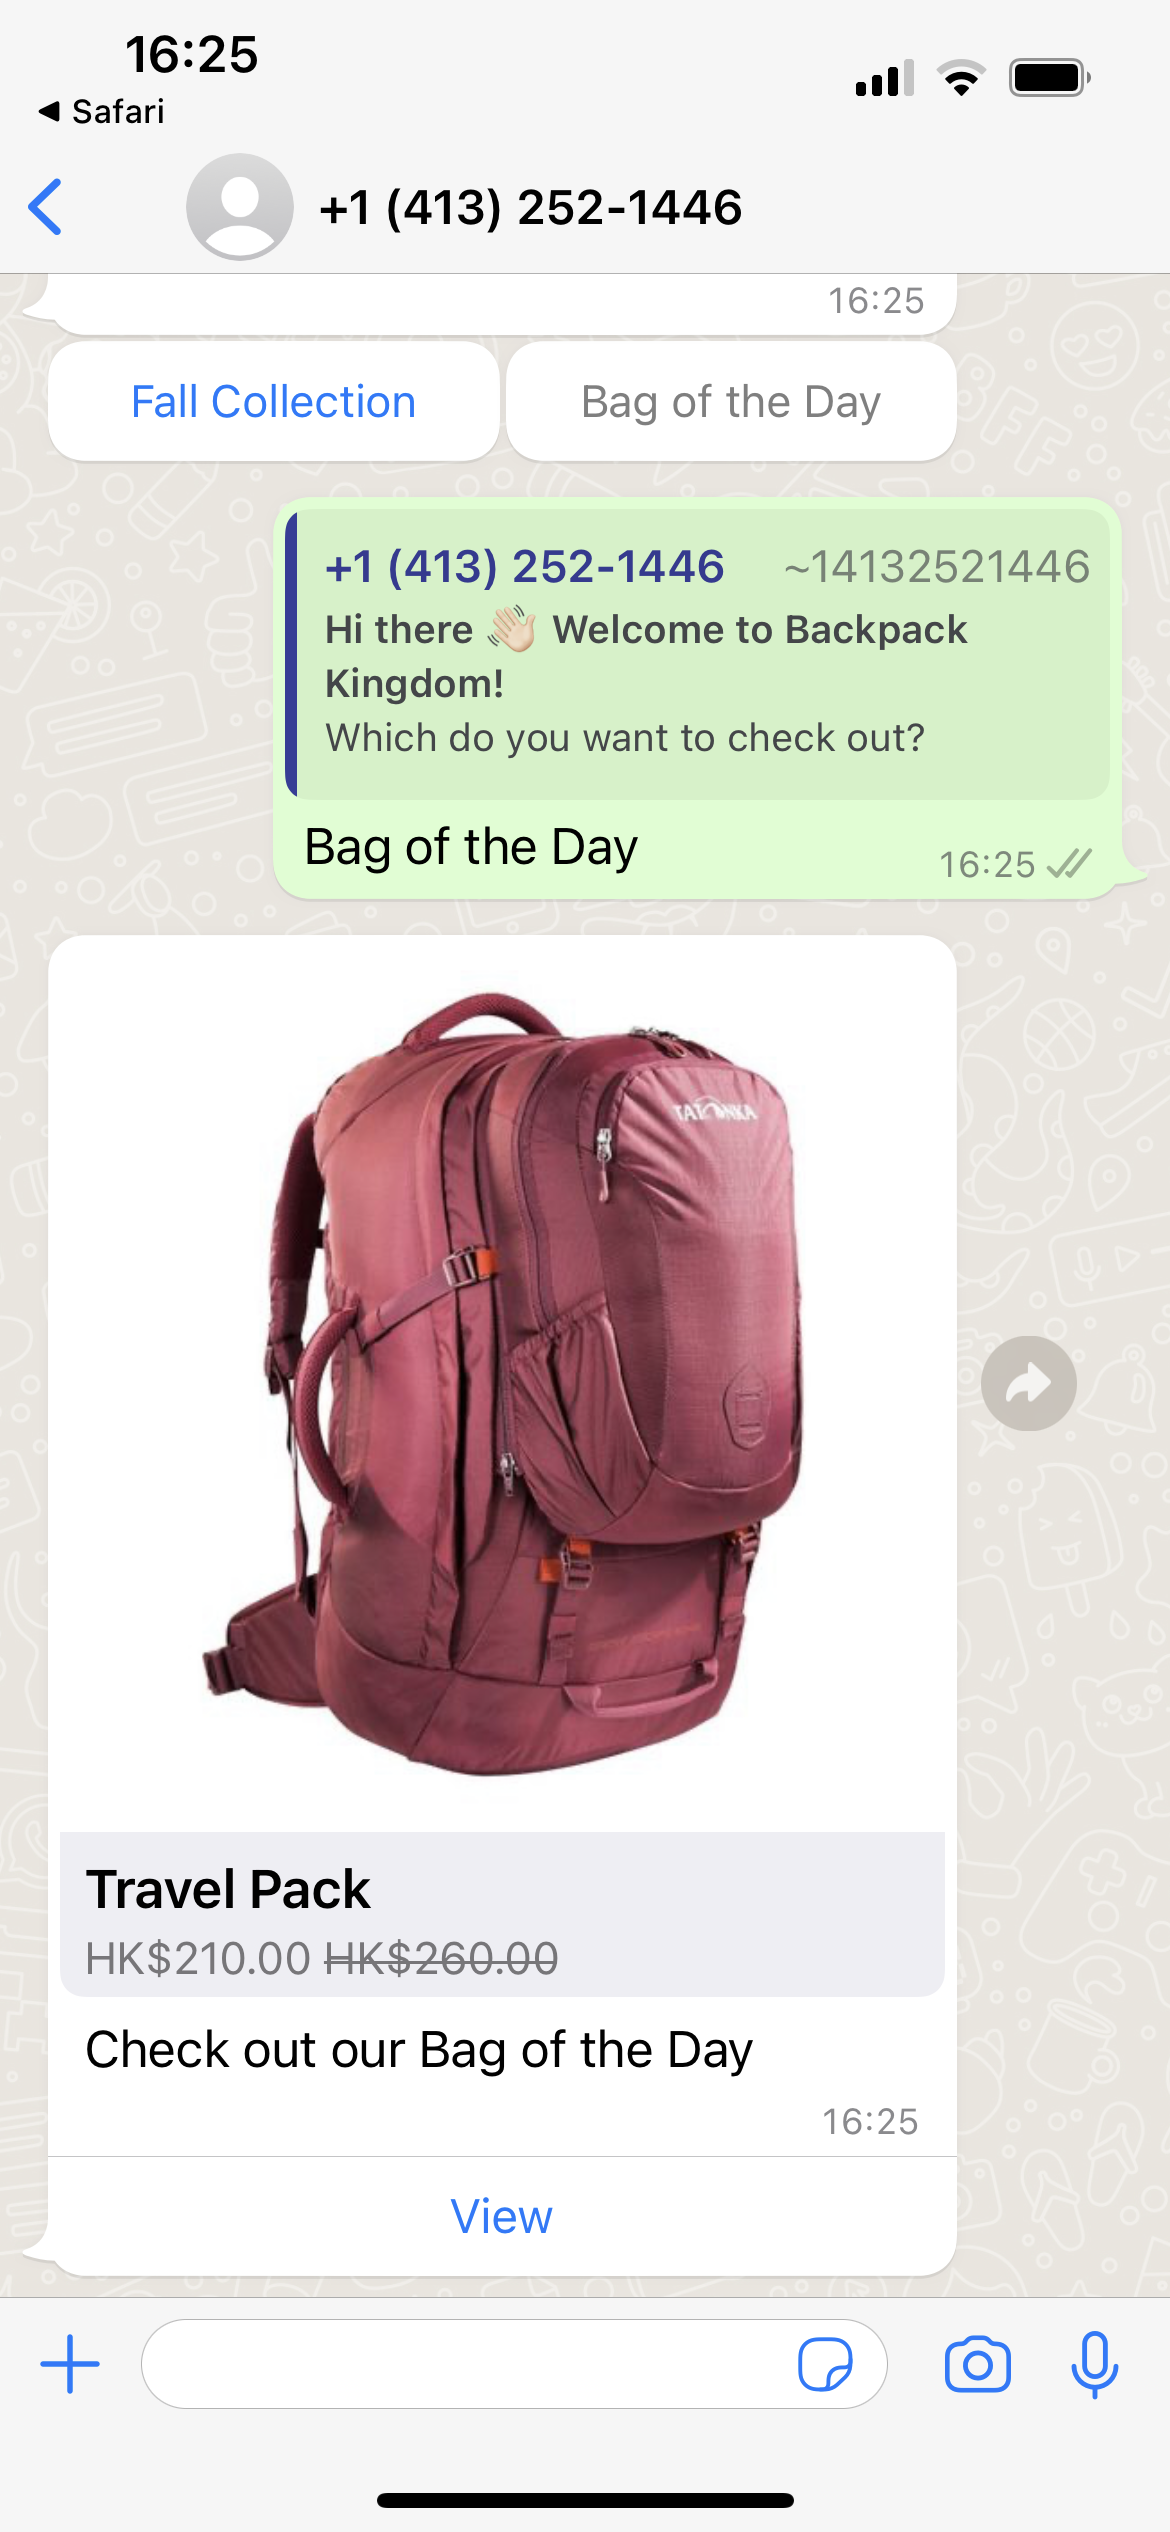
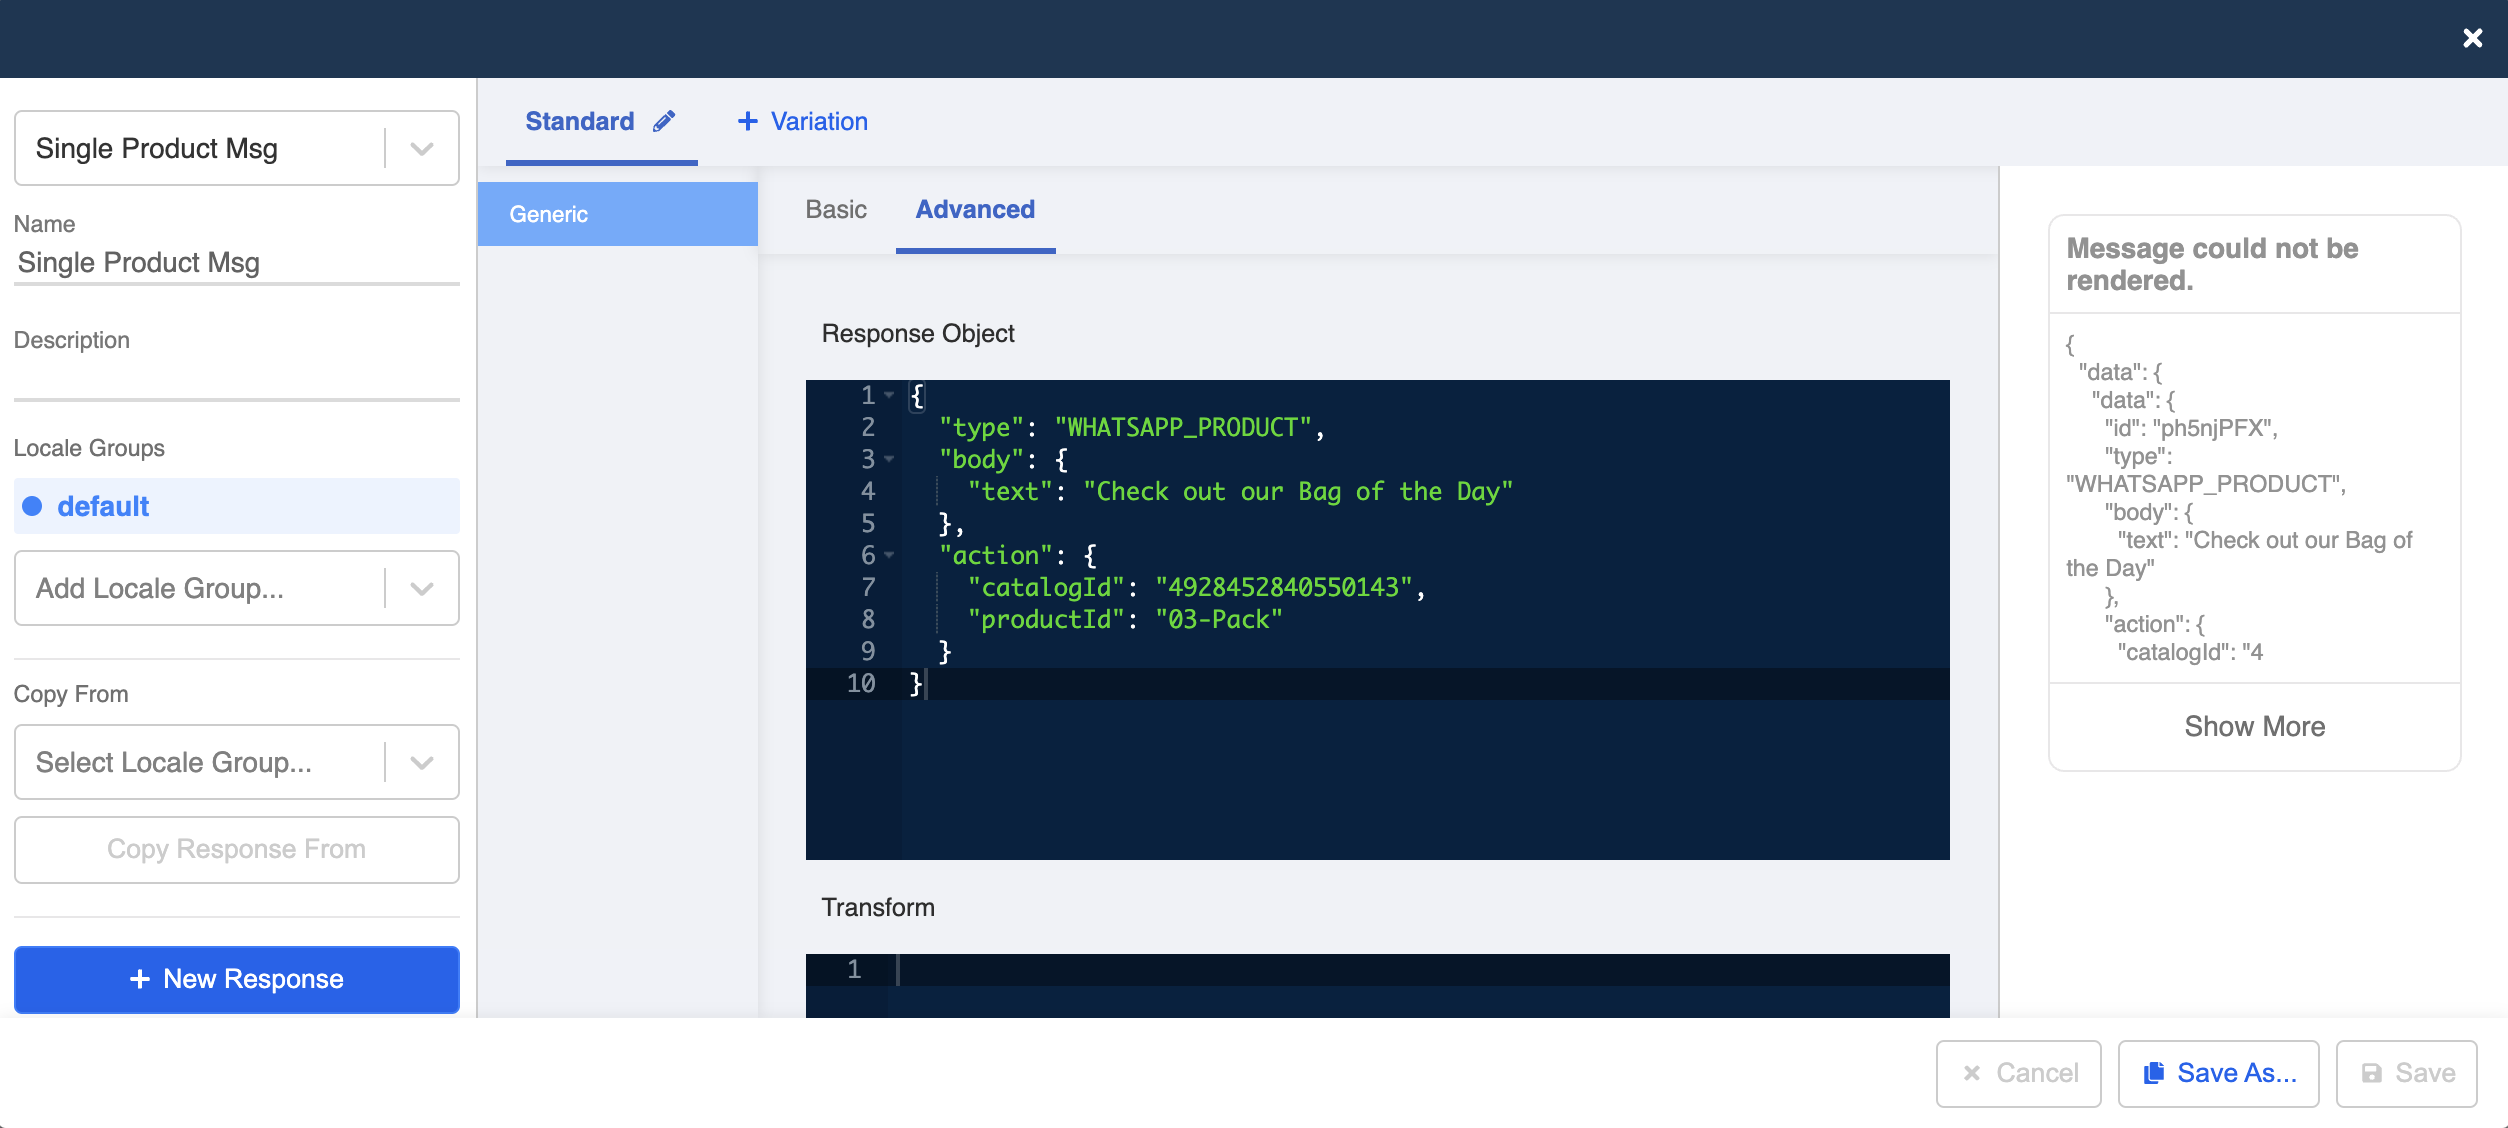
Then, head to Response, create a new response. Then, select Advanced, and enter the following code into the Response Object. This response can let you display one product with a detailed product page.
Please note that
catalogIDis the Catalog ID that can be found in your Commerce Manager andproductIdsis the Content ID of a product.
{
  "type": "WHATSAPP_PRODUCT",
  "body": {
    "text": "Check out our Bag of the Day"
  },
  "action": {
    "catalogId": "4928452840550143",
    "productId": "03-Pack"
  }
}
Sent Cart Message
Create a Tree Node - Sent Cart
- Create a new tree node. It is for sending the confirmation message after cart is sent.
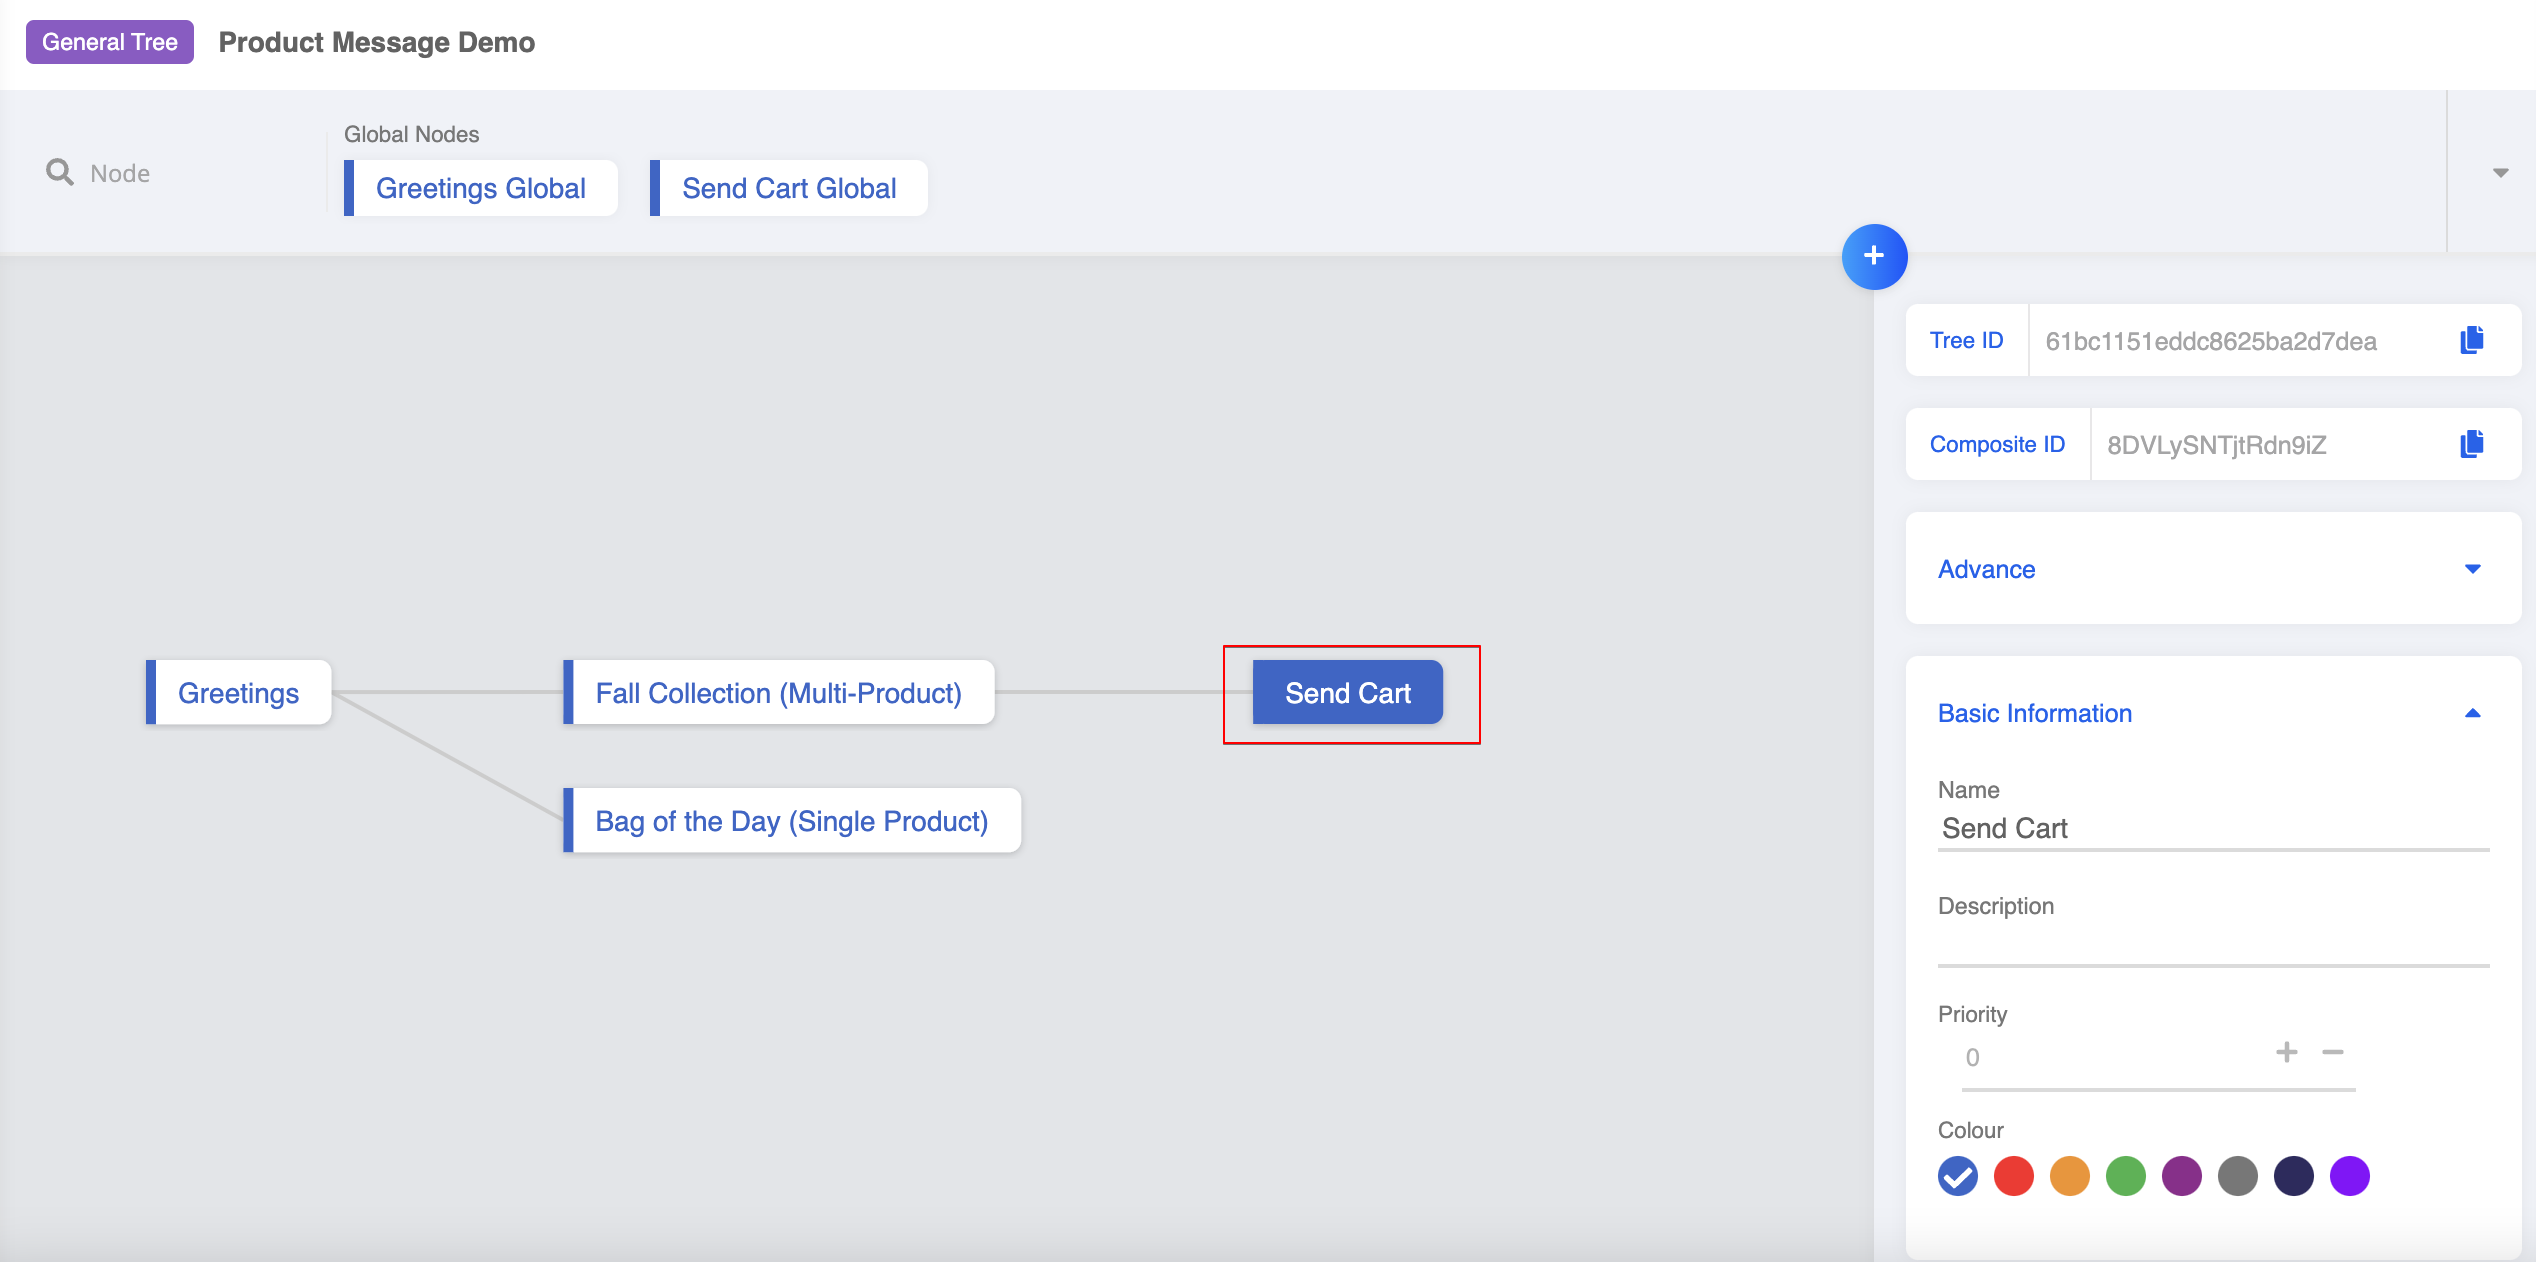
- Create a new response.
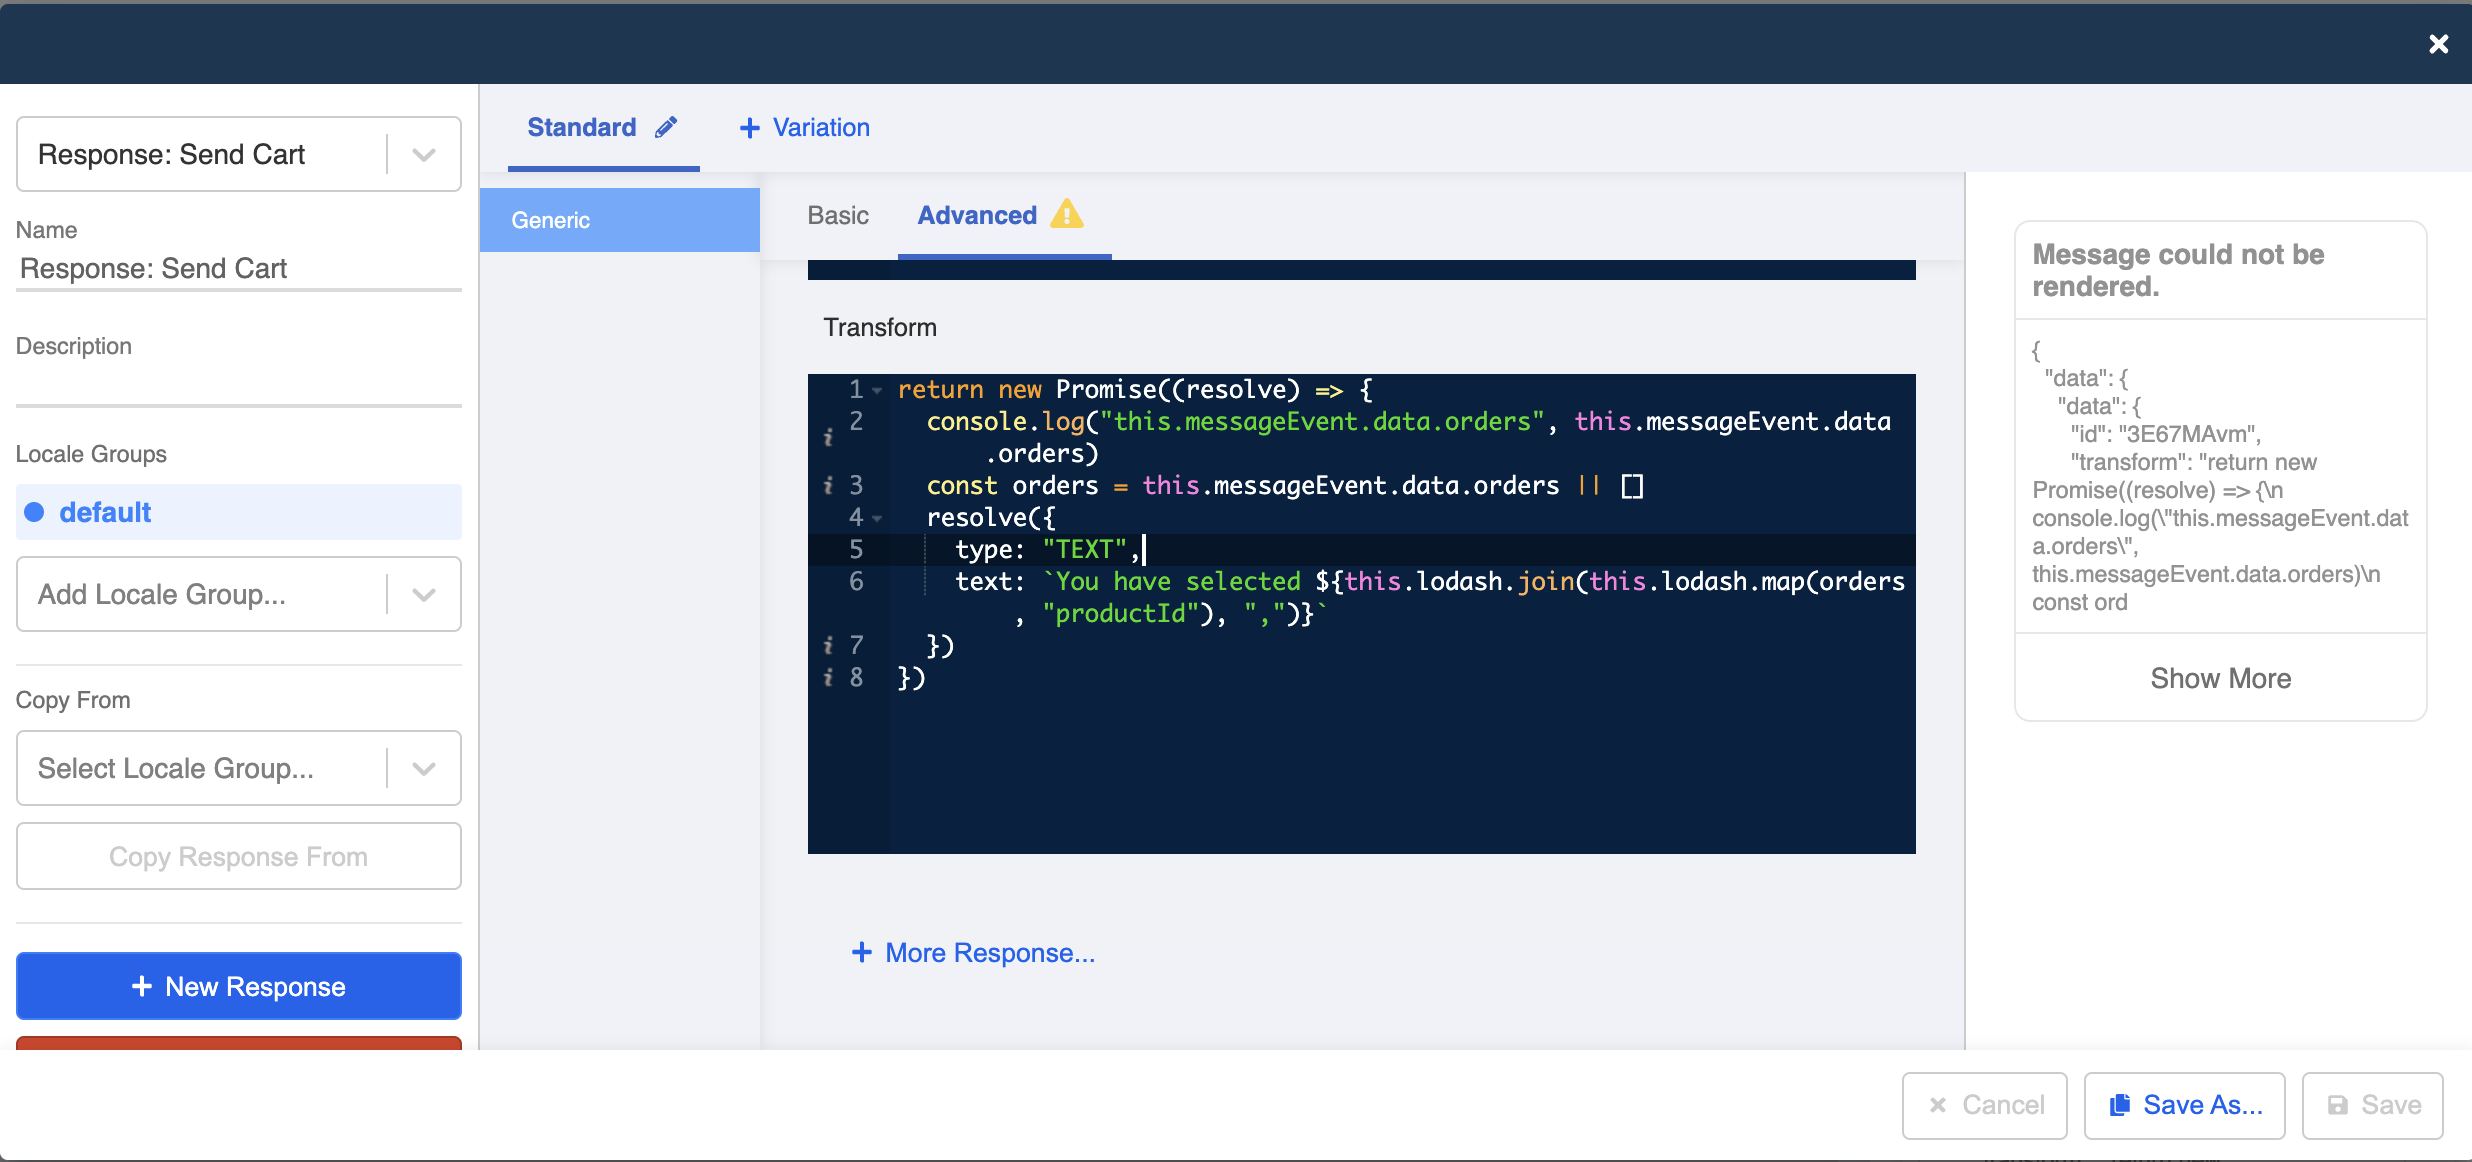
- Select Advanced, and enter the following code into Transform. You can customize the text message.
return new Promise((resolve) => {
  console.log("this.messageEvent.data.orders", this.messageEvent.data.orders)
  const orders = this.messageEvent.data.orders || []
  resolve({
    type: "TEXT",
    text: `You have selected ${this.lodash.join(this.lodash.map(orders, "productId"), ",")}`
  })
})
Create a Global Node - Sent Cart
- Now, create a new global node for triggering the sent cart message.

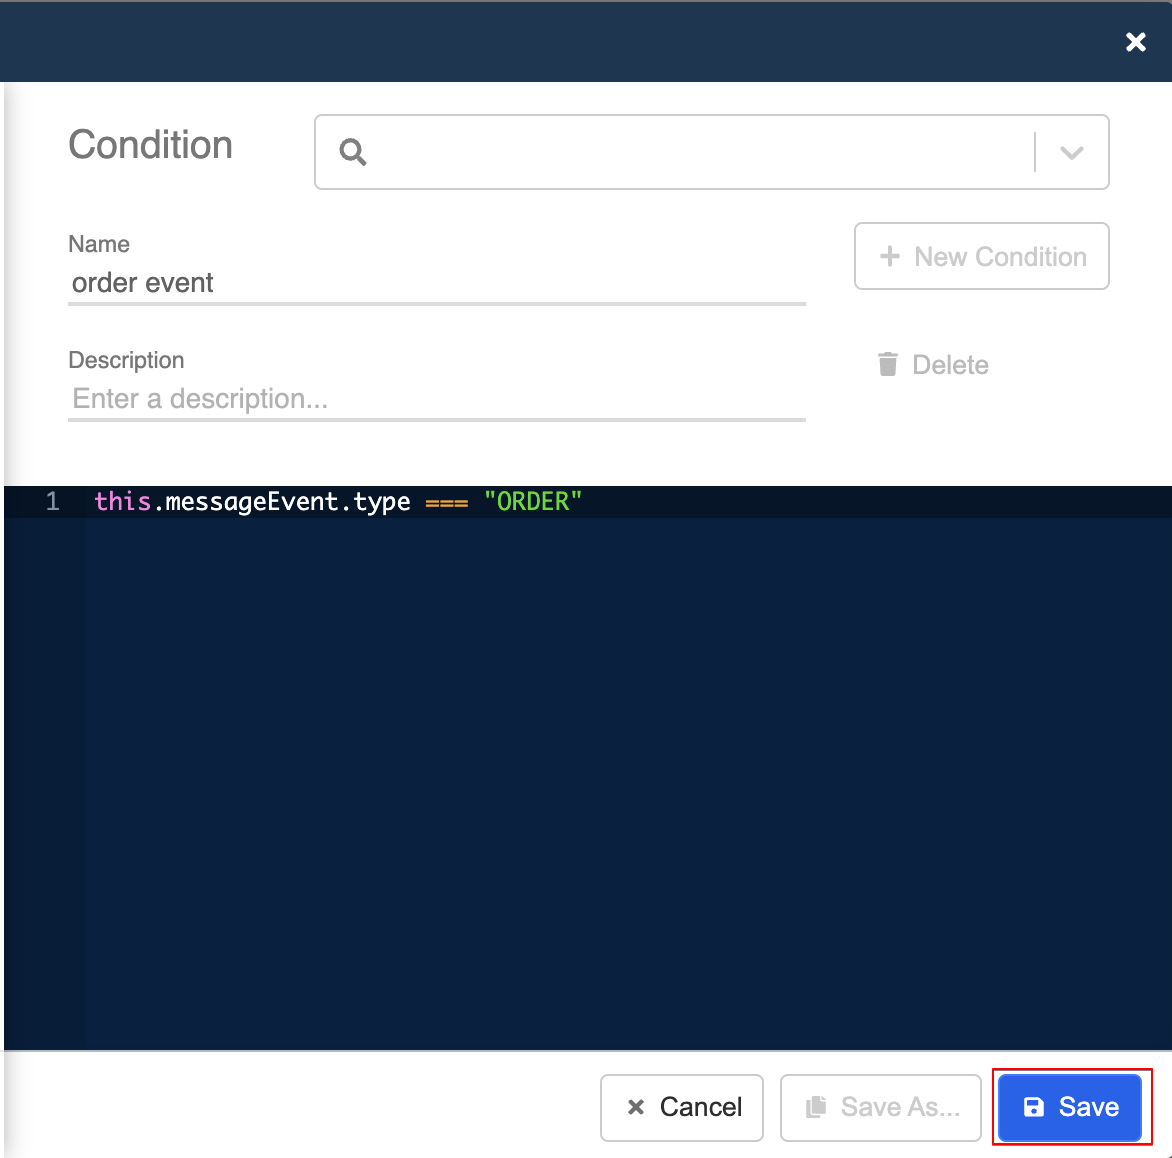
- In trigger, create a new condition to receive
ORDERevent.
this.messageEvent.type === "ORDER"
- Create a new trigger, select Advanced and add the condition you have just created. Click "Save" when you finish.
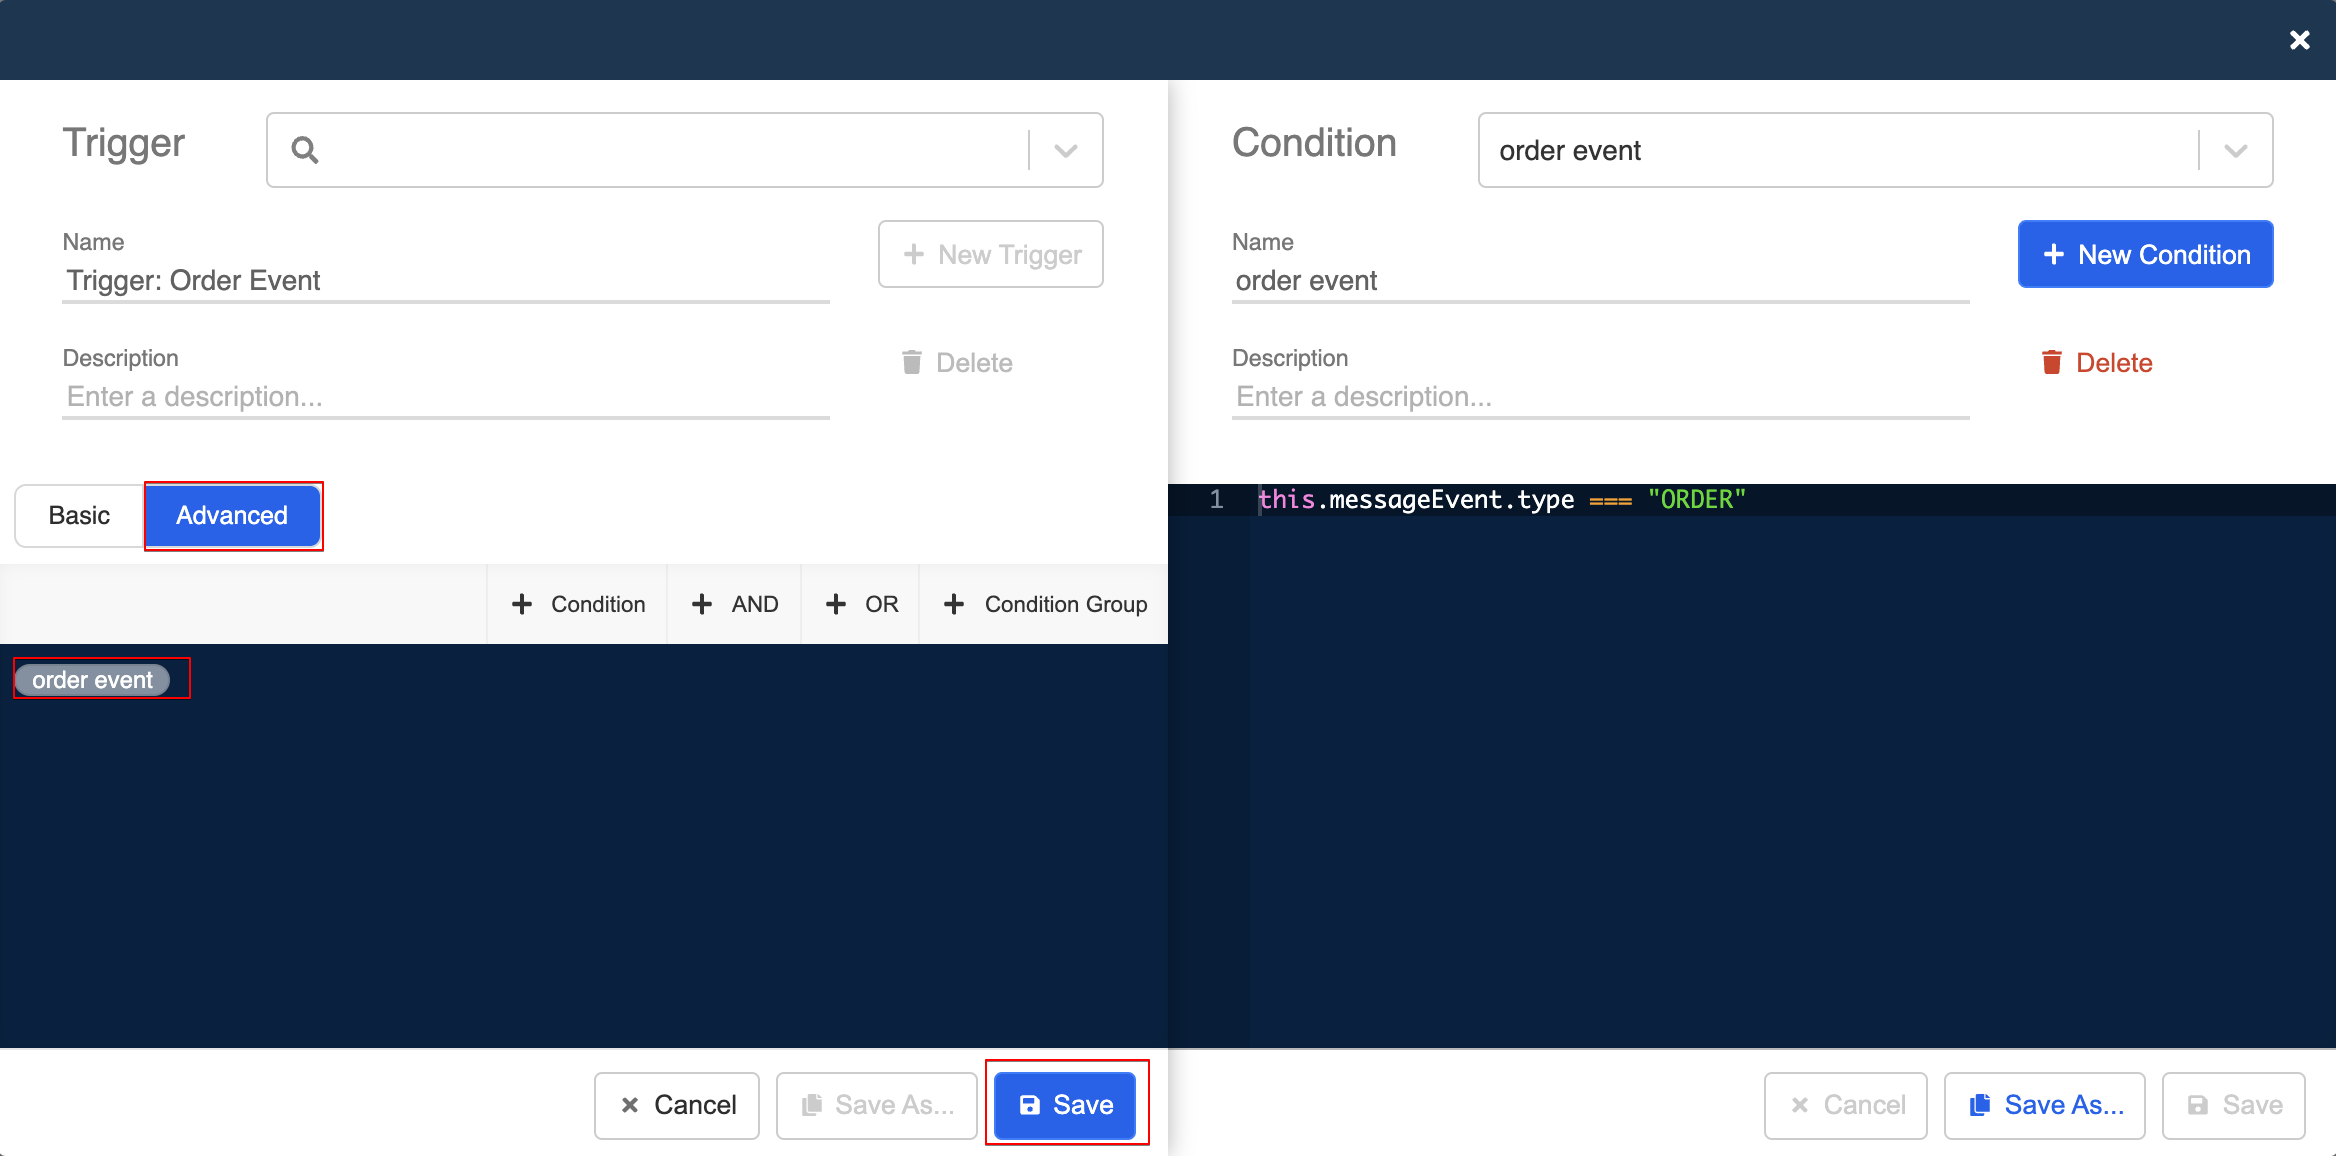
- Toggle on Redirect and redirect to the sent cart tree node.

Order Message Event
When a customer places an order after receiving a product message, the businesses will receive an message event for the order in the below format:
{
  "type": "ORDER",
  "data": {
    "text": "message in send to cart",
    "catalogId": "fb catalog id",
    "orders": [
       "productId": "01-McDonald (fb catalog item id)",
       "quantity": 100,
       "currency": "USD",
       "price": 100
    ]
  }
}
Add Tree to Channel
- Head to Channels, click "Edit" to enter the WhatsApp channel.
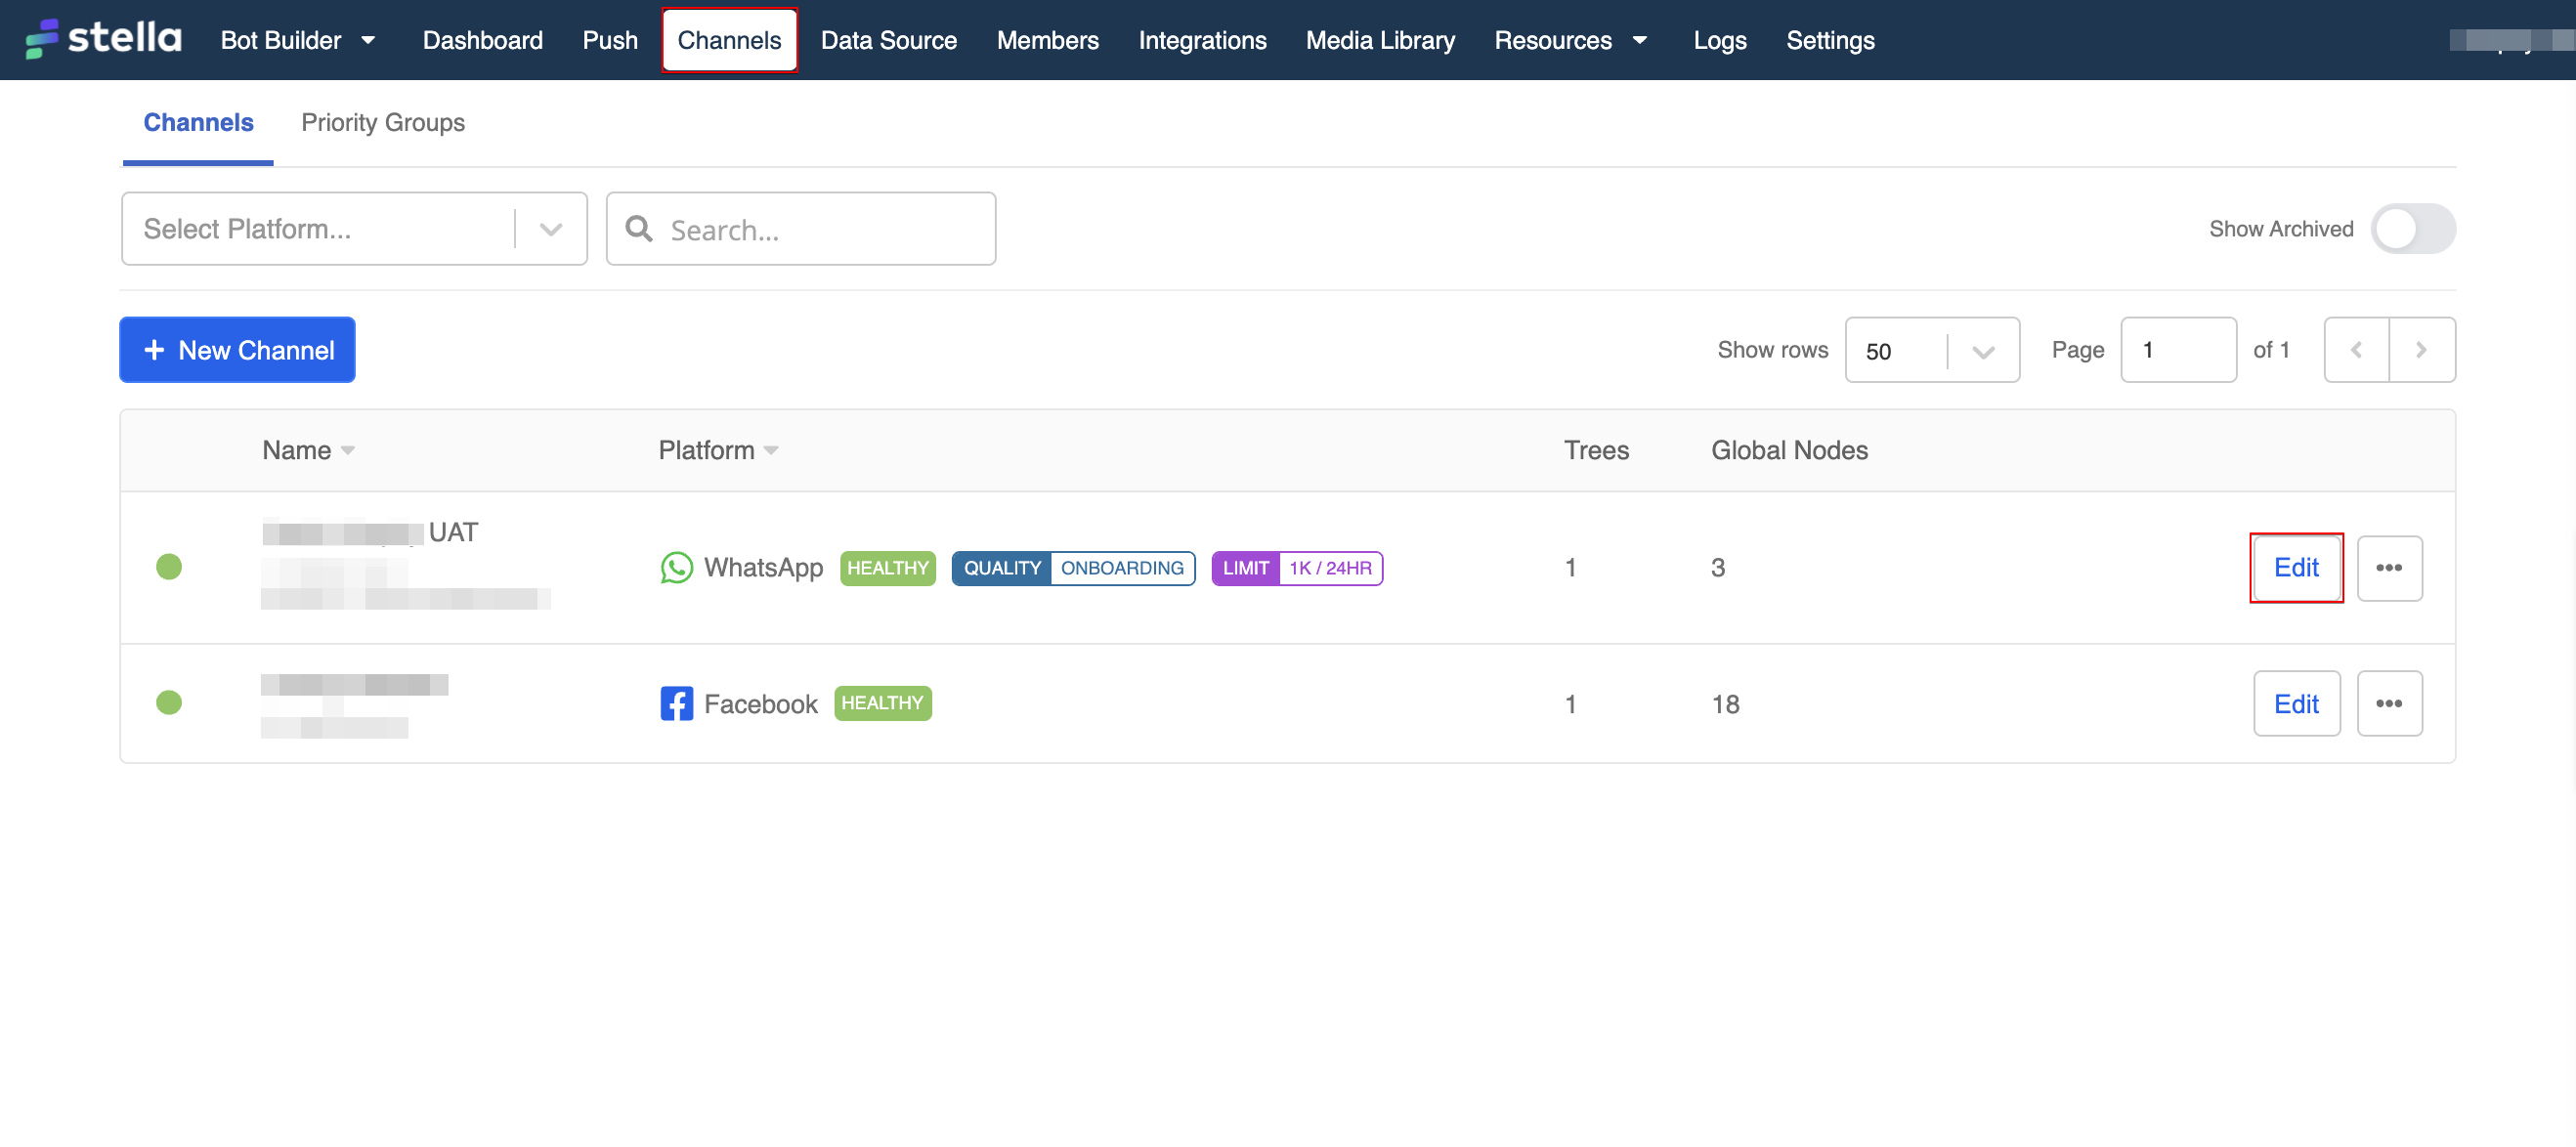
- Select Trees, and click "+ New Tree".
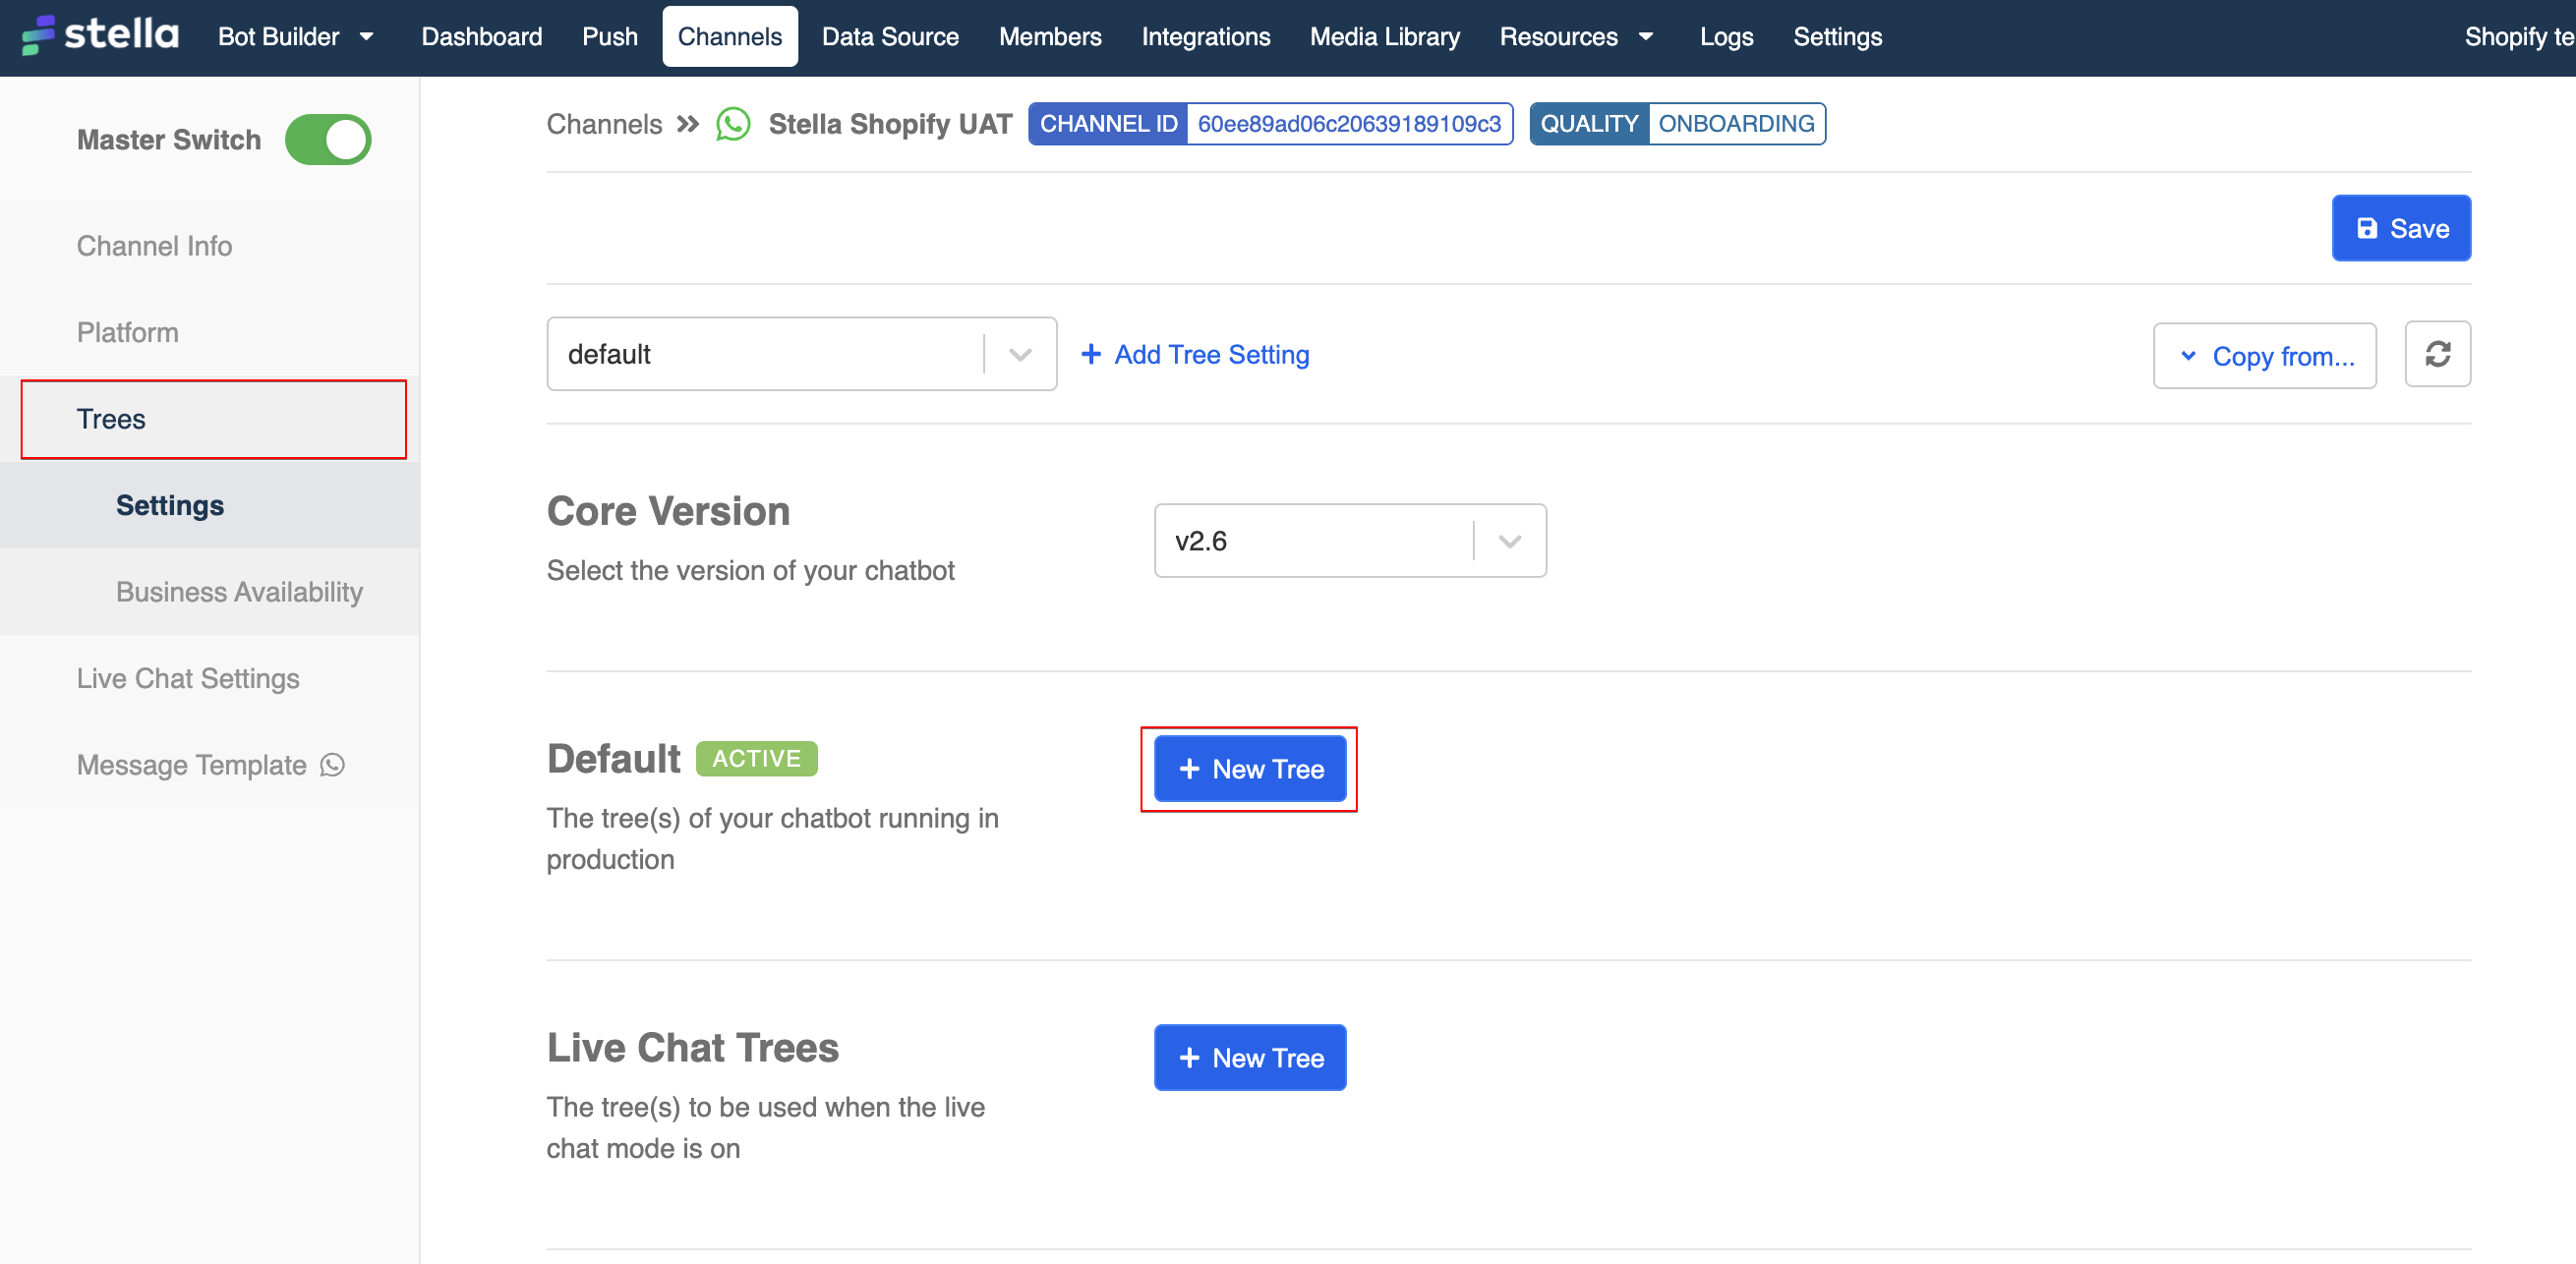
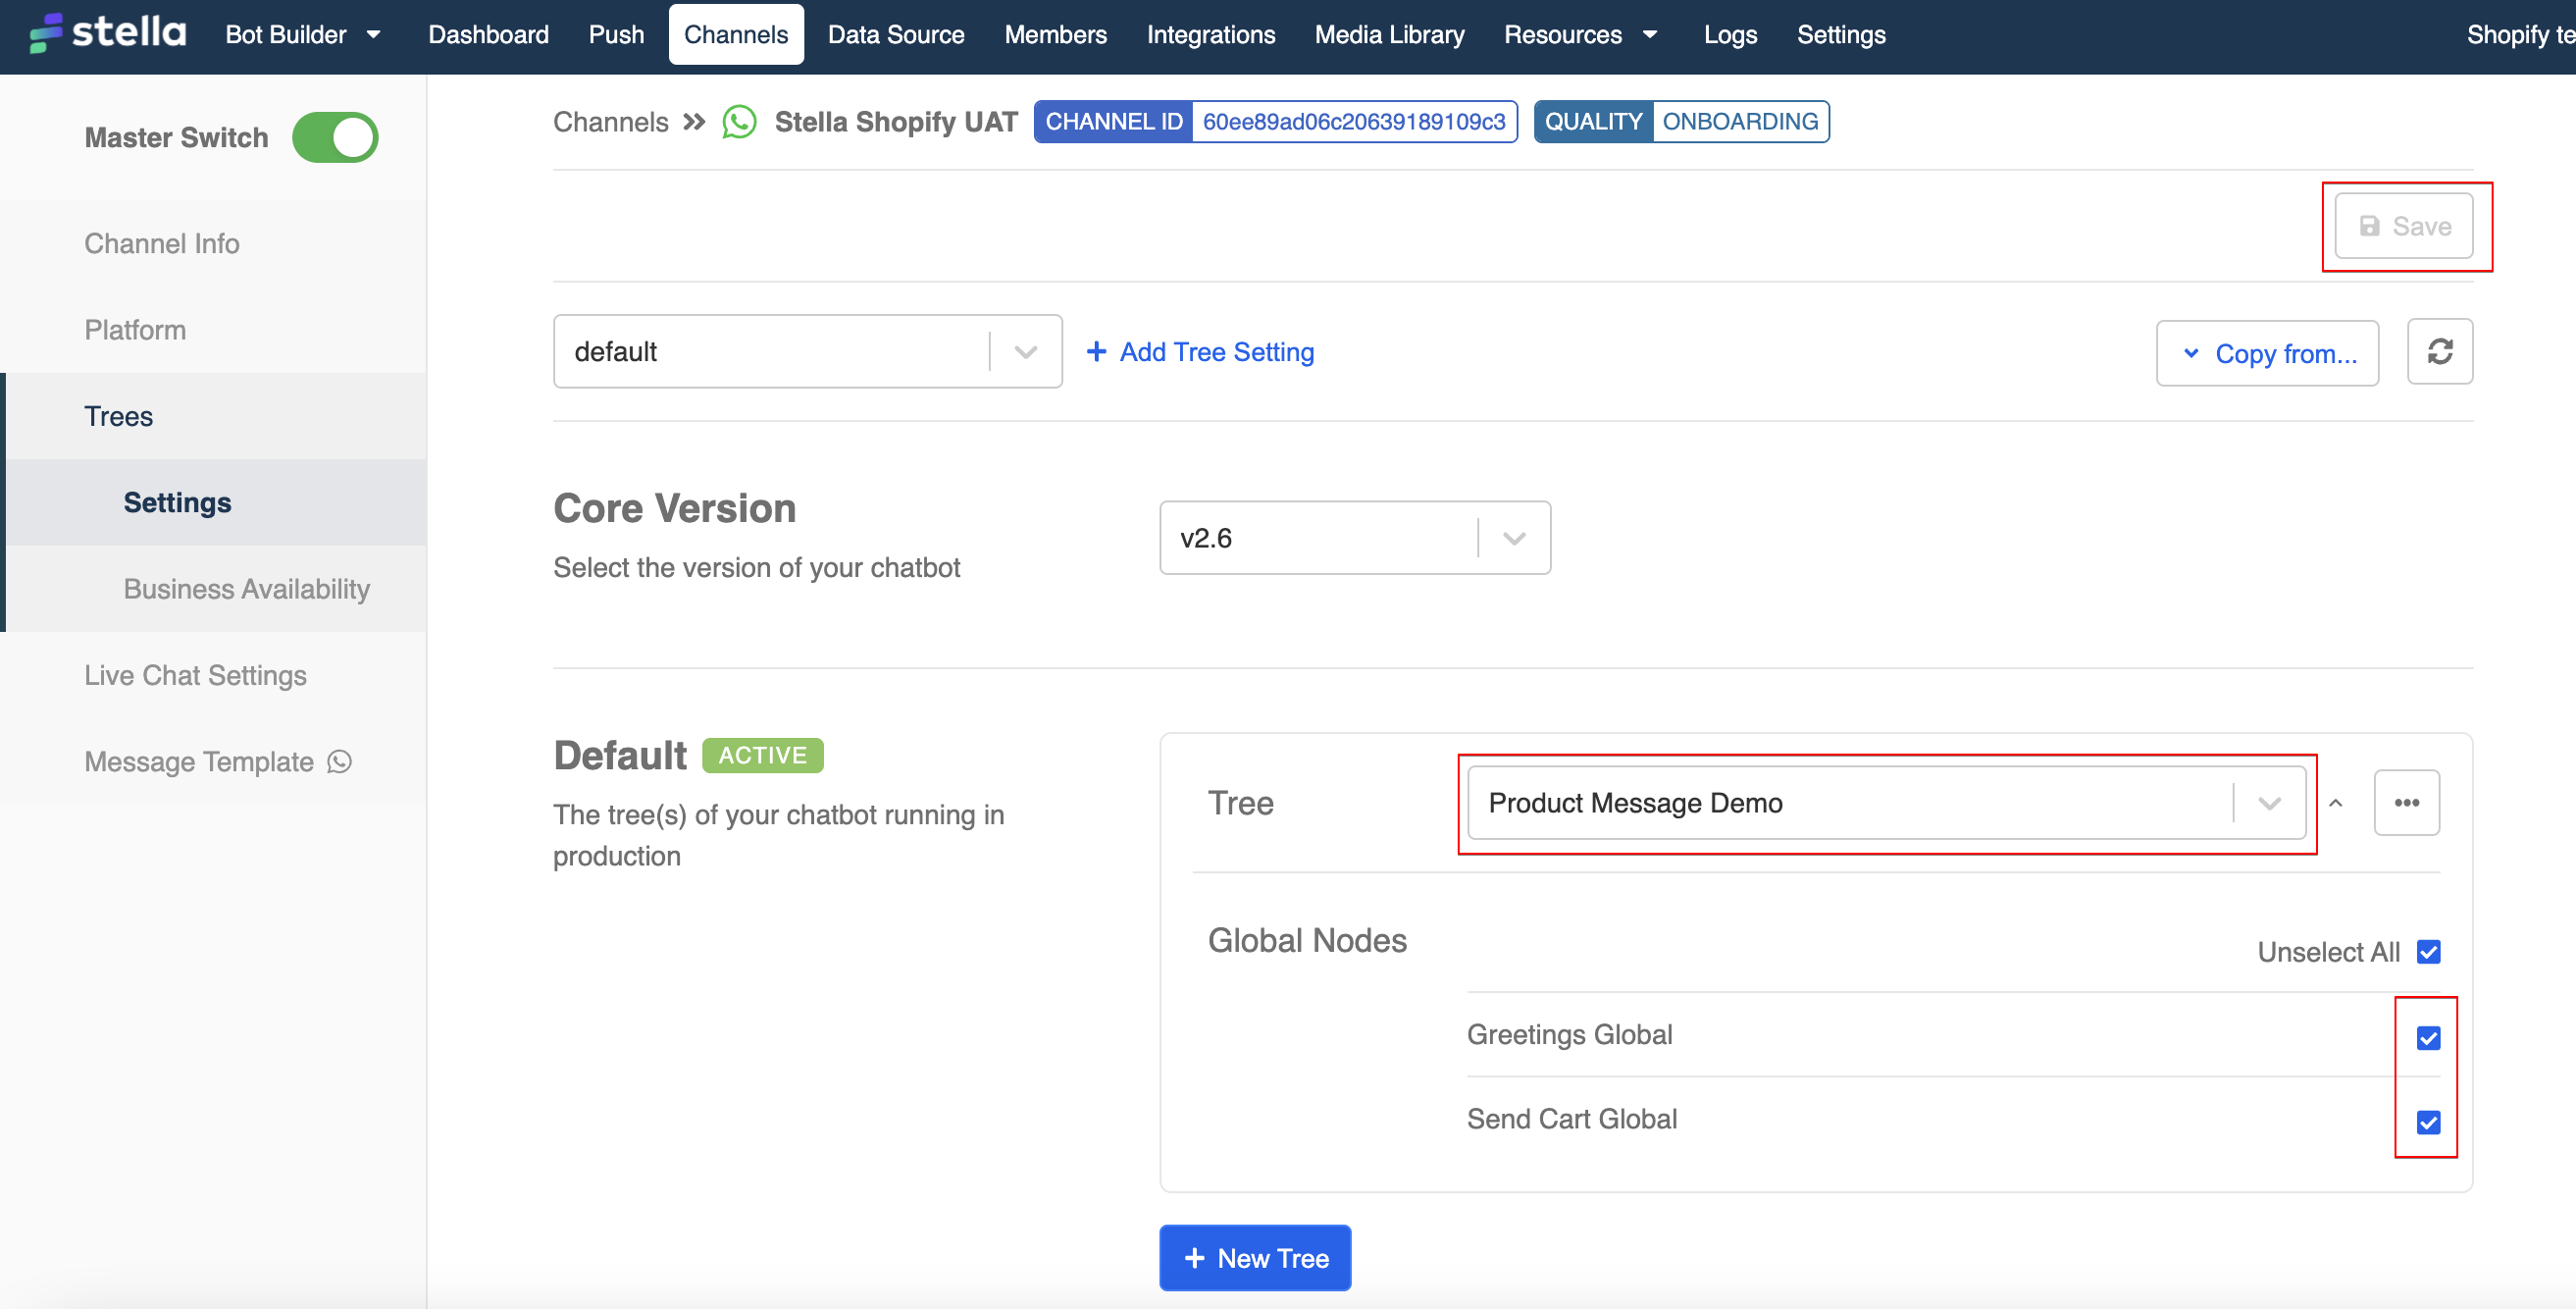
- Select the relevant tree from the dropdown list and select all the global nodes. Remember to click "Save" to save the tree settings.
- Now let's see if you can get the expected result!