Send Push Message
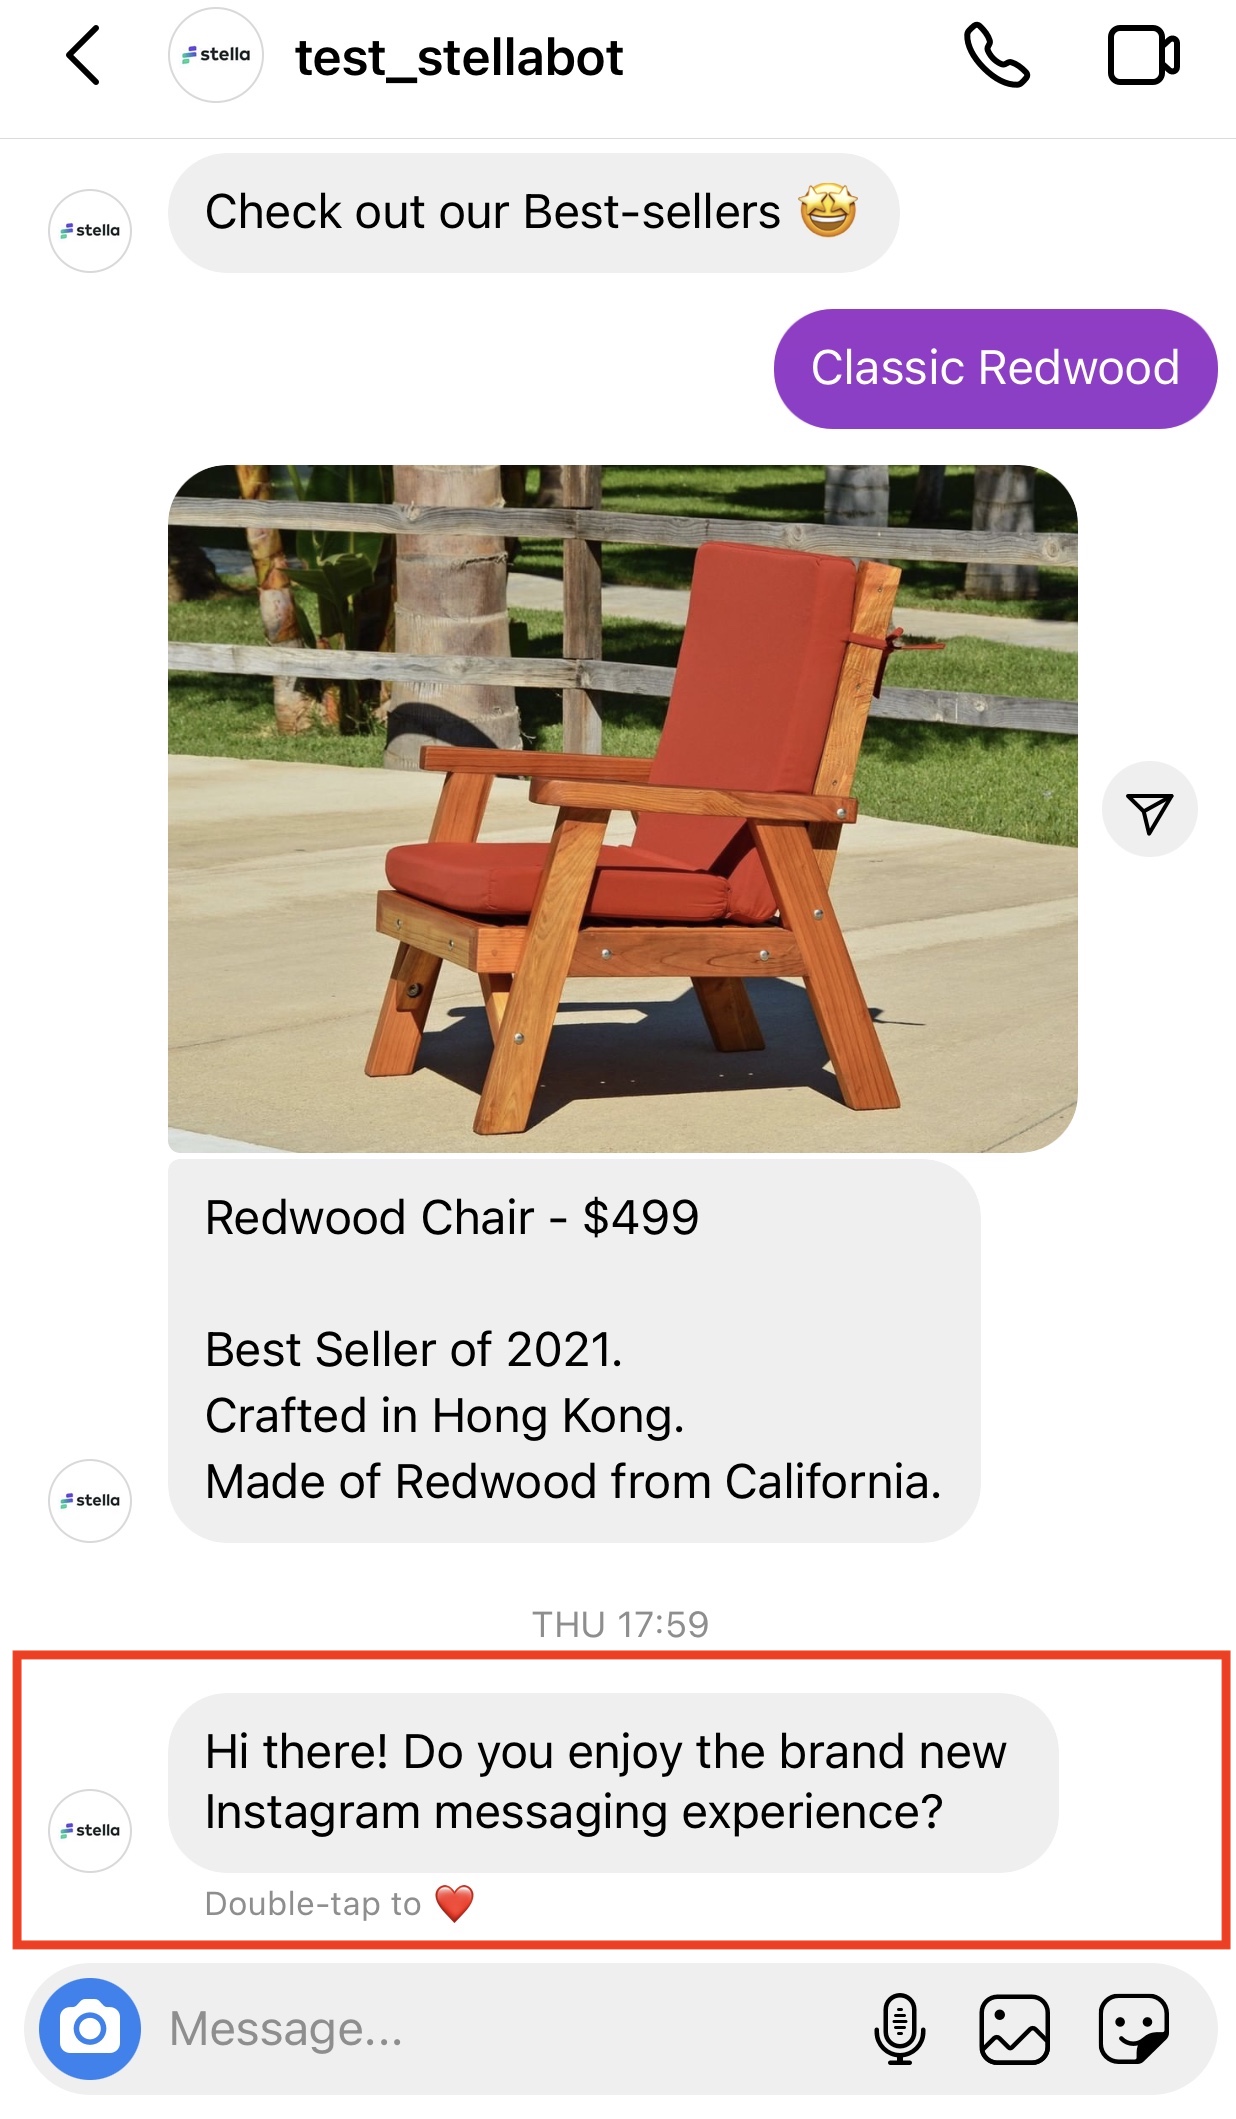
After engaging your customer with automated reply, what's next?
Customers who have interacted with you become subscribers of your Instagram channel. By using the Push Panel, you can create an audience group out of your members and send push messages to their direct message all at once.
Please note that Instagram must be sent within the 24-hour customer service window.
What is your Result?
Getting Hands-on
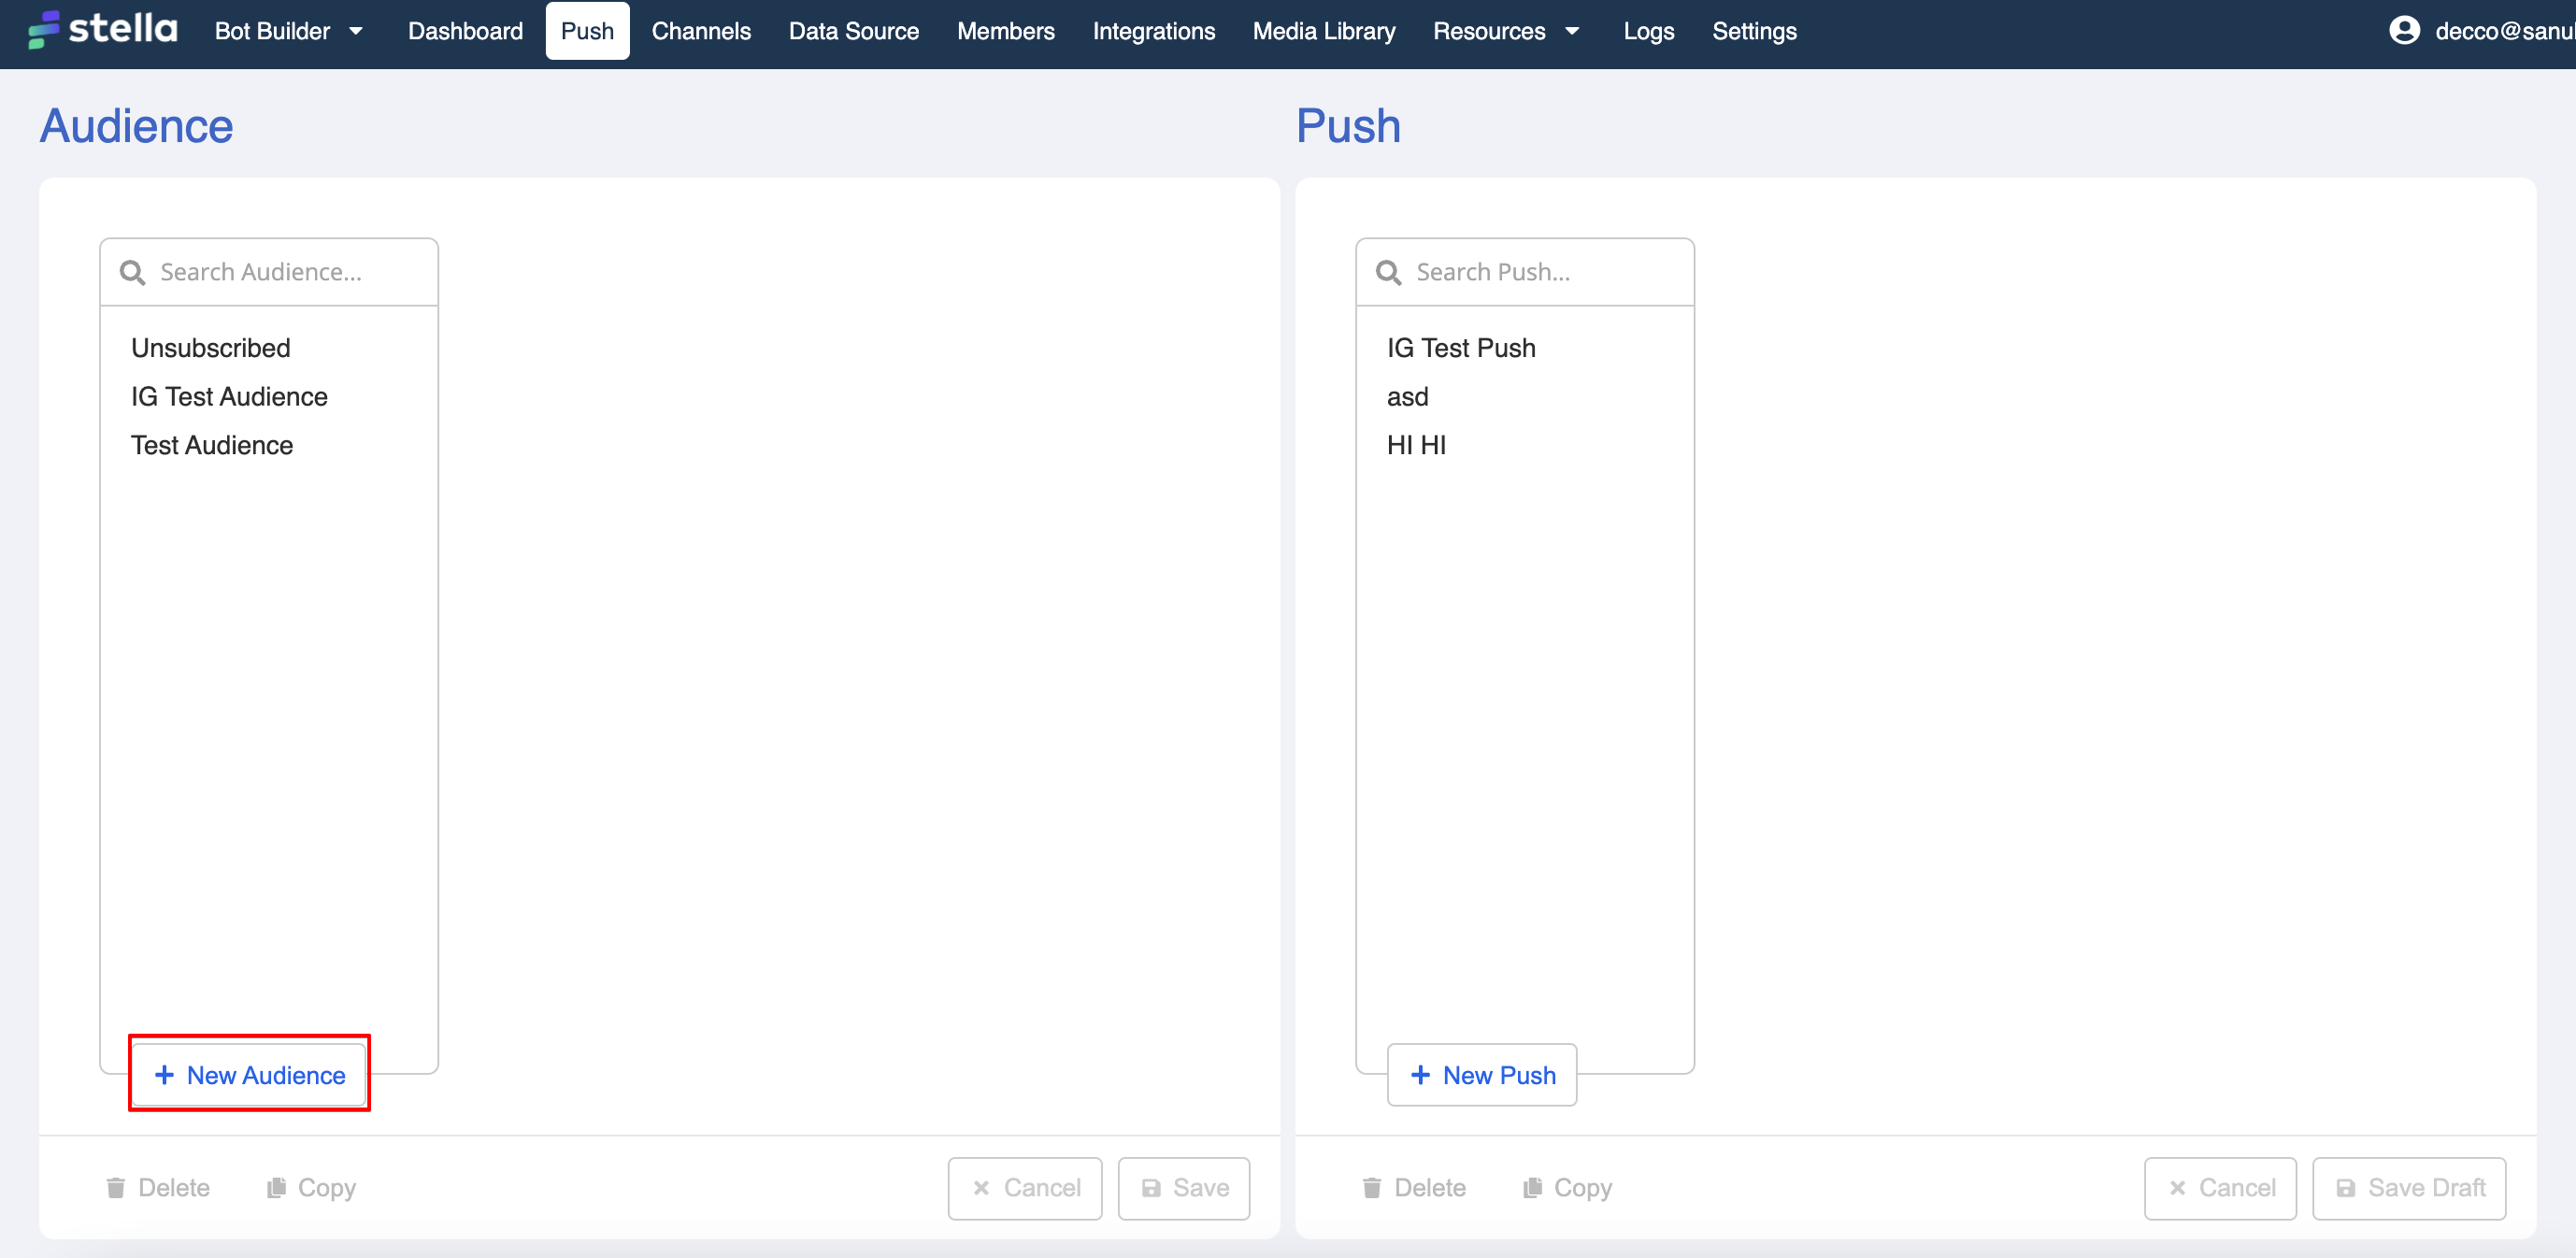
Create Audience Group
Head to Push Panel in the top bar menu.
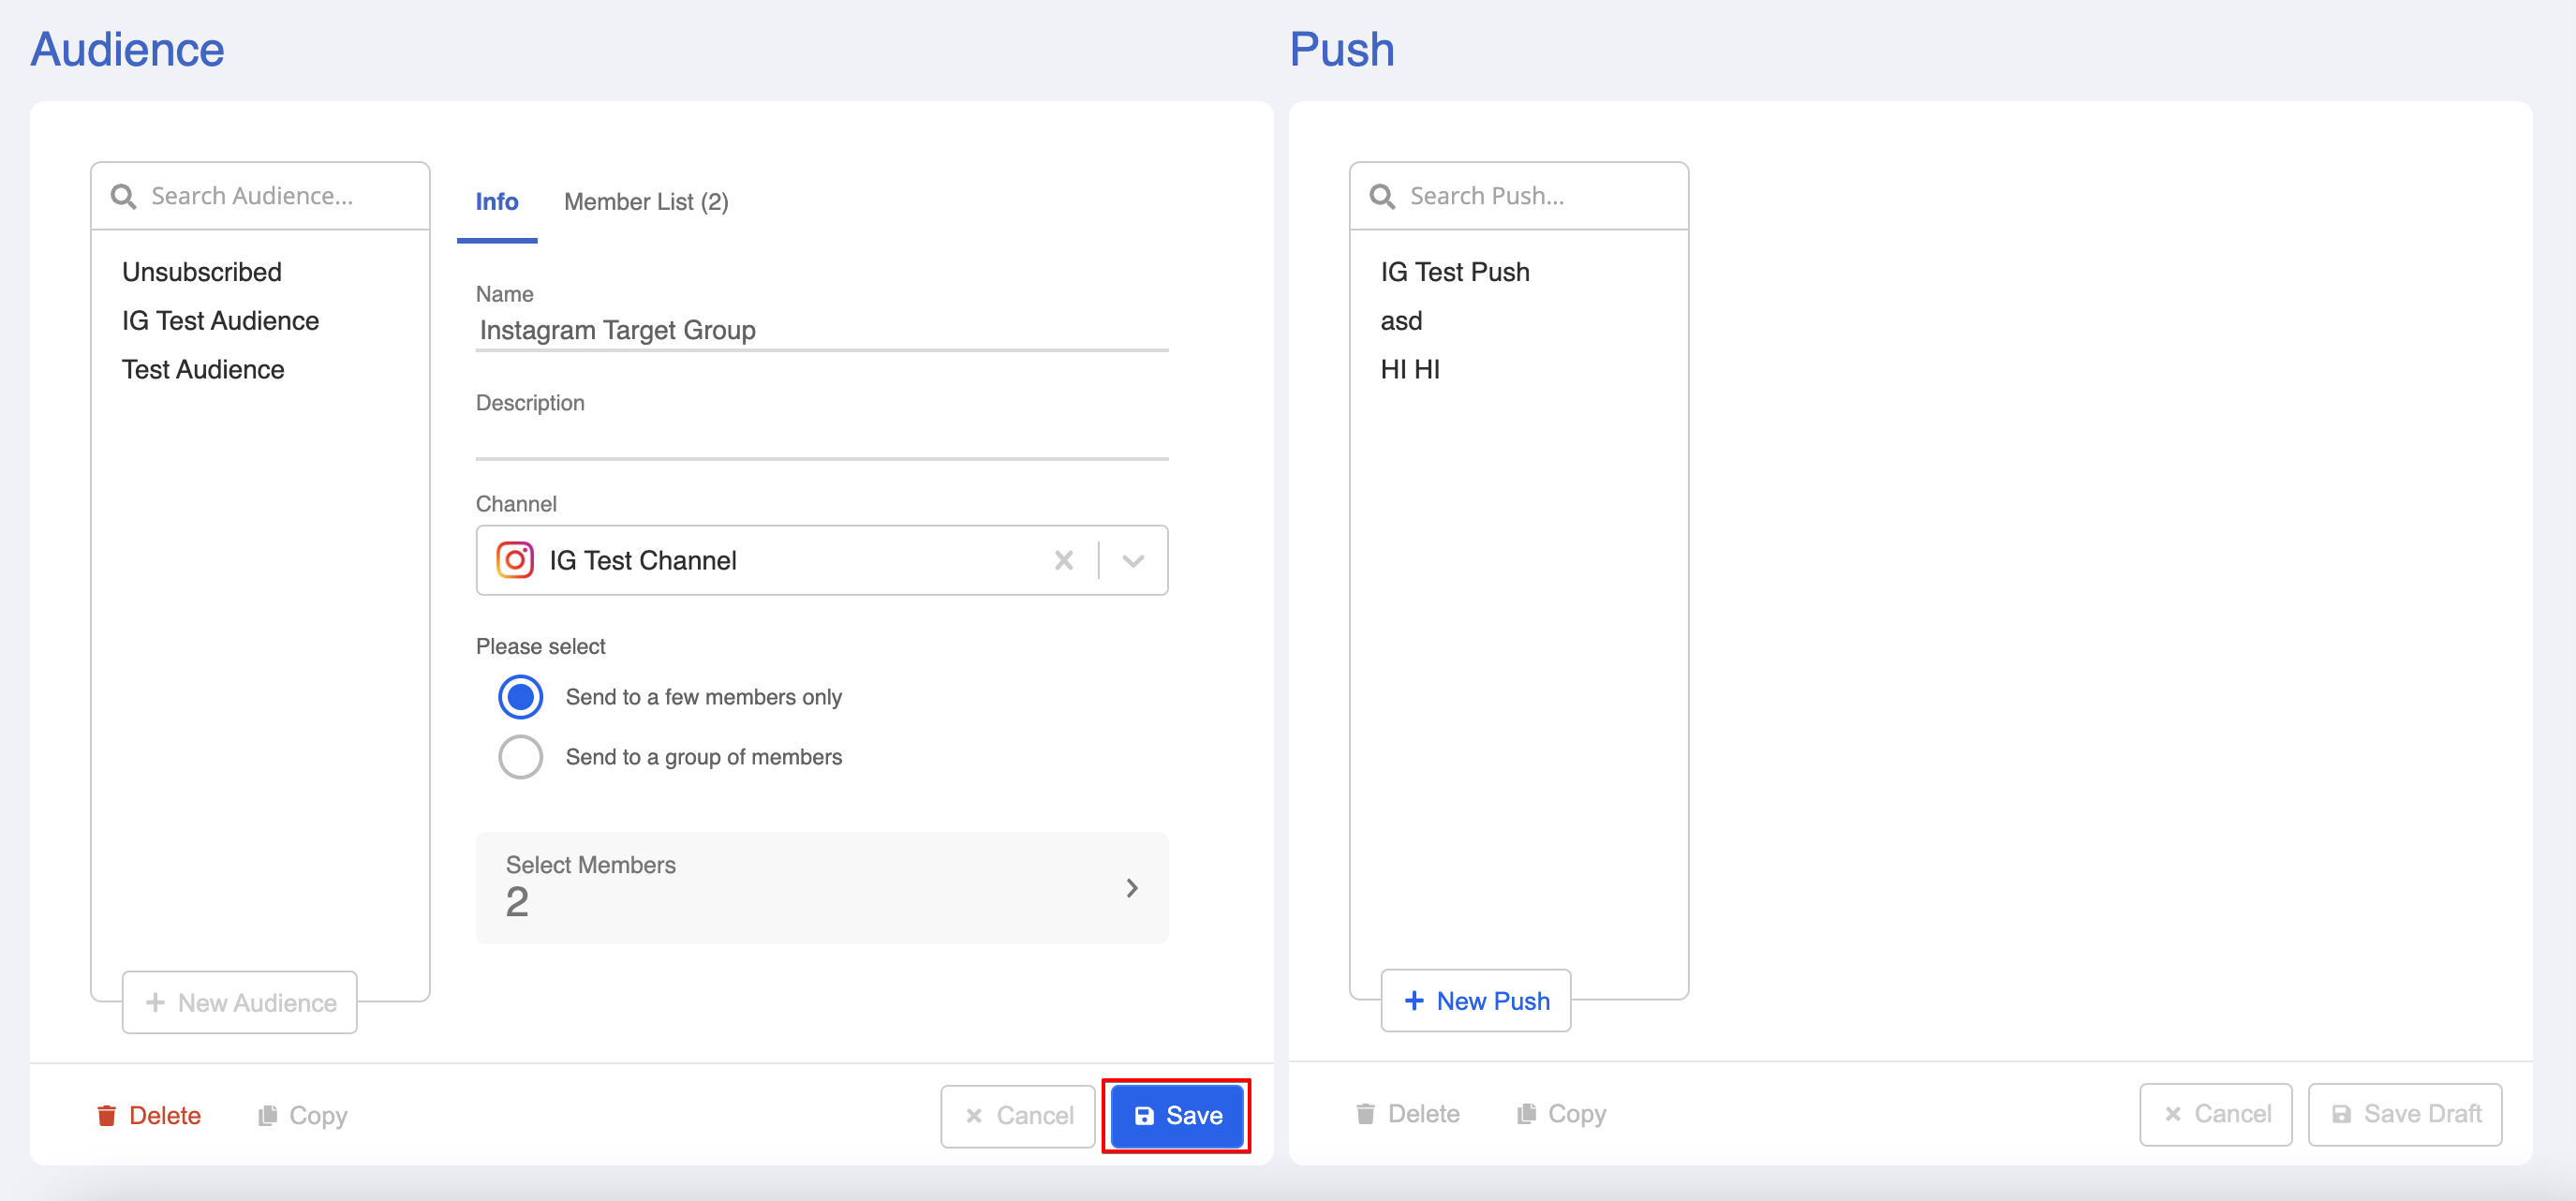
Select "+ Audience" to create new audience group.
- Name it and select your Instagram channel.
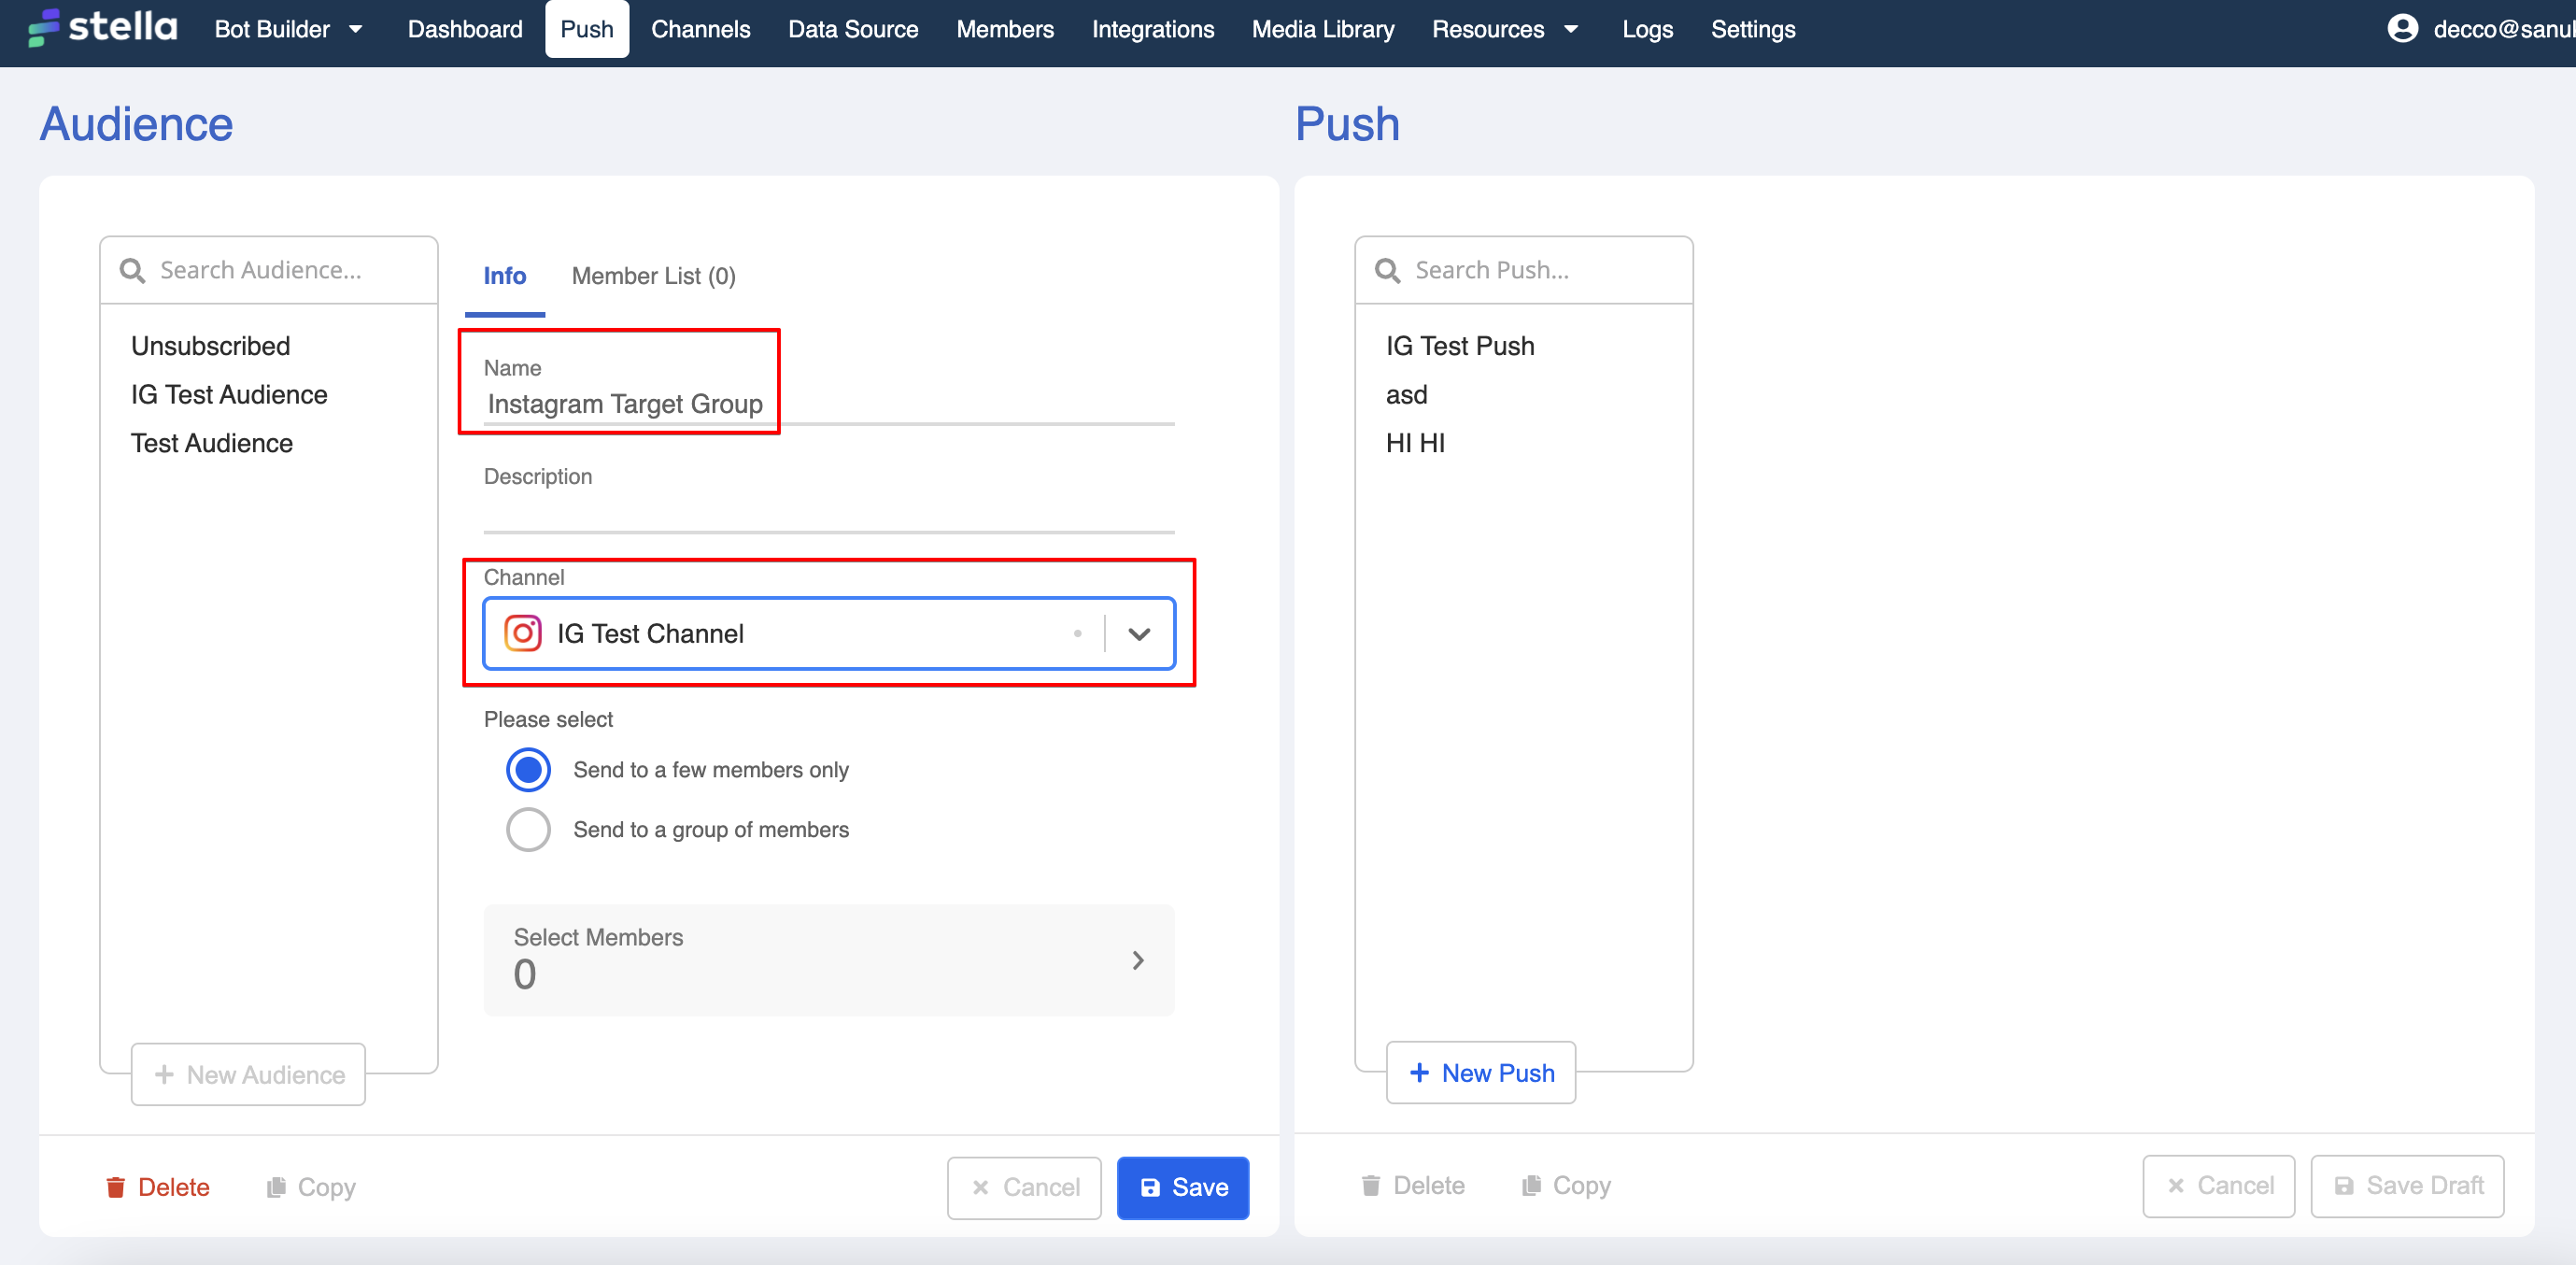
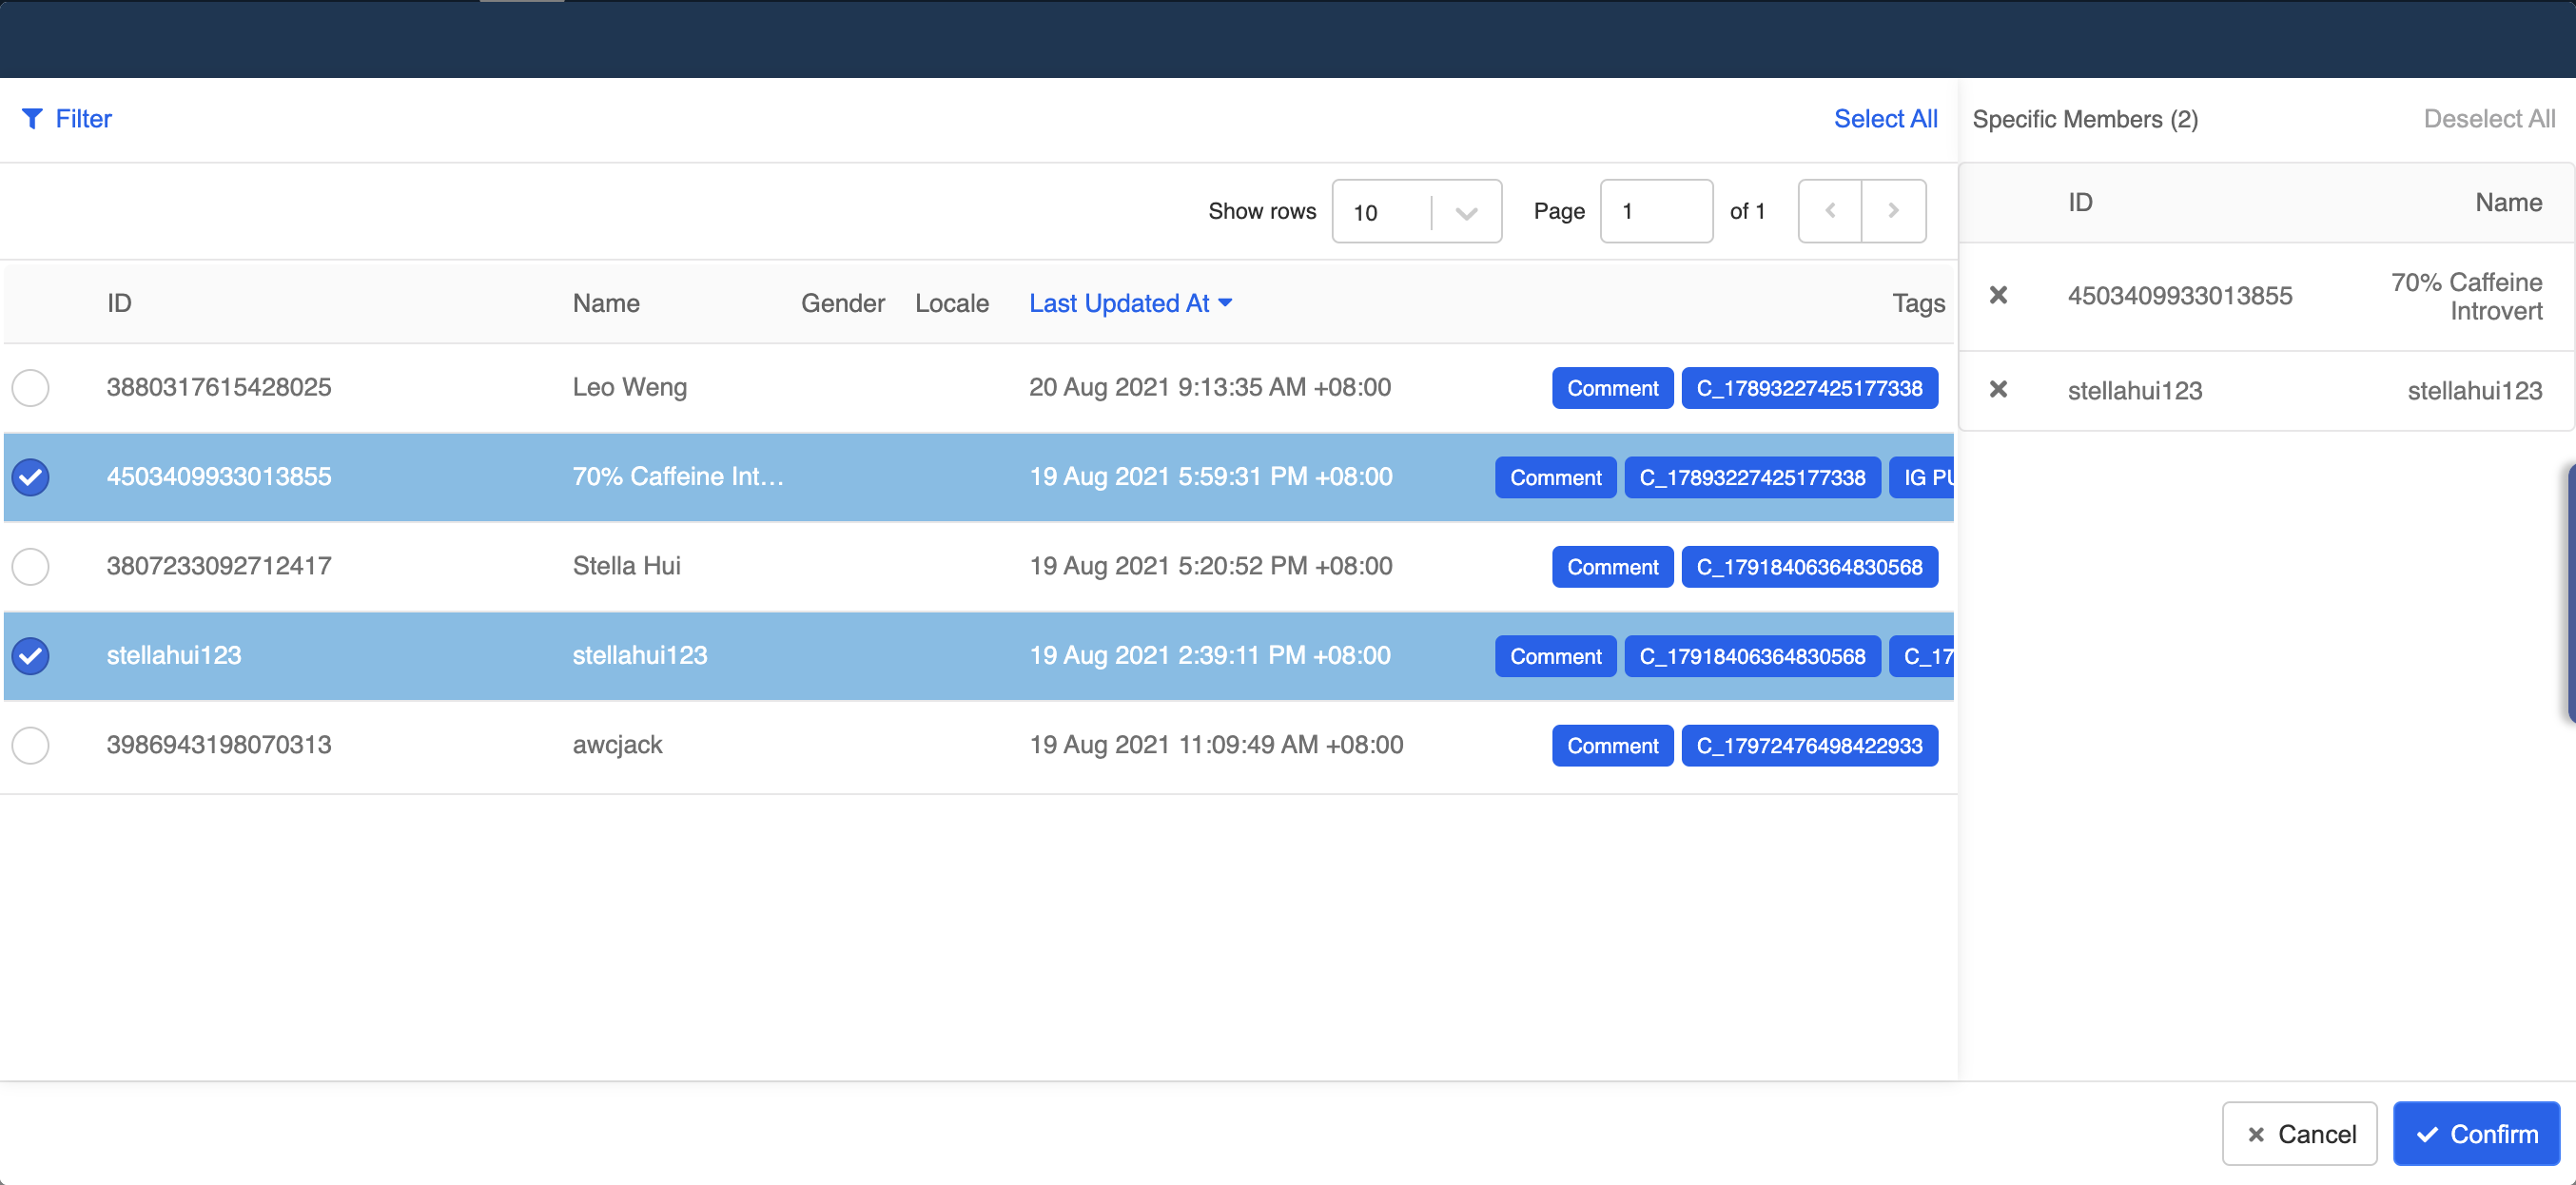
- Click "Select Memebrs" to select memebrs you would like to send push messages to. You can further filter the member list. Select "Confirm" when you finish choosing the audience.
- Upon completion, click "Save" to create the audience group.
Create Push
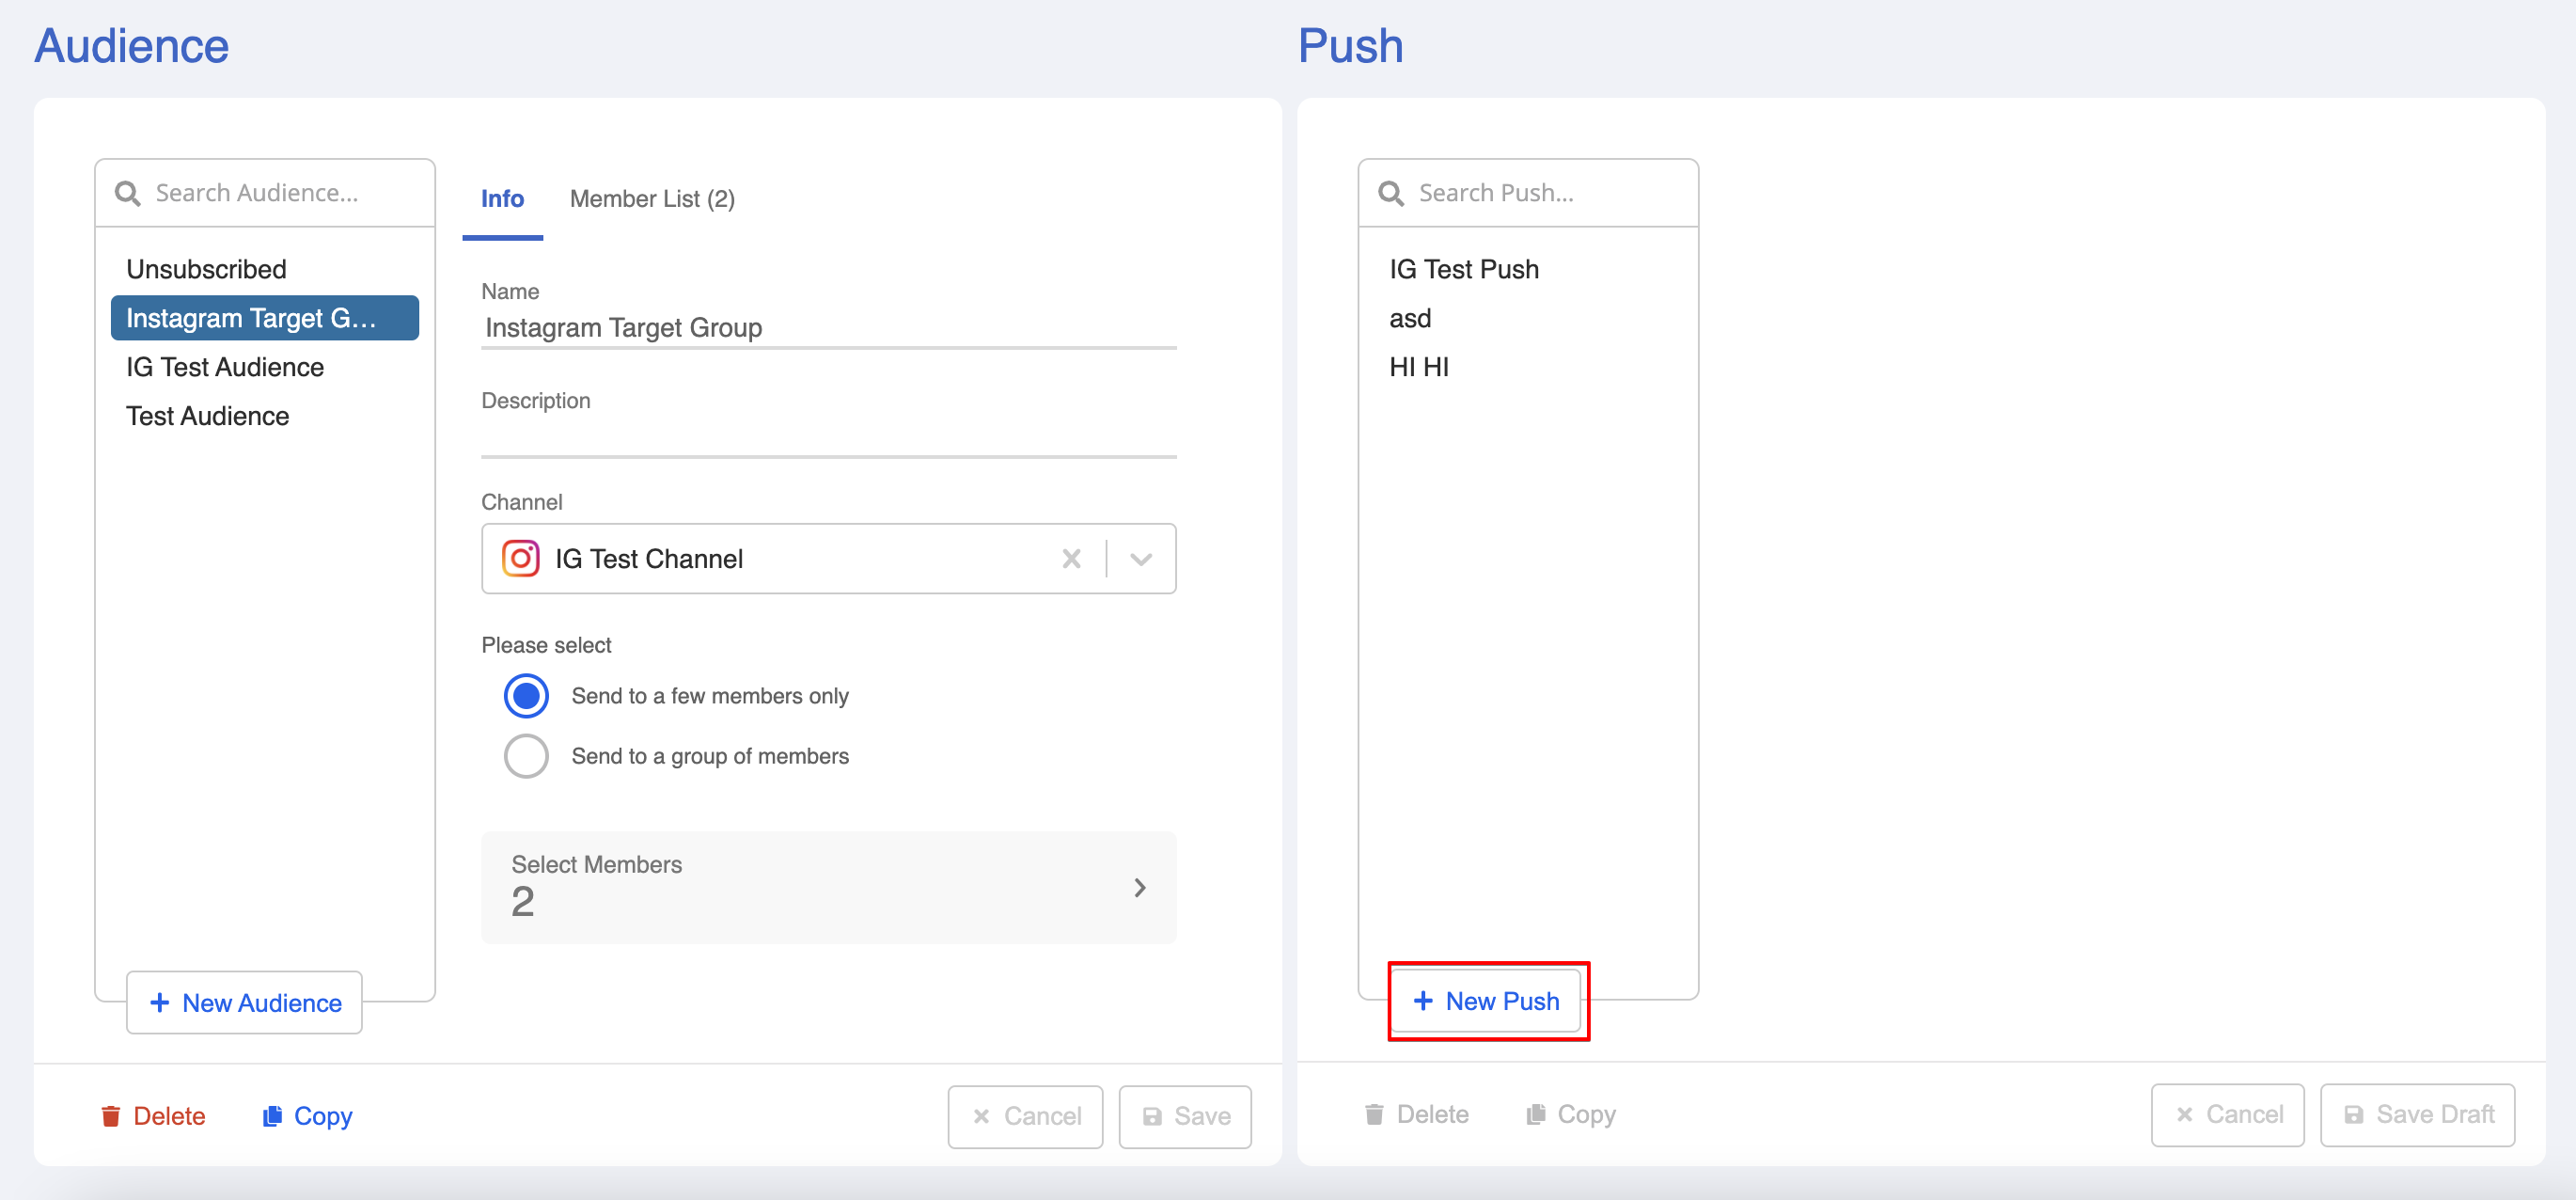
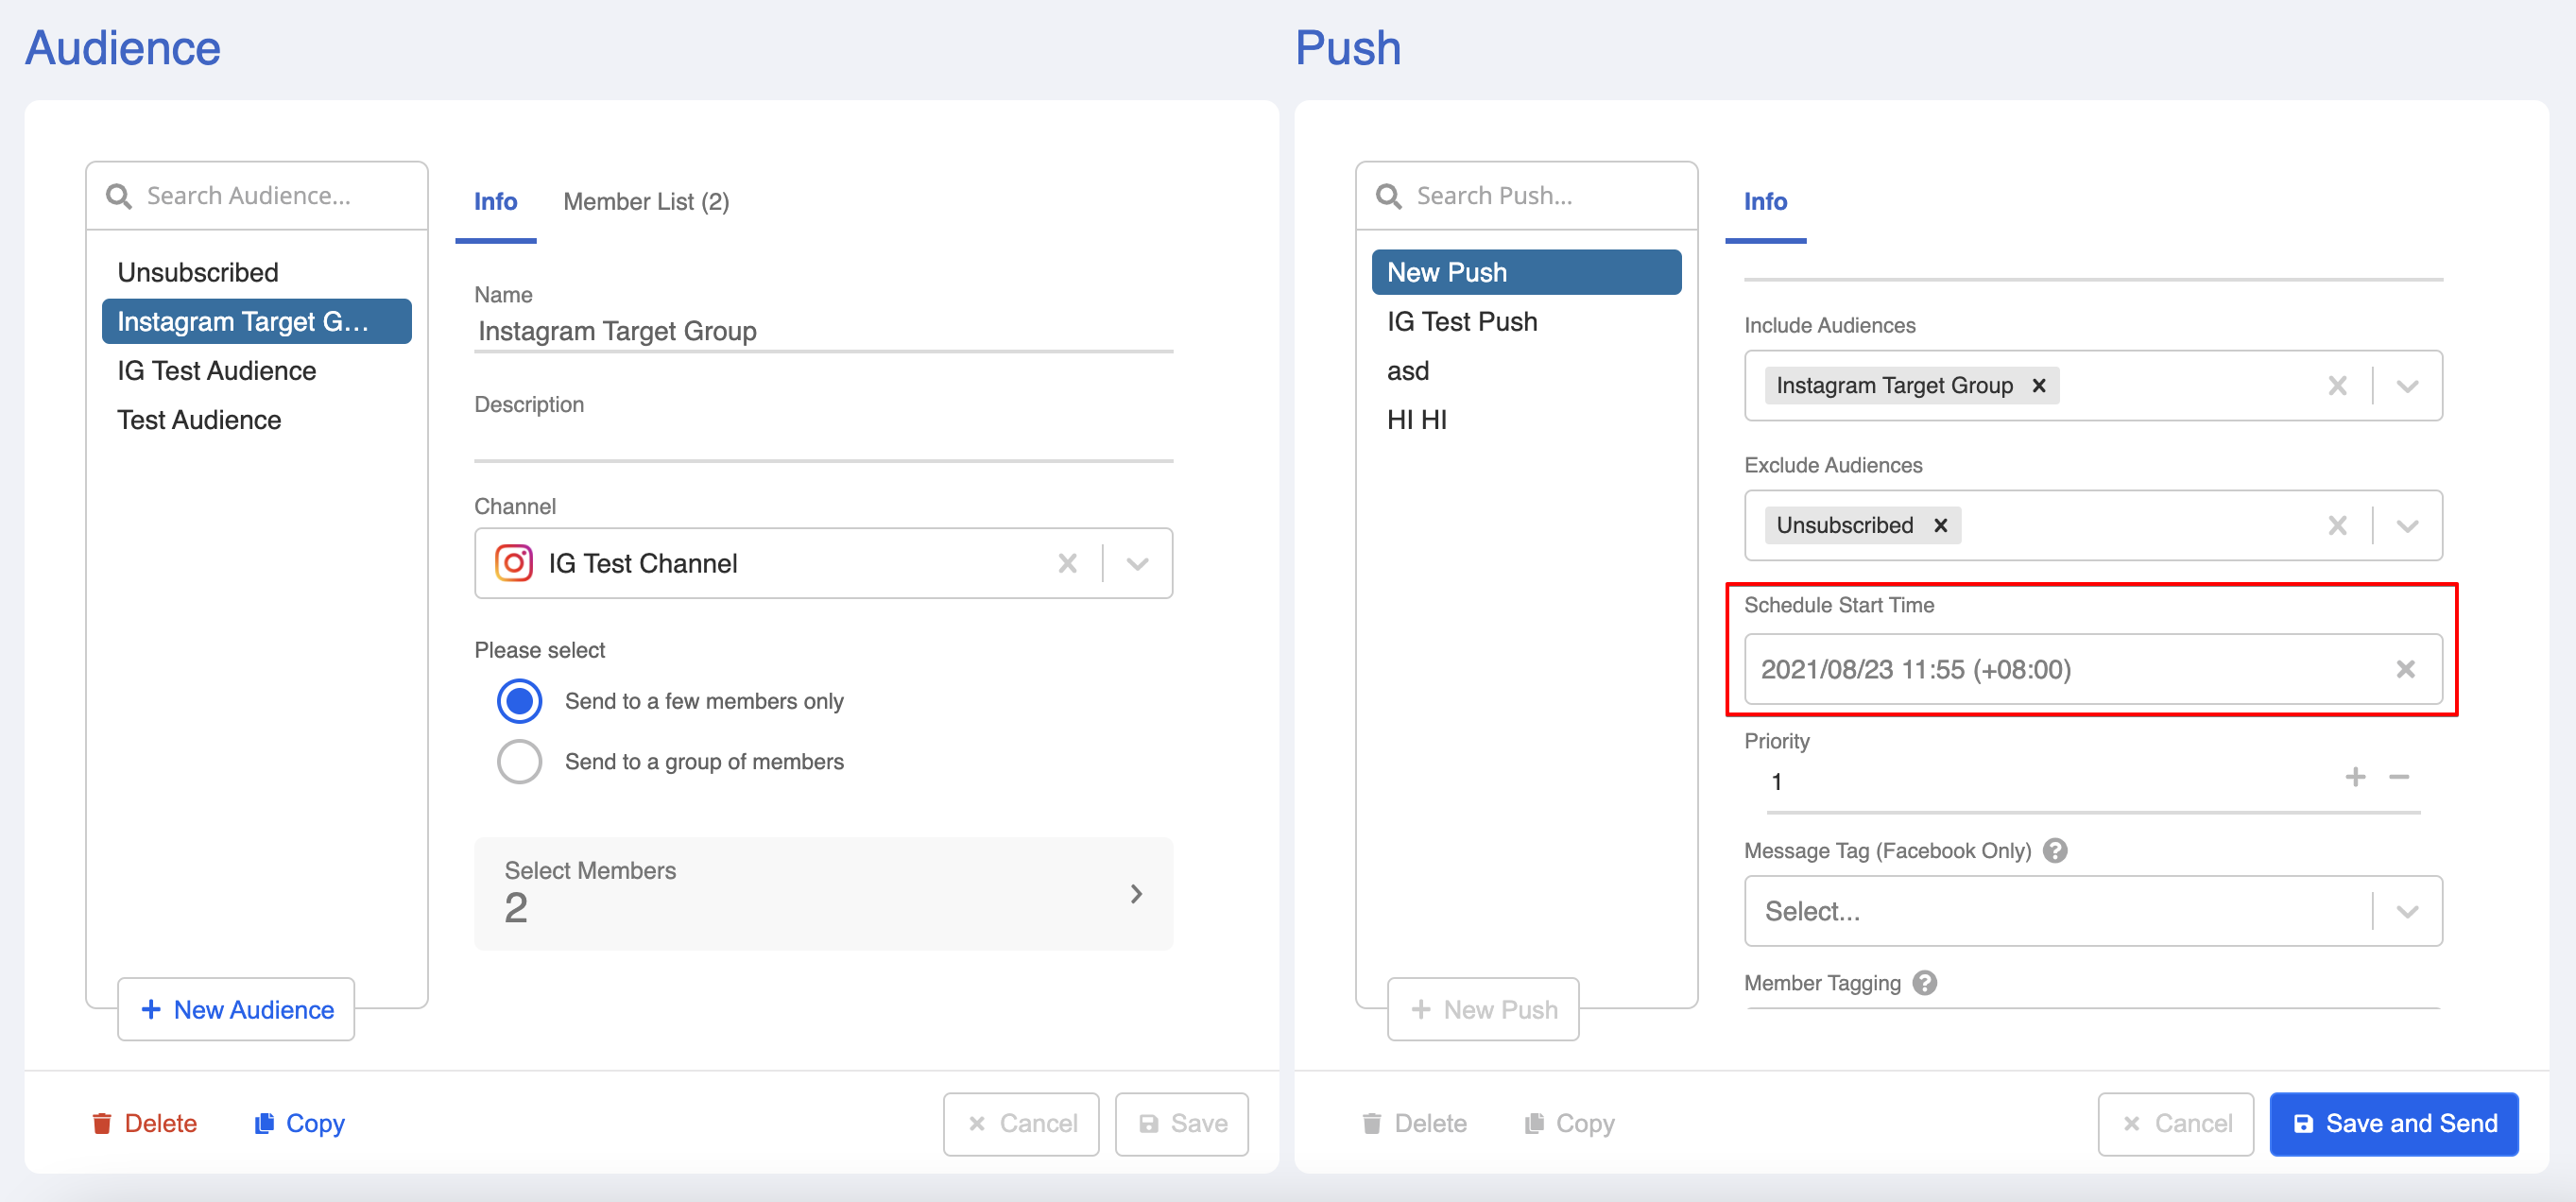
- On the right panel, select "+ New Push" and name it.
- Select to include the audience group. Unsubscribed members will be automatcially displayed as excluded memebrs.
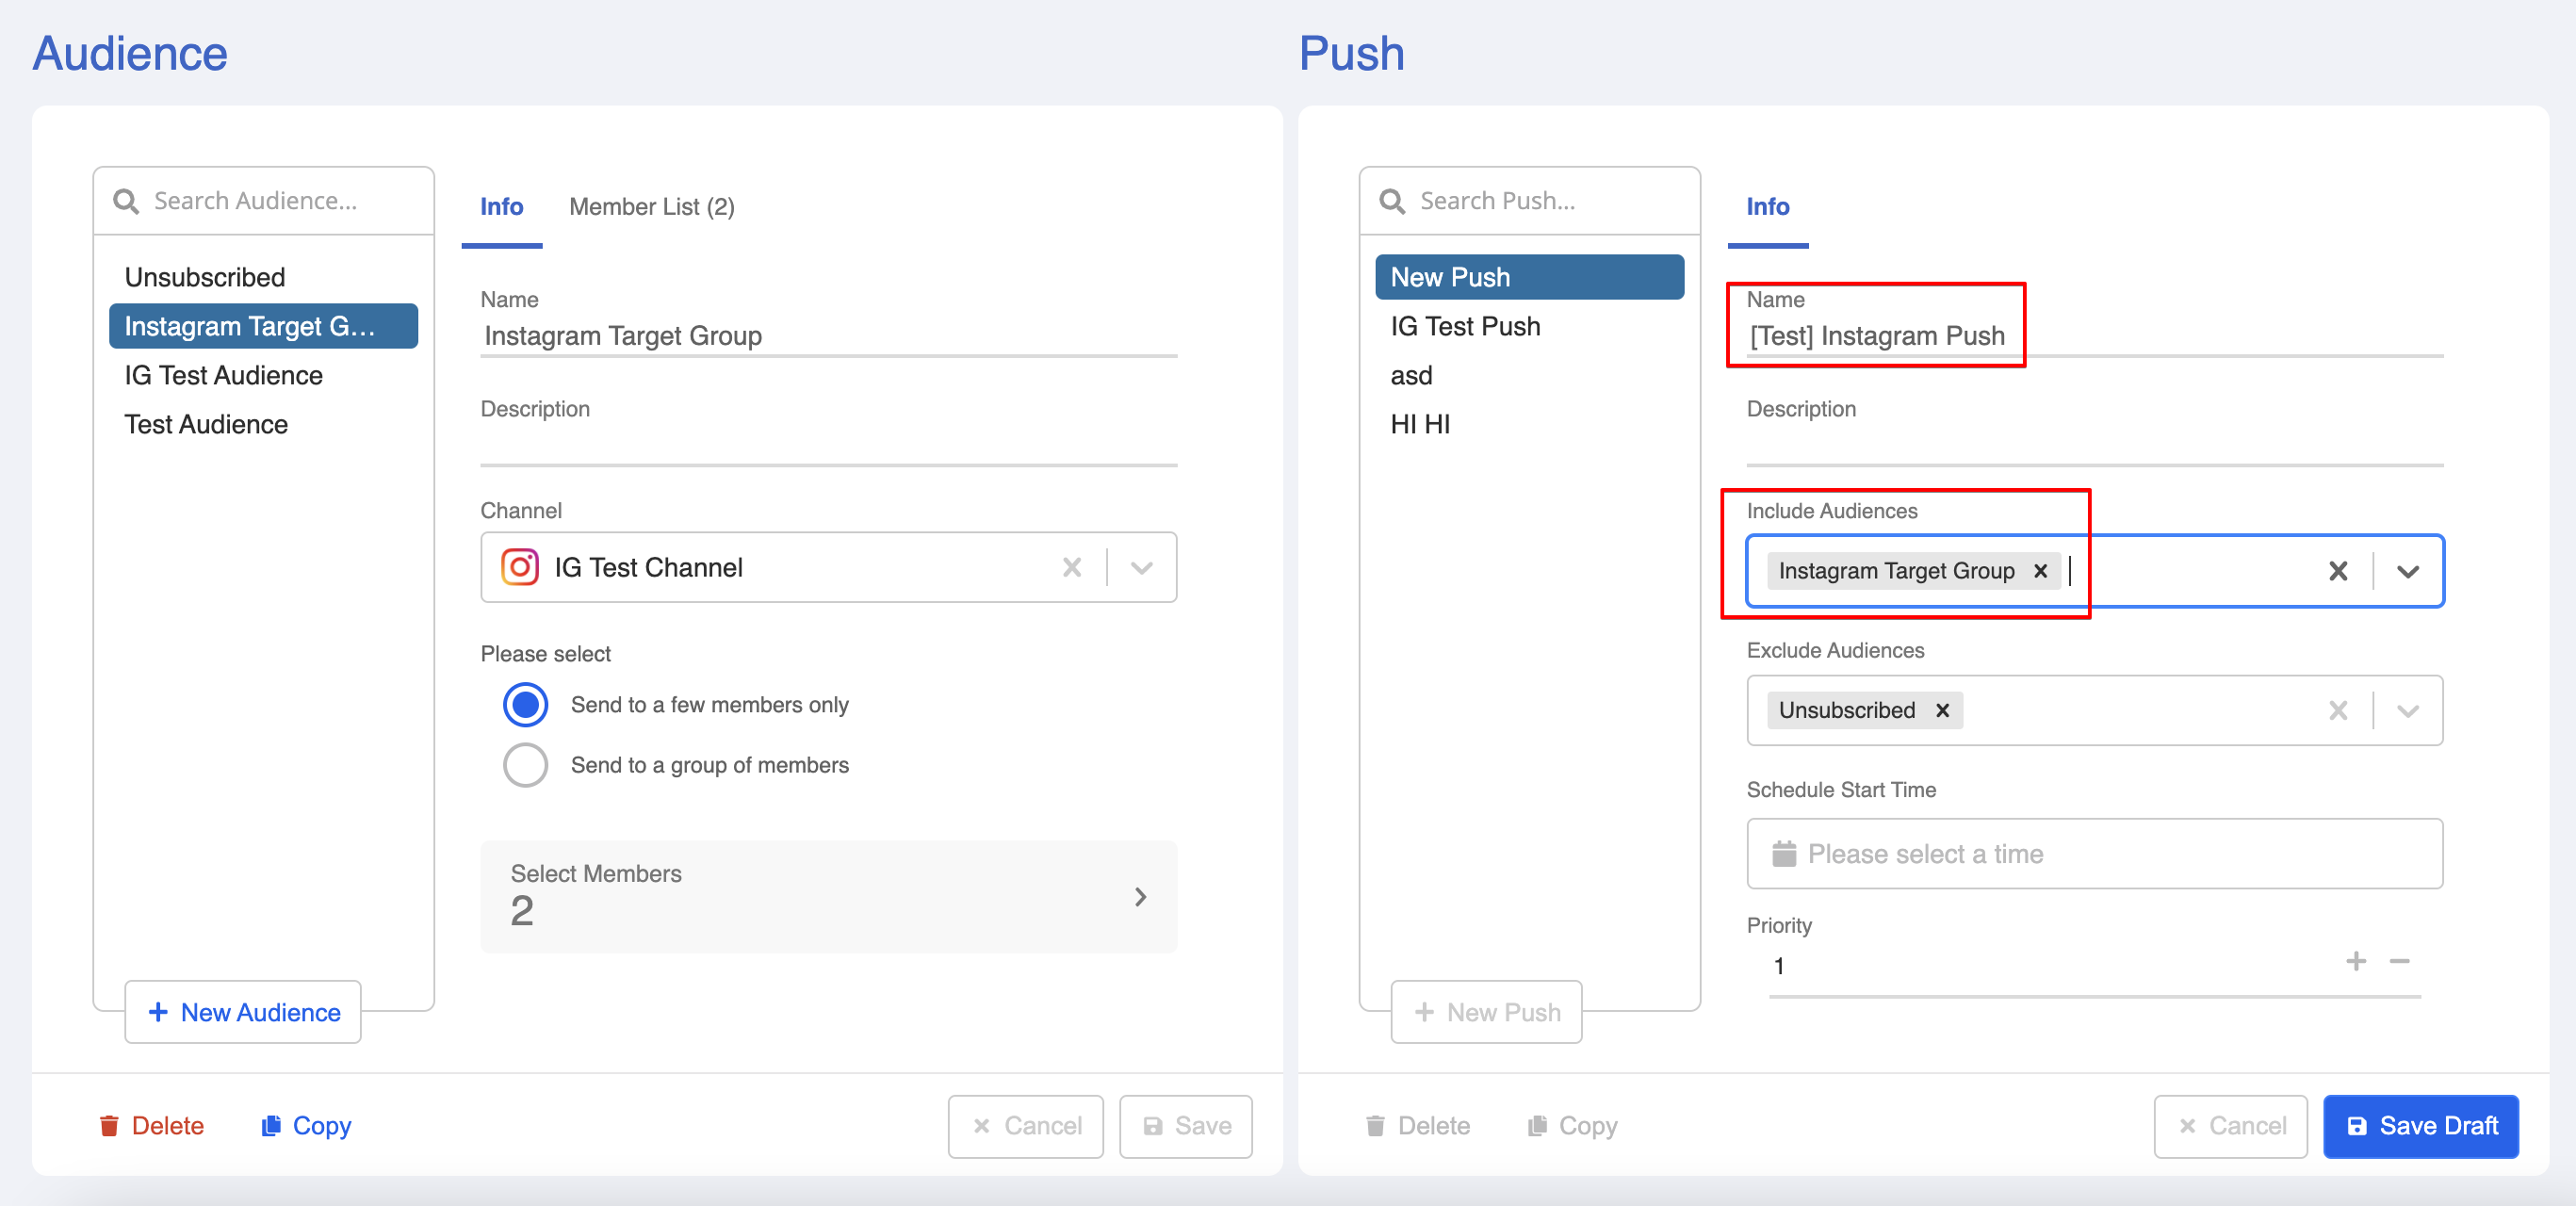
- Set the scheduled time for sending the push.
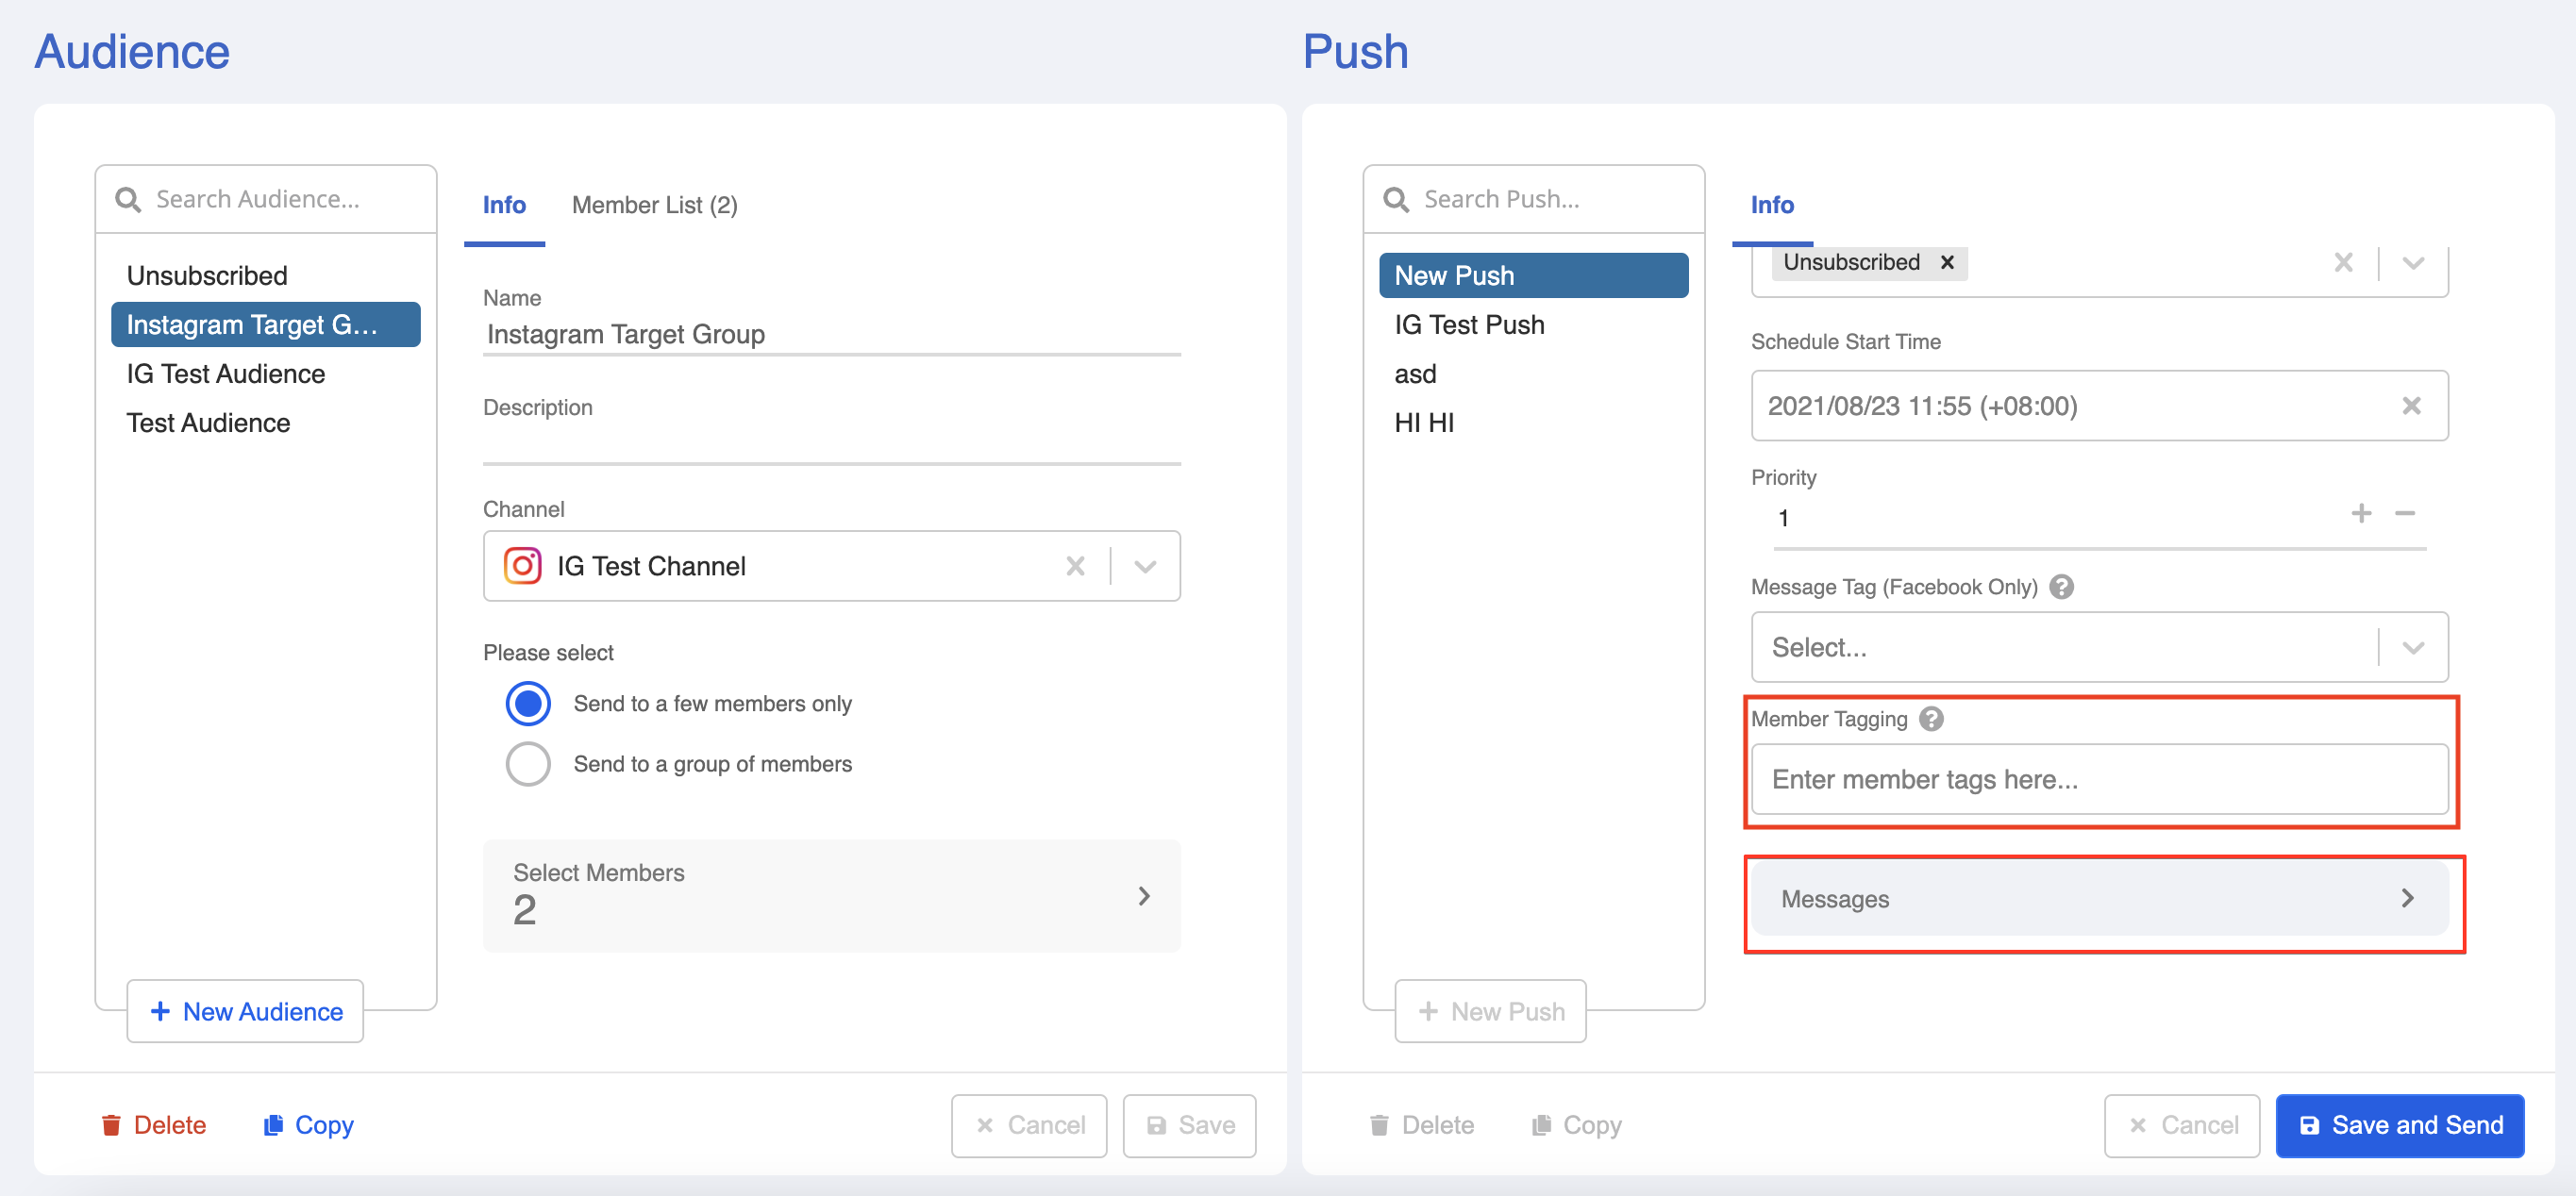
If needed, you can enter Member Tag(s) to the audience.
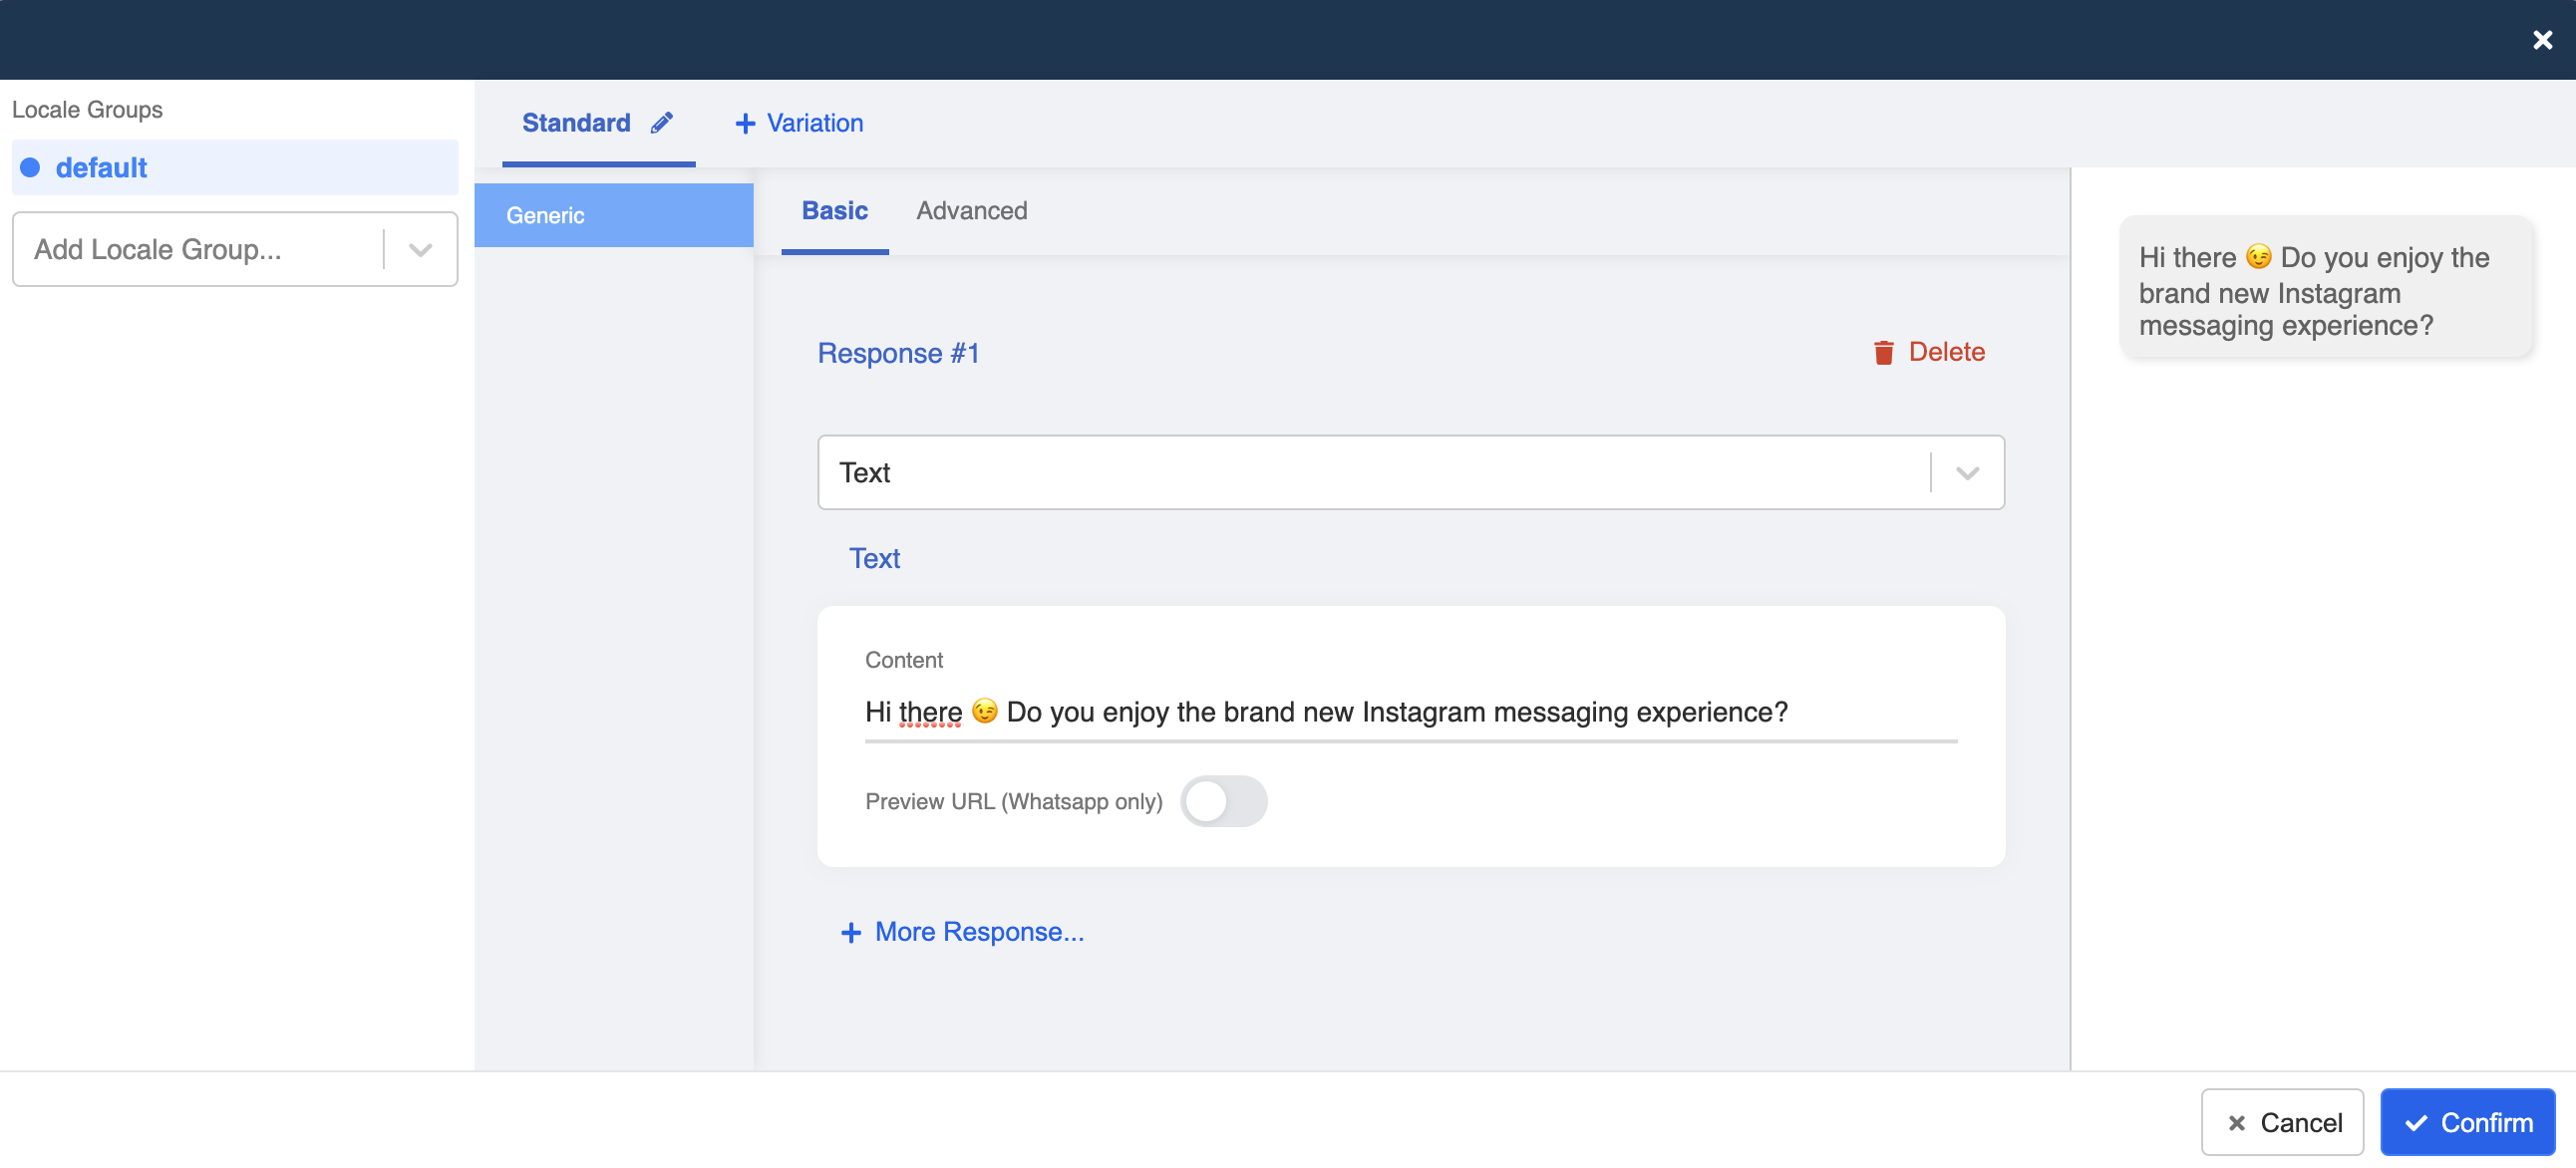
Select "Message" to formulate the content of the push message.
- You can create a response just like how you work on the bot builder.
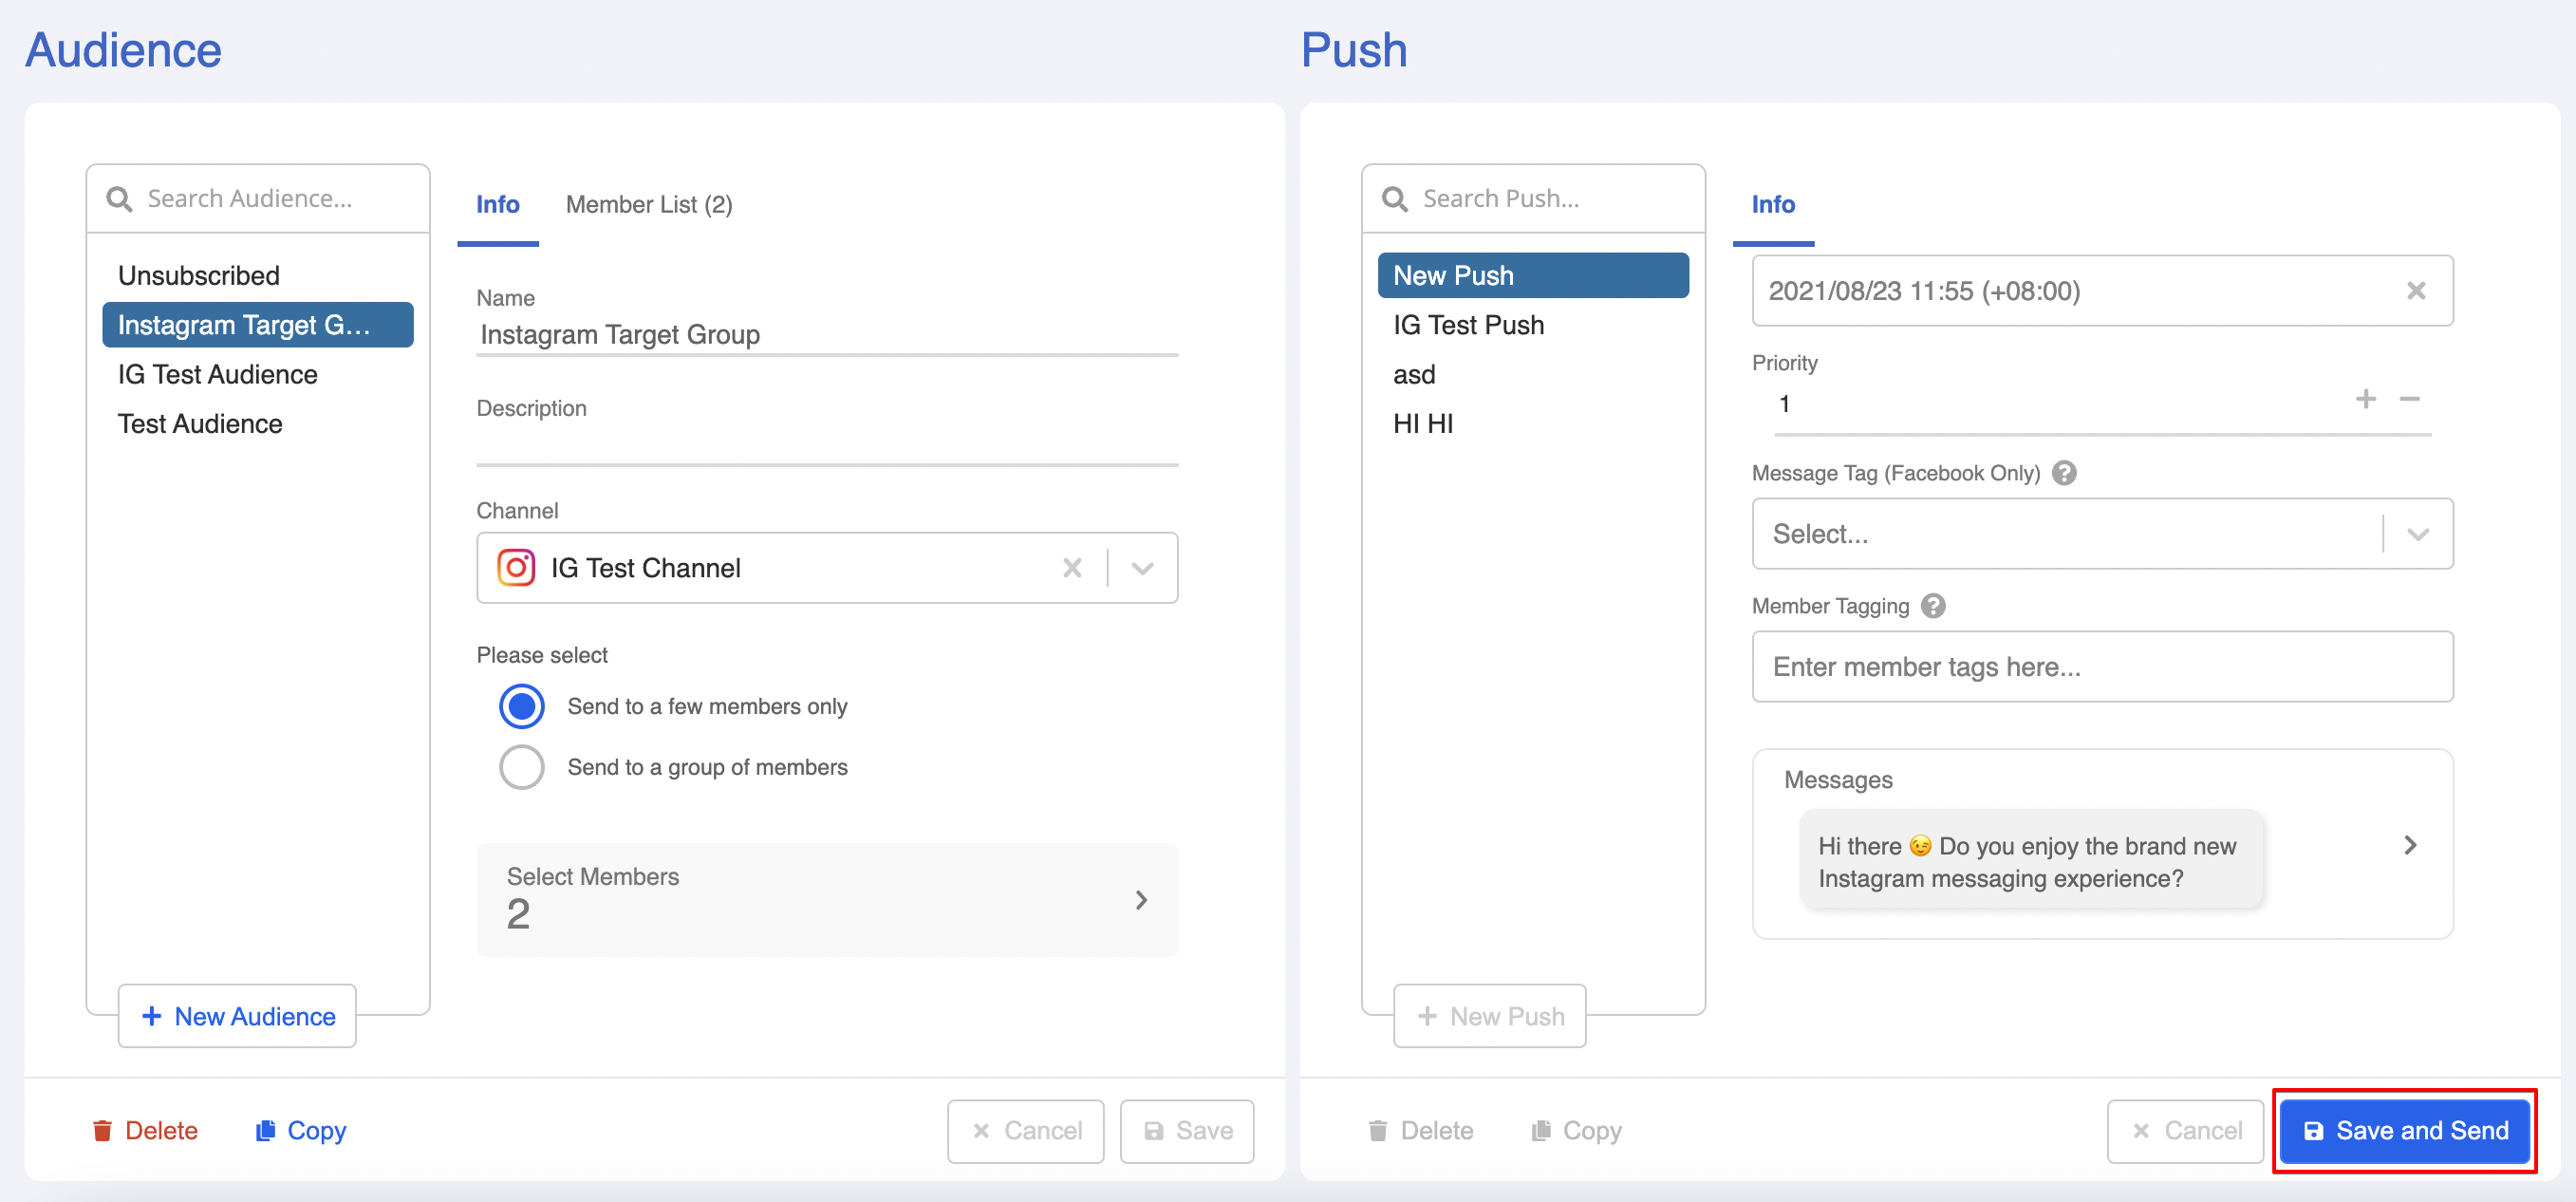
- Click "Save and Send" to send the push.
- The following message will be displayed when the push is being sent to the audience.

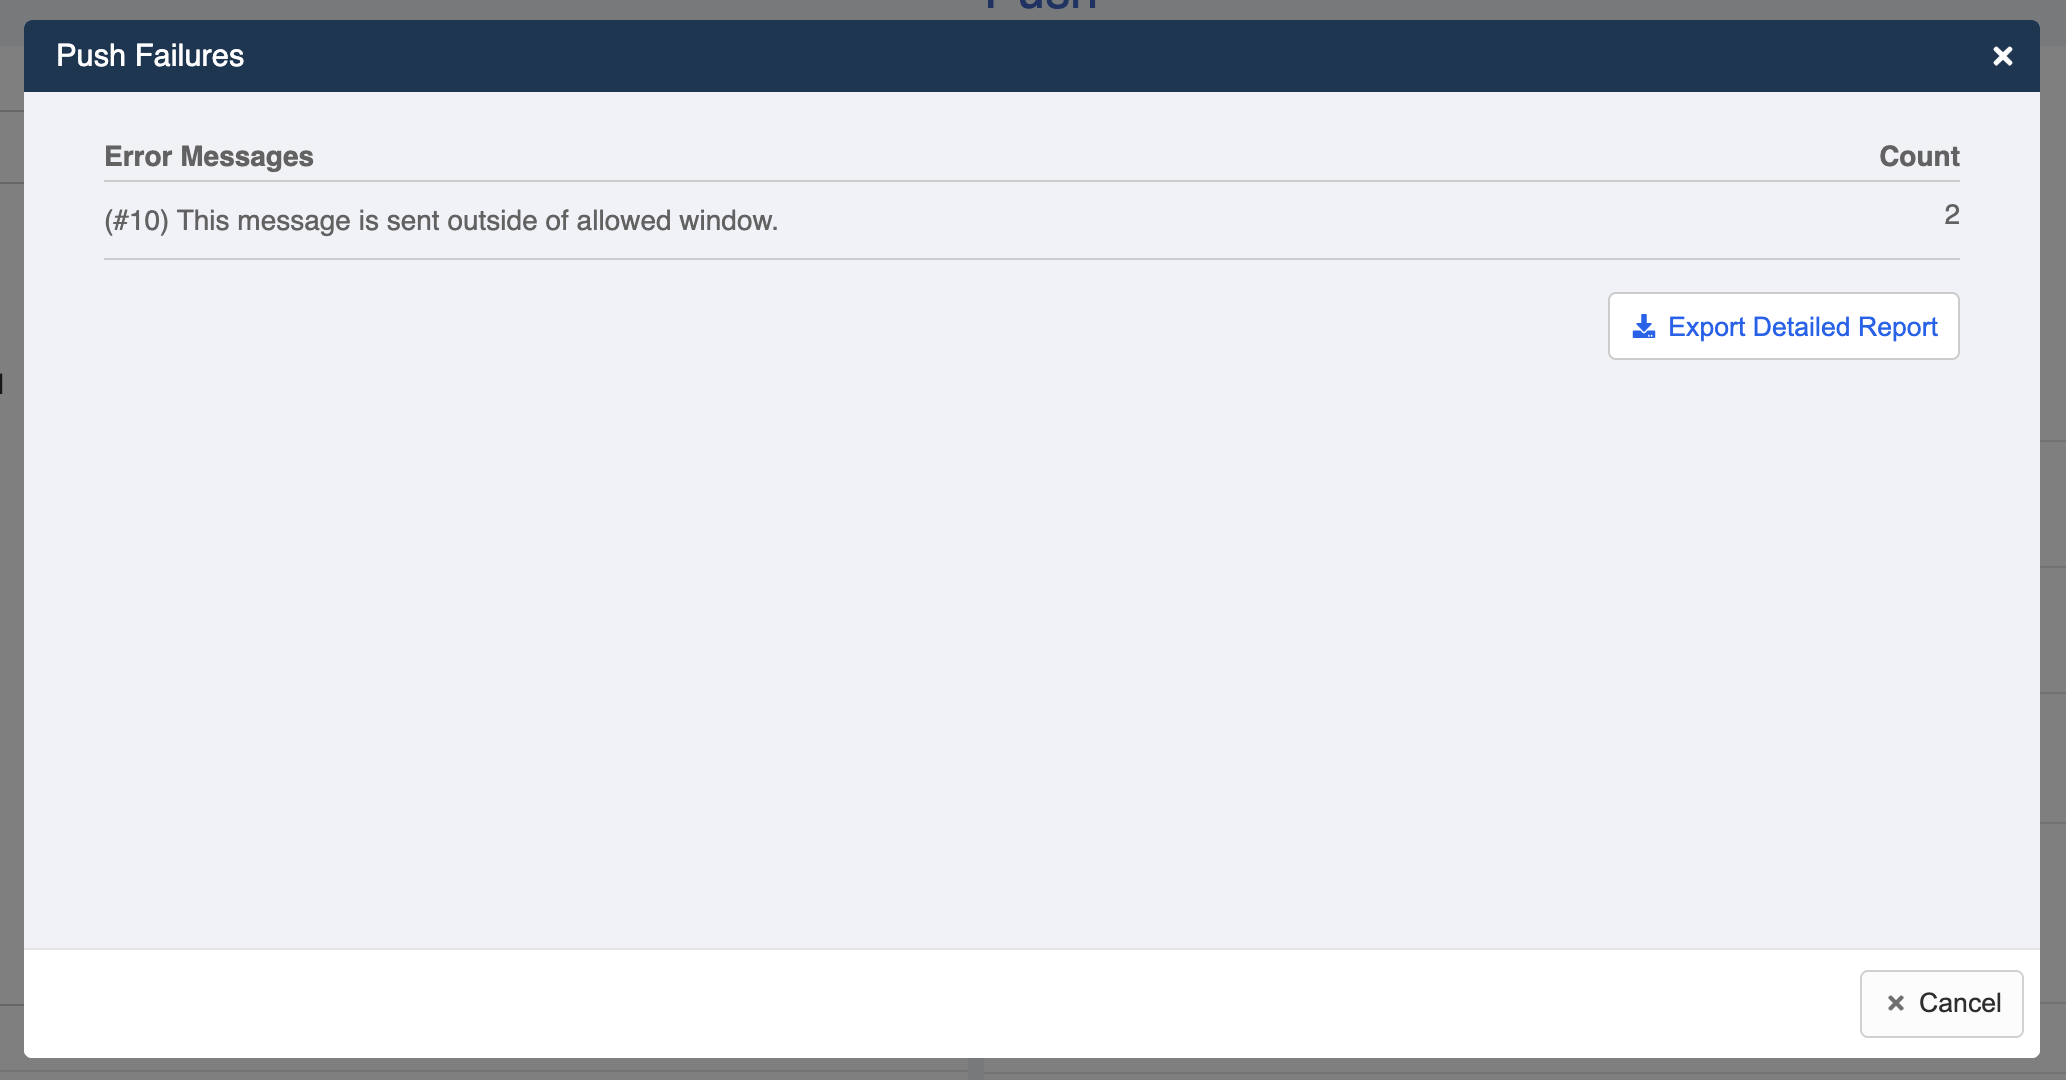
Push Fails
As mentioned, push messages on Instagram must be sent within the 24-hour customer service window. What will happen if we send push to customers who have been idled for more than 24 hours?
Push Panel will return with erro if you send push to customers out of the 24-hour window.
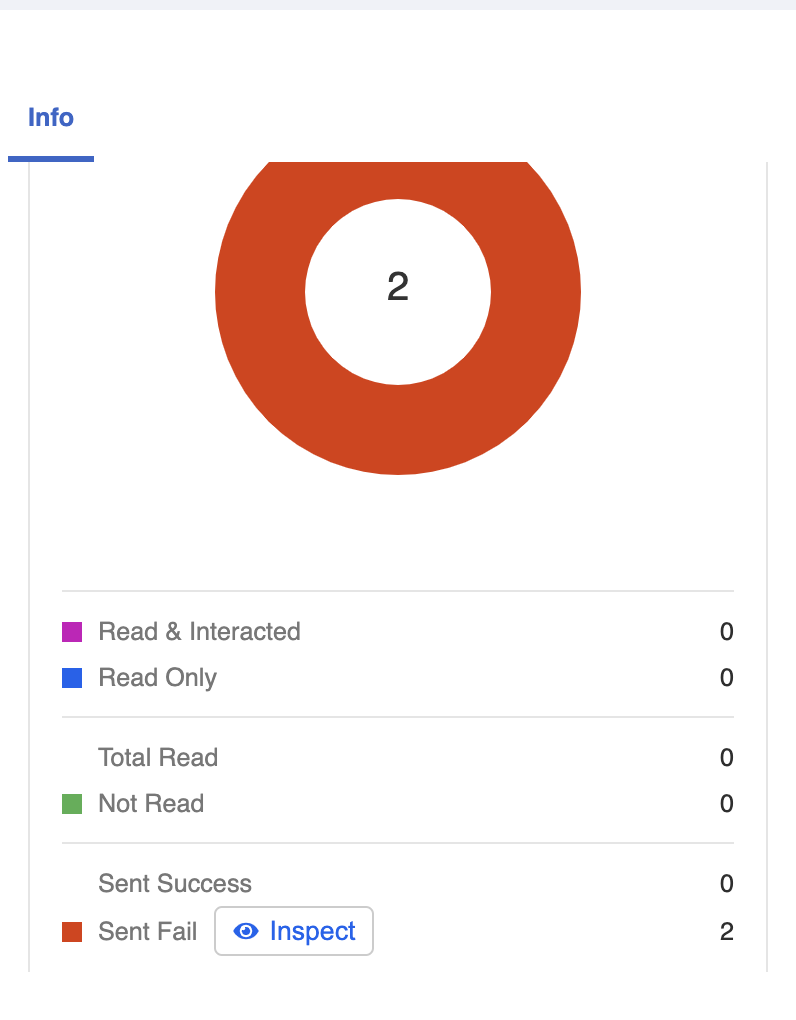
By clicking "Inspect", the error message will explain the cause of failure.