Connect to Datasource
Now you have your first WhatsApp chatbot working properly and people can make a booking on your bot, but how to check the booking record?
In this section, we are going to teach you how to save user's data into Datasource so you can have a copy of the record.
What is your Result?
| Property | Description |
|---|---|
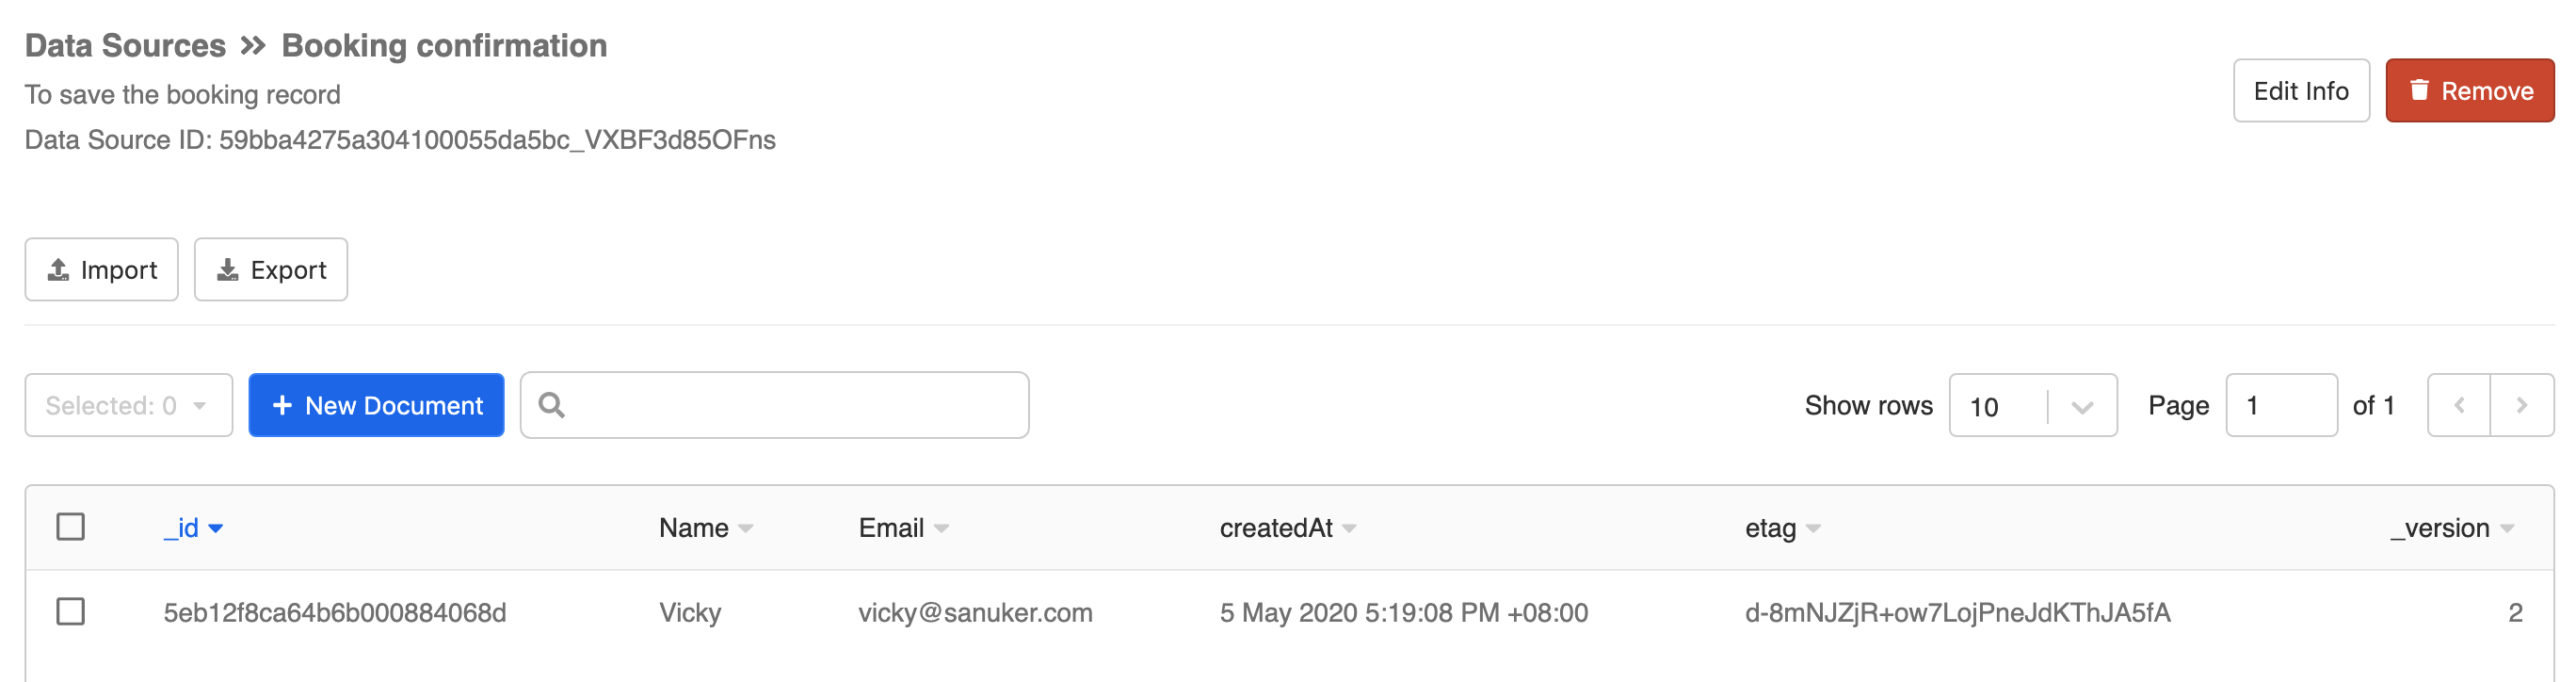
Successful Result | You should also be able to check booking record in Datasource on Stella. |
You may also right click Save As to download a sample result tree here to cross check with your chatbot!
Getting Hands-on
Save Name
To save the user input, we must perform the action in the node of the following level. For example, if we want to save the user's name, we have to save it in the node of "Ask email address" because the bot can only receive the user's name input at the node comes after.
Click on "Ask email address" node, and click "+ New Action" under Pre-actions.
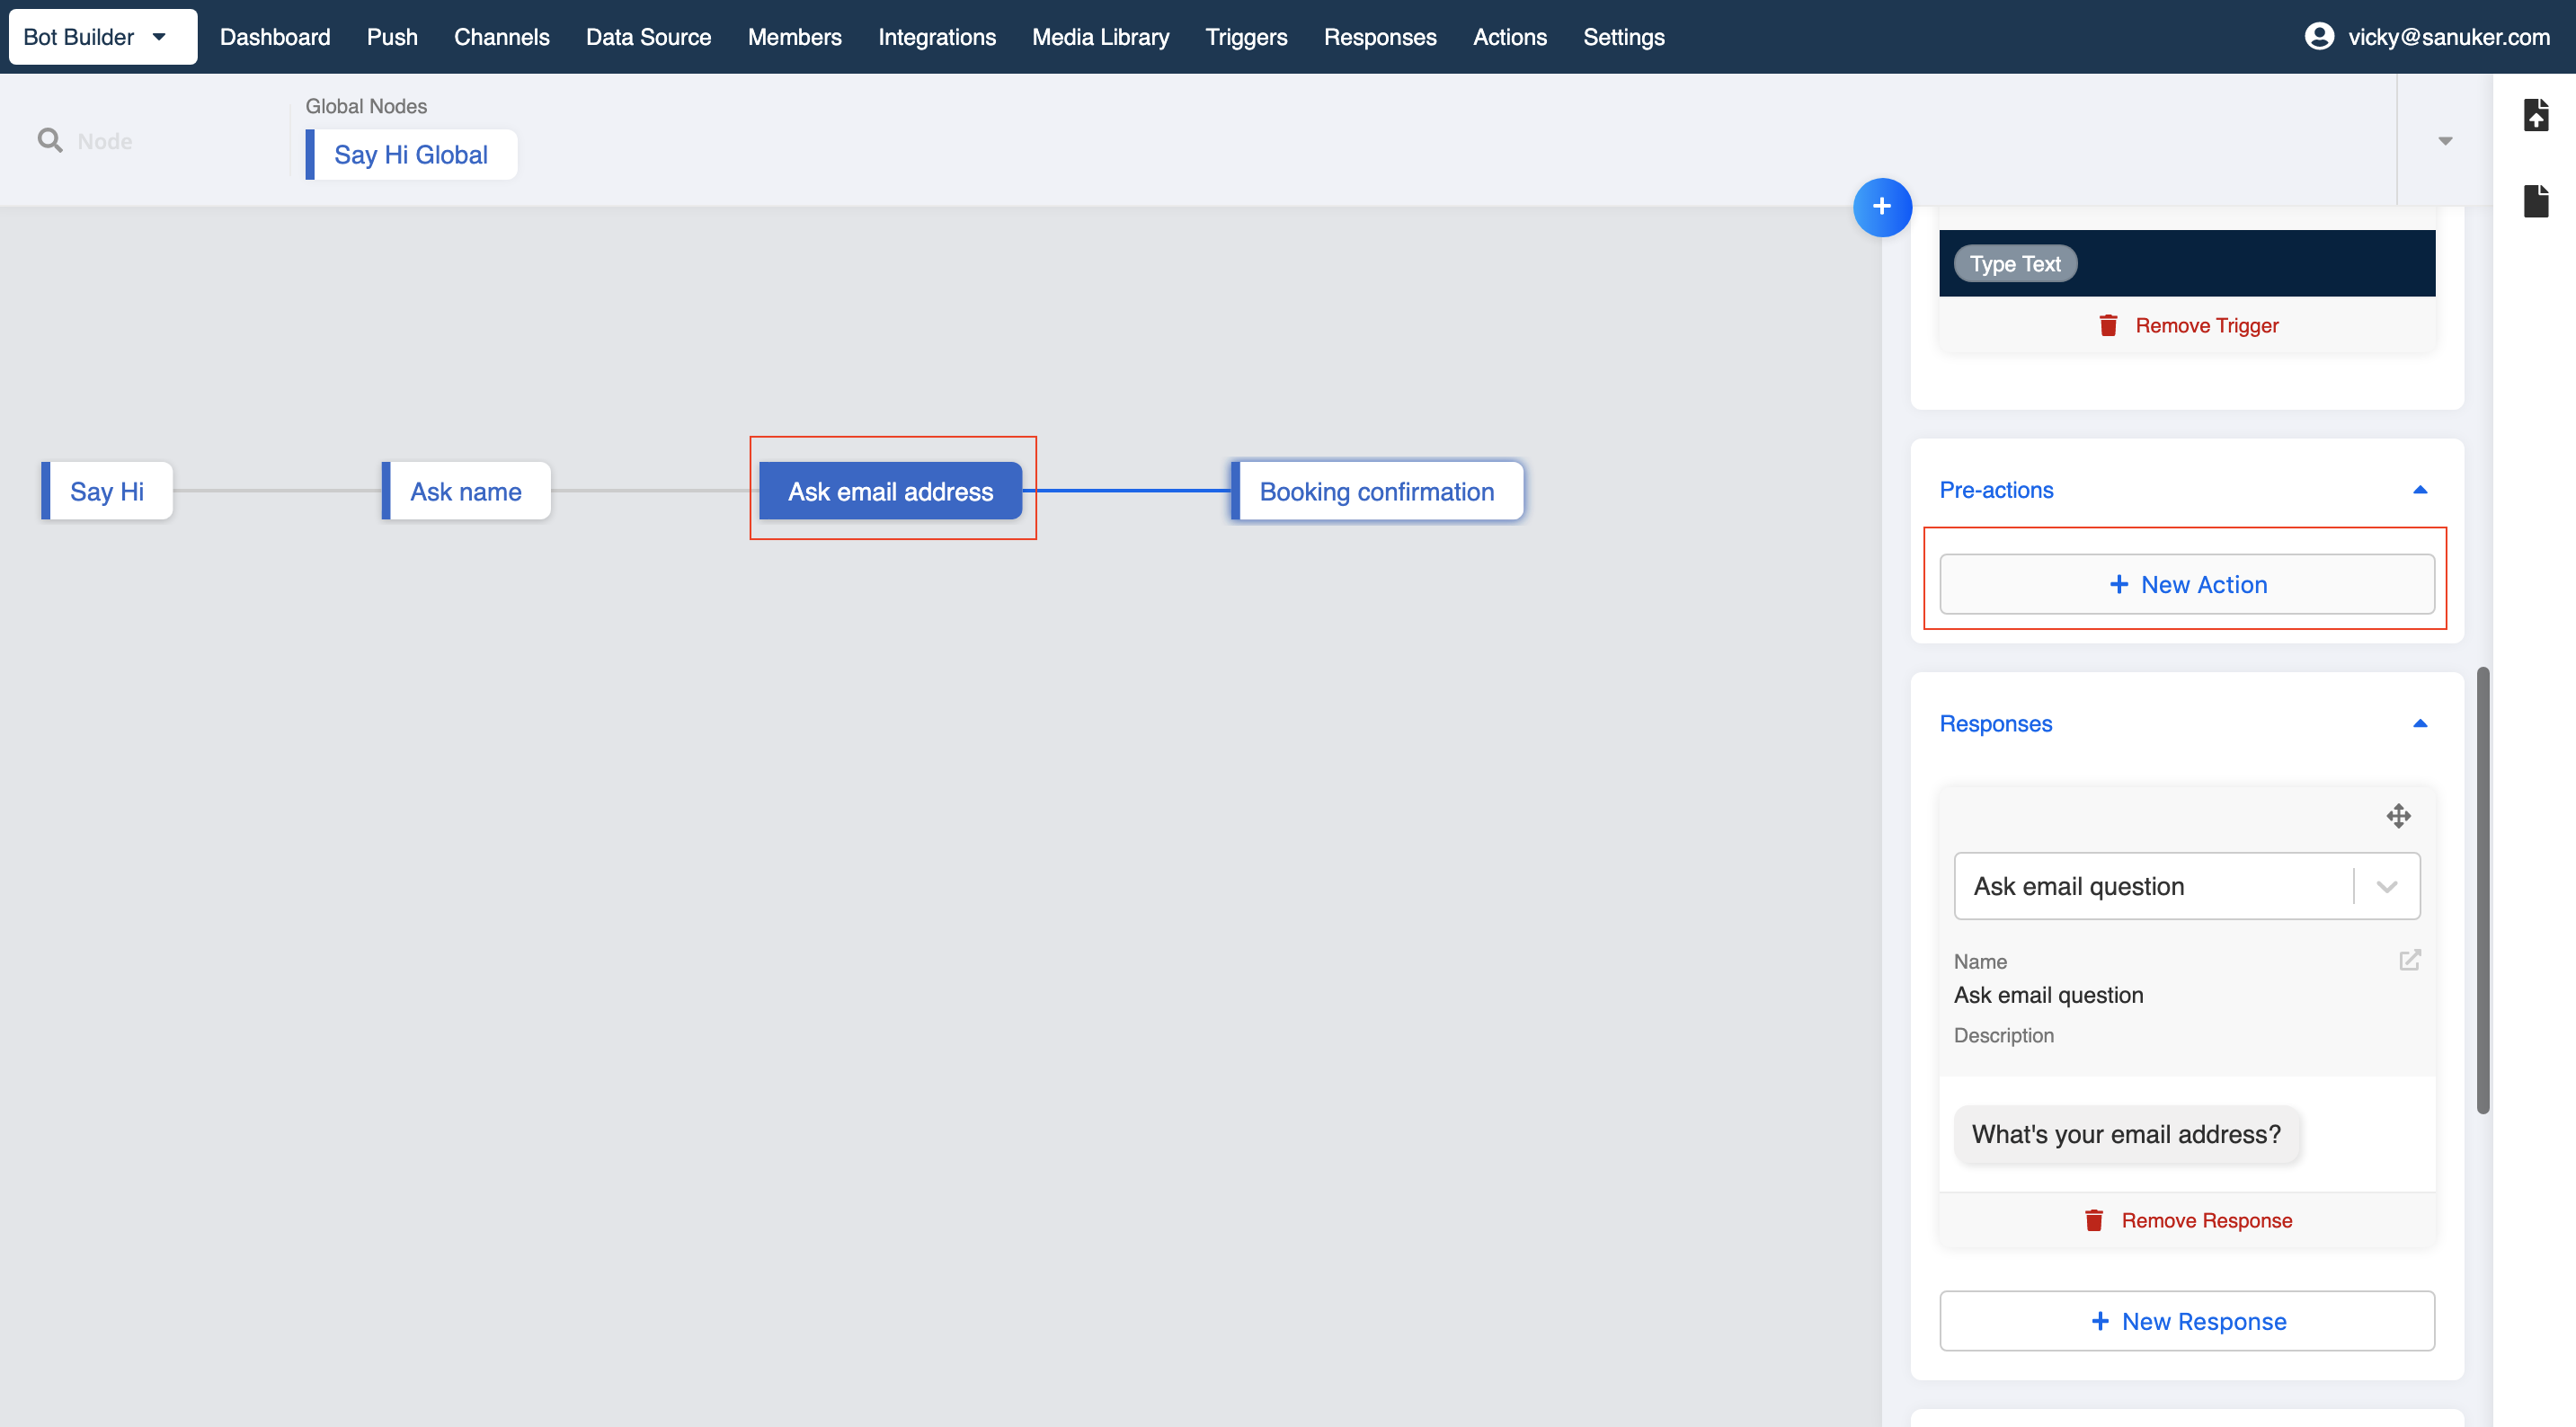
- Click "+ New Action" to create a new action to save down user's name.
- You can save that in user's
tempDataand categorize it undernameofbooking.
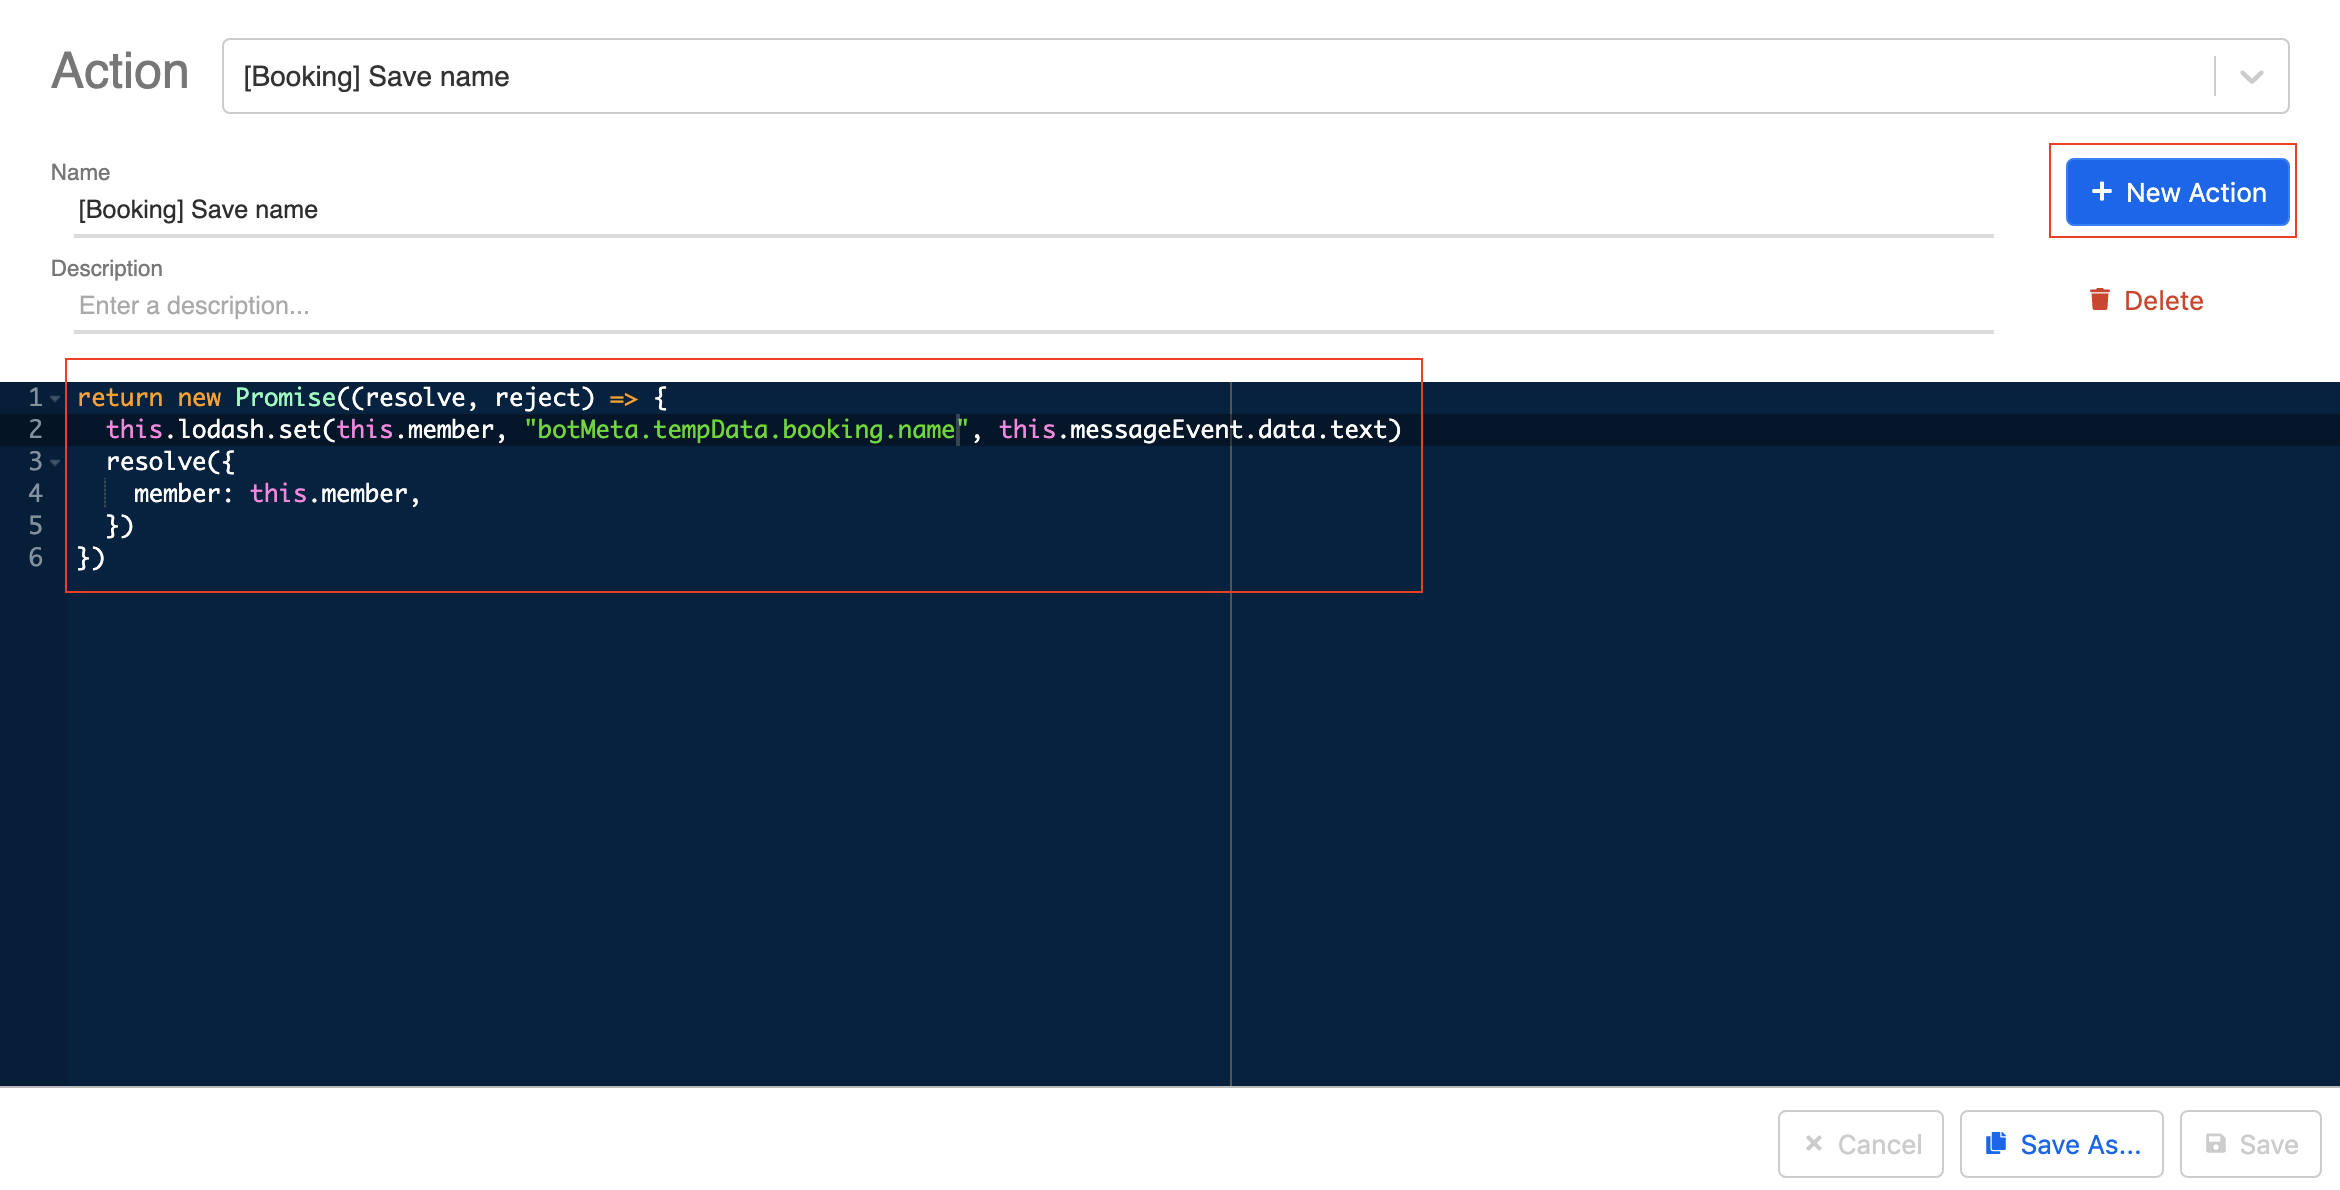
Example code:
return new Promise((resolve, reject) => {
  this.lodash.set(this.member, "botMeta.tempData.booking.name", this.messageEvent.data.text)
  resolve({
    member: this.member,
  })
})
- Save the action and save the node.
Save Email Address
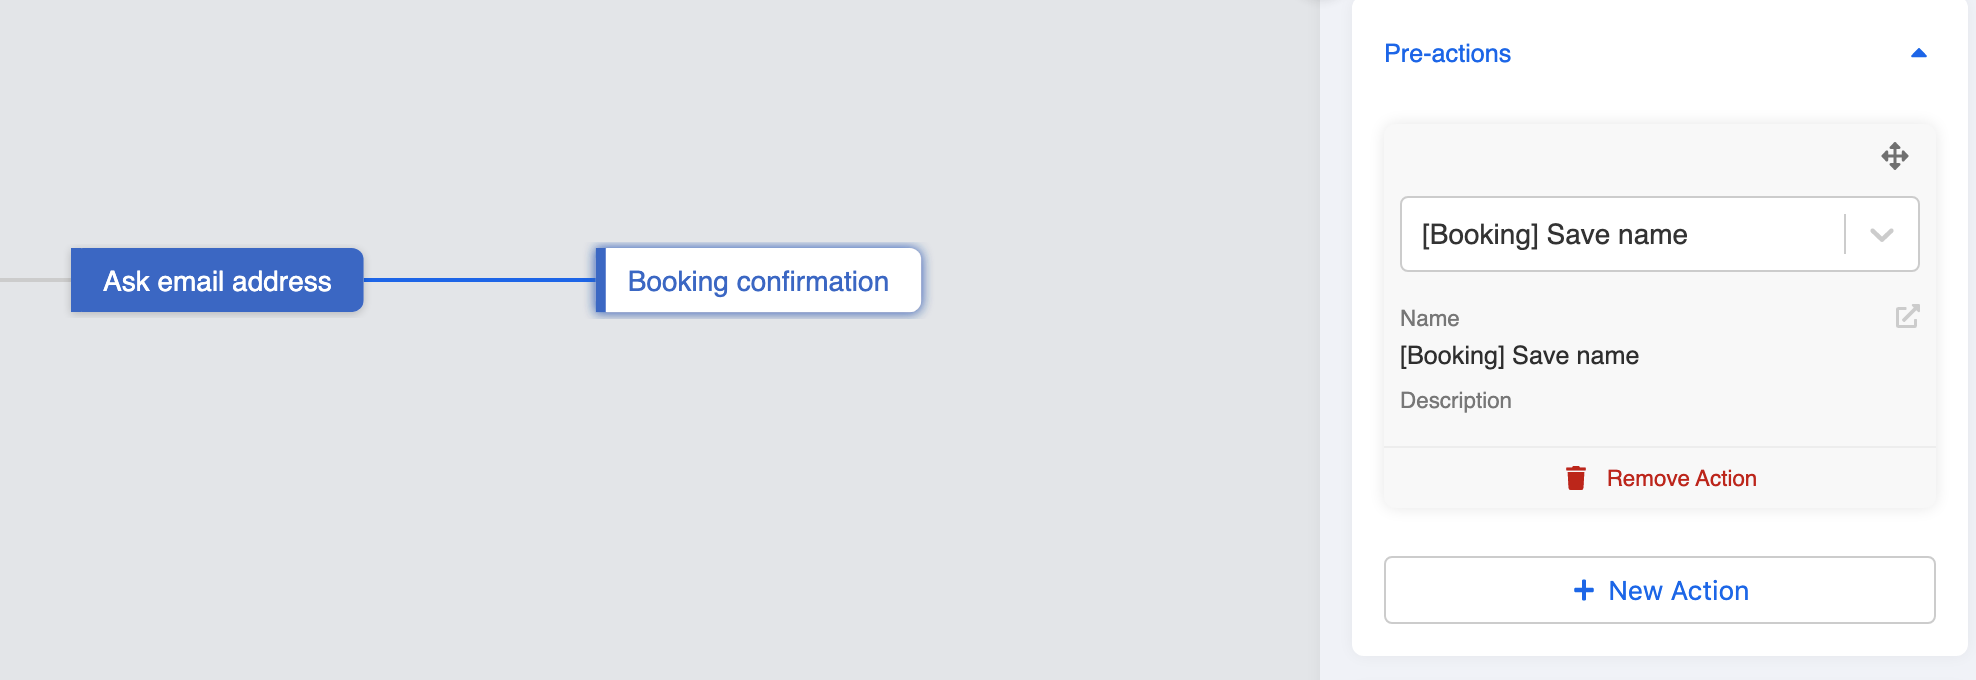
Similarly, goes to "Booking confirmation" node, and click "+ New Action" under Pre-actions.
Click "+ New Action" to create a new action to save down user's email address.

- You can save that in user's
tempDataand categorize it underemailofbooking.
Example code:
return new Promise((resolve, reject) => {
  this.lodash.set(this.member, "botMeta.tempData.booking.email", this.messageEvent.data.text)
  resolve({
    member: this.member,
  })
})
- Save the action and save the node.

Create Datasource
Now goes to Datasource at the top blue menu.
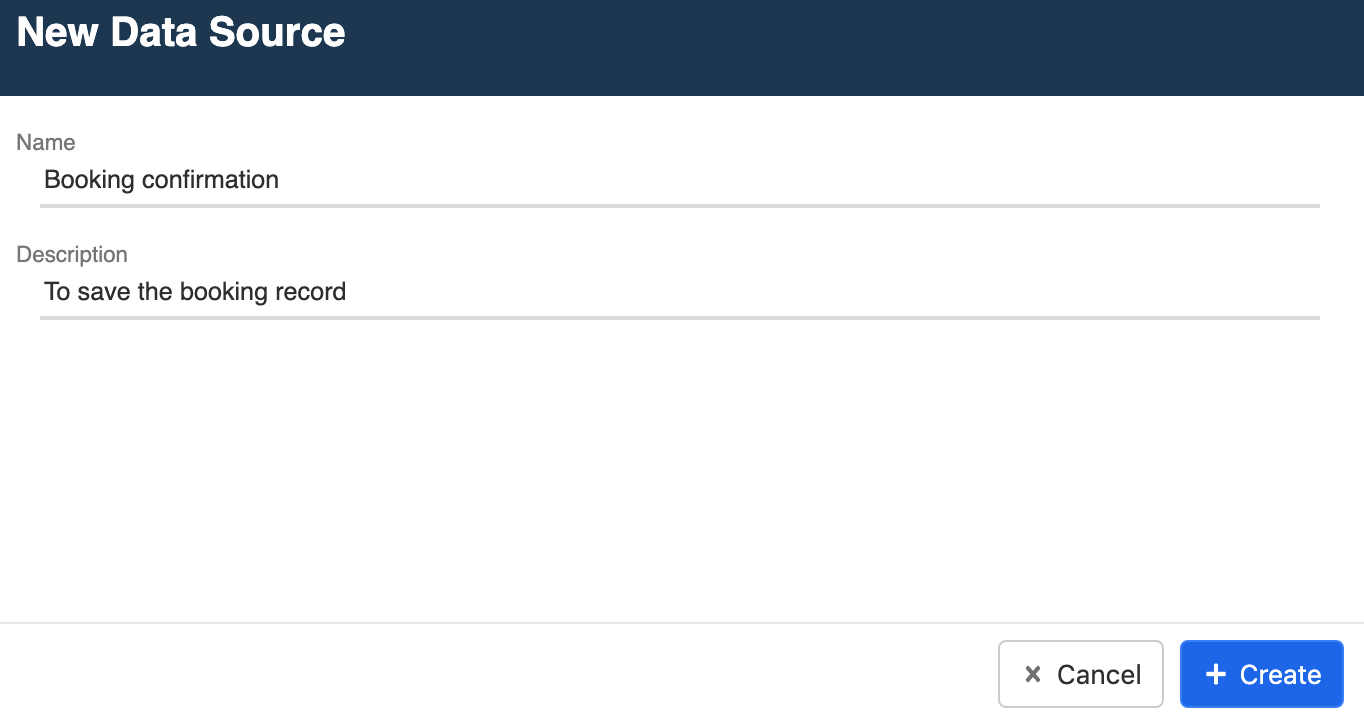
Click "+ New Datasource" to create a mini database to store your booking confirmation.

- Name your Datasource: Booking Confirmation and click "+ Create" to save it.
- You have created your Datasource now. You can see it on the Datasource list and click "View" to see the Datasource details.
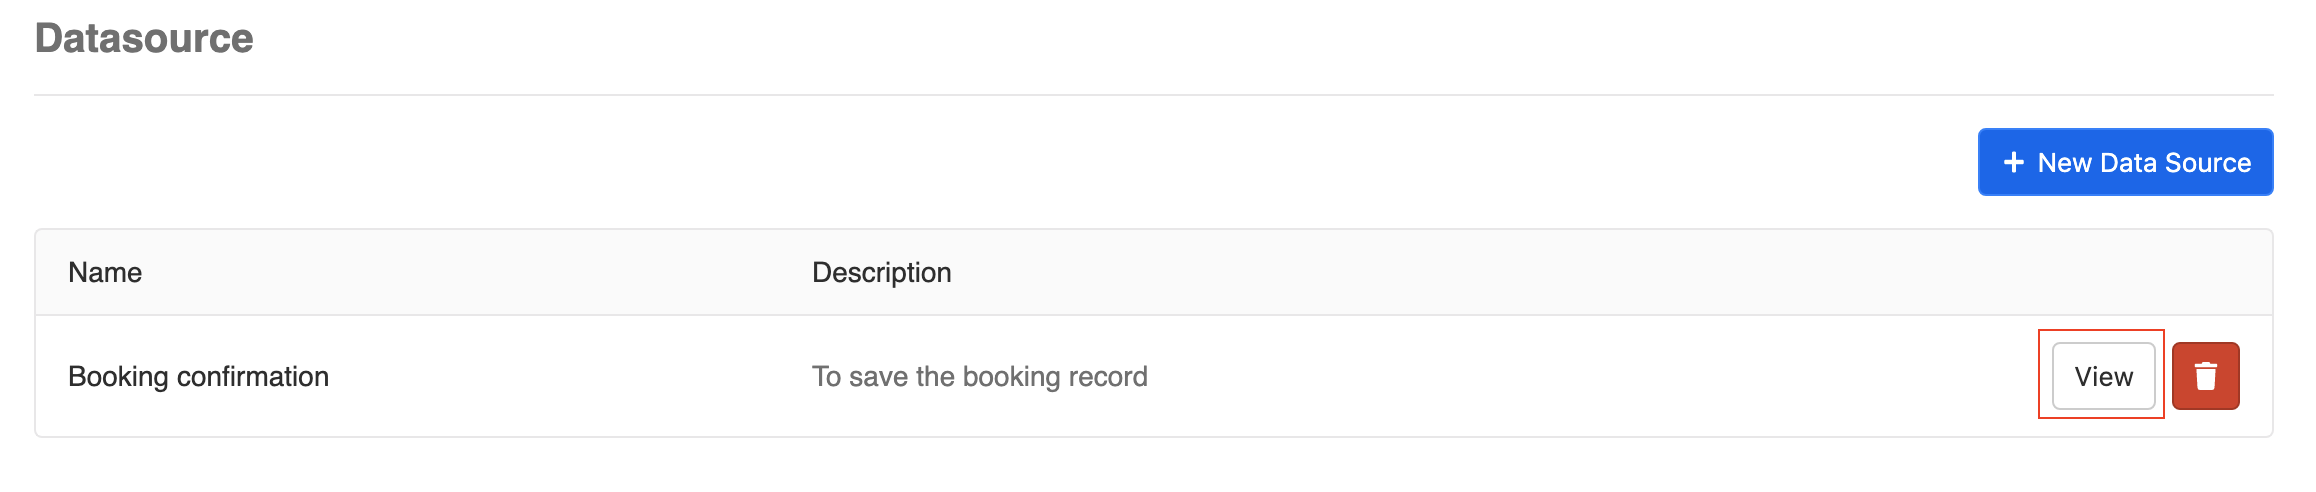
- You can see that there is no data now for your Datasource but don't worry, we will add the booking record in this database later. Now copy the Data Source ID in your notes and save it for later use.

Save Record in Datasource
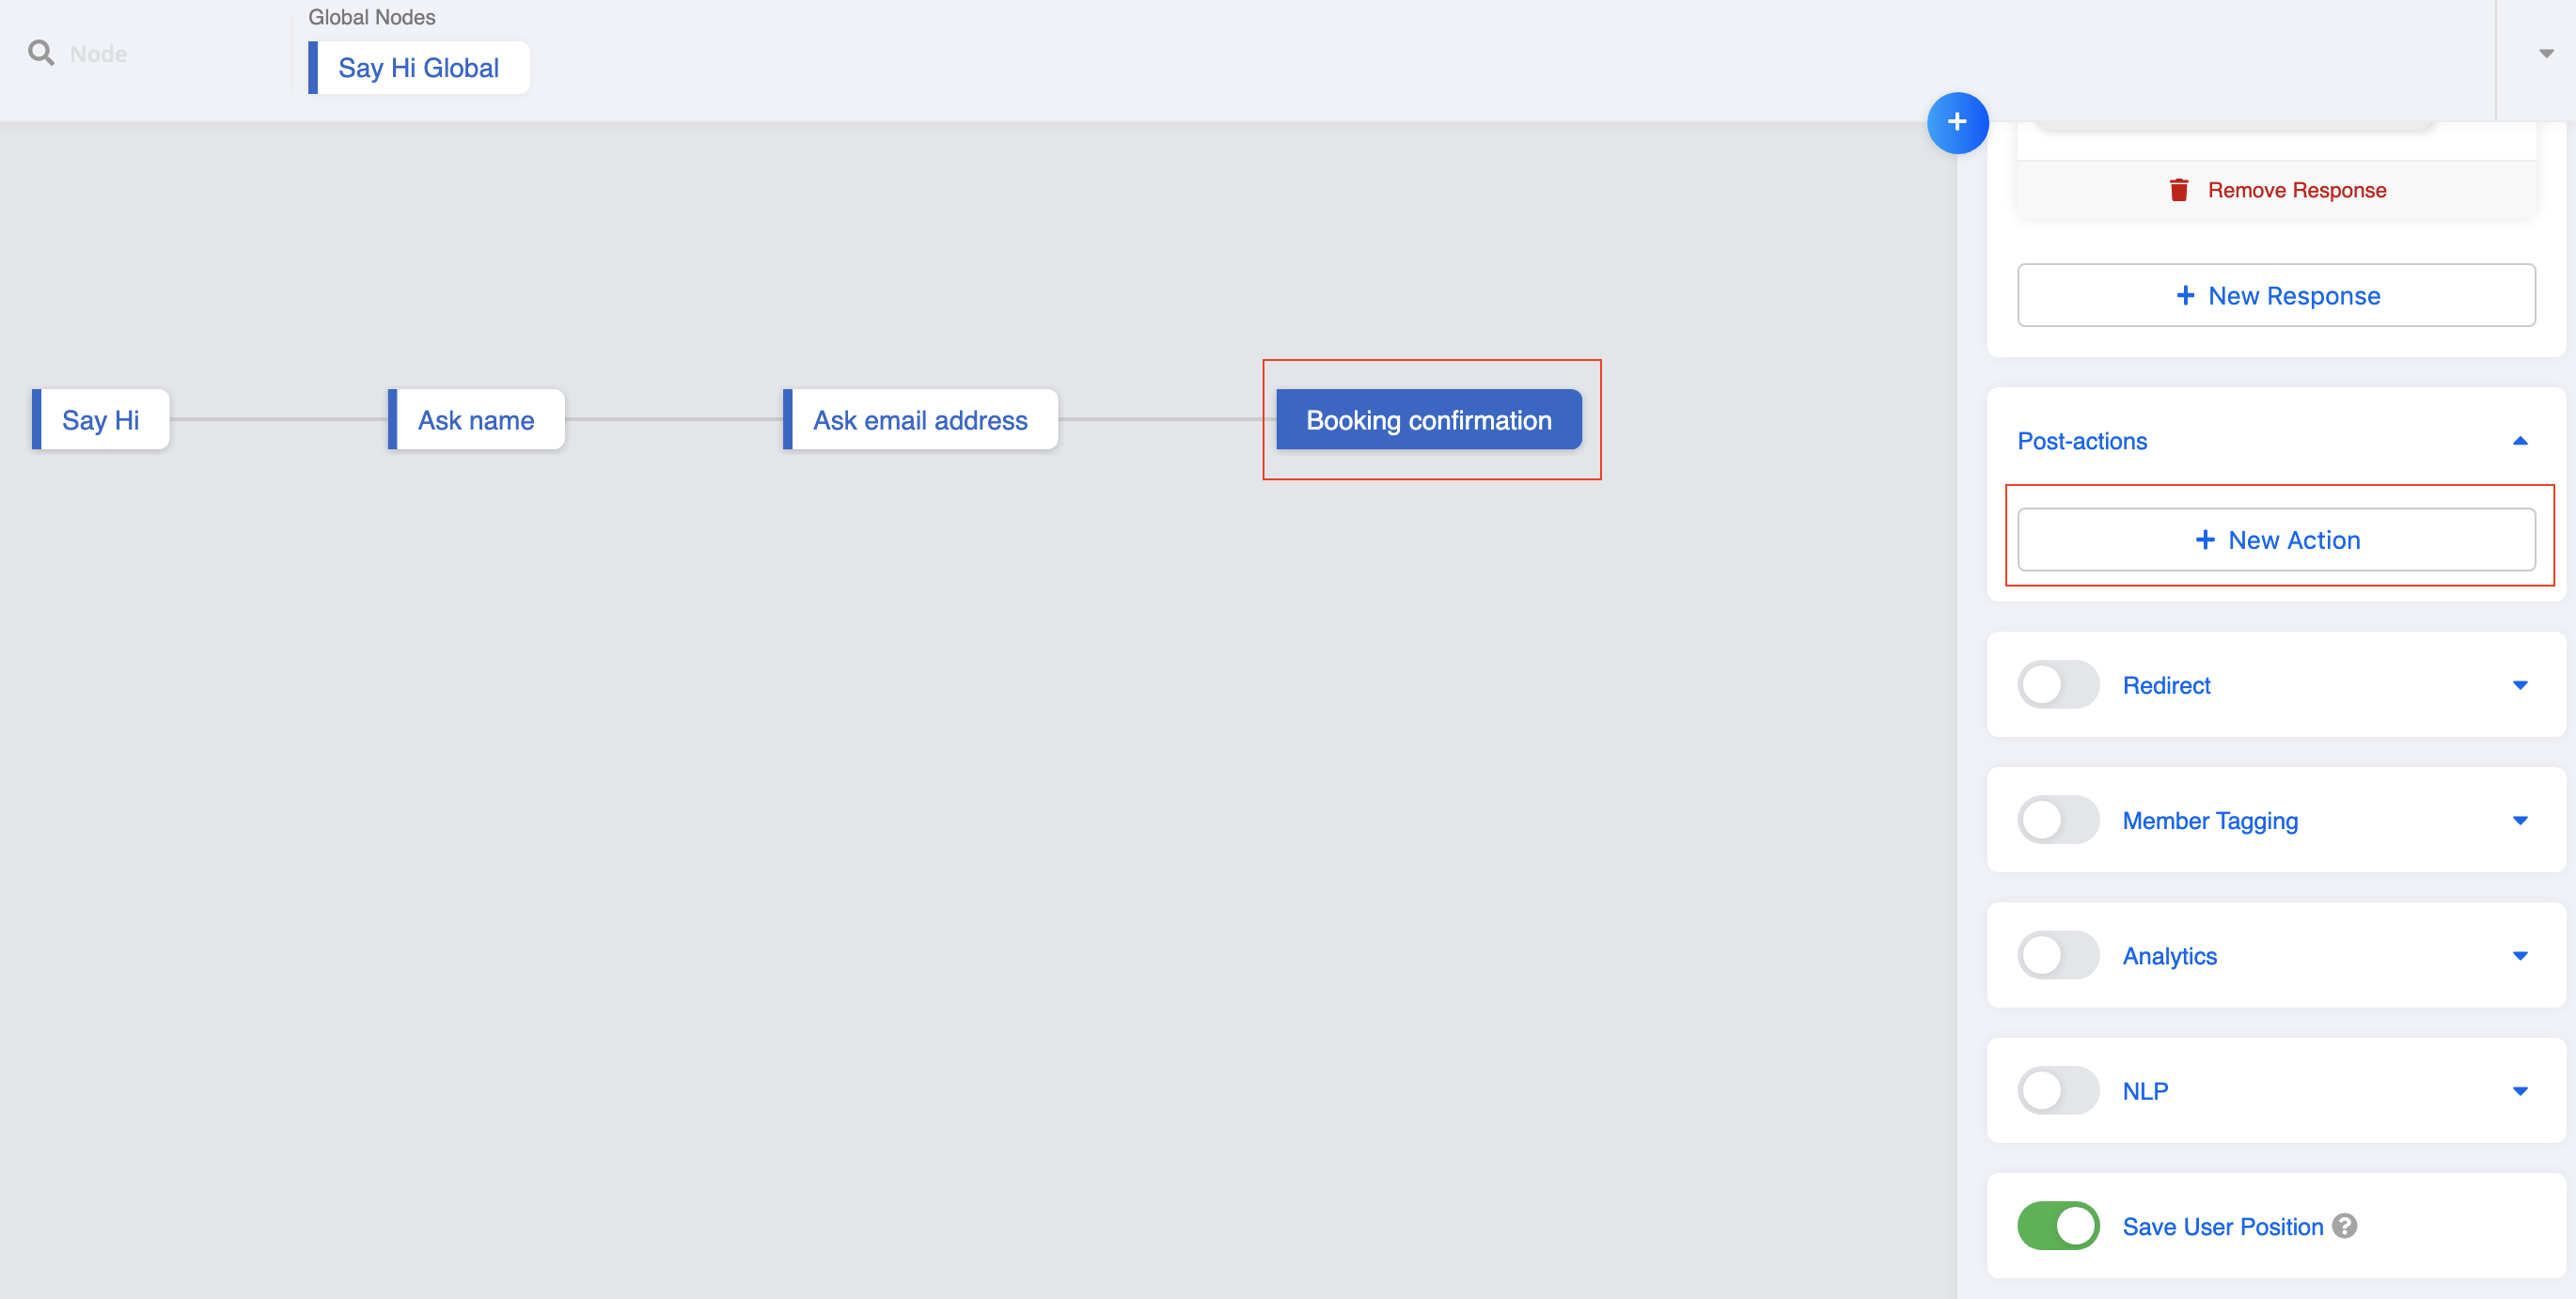
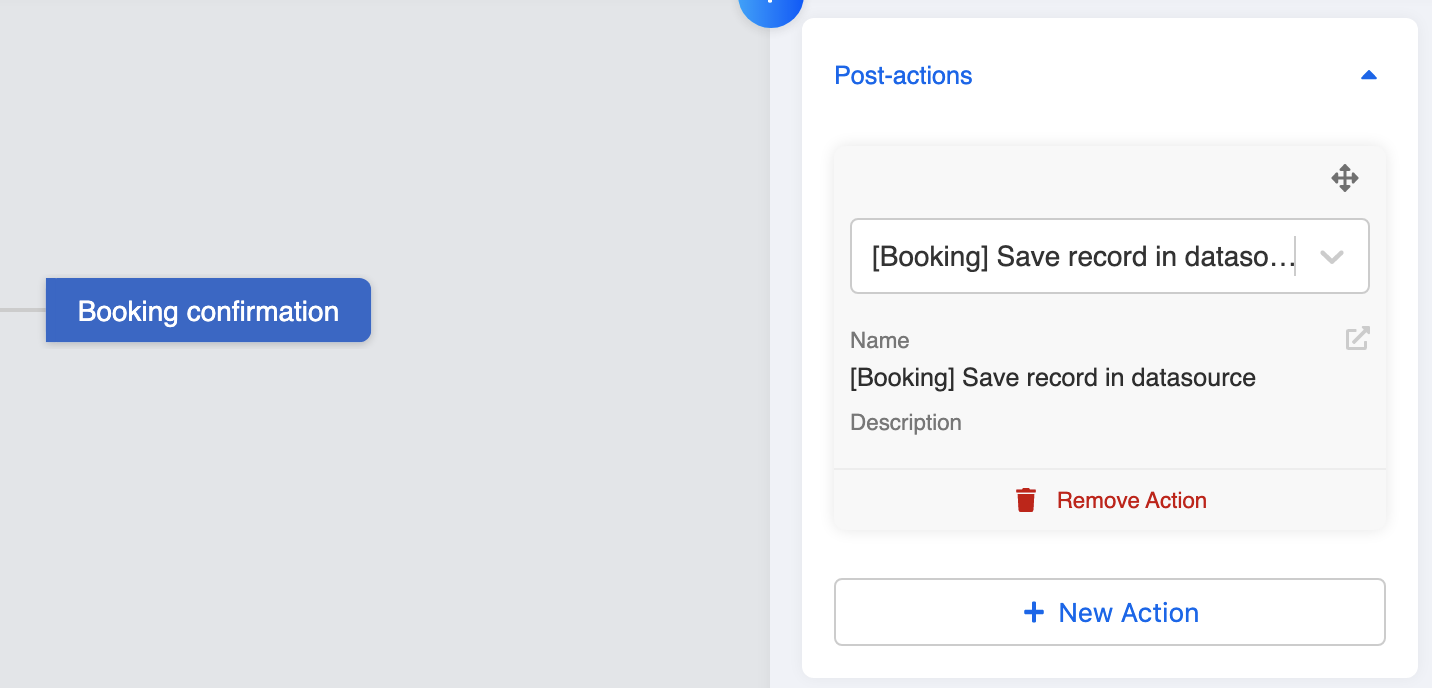
- Now you can go back to your workspace and goes to "Booking confirmation" node. Click "+ New Action" under Post-actions.
- Click "+ New Action". You can now retrieve the user's
tempDataand save it back in the Datasource.

Example code:
return new Promise(async (resolve, reject) => {
  try {
    await this.upsertDataToDataSource({
      dataSourceId: "YOUR_DATASOURCE_ID",
      data: {
        "Name": this.lodash.get(this.member, "botMeta.tempData.booking.name"),
        "Email": this.lodash.get(this.member, "botMeta.tempData.booking.email"),
      }
    })
  } catch (e) {
    console.log("cannot run upsertDataToDataSource, ", e.message)
  }
  resolve({
    member: this.member
  })
})
Remarks:
- Remember to input the copied Data Source ID in the script.
- The pairs inside
datarepresents the column head ("Name") and the value (this.member.botMeta.tempData.booking.name) filled in the field per record entry.
- Save the action and save the node.
- Try to make a booking on your WhatsApp chatbot now and check if you can get a successful result 🎉