Create Done Command
Once you have picked the ticket, a private channel will be created between you (agent) and the user. And you will be able to freely exchange conversations with the user within the private channel.
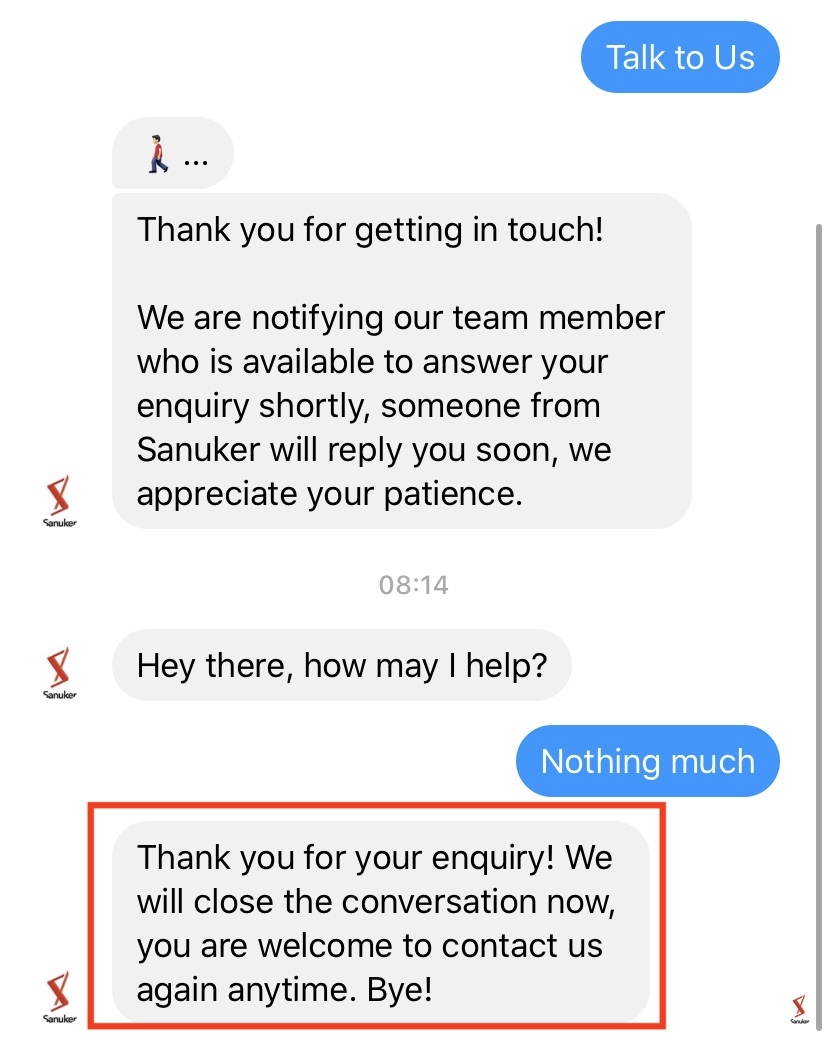
Upon the completion of a conversation, you could end the live chat ticket from the agent side by simply typing a done command in the private channel.
Please set up this command in the Slack Command Tree you've created in 2.1.
What is your Result?

- Please remember to connect your Slack Channel on Stella before testing for the result.
Sample Tree Structure - Done Command

You can click here to download the sample tree.
Getting Hands-on
Click here to build your tree node.
Create a Tree Node - Done Command
Create a tree node and name it as "Done Command".
In the following section, you will create 3 actions. Please follow the steps of the procedure and put these actions under pre-action of this node with the exact ordering
Create the 1st action for updating the ticket status to done with the following code:
return new Promise(async (resolve, reject) => {
  try {
    let group
    if (this.channel.exclusiveLiveChat === false) {
      group = await this.getGroupByExternalId({
        groupId: this.messageEvent.to,
        type: this.channel.type,
        channelId: this.channel._id,
      })
    } else {
      group = await this.getGroupByExternalId({
        adminExternalId: this.messageEvent.from,
        groupId: this.messageEvent.to,
        type: this.channel.type,
        channelId: this.channel._id,
      })
    }
    this.member.groupObj = group
    let assignments = []
    const assignment = await this.getAssignment({
      assignmentId: group.assignment
    })
    assignments = [assignment]

    if (assignment.parentAssignment) {
      const parentAssignment = await this.getAssignment({
        assignmentId: assignment.parentAssignment
      })
      const allAssignments = await this.getAssignmentsByParentAssignmentId({
        assignmentId: assignment.parentAssignment
      })
      assignments = [...allAssignments, parentAssignment]
    }

    let promises = []
    let name
    if (this.member.name) {
      name = this.member.name
    } else if (this.member.firstName && this.member.lastName) {
      name = `${this.member.firstName} ${this.member.lastName}`
    } else if (this.member.firstName) {
      name = this.member.firstName
    }
    let doneMessage = "Done"
    if (name) {
      doneMessage = `Done by ${name}`
    }
    console.log("assignments", assignments)
    assignments.forEach((obj) => {
      console.log("obj.targets", obj.targets)
      const target = this.lodash.find(obj.targets, { channel: this.channel._id })
      console.log("target", JSON.stringify(target, null, 2))
      const updateMessages = this.lodash.map(target.broadcastGroups, (broadcastGroup) => {
        return this.updateMessage({
          messageTs: broadcastGroup.messageTs,
          text: this.lodash.get(obj, "relayMessage.slack.text", "Done"),
          attachments: JSON.stringify([
            {
              text: doneMessage,
              fallback: doneMessage,
              color: "#36a64f"
            }
          ]),
          channel: this.channel,
          externalChannelId: broadcastGroup.id
        })
      })
      promises = [...promises, ...updateMessages]
    })

    await Promise.all(promises)

    resolve({
      member: this.member
    })
  } catch (e) {
    reject(e)
  }
})
- Create the 2nd pre-action for sending the end live chat message to inlet with the following code (you may customize your message within the "text" in "let response"):
return new Promise(async (resolve, reject) => {
  try {
    let response = {
      type: "TEXT",
      text: "Thank you for your enquiry! We will close the conversation now, you are welcome to contact us again anytime. Bye!"
    }
    const member = await this.getMember({ memberId: this.member.groupObj.member })

    if (/zh_HK/g.test(this.lodash.get(member, "customLocale", this.lodash.get(member, "locale", "")))) {
      response = {
        type: "TEXT",
        text: "感謝您的查詢!我們現在將結束對話,歡迎您隨時再次與我們聯繫。再見!"
      }
    }

    await this.sendMessageToInlet({
      messageEvent: this.messageEvent,
      channel: this.channel,
      response,
    })
    resolve()
  } catch (e) {
    reject(e)
  }
})
- Create the 3rd pre-action to end the live chat with the following code:
return this.endLiveChat({
 messageEvent: this.messageEvent,
 channel: this.channel
})
- Create 2 responses under Advanced > Response Object with the following code:
The first response:
{
  "type": "TEXT",
  "text": "Your DONE command has successfully sent. Thanks!"
}
The second response (this will only be activated once you have completed step 2.4):
{
  "type": "BUTTON",
  "buttons": [
    {
      "type": "postback",
      "payload": "ARCHIVE",
      "title": "Archive Now"
    }
  ],
  "text": "Do you want to archive this channel now?"
}
Create a Global Node - Done Command Global
- Create a global node and then create a trigger with two conditions (for details on creating conditions, please click here) with the and operator:
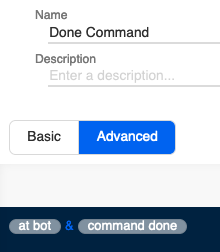
First condition - at bot:
new RegExp(`<@${this.channel.info.botId}`).test(this.messageEvent.data.text)
Second condition - command done:
new RegExp("done", "i").test(this.messageEvent.data.text)
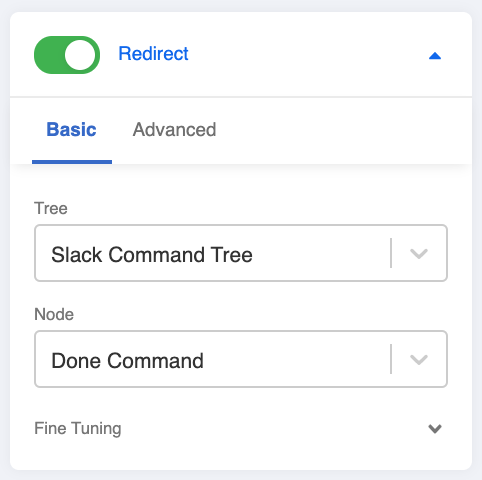
- Toggle Redirect to the tree node you have created for done command.
Before testing, please remember to update the tree and global node in the Slack Channel.
- Check and see if you can produce the expected outcome.